Make your instrument recordings more dynamic with this slick modulation hack
Sometimes the best way to make your track feel more kinetic is to eschew plugins and consider how you're recording your instruments
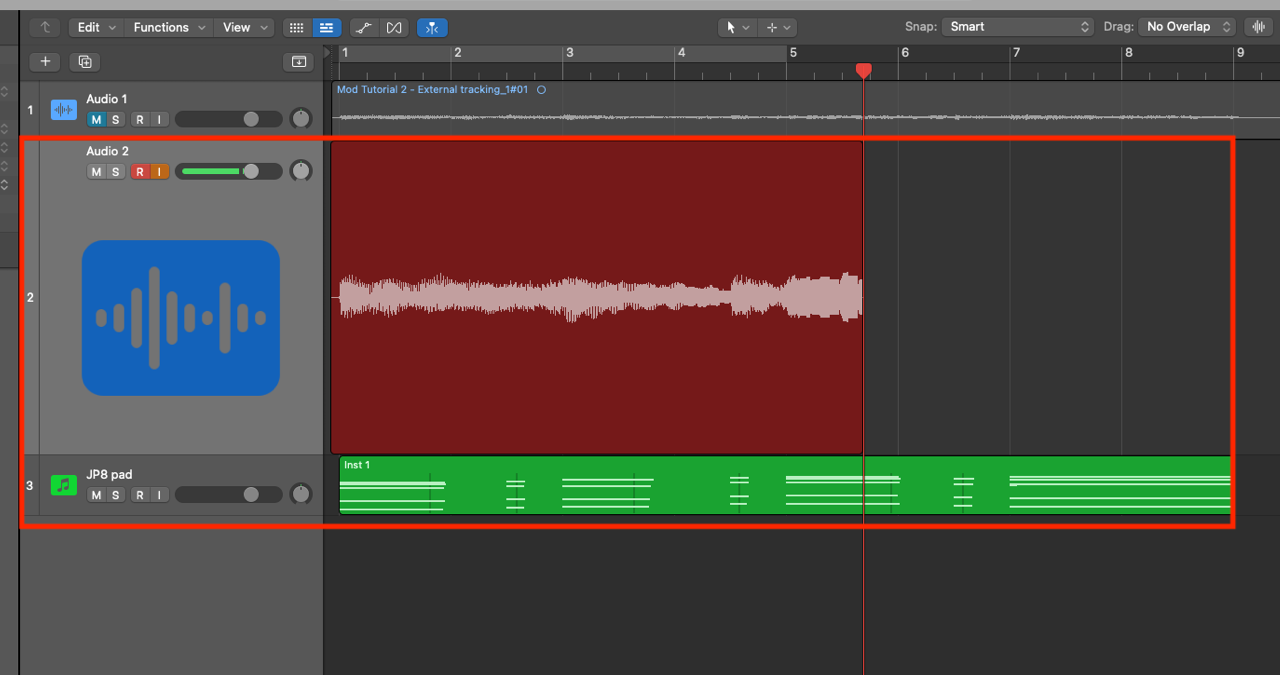
The aim of this tutorial is to simulate the effect of applying modulation by double-tracking an external instrument.
This concept will work beautifully with lots of different types of instrument, from piano and guitar, through to synthesisers, especially if analog in architecture or digitally-cloned designs.
How to simulate modulation with just instruments
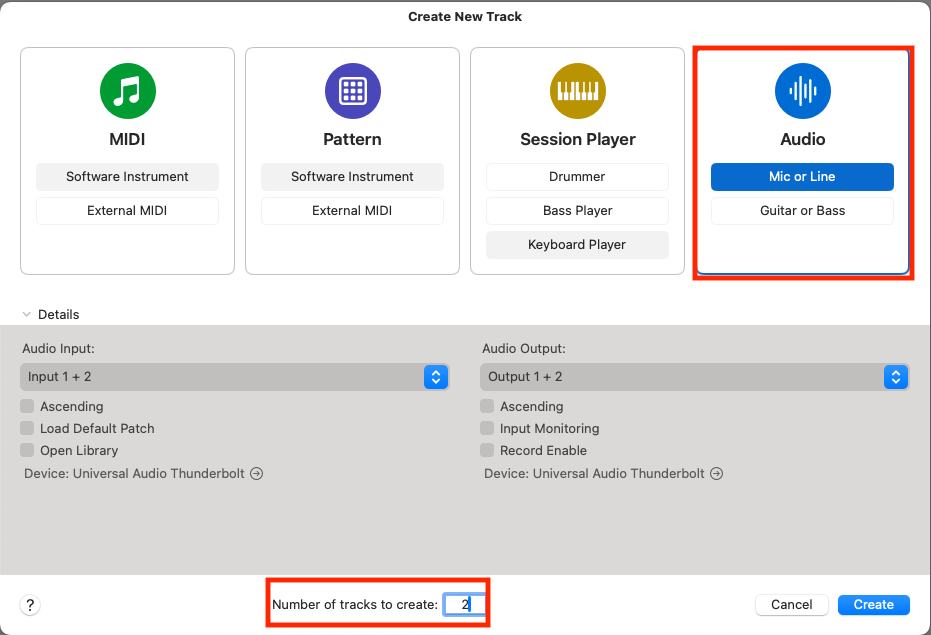
1. Begin by creating a project with two audio tracks, ready to record an external input.
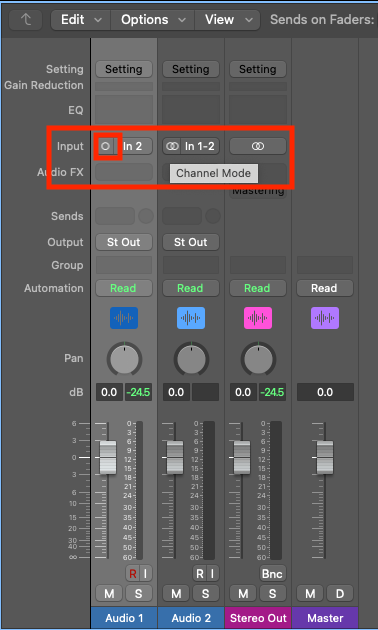
2. The intention here is to create two mono tracks, which we will then blend to simulate a form of modulation. Be sure to switch the track you are recording to to mono mode. If you are comfortable playing your instrument live, you can begin recording straight away, however better results might be achieved by capturing your playing via MIDI first.
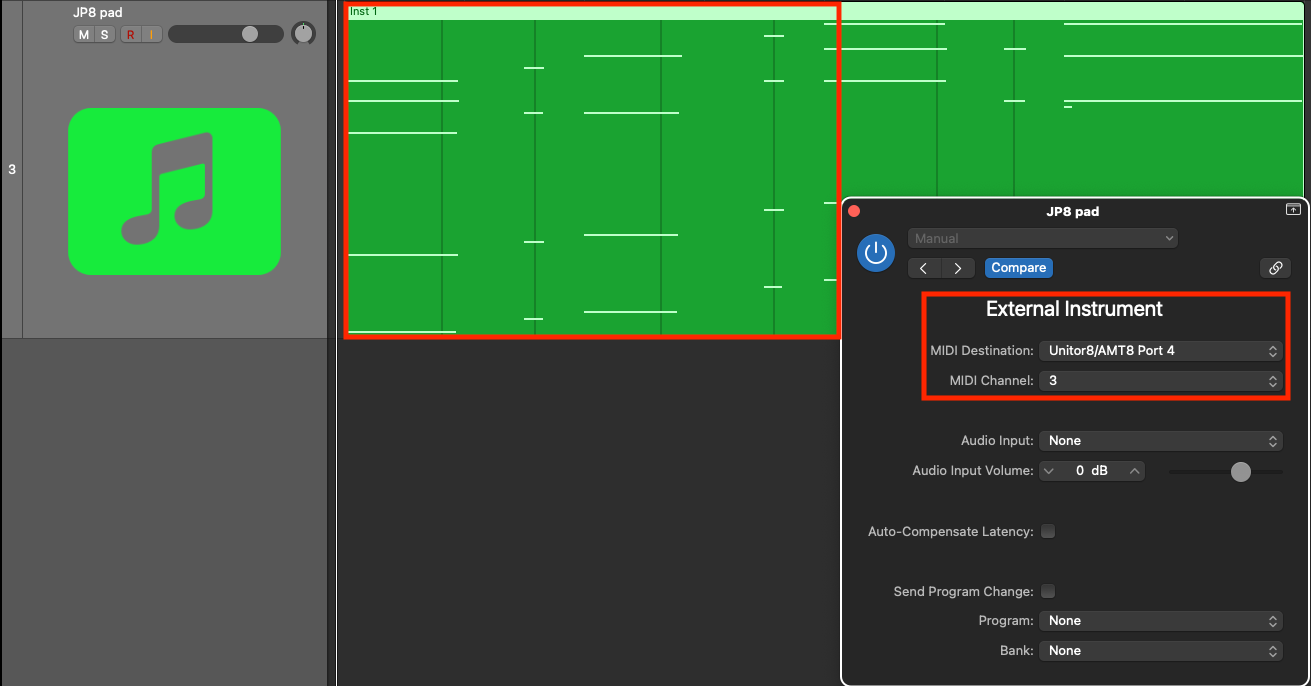
3. If you want to record your playing through the use of MIDI, now is the time to do it. Set up an external instrument track within your DAW and record your MIDI track. Once recorded, make any edits to ensure that your performance is as you want it. Of course, this step will not work if you are playing a guitar, piano, or other such acoustic instrument.
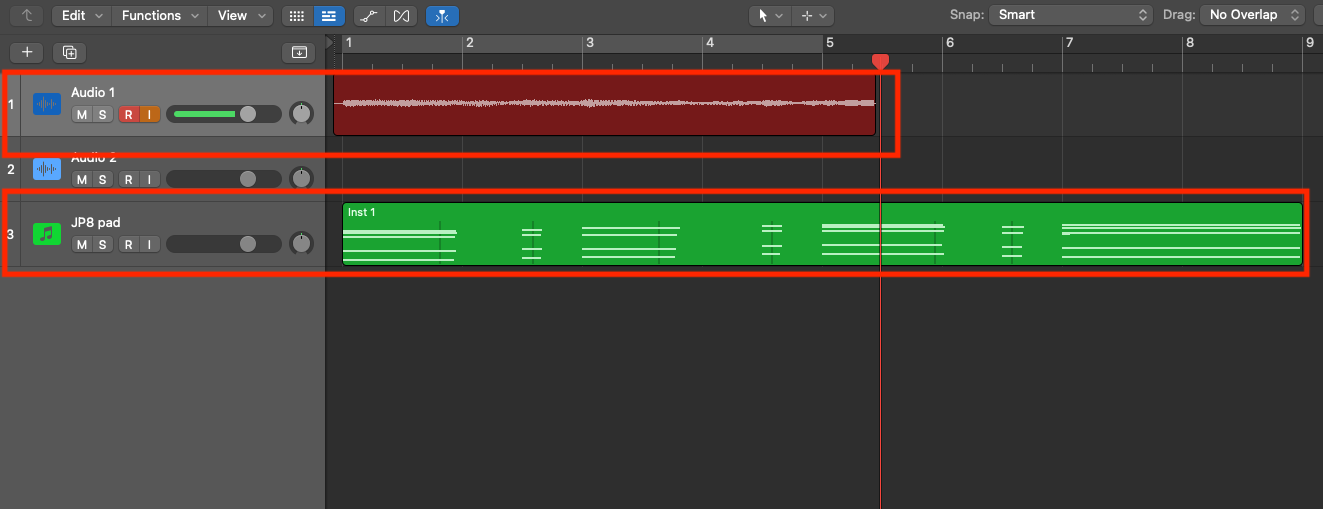
4. Now it's time to record the first mono pass of your track. In our example, we are recording an external synthesiser, from our pre-recorded MIDI, recording the outputted audio onto our first audio track. You may need to do some physical plugging-in of your external synthesiser or microphone into your audio interface. Be sure to capture the beginning, without clipping, as well as leaving any instrumental fades at the end.
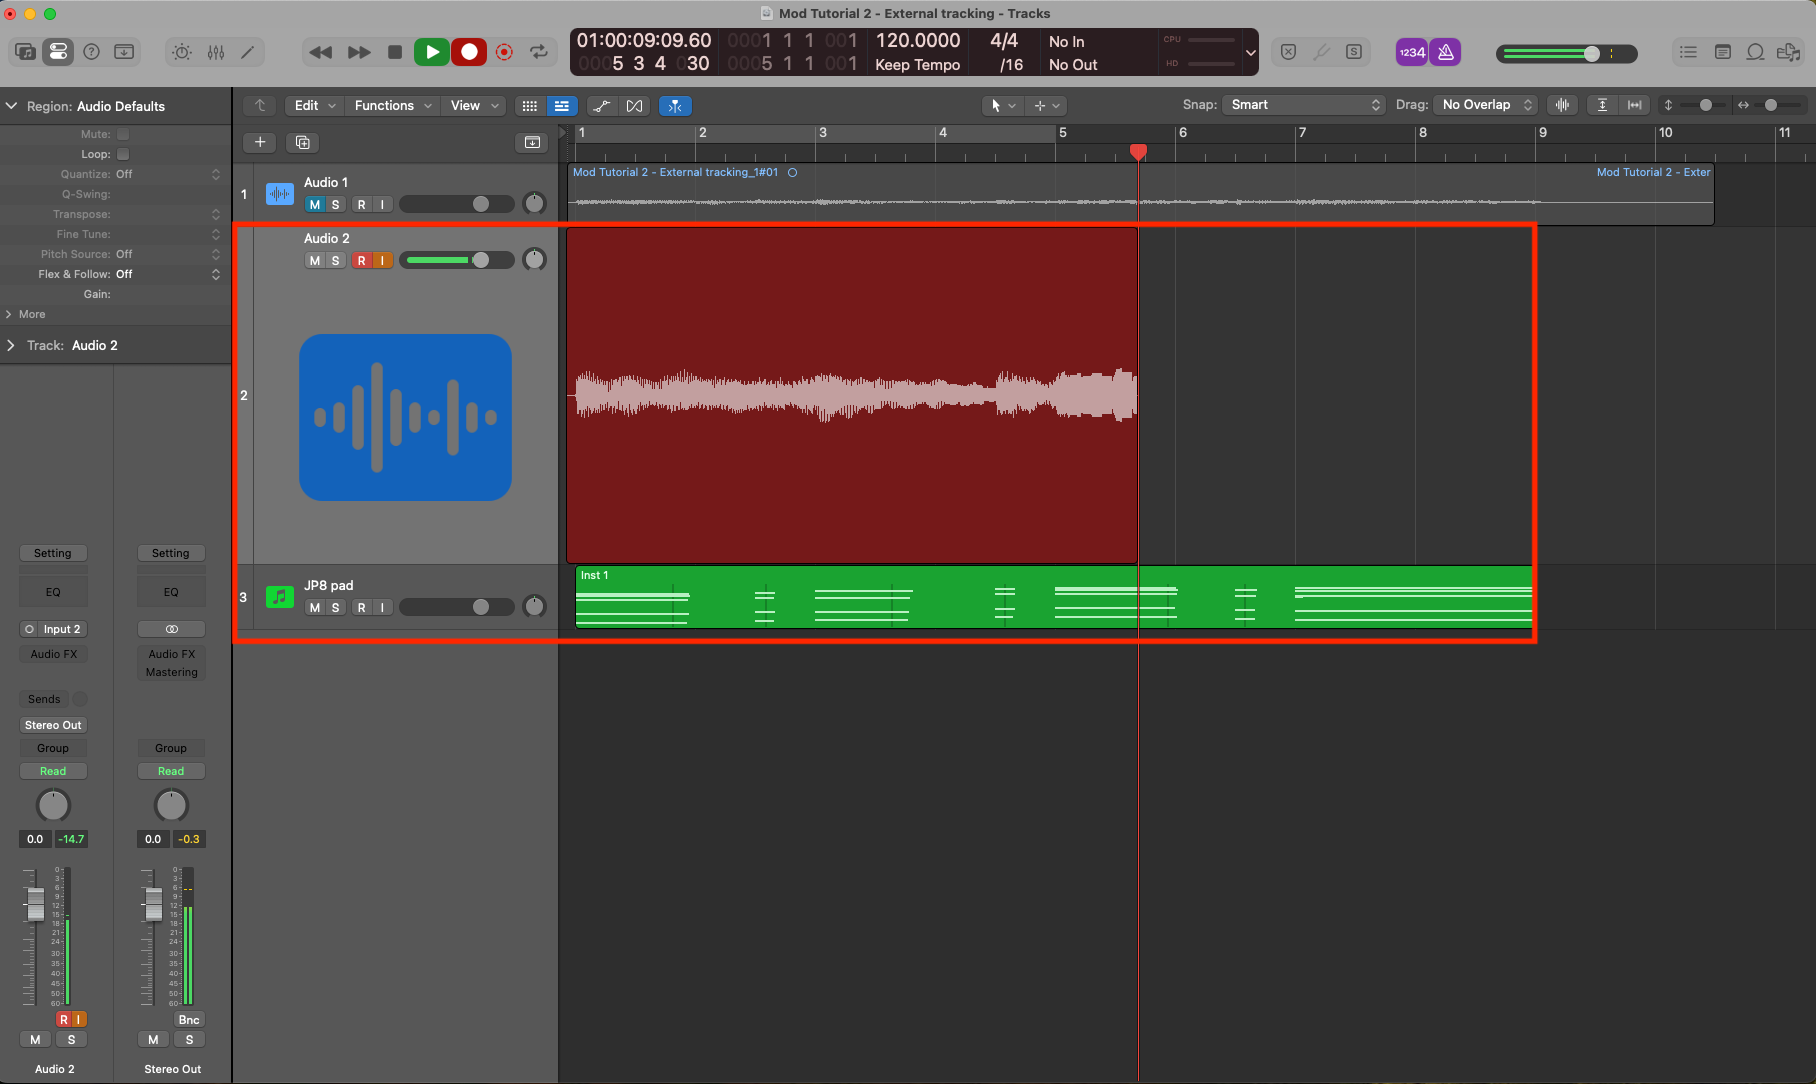
5. Next, we will repeat the same process as the last step, but onto our second audio track. If you are using a digital synthesiser, you may want to consider very slightly adjusting the tuning, so that the pitches are not identical. If your synthesiser has an analog impurity control, it would be worth adjusting this to subtly deviate oscillator tuning.
Want all the hottest music and gear news, reviews, deals, features and more, direct to your inbox? Sign up here.

6. You should now have two audio recordings of the same track, with a small amount of pitch variation between the two. As these are both mono tracks, they may sound a little odd when you play them back. It is important to pan your first track hard left, and your second track hard right. By doing so, you should get a very wide stereo image. Make sure you now mute your MIDI track so that it cannot be heard during playback.
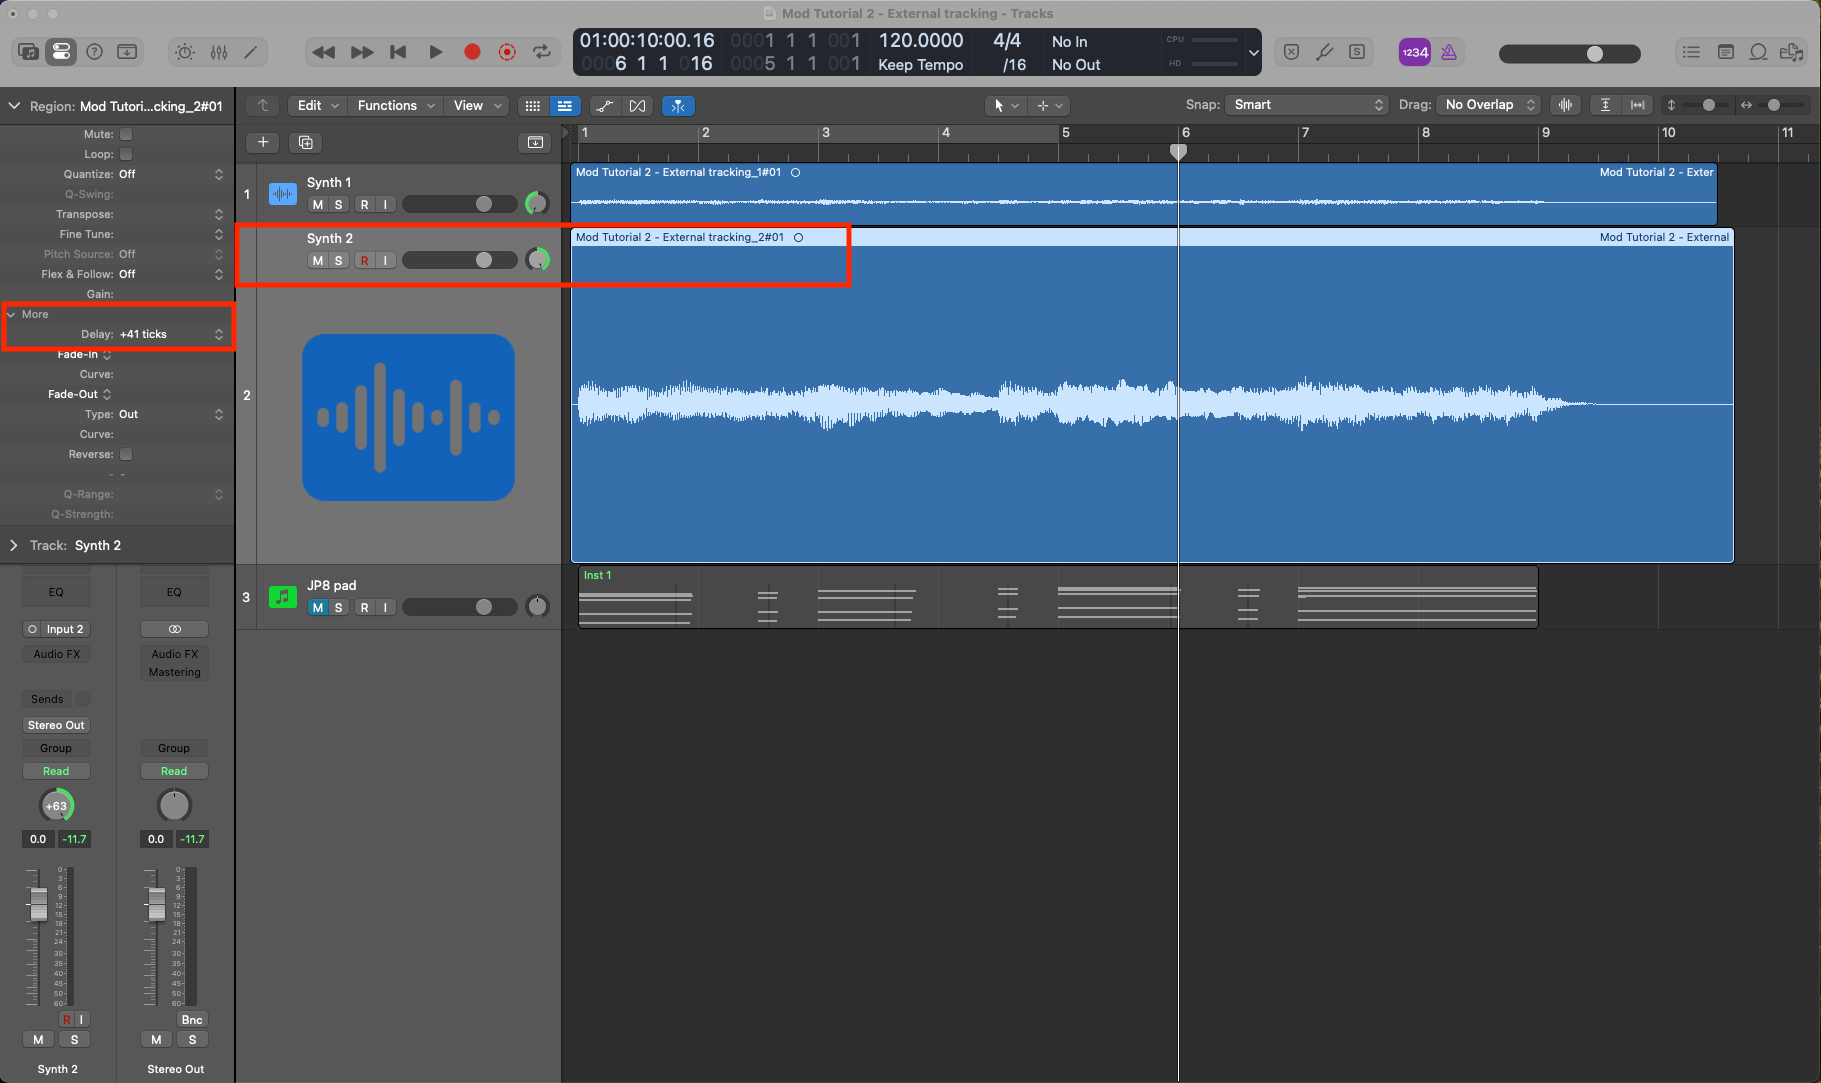
7. When you play the two tracks together they may sound a little too exacting, when played against each other. One very simple option, to make this process even more effective, is to slightly delay one of the tracks. The amount you may wish to delay the track by is dependent upon the tempo of the music being played, but don't be afraid to apply a reasonably high value, if it sounds good.
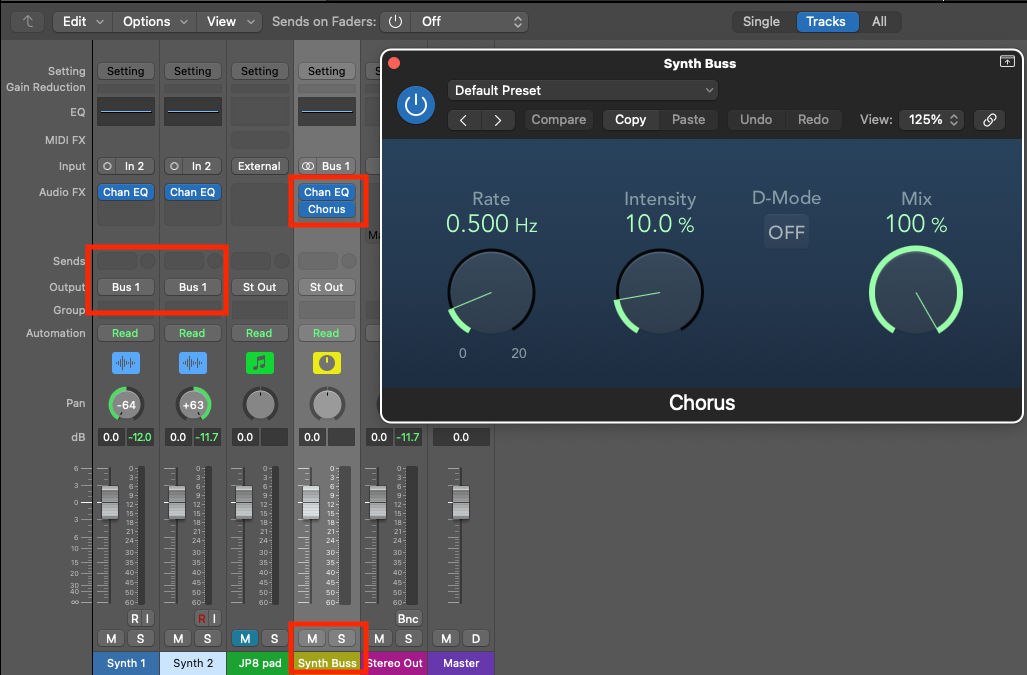
8. You may feel that the amount of thickness and width created by this process is not enough, in which case you can add further modulation to thicken the signal even more. Assign both of your recorded audio tracks to a buss, then simply apply your preferred modulation plugin, to the buss channel.
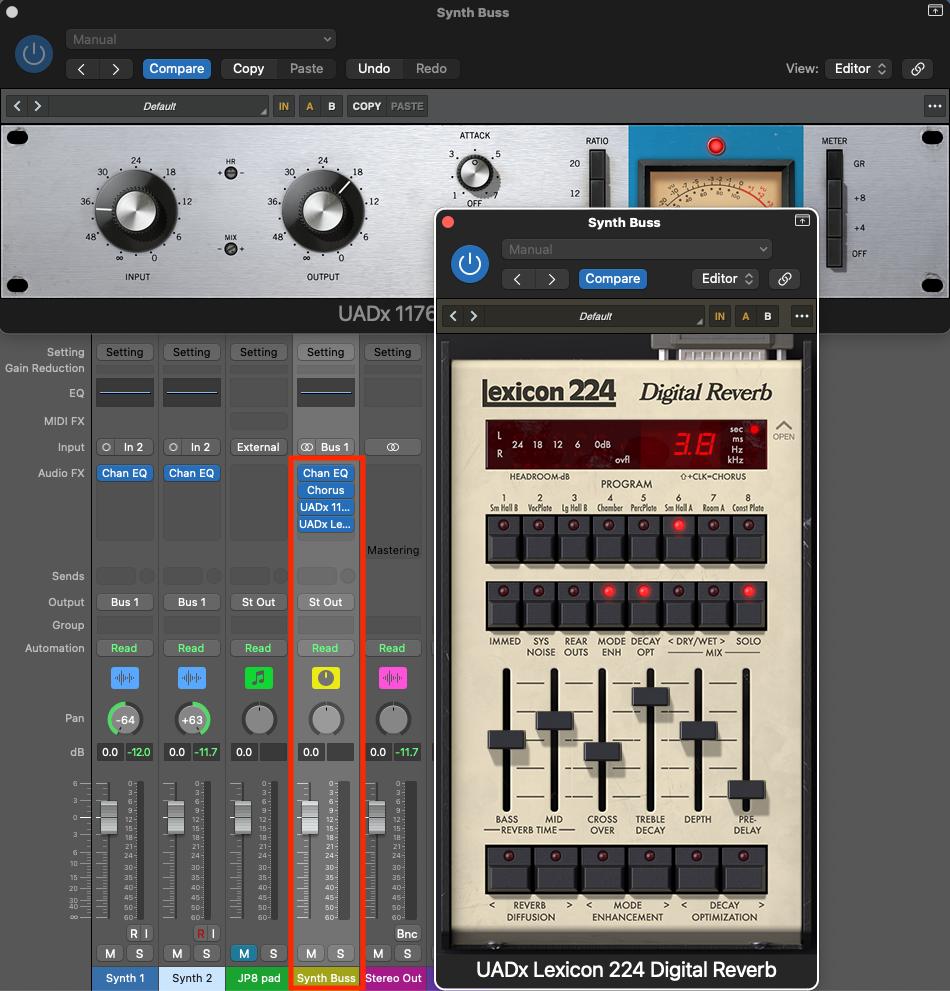
9. Finally, it might be advantageous to apply some compression to the synth buss, and there is nothing to prevent you from also adding some form of sweetening, in the shape of delay or reverb. The result should be a thick and manually created texture. The world is your plugin oyster!
Roland Schmidt is a professional programmer, sound designer and producer, who has worked in collaboration with a number of successful production teams over the last 25 years. He can also be found delivering regular and key-note lectures on the use of hardware/software synthesisers and production, at various higher educational institutions throughout the UK
