How to make a loop into a fully-fledged track
It’s simple to make a killer loop, but how does that become a dancefloor-filling hit? It only takes a few steps to get the process started…
While many producers can create a great sounding loop, it takes a little more knowledge to build a track that keeps the listener engaged throughout. Today, we’ll learn how to arrange an EDM track from a loop and examine the elements each section should consist of.
To understand electronic music structures, we can refer to the pop music song structure, where each song is made up of different parts that all serve a purpose. In pop music, a song consists of a verse, pre-chorus, chorus, second verse, pre-chorus, chorus, bridge and finishes with a chorus. Modern electronic music utilises a slightly different structure, yet the sections bear some resemblance.
A typical EDM track starts with an intro, moves on to a construction part where more elements are added, then the full beat, build-up and breakdown, drop, build-up and breakdown, second drop, deconstruction section and an instrumental outro. A good EDM track captivates the listener’s attention by creating contrasting parts, and creates excitement via tension and release.
Make a loop into a track

Start by making an arrangement guide for the track by making a new MIDI track. Create blank MIDI regions eight bars in length for each section and label each one with the names of the parts of the track. This arrangement will be Intro (2x), Verse (2x), Drop (2x), Verse, (2x) Drop (2x), Breakdown/Buildup, Drop (2x) and Outro.
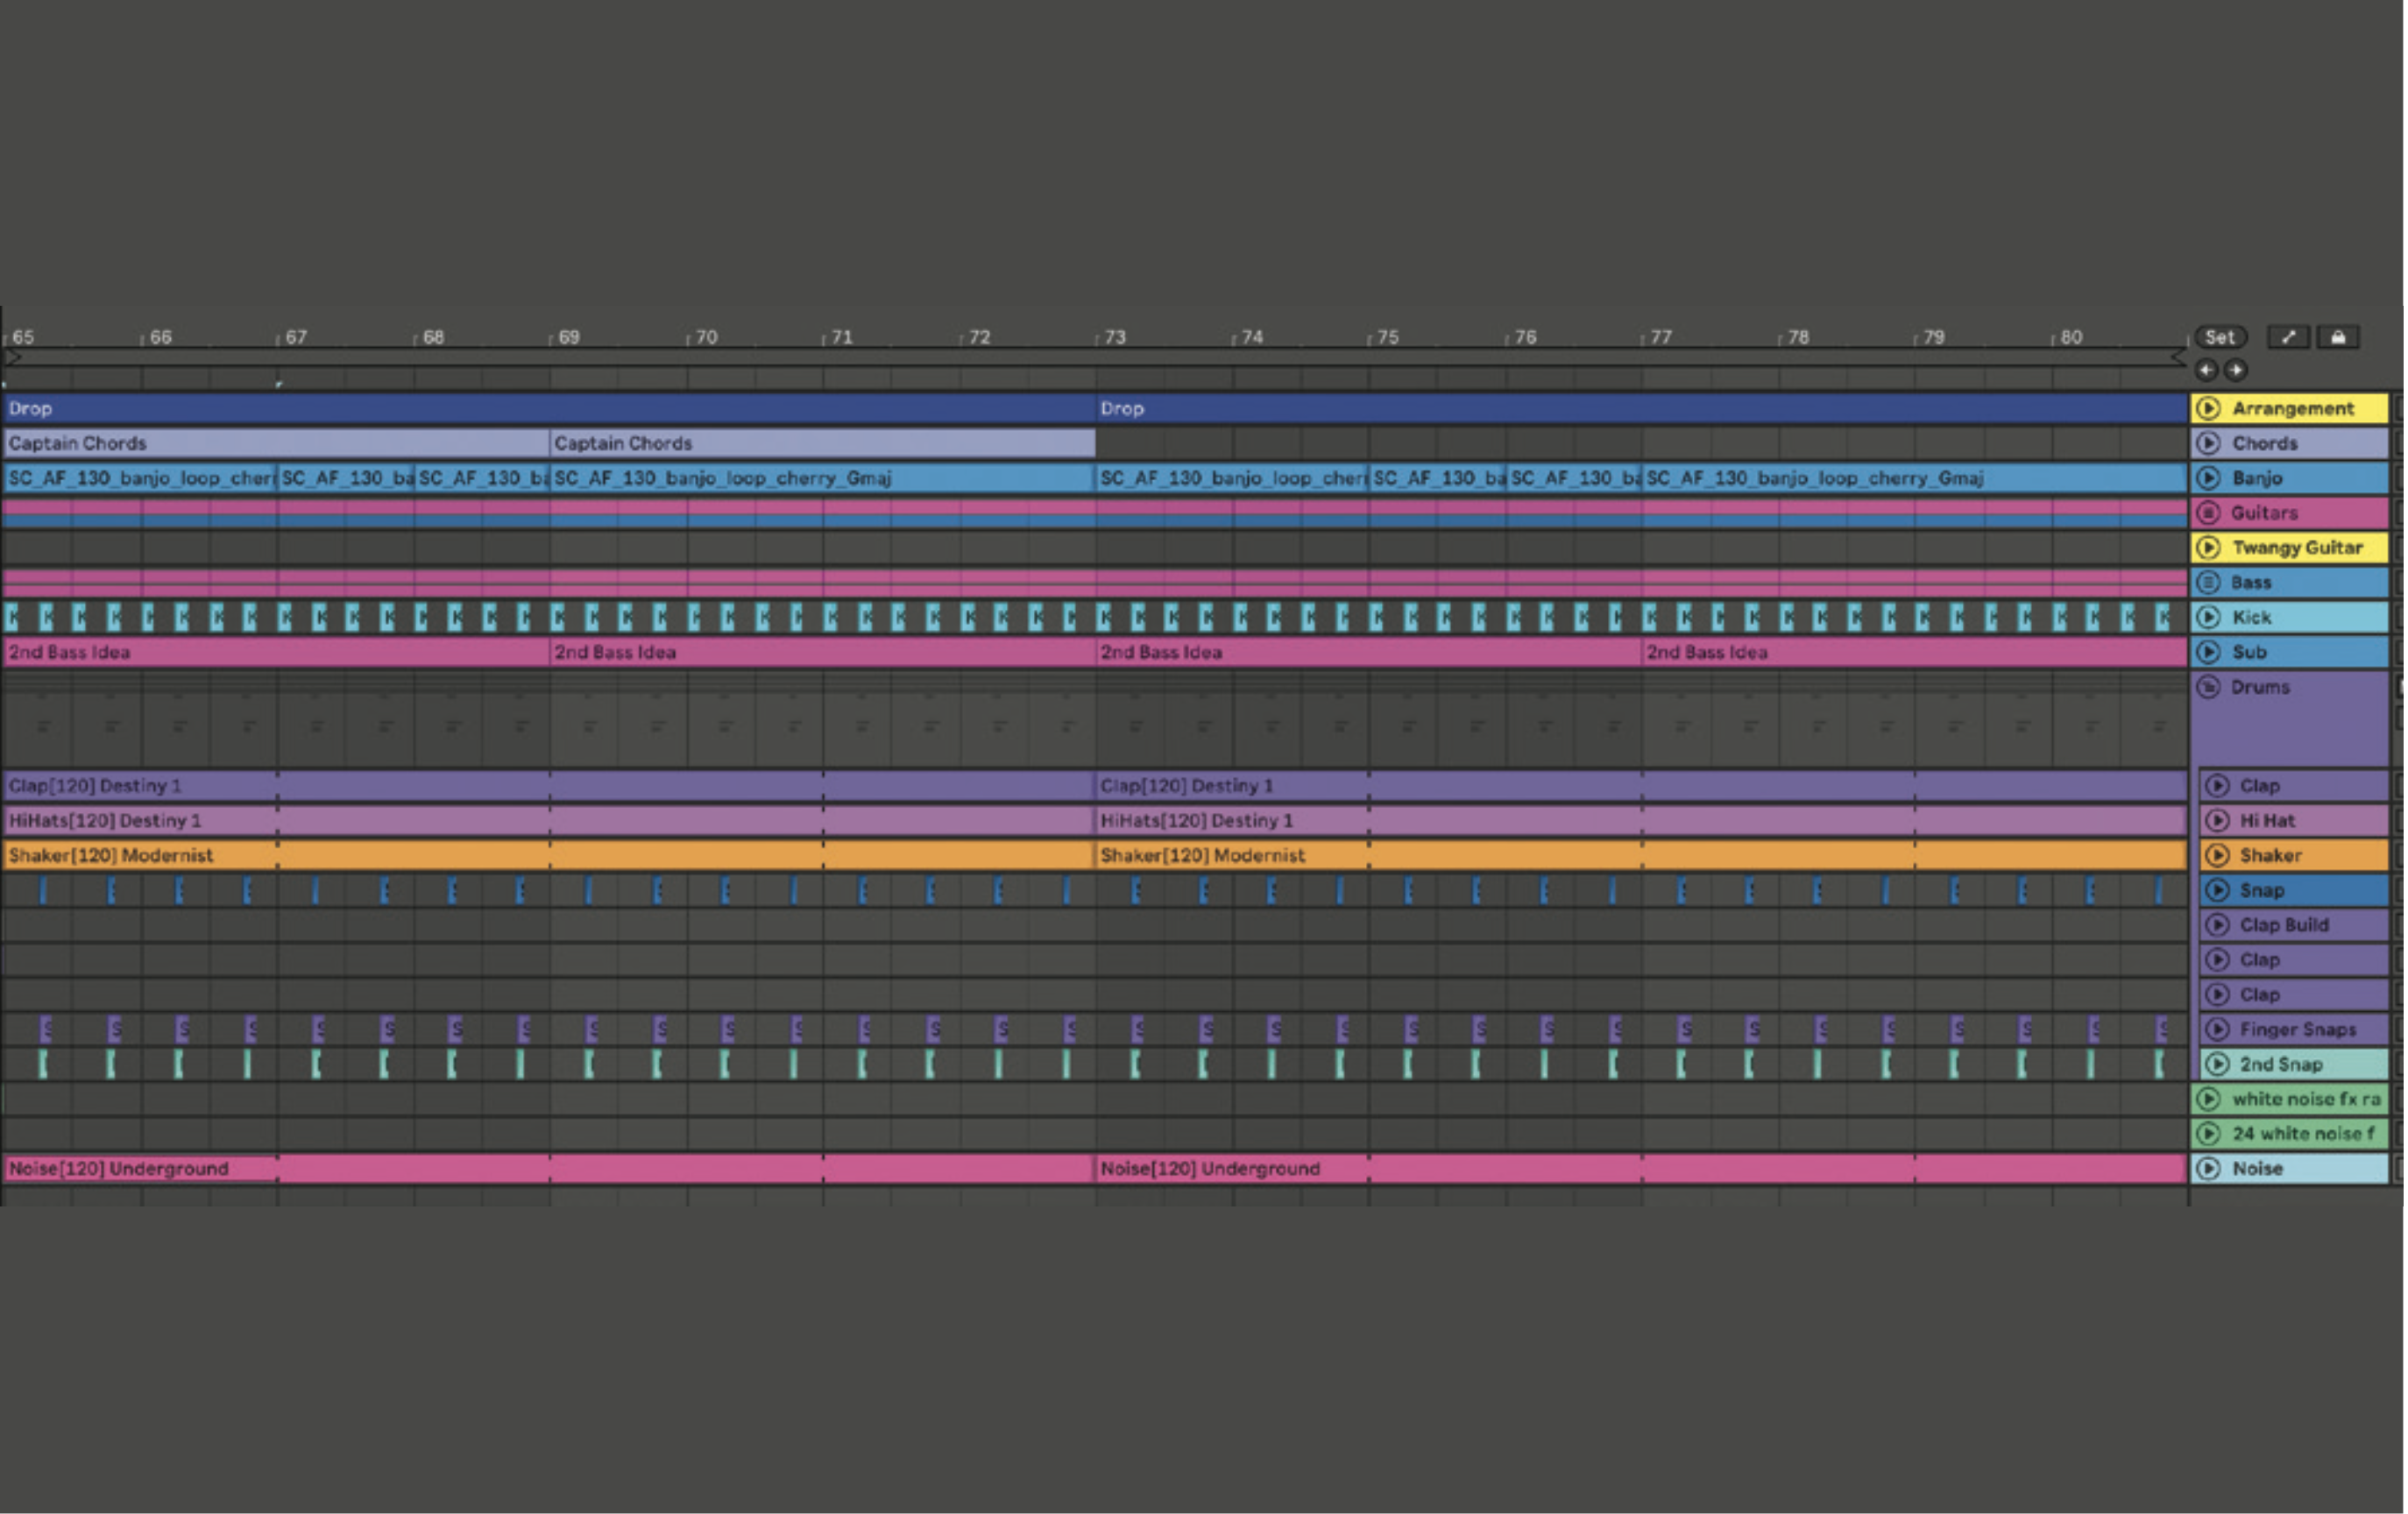
Colour each section differently so it’s easy to see the different parts. Start with an existing loop that you’ve created that consists of drums, bass, synths, other instrumentation, and vocals. Place the loop in the Drop section. Make sure all of the elements work together well, as the drop will be the highlight of the track. Remove any elements that feel out of place.
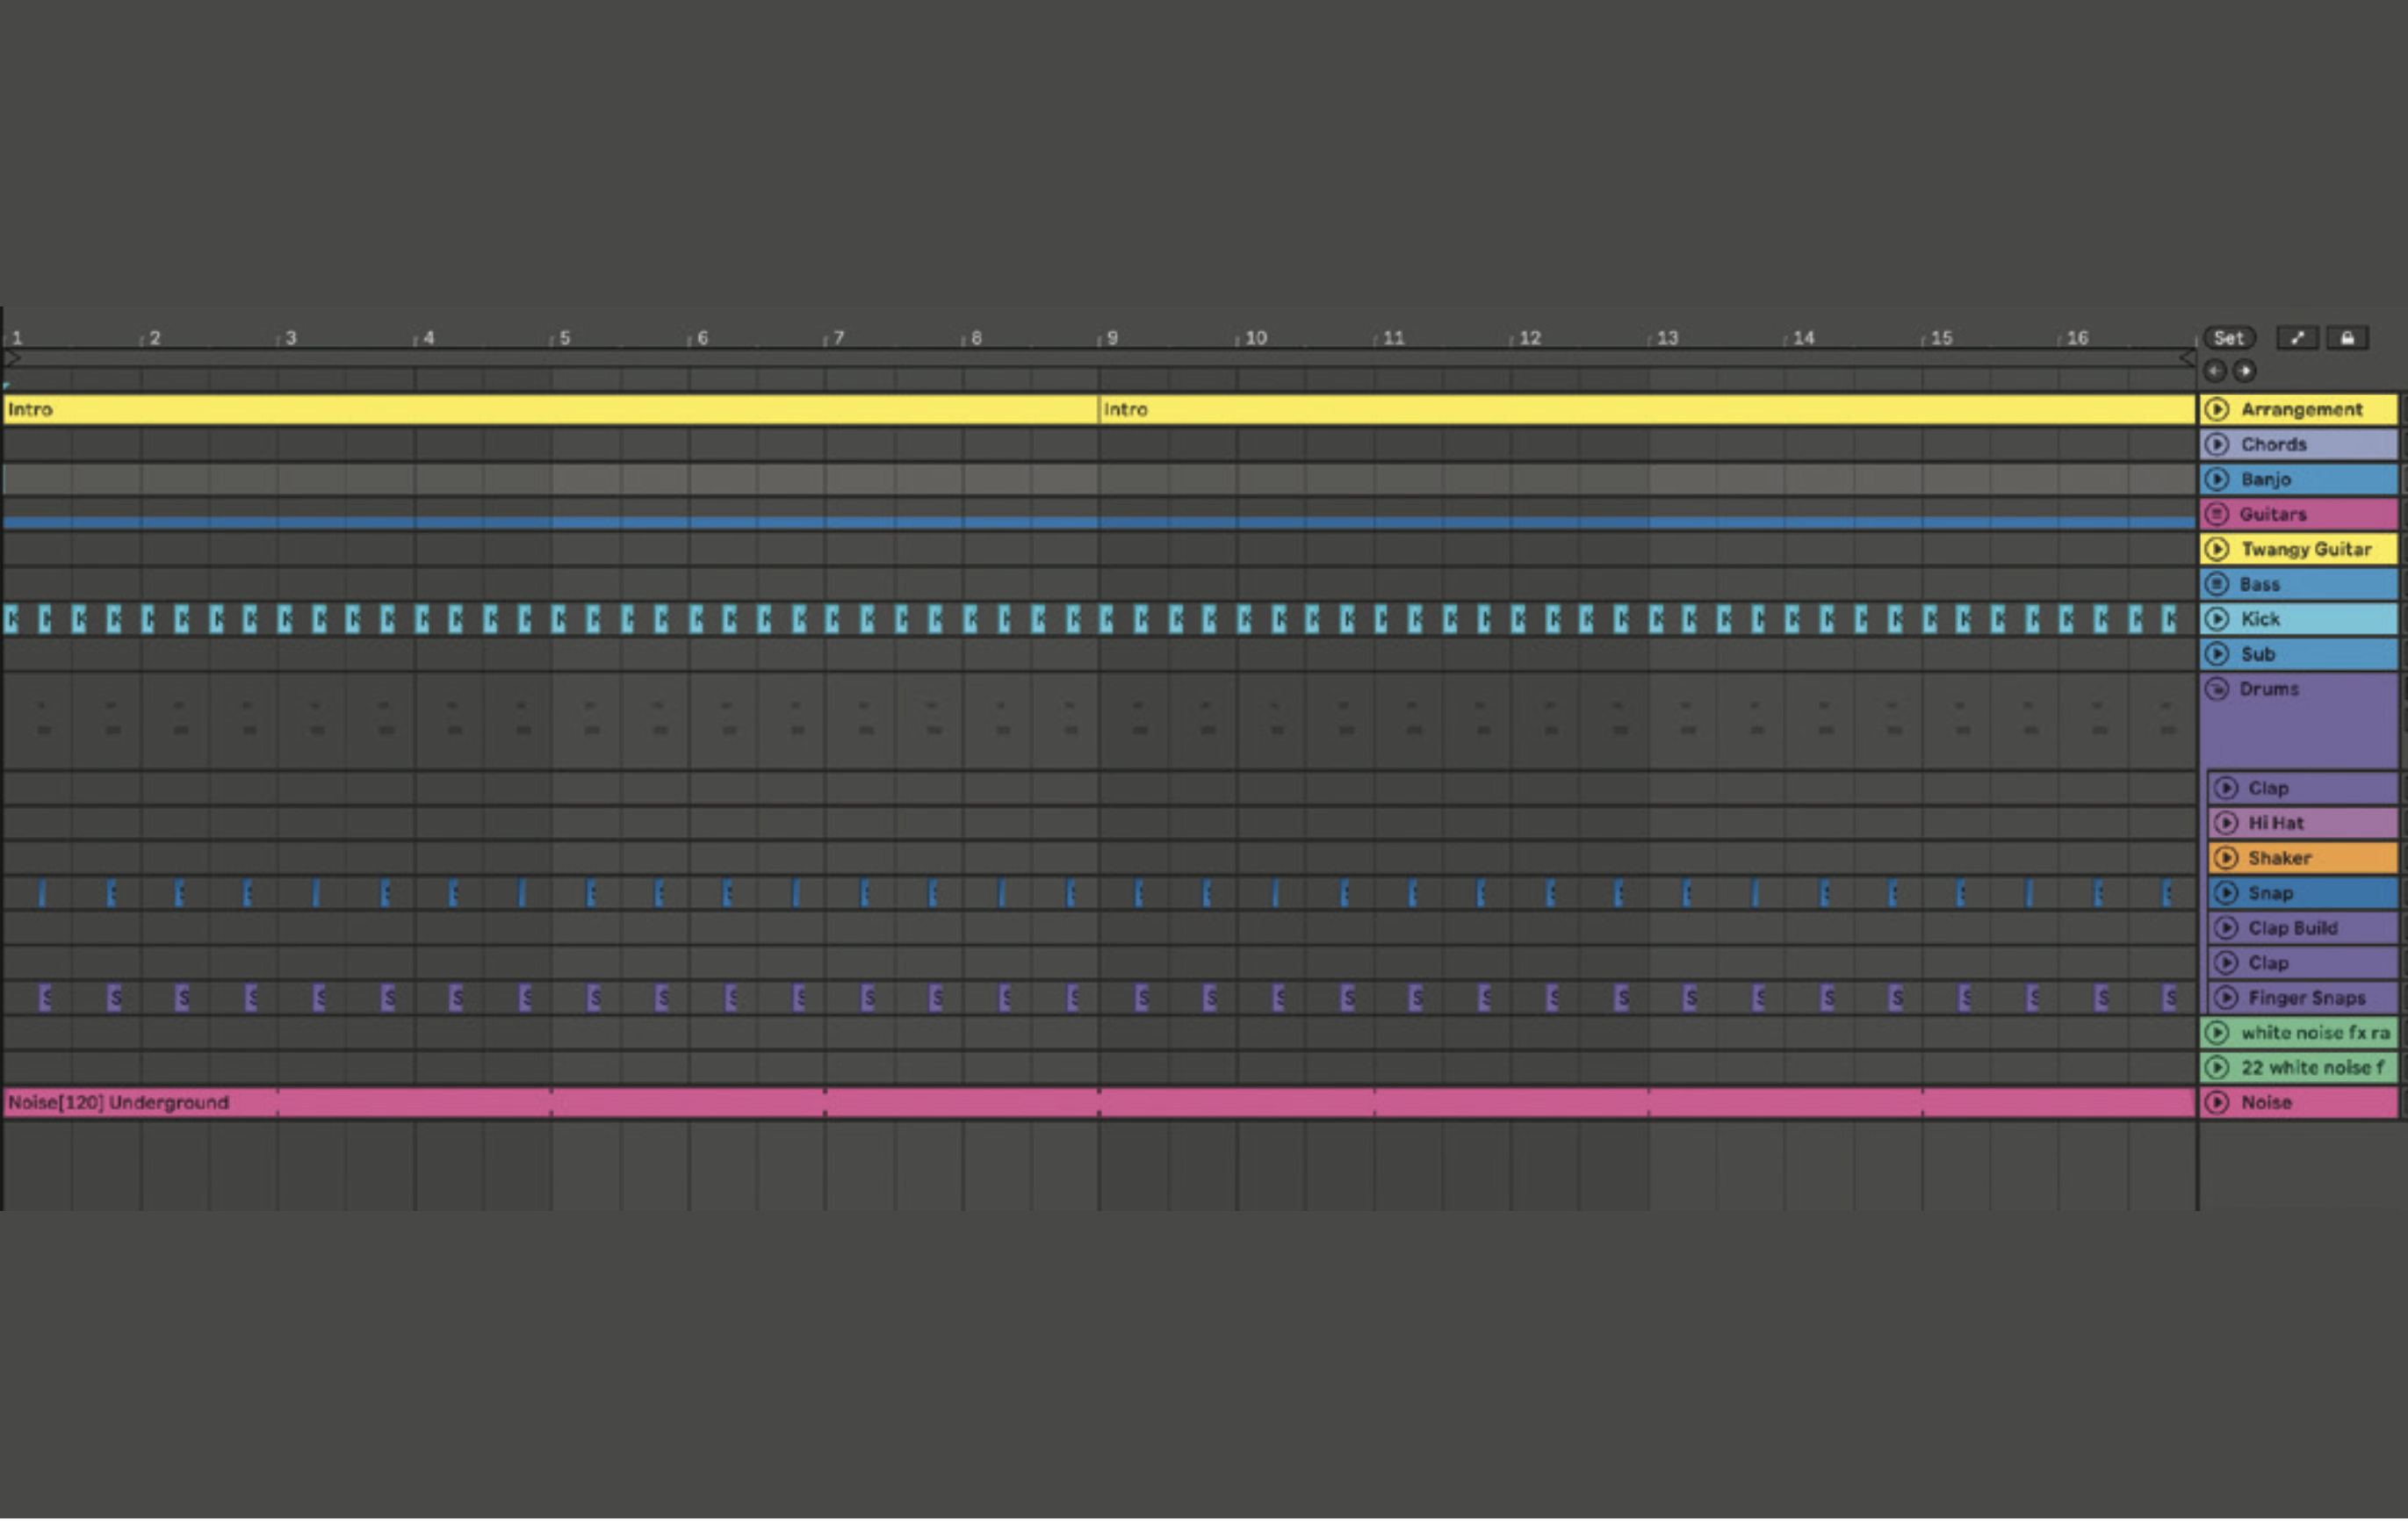
Copy a few of the elements to the intro section, including a shaker or hi hats, melodic line and the kick drum. Copy these elements to the verse section and add in instrumentation and vocals. If your track has vocals, the instruments you choose should support the vocal line. Add in more of the drums, such as claps, toms and percussive sounds.
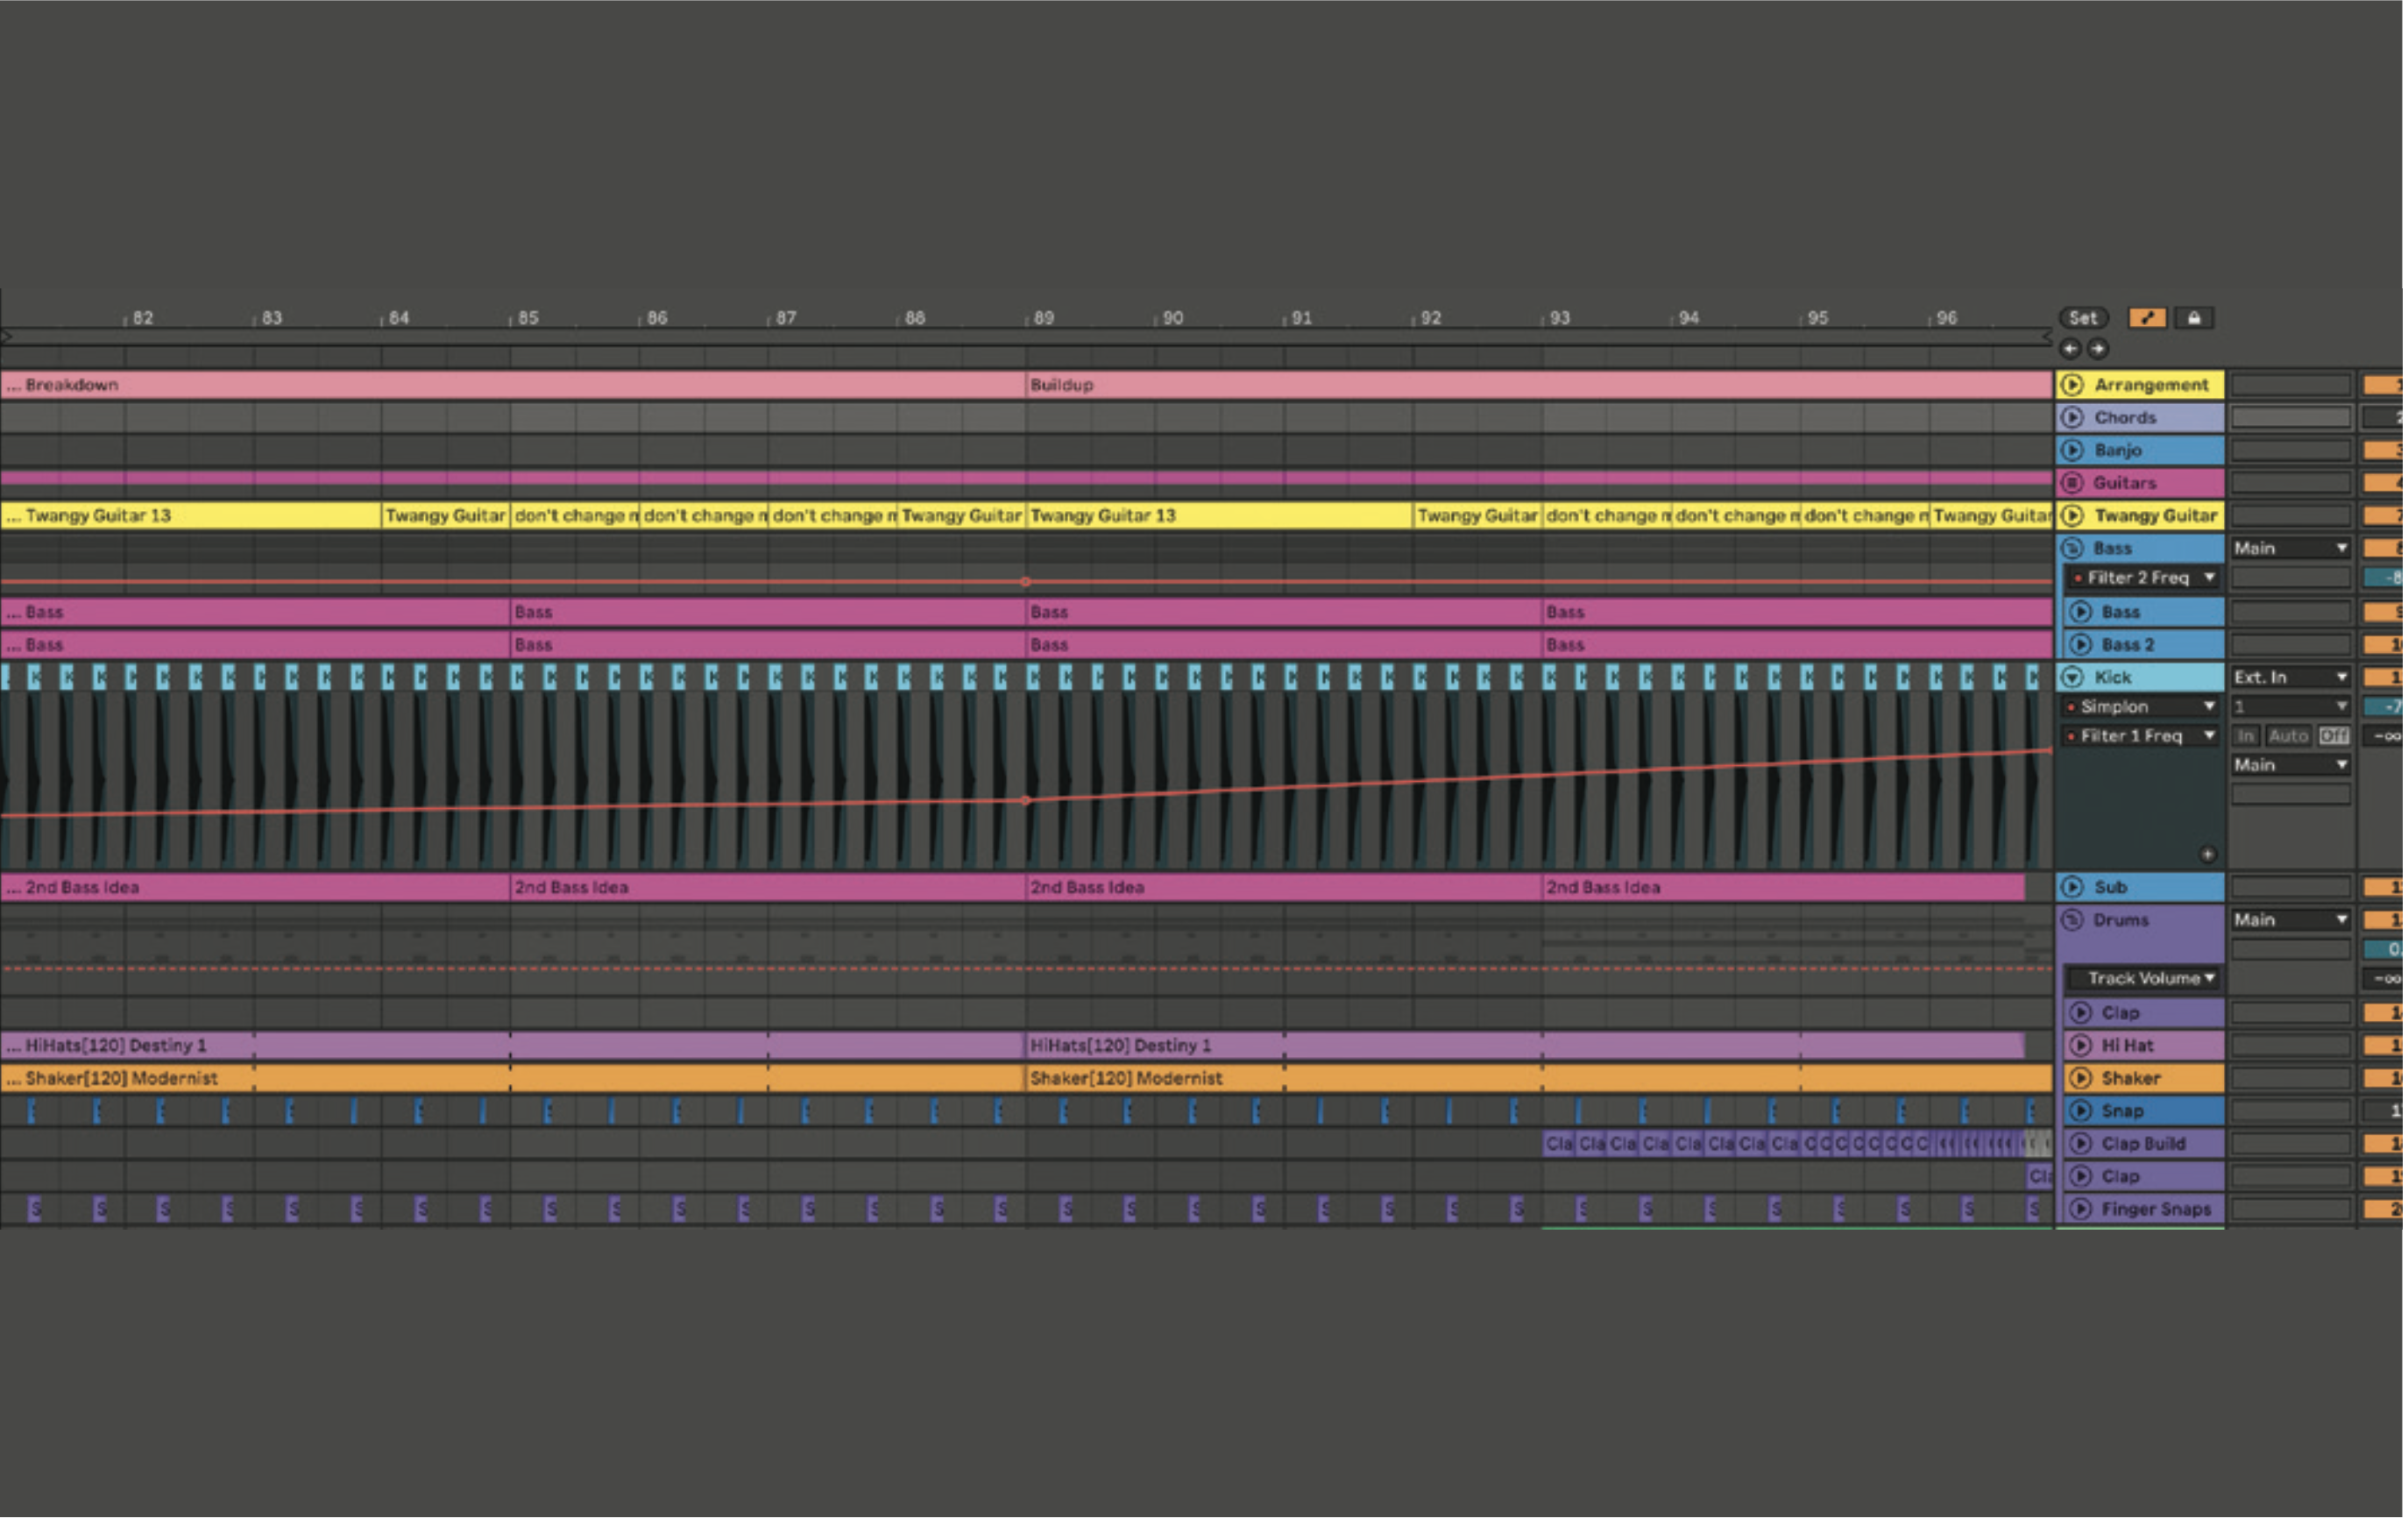
In the breakdown/buildup section, reduce the number of elements that are playing. Cut or filter the low-end out of the kick drum, but keep some movement in the track by including a light, percussive rhythm. You may want to keep the bass playing, but filter the low-end out. A pad is a good instrument to include in the breakdown.
Want all the hottest music and gear news, reviews, deals, features and more, direct to your inbox? Sign up here.
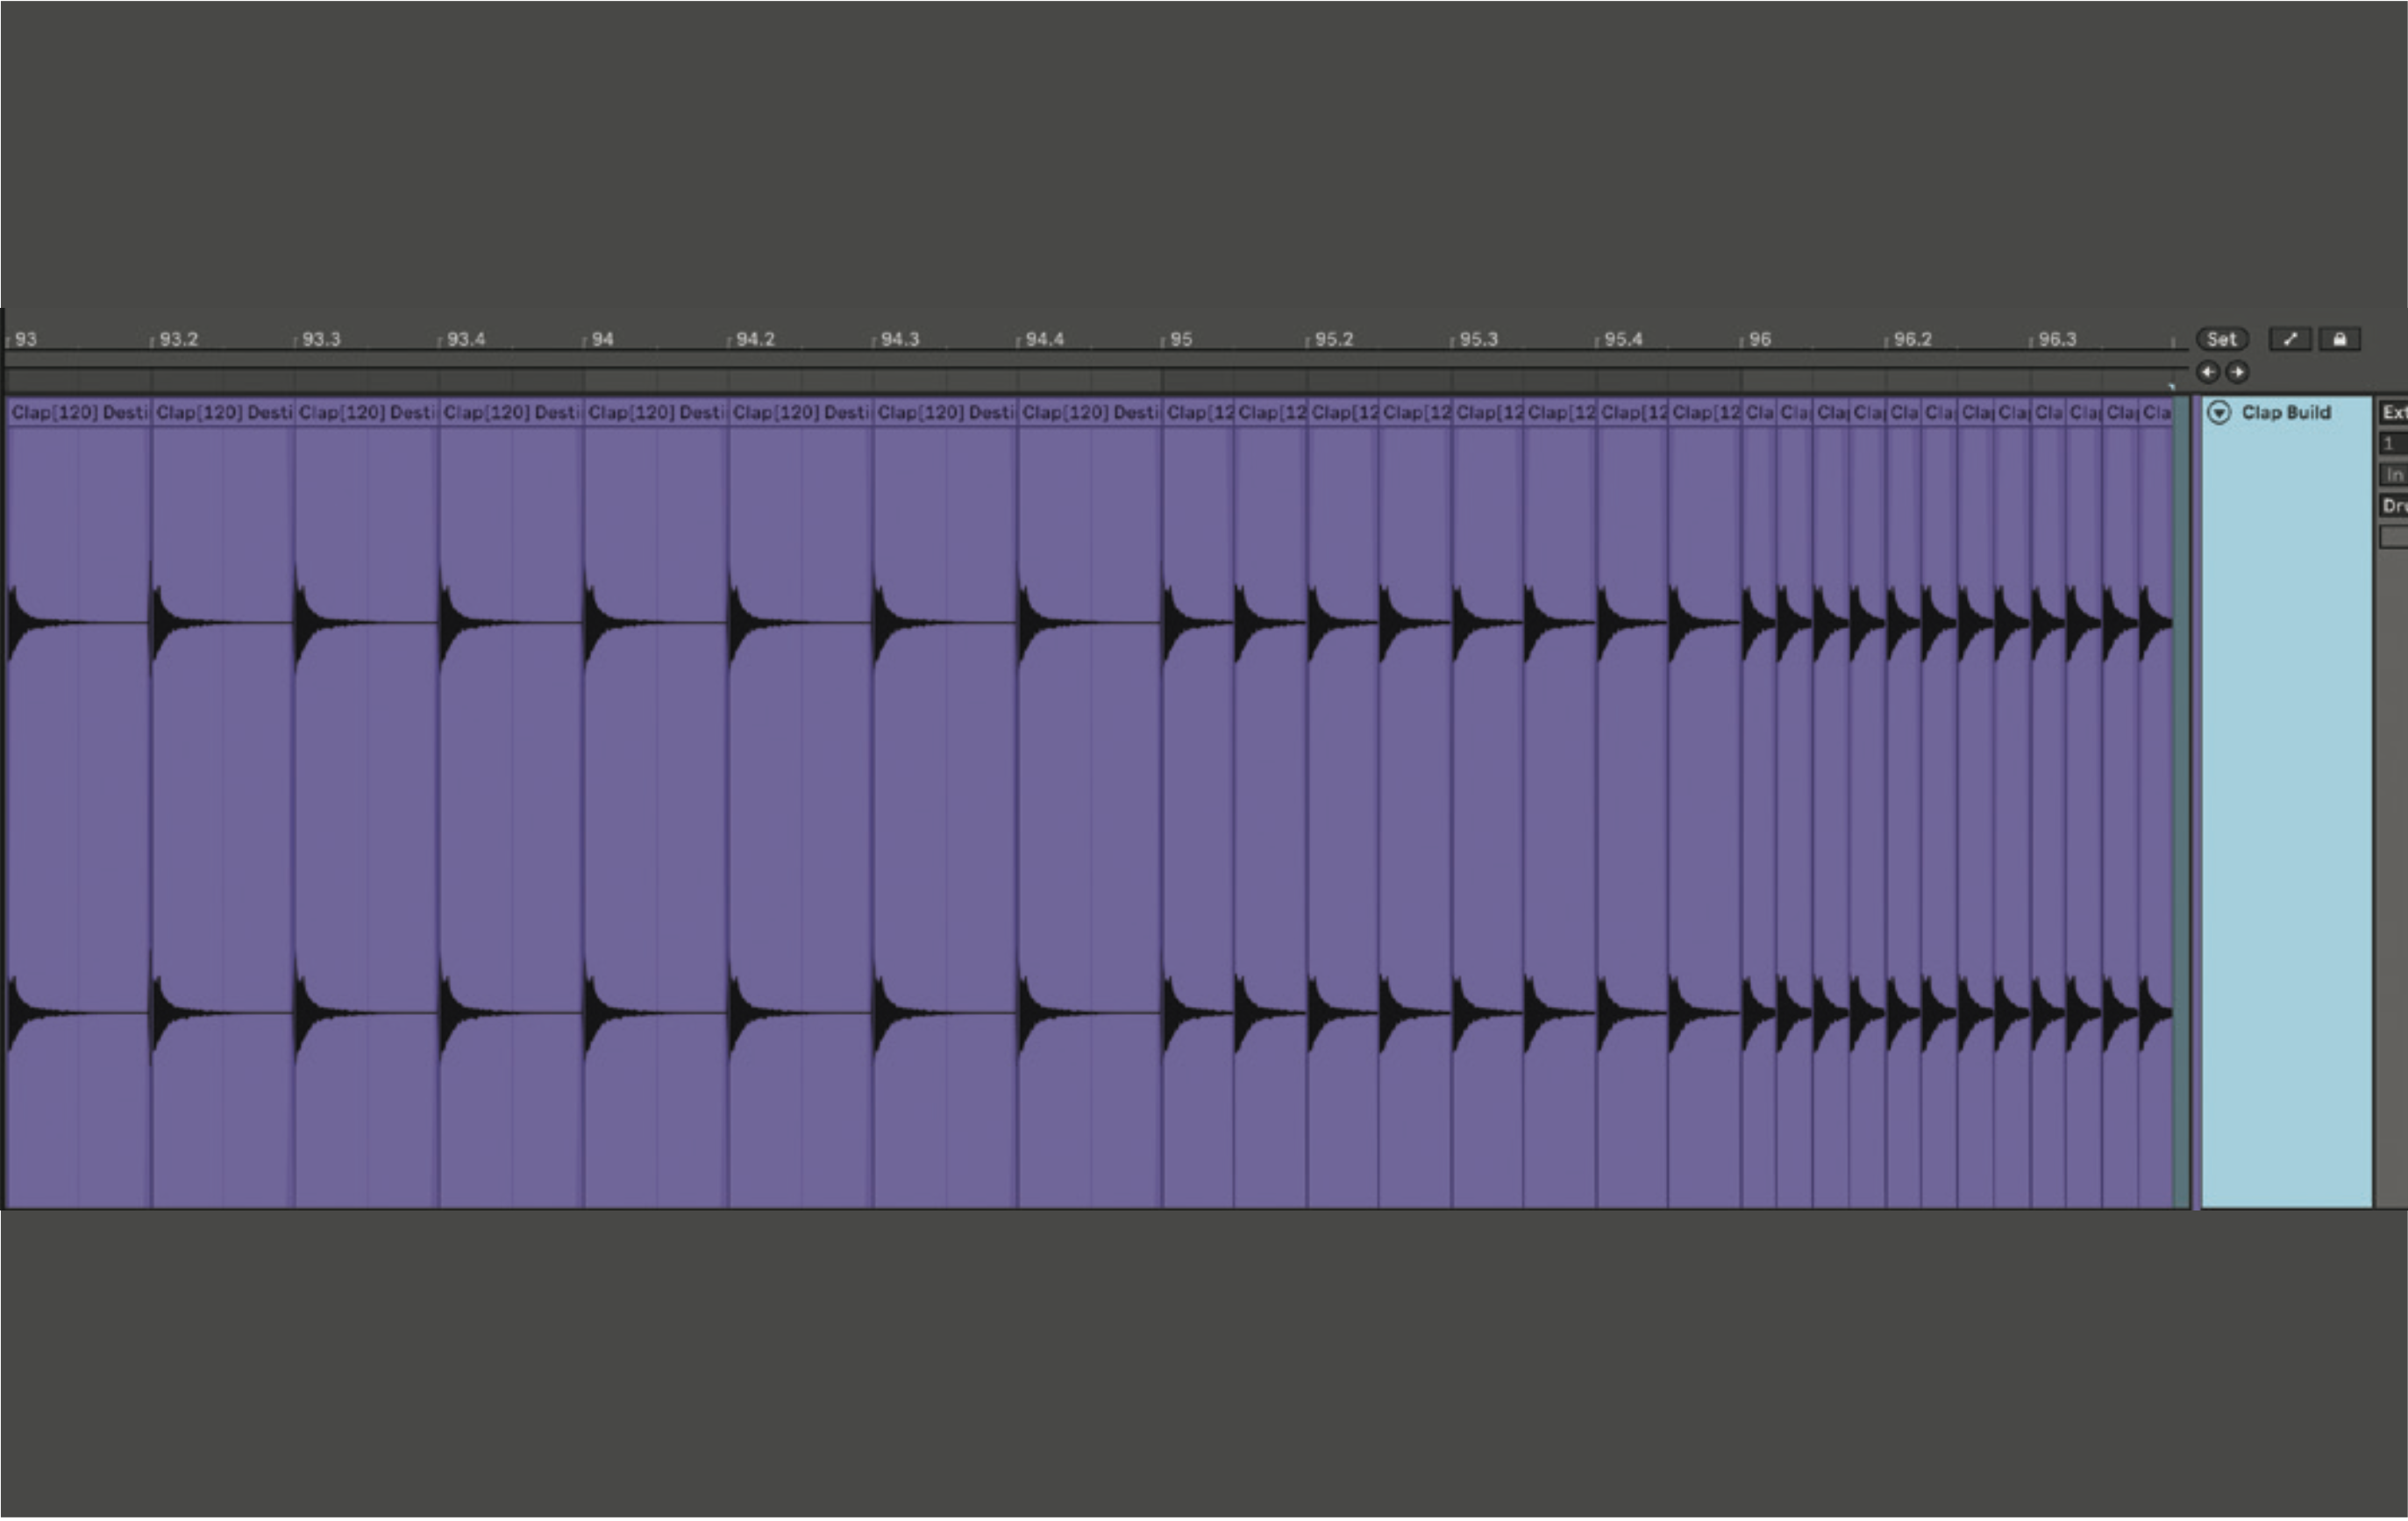
During the buildup, add a clap or snare-roll to increase the intensity. Copy one of the claps or snares from your track and start by having it play quarter notes, then cut down to eighth notes, followed by sixteenth notes. Add a white noise riser before the drop, either by creating this on your own or using an audio sample.
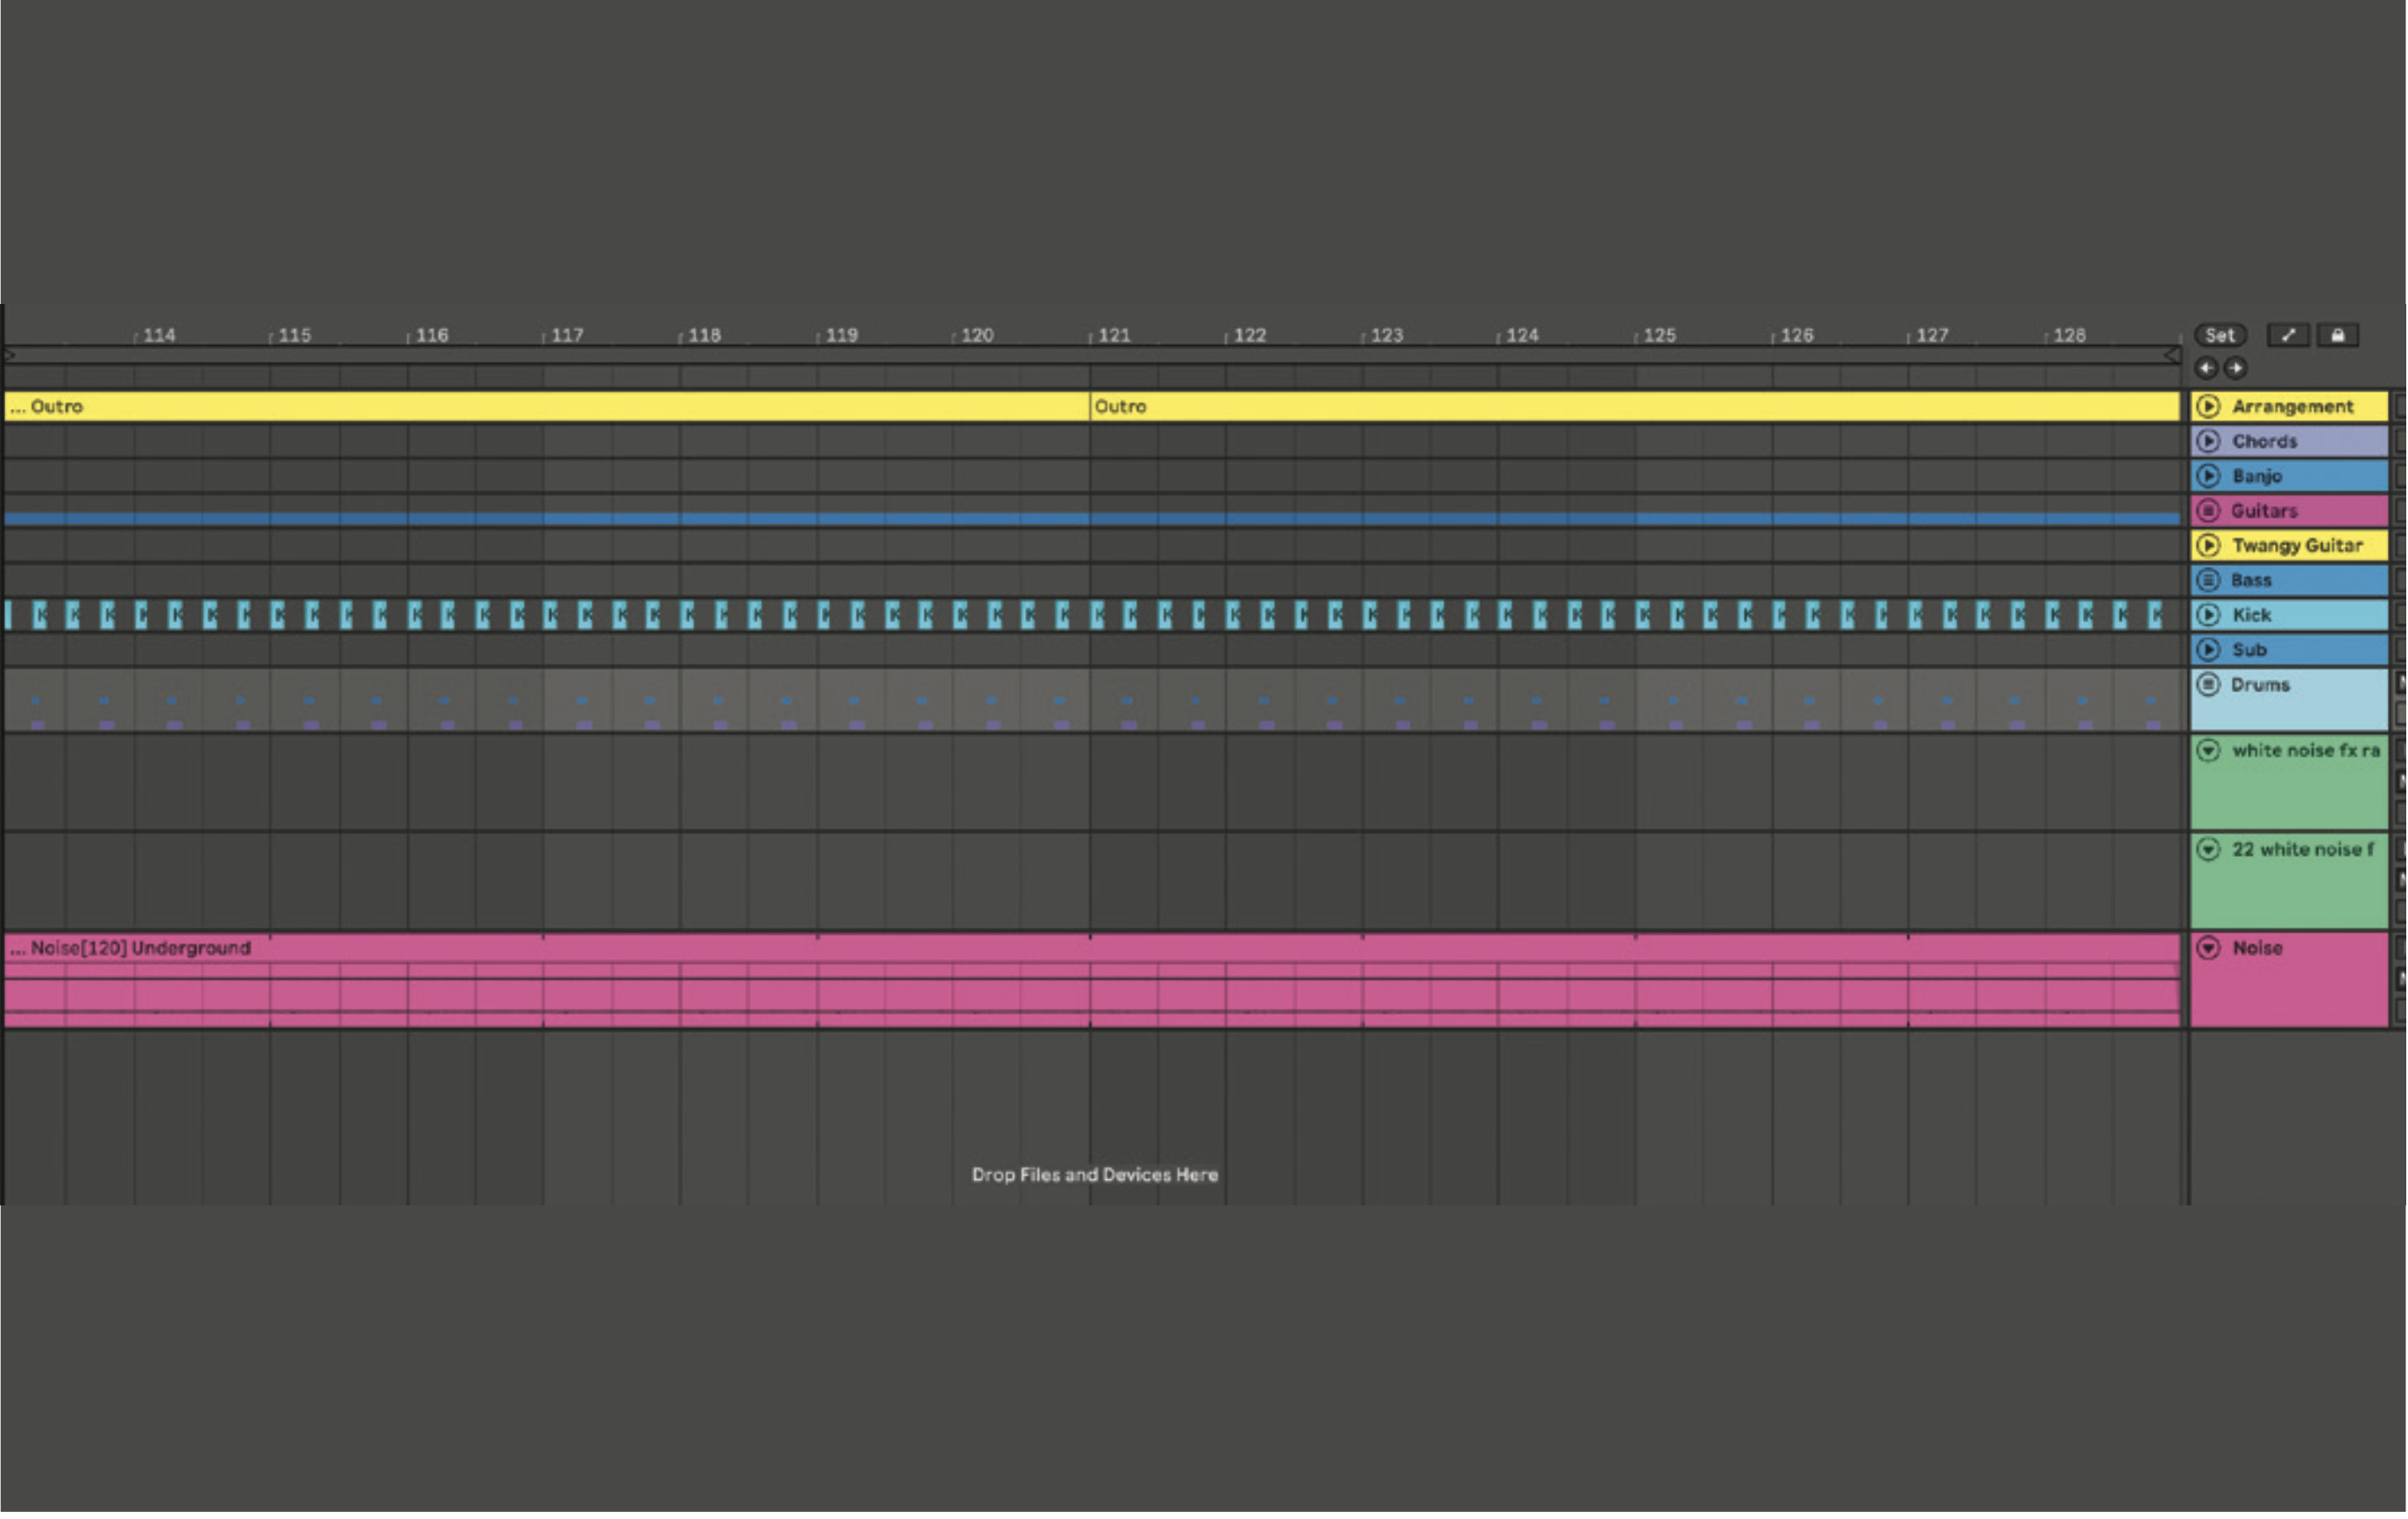
Copy the first drop to the second drop slot, and then create an outro for your track based on the track intro. A DJ should be able to mix out of the track with the outro, so focus on including the kick, bass, one or two instruments and other percussive elements. The outro of the track should bring the song to an ending.
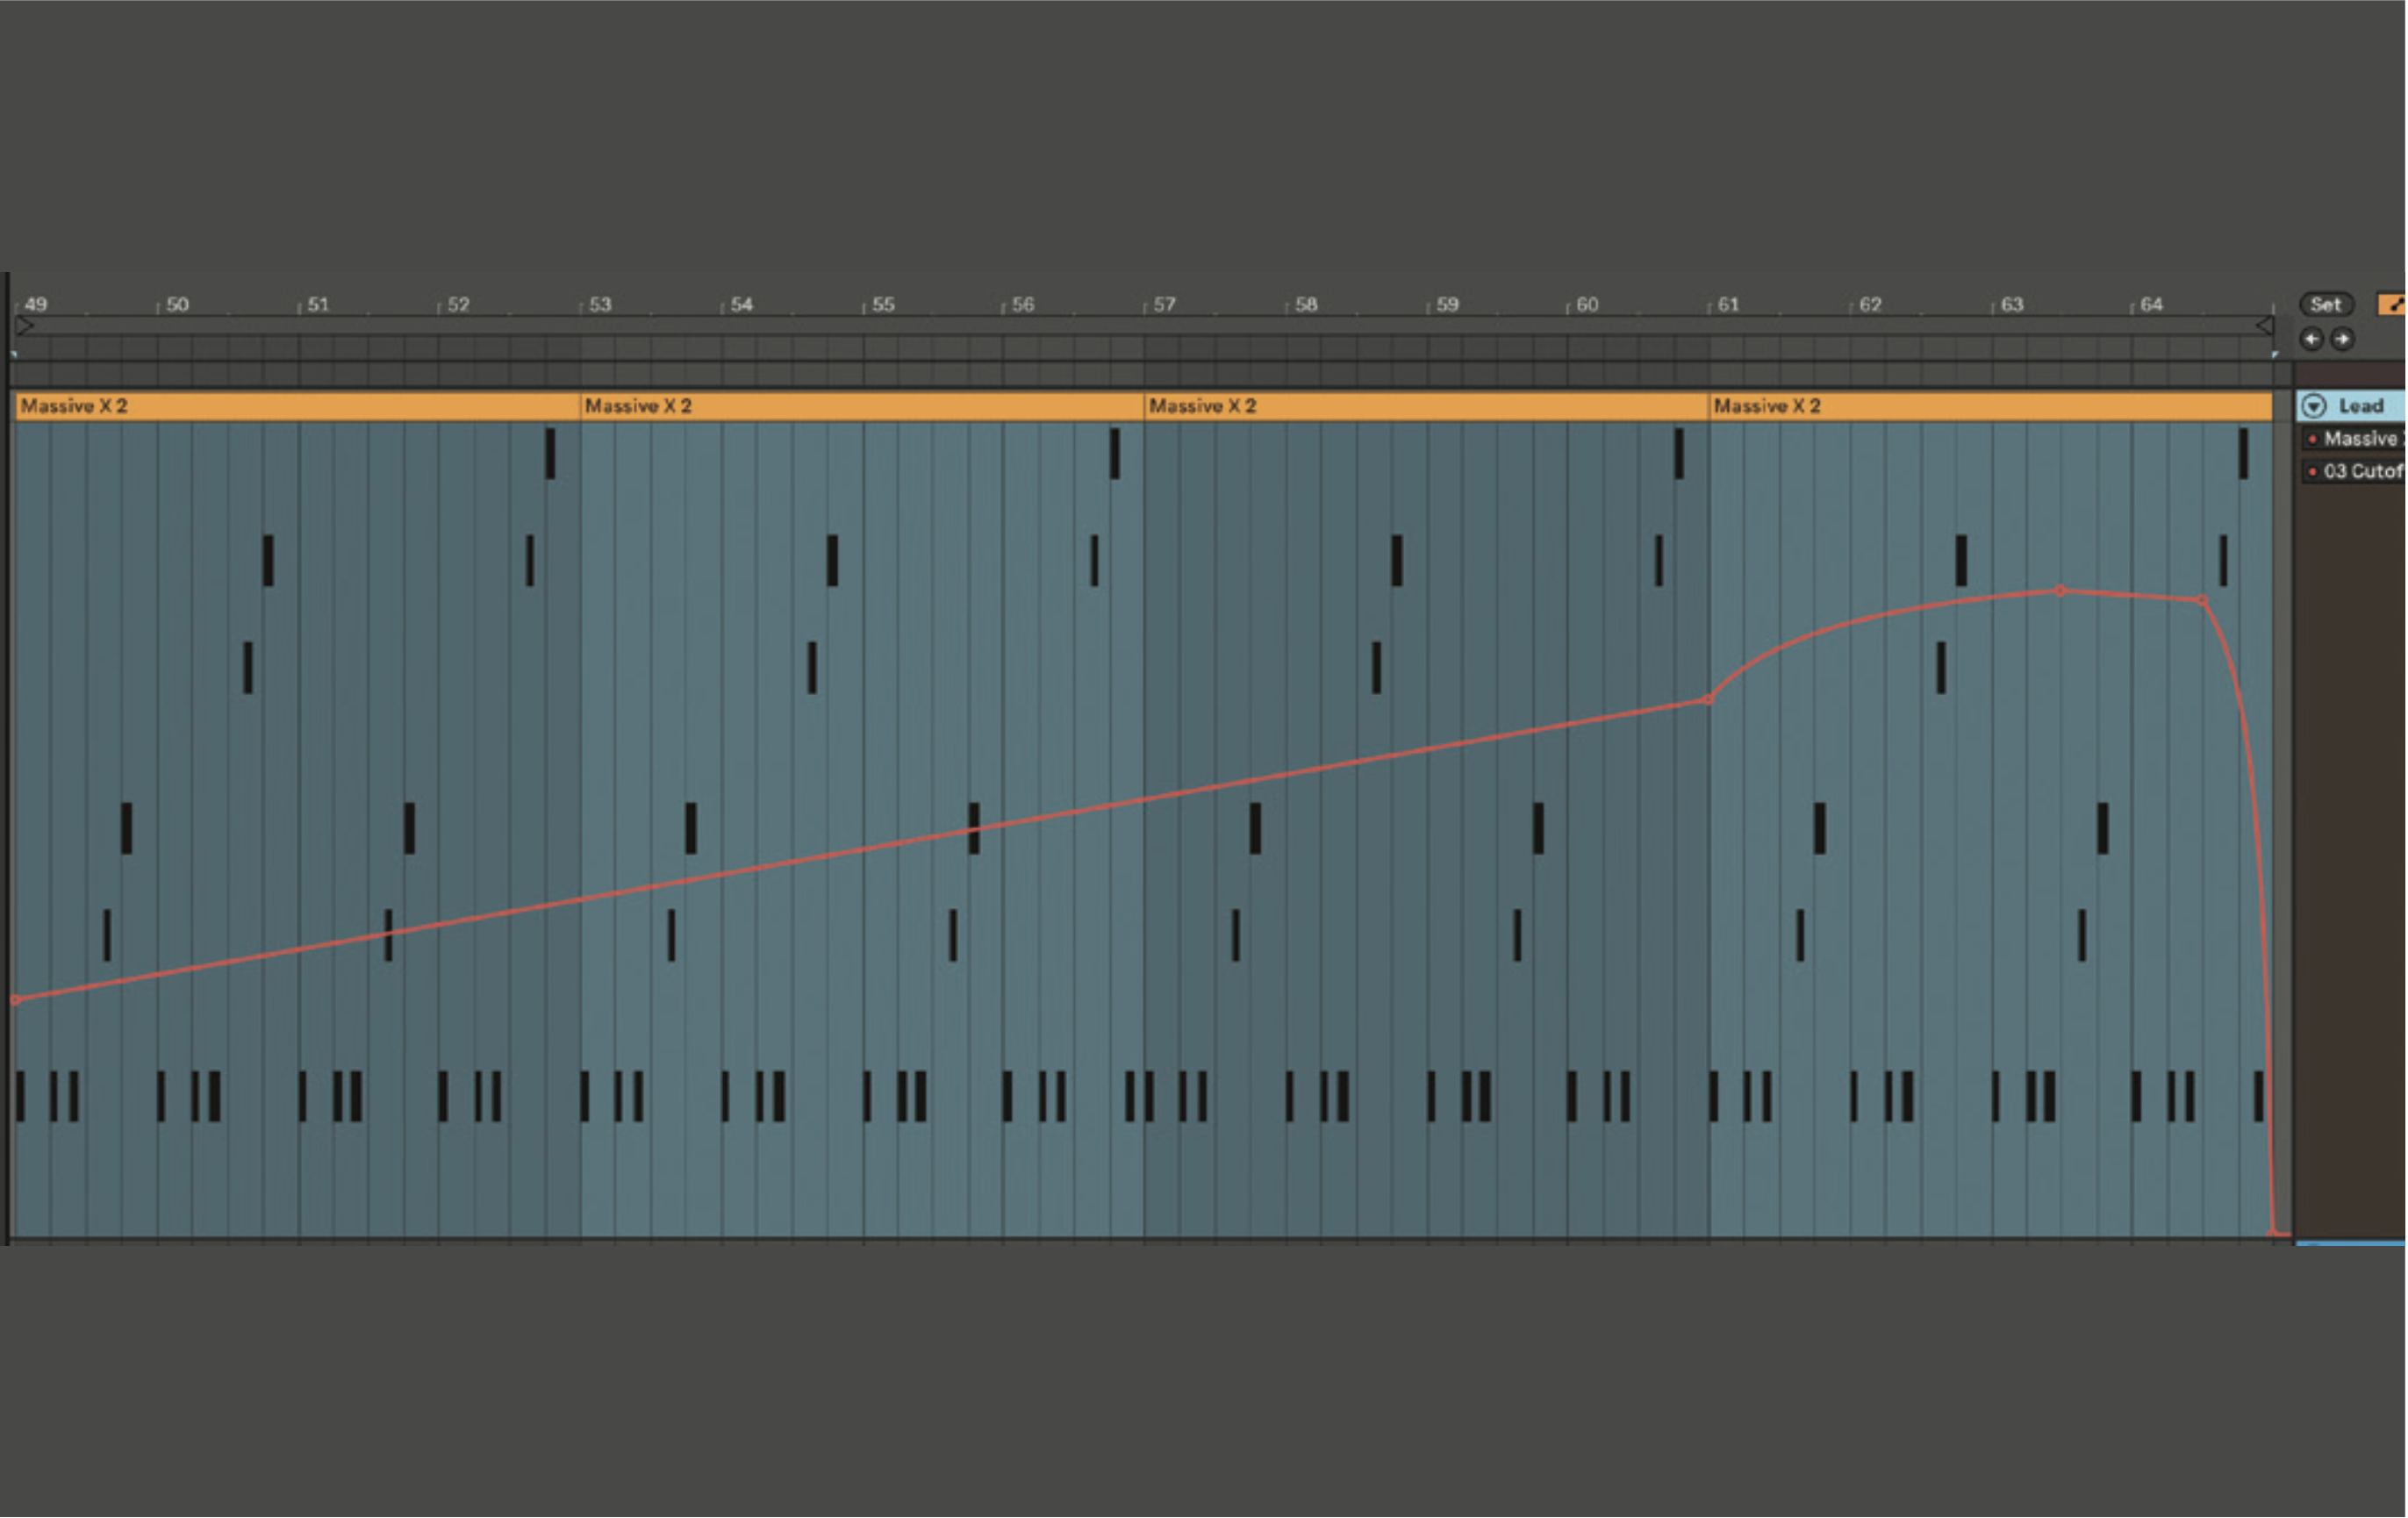
Once you have a track structure you’re happy with, it’s time to add automation to create movement and tension between the song sections. Go to the break section of your track, and choose a pad or synth to automate. Automate the filter cutoff. Use a low-cut filter, and open up the filter during the build-up. Right before the break ends, bring it down.
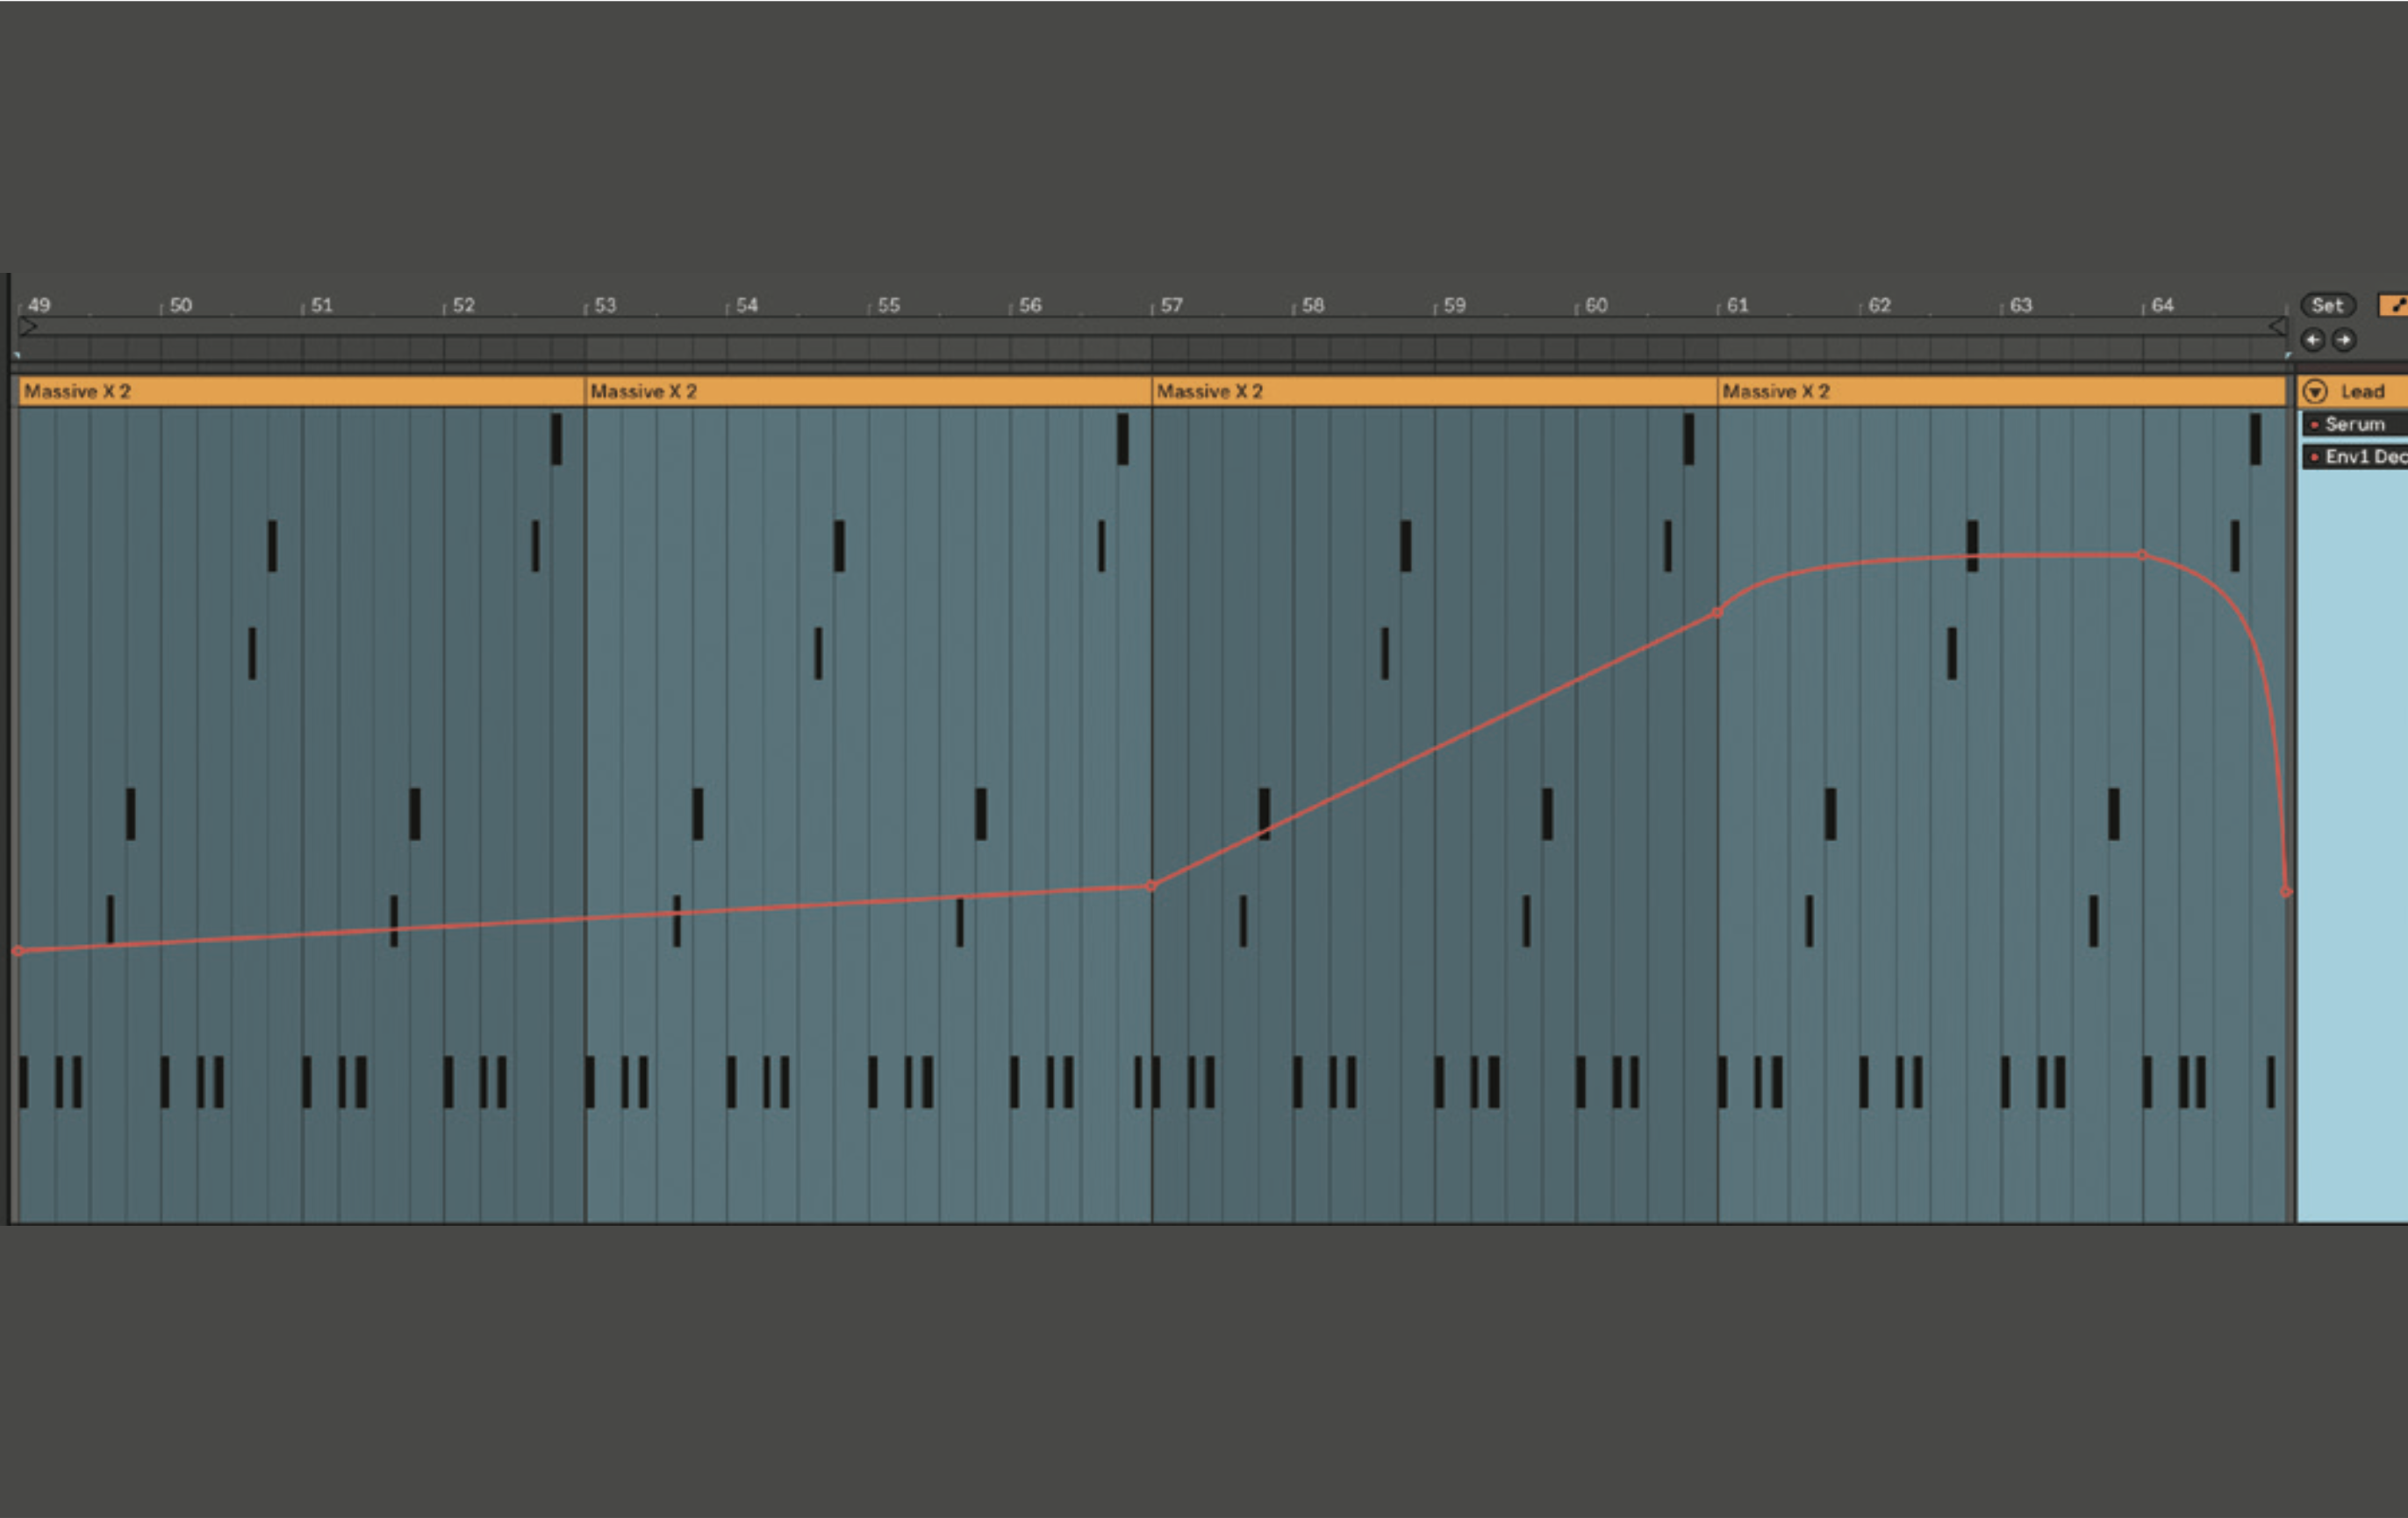
During the second half of the break, automate the sustain and decay on a synth, and then remove the automation for the drop. You can also try automating the attack or release. Start with lower values and gradually bring them up. Before the break ends, bring the automation back down. These subtle changes will give the synth more movement and increase the anticipation for the drop.
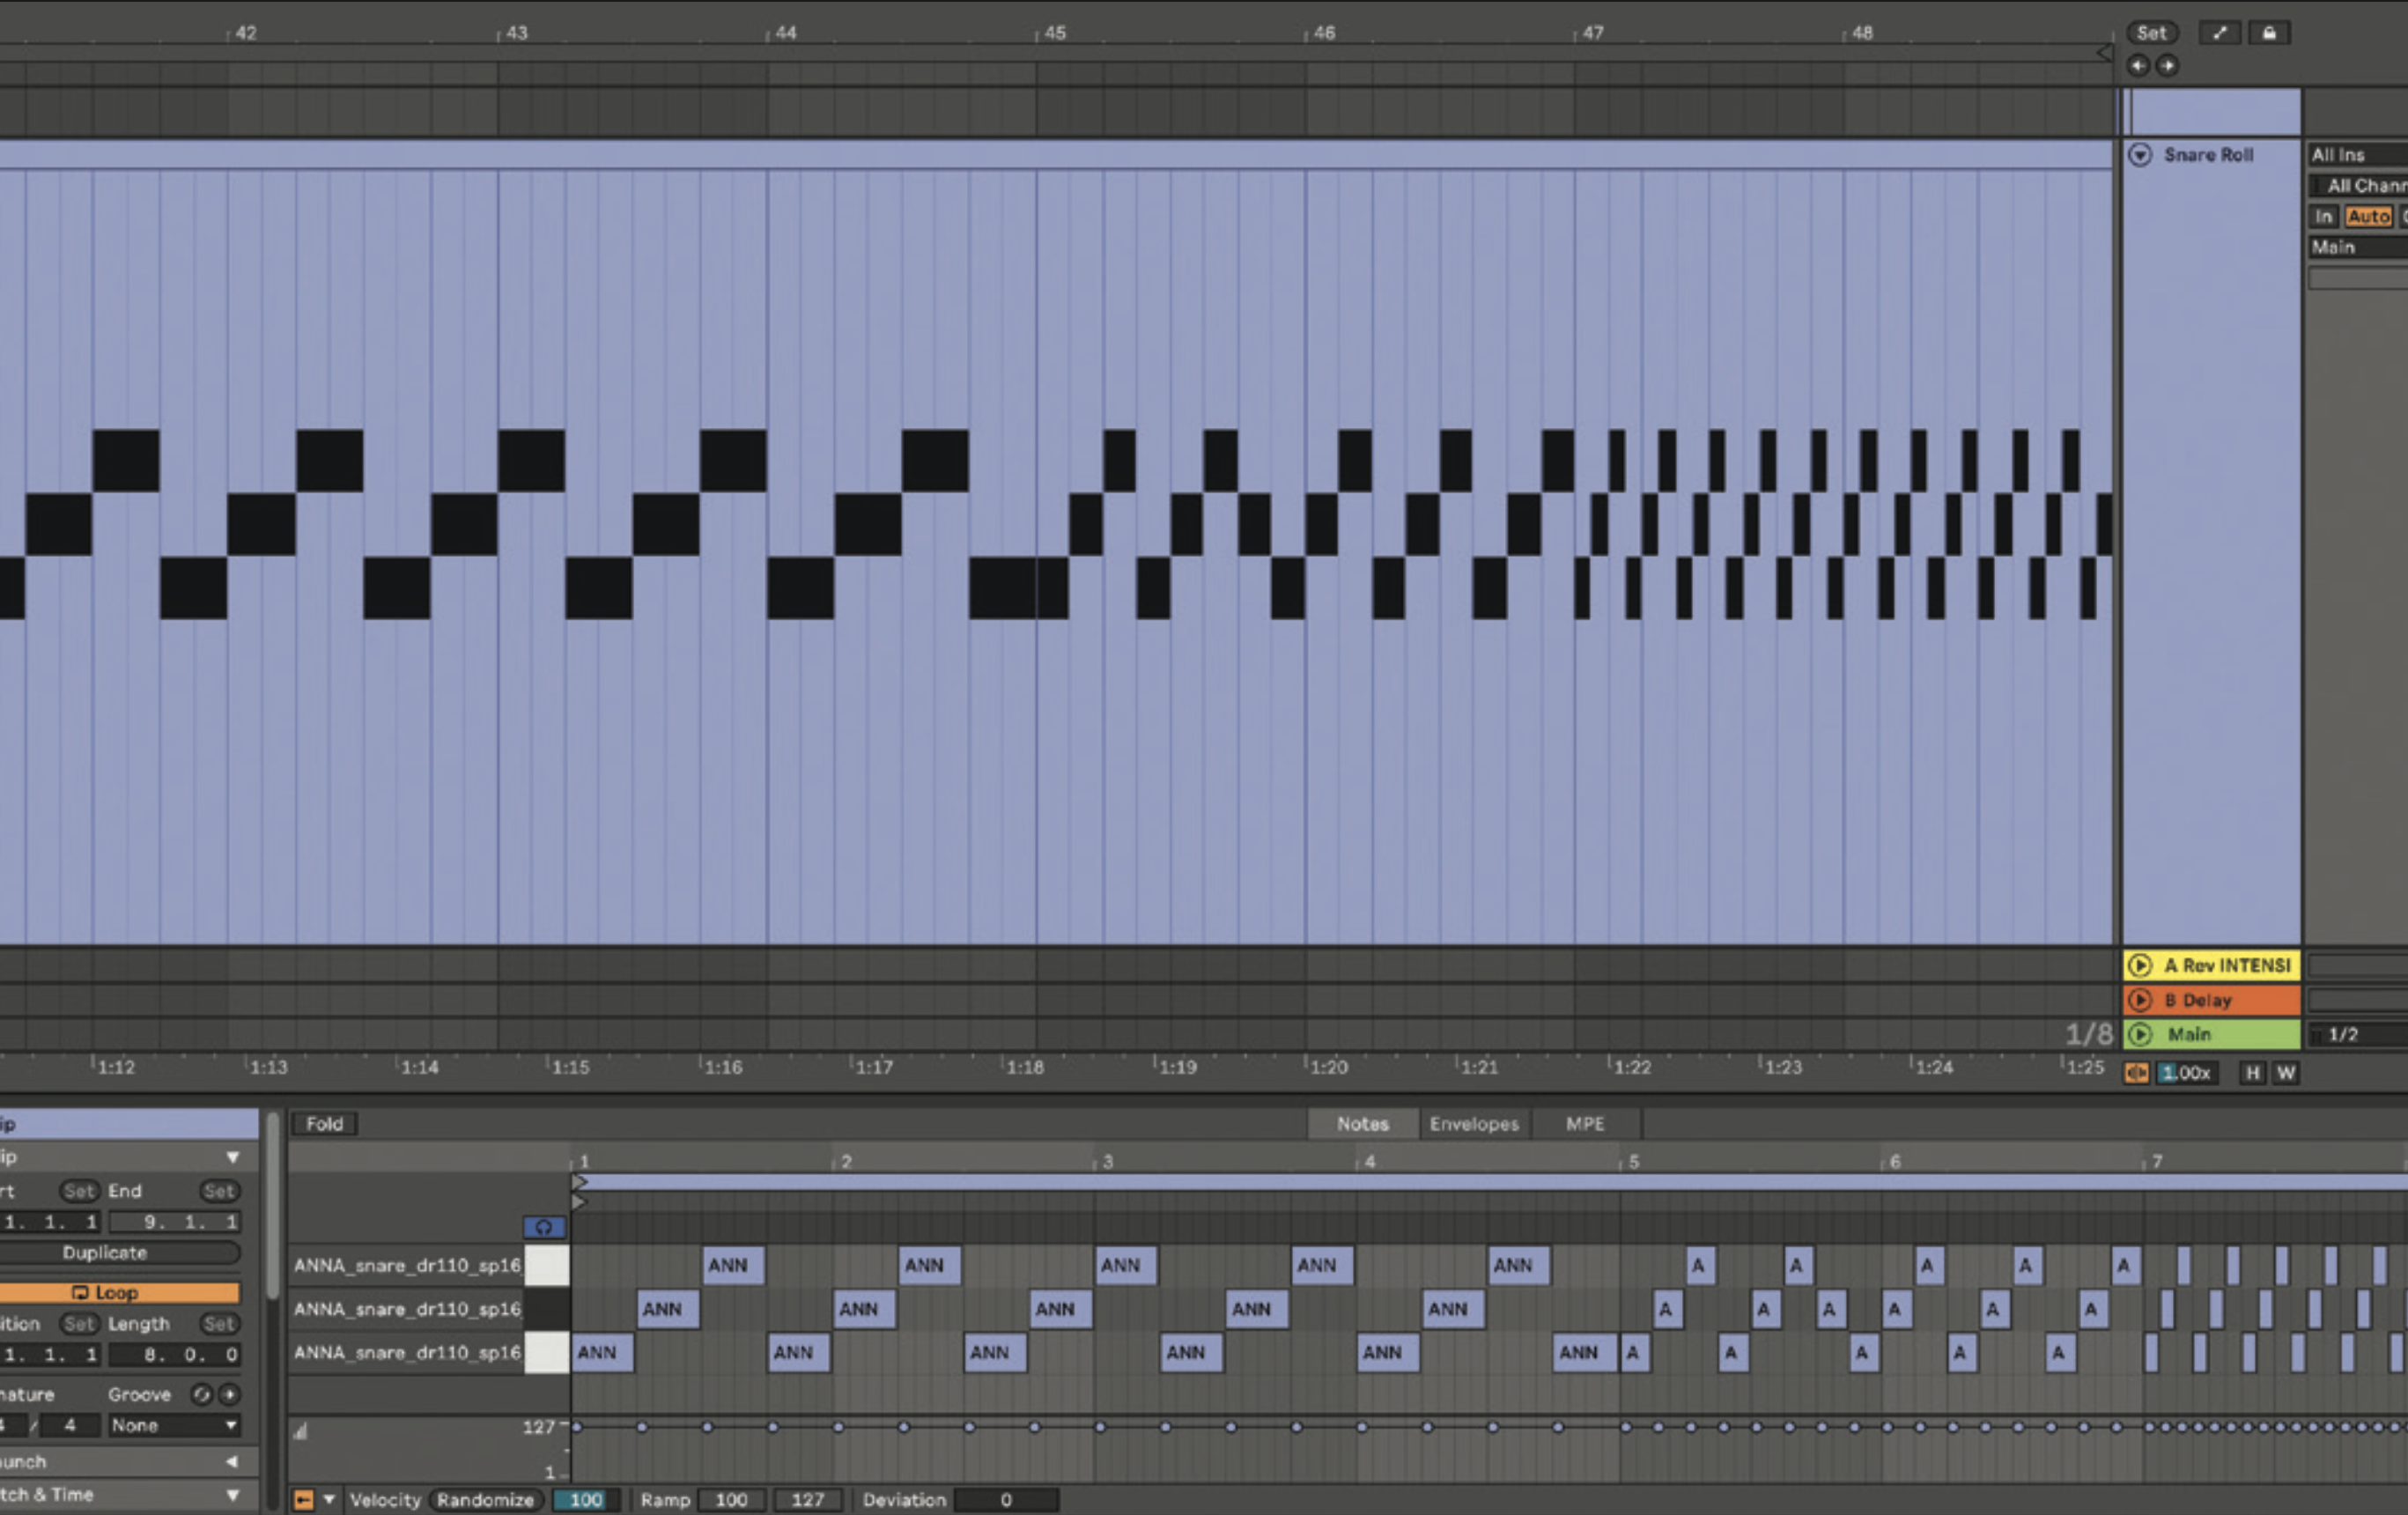
Create an interesting snare build-up by adding your audio samples in a Drum Rack in Ableton, and EQing each sound a little differently. This creates a more interesting snare roll to listen to. Add a filter to the snare roll, and automate the high-pass filter. Start with only the higher frequencies playing, and gradually open up the filter so that it builds in intensity.
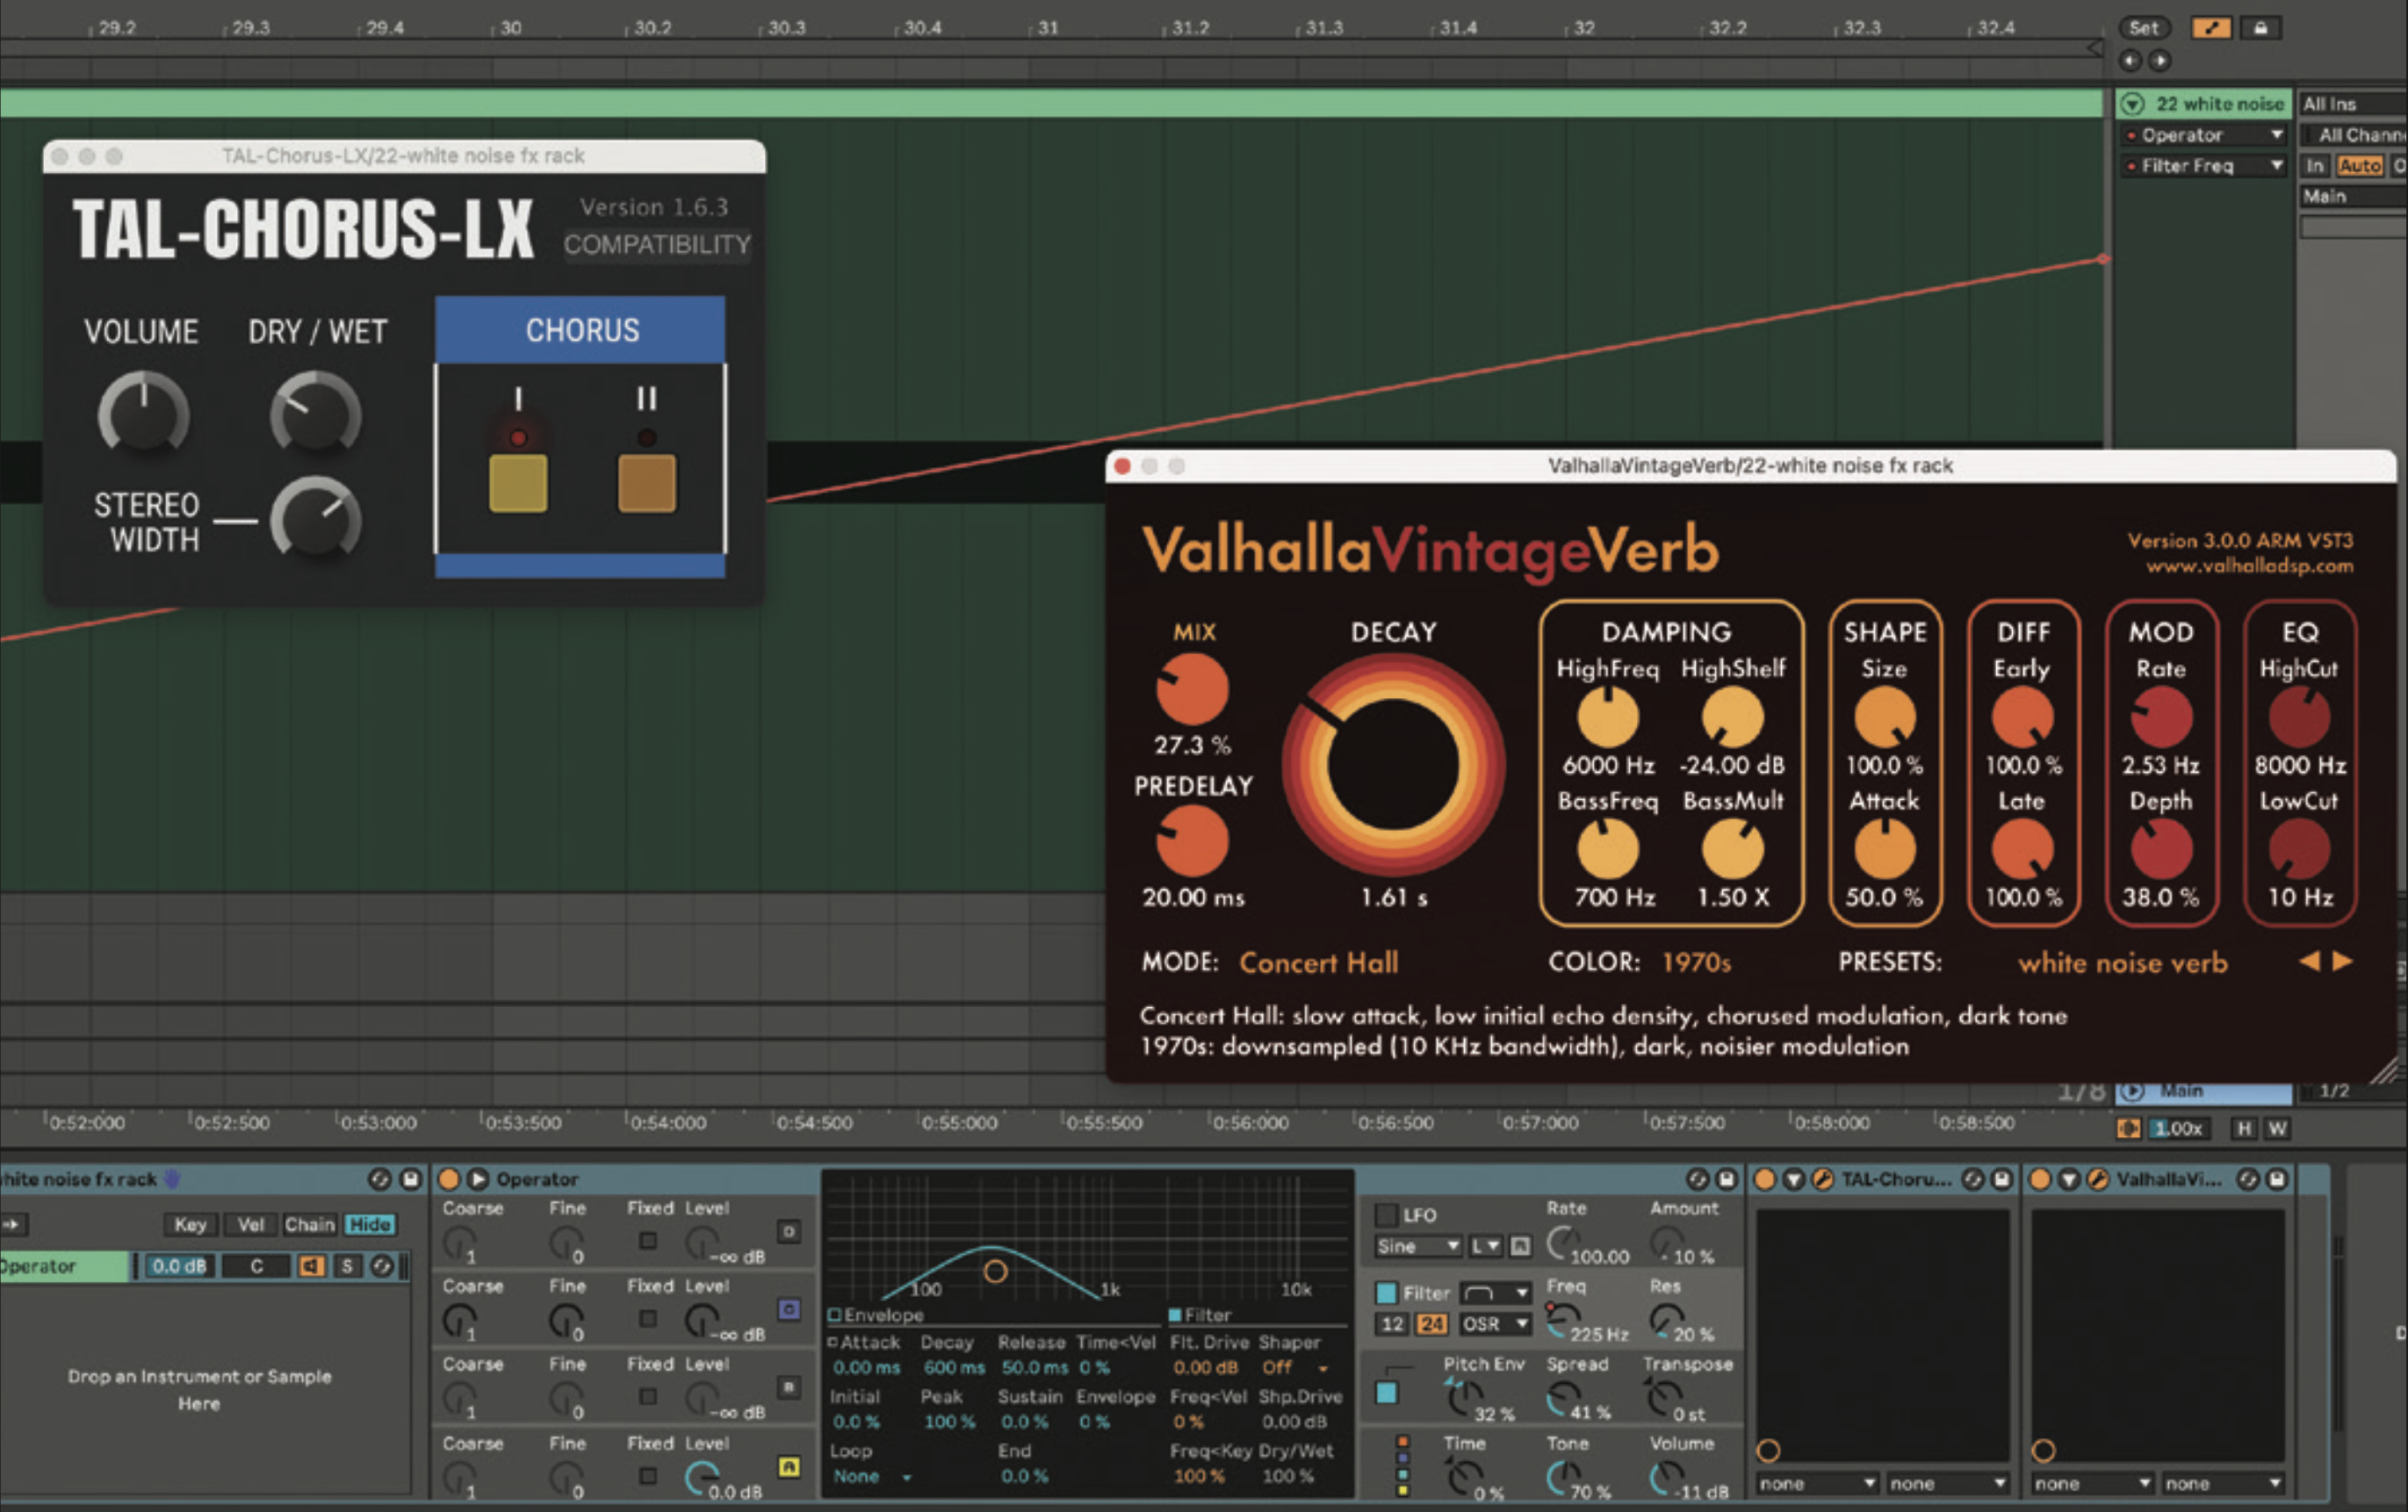
Add a white noise riser to your track. Use a synth plugin, disable the oscillators and turn on the noise. Create a MIDI track and draw in a note for eight bars. Use a bandpass filter on the white noise, and automate the frequency from 225 Hz to 5.85 Hz. Add a chorus plugin and reverb with a decay set to around 1.61s.
Bounce the noise to audio, duplicate the sample and reverse it. Cut off the tail end of the sound, and position the reversed noise so that it begins as the drop starts. Bring the volume down. Add Auto Pan to the white noise, and automate both the Amount and Rate controls. Start at a lower volume, and automate the values up towards the drop.
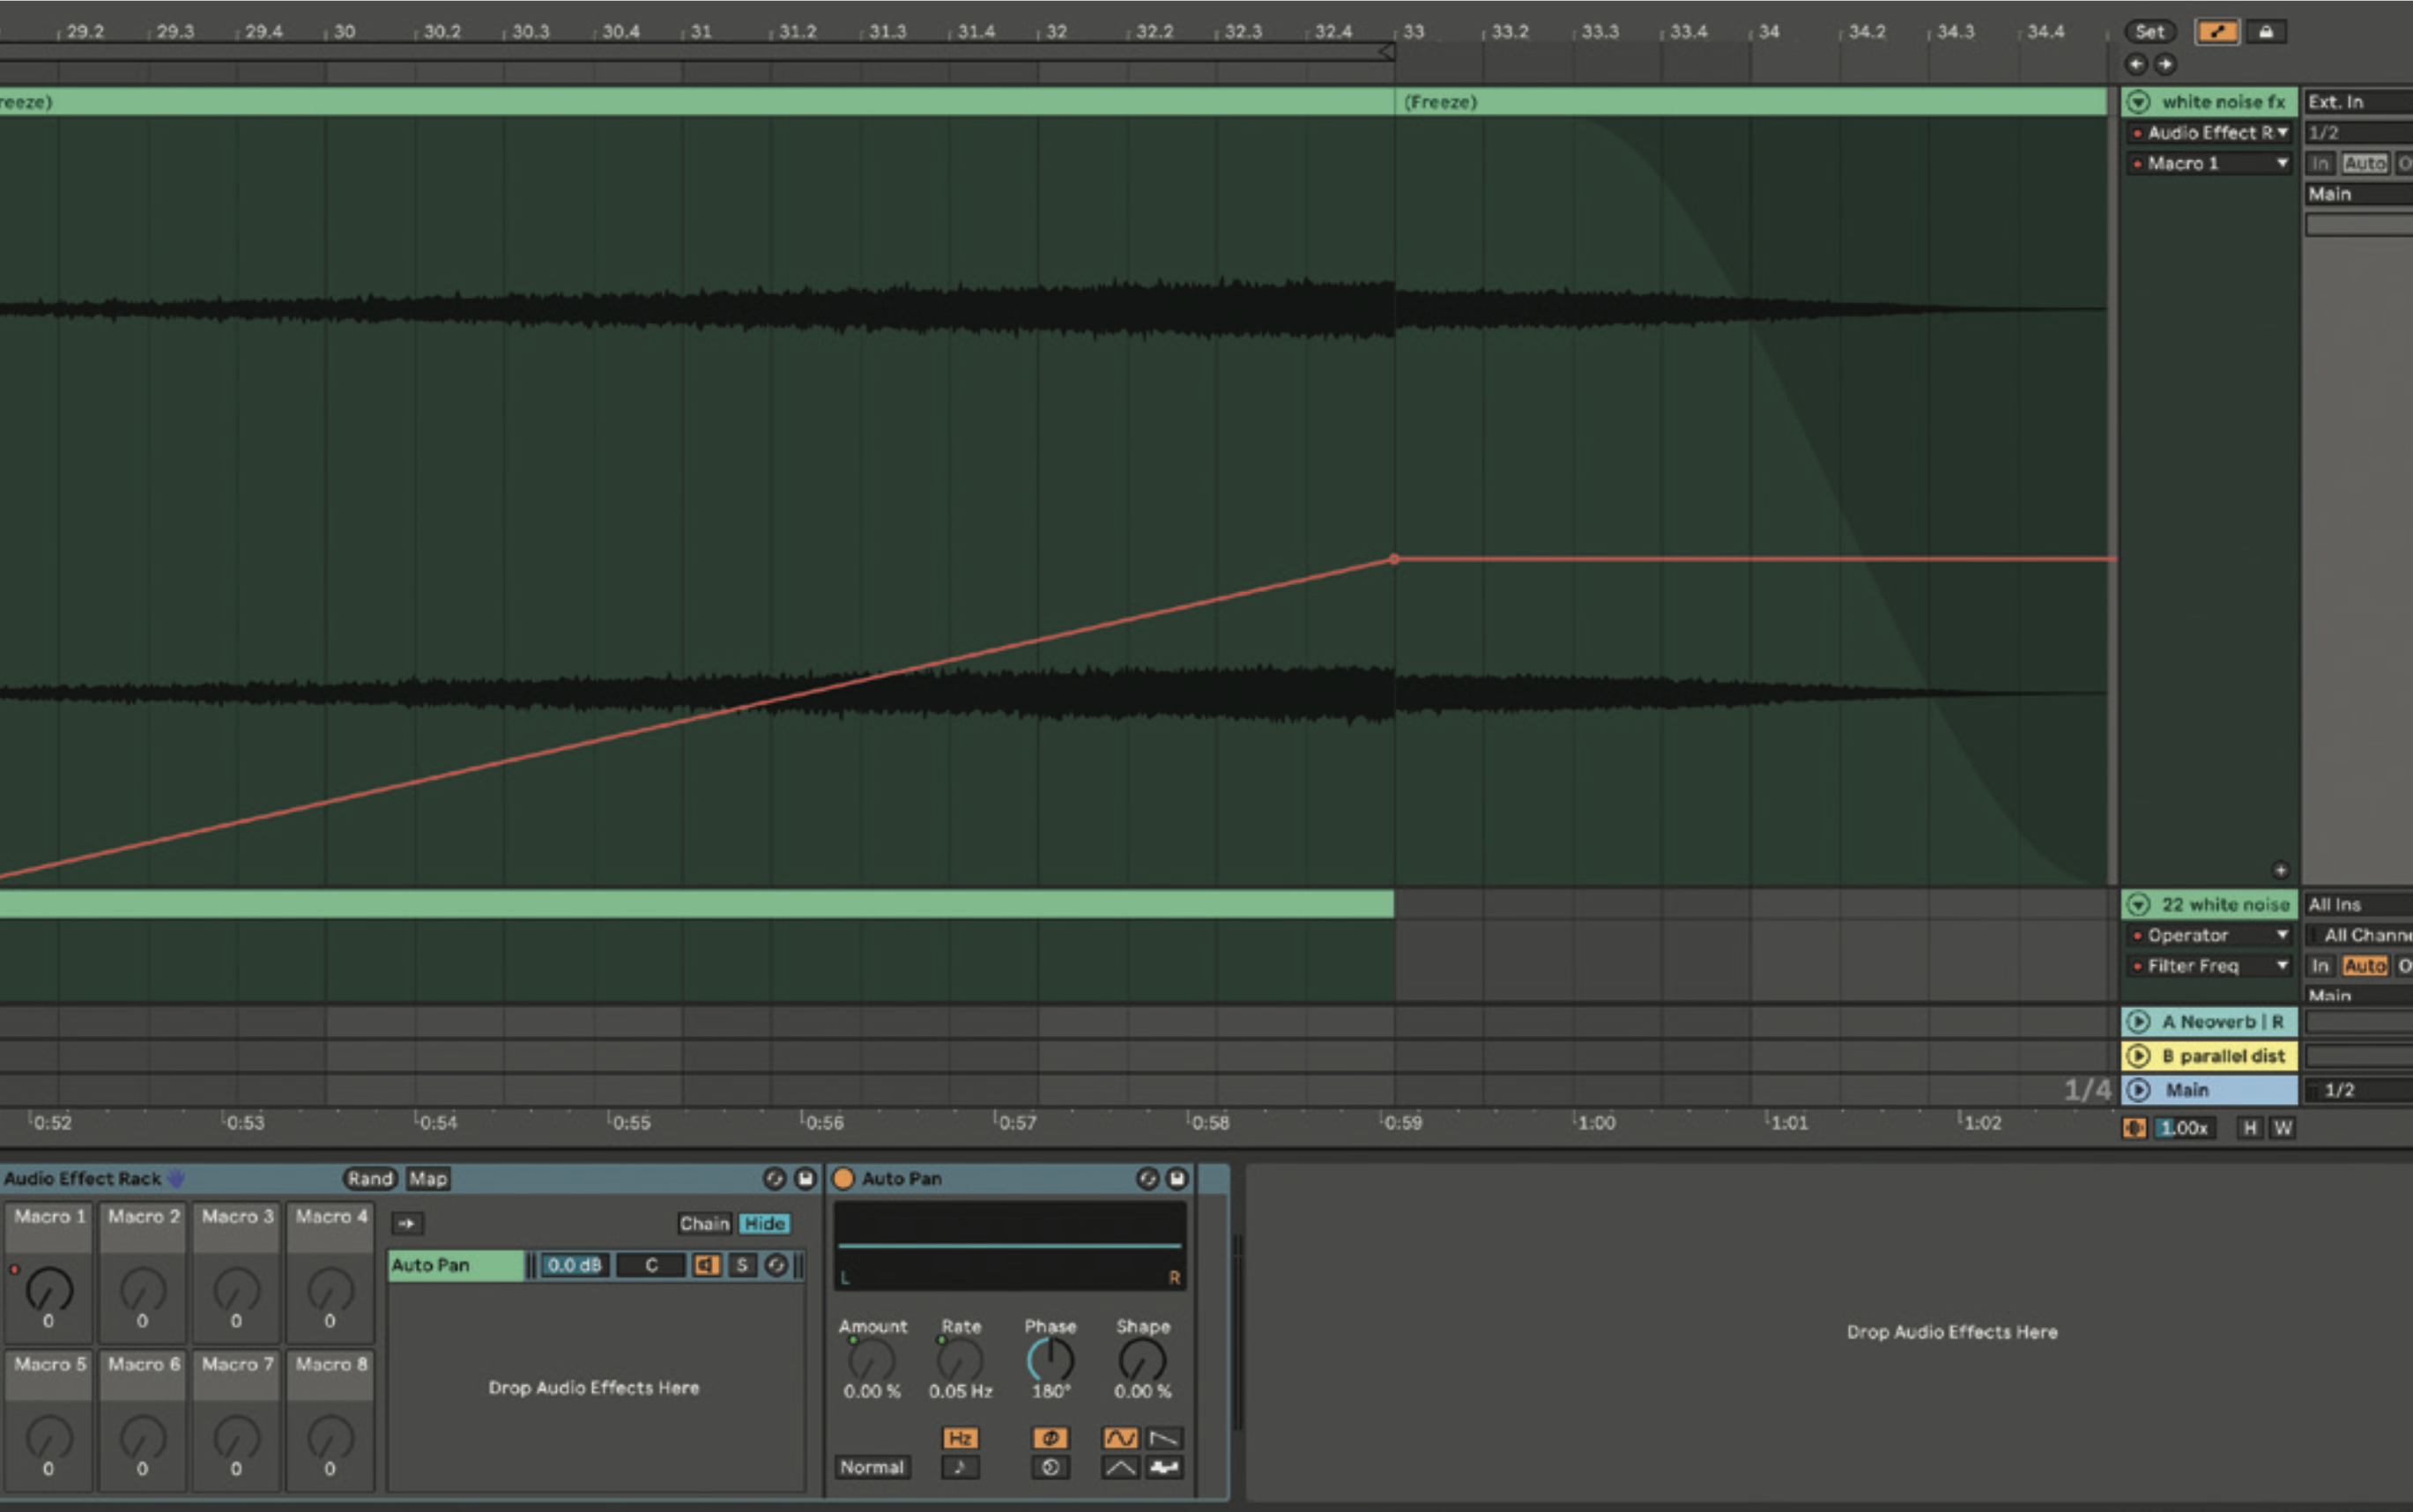
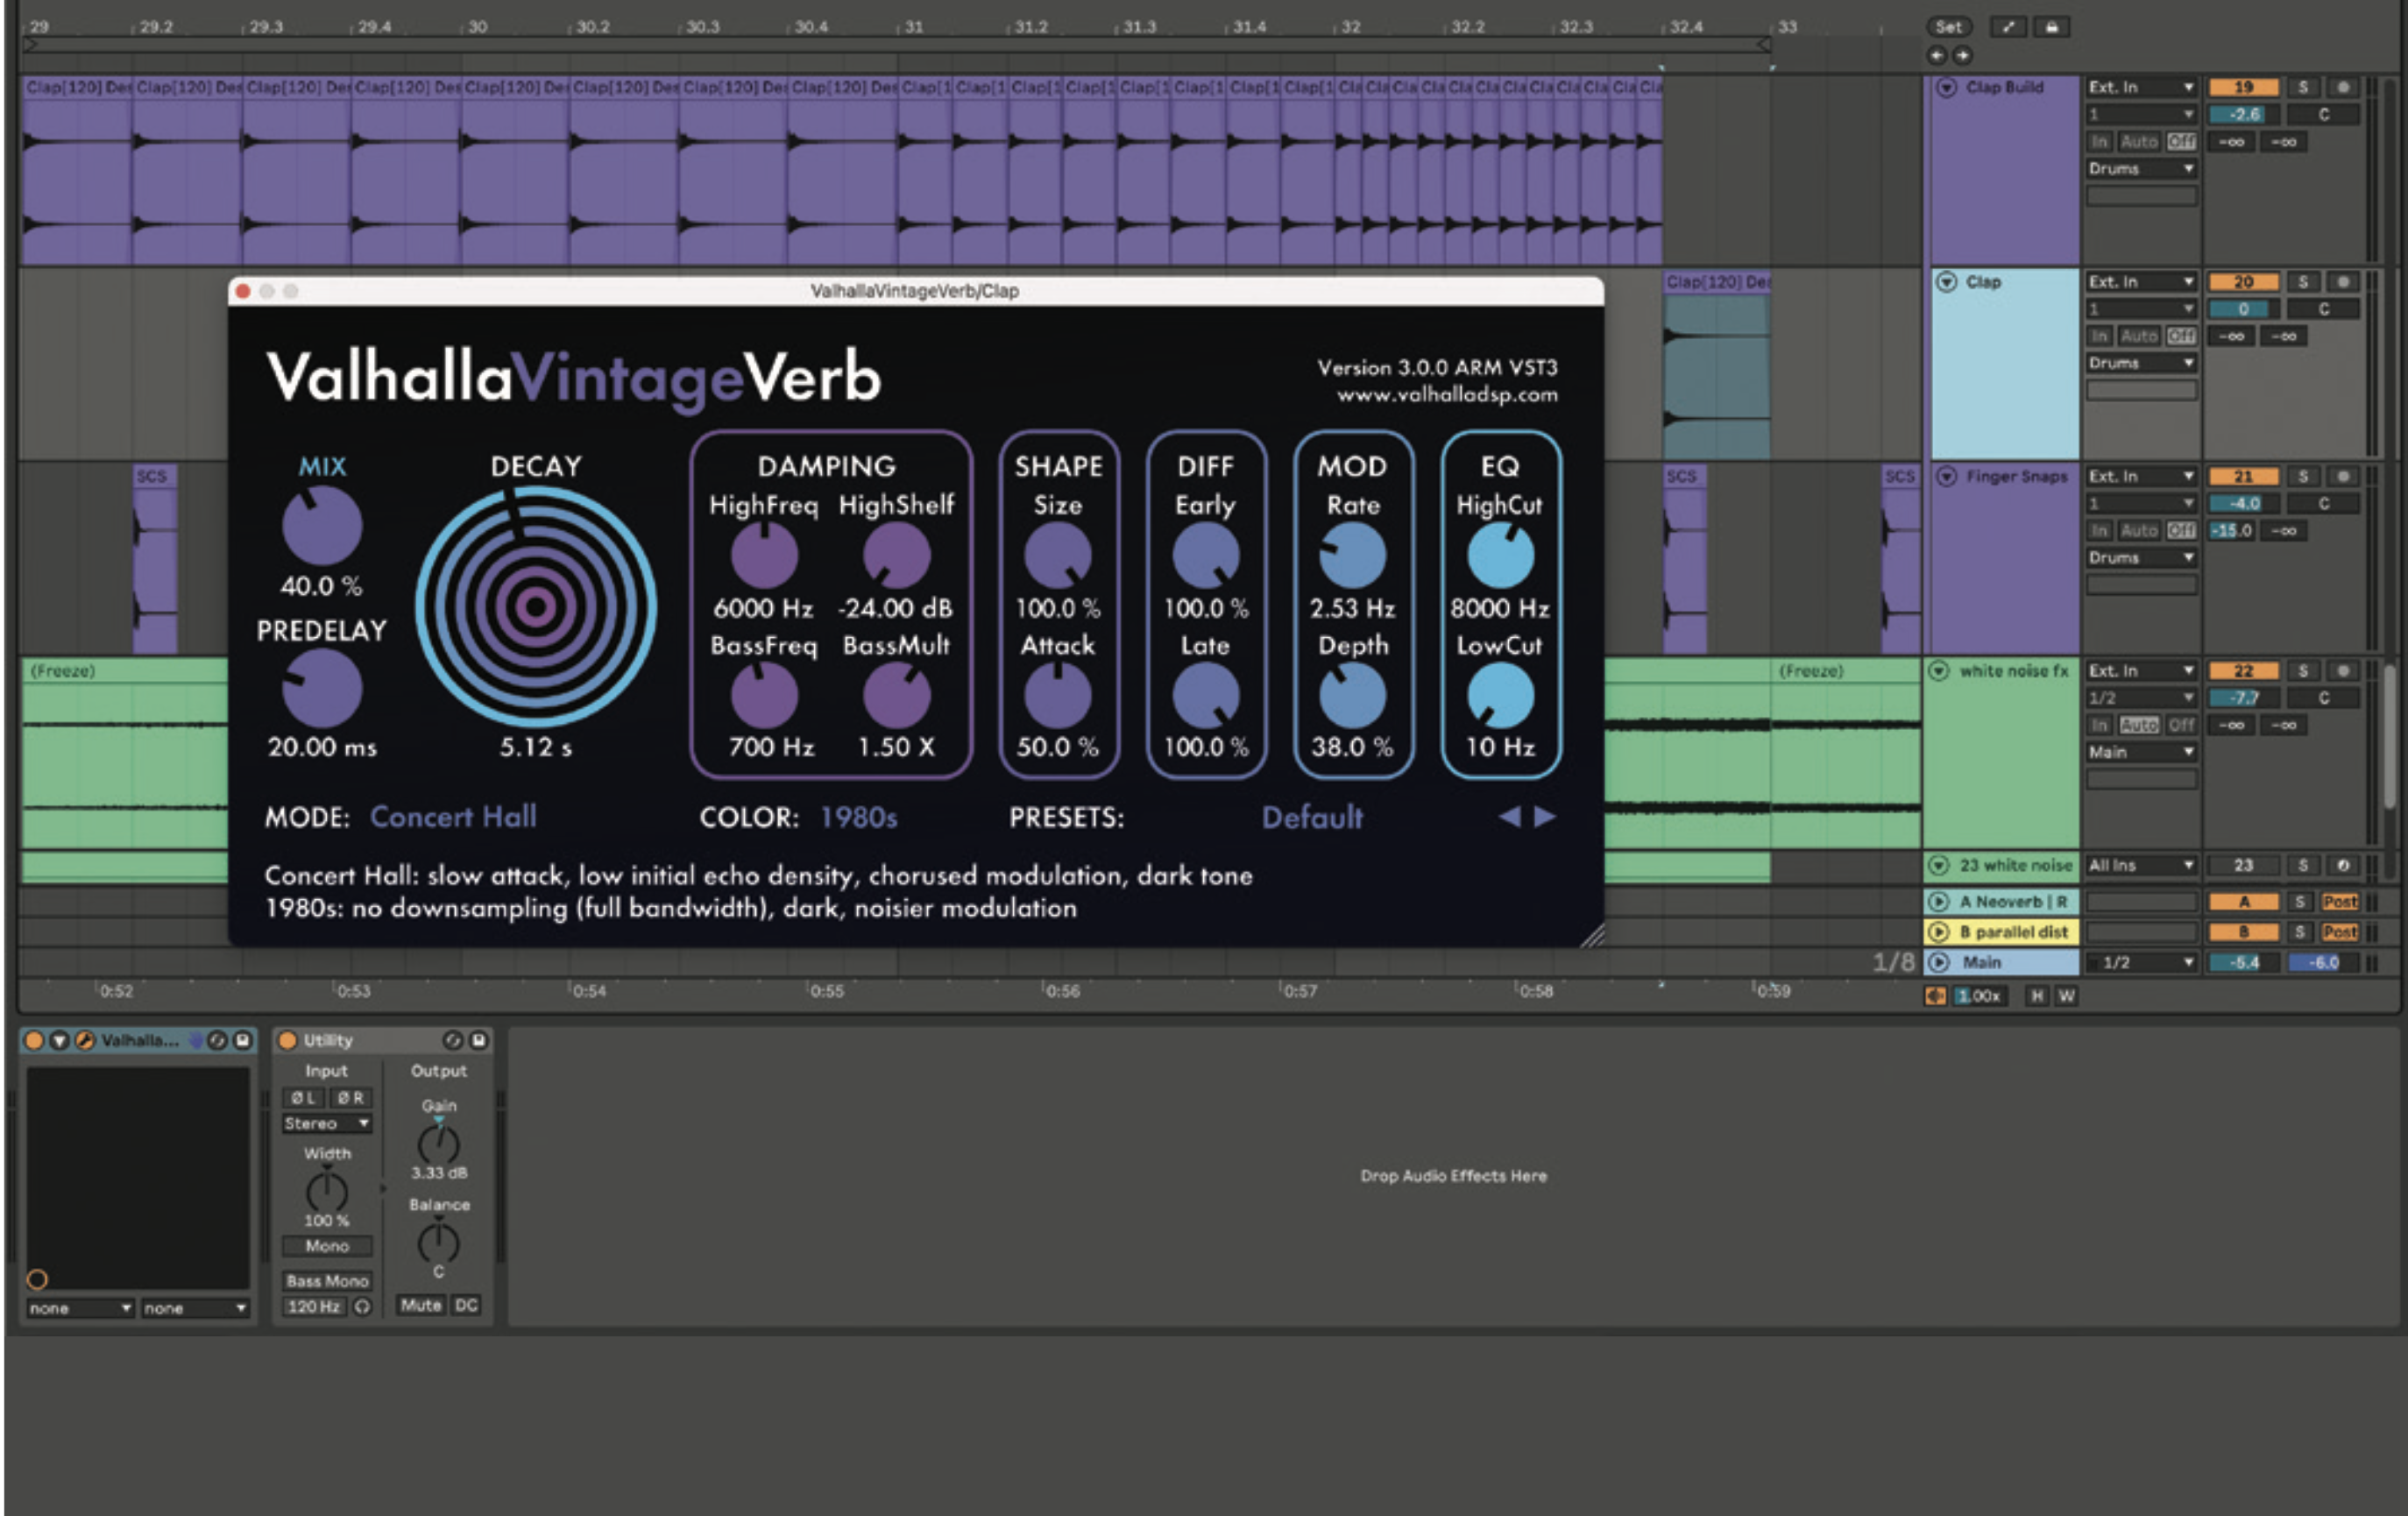
Before the drop hits, experiment with cutting out some of the drums. Try removing a kick or two before the drop, and cutting out some percussion for half a bar, or even a beat. Lastly, add an audio track and place a clap or snare onto it before the drop. Add a reverb with a decay level around five seconds or more, and mix it in.
Pro tip: Get the most out of your arrangement

It’s a good practice to begin the arrangement with the end goal of the song in mind. Do you want to create a shorter arrangement, or an extended version? If you’re making an extended version, you can add construction and deconstruction sections, where elements are added or removed.
If you want to include these sections, add them in the track arrangement guide. Using a MIDI track that’s marked with the names of the sections of the song is a great way to learn to arrange. You can use this guide when making changes to the track as it allows you to quickly find the area you’d like to work on.
Another way to learn to arrange a track is by using a reference track in the same genre
Another way to learn to arrange a track is by using a reference track in the same genre. Take one of your favourite tracks, listen to it and write out the elements you hear in every section. This exercise will help you to identify the type of instruments, effects and automations used throughout the track.
As you’re listening, try to identify which section of the track is playing. You can also add this track in your DAW and map out the different sections of the track. Now that you’ve learned a few arrangement tips, it’s time to dig out one of your loop projects and turn it into a full track. You’ll be happy when your idea is fully arranged into a song. It's the best feeling in the world!
