How to create Jean-Michel Jarre-style phasing with delay in your DAW using a free synth!
How to create that vintage Jarre sound, created from a single synth, that conjures a huge sound-stage.

Want all the hottest music and gear news, reviews, deals, features and more, direct to your inbox? Sign up here.
You are now subscribed
Your newsletter sign-up was successful
If you want to achieve some kinetic synthetic movement of the type first popularised by legendary French synth pioneer Jean-Michel Jarre then you've come to the right place. But don't worry, you don't need an expensive plethora of hardware synths and effects, your DAW (and a freebie synth) will have all you need…
Before we begin, be sure to grab Cherry Audio's Surrealistic MG-1 Plus synthesiser for free, via their website (click here).
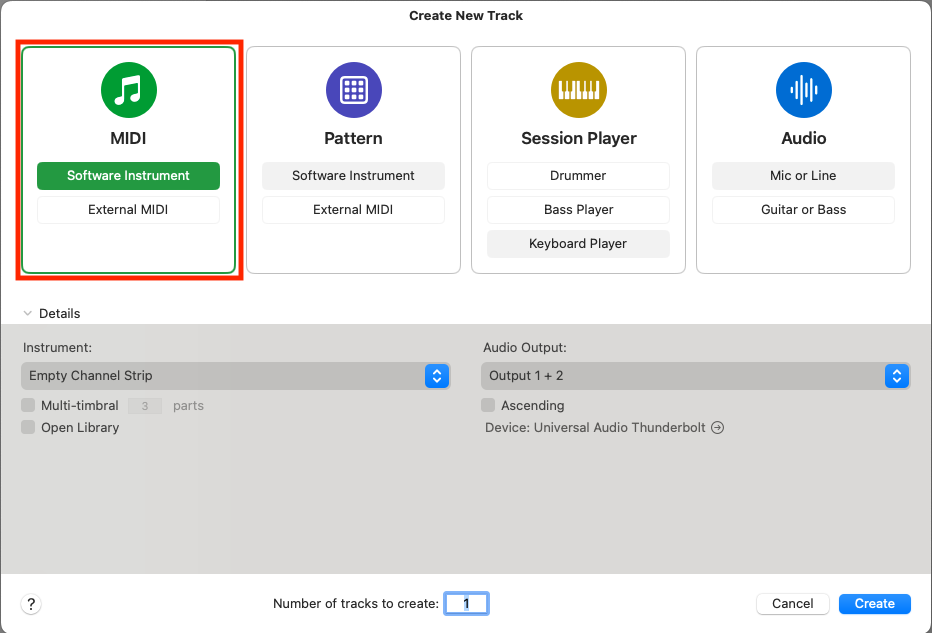
1. Our plan is to create a vintage-style, phased, synthesised sound, using existing or free content. Start by loading your DAW, and if requested, create a virtual instrument track ready to except some form of synthesiser. We are working in Logic, but any package will provide similar content.
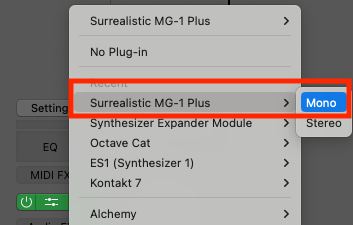
2. We want to use the most basic synthesiser that we can. Feel free to use anything from within your DAW’s included content, as long as you can reproduce a single oscillator, playing a Sawtooth wave. We are using the Surrealistic MG-1 Plus, from Cherry Audio, which is entirely free to download from their website. Load the synth in to a channel of your DAW, but be sure to load only a mono instance, and not stereo!
Article continues below 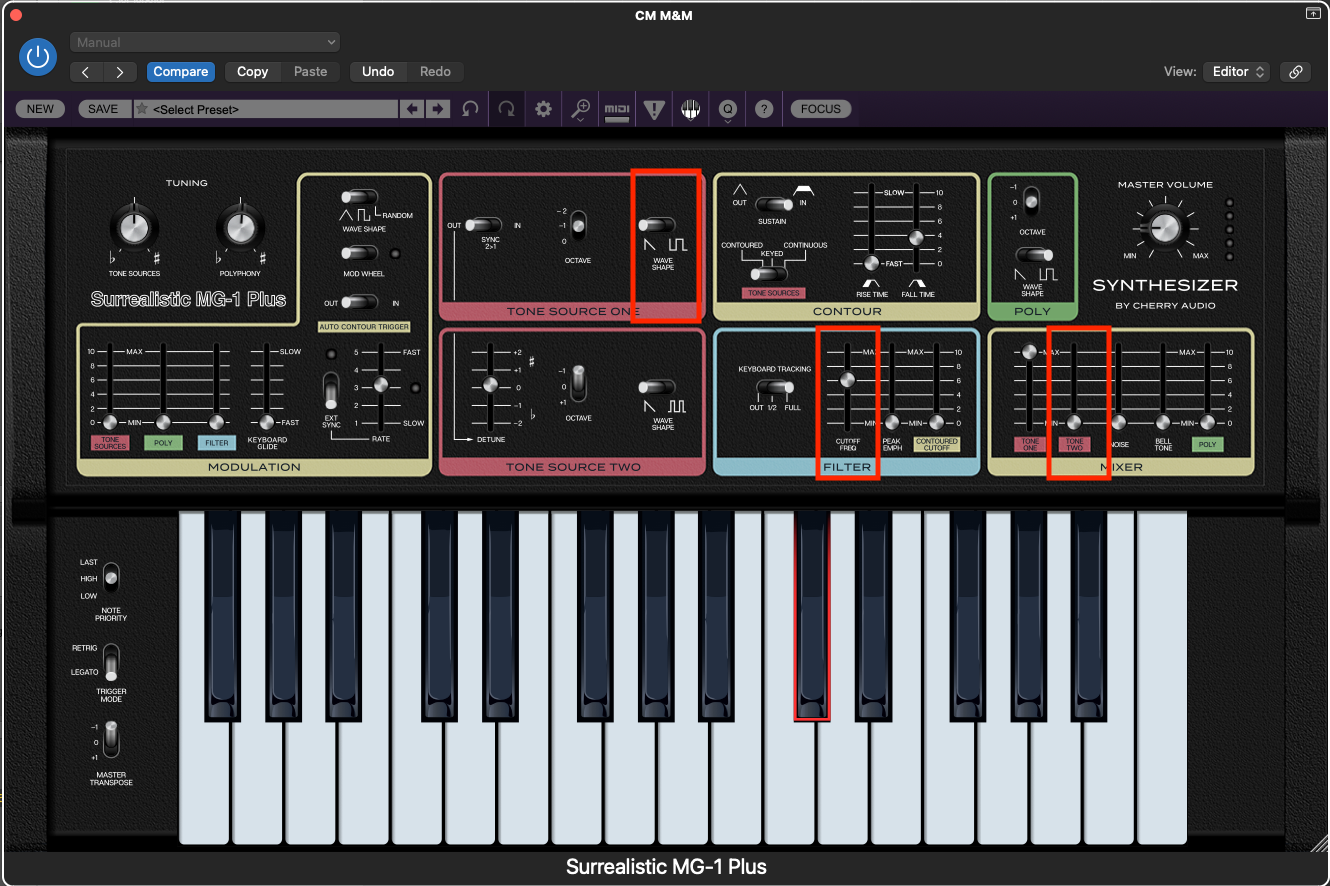
3. Once loaded, reduce Tone Source Two completely, within the Mixer section, and reduce the Filter Cutoff Frequency to a value of around 2000Hz. We only want to hear a saw from a single oscillator, slightly filtered. If you are using a different synth plugin, ensure that you are only hearing a saw from a single oscillator.
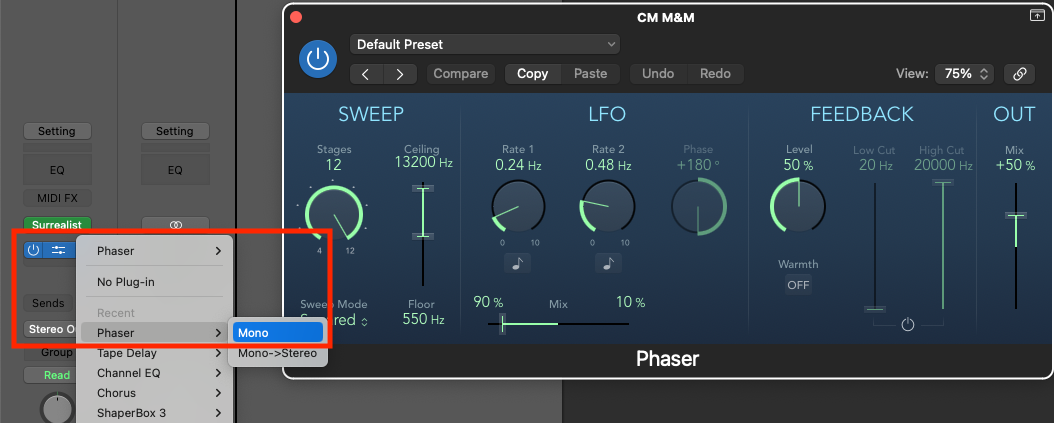
4. Now we can start to add some modulation; from your plugin effects list, add a phaser, but once again be very sure to add an instance in mono. Your DAW should be equipped with a basic form of phaser, that will present some basic settings. This is absolutely perfect for our requirements.
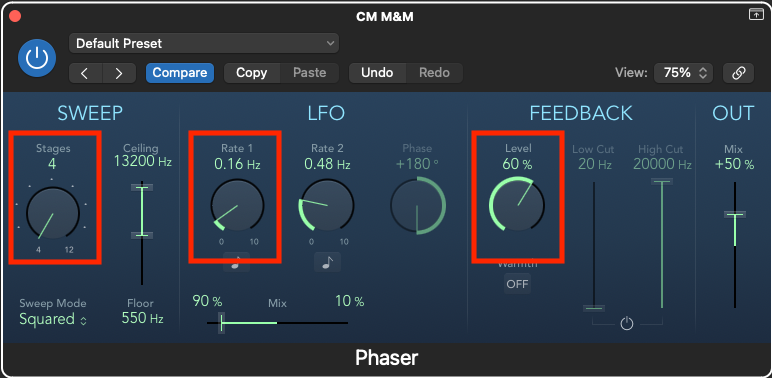
5. Next, we want to adjust the settings of the phaser. Start by reducing the number of stages to either 4 or 6. Then locate the LFO, which might be indicated by a Rate pot, and reduce the rate to a small value of around 0.16Hz. Then adjust the feedback level, to taste. Don't make your sound too resonant, but you do want a little bit of wispiness in the sound.
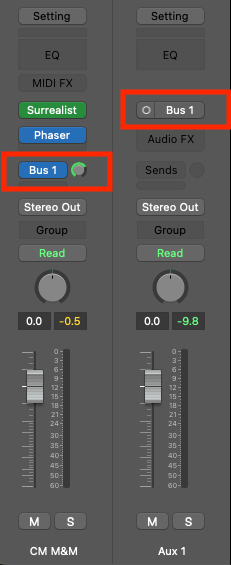
6. We want to send the signal from the channel, to either an auxiliary channel or a bus, depending on your DAW’s terminology. Use the first available auxiliary, and once assigned, be sure that the destination channel is also set to mono. Turn up the auxiliary/bus send, to 0db/unity.
Want all the hottest music and gear news, reviews, deals, features and more, direct to your inbox? Sign up here.
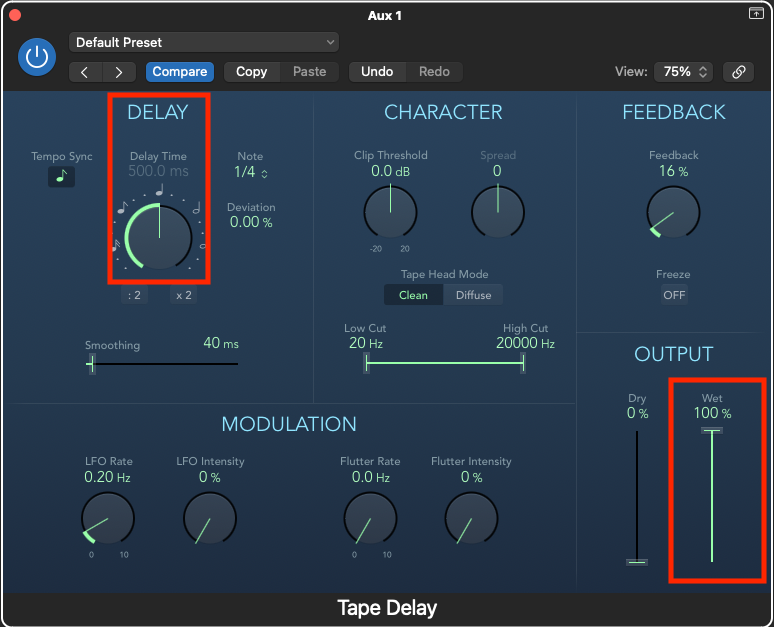
7. Turning our attention to the auxiliary/bus channel, load a delay; preferably some form of tape delay, as this will add to the vintage sound. Once again, make sure you load a mono instance of the delay, and make sure that the wet/dry mix is set towards wet, as much as 100%. Use a generous delay timing of around 500ms.
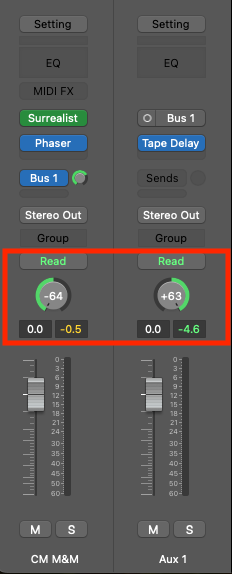
8. The reason for exclusively using mono signals will become apparent with our next step. You may have noticed that the signals sound completely central. Locate your channel panning controls, and set the synthesiser hard left, and the delay (which is on the auxiliary channel) hard right. You should now hear a very broad soundstage.
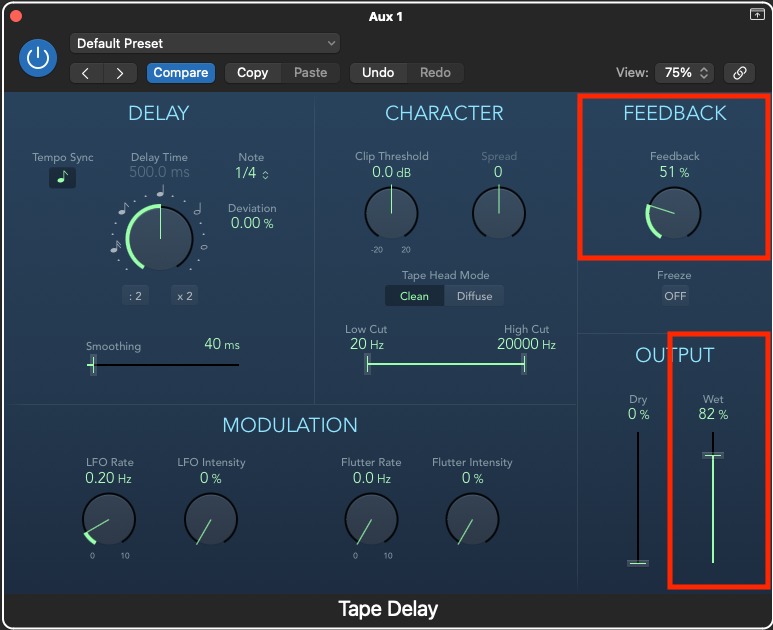
9. As all DAWs are different from one another, now is the time to tweak your settings to suit your track. This patch is entirely suited to synthesiser pads and chords, but you may well want to adjust the delay’s feedback control, to make it feel more generous, while also adjusting the delay’s amount or Wet volume, so that the sound nicely dissipates as you play. If you've ever wanted to know what it feels like to hear your synth-playing on the size of stage that Jarre would often play on, now you know!
Roland Schmidt is a professional programmer, sound designer and producer, who has worked in collaboration with a number of successful production teams over the last 25 years. He can also be found delivering regular and key-note lectures on the use of hardware/software synthesisers and production, at various higher educational institutions throughout the UK
