Working with Cubase 7's new Mix Console
Get familiar with some of the new features of Steinberg Cubase 7
Steinberg Cubase 7 arrived towards the end of last year and instantly impressed us with its useful - and often inspiring - new features.
The biggest change implemented in version 7 came in the form of the new Mix Console, which replaces the old mixer. In the video above and the step-by-step below we work through a few of the Mix Console's new features and capabilities.
To follow our tutorial, you'll need to download our Cubase project (right click and save as), which we've built using stock sounds and loops from within the program.
For more on working with the new features of Cubase 7, check out the March issue of Computer Music (issue 188) which is on sale now.
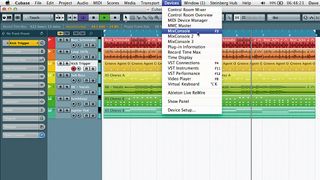
Step 1: Here's a simple project we've created using Cubase 7's stock loops and sounds (we've included the Cubase project in the Tutorial Files). We'll change the sound of the track using some of the new features in the redesigned Mix Console, which is opened in the same way as in previous versions of Cubase: select it from the Devices menu or use the F3 key command.

Step 2: The first thing to notice on playback is that the output meters are peaking. To turn all the channels down by the same relative amount, Cmd/Ctrl-select the channels you want to adjust and click the Q-Link button. This temporarily links the selected channels, so that any changes made to one will be made to all. Pull one fader down by 10dB and the others should follow suit. Turn Q-Link off again after.
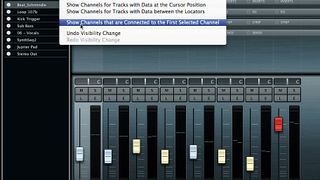
Step 3: Over on the left, the Visibility tab lets us choose which tracks are visible in the mixer. This is done by clicking the circular buttons to hide channels you don't need to see, like the Stereo Input channel here. To hide everything other than the selected track, we can hold down Shift while clicking. To reveal any channel that interacts with the selected channel, activate the option in the Agents menu.
Get the MusicRadar Newsletter
Want all the hottest music and gear news, reviews, deals, features and more, direct to your inbox? Sign up here.

Step 4: We'll select the main drum loop and add some compression using the new Channel Strip module. Click the box labelled Strip in the rack area above the channel, then select Standard Compressor from the Comp menu. Set the Threshold to -10.7dB and Ratio to 4.20:1. Click the small red button between the Attack and Release controls to enable auto release.
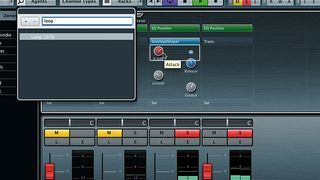
Step 5: Let's tighten the second drum loop with the envelope shaper. We can type 'Loop' into the search window to help us find the required channel. Click the Trans slot in the rack area and select the Envelope Shaper from the menu. Turn the Attack up to 8.0dB to harden up the front of the sound, and set the Output Gain to -2.0dB to compensate for the increase in overall level.
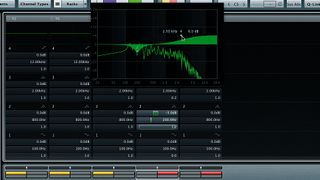
Step 6: Now let's change the EQ on the SynthSeq2 synth part using Cubase 7's revised EQ module. Click the EQ section of the central rack to reveal the EQ controls for each channel. If you click the small graphical display, it will enlarge, enabling you to click and drag to reshape the curve. We've cut 2kHz by 5dB and added a 6dB high shelf at 2.5kHz. Hold down Shift and drag to adjust a node's Q setting.
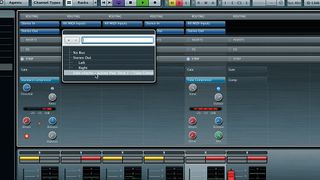
Step 7: Let's sidechain the Jupiter Pad part. Enable a Tube Compressor on the pad channel and click the SC button. Now find the Kick Trigger channel, a 4/4 kick drum part with its output turned off. Scroll up to the Routing section of the rack, click the output slot and select the pad channel's compressor sidechain. Set the compressor's Input to 48dB, Output to 1.0dB, Release to 99ms and Mix to 100%.
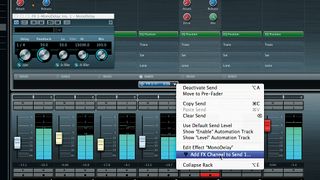
Step 8: The vocal could do with some more delay, so let's add a new FX channel directly from the mixer. Open the Sends section and right-click the first empty slot. Select Add FX Channel to Send from the menu. Pick a delay plugin from the list - we've gone for Cubase's MonoDelay - and click Create. Set the plugin's Mix to 100% and adjust the Send and Return levels to taste.
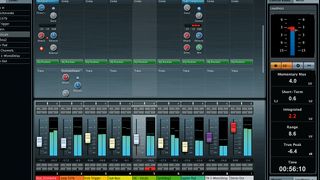
Step 9: Let's put the new loudness meter over the master output. Click the Window Layout palette in the top-left corner and tick the Control Room/Meters box. Set the tab at the top to Meter and the tab at the bottom to Loudness. The loudness meter displays the average loudness rather than just the peak values, making it easier to standardise the perceived loudness of multiple projects.
Computer Music magazine is the world’s best selling publication dedicated solely to making great music with your Mac or PC computer. Each issue it brings its lucky readers the best in cutting-edge tutorials, need-to-know, expert software reviews and even all the tools you actually need to make great music today, courtesy of our legendary CM Plugin Suite.

