How to make noise-based hi-hats in Ableton Live
The key to analogue-style hi-hats is noise, and plenty of it.
Hi-hats are key in analogue-style beats, and more often than not use noise generators at their core. Use noise-based sound sources to make your own hat patches.
We're using Ableton Live's stock virtual analogue synth, but any subtractive synth with a noise generator should do the trick.
We kick off with some undiluted white noise with zero processing. This is soon whipped into shape and a closed hi-hat is created. You'll hear this happen step-by-step in the accompanying audio above.
An open hat is more or less an extension of its fully closed counterpart. The last section of the tutorial shows you how this can be achieved with a simple clone of the original instruments, and some basic alterations to the amplitude envelope.Finally, processing and automation are used to set the two sounds apart. These sounds really can be put together very quickly, even with the most basic synth. The real beauty of making your own is the amount of control you have over the finished article.
• For many more Ableton Live guides go to our massive learning hub: Learn Ableton Live and Ableton Push: music production tips and tutorials
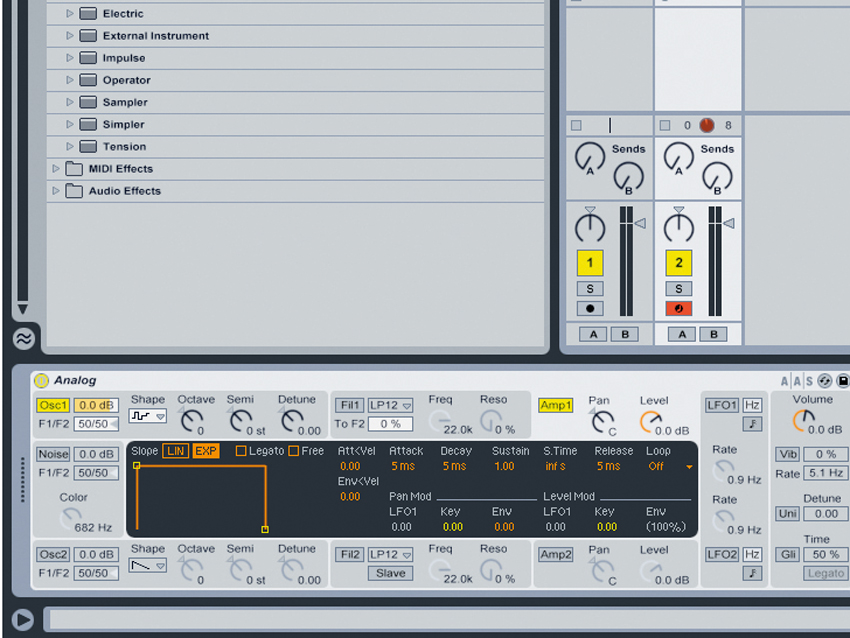
Step 1: We are going to be producing two sounds here, an open and closed hi-hat. They are both produced by manipulating noise, and therefore weneed to create a synth with a single white noise generator.
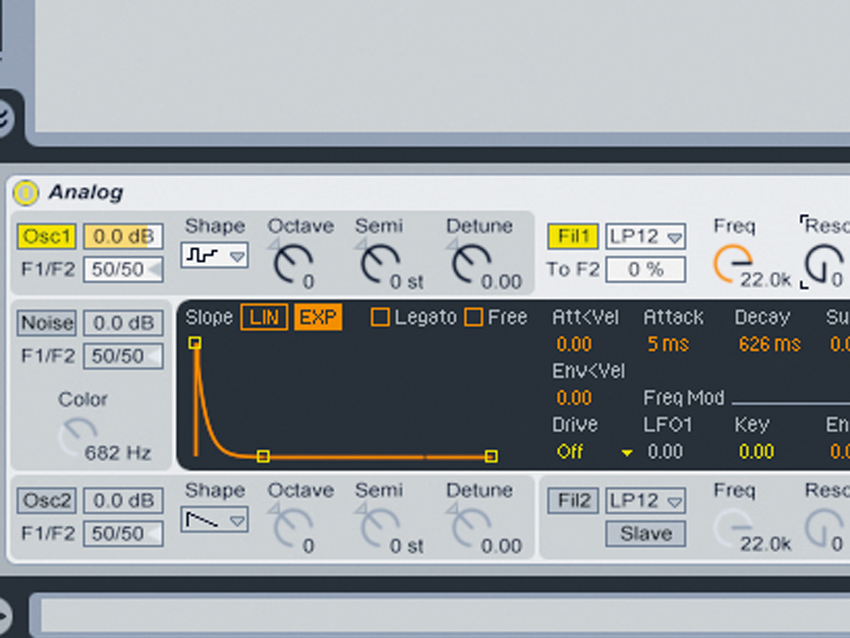
Step 2: With a simple closed hi-hat pattern and noise generator in place we can start to sculpt the sound to give it a more percussive feel. This isachieved mainly through the use of filters and envelopes. First up, an amplitude envelope is used to produce a more realistic dynamic effect.
Get the MusicRadar Newsletter
Want all the hottest music and gear news, reviews, deals, features and more, direct to your inbox? Sign up here.
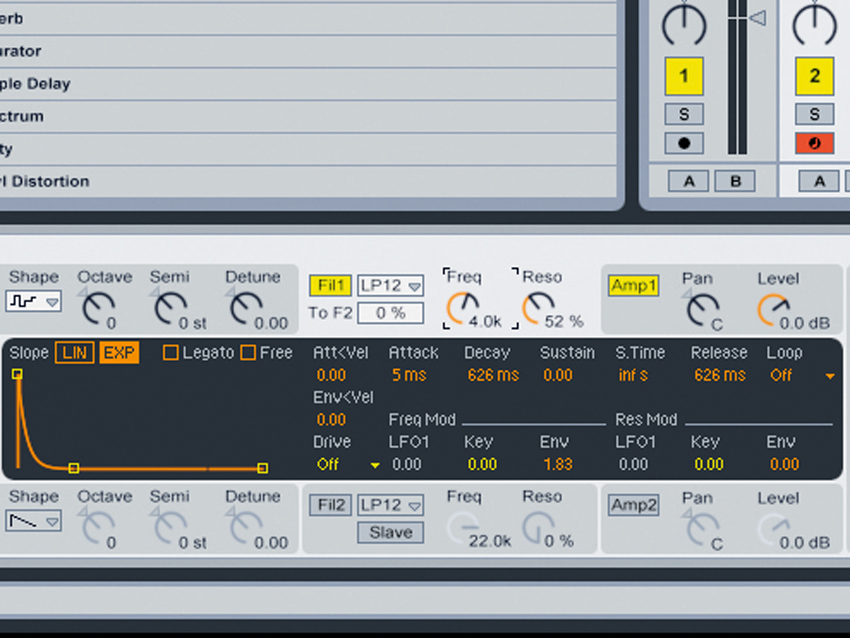
Step 3: Next up, a very similar envelope shape is applied to the filter.Combined with a moderate resonance setting, some high-pass filtering and a small amount of stereo delay and we have a solid, original, closed hi-hat sound.
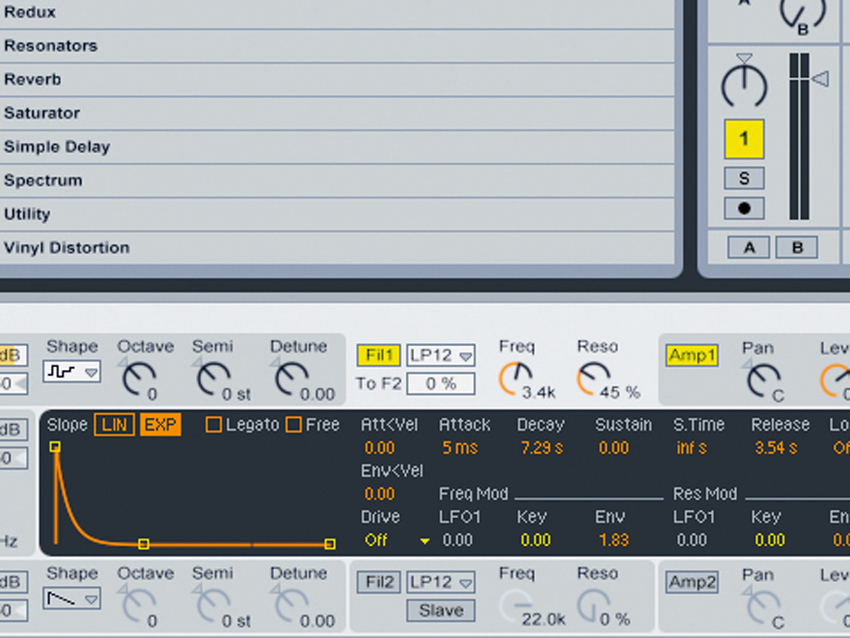
Step 4: Next we need to produce an open hat. In most cases this is verysimilar to the closed hat, but with a slightly different dynamic profile. This is achieved here by using a straight copy of the synth producing the open hat and extra release time added to the amplitude envelope.
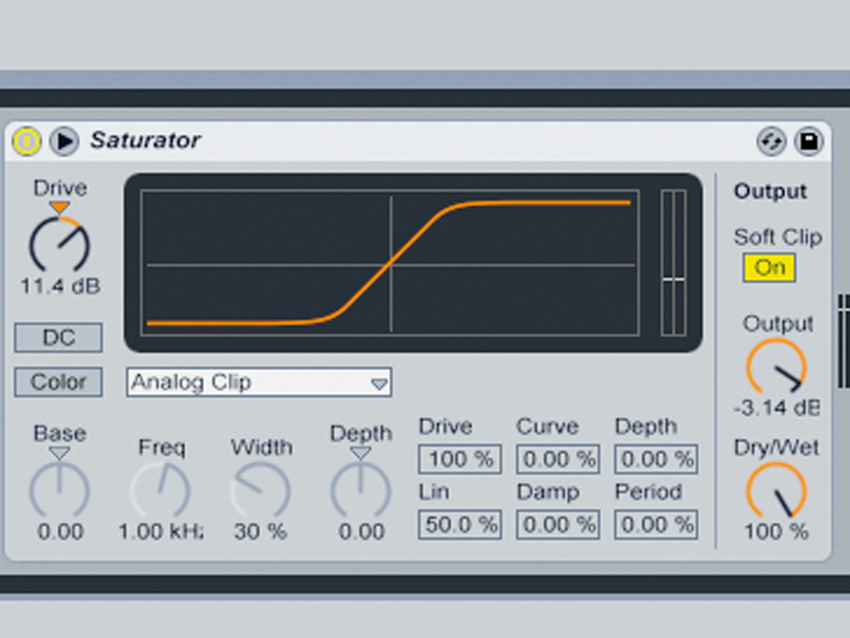
Step 5: Some attitude is added to the open hi-hat sound to make it more 'trashy' in nature. This effect is created by using a combination ofAbleton's built in Saturator and a high-pass filter. A decent amount of drive is introduced followed by the removal of unwanted low frequencies.
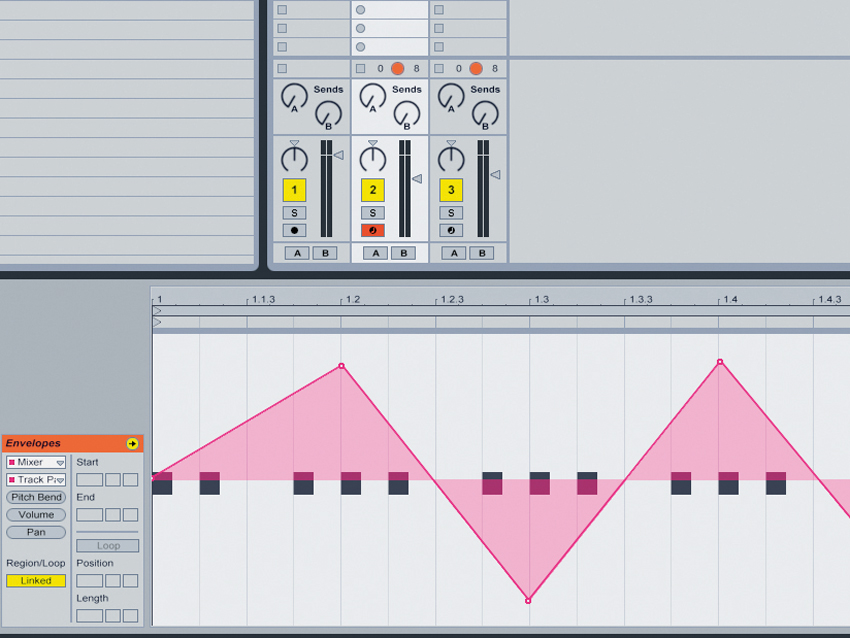
Step 6: To add some extra interest to your closed and open hi-hat patterns you can use some automation. In this case some auto-pan was created using Ableton's automation envelopes. This opens the stereo image and makes the whole pattern a little more dynamic.
Future Music is the number one magazine for today's producers. Packed with technique and technology we'll help you make great new music. All-access artist interviews, in-depth gear reviews, essential production tutorials and much more. Every marvellous monthly edition features reliable reviews of the latest and greatest hardware and software technology and techniques, unparalleled advice, in-depth interviews, sensational free samples and so much more to improve the experience and outcome of your music-making.


