How to use reverb to place sounds in space
Get your signals exactly where you want them
As anyone who's ever experienced the deeply disconcerting aural dead zone of an anechoic chamber will know, without reverberation, the world would be a strange place indeed. Sound waves bouncing off surfaces play a huge part in giving us a sense of spatial positioning to accompany the input of our eyes and other senses. It's an inevitable, inescapable force of nature - and an essential element of music production.
Although classified as an 'effect', reverb shouldn't be lumped in with chorus, delay, filtering and other 'optional' processors - it's as fundamental to the craft of mixing as EQ and compression, and almost every sound in every track you make will benefit from at least a touch of it. But like all powerful tools, reverb must be used responsibly. Apply it incorrectly and you'll suck the energy and life out of your mix as those all-important transients get washed away, high frequencies disappear beneath a wave of scintillating echoes, and bass loses definition and power. And that's where the August issue of Computer Music (206) comes in, telling you - as it does - everything you could ever need to know about reverb and its application in projects of all genres.
Here, we'll show you how to use reverb plugins to position signals on the '3D' soundstage.
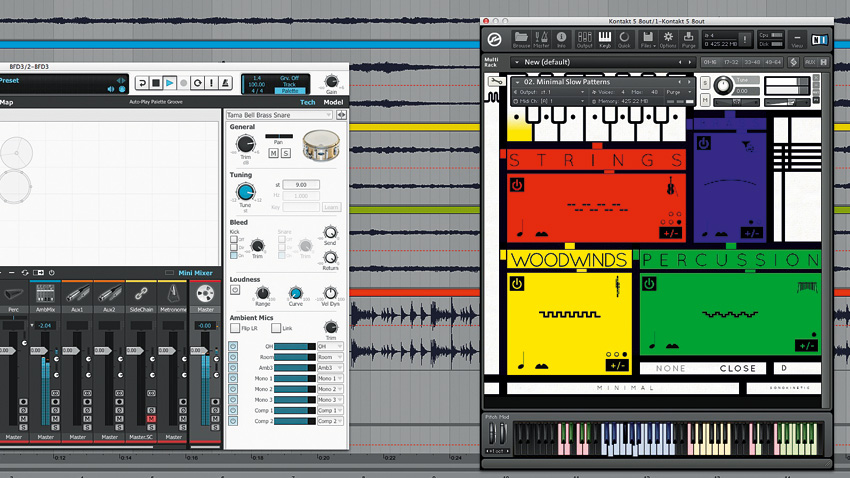
Step 1: Reverb can be used to move sounds towards the perceived 'front' or 'back' of the '3D' soundstage. Here we have an orchestral passage comprising strings, brass, wind and tuned percussion sections from Sonokinetic's Minimal library for Kontakt. We add to this with a snare drum part courtesy of FXpansion BFD 3, and render the whole thing as five tracks of audio.
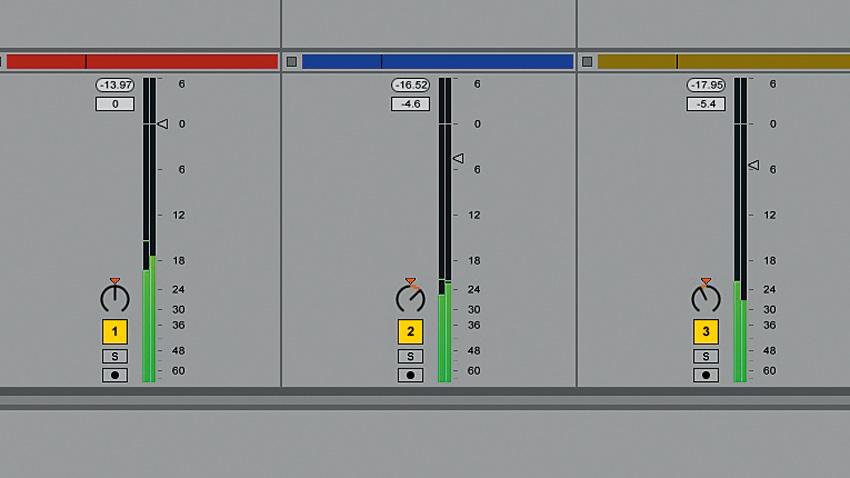
Step 2: Before positioning our sounds in space (we're going for strings up front, brass and winds in the middle and percussion at the back), we need to do a rough mix, just in terms of levels and panning. Tweaking the volume levels gives us a more palatable balance. Each of our tracks is a stereo orchestral section, so the instruments are already placed in the stereo field, thus our panning offsets are kept small.
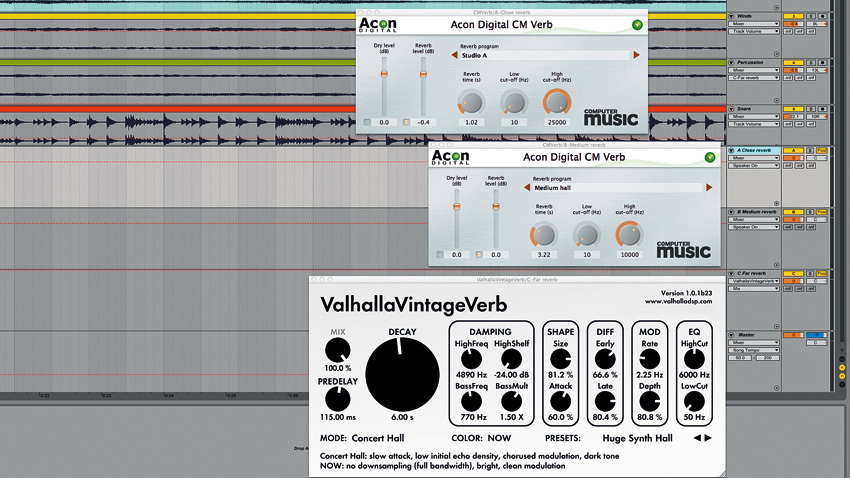
Step 3: OK, we're ready to introduce our reverbs! We set up three plugins on auxiliary buses in our DAW, naming them Close, Medium and Far. For Close and Medium, we load up our very own CM Verb, with Close set to the small, short Studio preset, and Medium set to the bigger, longer Medium Hall. For the Far, we opt for ValhallaDSP VintageVerb's Huge Synth Hall preset. All three are 100% Wet.
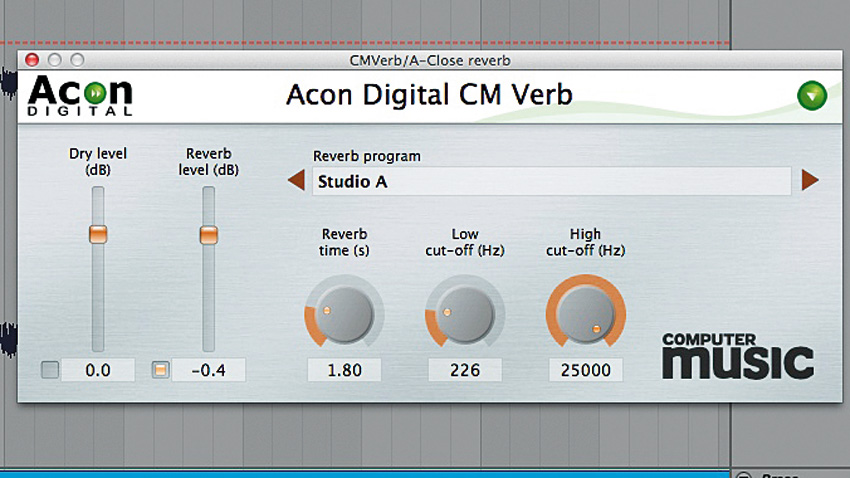
Step 4: We want the string section upfront, as it would be placed in a real orchestra, but still with a sense of space beyond the width of the dry, close-miked recording, so we send it to the Close reverb. We also tweak the reverb itself, raising the Reverb Time to 1.8s and upping the Low Cut-Off to 226Hz. This last adjustment takes the very lowest frequencies out of the reverb, so as not to take up headroom unnecessarily.
Get the MusicRadar Newsletter
Want all the hottest music and gear news, reviews, deals, features and more, direct to your inbox? Sign up here.
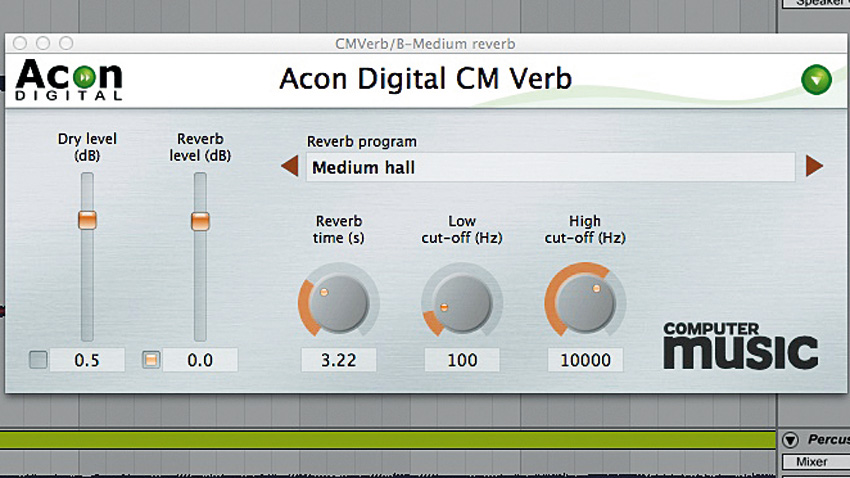
Step 5: Our brass and woodwinds will share the '3D middle' of our soundstage, and to that end, we send them both to the Medium reverb (Reverb Time: 3.22s). Again, we shave off the bottom of the signal, but this time the Low Cut-off is applied at just 100Hz, since the low end of the brass above that actually works well within the reverb.
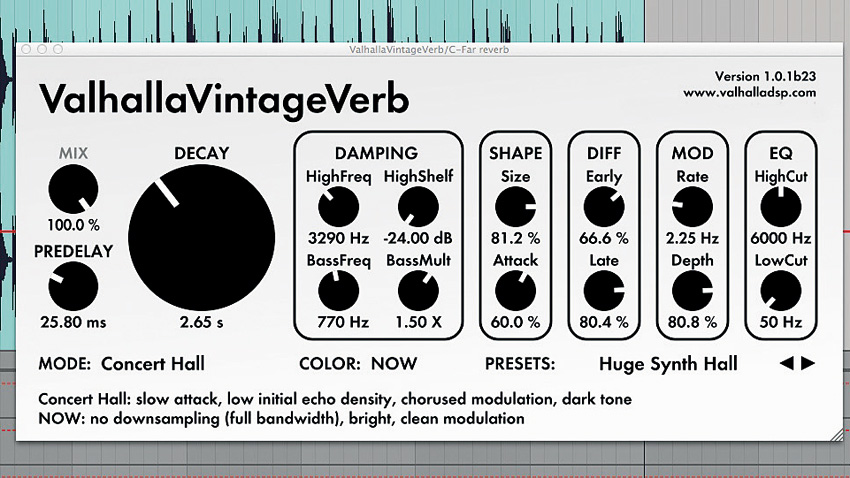
Step 6: We place the snare off in the distance by sending it to the Far reverb. At the current VintageVerb settings, though, it's way too bright and long, so we reduce the Decay Time, HighFreq Damping and Predelay (we don't want any noticeable slapback). Lowering the damping darkens the top end, pushing the snare even further away. We also send the Percussion to this reverb, just to give it a touch of ambience.
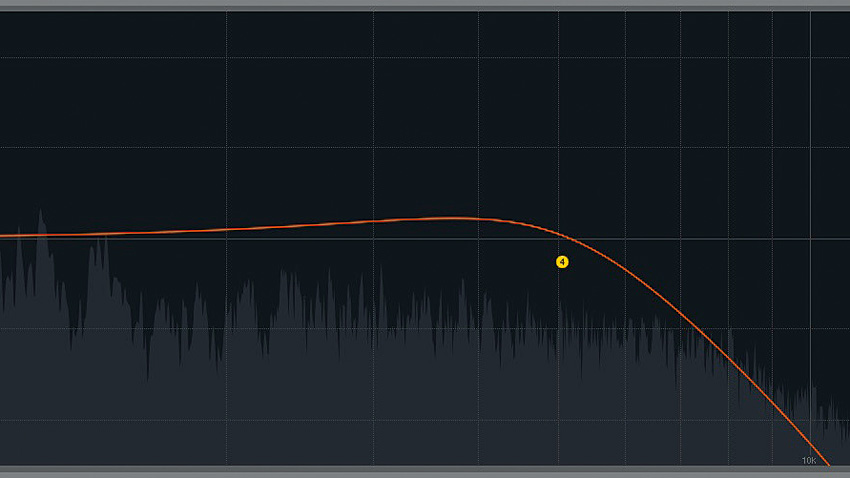
Step 7: The snare still sounds rather too 'present' for our liking. We've darkened it with the reverb's damping, but we can also EQ the snare itself to make it more distant still - dulling the treble increases 'distance'. Using our DAW's built-in EQ, we apply a High-cut Filter at around 5kHz, with a small hump at the cutoff point to retain impact. We also raise the snare channel by about 3dB to compensate for the cut.
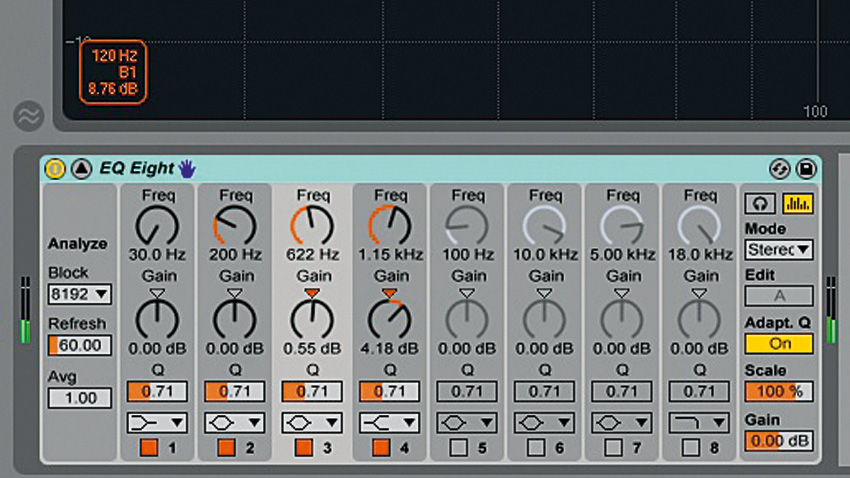
Step 8: Applying the same principle in the opposite direction, we give the strings a high EQ boost to bring them further to the fore, and lower their overall volume by 3dB. Brightening a sound by emphasising its highs brings it to the front of the stage, while darkening it by attenuating the top end sends it further back. Similarly, short reverbs imply closeness and long reverbs give the impression of distance.
Power tip: While a carefully designed 3D soundstage can imbue a mix with palpable depth, always bear in mind the established tenets of your genre. While certain genres benefit from every sound occupying its own individual front/back position (ambient, orchestral), rock, dance and pop music usually require their focal elements to be kept upfront. Depending on the track, that might be the majority or even all of them - drums, bass, guitars and vocals in rock, for example. Of course, rules are made to be broken, though, so if you're absolutely sure that ghostly, wandering snare works well in your latest DnB roller, who are we to suggest otherwise?
Computer Music magazine is the world’s best selling publication dedicated solely to making great music with your Mac or PC computer. Each issue it brings its lucky readers the best in cutting-edge tutorials, need-to-know, expert software reviews and even all the tools you actually need to make great music today, courtesy of our legendary CM Plugin Suite.


