How to program a realistic drum fill from scratch
Learn how to conjure up acoustic drum fills in your MIDI editor, and the things you need to bear in mind to keep them realistic
Programming drums with adherence to the limitations of a real drummer and their drum kit is every bit as important in relation to fills as it is beats.
First and foremost, with only four limbs, a drummer can only hit a maximum four things at a time, and with two of those limbs being their feet, two of said things have to be the kick drum and hi-hat pedal. So, if you ever hear more than two drums (excluding the kick) and/or cymbals being struck at the same time in your fill, you need to delete all but two of them.
Although a skilled drummer might sound as temporally tight as a drum machine, in actuality, their strokes will rarely land perfectly on the beat - much like the world's greatest archer will hit the bullseye every time but only very occasionally in its absolute centre. It's this subtle deviation from perfectly 'on the nail' that gives a live drum track its rhythmic feel, and to emulate it, all you have to do is shift the notes of the fill away from the sequencer's quantise grid. The same applies to dynamics: no two consecutive hits will land with the exact same force, so be sure to subtly fluctuate MIDI velocity from note to note.
Change it up
Then there are the timbral variations that also occur from stroke to stroke - particularly with regard to the snare. Your sampled drum kit needs to offer at least two snare articulations - regular hit and rimshot - and by combining these with the aforementioned velocity variations, you should be able to coax convincing fills from this most vital element of the kit. Some virtual drum instruments even facilitate differentiation of left and right hand strokes - surely the most subtle of details - automatically switching between separately sampled left/right hits on the one note, or offer independent left/right samples on separate notes.
Finally, to really earn your virtual drummer stripes, you'll want to familiarise yourself with drum rudiments. These are specific sticking patterns that constitute a sort of vocabulary of drumming, and while you don't need to know all of them, becoming au fait with the essentials - flams, drags, ruffs, rolls and paradiddles - will greatly expand your fill-programming horizons. Google 'drum rudiments' to find plenty of websites dedicated to the subject.
In this walkthrough, we'll show you how to program an authentic 'live' drum fill from scratch in Ableton Live's MIDI editor. For more on the subject, check out the full cm Guide to Drum Fills in the July edition of Computer Music (CM231).
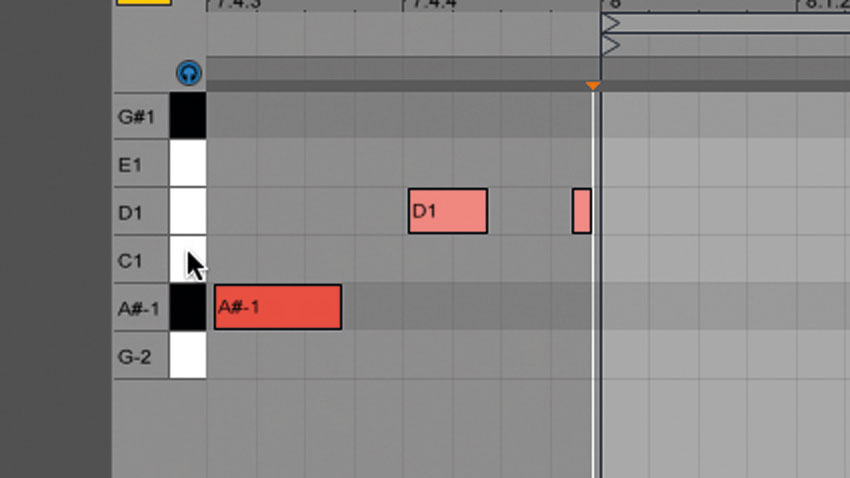
Step 1: We're going to program a one-bar fill at the end of a basic drum groove. We set the cycle markers in our DAW to loop at bar 8, then delete all the MIDI notes therein. We will, however, need to remind ourselves of the groove quite frequently while working on our fill, rather than drive ourselves mad listening to it over and over again out of context…
Get the MusicRadar Newsletter
Want all the hottest music and gear news, reviews, deals, features and more, direct to your inbox? Sign up here.
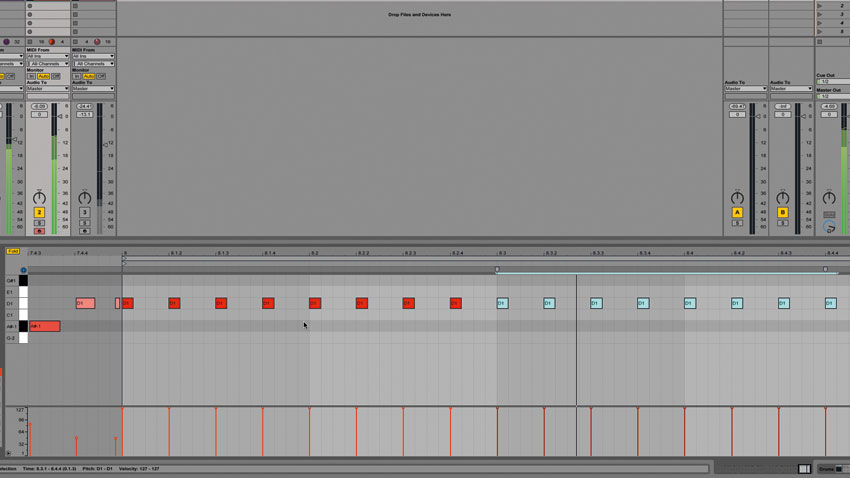
Step 2: Our ultimate goal is to create a believable 'performance' that a real drummer could have played, and the easiest way for a non-drummer to do that is to start with a simple snare drum fill. So, we draw in a series of full-velocity 16th-note snare hits - a slow machine-gun roll, if you will. What a racket! But don't worry - this is only the beginning.
Machinegun snares
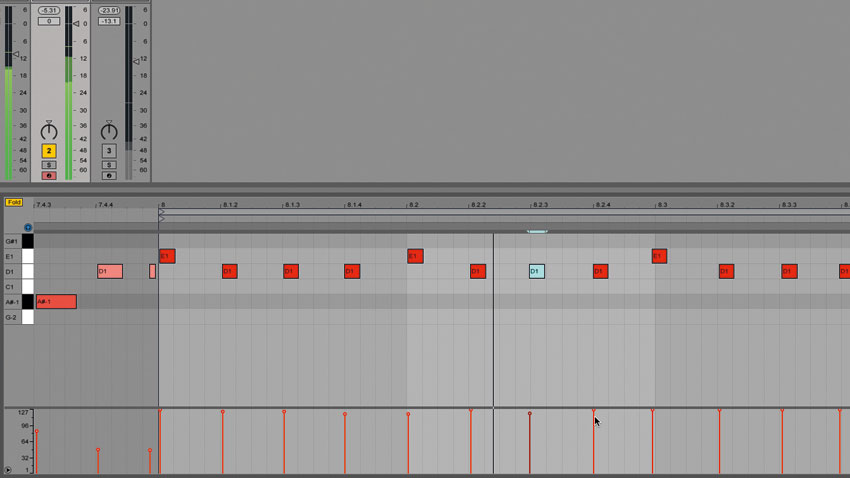
Step 3: We can easily make our snare fill more 'human' in terms of sound and timing by shifting the hit on every main beat to a rimshot articulation, manually offsetting each hit from the quantise grid a touch, and varying the velocities to emulate a drummer's natural inclination to hit slightly harder with their right
hand - assuming they're right-handed.
Human snares
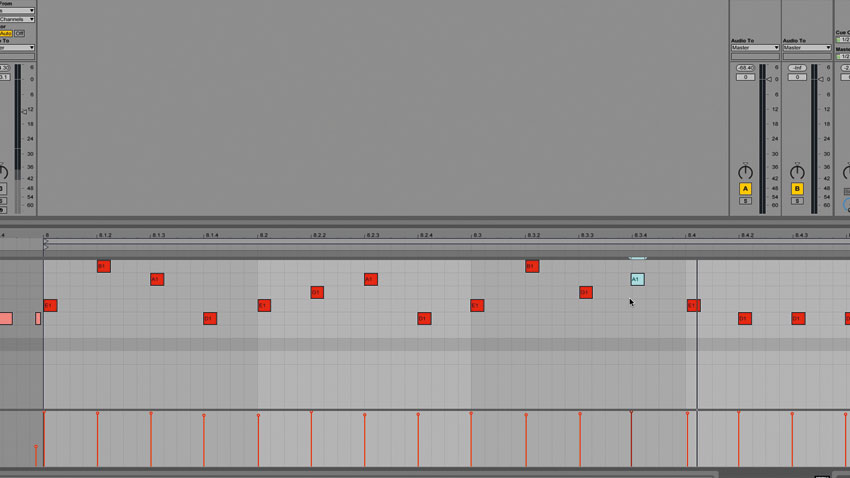
Step 4: Now, bring in the tom toms by picking out a few snare hits and dragging them onto the notes assigned to toms in your virtual drum kit. You can move as many hits as you like - all of them, even!
- but keeping the main beats centred on the snare will ensure that the high-end energy of the groove is maintained through the fill.
Toms in
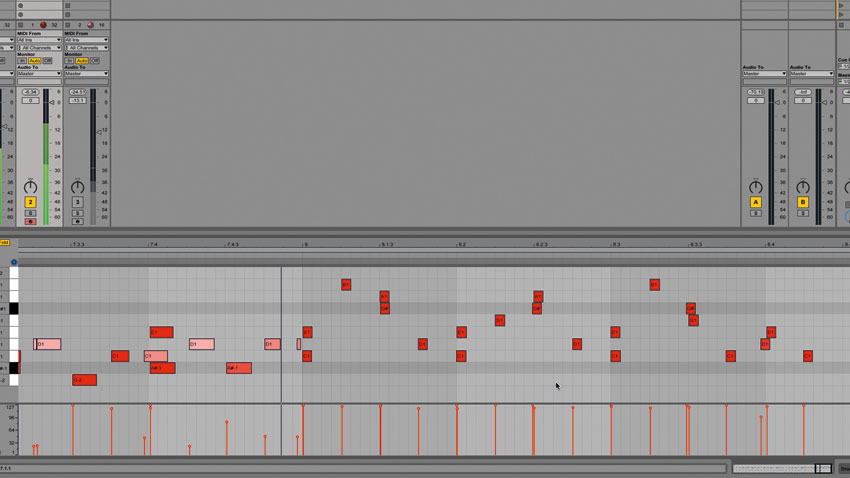
Step 5: To make our fill more 'conclusive', we delete the last three 16th-notes, move the last hit of beat 3 to the kick, make the final snare hit a flam, and end on an offbeat kick. To keep the feet busy, we draw alternating kick drums and pedalled hi-hat hits on and between the first three beats. An explosive crash cymbal at the start of the groove wraps things up nicely.
Final fill
Computer Music magazine is the world’s best selling publication dedicated solely to making great music with your Mac or PC computer. Each issue it brings its lucky readers the best in cutting-edge tutorials, need-to-know, expert software reviews and even all the tools you actually need to make great music today, courtesy of our legendary CM Plugin Suite.

