How to prepare an Ableton Live track for live performance
Make the transition from studio to stage with our guide
One of the things that's always set Ableton Live apart from the vast majority of other DAWs (indeed, all of them, when it debuted in 2001) is its amazing potential as a highly manipulable live playback system. While the main impact of this has been a total reshaping of the global DJing landscape, it's also enabled producers to quickly and easily convert their linear multitrack projects to genuinely 'playable' performance pieces, all within Live itself.
In this tutorial, we're going to show how to do exactly that, turning a 'produced' project in the Arrange view into a collection of clips and Scenes in the Session View.
• For many more Ableton Live guides go to our massive learning hub: Learn Ableton Live and Ableton Push: music production tips and tutorials
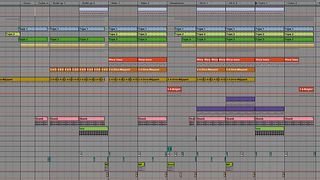
Step 1: Our track is a stomping, bassy number with a breakdown and drop in the middle, and a general sense of build-up throughout. The drums and bass are built on a range of sources, and we've already marked out our structure using Live's Locators. So that we can play the track out live, we want to get the whole lot into the Session View, mostly as audio clips but with a few parts left 'live' for jamming.
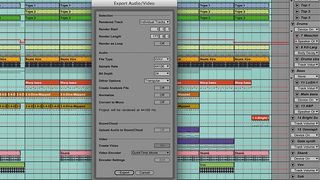
Step 2: The first stage is to export each channel as a full-track-length audio file - a process that Live makes light work of. We turn off the master channel effects (we'll run those live), set the loop range to encompass the whole track, hit Cmd/Ctrl-R to bring up the Export Audio dialog, select Individual Tracks in the Rendered Track dialog at 24-bit, click Export and choose a folder for our renders.
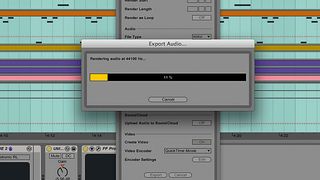
Step 3: We've rendered our drums as full tracks, but it's always handy to have some deconstructed drum loops around, too, so we also export four bars of the full drums mix in solo kick, kick and hats, kick and snare, and hats and snare versions. Similarly, grabbing eight bars of each of our three main bass layers separately will expand our jamming options.
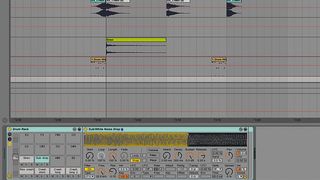
Step 4: It's also a good idea to give yourself instant access to any crashes, whooshes and other spot FX by loading them into a sampler or Drum Rack on a new MIDI track, even if you keep the full rendered tracks in the project too. We do exactly that now with our crash and siren samples. We'll come back to the MIDI-triggered impact and drum fill shortly.
Get the MusicRadar Newsletter
Want all the hottest music and gear news, reviews, deals, features and more, direct to your inbox? Sign up here.
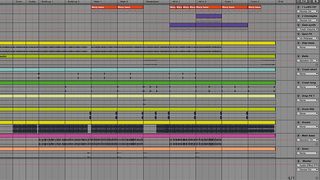
Step 5: We save a new version of the project and delete all tracks except the gated synth lead, LFO-modulated 'lead' bass, pad and Spot FX Drum Rack. Then, we simply import our rendered tracks and Group stems (but not the individual tracks that are already in Groups, since we don't want them in our project twice). We name each track and set suitable Warp Modes.
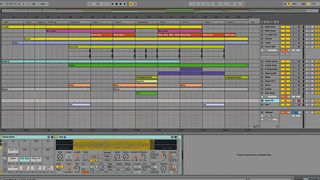
Step 6: Next, we delete all sections in which there's no sound, as we don't want to create Scene clips for these parts, but we leave the entire 'block' in place in all sections that contain any signal at all. Now we have an audio (plus three synths and a Drum Rack) version of our track. We also chop out the MIDI-triggered spot FX mentioned earlier and put them in the Spot FX Drum Rack.
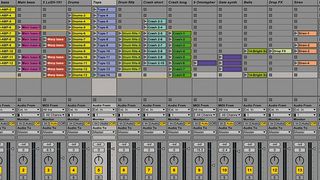
Step 7: All that remains is to turn our song sections into Scenes: set the loop braces around each section in turn and select Consolidate Time to New Scene from the right-click menu. Voila - the Session View now reflects the Arrangement such that if we play all the way through each Scene from one to the next, it'll sound identical - once we've turned the master effects back on, of course.
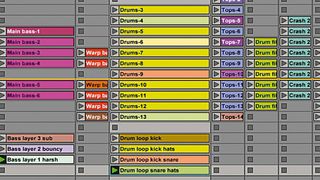
Step 8: Every clip is set to Loop by default, which is fine for all but the final Outro Scene, which ends on a downbeat and thus won't loop properly - so we disable Loop for all of its clips. Then we put our deconstructed drum and bass loops on the Drums and Main Bass tracks, below the full renders, and, finally, colour the clips on each track to indicate variations.
Computer Music magazine is the world’s best selling publication dedicated solely to making great music with your Mac or PC computer. Each issue it brings its lucky readers the best in cutting-edge tutorials, need-to-know, expert software reviews and even all the tools you actually need to make great music today, courtesy of our legendary CM Plugin Suite.

"If I wasn't recording albums every month, multiple albums, and I wasn't playing on everyone's songs, I wouldn't need any of this”: Travis Barker reveals his production tricks and gear in a new studio tour

“My management and agent have always tried to cover my back on the road”: Neil Young just axed premium gig tickets following advice from The Cure’s Robert Smith


