How to mix classic pop vocals
Record perfect pop hits in your DAW

Pop power
Pop encompasses so many different forms and styles that the question of what constitutes a ‘classic’ pop vocal sound can be a rather open one. Fortunately, whether it’s ‘80s power pop, ‘90s ballads or modern club bangers, there are a few things you can do to instantly capture a powerful pop vocal sound that would be right at home in any era - and on any chart.
For the most part, pop songs are designed to be heard through radios and huge speaker stacks - systems not known for their dynamic range. In other words, if you’re mixing a powerful pop song, preserving the dynamic qualities of the vocal is less important than it would be in many other genres.
What’s more important is getting a sound that’s big, forceful and unmistakable, and that can stand up to busy, compressed pop production. This is easier said than done - especially when you consider that pop backing tracks can run to dozens of different elements, all of which need to make room for the vocal.
Many chart hits today involve the vocalist being Auto-Tuned, corrected and artificially backed up until there’s almost nothing of the original left. We advise staying away from that sort of thing for the most part, but sometimes it can be a good thing to make your track’s vocal sound ever so slightly artificial.
That’s why Auto-Tune is so popular, after all, and why doubling and delaying vocals to create a metallic sound can work so well for this kind of production.
Next: Five steps to flawless pop vocals
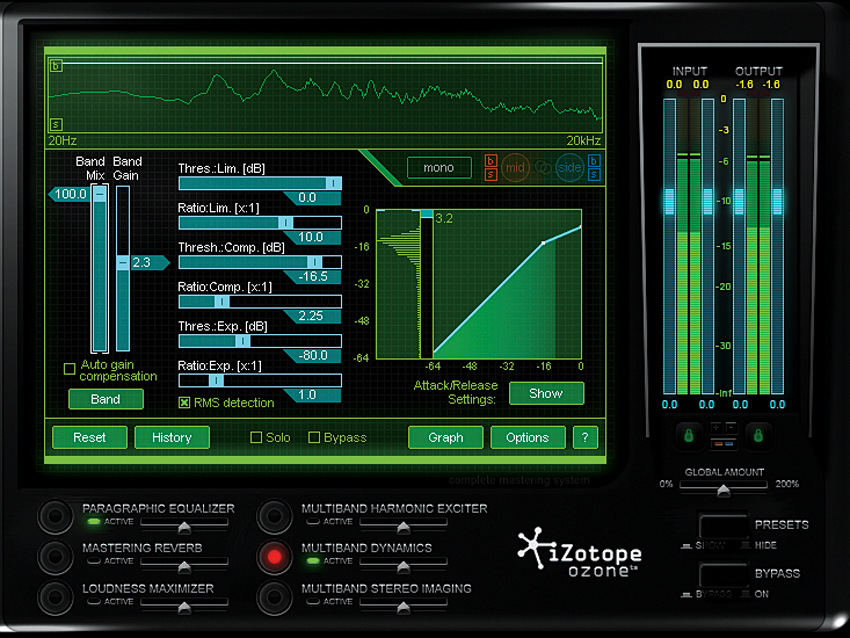
EQ and compress
Step 1: Try to avoid any major EQ bumps with your pop vocal. A low cut around 50Hz is always good, as is a slight boost at the very top. Far more important is compression, and the first thing you should do is apply a compressor as an insert effect. Don’t go too hard at first: keep the Ratio between 1:2 and 1:4, and the Threshold fairly high.
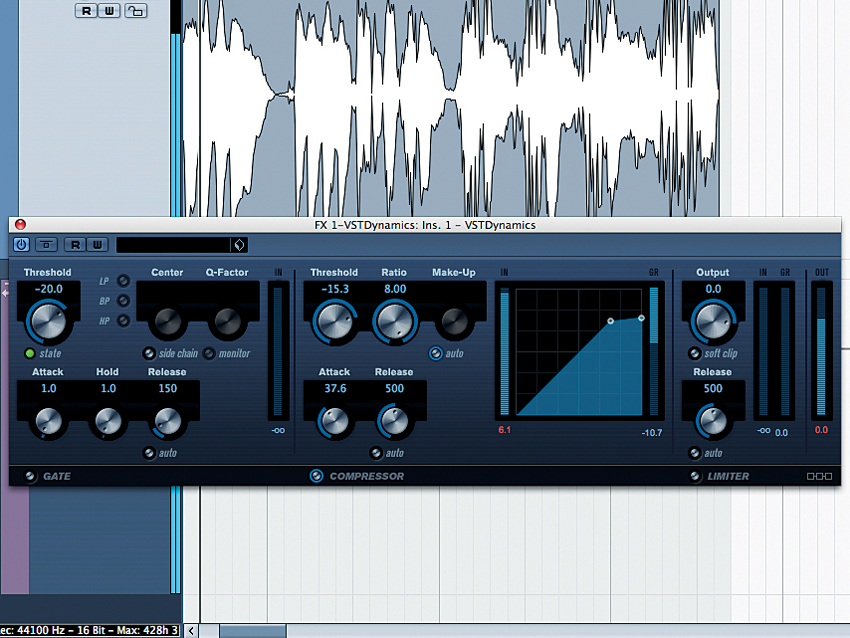
Parallel compression
Step 2: To get that ultra-compressed sound, let’s apply some parallel compression. Create an auxiliary channel and send your main vocal to it, making sure the send is pre-fader. On the aux track, add your choice of compressor and go hard, pushing it until there’s at least 10dB of compression taking place. Play with the send level until you get a big, powerful sound.
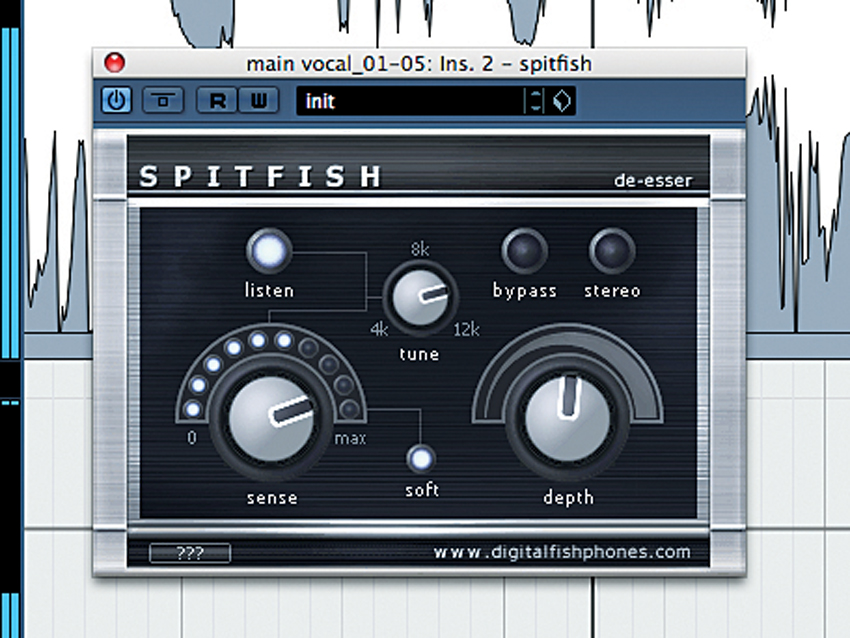
Smooth it out
Step 3: Big doesn’t necessarily mean harsh. You might find (as is the case with our example audio) that parallel compressing your vocal makes it a little sibilant, which isn’t what we want. We use Digital Fish Phones’ Spitfish to smooth things out a little, sweetening the vocal up a touch.
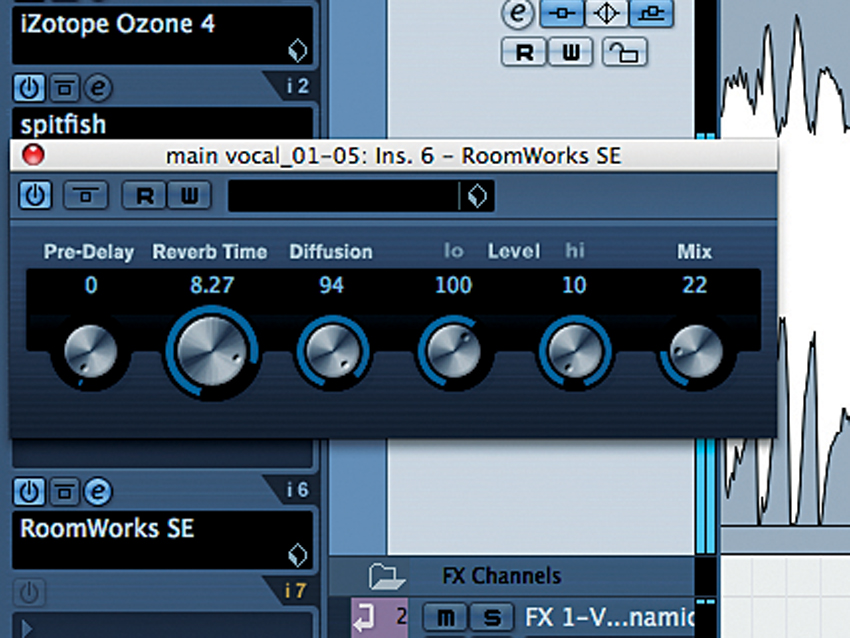
Add reverb
Step 4: Now that you’ve got the basic, big sound down, you can point your vocal in the direction of the style you’re aiming for. For example, here we’re using reverb to get Minki sounding properly ‘80s, cranking up the Reverb Time and dialling down the Pre-Delay to get something that wouldn’t sound out of place on a synthy love song.
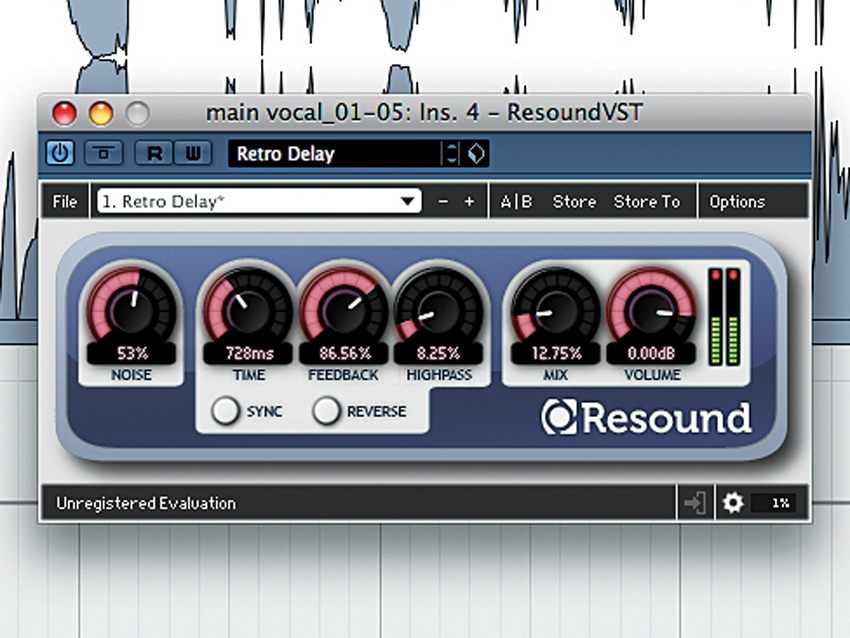
Add delay?
Step 5: Going for something more modern? Lower the reverb a little, then add some delay (we like Loomer’s Resound VST) and bang in a harmoniser. You don’t want to push it too hard, as all you’re going for is a clean, metallic effect, but it shouldn’t take much tweaking before you’ve got a chartable sound.

Computer Music magazine is the world’s best selling publication dedicated solely to making great music with your Mac or PC computer. Each issue it brings its lucky readers the best in cutting-edge tutorials, need-to-know, expert software reviews and even all the tools you actually need to make great music today, courtesy of our legendary CM Plugin Suite.


