How to make vocal stutter effects in your DAW
Do It Yourself
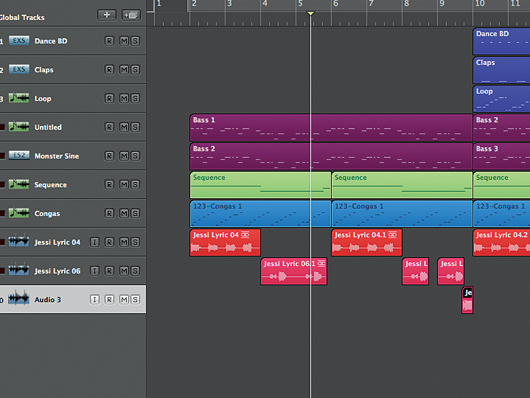
Step 1: Plug-ins such as Live’s Beat Repeat can make creating stutter effects almost too easy. Sometimes it’s better to take a little more time and personalise your vocal glitch effects. Here’s a basic backing track which we’ll use to create some interesting vocal stutters.
As these tend to work best when there’s room for them, we’ve kept the backing track simple.
For more vocal production tricks, check out Computer Music Special: Vocals (CMS46) which is available now from selected newsagents and www.myfavouritemagazines.co.uk.
EQ and tremolo tweaks
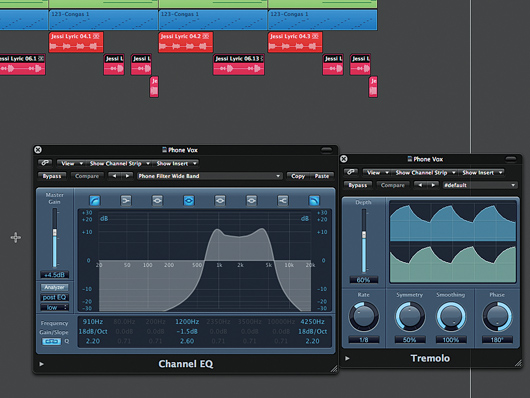
Step 2: We separate the sound of the two vocal parts into distinct ‘lead vocal’ and ‘answer’ phrases. The answers are treated to the same telephone EQ and tremolo treatments and dropped in volume so that they’re thinner, harsher and quieter. This will give our stutter edits different tonal characteristics.
Chop and repeat
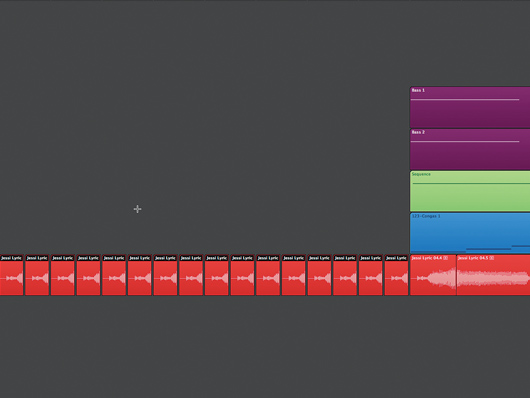
Step 3: We create our first stutter edit by chopping the start of the first word, ‘get’, and copying this to beat 3 of the previous bar. We then shorten the region further and copy it 16 times so it plays 32nd-notes between this point and the down beat where the main track starts. This doesn’t work as hoped, as this short region contains silence before the vocal starts.
Positioning tweaks
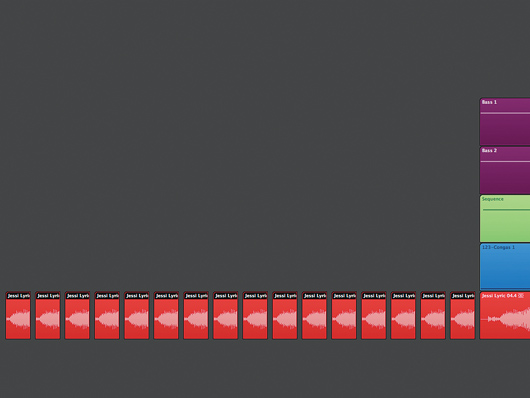
Step 4: We take the first stutter region and move its end point back, creating a longer region. We then move the start point to later before moving the whole region back to its original location at beat 3 of the bar before the track starts, and copy this new region to the other 15 locations as before. This works better.
Automation
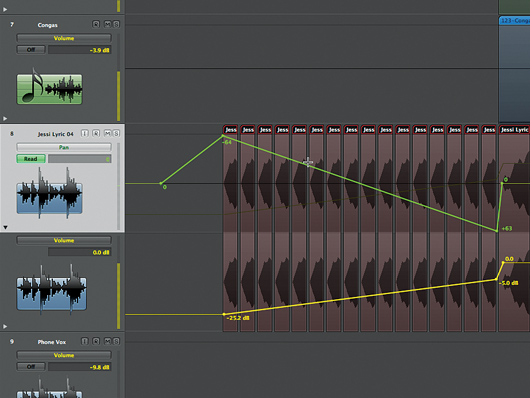
Step 5: The stutters are too robotic, though, so we turn to automation to provide a more dynamic initial effect. We start with a volume ramp so that the stutters fade in, then add a pan ramp so that the stutters start on the left and switch to the right before the pan resets to the centre in time for the lead vocal’s start.
Slice editing
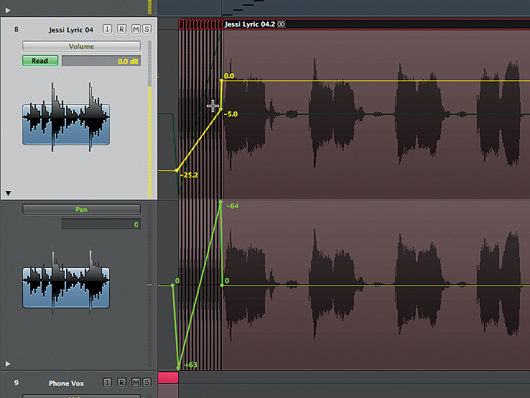
Step 6: We copy this stutter so that it precedes the third lead vocal slice but shorten the slices to that they play 48th-notes this time. Lastly, we select four of the original slices and copy these to precede the first three ‘get up’s of the final phrase, all with automation data to bring them to life.
Stutter transpose
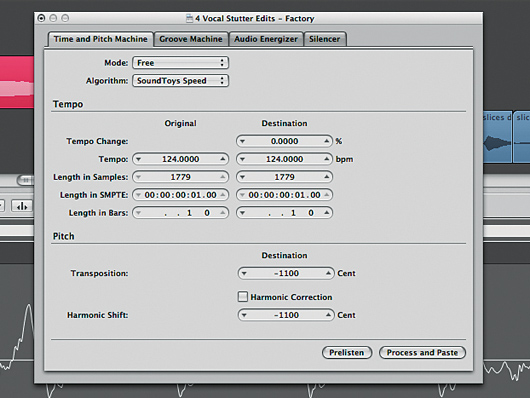
Step 7: We then stutter edit the final ‘come on’ phrase in our four-bar loop. The beginning of this coincides with the 48th-note stutter we’ve created in the second half of our track, so we chop it into 48th-notes to match the regions of the stutter above. Second time around, we chop the final note into 48ths again but transpose each region down in semitones.
Random slicing
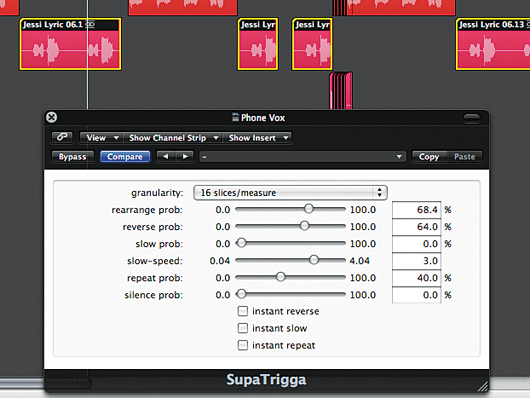
Step 8: Now we solo the main answer phrase and let technology create stutters for us. There are lots of ‘glitch’ effect plug-ins that rearrange, reverse and slow down audio in real time - we’re using the freeware SupaTrigga to create slices randomly. We solo the vocal and bounce it down as a new audio file, then take SupaTrigga out of the main answer track.
Finishing off
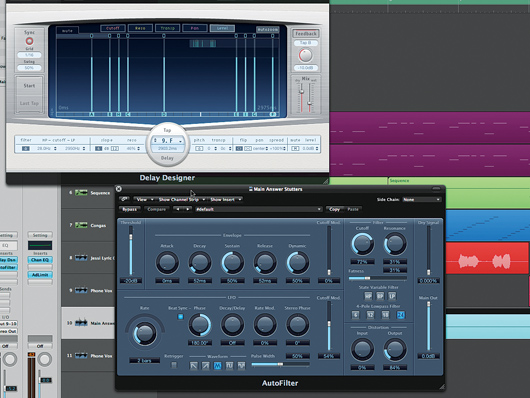
Step 9: We import this file onto a new track and use Logic’s Delay Designer, featuring a preset called BackTrack Rhythm, as an insert. The SupaTrigga’d stutters trigger these delays to enhance their effect. We then use Logic’s Autofilter and LFO to control the tone of these echoes.
Liked this? Now read: Essential vocal production tips
Connect with MusicRadar: via Twitter, Facebook and YouTube
Get MusicRadar straight to your inbox: Sign up for the free weekly newsletter


