How to make big dubstep/DnB beats with Reso
Dishing the dirt
Reso - aka Alex Melia - has only been releasing music for a few short years, but he’s quickly established himself as one of dubstep’s top filth-mongers. Recently, he’s branched out into DnB, spinning out tracks such as Slap Chop on Hospital Records and a tearing 170bpm remix of The Qemists’ Your Revolution.
But Alex’s first steps into music didn’t point to a future as a cutting-edge producer, let alone a dubstep one; his introduction to production was pretty low-tech, and live rock used to be more his thing.
“I’ve played drums since I was nine, and I played in bands and whatever too. My mate Jamie got a computer when he was 18 and we first started messing around on HipHop eJay and Dance eJay!” confesses Alex. “They were wicked because they teach you arrangement - you haven’t got to make any music, you can maybe do a little bit of automation, but that’s it.
“Eventually I got a computer and a copy of Logic when I was 21. I made crappy breaks and DnB - it was rubbish! I was introduced to dubstep, and eventually it took over what I liked about breaks. I began making dubstep and developing along with it, and then my friend Rogue Star - who runs Urban Graffiti - introduced me to a bunch of people in the scene and I started giving tunes out. I got offered £50 to DJ for someone, so I promptly learned to DJ! Eventually I got some tunes released - first on mates’ labels, then elsewhere - and I kept improving my production and making better tunes.”
More recently, Alex has turned his attention to the sounds of DnB and drumstep. “It’s not that I wasn’t into DnB back then, I just wasn’t good enough to make it. Now I just scrape through being good enough!” says Alex.
He’s being modest - in the following tutorial, Alex takes us through his method of creating huge dubstep/DnB beats.
Sampler setup
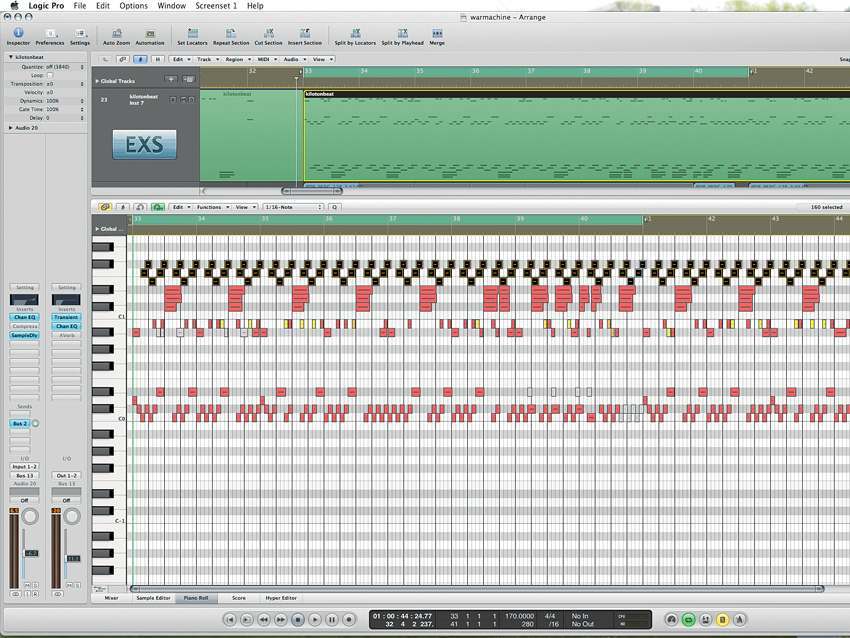
Step 1: Alex uses Logic’s EXS24 sampler to program his beats, set up so that the drums can be routed to different auxiliary outputs if they need to be processed individually. All the single hit drums are triggered from a single EXS24, so that the MIDI of the drum part can be edited on a single track.
EQ
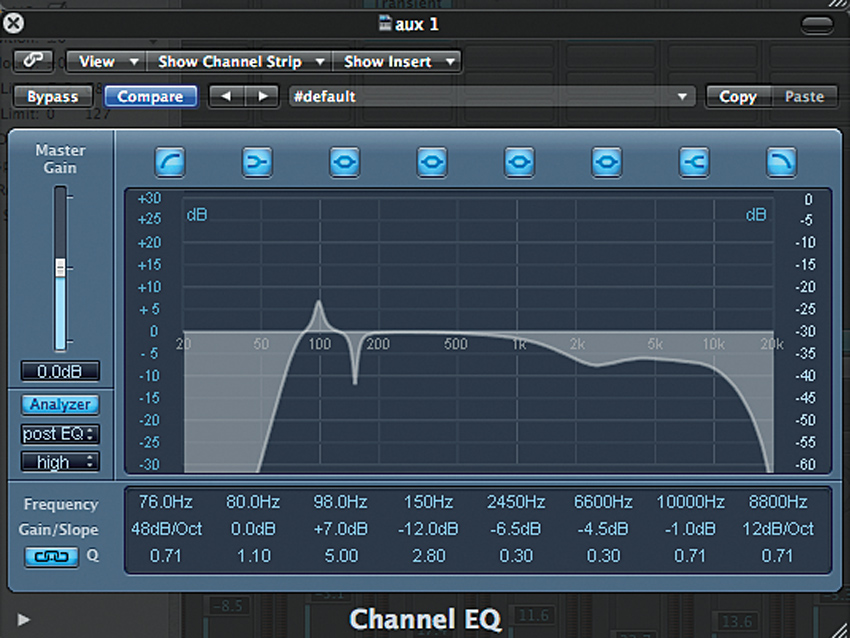
Step 2: He EQs the kick drum to bring it out at 98Hz, will a roll-off at 76Hz to get rid of the extraneous low end. He also attenuates the top end slightly: the kick will be layered with a hi-hat, which will provide the top-end energy.
Transient shaping
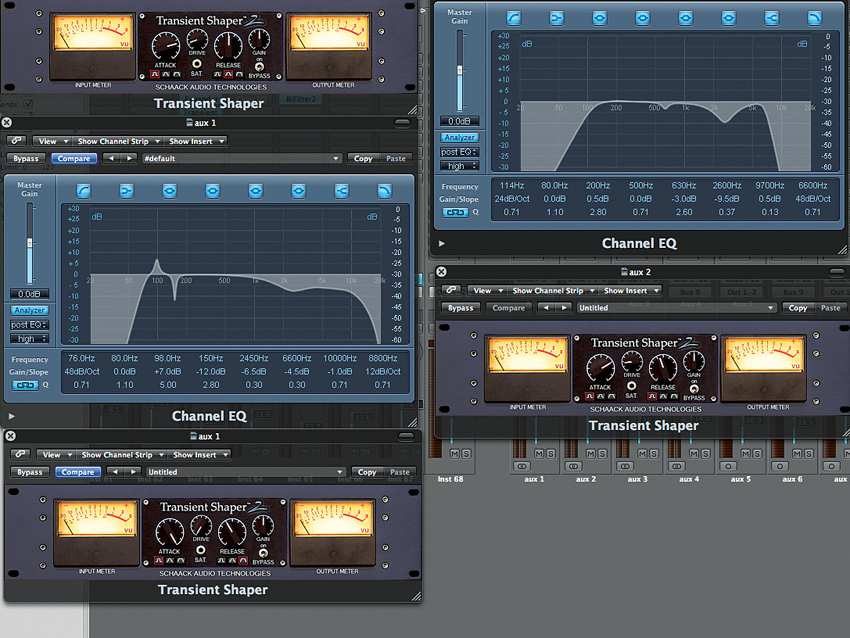
Step 3: Alex uses Schaack Audio Technology’s Transient Shaper to make his drum sounds as punchy as possible. “It tightens it up and gives it a really nice attack, and you can adjust the tail, too,” he explains. Here he uses two instances of Transient Shaper on the drums: one before and one after the EQ.
Layering and cutting
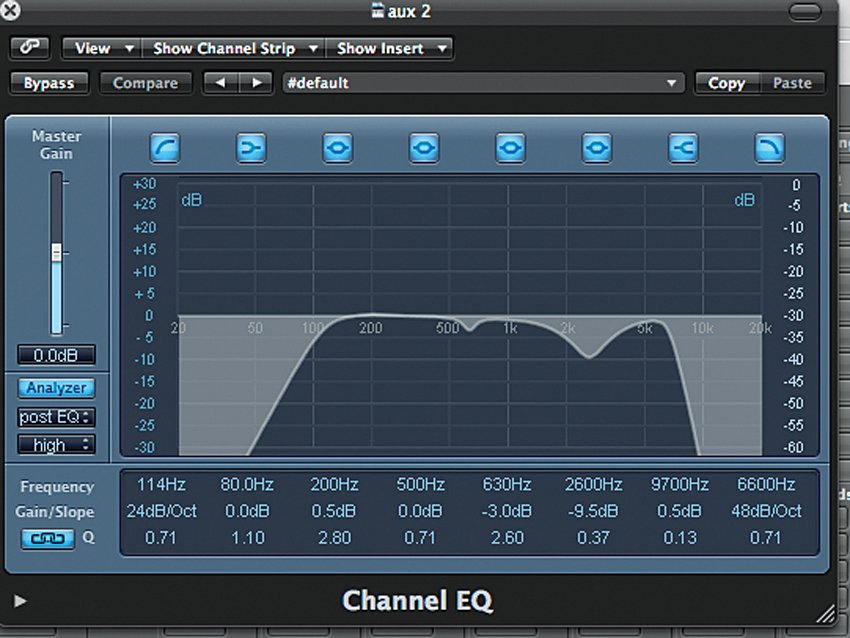
Step 4: To get that big snare sound, three different samples are layered on top of each other. One provides bottom-end punch, peaking at around 200Hz, with EQ cuts at 630Hz and 2.6kHz. “I’m a fan of subtractive EQ - a good analogy is to think of the frequency spectrum like a chest of draws. You can’t just keep shoving things in: if you take things out and move them around, you can make everything fit!”
More snares
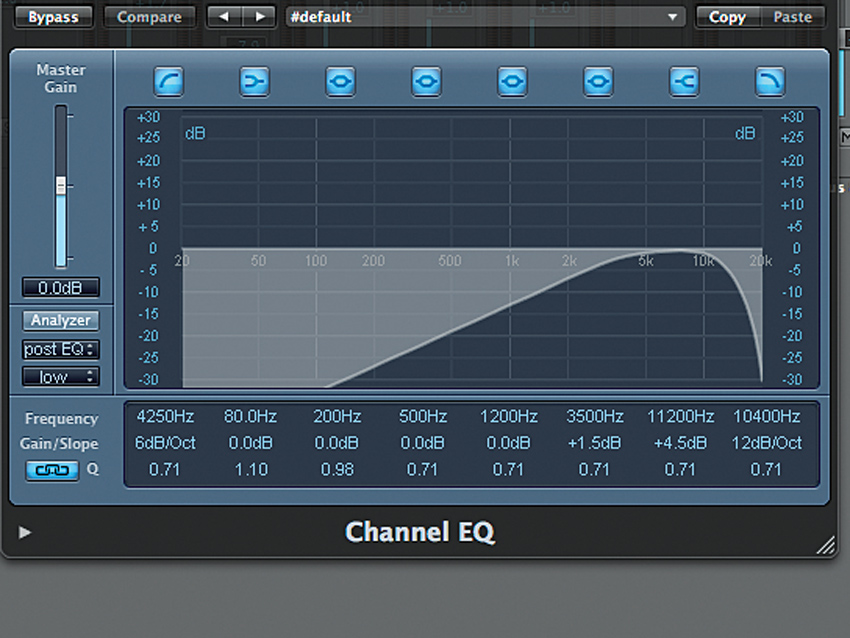
Step 5: Alex layers the low-end sound with a more clap-style snare, which he drives through Logic’s Bitcrusher effect, then Transient Shaper to tighten up its tail. He then rolls it off at 4.25kHz so that it doesn’t interfere with the bottom-end snare. The final element is another snare sample; Alex boosts its top end slightly to fill out the sound.
Single hits
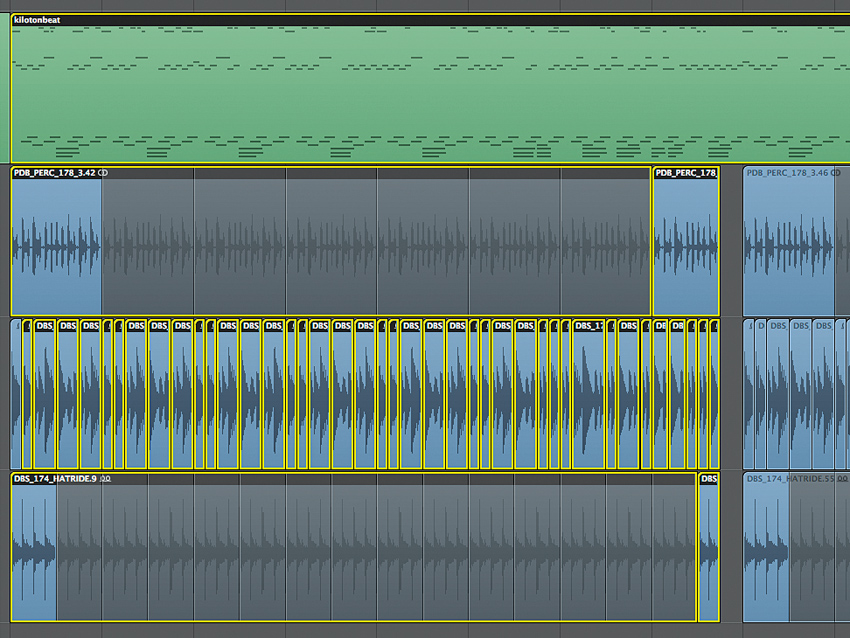
Step 6: To fill out the single-hit drum sounds, Alex layers up a shaker and a DnB loop, then chops them up to make them follow the rhythm of the existing beat. In order to ensure they fit the beat at all times, he manually edits them so that they slot in nicely with the various drum fills that occur throughout the track.
Dynamic compression
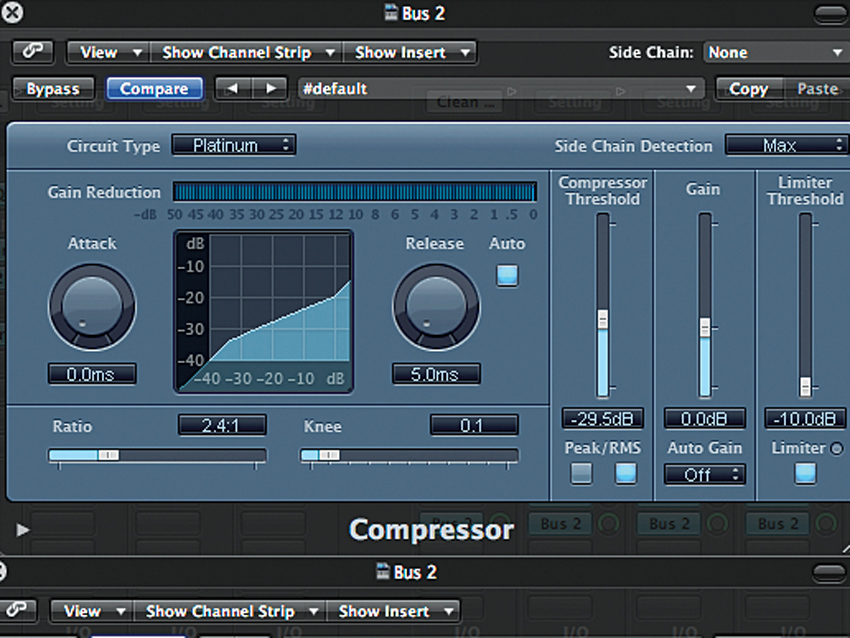
Step 7: To help get the right combination of punchy dynamics and a heavy, compressed drum sound, Alex uses dynamic compression. The drums are routed to a bus, where they’re compressed with Logic’s built-in Compressor in Platinum mode. He EQs the bottom end out, then applies a Transient Shaper with a high Drive setting to the whole bus to make it louder and crunchier.
Convolution reverb
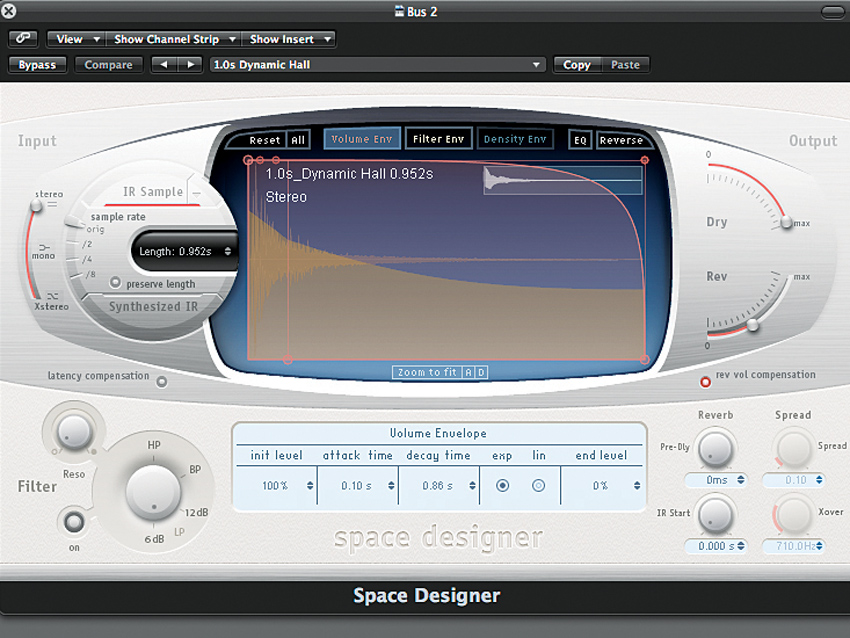
Step 8: For the final touch on the parallel compression bus, Alex applies Logic’s Space Designer reverb, with the Dynamic Hall preset loaded, to give the sound a smooth sheen. Finally, he routes all the drum sounds to a single channel, which is limited to even out the peaks.
Liked this? Now read: How to sound like a pro artist in your DAW

Computer Music magazine is the world’s best selling publication dedicated solely to making great music with your Mac or PC computer. Each issue it brings its lucky readers the best in cutting-edge tutorials, need-to-know, expert software reviews and even all the tools you actually need to make great music today, courtesy of our legendary CM Plugin Suite.


