How to make an Underworld Rez-style lead synth sound
Getting started
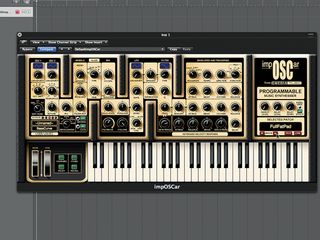
Step 1: We’ve had more than a few requests for this one over the years. We’re not sure about the exact gear Underworld used when they were making Rez, but we do know that the boys have long counted an ARP 2600 and an OSCar among their synths. Both would be suitable choices, though the screeching sound of the OSCar’s filter being overdriven makes us think that GForce’s impOSCar might be a good place to start (download a demo from the GForce website).
Patch selection
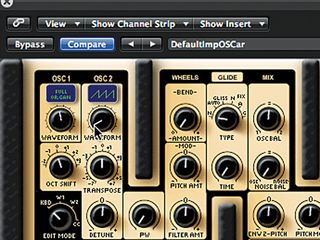
Step 2: There are a couple of ways to go about creating a patch similar to the one heard in Rez. We could create a static patch and sequence it in our host, or we could use a random LFO to simulate the frenetic sound of the original. We’re going to do the latter. Start by hitting the Recall button to initialise the patch, then select the Full Organ wave for OSC 1 and the sawtooth wave for OSC 2.
Adding some bite
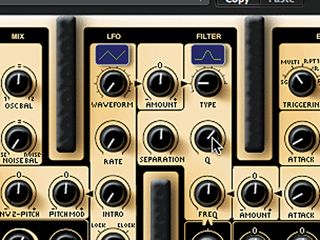
Step 3: Those waveforms are being filtered pretty drastically. We’ll get to that in a moment, but first, let’s turn the Oct Shift knob down to -1 for a lower pitch. Next, cruise over to the Filter section. Select the second (band-pass) filter type and crank the Q up to 0.64. That gives us a biting, nasal tone.
Syncing to host
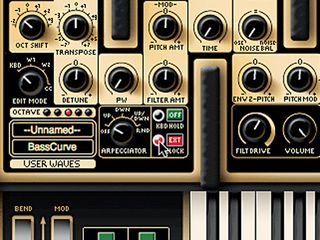
Step 4: Leave the filter cutoff (FREQ) where it is. We need to liven things up with some auto-triggering action. Before we do that, let’s sync the clock to our host’s tempo by checking the Clock button next to the Arpeggiator. This will allow us to use divisions of the host’s tempo in the Triggering section.
Putting it on repeat
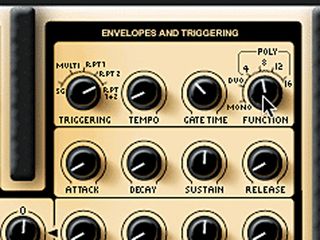
Step 5: Now let’s look at the Envelopes and Triggering section. Set the Triggering knob to Rpt 1+2, and the Tempo to 8 Bts/ Bar. Next, set the Gate Time to around 36%, and the Function knob to Poly 8. You should now hear a hard, repetitive pulse whenever you play a note using your keyboard controller. Now we have some movement!
More movement
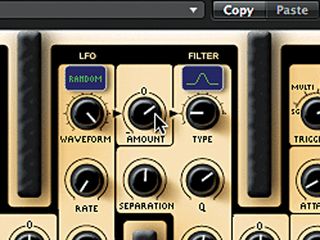
Step 6: We’ll get even more movement if we get impOSCar’s LFO in on the action. We’re going to use the LFO to modulate the filter’s Cutoff frequency. The LFO has a number of waveforms from which to choose. We select the Random wave in order to simulate the frenetic action of the original sound. Do that, and then turn the LFO’s Amount up to around 22%.
Changing the rate
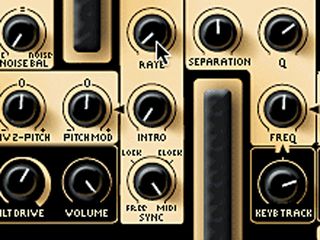
Step 7: The LFO isn’t doing much, and that’s because the Rate is turned way down. Before we set the Rate, we need to switch the LFO’s Sync function over to MIDI. Now, you can adjust the Rate. Set it to either 4 Cycles/B or 8 Cycles/B. That sound is a little better, but it still lacks the excitement of the Underworld patch.
Delay
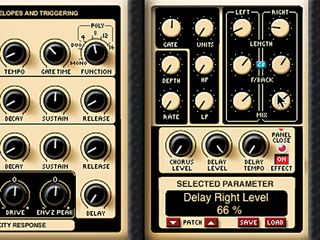
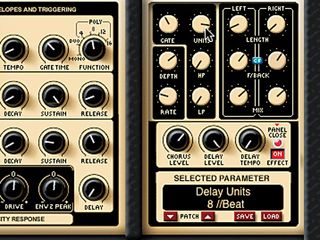
Step 8: Activate the Effect button, click the arrow to open the panel and turn the Delay Level knob all the way up. Click the little CF button between the Left and Right delay channels. Set the Length of one channel to 4 units and the other to 2 Units. Set both Feedback (F/back) levels to 57% and both Mix levels to 50% or more.
Finishing off
Step 9: For more oomph, slam up the FiltDrive and warm it up with some chorusing. It’s not precisely the same sequence, of course: use a step sequencer to hit it right on the head. You could also set the Delay Gate to -22% and the Delay Units to 8/ Beat. Tweak your envelopes and lay this rip-roaring patch over a skittering beat.
Liked this? Now read: How to sound like a pro artist in your DAW
Connect with MusicRadar: via Twitter, Facebook and YouTube
Get MusicRadar straight to your inbox: Sign up for the free weekly newsletter

Computer Music magazine is the world’s best selling publication dedicated solely to making great music with your Mac or PC computer. Each issue it brings its lucky readers the best in cutting-edge tutorials, need-to-know, expert software reviews and even all the tools you actually need to make great music today, courtesy of our legendary CM Plugin Suite.

"If I wasn't recording albums every month, multiple albums, and I wasn't playing on everyone's songs, I wouldn't need any of this”: Travis Barker reveals his production tricks and gear in a new studio tour

“My management and agent have always tried to cover my back on the road”: Neil Young just axed premium gig tickets following advice from The Cure’s Robert Smith

"If I wasn't recording albums every month, multiple albums, and I wasn't playing on everyone's songs, I wouldn't need any of this”: Travis Barker reveals his production tricks and gear in a new studio tour

“My management and agent have always tried to cover my back on the road”: Neil Young just axed premium gig tickets following advice from The Cure’s Robert Smith


