How to make a Sub Focus Falling Down-style futuristic synth pluck sound
A classic trance/prog house sound used on the breakdown of this rave leviathan
Getting started
It’s not the most novel patch in the world, but it seems to be doing the rounds at the moment, especially in dubstep and drum ’n’ bass tracks.
This type of sound was practically a prerequisite for progressive house a few years ago, so we reckon its recent popularity stems from there.
Having said that, to our ears the sound you’re talking about is a classic trance patch. So, make no mistake about it - this is a sound that’s useful in a wide variety of styles!
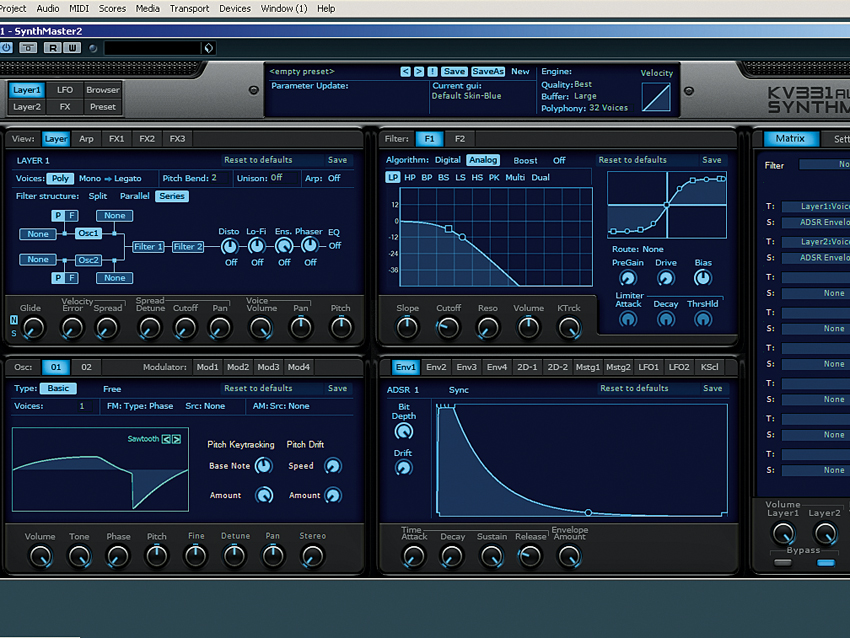
Step 1: We’re going to use SynthMaster 2.5 by KV331 Audio because it’s powerful, easy to program and sounds exceptional. If you’d rather follow along with your synth of choice, then that’s fine too, but we recommend that you check out SynthMaster. We’re starting from the synth’s default state.
Listen: Sub Focus - Falling Down
Programming chords
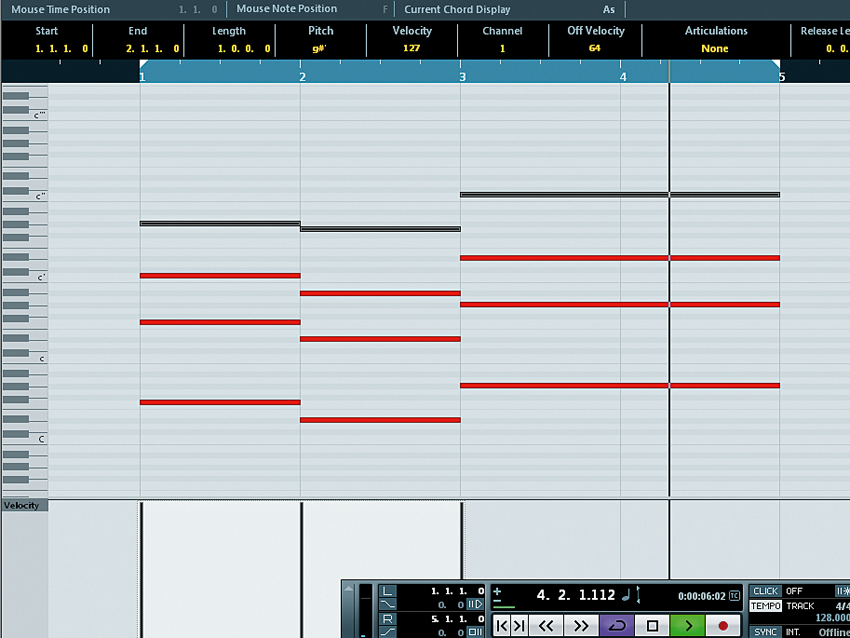
Step 2: Before we get into the synthesis, we’ll show you how we’re doing the chords. Those in Falling Down are based on simple triads, with the root notes reinforced an octave below and the remaining notes spaced out. It essentially means that what would usually be the middle note of the triad is now an octave higher than usual.
Tuning the oscillator
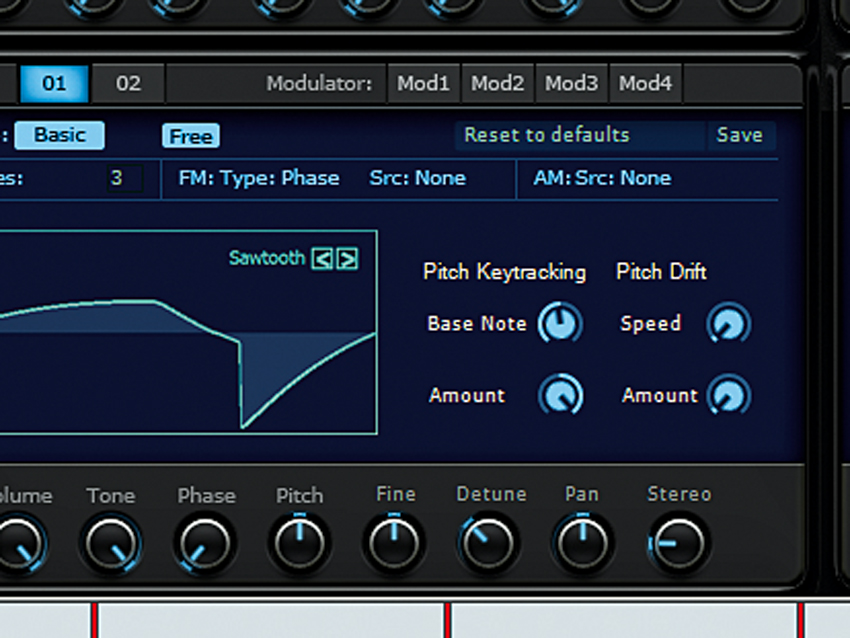
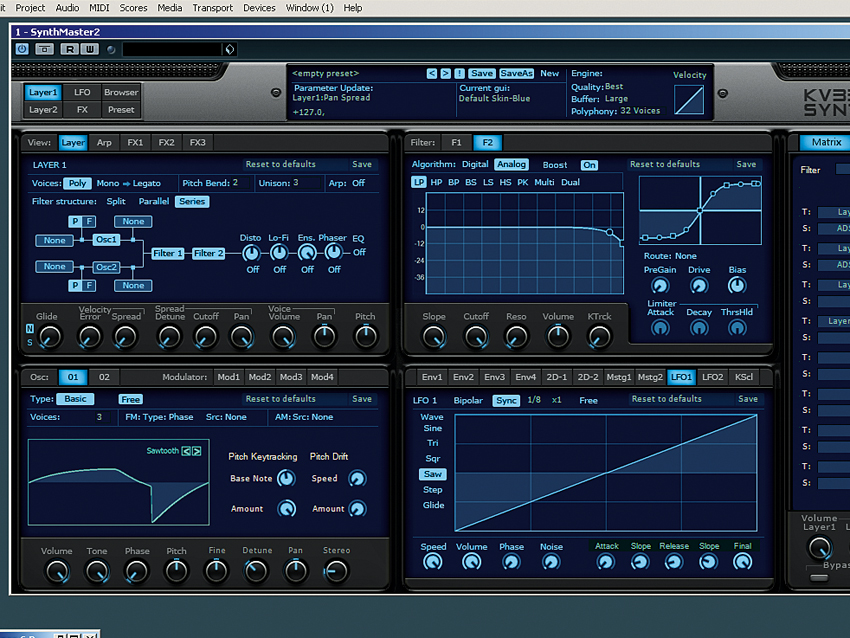
Step 3: Now to SynthMaster 2.5! Push Osc 1’s number of Voices up to 3. This is essentially a unison effect - one of the key ingredients to this type of patch. We’re using the Sawtooth waveform with Free activated (so that it’s free-running). Push the Stereo knob up to 24 and the Detune to around +43.5, which is actually slightly more detuned than the Sub Focus version.
Filter 1
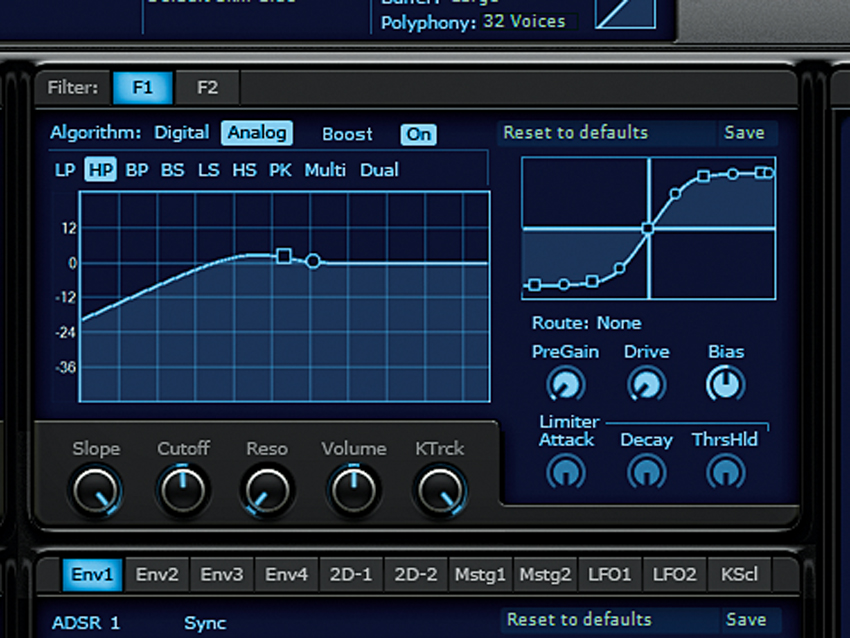
Step 4: Activate Filter 1, put it in HP mode, turn the Slope knob all the way to the top and the sweep the Cutoff knob to about halfway. With KTrck engaged, this is a sneaky way of attenuating a build-up of muddiness so that we don’t have to EQ it out later. We used a spectral analyser to judge how far to cut, we’re aware that it sounds quite harsh at the moment.
Filter 2
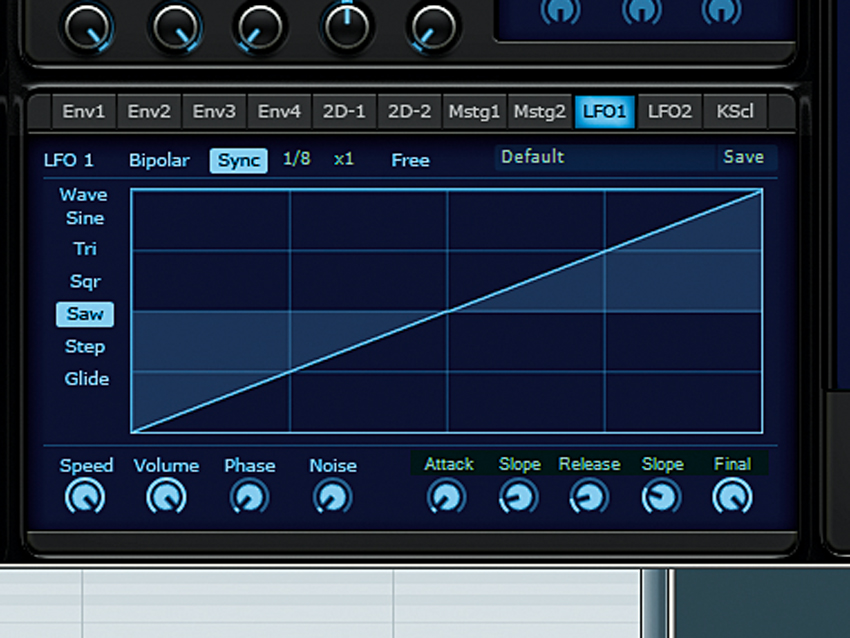
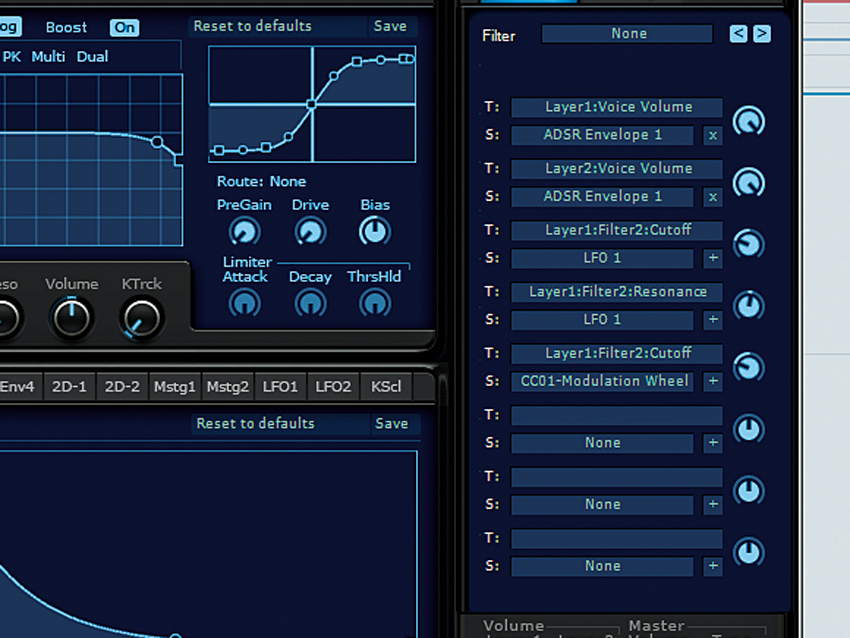
Step 5: Activate Filter 2, but turn the KTrck knob all the way down. Next, push the Slope and Cutoff knobs to the top. Right-click the Cutoff knob and navigate to Modulation 1 Source»Voice»LFO 1. Now that LFO 1 is Filter 2 Cutoff’s modulation 1 source, set LFO 1 to a Saw, activate Sync, change the Speed to 1⁄8 and turn down the relevant Matrix knob to about -60.
More modulation and adding chorus
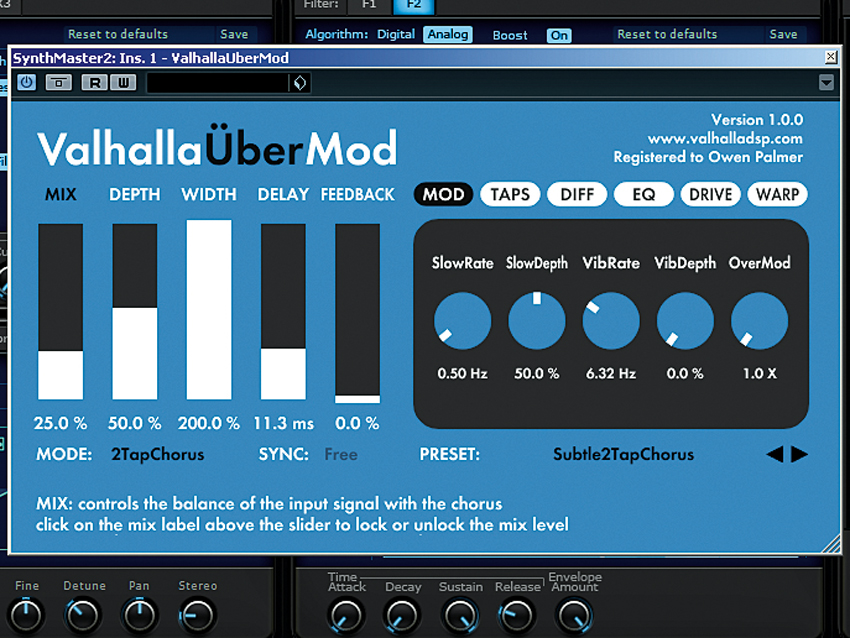
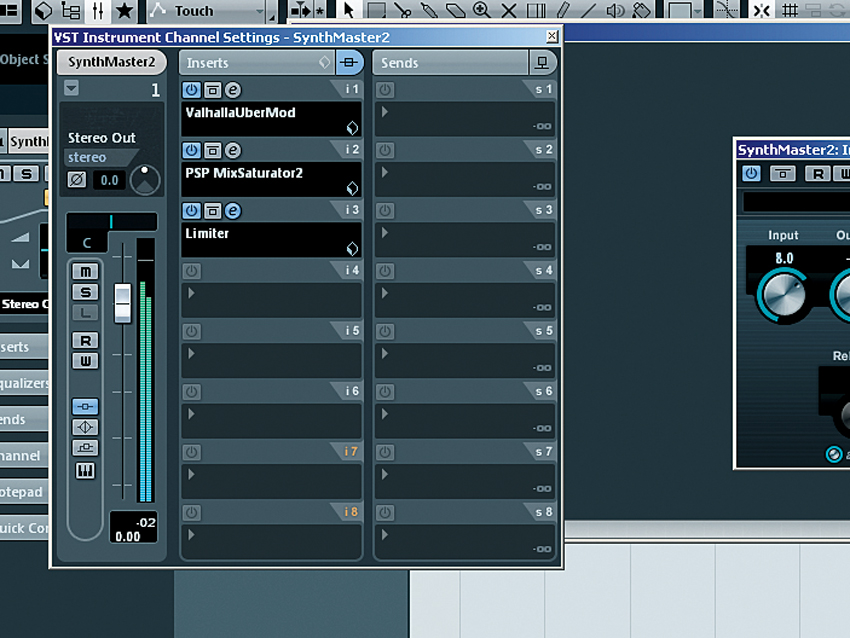
Step 6: To add a bit of extra bite, also set LFO1 as the Modulation 1 Source for Filter 2’s Resonance, with the Matrix knob at around +10. A touch of your favourite chorus wouldn’t go amiss at this point. Valhalla’s ÜberMod has a preset called Subtle2TapChorus, which sounds lush on this with the Mix set at 25%.
Further tweaking
Step 7: It’s vital to do an honest evaluation of the patch so far. We think it could be richer, thicker, wider, and generally tighter. It’s a delicate patch in the sense that a small change in, say, the oscillator detune amount or the filter resonance could drastically alter its style. Set Layer 1’s Unison to 3 voices and maximise the Pan Spread to widen the sound’s stereo image.
Taming the top end
Step 8: Next, let’s deal with the abrasive top end. Set Filter 2 Cutoff’s Modulation 2 Source to CC01 Modulation Wheel (under MIDI) and turn the Matrix knob down to -60 or so. The modwheel will now create a shift in tone. Take care to exploit the sweet spot when laying down your patterns! The extreme ends of the scale could be useful at times, so we won’t reduce the range.
Beefing up the tone
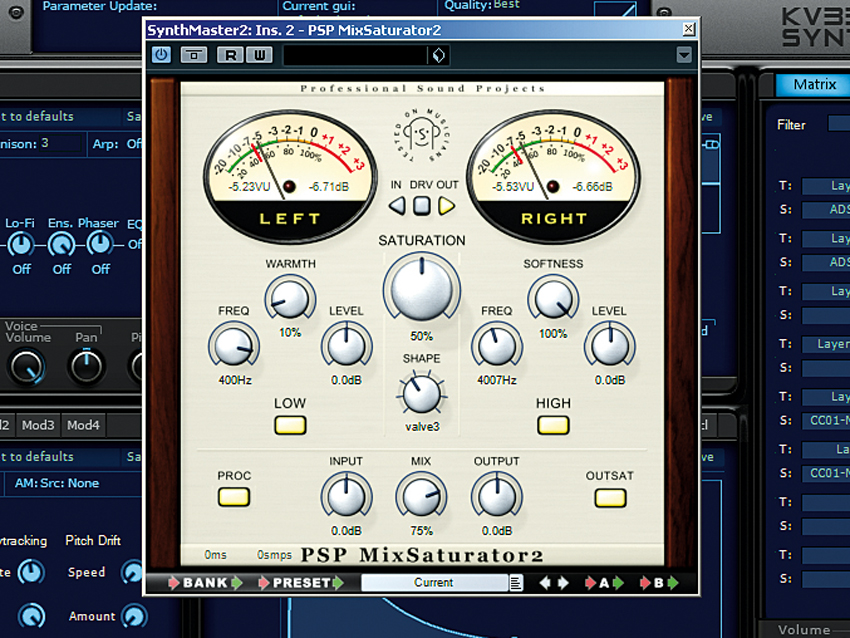
Step 9: PSP’s MixSaturator2 does a number of things to help beef up the tone. Activate Low with a Freq of around 400Hz and 10% Warmth to begin. Saturation at 50% with a Shape of Valve3 gives nice colouration. Activate High with a Freq of 4000Hz and 100% Softness to smooth out the top end. Activate Outsat to catch peaks, then reduce Mix to 75% to restore a bit of dry signal.
Adding more atmosphere
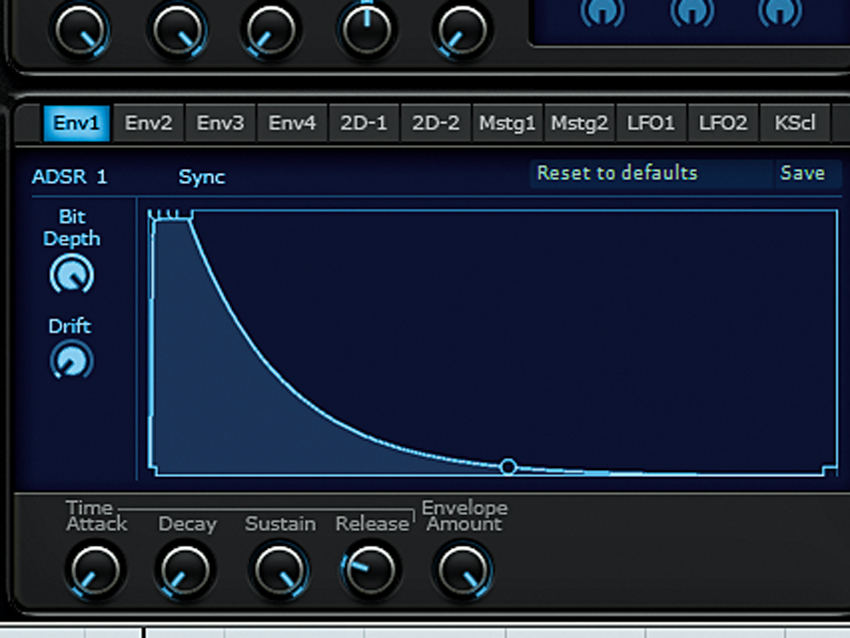
Step 10: Our sound should be exceptionally atmospheric now. Still, it can be better. Click over to the synth’s Edit page, give the Amp envelope’s Attack a nudge and crank the Release up past halfway. Reduce the Filter Cutoff to 53, then boost the Filter Envelope’s Attack, Decay and Release stages even more, before bringing the Sustain down.
Limiting
Step 11: With the worst offending peaks already softened by the saturation, a limiter works perfectly to further tighten any unruly peak transients. Here we're using an Input of 8dB and an Output of 3dB, which has given us about 4.5dB of gain reduction. We tried the release on Auto mode out of pure curiosity and it sounds acceptable, so we’ll go with it.
Finally... a little reverb
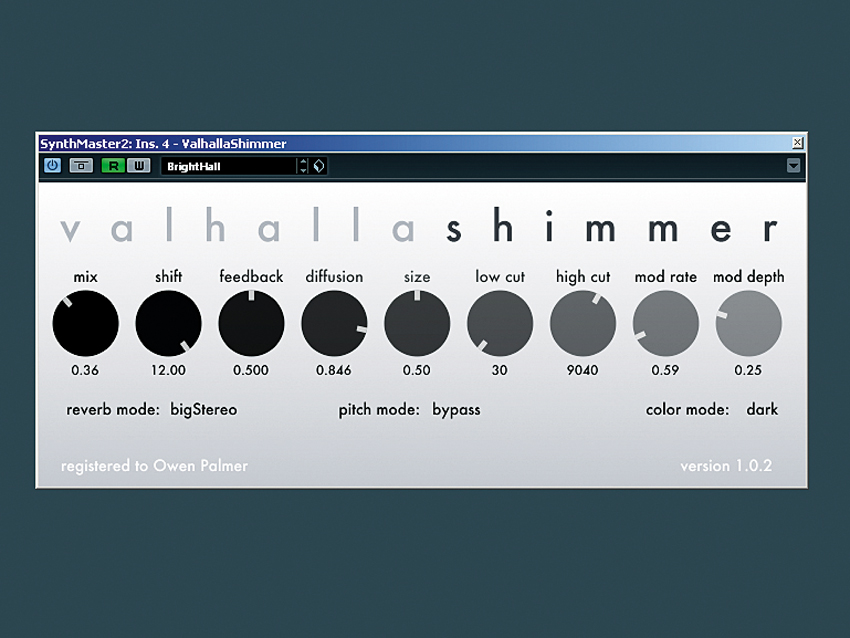
Step 12: Valhalla DSP’s Shimmer is the daddy of long, evolving, reverberant textures. The BrightHall preset gets us into the right zone, but we prefer it with Reverb Mode set to BigStereo and Color Mode set to Dark. We automated the Mix knob because the patch sounds better with less reverb when it is brighter.
Liked this? Now read: How to sound like a pro artist in your DAW

Computer Music magazine is the world’s best selling publication dedicated solely to making great music with your Mac or PC computer. Each issue it brings its lucky readers the best in cutting-edge tutorials, need-to-know, expert software reviews and even all the tools you actually need to make great music today, courtesy of our legendary CM Plugin Suite.
