How to make a Rihanna S&M-style synth sound

Pulse Width Modulation excites us
We’re going to recreate that big stack synth sound that sits alongside the very basic drum track in Rihanna’s 2011 single S&M.
The key to the sound is the synth technique of Pulse Width Modulation (PWM). In the realm of analogue synthesis, this is most often applied to an oscillator’s square wave, effectively changing the width of the ‘square’ under control of a modulation source. If this modulation source is an LFO with its rate pushed up to around 5Hz, then there is a noticeable thickening - much like doubling a sound.
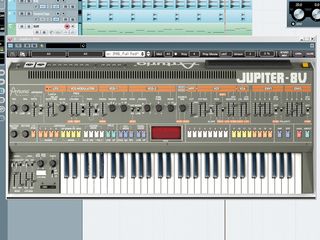
For this example we’ve turned to Arturia’s Jupiter-8V to deliver the starting point. A key aspect of the riff is that the bass follows the higher elements, and for this we’ve added some low-end from TAL’s NoiseMaker (a good free synth). Further layering is achieved with Steinberg’s Prologue (another analogue-style synth), and this is all topped-off with some reverb, compression and a little overall dynamic control.
A video guide to getting the sound is below - read on for a step-by-step walkthrough.
NEXT: Jupiter-8V main riff
Jupiter-8V main riff
Step 1: Starting with a basic kick and snare beat at the appropriate tempo, we load up Jupiter-8V and with a basic ‘vanilla’ patch: Oscillator 1 set to sawtooth, filter open and amplitude envelope set to sustain only - quick attack and release. We use this to play the basic riff. Some MIDI note editing may be required - pay attention to the different quantise and note length values.
Now we need to introduce the basic character of the sound to the mix. Using Oscillator 2 set to a square wave (mixed 50/50 with the first oscillator) ensure that PWM level is modulated by the LFO (in the VCO Modulator section) and push up the PWM Modulation Amount to get a nice fast ‘fuzzy wobble’.
A subtle stereo effect can be added by inserting a delay across the synth’s track. Use small but varying amounts for the left and right channels, and keep the feedback set to zero.
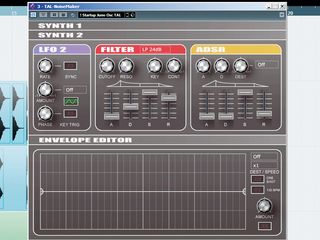
TAL NoiseMaker bass
Step 2: Something of particular note with this track is that the bassline tracks the riff exactly. In other words, in much of the track the music is made-up almost entirely of a single note riff (playing at various octaves, with different sounds).
So next we dial up TAL’s NoiseMaker plug-in and create a patch with two slightly detuned oscillators and large amounts of low-pass filtering. This gives us a warm bass sound that will sit under the Jupiter part well.
The best way to create this part is to copy the MIDI notes to a new track that’s routed to NoiseMaker. This allows you to bring the low-end in or out of the track, giving extra flexibility when putting together a meaningful arrangement. However, there’s nothing to stop you routing all the layered elements to a Group/Buss Channel if you need overall control of the riff once it’s complete.
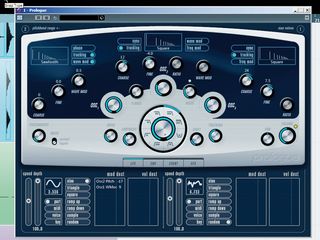
Layering with Prologue
Step 3: The next piece of the jigsaw is yet more layering. This time, we’re using Cubase’s Prologue. Prologue has three oscillators, and what we’re doing is to set each to play in a different octave: Oscillator 1 is the lowest (and loudest); Oscillator 2 is an octave above; and Oscillator 3 is an octave above that.
Osc 1 uses a sawtooth waveform with PWM enabled (or at least Prologue’s version of it) and is modulated by an LFO. The same LFO is used to add some subtle vibrato to Osc 2, while both Osc 2 and 3 are detuned slightly in relation to Osc 1, which adds thickness to the sound. The square waves used by Osc 2 and 3 give a hollow character to the sound that doesn’t get the way of the warmer/brighter Saw of Osc 1.
Finally, a spare envelope is used to introduce a simple white noise pulse to the attack of each note to give the riff extra bite.
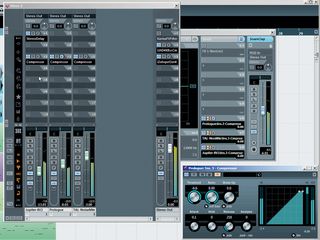
The final layer and processing
Step 4: To round things off, we’ve made a copy of the original Jupiter-8V track and transposed the new version up an octave to bolster the layering effect. Next, we configure a reverb to use as a send effect; this can be applied to the Jupiter and Prologue elements (but not the NoiseMaker bass).
Next, we apply compression across all three main synth outputs, but switch them to external sidechain mode. By routing a bit of both the kick and snare to the sidechain, a small amount of gain reduction will happen on each rhythmic hit, freeing-up a few extra dB in the mix.
Lastly, and mainly to get an idea of how all the elements sit together, we apply some processing to the main output in the form subtle buss-compression for flavour, and heavy limiting for level maximisation.
Liked this? Now read: How to sound like a pro artist in your DAW

Future Music is the number one magazine for today's producers. Packed with technique and technology we'll help you make great new music. All-access artist interviews, in-depth gear reviews, essential production tutorials and much more. Every marvellous monthly edition features reliable reviews of the latest and greatest hardware and software technology and techniques, unparalleled advice, in-depth interviews, sensational free samples and so much more to improve the experience and outcome of your music-making.

"If I wasn't recording albums every month, multiple albums, and I wasn't playing on everyone's songs, I wouldn't need any of this”: Travis Barker reveals his production tricks and gear in a new studio tour

“My management and agent have always tried to cover my back on the road”: Neil Young just axed premium gig tickets following advice from The Cure’s Robert Smith

"If I wasn't recording albums every month, multiple albums, and I wasn't playing on everyone's songs, I wouldn't need any of this”: Travis Barker reveals his production tricks and gear in a new studio tour

“My management and agent have always tried to cover my back on the road”: Neil Young just axed premium gig tickets following advice from The Cure’s Robert Smith

