How to make a dubstep snare sound in Reason 5's Kong Drum Designer
Getting started
Step 1: If you’re making tear-out dubstep, at some point you’re going to need a big, splashy snare sound such as this one:
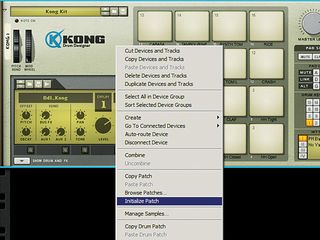
Getting your drum hits sounding right is a crucial part of dance music production, but thankfully, Reason 5’s Kong Drum Designer has everything you need to get the job done. Start by adding Kong to your rack, then right-click it and select Initialize Patch.
Browsing
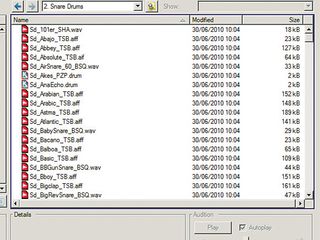
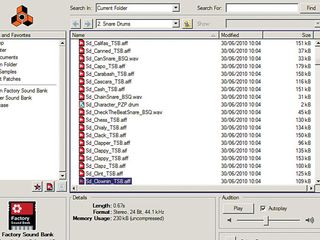
Step 2: Kong features various ways to make drum sounds, including some great physical modelling capabilities, but for a full-on dance track, samples are the way to go. Right-click the first pad and select Browse Drum Patches. Open Reason Factory Sound Bank/Kong Patches/ Kong Sounds & Samples/Snare Drums. As you can see, Reason has a wide range of snare samples to choose from.
Choosing a snare
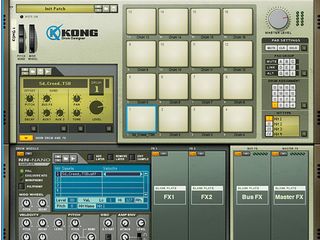
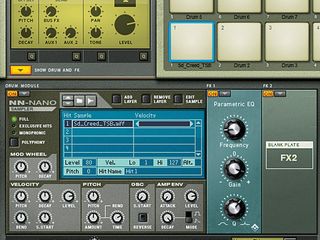
Step 3: We want something big and meaty to make the low part of our drum, so double-click Sd_Creed_TSB. Click pad 1 to hear how this sounds. This snare is nice and punchy with a decent low end, and we can use Kong’s processing to really make the most of it. Click the Show Drum and FX button in the bottom left-hand corner to bring up the rest of the interface.
EQ
Step 4: We’re going to use this snare to provide the bottom end of our overall snare sound, so we want to bring out its punchy lows. Click the triangle dropdown button in the FX1 panel and select Parametric EQ. Set the Frequency to 25, the Gain to 109 and the Q to 81.
Layering
Step 5: This drastically boosts the low end, but let’s layer some more snares on top to get a fuller sound. Right-click pad 2 and select Browse Drum Patches, then select Sd_Clownin_TSB from the Kong snare library.
Linking the snares
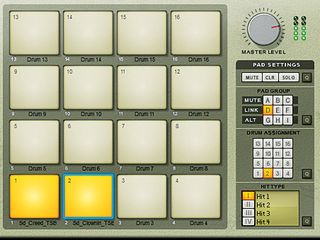
Step 6: We want the two snare sounds we’ve loaded to play at the same time when we trigger the snare. We can do this by linking them. In the Pad Group panel, activate the D button, then select pad 1 again and activate the D group for that as well. Now when you hit pad 1 or pad 2, both snares will play in unison.
Balancing act
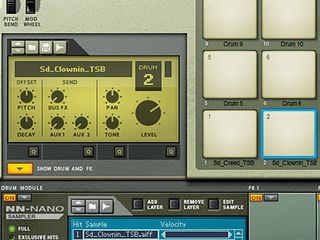
Step 7: Likewise, when you trigger either sound in Reason’s sequencer, both sounds will play at the same time. The addition of Sd_Clownin_TSB gives the overall sound a more interesting feel in the mids, and you can control the balance between pad 1 and pad 2 using their Level knobs. Turn pad 2’s Level down just a touch.
Adding reverb
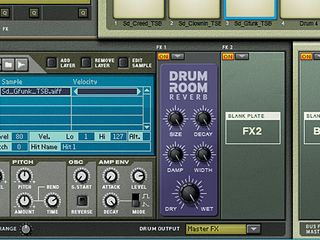
Step 8: Sounds good, but we’re still missing something - a huge, washy reverb. Select pad 3 and load the Sd_Gfunk_TSB snare from Kong’s library. Assign this to the D group so that it plays along with the others. Set FX1 to Room Reverb, with all the settings turned up to maximum. Crank the Dry/Wet balance right up so we only get the reverb without the unprocessed sound.
Filter and compressor
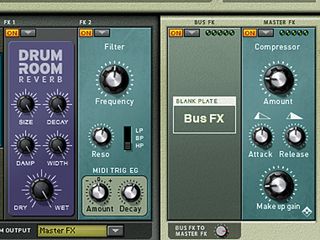
Step 9: We want to high-pass this sound to cut out the low frequencies, so set FX2 to Filter and set the mode to HP and the Frequency to 67. Turn the Level of this sample down to 54 so that it just adds a layer of reverb on top of the other sounds rather than dominating them. For the final touch, set the Master FX to Compressor to help glue the sounds together. (Right-click here to download our finished Kong patch.)
For more Reason tutorials, get the latest Computer Music Special (CMS45) - Reason: The Expert Guide - which is on sale now.
Liked this? Now read: A brief history of Propellerhead Reason and Record
Connect with MusicRadar: via Twitter, Facebook and YouTube
Get MusicRadar straight to your inbox: Sign up for the free weekly newsletter

"If I wasn't recording albums every month, multiple albums, and I wasn't playing on everyone's songs, I wouldn't need any of this”: Travis Barker reveals his production tricks and gear in a new studio tour

“My management and agent have always tried to cover my back on the road”: Neil Young just axed premium gig tickets following advice from The Cure’s Robert Smith

"If I wasn't recording albums every month, multiple albums, and I wasn't playing on everyone's songs, I wouldn't need any of this”: Travis Barker reveals his production tricks and gear in a new studio tour

“My management and agent have always tried to cover my back on the road”: Neil Young just axed premium gig tickets following advice from The Cure’s Robert Smith
