How to make a dubstep beat
Essential programming techniques revealed
The syncopated rhythms of dubstep are no longer the exclusive preserve of underground producers - they've been adopted by other genres and made their way into the mainstream. We're going to show you how to create a dubstep beat using Reason, a demo of which can be downloaded here.
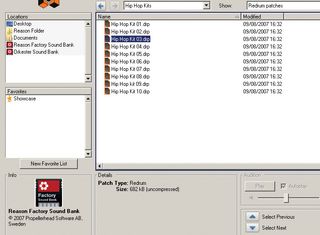
Step 1: The first thing you need to do when creating a dubstep beat is get your hands on some drum sounds! For a unique vibe, you can source each hit individually, but to keep things simple, we're going to use Redrum's preset Hip Hop Kit 03 here. Set Reason's Tempo to 140bpm.
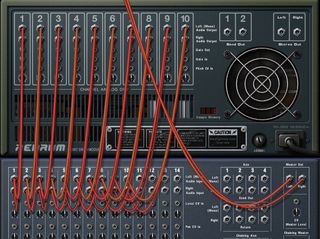
Step 2: Create a Mixer and connect each of the drum outputs individually. This enables you to process each one separately, which is useful if you want to apply EQ or reverb to a particular sound but not the whole mix.
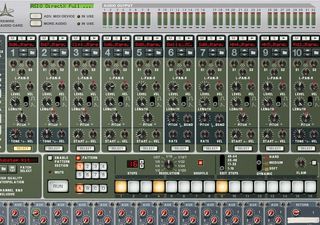
Step 3: Using Redrum's step sequencer, start by programming a kick drum rhythm. Place triggers on the first, fourth and ninth steps of the step sequencer. Currently the kick is a little long for our needs, so turn down the Length knob as we have here.
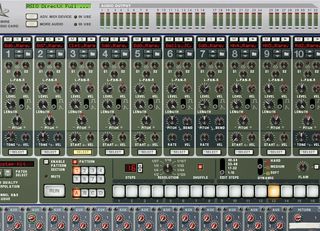
Step 4: Next, we need a snare. The Hip Hop 03 kit has snares loaded into sample slots 3 and 7. Individually they're OK, but they're better together, so trigger them both on the 13th step. The snare in slot 7 is a bit long, though, so reduce its Length.
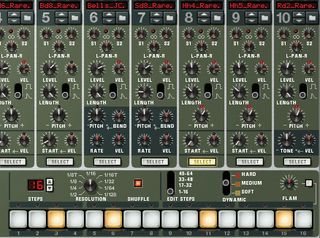
Step 5: Hi-hats are up next. Select slot 8 and trigger it on steps 3, 6, 11 and 15, and turn down its Length control, as shown. Also, trigger slot 9 on step 14 to create a bit of hi-hat interplay at the end of the bar.
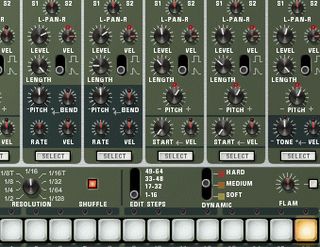
Step 6: For the final touch, select slot 4 and put a trigger on step 16. This thin little snare gives a bit more of a skippy feel at the end of the bar. We now have a basic beat, but it's not terribly funky at the moment. Activate Reason's Shuffle by pressing that button on Redrum.
Get the MusicRadar Newsletter
Want all the hottest music and gear news, reviews, deals, features and more, direct to your inbox? Sign up here.
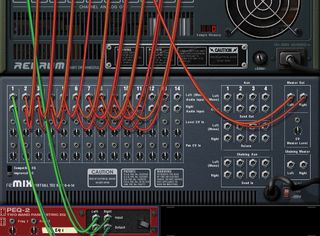
Step 7: Let's tailor the drum sounds a little further. Put a PEQ-2 in between Redrum slot 1's output and the Mixer. Adjust the first band to Freq 0, Gain -8, then activate the second band and set it to Freq 16, Gain 14. This cuts out some of the really low frequencies where we want the sub bass to be, yet boosts the frequencies in the 80-100Hz region.
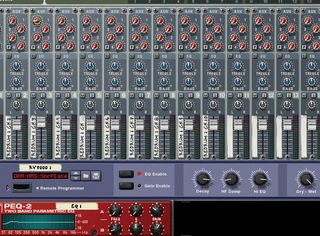
Step 8: To give some of the snare hits extra emphasis, let's use a reverb. Right-click the Mixer and select Create»RV7000 Advanced Reverb. Load the DRM AMS SnrPlate preset. Turn the Decay to around 3 o'clock and use the Aux1 level on channel 3 in the Mixer to apply reverb only to certain snare hits.
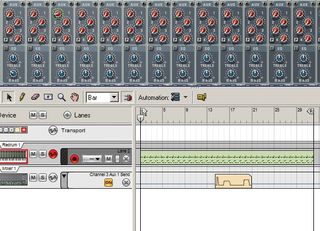
Step 9: To automate this, right-click the Mixer and select Create Track for Mixer 1. Hit record on the transport bar to capture your movement of the Aux1 knob. To get the pattern into the sequencer, select the Redrum track in the Mixer, then right-click Redrum and select Copy Pattern to Track. Now just deactivate Enable Pattern Selection.
Computer Music magazine is the world’s best selling publication dedicated solely to making great music with your Mac or PC computer. Each issue it brings its lucky readers the best in cutting-edge tutorials, need-to-know, expert software reviews and even all the tools you actually need to make great music today, courtesy of our legendary CM Plugin Suite.

"If I wasn't recording albums every month, multiple albums, and I wasn't playing on everyone's songs, I wouldn't need any of this”: Travis Barker reveals his production tricks and gear in a new studio tour

“My management and agent have always tried to cover my back on the road”: Neil Young just axed premium gig tickets following advice from The Cure’s Robert Smith

