How to make a Daft Punk One More Time-style vocal effect
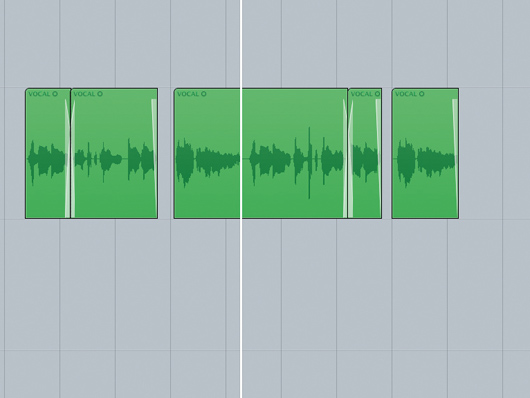
Cleaning up the vocal
Step 1: Start by cleaning up the vocal take – we need to remove all breathing between the words. This will make it sound less human and more robotic, especially once all the effects are in place. It’s safer to do a bit of manual editing on the audio file, instead of trying to duck the breathing with a gate
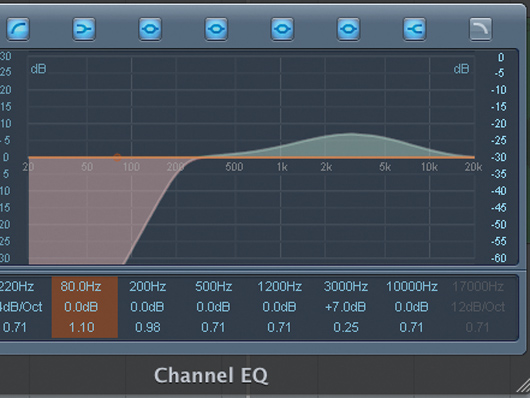
EQ
Step 2: The vocal is very bright and metallic sounding, with very little going on in the bass, so it’s time to apply some EQ. Use a high-pass filter to roll off the bass around 230Hz. Next, boost the mid-range by several dBs around 2.5kHz-3kHz with a wide band parametric EQ. It should be sounding a little sharp and edgy by now.
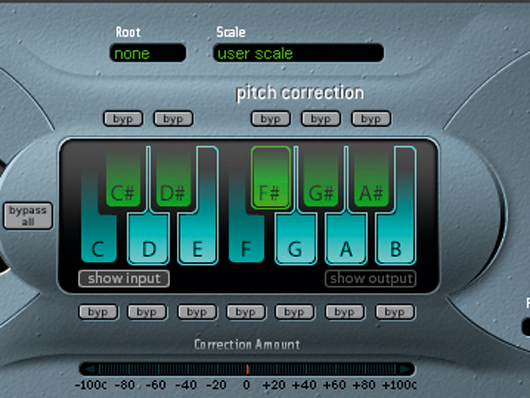
Tuning
Step 3: With the basic tone in place, we move on to the tuning stage. Insert Auto-Tune or Logic’s Pitch Correction plug-in. The first thing to do here is set the scale and notes to match the key of the track. One More Time uses the D major scale – but the melody line doesn’t use the 7th note, so de-select it in the interface.
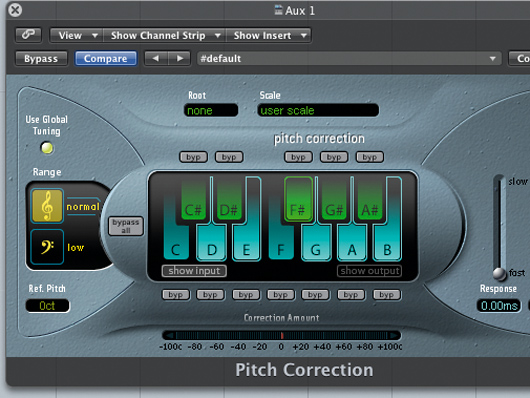
Going to the limit
Step 4: To help the plug-in track the incoming vocal, we need to select the best option for ‘input type’ or ‘range’. Set this to Alto/ Tenor on Auto-Tune, or Normal on Logic’s Pitch Correction. Now it’s time to push the effect to the limit, so locate the tracking or response parameter and set it to the quickest value. Notice how the pitch should be jumping between notes instead of sliding.
Compression and limiting
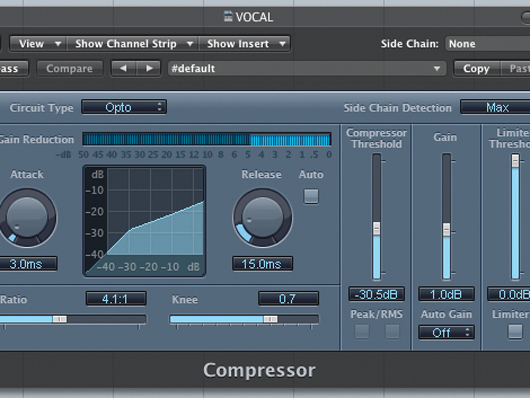
Step 5: Now it’s time to squash all the dynamics out with some heavy compression and/or limiting. The Opto mode on Logic’s compressor is ideal as it has a very fast reaction time. Set the attack to 3ms and the release to 15ms – Ratio and Threshold are around mid-way on both. If there’s still some life left, smash it with a brick wall limiter so it’s at a constant volume level.
Effects
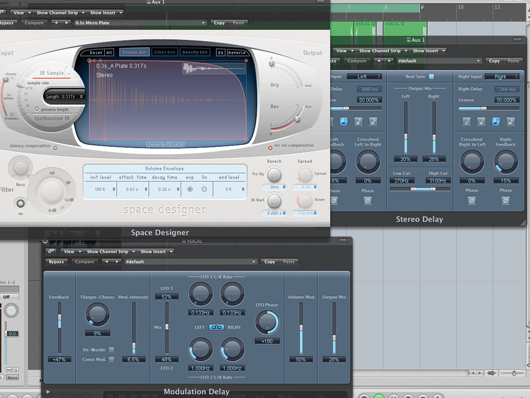
Step 6: Add some subtle flanger/modulation delay - this will accentuate the metallic quality. A little bit of delay and reverb will finish off the sound and help it sit in the mix. Use the high- and low-pass filters on the delay to mellow out the tone. For the reverb, try a very short plate around 0.3secs long. This will make it a bit wider and bring out the harmonic quality of the flanger.
For more tips on recreating classic sounds, check out the September issue of Future Music (FM217), which is on sale now.
Future Music is the number one magazine for today's producers. Packed with technique and technology we'll help you make great new music. All-access artist interviews, in-depth gear reviews, essential production tutorials and much more. Every marvellous monthly edition features reliable reviews of the latest and greatest hardware and software technology and techniques, unparalleled advice, in-depth interviews, sensational free samples and so much more to improve the experience and outcome of your music-making.
