How to make a Calvin Harris-style '80s lead synth sound
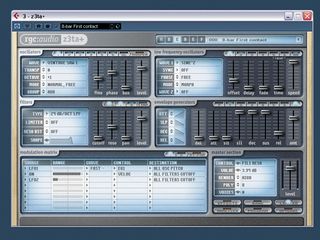
Getting started
Step 1: The kind of lead synth sound that was ‘acceptable in the 80s’ is relatively easy to program – the quality of the sound will depend on the synth that you use to create it. We’ve played it safe and gone for the mighty Z3TA+ (click here to download the demo).
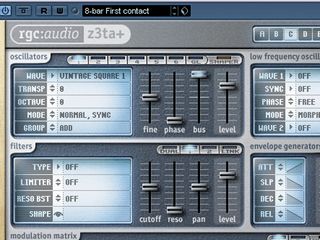
Oscillator 1
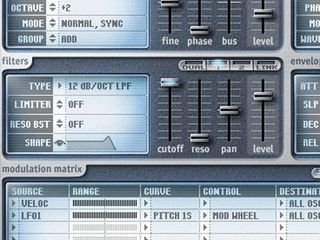
Step 2: Load Z3TA+ in your DAW. Click the Program button and select Initialize, which resets the synth to its default state. Set the Wave shape of Oscillator 1 to Vintage Square 1, and whack the Bus slider all the way up so that the oscillator is routed to Filter 1. To make the sound sustain indefinitely, set the Sus (sustain) to full in the Envelope Generator panel.
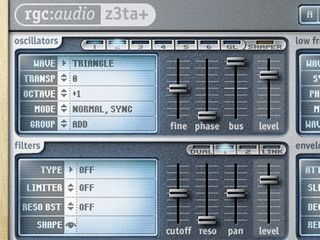
Oscillator 2
Step 3: To improve the quality of Z3TA+’s output, change the Render mode in the Master Section to High. Select Oscillator 2, set it to the Triangle Wave shape and route it to Filter 1 by raising the Bus slider. We want this sound to sit an octave above the square wave, so set Octave to +1.
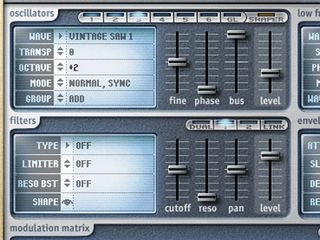
Oscillator 3
Step 4: Adding the triangle oscillator thickens up the sound. Let’s emphasise this by adding another one. Select Oscillator 3, route it to Filter 1, set Octave to +2 and choose Vintage Saw 1 for the waveshape. Finally, turn its level down to about 30%.
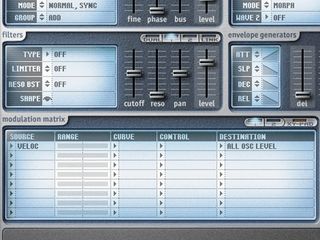
Modulation Matrix
Step 5: We’ve now got a tone that will sound rich at any pitch. It’s not very expressive though, so let’s sprinkle some of that 80s magic on it using the Modulation Matrix. On the first row, set the Source to Veloc, the Destination to All Osc Level and the Range to 0-100.
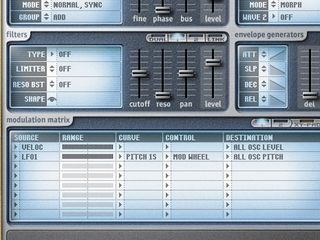
LFO modulation
Step 6: On the next row of the Matrix, set the Source to LFO1, Destination to All Osc Pitch, Curve to Pitch 1s, and Control to Mod Wheel. Again, set the Range to 01-100. This tells Z3TA+ that we want LFO1 to modulate the pitch by a semitone, and that we want to control the modulation with the mod wheel.
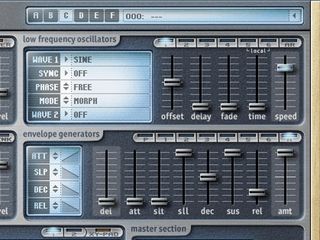
LFO activation
Step 7: For all of that to make a difference, we have to turn LFO1 on. The Low Frequency Oscillator panel is in the top right-hand corner. Set Wave 1 to Sine, and turn the Speed up to 9.4Hz. Play a few notes while giving it some on the mod wheel – instant '80s!
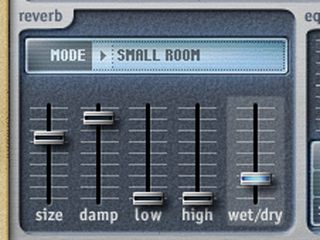
Reverb
Step 8: There’s still room for improvement, however. Click the Effects button to bring up the effects page, and set the reverb Mode to Small Room. Turn up the Size, Damp and Wet/Dry levels as we’ve done here. Adding reverb gives the sound more of an ‘organic’ quality.
Finishing off
Step 9: While we’re on the effects page, set the Distortion Mode to Soft Drive, Dest (destination) to Filter 1, and turn the Level all the way up. Click the Effects button again to return to the main screen, then set the Filter Type to 12dB/Oct LPF and turn the Cutoff all the way up. Activating the filter means we can hear the distortion, which brings out the sound’s harmonics nicely.

Computer Music magazine is the world’s best selling publication dedicated solely to making great music with your Mac or PC computer. Each issue it brings its lucky readers the best in cutting-edge tutorials, need-to-know, expert software reviews and even all the tools you actually need to make great music today, courtesy of our legendary CM Plugin Suite.

"If I wasn't recording albums every month, multiple albums, and I wasn't playing on everyone's songs, I wouldn't need any of this”: Travis Barker reveals his production tricks and gear in a new studio tour

“My management and agent have always tried to cover my back on the road”: Neil Young just axed premium gig tickets following advice from The Cure’s Robert Smith

"If I wasn't recording albums every month, multiple albums, and I wasn't playing on everyone's songs, I wouldn't need any of this”: Travis Barker reveals his production tricks and gear in a new studio tour

“My management and agent have always tried to cover my back on the road”: Neil Young just axed premium gig tickets following advice from The Cure’s Robert Smith


