How to make a beat in Korg iElectribe for iPad
Getting started
Step 1: Korg’s iElectribe is a must-have for any iPad musician, so if you haven’t yet bought it from the App Store, we recommend you do so.
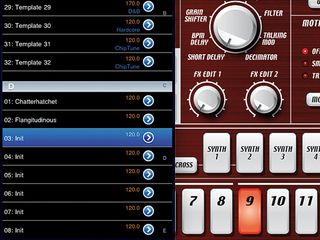
Fire it up and tap the orange display to call up the pattern browser. Scroll down until you see the Init patterns. These are practically empty, consisting of only a kick drum on every downbeat.
Synth 1
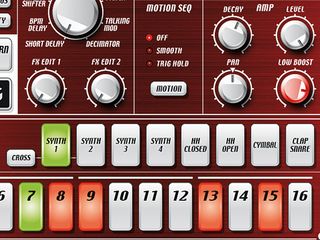
Step 2: With the pattern running, notice that the Synth 1 button is lit up green, and also that there are four illuminated buttons in your pattern row at the bottom. Touch buttons 7, 8 and 15. They’ll light up and you’ll hear your kick drum playing those steps as the pattern cycles.
Now let’s beef up the bass a little. In the Amp section in the middle-right of the GUI, bring the Low Boost knob up a touch.
Synth 2
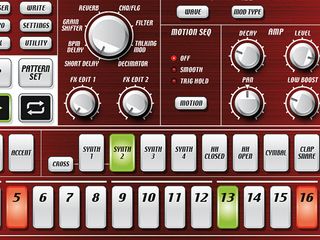
Step 3: Touch the Synth 2 button to select it. The sound will be triggered when you do - it’s a classic 808-style snare sound. As you can see, all of your pattern steps are now white - that’s because there are no snares programmed for this pattern. Touch steps 5, 13 and 16 to give your pattern a backbeat with a pickup beat just before it cycles back to the beginning. Easy and effective.
Real-time tweaking
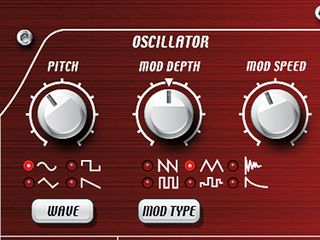
Step 4: iElectribe really comes alive when you start messing about with the parameters in real time. Select Synth 4 and add in some busy hits by dragging your finger across sections of the pattern buttons. When you have a frenetic pattern, have a play with the Pitch knob in the Oscillator section. Drag it across its entire range to hear the effect on the sound and then bring it back to around 048.
Automation
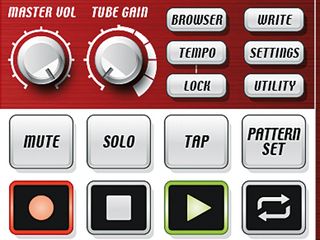
Step 5: Our Synth 4 sound ranges from sine kicks to electronic bleeps, and we can automate some of that motion. At the middle-left is a standard set of transport controls. Tap the Record button to engage iElectribe’s Motion recording. Now use your finger to swing the Oscillator Pitch knob from where it’s sitting to around 79 and wiggle it about in between. Your actions will be written into the pattern. Tap the Record button to disengage it.
Closed hi-hats
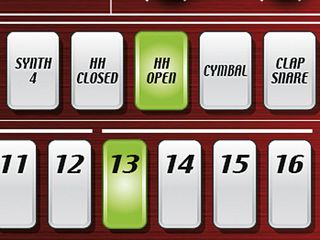
Step 6: Now let’s add some closed hi-hats. Touch the HH Closed button and write a busy pattern into the sequence. Select the HH Open sound and write some hits into the steps where there were no closed hats sounding. Now we’ve got a pretty good electronic beat going, so let’s add a few more sounds to spice it up before moving on to the effects section.
Claps
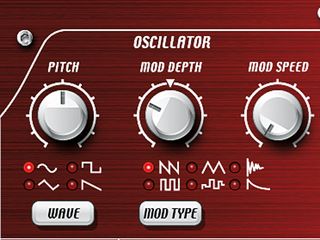
Step 7: Tap the Clap Snare button to select it and add a couple of clap hits on steps 5, 11 and 15. Those clap sounds can get stale pretty quickly, so let’s add some interest with iElectribe’s Motion sequencing. With your pattern playing, move the Oscillator’s Mod Depth knob. Quickly swing it from nine o’clock to about two o’clock and then back to the middle. When you like what you hear, record it!
Saving
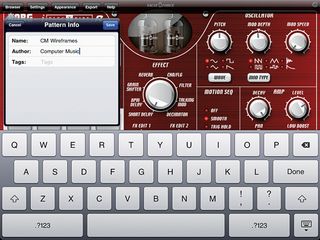
Step 8: Let’s save our handiwork. Tap the Write button and the browser will appear. Touch the patch slot into which you’d like to save the pattern. You’ll be met with a pop-up asking you to confirm and offering some options. Choose Write & Edit Info. An info box will appear, where you can edit the pattern’s name and author, and add any comments using the iPad’s keyboard. Do so and touch Save.
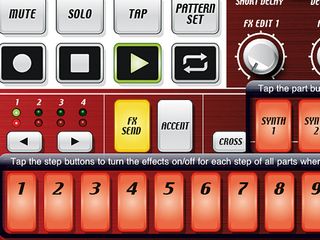
FX
Step 9: Let’s fire up our pattern again. We’re really quite pleased with this - the sound is far more malleable than that of a sample-based beatbox, and there’s still so much more we can do! For example, the effects processor. It’s simple and the options are rather limited, but you can do a lot with it by recording some real-time tweaks. Click on the FX Send button - everything will light up.
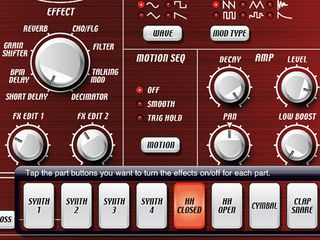
Short Delay
Step 10: Swipe your finger across all the instrument buttons and pattern steps to deactivate the effects sends for those sounds and steps. Select HH Closed and tap the first five buttons in your pattern. Now look to the Effect section. FX Edit 1 and FX Edit 2 are turned all the way down. Turn them up to around 10 o’clock and you should hear a metallic echo. That’s because Short Delay is selected.
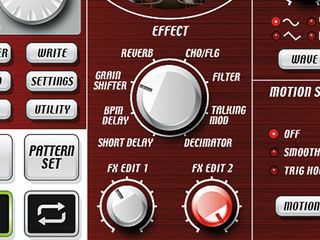
Grain Shifter
Step 11: Use the big Effect knob to select a different effect. Try Grain Shifter. Tap the Synth 4 button to send the Synth 4 sound through the effects as well. Touch steps 10, 11, 12, 13 and 14 of your pattern to send them to the effect also. Now have a play with the FX Edit 1 knob. This controls the speed of the Grain Shifter effect and can make some crazy sounds! Try FX Edit 2 next - this controls the effect balance.
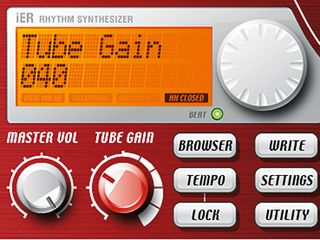
Tube Gain
Step 12: Click Record and record some real-time spins of those knobs. You should now have a truly diabolical sound, and if you want even more destruction, give the Tube Gain knob a bit of a nudge. As you’d expect, this will impart a bit of high-frequency roll-off and not-so-subtle distortion to your pattern.
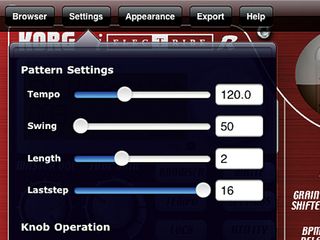
Pattern Length
Step 13: You probably know how to change the pattern’s tempo, but to change the length, use the Settings. Tap the Settings button to adjust such things as the built-in swing, knob operation and pattern length. Change the Length to 2 - it now plays the pattern we made, followed by another bar of the basic kick pattern. You can multiply the basic pattern length of 16 steps by a maximum of four. Set it back to one bar.
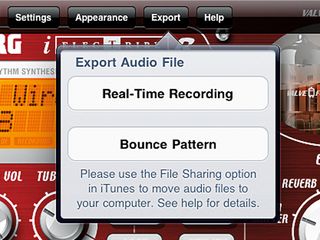
Audio export
Step 14: If you want to save an audio version of your pattern, a recent update makes it possible to export it to your computer via iTunes. Tap the Settings button. An Export option appears at the top and you can bounce a copy of the pattern or record a real-time performance. After that, sync your iPad, to export the audio file to iTunes.
Liked this? Now read: The best iPad music making apps
Connect with MusicRadar: via Twitter, Facebook and YouTube
Get MusicRadar straight to your inbox: Sign up for the free weekly newsletter

Computer Music magazine is the world’s best selling publication dedicated solely to making great music with your Mac or PC computer. Each issue it brings its lucky readers the best in cutting-edge tutorials, need-to-know, expert software reviews and even all the tools you actually need to make great music today, courtesy of our legendary CM Plugin Suite.
“It’s a mighty emulation of an emulation of an emulation”: GForce Novation Bass Station review

“I want to shout from a mountain top about this incredible technology”: Is Dreamtronic's Synthesizer V Studio 2 Pro really the first artificial vocalist to finally nail the fake factor?

“It’s a mighty emulation of an emulation of an emulation”: GForce Novation Bass Station review

“I want to shout from a mountain top about this incredible technology”: Is Dreamtronic's Synthesizer V Studio 2 Pro really the first artificial vocalist to finally nail the fake factor?
Most Popular


