How to learn the basics of additive synthesis
Ableton Operator might be a predominantly FM instrument but it's ideal for getting to grips with additive synthesis, too
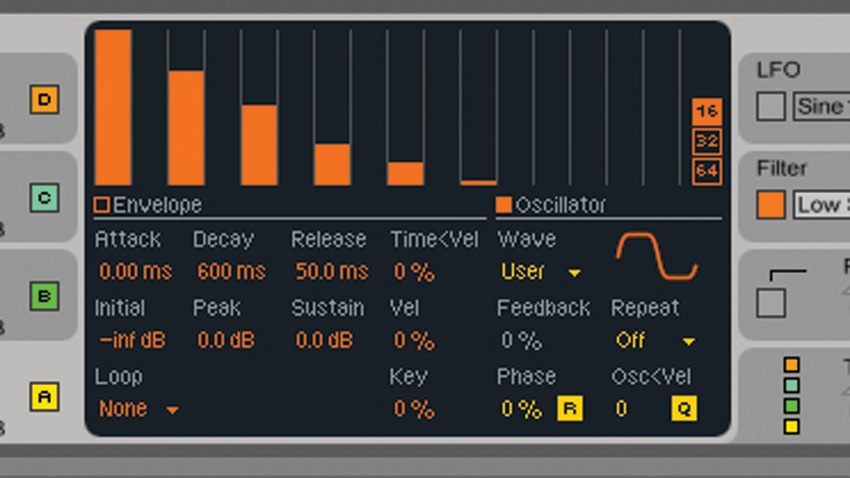
Getting to grips with additive synthesis at its most basic level is straightforward and, because quite a few synths have additive capabilities, you don't even need a dedicated additive-based instrument to get started.
We're going to use Ableton Live's Operator, which, while essentially a frequency modulation synth, also boasts a useful additive waveform editor, handy for making waveforms from scratch and editing the synth's library of included waveform shapes.
Operator's implementation of additive synthesis is quite straightforward and doesn't allow for modulation of partial levels in real time, but it's adequate for demonstrating the fundamentals of the technique. Building up harmonically complex waveforms is easy with the Oscillator editor page, and these can be used to create rich, evolving sounds when modulated by another of the synth's operators. In fact, modulate one additive waveform with another and you can create filth to rival the likes of FM8!
For more on additive synthesis, pick up Future Music 292, which is on sale now.
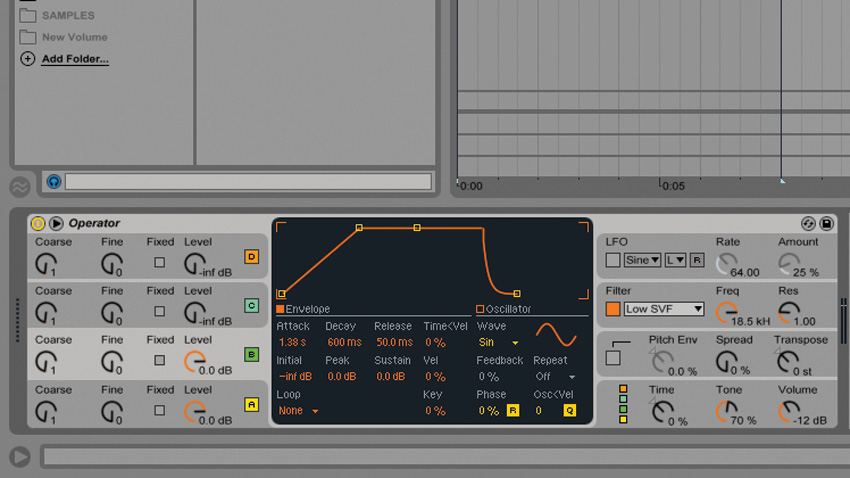
Step 1: Operator is Ableton's bread and butter FM synth, but unlike traditional FM synths, it has the ability to create and customise waveforms with additive synthesis. Load the synth up on a MIDI track and click the Oscillator button at the bottom of the envelope display.
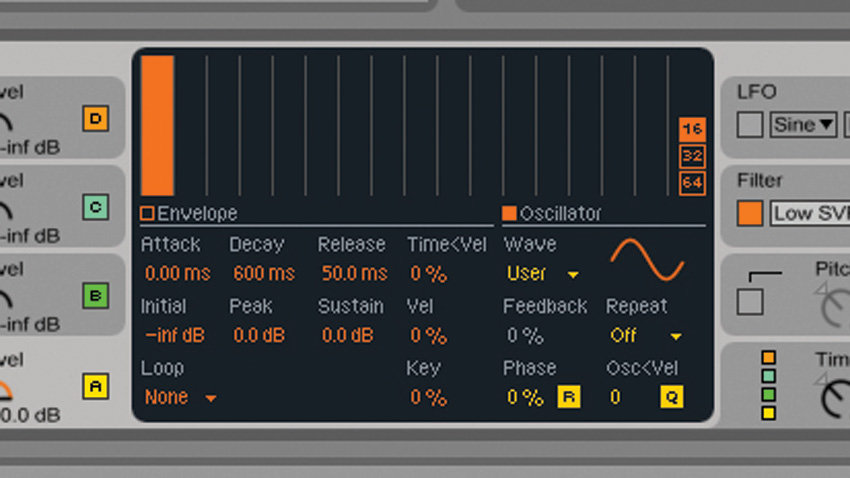
Step 2: In default mode, this displays all of the oscillator's 64 available bands. Currently, the oscillator is set to a sine shape, so only the first band is active. The additive display is pretty small, so click the 16 button at the right of the display to zoom in on the first 16 bands.
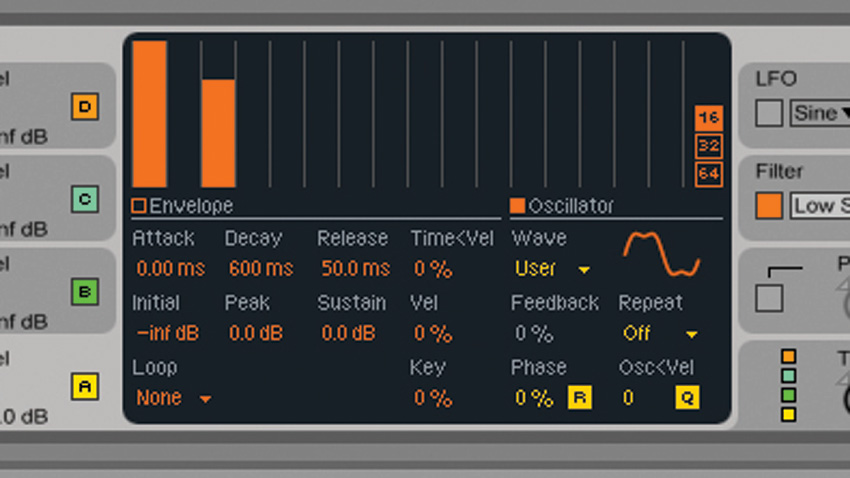
Step 3: Let's edit the oscillator's waveform by adding some energy to the third harmonic. Play a note and drag the third column about three-quarters of the way up. You'll see the visual representation of the waveform at the bottom right change slightly, and hear the sound become more organ-like.
Get the MusicRadar Newsletter
Want all the hottest music and gear news, reviews, deals, features and more, direct to your inbox? Sign up here.

Step 4: Continue adding odd-numbered harmonics that get quieter. Our waveform begins to sound and look more like a square wave with each one we add. This is additive in a nutshell! With some synths, it's possible to vary the levels of these harmonics over time but in Operator they're static.
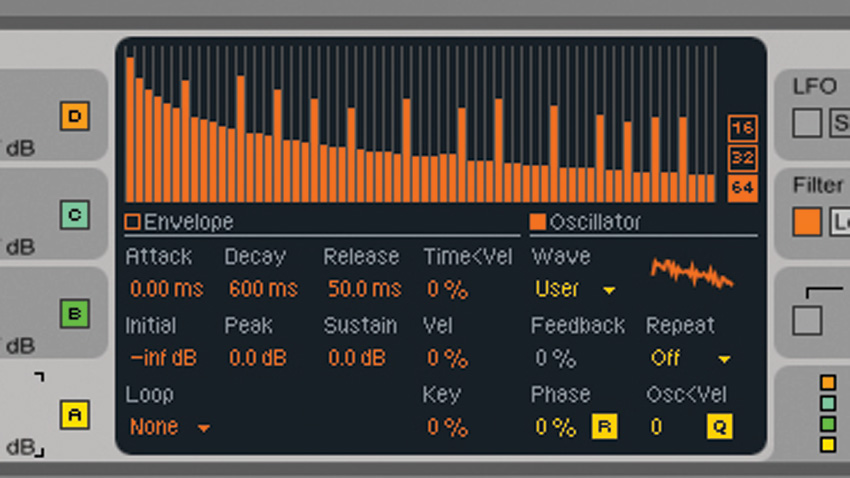
Step 5: By combining Operator's additive synthesis and FM capabilities, we can create some useful sounds. Click User under the Wave parameter and select Saw 64 from this list. This gives us a 64-band sawtooth wave. Noise up the waveform by increasing the volume of some arbitrary bands.
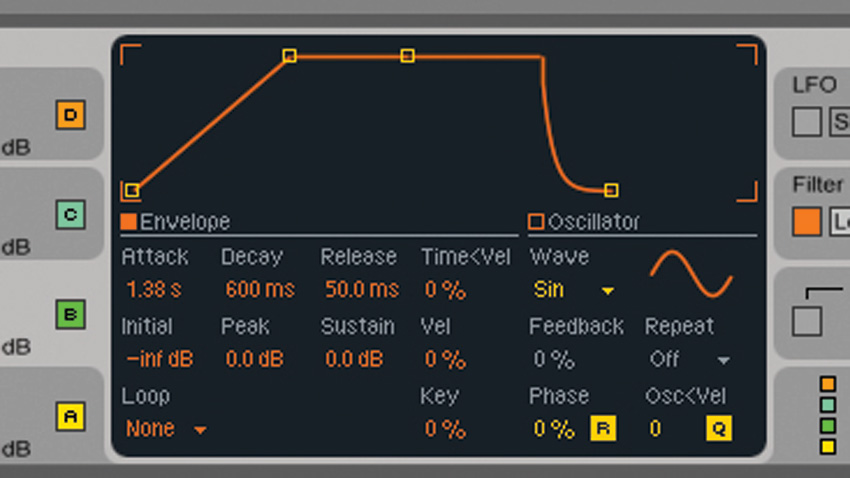
Step 6: Click operator B, set it to 0dB, and adjust its Attack time to 1.38 seconds. This causes operator B to frequency modulate the sawtooth, with the complexity of harmonics increasing as its amplitude level increases during the attack stage. This gives us a filthy sweep, ideal for a grungy bass sound.
Future Music is the number one magazine for today's producers. Packed with technique and technology we'll help you make great new music. All-access artist interviews, in-depth gear reviews, essential production tutorials and much more. Every marvellous monthly edition features reliable reviews of the latest and greatest hardware and software technology and techniques, unparalleled advice, in-depth interviews, sensational free samples and so much more to improve the experience and outcome of your music-making.
"If I wasn't recording albums every month, multiple albums, and I wasn't playing on everyone's songs, I wouldn't need any of this”: Travis Barker reveals his production tricks and gear in a new studio tour
“My management and agent have always tried to cover my back on the road”: Neil Young just axed premium gig tickets following advice from The Cure’s Robert Smith


