How to layer monstrously phat breakbeats
Layering is the key to creating phat breakbeats, but not everyone who tries this does it successfully. It's essential to make sure that the hits you use don't fall on the exact same frequency - we'll show you how to do this and build a beat that's bold and beefy.
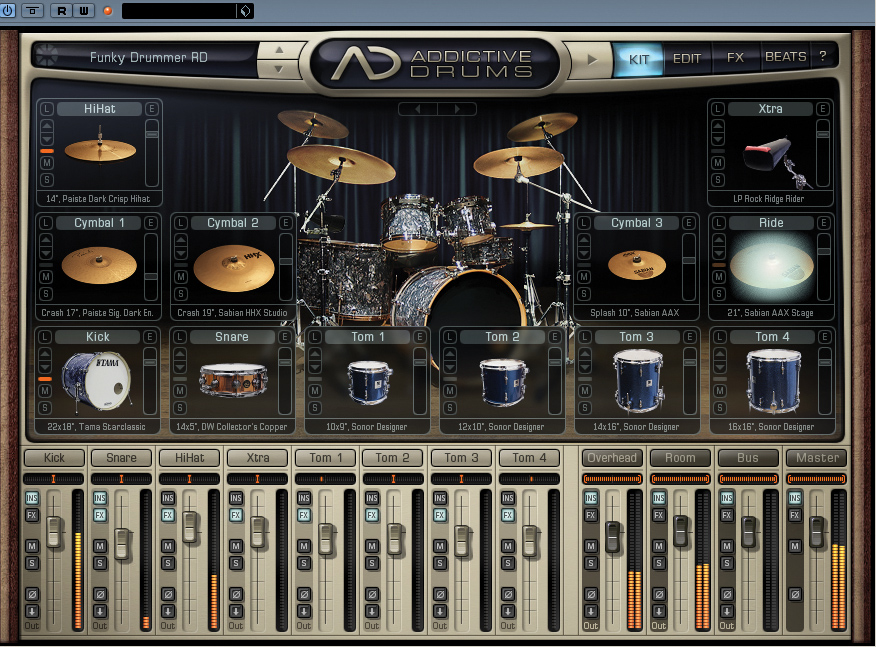
Step 1: We're going to layer up a beat from the ground up, and our first port of call is to find a kick drum - if necessary, we'll layer up more than one sound to create a fat kick. Good hits can come from a wide variety of sources, and here we're trying XLN Audio's Addictive Drums - just because we're making 'unreal' beats doesn't mean the hits can't come from a 'live' source.
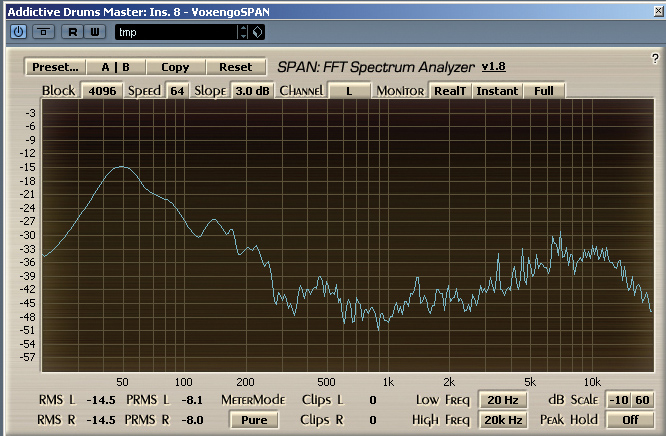
Step 2: Once you've got the kick playing, use a spectrum analyser to determine where it's peaking. We're using Voxengo's mighty (and free) SPAN, which clearly shows the kick pumping away at 50Hz. Just bear in mind that you don't want the frequency of the kick to clash with that of the bassline. Also remember that you can resample a drum sound and repitch it in a sampler, if needs be.
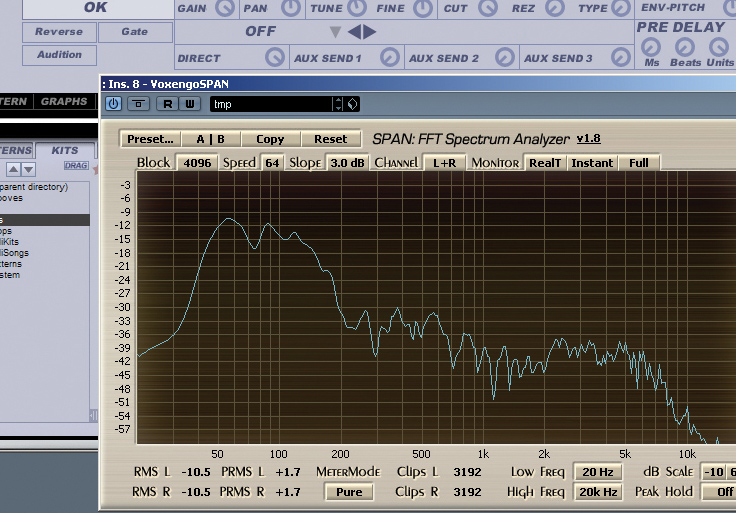
Step 3: Virtual drum machines are very useful for layering, as you can use the pitch controls to shift sounds into the desired frequency area. To reinforce the sound further, and make it punch, we're using a fat kick layer from FXpansion's Guru, which also allows for very fine adjustments to the amplitude envelope. Once the kick is sorted, use the same techniques for layering up a snare.
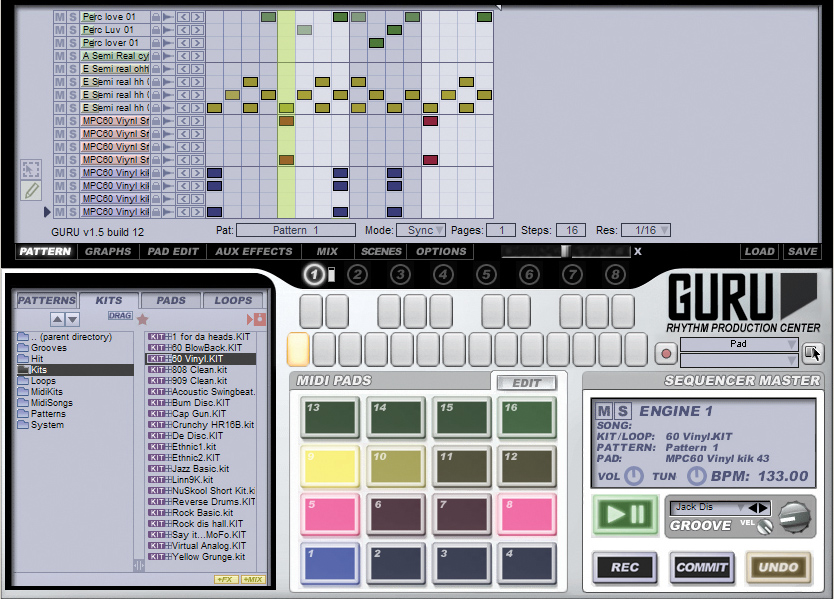
Step 4: Once you've got suitable kick and snare layers on the go, it's time to start sequencing the rest of your percussion. Guru is great for this and includes a nice selection of funky groove templates to shuffle your beats. Playing with the different velocity levels can add character by varying the sound of each hit.
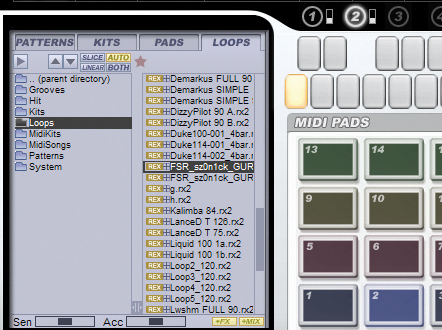
Step 5: So far, we've worked with single hits, but, to really give the drum beat a sense of size, depth and momentum, we're going to layer on an old breakbeat. Guru comes with its own loops, although if you're feeling adventurous, you could construct your own rhythm and then use the effects section to make it sound dated, as if it's been recorded from vinyl.
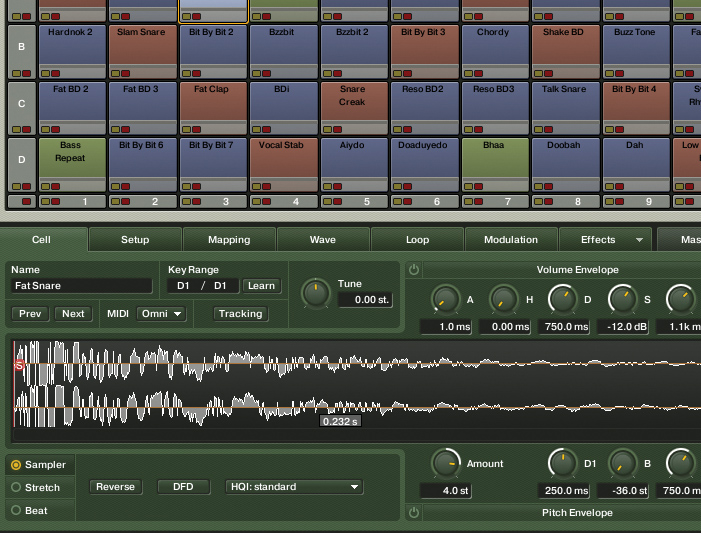
Step 6: We decide on a reverberated breakbeat sample. It's often a good idea to rearrange the breakbeat (by manually slicing it up or using tools such as ReCycle) to fit the beats of your single hits, for maximum punch. Furthermore, you can add cleaner layers on top of everything to brighten attack transients. We've called upon NI's Battery 3, which is bursting with glitzy percussive sounds.
Get the MusicRadar Newsletter
Want all the hottest music and gear news, reviews, deals, features and more, direct to your inbox? Sign up here.
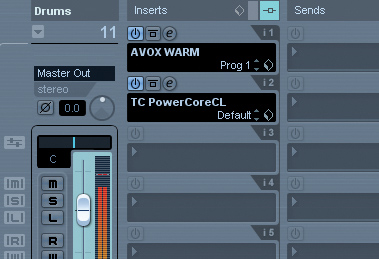
Step 7: Once you're satisfied that you have a nice, fat loop - with beefy kicks and snares, and a good sense of depth and clarity - you'll need to route all the layers to a bus channel. Here, you can apply subtle effects to help gel all the sounds together, to promote the illusion of one big, bad beat. We've used Warm from Antares and a TC Powercore compressor on our loop.
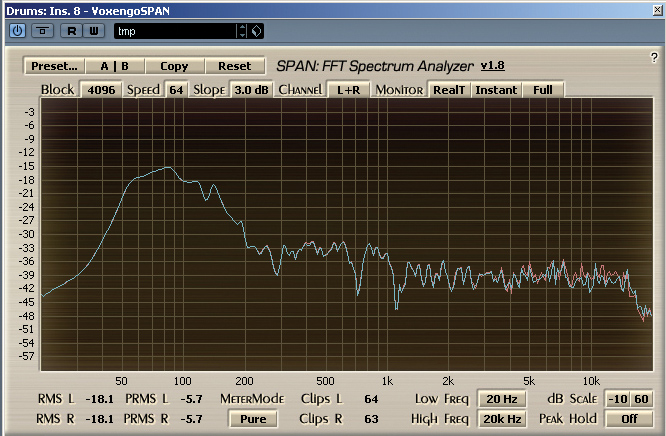
Step 8: Now that you have everything bussed, you can inspect the overall frequency distribution by using a spectrum analyser on the Group Channel. If you need to make adjustments to the sounds after this point, it's a good idea to refer to the analyser to help you determine what effects your adjustments are having. But remember to prioritise what you hear over what you see - it's only there to identify problems.
Computer Music magazine is the world’s best selling publication dedicated solely to making great music with your Mac or PC computer. Each issue it brings its lucky readers the best in cutting-edge tutorials, need-to-know, expert software reviews and even all the tools you actually need to make great music today, courtesy of our legendary CM Plugin Suite.


