How to layer acoustic and electronic drum sounds
Learn how to get the best of both percussive worlds
For many computer musicians, it can be all too easy to fall into the trap of dividing drum sounds cleanly into 'acoustic' and 'electronic' categories, then sticking to one or the other for any given track - the former represented by samples, the latter by synths, generally speaking. Restricting your thinking like that, though, means you miss out on a huge and colourful palette of sounds that can only be achieved by enthusiastically bringing these two seemingly disparate worlds together.
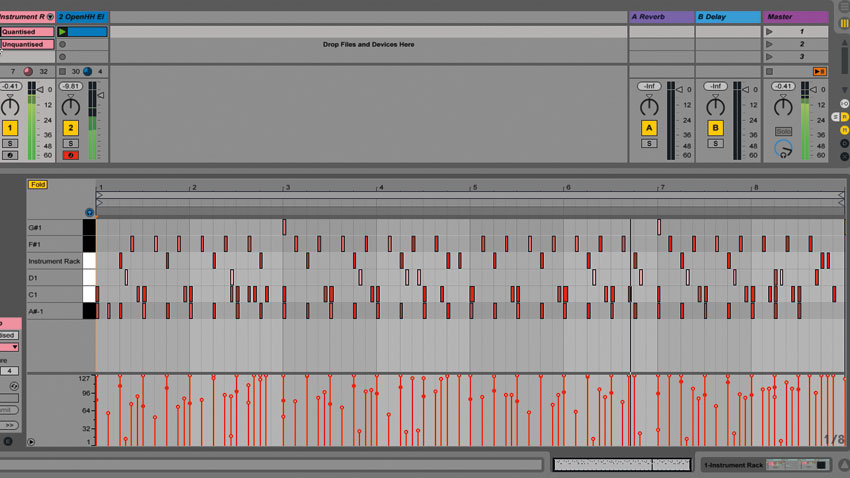
Mixing up electronic and acoustic percussion enables you to merge the dynamics and organic sounds of a 'real' drum kit with the unreal tones and energy that can only come from drum machines and synths. And if the triggering MIDI part is captured from a real drummer's performance, you can choose to retain the
live feel or quantise it to the grid to make it more dancefloor-appropriate.
In this tutorial, we'll show you how to use Ableton Live's Instrument Rack to build just such a hybrid MIDI drum setup. If you're not a Live user, everything we're going to do here can be replicated in any other DAW, although you'll need to put each sound source on its own track and trigger it with a duplicate of the MIDI file if yours doesn't have an equivalent to Live's Racks.
Step 1: Our MIDI file was recorded from an electronic drum kit. No quantise has been applied, so the feel is 100% live. At the simplest level, we can fuse acoustic and electronic kit sounds by putting Toontrack Superior 2 in an Instrument Rack and layering that with another kit - Battery 4, for example.
Acoustic kit
Simple hybrid kit

Step 2: We're after rather more detail than that, though - separate sources for kick, snare and hi-hats. Remove Battery 4, and let's start with the kick drum, which we rather fancy underpinning with a subby TR-808 kick. We load D16's superb Nepheton into the Instrument Rack. Now my acoustic kit is doubled up with a full 808.

Step 3: Since we only want the kick, we zone the key range down to just C1 in the Rack's Key editor, filtering out the snare and hats. We really only want the sub part of the 808 kick - increasing Nepheton's Decay extends the sub tone, and filtering out everything above about 130Hz gets rid of the kick's attack.
808 kick added

Step 4: For the snare, we load an Ableton Live Drum Rack and fill its E1 cell with identical Instrument racks, containing Synapse Audio's Dune 2 synth (playing a snare patch) and AudioThing's Hand Clapper plugin. That's one thick, frequency-rich snare, but it's also very loud, so we turn the new elements down.
Get the MusicRadar Newsletter
Want all the hottest music and gear news, reviews, deals, features and more, direct to your inbox? Sign up here.
Snare and clap
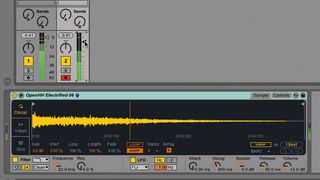
Step 5: Rather than just layer the acoustic hi-hat with an electronic one, let's instead work in an additional hi-hat part designed to change the feel of the whole loop. Using Simpler and a sample from Live's Core Library, we throw an offbeat hat in on a new MIDI track, and lower the level to blend it in5.
Off-beat hats
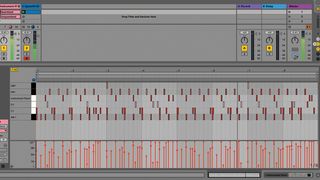
Step 6: The open acoustic hi-hats at the ends of bars 2, 6 and 8 clash with the new hats, so we delete their triggering notes. The new hats give the loop a semi-quantised feel, but depending on the track it ends up in, we might eventually elect to fully quantise it anyway.
Deleted hats
Quantised
Computer Music magazine is the world’s best selling publication dedicated solely to making great music with your Mac or PC computer. Each issue it brings its lucky readers the best in cutting-edge tutorials, need-to-know, expert software reviews and even all the tools you actually need to make great music today, courtesy of our legendary CM Plugin Suite.

