How to integrate iPad apps with Reason 7 via wireless MIDI
Control an iOS synth using Reason's External MIDI Instrument
The capabilities of iPad music making apps have shot up in the last year or so. There's no shortage of synths, effects processors and workspace tools on the App Store these days and - in terms of sound and capabilities - many of this can match, and even occasionally best, their plugin peers.
The biggest challenge with iOS music making, however, is working out how best to integrate the results into a larger, desktop-focused production setup.
Here, in the video above and step-by-step below, we show you how it's possible to use the External MIDI Instrument rack device found in Reason 7 to control an iPad synth via Wireless MIDI.
For more on getting the most out of the new features of Reason 7, pick up the September issue of Computer Music (CM194).

Step 1: The most obvious target for Reason 7's External MIDI Instrument device might be a hardware instrument like a synth, but anything that can receive MIDI is fair game - and that includes suitably receptive iPhone and iPad apps. Here we're going to trigger Arturia's iMini Minimoog emulation from Reason's sequencer and record its output onto an Audio track. Yeah, really!
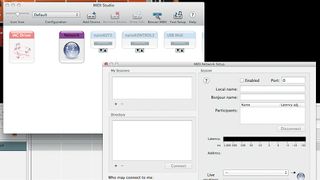
Step 2: We're doing this on a Mac using OS X's Network MIDI driver to trigger our iPad from Reason. If you're on PC, you can try a Wi-Fi MIDI driver like loopMIDI. On Mac, open Audio MIDI Setup (in the Applications/Utilities folder,) select Show MIDI Window from the Window menu, and double-click Network to launch Network MIDI Setup.
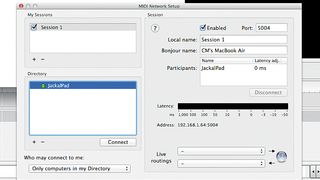
Step 3: Click the + button under My Sessions to create a session. Check the Enabled checkbox in the Session pane on the right to activate it. Now, launch a MIDI-capable app on your iPad (iMini in our case) and it'll appear in the Directory pane. Select it and hit Connect.
Get the MusicRadar Newsletter
Want all the hottest music and gear news, reviews, deals, features and more, direct to your inbox? Sign up here.
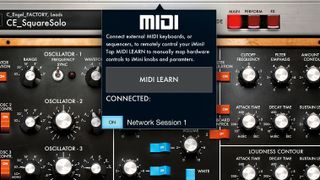
Step 4: Our iPad is now connected to our MIDI network. In Reason, Create an External MIDI Instrument device and set its output to Network Session 1; in iMini, tap the Connect button, then the MIDI DIN socket and turn the Network Session 1 input On. Play your MIDI keyboard to check that Reason is sending MIDI to iMini.
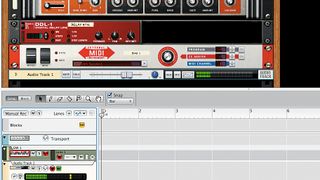
Step 5: At the moment, of course, our iPad is outputting through its own speaker, which is hardly ideal. To rectify this, we connect its headphone output to our Mac's audio interface and set up an Audio track in Reason to monitor and record it. Now we can hear iMini coming through Reason (and thus through the speakers or headphones connected to the computer's audio interface).
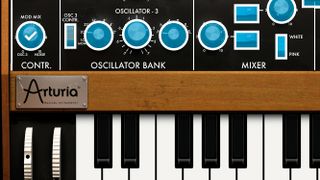
Step 6: As well as sending note data to iMini, External MIDI Instrument features an assignable knob that can be set to output any MIDI CC up to 119. We turn it On, set it to 2, and use iMini's MIDI learn system to assign it to the Mod Mix control.
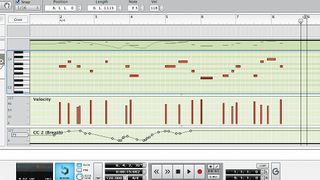
Step 7: At last, we're ready to record our MIDI part. We play iMini via a MIDI keyboard hooked up to Reason, tweaking the External MIDI Instrument's assignable knob via an assigned rotary controller. We then quantise the part to tighten it up.
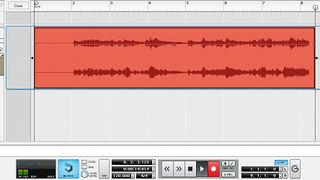
Step 8: All that remains, then, is to record the synth as audio. We could have done this at the same time as recording our MIDI part, but instead, we now Arm the audio track, hit Record on the Reason transport and play back our quantised MIDI synth part, which is recorded onto the track. You may notice that the audio is a little late due to latency - this is easy to fix by sliding the audio back onto the beat.
Computer Music magazine is the world’s best selling publication dedicated solely to making great music with your Mac or PC computer. Each issue it brings its lucky readers the best in cutting-edge tutorials, need-to-know, expert software reviews and even all the tools you actually need to make great music today, courtesy of our legendary CM Plugin Suite.

"If I wasn't recording albums every month, multiple albums, and I wasn't playing on everyone's songs, I wouldn't need any of this”: Travis Barker reveals his production tricks and gear in a new studio tour

“My management and agent have always tried to cover my back on the road”: Neil Young just axed premium gig tickets following advice from The Cure’s Robert Smith

