How to create vocal harmonies with Melodyne

Layer we go
Not so long ago, if you wanted to create harmonies for a vocal part, you were left with little choice other than to ask your vocalist to sing these for you, one part at a time. It’s only fairly recently that the option to create harmonies from a single lead vocal line has become available.
The trend began with offline processing. The ability to copy an audio region, save it as a unique audio file and then process a transposed version of it was revolutionary when such tools first arrived, though it remains the case that offline processed audio starts to sound very strange once it gets too far away from its source pitch. It’s only really been with the development of more accurate pitch correction and pitchshifting plug-ins that more authentic-sounding harmonising tools have become available.
One of the major advantages of this technology is that it’s possible to create a fully harmonised part from a single lead vocal line. This is wonderful if you’re working with a singer who is uncomfortable working out and then performing harmonies that match the chord progression of your track. Indeed, many producers now use tools such as Melodyne to create harmony parts that they then teach back to singers for them to perform.
It’s also great if you’ve long since recorded a lead vocal but your singer isn’t available to come round and sing the harmony parts for you. But finally, and probably of most interest to us here, this technology is manna from heaven for producers who like to construct vocal parts from sample CDs, Apple Loops or any other resource where direct interaction with the lead vocalist is impossible.
Make it your own
Being able to personalise a vocal part to which other producers have access is a neat production trick and one which will definitely make your vocals stand out from your track without the often-heard ‘Yeah, but everyone’s got that sample’ griping. All you need to turn a single line into a multi-harmonised arrangement is a pitchshifting tool and an ear for a decent harmony.
Melodyne and Auto-Tune (in graphic editing mode) are ideal for this, in that they allow you to see and hear harmonies at the same time, so anything that doesn’t sound right can be easily identified. We’ll be using Melodyne in our tutorial (you can download a demo here), but if you don’t own one of these and are using a regular pitchshifting plug-in instead, you can still achieve some pretty good results simply by using automation to select the amount of transposition that you want on a note from one step to the next.
Obviously, as you’ll want these harmonies to play in addition to your lead vocal, you’ll need to copy the original file to separate tracks before undertaking the processing.
For more vocal production tricks, check out Computer Music Special: Vocals (CMS46) which is available now from selected newsagents and www.myfavouritemagazines.co.uk.
NEXT: create vocal harmonies using Melodyne
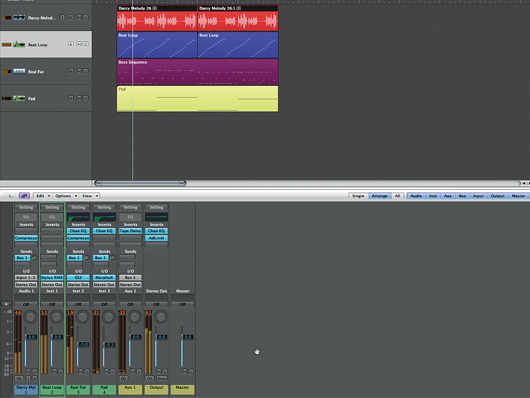
Getting started
Step 1: Our track starts off with a sweet-sounding vocal sample taken from the Apple Loops library. To this we’ve added an electro sequenced bassline, a driving beat loop and a dark single note pad. There isn’t enough weight in the vocal sound at the moment.
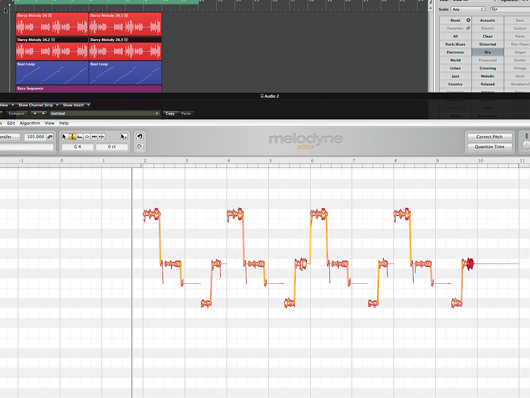
Duplication
Step 2: We duplicate the lead vocal track and copy the part down to this duplicate. We open Melodyne and scan this copy in, then change each note to create a harmony part which plays at the same time as the original. We start by shifting the whole part up a third, then move any notes which don’t sound right.
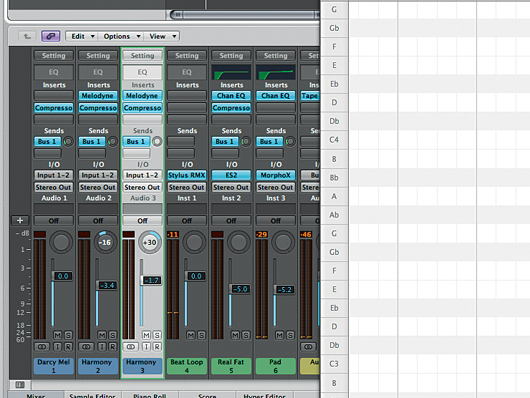
Mixing
Step 3: We repeat the process, duplicating the original track once more and creating a second harmony in Melodyne - this one is lower. Once we’re happy with the part, we pan the first harmony narrowly left and the second narrowly right and drop the volumes a little to let the lead vocal through.
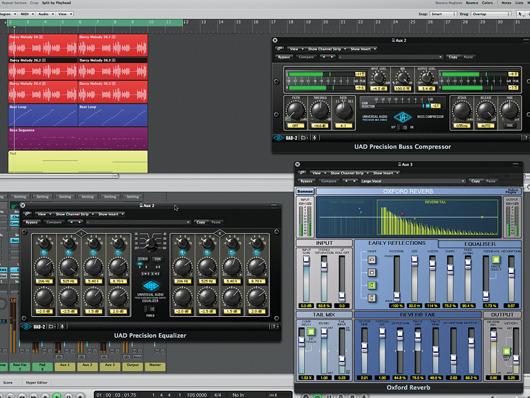
EQ, compression and reverb
Step 4: We layer the sound further by giving the backing vocals their own space. Using the UAD Precision EQ and Buss Compressor, we thin the sound out, making it brighter, and flatten the dynamics with compression. We do this by sending both parts to the same auxiliary, where the effects are added. We add the Oxford Reverb to provide more space.
Soft distortion
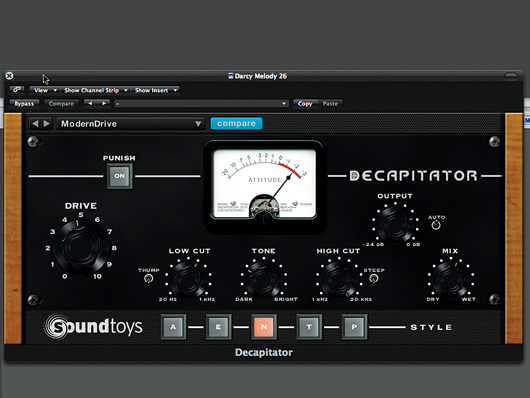
Step 5: The lead vocal still isn’t cutting through the mix as much as we’d like, so we turn to SoundToys’ Decapitator to provide some saturation. We don’t want the vocal to sound too overdriven, so once we find a sound we like with some soft distortion, we turn the Dry/Wet Mix dial to 50% to soften the effect.
Chorus
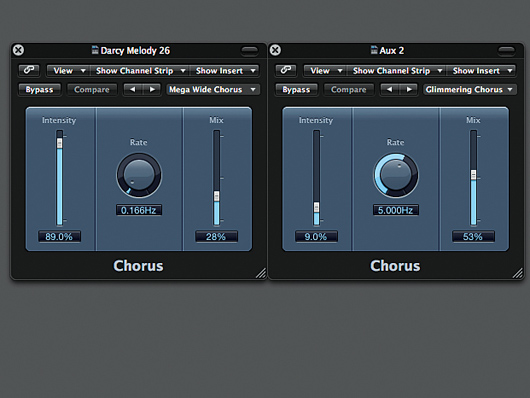
Step 6: Before saving the final mix, we create one more layer of richness by adding a chorus plug-in to both the main lead vocal and to the auxiliary channel with the backing vocals. We select different treatments so that pitch thickening is applied differently across the three voices.
Liked this? Now read: How to make Aphex Twin-style demonic vocals
Connect with MusicRadar: via Twitter, Facebook and YouTube
Get MusicRadar straight to your inbox: Sign up for the free weekly newsletter
“I actually specifically remember making a deal with myself": Billie Eilish reveals what she had to do in order to become “looser and jazzier” with her vocal delivery
Softube’s latest plugins are a pair of must-have vocal effects – and right now you can grab them as a bargain introductory bundle
“I actually specifically remember making a deal with myself": Billie Eilish reveals what she had to do in order to become “looser and jazzier” with her vocal delivery
Softube’s latest plugins are a pair of must-have vocal effects – and right now you can grab them as a bargain introductory bundle


