How to create authentic timestretched jungle breaks with Akaizer
Revisit this old-skool drum production technique in software
The hardcore scene of the early 90s was at the forefront of timestretching experimentation. Early drum 'n' bass tracks such as Origin Unknown's Valley of the Shadows and 4hero's Journey From The Light showcased the elongating and shortening of breakbeats with an Akai sampler's timestretching functions, then playing them back at higher or lower pitches, so that they ran for the same duration as the original samples.
This imbued breaks with intriguing new textures, and became a staple technique of the genre. More recently, timestretching and pitchshifting effects can be heard in the work of hardcore-influenced artists like Burial and Special Request, who treat beats and vocals with pitchshifting to scintillating effect.
In this tutorial, we'll show you how to use Akaizer to bring that authentic 90s sound to a junglist beat.
For more on timestretching, pick up Future Music 286, which is on sale now.

Step 1: Download Akaizer and run the application. Copy Jungle Break.wav to your desktop, then click the Open Wave/Aiff File button. In the browser, double-click Jungle Break 140.wav to load it up. Akaizer gives us the option to simply set a Transpose value, so set this to +12, then click the Preview button to hear how this sounds.
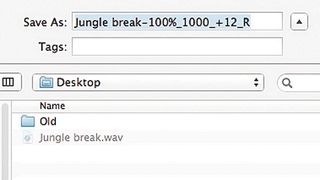
Step 2: To save out the transposed version of the sample, click the Save File button. Akaizer will automatically name the file with the transpose amount included in the file name, so don't worry about changing the name it generates. Save the new version of the break to your desktop. Let's make a few different versions of the break.
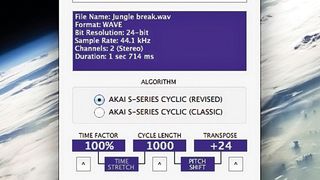
Step 3: We don't have to reload the original break, as changing any of the values causes Akaizer to recalculate its processing from the original sample. Save out new versions of the break at +17, +19, and +24 semitones. This gives us a root note version of the break, plus a perfect fourth, perfect fifth, and octave up. Because pitchshifting upwards brings out the pitched elements of the break, we can use these different versions to create something quite melodic.
Get the MusicRadar Newsletter
Want all the hottest music and gear news, reviews, deals, features and more, direct to your inbox? Sign up here.
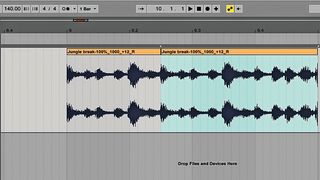
Step 4: Launch your DAW, set the project tempo to 140bpm, and drag the +12 version of the break onto an audio track. Put the sample at the start of a bar, and cut it after the third eighth note - ie after the snare. Now duplicate the sample, and set this new version's end point to the end of the bar.
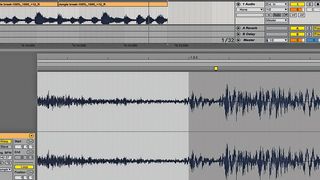
Step 5: You'll notice that, because its timing is a little loose, the start of the snare begins just before the bar ends. Use your DAW's time-stretching to move the start of the snare back so it's not heard - turning snap off makes it easier to get accurate results. You might wish to try different timestretching algorithms if you're not happy with how this processing sounds.
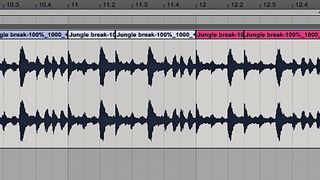
Step 6: Now repeat the last two steps with the processed breaks in sequence to create a simple, melodic breakbeat riff. If you want to take this further, try using your DAW's real-time pitchshifting to add pitch bend, and use sample rate or bit-depth reduction to get an authentic lo-fi sound.
Future Music is the number one magazine for today's producers. Packed with technique and technology we'll help you make great new music. All-access artist interviews, in-depth gear reviews, essential production tutorials and much more. Every marvellous monthly edition features reliable reviews of the latest and greatest hardware and software technology and techniques, unparalleled advice, in-depth interviews, sensational free samples and so much more to improve the experience and outcome of your music-making.

"If I wasn't recording albums every month, multiple albums, and I wasn't playing on everyone's songs, I wouldn't need any of this”: Travis Barker reveals his production tricks and gear in a new studio tour

“My management and agent have always tried to cover my back on the road”: Neil Young just axed premium gig tickets following advice from The Cure’s Robert Smith

