How to create a morphing wavetable pad sound in Xfer Records Serum
Try using Serum's FFT Editor to make complex wavetable sequences
Brainchild of music technology maven Steve Duda, Serum is a cutting-edge hybrid synth that enables the user to make their own wavetables for maximum flexibility.
This is done by importing audio or generating a series of single waveform frames that the synth crossfades or spectrally morphs between.
To create these frames, you can use the Waveform Editor to build up waves using a variety of predefined building blocks, or take the additive approach and use the synth's FFT Editor to the level of each partial additive-style, and process the array of values with some predefined functions.
Here we'll use the additive approach to create a standard sawtooth waveform, making a selection of frames by processing it in a variety of ways. This series of frames will be turned into a wavetable via spectral morphing, which is then used as an oscillator to create the basis of a mysterious animated pad sound that's smoothed out with lazy attack and release times and a couple of FX.
To read more on additive synthesis, pick up Future Music 292, which is on sale now.
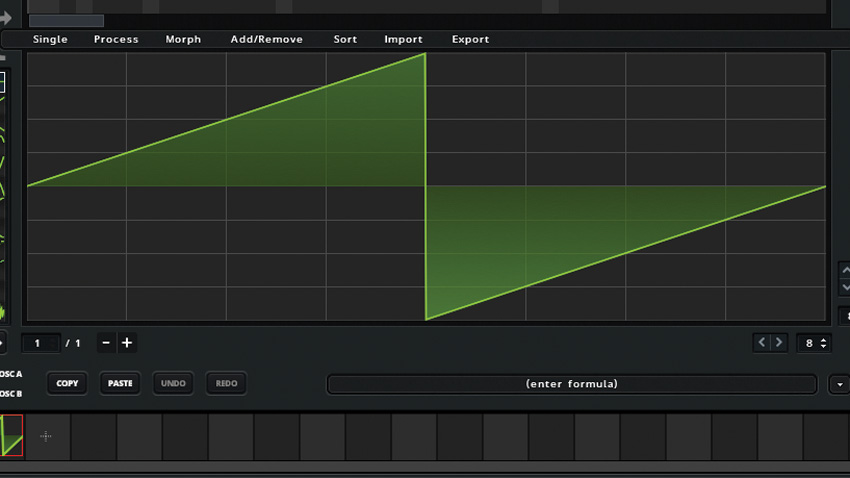
Step 1: Bring Serum up on a MIDI track in your DAW, and click the pen icon in the Osc A panel. This brings up the wavetable editor. At the top of this screen is the FFT Editor, which enables us to create our own waveshapes using additive synthesis.
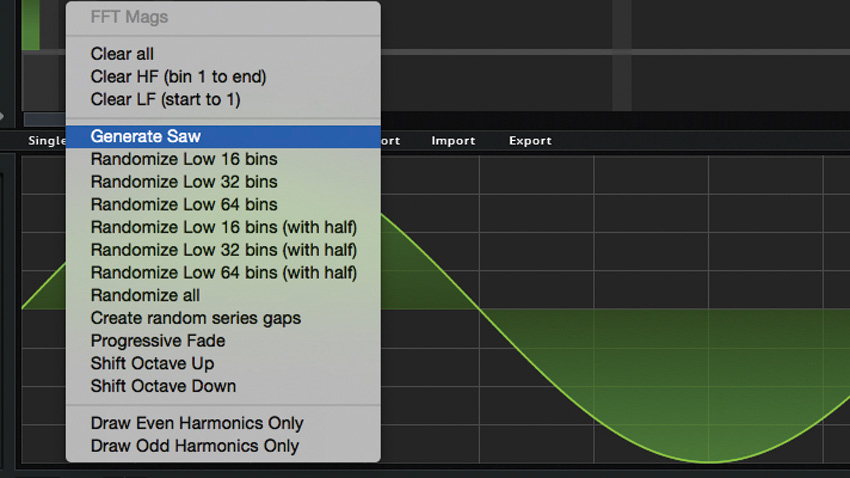
Step 2: Drag up on Bin 1 (the first column), and the existing sawtooth will be replaced with a new waveform. Because we've only added the first harmonic, this will be a simple sine wave. Right-click the FFT Editor and select Generate Saw.
Get the MusicRadar Newsletter
Want all the hottest music and gear news, reviews, deals, features and more, direct to your inbox? Sign up here.
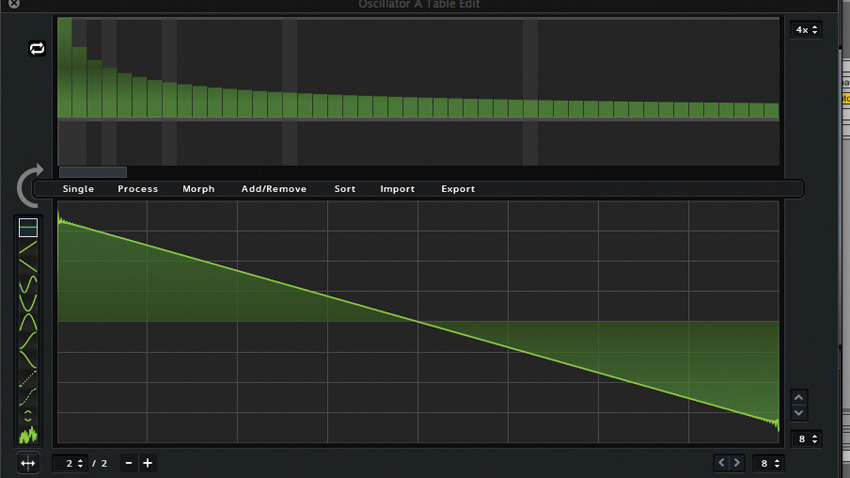
Step 3: This gives us a straight-up sawtooth waveform with energy on odd and even harmonics, which will be a jumping-off point for our patch. Click the + in the Thumbnails at the bottom of the Wavetable Editor. This adds another frame to our wavetable, with the same waveshape as the first.
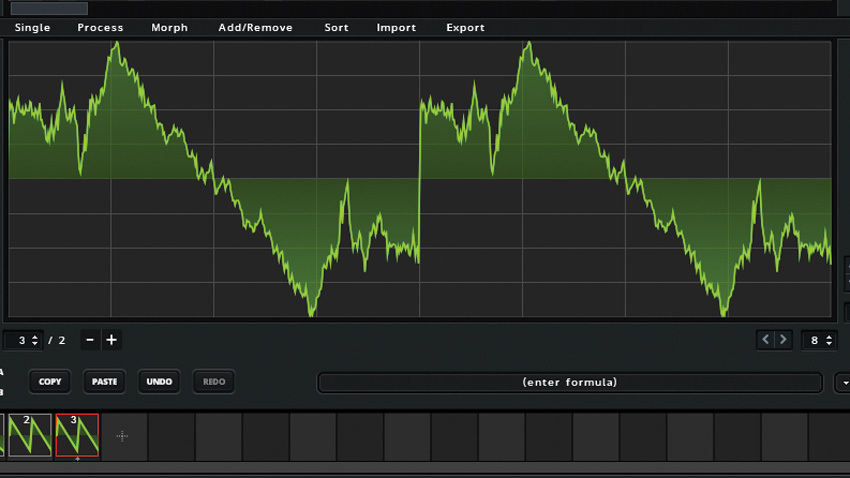
Step 4: Right-click the FFT Editor and select Shift Octave Up. This gives us a sawtooth an octave up from the root note. Click + to add another frame. Right-click the FFT Editor and select Create Random Series Gaps. This removes harmonics at random, giving us a more jagged, lo-fi waveform.
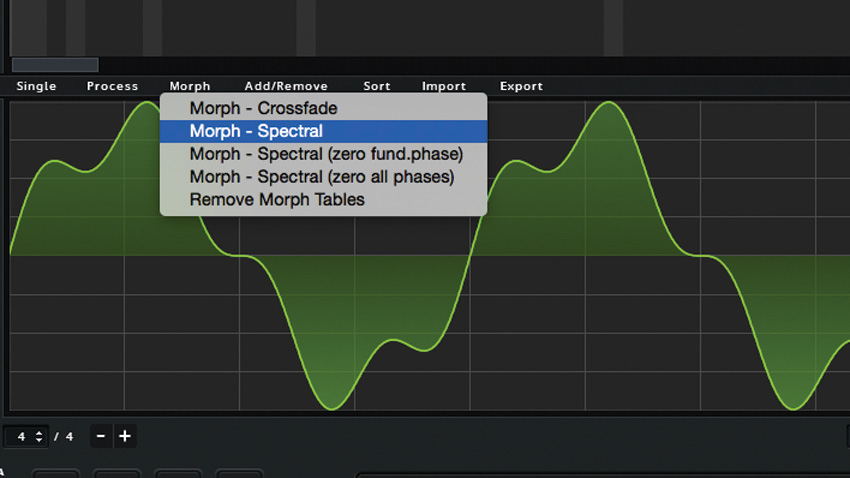
Step 5: Add one more frame, and this time right-click the Editor on Bin 10 and select Clear HF (Bin 10 to end). This acts as a low-pass filter, smoothing out the top-end. Now click the Morph menu and select Morph - Spectral. Click the cross at the top corner of the screen to close it.
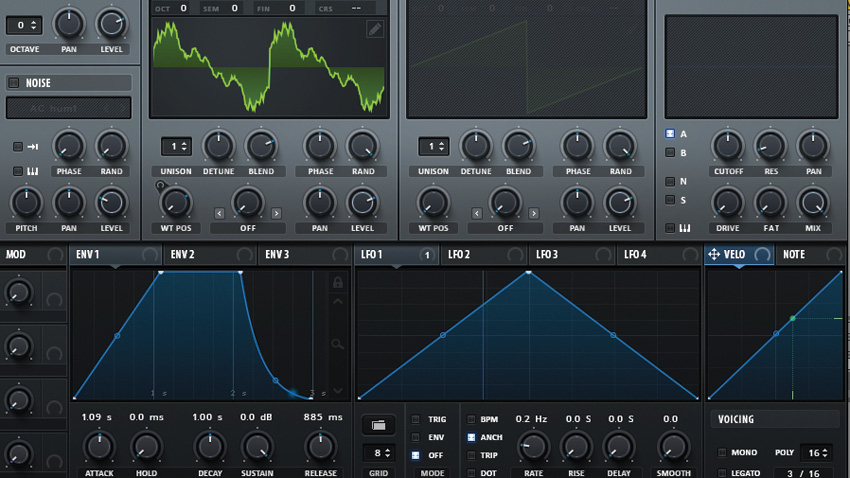
Step 6: Turn Osc A's WT Pos knob all the way down, right-click it and select Mod Source>LFO1. Ensure the knob top left of WT Pos knob is all the way up and you'll hear the wavetable morph between our four frames. Turn Env 1's Attack/Release times up. Activate the FX section's Delay/Reverb.
Future Music is the number one magazine for today's producers. Packed with technique and technology we'll help you make great new music. All-access artist interviews, in-depth gear reviews, essential production tutorials and much more. Every marvellous monthly edition features reliable reviews of the latest and greatest hardware and software technology and techniques, unparalleled advice, in-depth interviews, sensational free samples and so much more to improve the experience and outcome of your music-making.
"If I wasn't recording albums every month, multiple albums, and I wasn't playing on everyone's songs, I wouldn't need any of this”: Travis Barker reveals his production tricks and gear in a new studio tour
“My management and agent have always tried to cover my back on the road”: Neil Young just axed premium gig tickets following advice from The Cure’s Robert Smith


