How to create a huge sub bass sound
Make a huge, rumbling bass by using the custom wavetable capabilities of Xfer Records' Serum
When deciding on a sub bass sound for your track, it can be tempting to opt for a straightforward, single sine oscillator-based patch. If your mix already has a lot of heavy synth sounds that dip into the low end, it can make sense not to clog up the lowest octaves with superfluous extra harmonics.
However, if your mix has room in the lows to spare, using a sine sub won't give you the maximum amount of weight possible. Sine-based sub tones are essentially single harmonics that, while clean-sounding, don't use the low-end to its full potential.
It's possible to get more out of sine-based sub sounds with some programming trickery, but, if you're after big, sustained bass tones, your best bet is to use a synth patch with more weight built in.
Let's see how we can make a satisfyingly weighty sub by starting with a harmonically rich, animated timbre, and filtering out the highs to get that big, rumbling bass tone.
For more sub bass tutorial action, grab Future Music 291, which is on sale now.
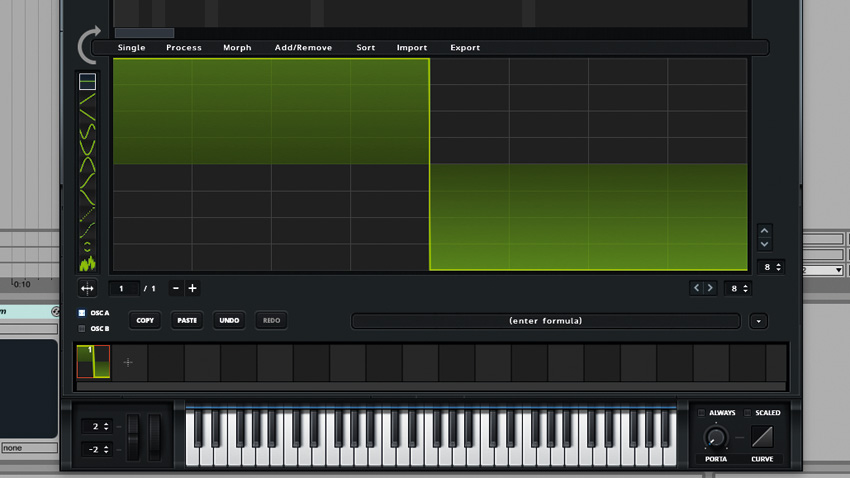
Step 1: Load Serum up in your DAW. In the Osc A panel, click the pen icon to bring up the wavetable editor. We can edit the shape of the waveform by drawing on it. Set the first eight steps to the maximum value, and the second eight steps to the minimum value. This gives us a square waveform.
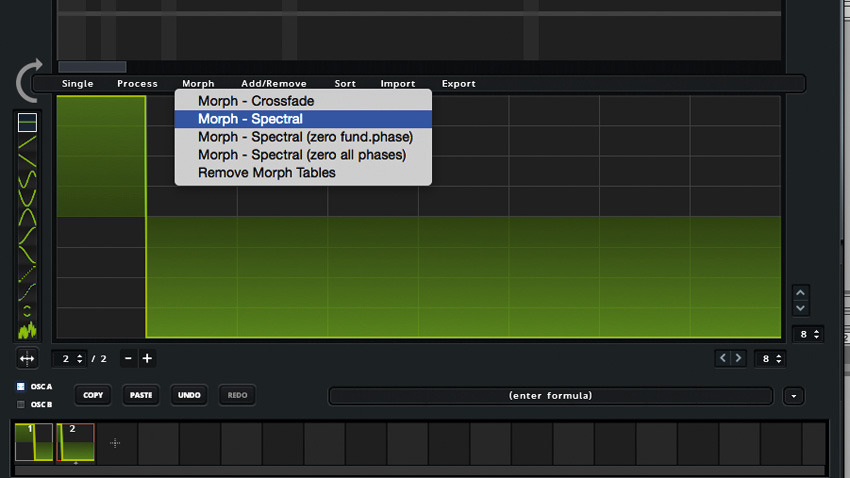
Step 2: Click the plus button in the row of waveforms at the bottom. Now set all of the steps bar the first to the minimum value, giving a 12.5% pulse waveform. We want to be able to morph smoothly between these shapes, so click the Morph option in the menu and select Morph - Spectral.
Get the MusicRadar Newsletter
Want all the hottest music and gear news, reviews, deals, features and more, direct to your inbox? Sign up here.
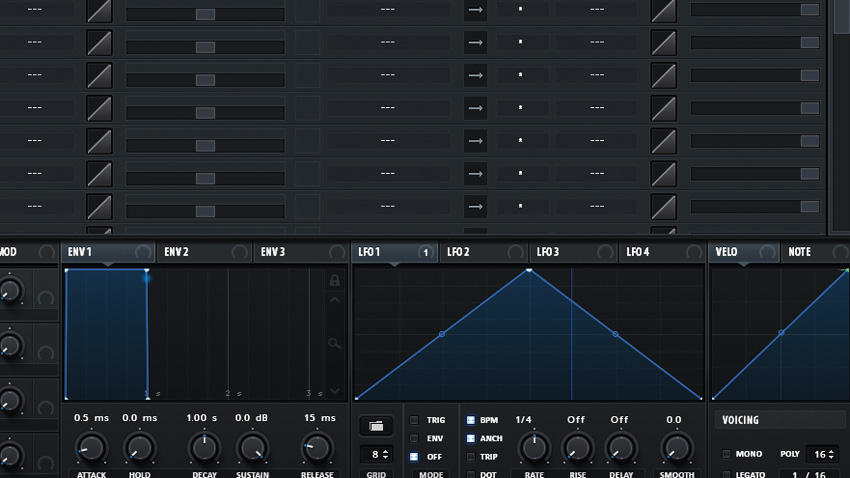
Step 3: Click the cross icon at the top of the screen to close this page, and turn Osc A's WT POS down to 1. Click the Matrix tab to bring up Serum's Modulation Matrix. Set the first row of the Matrix's Source to LFO 1, and the Destination to Osc A>A WTPos.
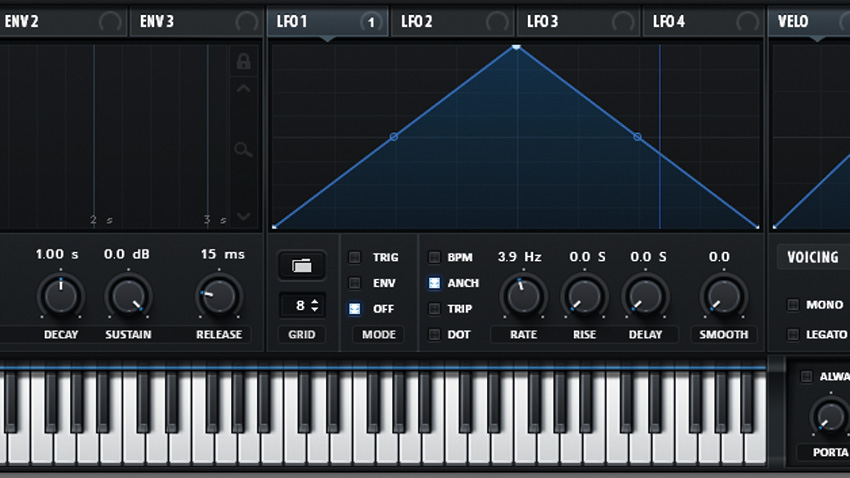
Step 4: When you turn up the Amount fader you'll hear the sub begin to throb menacingly. Set Amount to 8 so that it doesn't get too thin but still has movement. The speed of this movement is controlled by LFO 1. In the LFO 1 panel, deactivate the BPM button and set Rate to 3.9Hz.
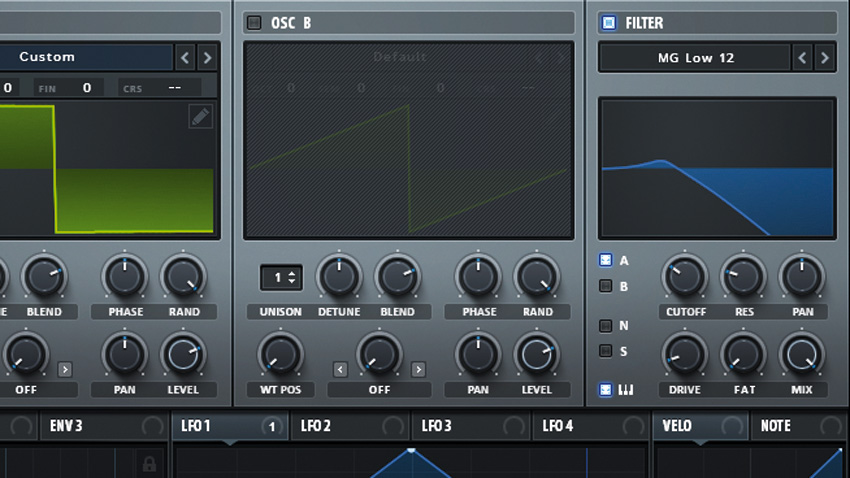
Step 5: Click the Osc tab, activate the Filter section's power button and set the filter to follow the note played by clicking the keyboard icon in the bottom left-hand corner. Set the Cutoff to 374Hz to smooth out the sound, Res to 23% to give it a little bite, and Drive to 10% to warm things up a little.
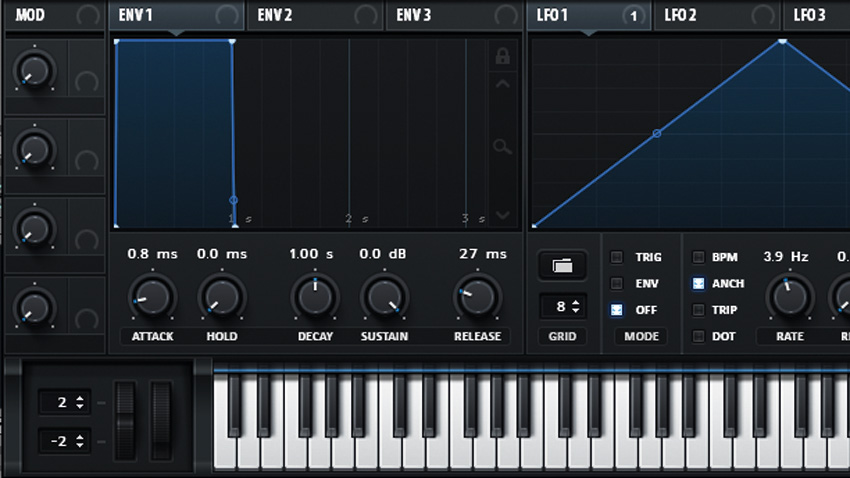
Step 6: Activate the Mono button in the Voicing tab at the bottom right of the interface. To ensure that we don't get a click at the start of new notes, set the Attack to 0.8 ms and the Release to 27ms in the Env 1 panel. This makes the amplitude envelope kick in and fade out slightly more slowly.
Future Music is the number one magazine for today's producers. Packed with technique and technology we'll help you make great new music. All-access artist interviews, in-depth gear reviews, essential production tutorials and much more. Every marvellous monthly edition features reliable reviews of the latest and greatest hardware and software technology and techniques, unparalleled advice, in-depth interviews, sensational free samples and so much more to improve the experience and outcome of your music-making.
"If I wasn't recording albums every month, multiple albums, and I wasn't playing on everyone's songs, I wouldn't need any of this”: Travis Barker reveals his production tricks and gear in a new studio tour
“My management and agent have always tried to cover my back on the road”: Neil Young just axed premium gig tickets following advice from The Cure’s Robert Smith


