How to create a hard stop/start edit
Getting started
The ebb and flow of any mix is determined by its transitions - the way it moves between different sections of the track. We’ve all experienced the impact that can be created when a song moves up a gear from verse to chorus, or when a momentary stop lets a soloed vocal line cut through before the track slams back into a full-on moment.
Often, the recorded and programmed sounds you have working within a track will automatically support such transitions. Sometimes, however, particularly in cases where you want clear delineation between the sections, a ‘jigsaw-piece’ edit works better. This can be very effective - imagine a verse building up in intensity until the last line is presented as a solo vocal, before the whole arrangement comes back in hard on the chorus. Let’s see how it’s done.
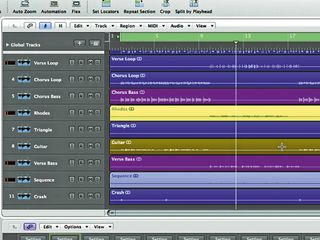
Step 1: First, download the stop-start-edit.zip folder and place all the parts in a new arrangement with a tempo of 110bpm. Next, set up a reverb and delay as auxiliary effects. You’ll need a reverb with a decent-length tail (around 2 seconds) and a quarter-note delay with enough feedback to hear four or five repeats. Dial some of both effects onto the drum loops, Rhodes, sequence, guitar and vocal parts.
Making the cut
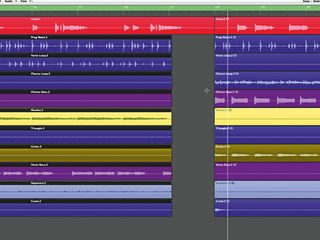
Step 2: At bar 17 we want the instruments to stop dead after we’ve heard beat 1, all the way through until the downbeat of the following bar. Using your Scissors tool, chop all the audio files on the second 16th-note of bar 17 and again on beat 1 of the following bar, excluding only the Vocal file, which should remain uncut. Then erase the dead audio files in the gap.
Reverb and delay issues
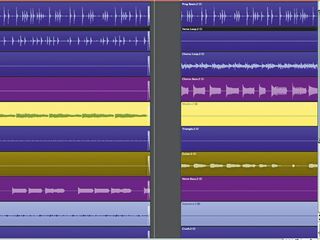
Step 3: To eliminate any possibility of a slight click on those chopped files, add a short fade-out of 20ms to their ends. Listen to the section across that transition. The power of the moment is being lost because the reverb and delay are smudging the transition - rather than the desired silence, we can hear the effect tails.
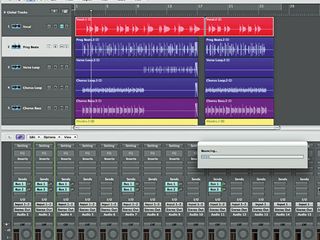
Reverb and delay bounce
Step 4: We want to bounce the reverb and delay signals so they’re not playing ‘live’, apart from on the vocal. Mute the vocal audio and solo the reverb auxiliary channel so you’re only hearing the reverb. Bounce down an audio file of just the reverb all the way through the track.
Repeat this for the delay bus.
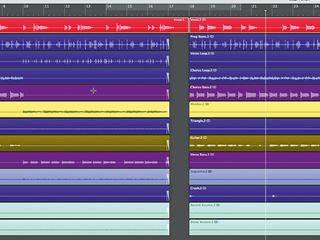
Creating the silence
Step 5: Import these files onto two new tracks in your arrangement and place them at bar 1. Unsolo the aux channels. You can now bypass or switch off the aux sends on all channels apart from the vocal. Chop the reverb and delay bounces at the same position in bars 17 and 18 as we did in step 2, and delete the dead area. We now have a silence in the gap.
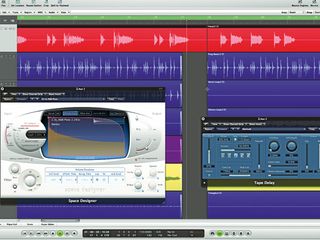
Bringing back the vocal
Step 6: Now it’s time to bring our vocal back in. Unmute the vocal track. As it’s still feeding the auxiliary reverb and delay, it’s still fully processed. The space we’ve created around it makes it stand out much more clearly, though.
"If I wasn't recording albums every month, multiple albums, and I wasn't playing on everyone's songs, I wouldn't need any of this”: Travis Barker reveals his production tricks and gear in a new studio tour
“My management and agent have always tried to cover my back on the road”: Neil Young just axed premium gig tickets following advice from The Cure’s Robert Smith

"If I wasn't recording albums every month, multiple albums, and I wasn't playing on everyone's songs, I wouldn't need any of this”: Travis Barker reveals his production tricks and gear in a new studio tour

“My management and agent have always tried to cover my back on the road”: Neil Young just axed premium gig tickets following advice from The Cure’s Robert Smith
