How to change a vocal melody to fit a track with Melodyne
Reshape a vocal hook with Celemony's software
Celemony's Melodyne is an invaluable tool when it comes to working with vocal samples.
Much like Antares' well-known Auto-Tune software, Melodyne allows users to correct the pitch of any audio recording. Melodyne goes a step further, however, in offering polyphonic as well as monophonic correction.
Here we demonstrate the basics of using Melodyne to reshape and correct a simple vocal hook to fit the key and timing of a track.
For loads more on mixing, recording and working with vocals check out the August issue of Computer Music (CM193) which is on sale now.
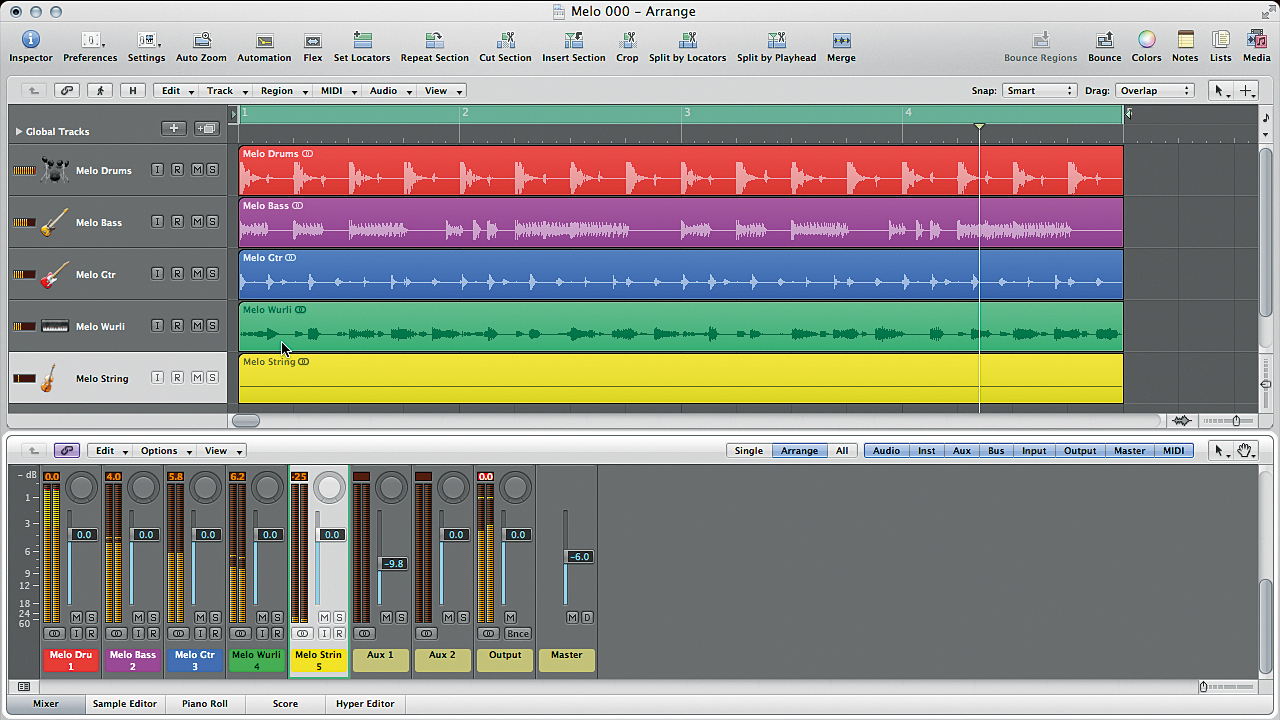
Step 1: If you have a vocal that suits the track but doesn't have the right rhythm or melody, you can adjust it in software. Download our tutorial files here (right click and Save As.) Import the files named Melo... .wav (except for Melo vocal.wav) onto tracks in your DAW. This is a backing track in F minor, and we can use software like Melodyne to tweak the notes in a vocal to fit with it. If you don't have Melodyne, get the demo at celemony.com
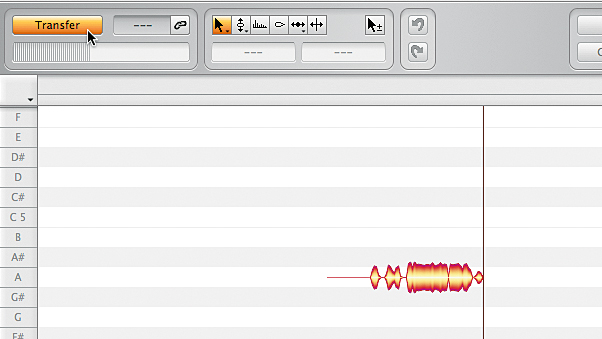
Step 2: Import Melo Vocal.wav onto an empty track and play the tune. The vocal is clearly in a different key and the melody doesn't fit, but we like the vibe of the singing. Insert Melodyne Editor across the vocal track and open the plugin window. Click Melodyne's Transfer button and hit your DAW's Play button to play the audio for analysis. Some red and yellow blobs should appear in Melodyne.
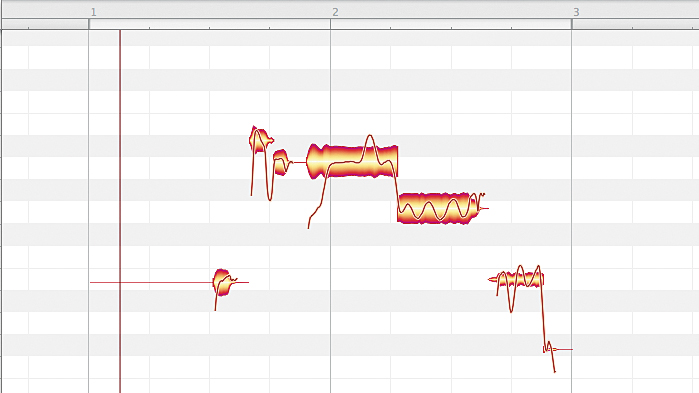
Step 3: Once the vocal is played in, hit Stop and the blobs should explode out to show the note pitches that Melodyne has detected. Melodyne usually gets it fairly spot on, but in this case, it's ignored the semitone flick in the word "all". That's OK for now as this should still work whatever pitch we shift it to. Use the zoom slider in the scroll bars to zoom in on the vocal, which is a single phrase.
Get the MusicRadar Newsletter
Want all the hottest music and gear news, reviews, deals, features and more, direct to your inbox? Sign up here.
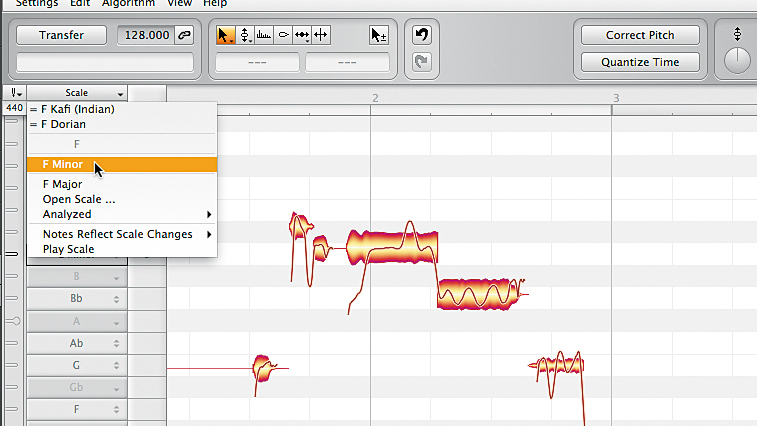
Step 4: Now we can get to work shifting the pitch of each note to create a new melody that fits the key of the track. First, set the grid to only snap to notes in the scale of F minor by right-clicking on the column of note names down the left hand side. Select Scale Editor » Selection and Master Tuning and click on an F in the note ladder. Select the key of F minor from the popup.
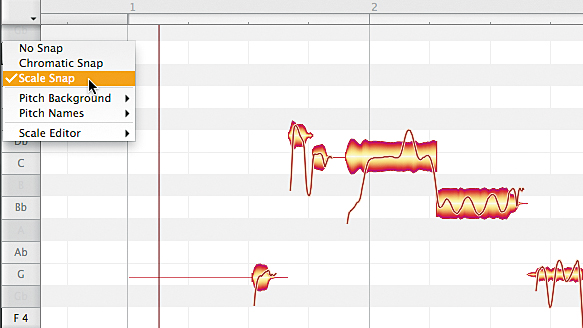
Step 5: Select Scale Editor » Hide to hide the panel again, then right-click on the note name column once more, this time choosing the Scale Snap option. This removes notes from the grid that aren't in the key of F minor, making it easier to select alternative notes for our melody that will work with our tune.
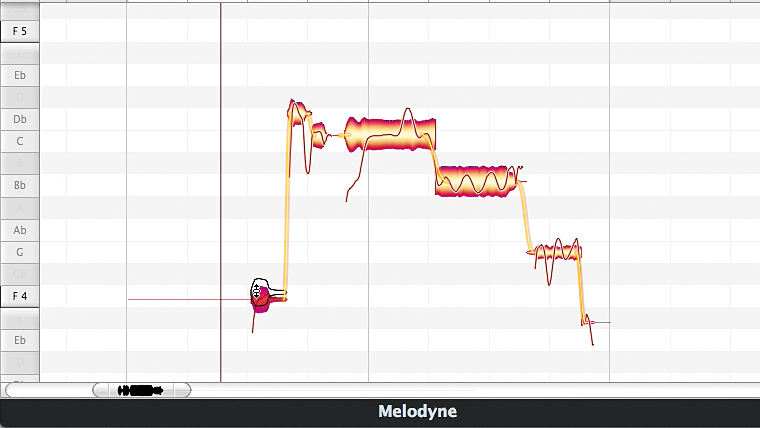
Step 6: Select the Pitch tool from the toolbar above the main window (it's the second one from the left, next to the Pointer tool.) This allows you to click and drag notes to different pitches. Let's try it with the first word in our phrase - "I'll". Click-hold on the note with the Pitch tool and drag it down two semitones from G4 to F4. Then move the 2nd note "give" up from D♭ to E♭.
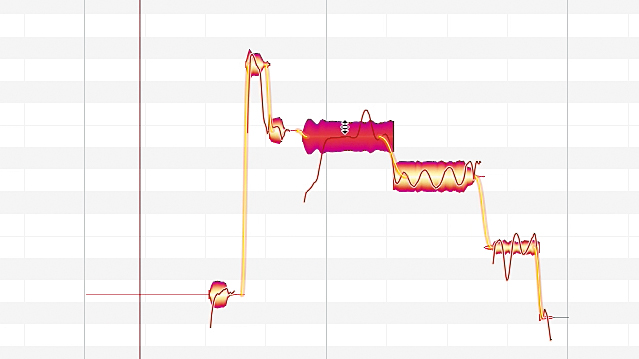
Step 7: The next two words, "it" and "all", we can leave on the C note, but the notes are pitched just a touch sharp. We can take care of that by double-clicking on them one at a time with the Pitch tool. This automatically quantises their tuning so that it's dead centre of the required note. While we're at it, we can do the same for the previous note, the E♭, too.
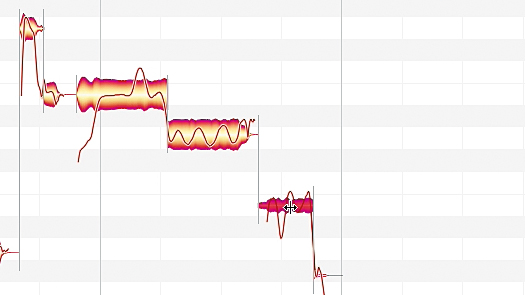
Step 8: In the final "to you" phrase, both words are on the same note, but it might sound catchier if they were different. Select the Note Separation tool (far right on the tool strip) and double-click at the halfway point within the last blob to split the phrase in two, as shown. Then use the Pitch tool to shift the second of the two notes up from G to C. Put the tail of the last note on C too, so it sounds more natural.
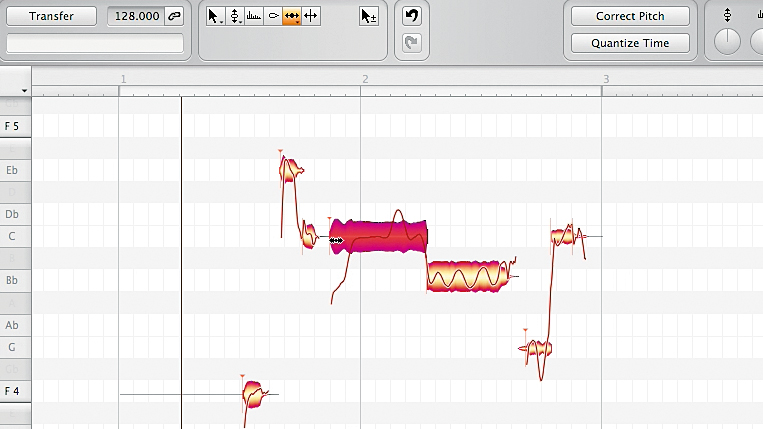
Step 9: Timing-wise, this sample fits quite well, but any slight timing tweaks can be achieved using the Timing tool, which is just left of the Note Separation tool. With this selected, tiny orange markers appear to denote each note's quantise anchor. To make fine timing adjustments, hold down the Alt or Option key and drag notes left or right. If you make a mistake, just click the Undo button to go back a step.
Computer Music magazine is the world’s best selling publication dedicated solely to making great music with your Mac or PC computer. Each issue it brings its lucky readers the best in cutting-edge tutorials, need-to-know, expert software reviews and even all the tools you actually need to make great music today, courtesy of our legendary CM Plugin Suite.
“From a music production perspective, I really like a lot of what Equinox is capable of – it’s a shame it's priced for the post-production market”: iZotope Equinox review
"This is the amp that defined what electric guitar sounds like": Universal Audio releases its UAFX Woodrow '55 pedal as a plugin, putting an "American classic" in your DAW


