Get the sound of Eurythmics' Sweet Dreams
Learn how to make one of the most famous synth sounds ever

Intro
The title track from 1983’s Sweet Dreams (Are Made Of This) album has one of the most instantly recognisable synth riffs around. There have been many different theories about the synths used on it, but the consensus seems to be that either an Oberheim OB-X was used for both the left and right riffs, or perhaps a Juno-6 and Roland SH-09 for the left and right channel riffs, probably sequenced using a Roland CSQ-100.
While the effect of the hard-panned dual riffs is of one simple riff, it’s actually quite hard to work out. My suggestion (as always) is to loop up the first part of the original track and then pan it left and right so you can isolate and try to copy the riffs accurately. Slowing the track down while keeping the pitch the same, using Logic’s ‘Varispeed’ function or Ableton, will help too. Let’s go.

Step one
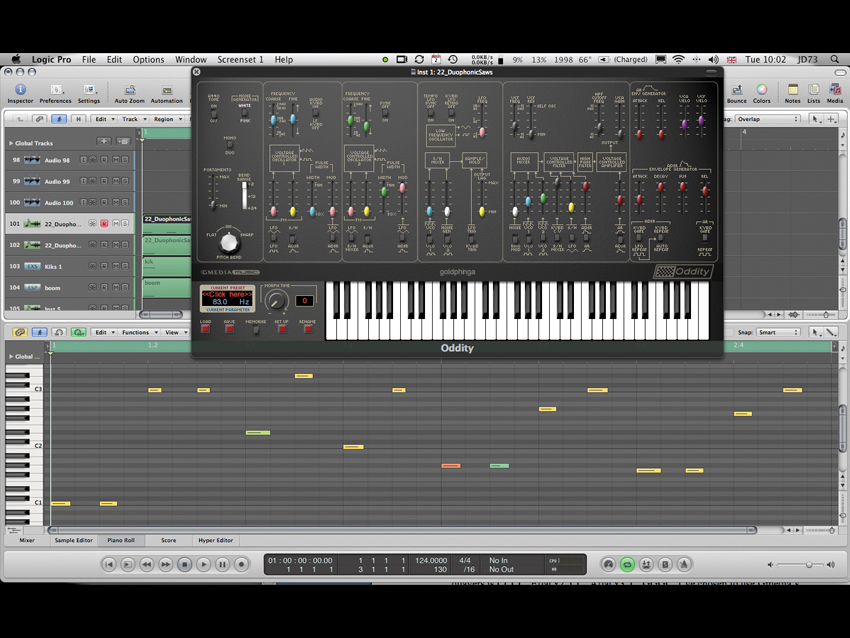
The first step is to copy each riff by ear. Starting with the right-hand riff, set the speed of your sequence to 125bpm. The pattern of notes is: CCCC, E-flat x2, CC, A-flat x3, C, GGGC. I’ve chosen to use GForce’s ‘Oddity’ synth for its authentic analogue sound – the PWM function is particularly useful as it’s a big part of the riff.
You’ll probably notice that the riffs are continually evolving in terms of timbre and this is due to the PWM being swept by the LFO, causing sound to thicken and thin out, while adding interest and movement. Startwith the 22_DuophonicSaws preset. Here I’ve dialled in a pulse on OSC1 and a saw on OSC2.

EQ and filters
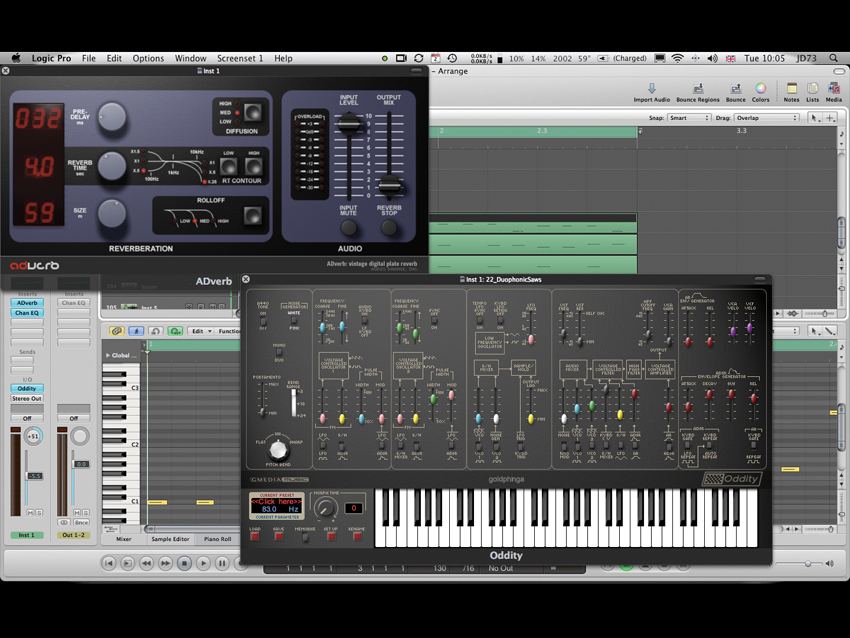
Add some high-shelf boost on Logic’s Eq (+8dB@4350Hz) to get the sound to cut a little more and also try an ’80s sounding reverb, such as the Audio Damage Adverb. Level the OSCs on the mixer so there’s pretty much an equal blend of saw and pulse.
Set the pulse width mod to approx 80% and pulse width to approx 20%. Make sure the LFO is set to a pretty slow rate so that the PWM pulses naturally with the riff. Now have a look at the ADSR. Set Attack to a slow 155ms, Decay to 2275.0ms, Sustain to almost full (labelled as -4dB on the Oddity) and Release to 3016.7ms. Set LPF frequency to 100Hz, resonance to 0 and add in some HPF output on the mixer (87%). Finally, set the HPF frequency to 83Hz and pan hard right. This really helps to get us in the same ballpark as the original.

Left side riff
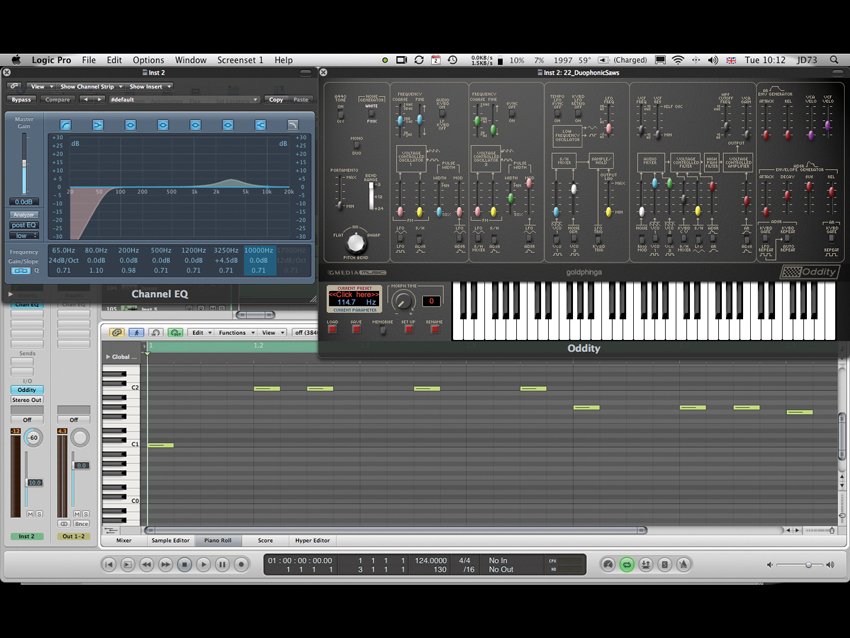
Now let’s move onto the left-side riff. Again, I’m using Oddity with the same preset as a starting point, this time with an equal blend of OSC1 and 2. OSC1 is set to saw and OSC2 to pulse.PWM width is set to 28% and PWM Mod depth to full, which is modulated by the LFO set to 0.589Hz. This gives some nice movement to the riff, stopping it from being boring.
The pattern of notes is CCCCC, A-flat x3, GG, B-flat x2. Once you’re happy that this riff is sounding good, level it against the right-hand riff so that the levels complement each other nicely and so that it sounds like one complete riff rather than two distinct parts. Set the low pass filter frequency to 53.4Hz, resonance to 0 and then add the HPF output on the mixer set to 88% and the HPF frequency set to 114Hz.
Add some high boost (+4.5dB@3250Hz) on Logic’s Eq and roll out some lows from 65Hz downwards to get rid of any low mud. Set Attack to fast, Decay to medium, Sustain to full, Release to almost full and pan hard left.

Kicks and noise
The final two elements to add to the main riff are a kick drum on each crotchet beat (four to thefloor) and a noise blast at the start of every second bar. Use a kick that has a nice amount of low but plenty of click in order to cut through. Compress it quite severely in order to make it bounce with the track and cut through the synth riffs.
Experiment with the enveloper plug-in, or a gate to get the correct kick length. Also add some reverb and roll out any unnecessary low-end on the Eq. In order to make the noise blast, I’ve used Logic’s ESP Noise generator with a long Decay, Sustain and Release and fast Attack, with the filter frequency set to about a quarter open. I’ve also added a reverb plug-in to help blend the noise with the track nicely. To finish off, add some Eq across the mix, as the original is very high-mid heavy. I’ve boosted +6.5dB @3.5kHz, +2dB @2kHz and +3.5dB @1060Hz.
Future Music is the number one magazine for today's producers. Packed with technique and technology we'll help you make great new music. All-access artist interviews, in-depth gear reviews, essential production tutorials and much more. Every marvellous monthly edition features reliable reviews of the latest and greatest hardware and software technology and techniques, unparalleled advice, in-depth interviews, sensational free samples and so much more to improve the experience and outcome of your music-making.


