Exploring Ableton Live 9's new piano and bass guitar instruments
We get to grips with Live 9's instrument packs
Grand Piano and Guitar and Bass are two sets of instrument Packs that Live 9 users can download for free from the Ableton website.. For the most part, these are straightforward, bread-and-butter sounds designed for composition, but there are some subtleties to them worth getting to know about.
• For many more Ableton Live guides go to our massive learning hub: Learn Ableton Live and Ableton Push: music production tips and tutorials

Step 1: When you've downloaded and installed the Packs, they'll appear in the Packs section of Live's browser.
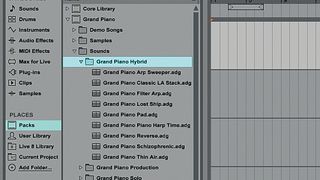
Step 2: Here you'll find two new folders: 'Grand Piano' and 'Guitar and Bass'. Let's take a quick look at Grand Piano first. Double-click Grand Piano to show its contents, then double-click the Sound folder to see the available piano categories. Let's try out one of the more unusual sounds. Double-click the Grand Piano Hybrid folder.
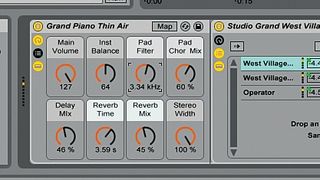
Step 3: Double-click Grand Piano Thin Air to load the patch. Try playing a chord and you'll hear the grand piano tones supplemented with a lush, processed Operator pad. You can use the Inst Balance macro knob to adjust the balance of the two sounds, and sweep the Pad Filter knob to hear the sweet-sounding low pass filter on the Operator patch.

Step 4: Let's take a look at something a bit more complex now. Delete the MIDI track with the Grand Piano Thin Air patch on it and this time open the Guitar and Bass/Sounds/Bass folder. Double-click Electric Bass to create a new MIDI track with the instrument on.
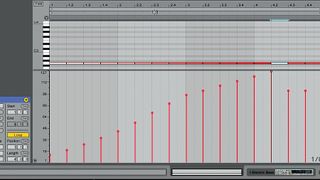
Step 5: This gives us a clean, generic electric bass sound. Place a G2 on every quarter-note as above, with gradually increasing velocity. You'll hear that the velocity layers used give each note a different feel, culminating in a slap sound at the top of the velocity range.
Get the MusicRadar Newsletter
Want all the hottest music and gear news, reviews, deals, features and more, direct to your inbox? Sign up here.
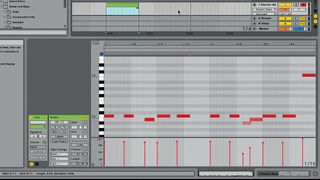
Step 6: Copy the pattern and velocites we've used here to get a funky slap bass part. Note that while we've got the start and end of the main notes hitting the grid, the quieter notes that rise up on the sixth beat need to overlap to sound fluid and natural.
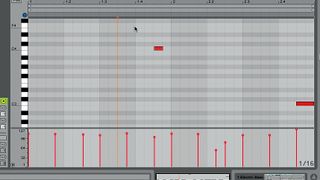
Step 7: Let's add a higher note on C4 on the last eighth-note of the first bar. If you're after a really authentic, live-sounding bassline, you can also add various string noises and note-stopping sounds using MIDI notes A-2 to A#0.
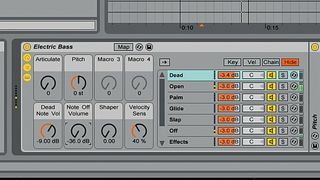
Step 8: You can get a cleaner result (at the expense of realism) by turning down the Note Off Volume parameter. Try turning it down all the way to -36dB now. The Dead Note Vol parameter controls the volume of notes with a velocity lower than 48.

Step 9: The Articulation knob allows you to toggle between the open and muted sound. Play the bassline back and set the Articulation knob to any value over 97. You'll hear the bassline change in character dramatically, especially the slap note, which becomes a bend. By combining note velocities and manipulating the articulation knob, you can create convincingly 'real' bass parts.
Computer Music magazine is the world’s best selling publication dedicated solely to making great music with your Mac or PC computer. Each issue it brings its lucky readers the best in cutting-edge tutorials, need-to-know, expert software reviews and even all the tools you actually need to make great music today, courtesy of our legendary CM Plugin Suite.
Most Popular


