8 Cubase 6 power tips

Steinberg's recent Cubase 6 update was well-judged, addressing some of the gripes of existing users while also adding several forward-thinking new features.
But a spec sheet is one thing - what you really need to know is how the changes made in Cubase 6 will affect the way you make music with the software. And if you read our eight tips, you'll be a whole lot closer to finding out.
For a complete guide to Cubase 6, check out the May issue of Computer Music (CM164) which is on sale now.
External storage
New in Cubase 6 is the ability to store your personalised presets and attributes for Media Bay on a separate storage device - a USB memory stick, for example. This is done through the use of Volume Databases. To create a new Volume Database, browse to Define Locations in Media Bay, then right-click the drive you want to store it on and select Create Volume Database. Removing it again is just as easy: simply browse to the same place, right-click the drive and select Remove Volume Database.
Multiple bypass
Another cool new feature in Cubase 6 is the ability to simultaneously bypass insert effects over a selected range of channels. Hold down Ctrl while clicking channels in the Mixer window to select multiple channels as usual, then release Ctrl, hold Alt+Shift and click the Bypass switch for just one of the selected channels - and the rest will follow. Interestingly enough, this works with the Bypass buttons on separate insert slots as well as the main Bypass all inserts switch. If you were sufficiently organised with your plug-in chains, you could conveniently listen back to a mix with and without a saturation plug-in in place, for example.
Tape formant timestretch
Among the new timestretch algorithms in Cubase 6 is the rather odd addition of Èlastique Formant - tape. Why is it odd? Well, scientifically speaking, the name is something of an oxymoron. Tape timestretch algorithms are supposed to emulate the 'old school' method of timestretching, which links pitch and speed just like a tape machine or record player would do. In contrast, formant timestretching algorithms are designed to retain the acoustic stamp of the sound, derived from its frequency content. So how does this crossbred algorithm work? The answer is, it sounds nothing like tape but does strange things to the signal as it tries in vain to retain the formant, making it a great sound mangler - especially for vocals.

Smooth out quantise results
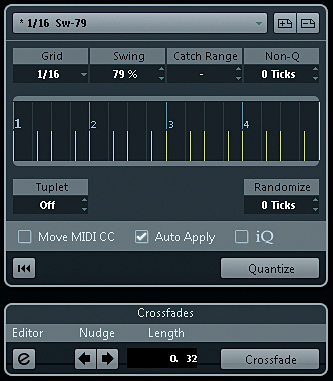
If you select a group of audio events and open the Quantize Panel, you can preview the settings by checking Auto Apply and playing back that section. This feature has been around for a while, coming in handy for discovering whether or not your quantise settings have introduced any gaps between hits. New to Cubase 6 is the addition of a Crossfades function, complete with its own editor. Clicking Crossfade at the bottom of the Quantize Panel sees the software intelligently overlap selected hits and automatically create fade points, thereby giving the impression of a natural, seamless transition.
Get the MusicRadar Newsletter
Want all the hottest music and gear news, reviews, deals, features and more, direct to your inbox? Sign up here.
Multiple Note Expression Edits
When working with the new Note Expression editor, it's easy to get bogged down in touching up individual MIDI note events, so it's good to remember that you can select multiple notes and edit their Expression data at once. At the top left-hand corner of the Expression editor window is a little blue button: this activates or deactivates a mode that will result in a static value rather than a free curve. Don't fiddle about with editing short notes, either - you can drag the edge of the editor window to resize its view.
Quick tool modifying
Tool modifiers are keys that you can hold down while performing a regular function to modify it. For example, dragging the end boundary of an audio part will resize it by default, but if you hold down the Alt key (its tool modifier), the part will be duplicated as many times as it takes to fill up the space you drag across. Under File»Preferences» Editing, you'll find the Tool Modifiers page. Here you can set up new Tool Modifier keys, but before you start doing that you should really get to know the default modifiers and learn them. They will reveal a fair amount of Cubase functionality that can't be accessed any other way.

Remove overlaps
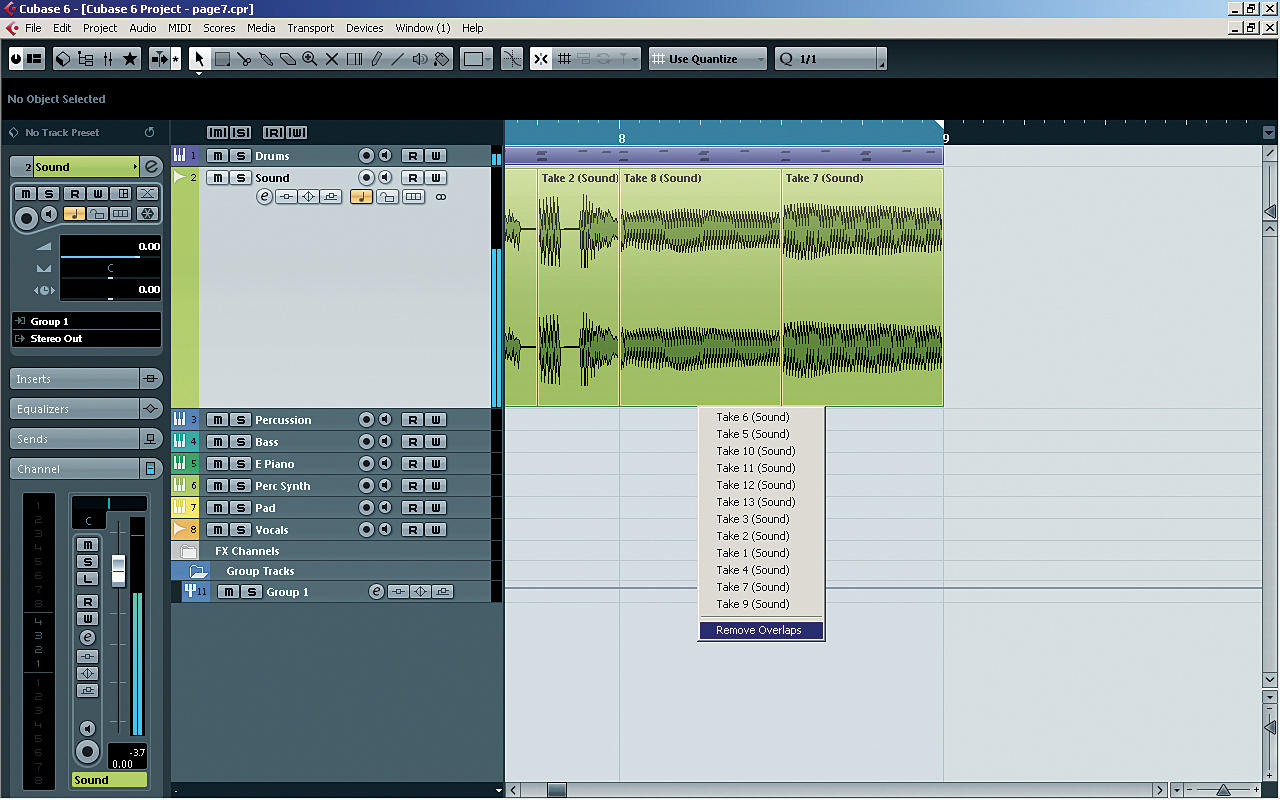
Cubase 6 has a new system for dealing with overlaps. Audio part overlaps are hidden from view by default, which makes it much easier to see what you're doing, but you can reveal them whenever you need to by hovering the mouse over the overlapped part. With the new Lanes features especially, it's very easy to end up with a lot of redundant audio parts hidden behind the bits you're actually using. When you hover the mouse cursor over a part that overlaps another, a little down arrow will appear that gives you a menu of every overlapped part underneath to pick from, as well as the Remove Overlaps function. Alternatively, you can go to Advanced from the Audio menu and select Delete Overlaps.
Memorise key commands
Take the time to go through Cubase 6's Preferences and key commands, even if you're a long-time Cubase user. New things get added with every update, and the key commands list in particular is thoroughly updated. Knowing which key controls what will speed up your access to those fancy new features and smooth out your workflow.
Liked this? Now read: 11 Cubase 5 tips you need to know
Computer Music magazine is the world’s best selling publication dedicated solely to making great music with your Mac or PC computer. Each issue it brings its lucky readers the best in cutting-edge tutorials, need-to-know, expert software reviews and even all the tools you actually need to make great music today, courtesy of our legendary CM Plugin Suite.


