8 creative sidechaining tips
Sidechain compression is a cornerstone technique for producers in a wide range of genres, particularly dance. It's most often employed on basslines, automatically ducking the volume of the bass to let the kick drum through without muddying up the low end.
However, there's more to sidechaining than this, as these eight creative tips should prove to you.
It's a lock in
When laying down a synth chord sequence over a beat, program in something quite straight in staccato eighths or 16ths, then add rhythmic flourishes with a sidechaining plug-in. For example, try using heavy sidechain compression to create pauses on the kicks and/or snares in your track.
For something a little funkier, use a sidechained low-pass filter on the synth with the cutoff rising in time with, say, a snare or ride cymbal sound, only to drop back down during the tail phase of the hit. The advantage of this technique is that your synth will remain locked in with your beat at all times.

Repeat after me
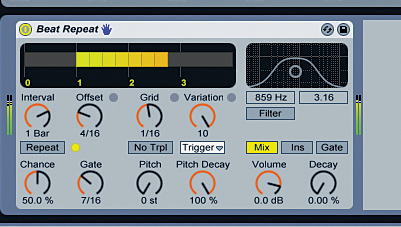
In many cases, when we use Ableton Live's Beat Repeat plug-in on our trigger notes, we set it so that none of its randomisation parameters are active. If you're ever short on inspiration, though, why not let that bad boy run wild? The Variation, Chance and Gate knobs can add an element of surprise to your parts, as your triggers change from one bar to the next.
If you'd prefer some less OTT randomisation, try recording a long section of the effected instrument to a separate audio track, then slicing out choice parts that work particularly well in your track.
If it ain't got that swing
If your kick drum trigger patterns are sounding a little rigid and mechanical, have a go at shifting them around, adding extra triggers on occasional offbeats or removing some of them altogether. This sort of variation can really help to keep the interest levels up, especially when used sparingly to create a few subtle fills or the occasional transition into another section.
Get the MusicRadar Newsletter
Want all the hottest music and gear news, reviews, deals, features and more, direct to your inbox? Sign up here.
Another good way to keep things creative is to use groove templates, which most DAWs have in one form or another. Ableton Live contains hundreds of human grooves as well as the swing patterns from various hardware drum machines. These patterns can be thrown straight over the top of your programmed kick triggers, helping to give your sidechained parts a dose of human or mechanically swung feel.

Hold that thought
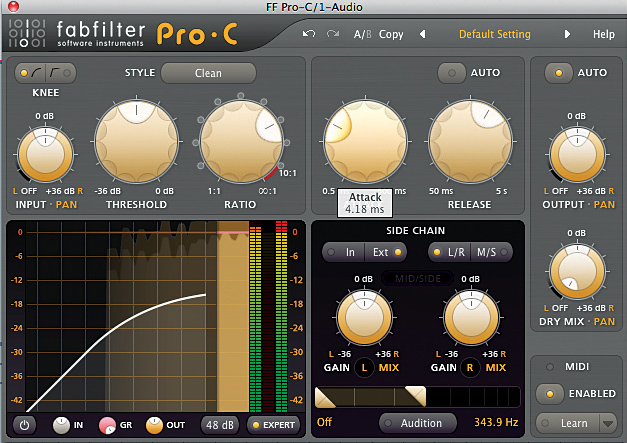
It's worth paying close attention to the Attack, Hold and Release parameters on your sidechain effects. Attack determines the length of time it takes for the plug-in to start doing its thing after a trigger has been detected - so longer Attack times can be used to create offset rhythms by making the sound come in just after each trigger.
Hold only appears on gate plug-ins: it determines how long the gate remains open after a trigger has crossed the threshold. This is a particularly good parameter for automation on gated synths, to extend or shorten note lengths, for example. Release dictates the period over which the effect dies off after the trigger signal dips below the threshold. Long release times on sidechained compressors are therefore particularly good for those swelling basslines that rise in volume on the offbeat.
Suck it up
If you like to use lots of reverb or heavily delayed ambient sounds but often end up with muddy mixes as a result, sidechaining can help. Place a sidechain compressor on your reverb or delay channel and set the Threshold to just capture the kicks and snares in your track. Set the Ratio at around 2:1 to keep the ducking fairly undetectable in the context of a full mix, while providing your main drum hits with a little more space.
Alternatively, use the same technique with a much higher Ratio and a long Release time to create a kind of 'breathing' offbeat reverb/delay pattern.
Distorting the truth
If your synth needs a little more bite to cut through the mix, or you want a heavily gnarled sound for a particularly intense section of a track, try putting a sidechained low-pass filter (keyed to your main beat) on a send/return track, followed by a distortion or saturation plug-in. Not only will this bring a heightened sense of rhythmic coherency to your beat, with the filter rising to let more of the richer frequency content through on the main hits, but it also gives you the option of blending the filtered distortion/saturation in with your original synth sound, thus enabling you to rough up your patch without compromising on any of its low-end oomph.

Is there an echo in here?
Try placing a sidechain compressor after a delay on a send/return track, triggered by whatever you're delaying in the first place. This will cause the delay output to be ducked for the duration of any notes or hits from the source audio, so that the echoes only appear during any gaps in the original part. This can be deployed in a number of ways - to slightly reduce the delayed signal whenever the source goes over the threshold in order to help build a cleaner mix, or to strategically and creatively place the repeated sections so that they fall whenever you want them to, for example. Vary the Ratio and Attack/Release times to achieve these two effects.
Finger on the trigger
Lastly, remember that the frequency content of the trigger signal is irrelevant for the sort of techniques we've discussed here. Therefore, when deciding on what part you want to use as a sidechain input, all you need to consider is its attack, duration and rhythm. If you want to create a fast, stuttering gate pattern, why not use those 16th-note hi-hats that are already in your track as the trigger? Or, if you're after a slowly opening filter, assign the trigger to be an evolving pad sound or swelling string sample. Don't forget that you can achieve some great sounds by using the actual track that you want to effect as the sidechain input, too. Experiment to see what else you can come up with.
Liked this? Now read: How to make your music loud
Connect with MusicRadar: via Twitter, Facebook and YouTube
Get MusicRadar straight to your inbox: Sign up for the free weekly newsletter
Computer Music magazine is the world’s best selling publication dedicated solely to making great music with your Mac or PC computer. Each issue it brings its lucky readers the best in cutting-edge tutorials, need-to-know, expert software reviews and even all the tools you actually need to make great music today, courtesy of our legendary CM Plugin Suite.
“I’m looking forward to breaking it in on stage”: Mustard will be headlining at Coachella tonight with a very exclusive Native Instruments Maschine MK3, and there’s custom yellow Kontrol S49 MIDI keyboard, too
“Turns out they weigh more than I thought... #tornthisway”: Mark Ronson injures himself trying to move a stage monitor


