7 finishing touches to add to your stereo mixdown

7 finishing touches to add to your stereo mixdown
The process of turning the parts that you’ve recorded and programmed into a complete mix is fun, creative and hugely enjoyable, but it’s often done with the assumption that when mixing, you’re always creating the final version of a project before mastering.
However, there are certain tricks that can help add extra sonic interest to a track which can be performed much more easily once a stereo bounce of the track has been created.
The tutorial below will take you through some of these, and in doing so will endeavour to show you that your ‘finished’ mix needn’t necessarily be your final version.
For instance, if you wanted to create a stutter edit in your unmixed project that affected every sound in your track, this would be hugely fiddly work. You’d have to chop and repeat all of your audio files and then do the same thing, separately, with the MIDI parts, perhaps adjusting note lengths for multiple files at the same time to achieve the right result.
Once your mix is bounced to stereo, however, nothing could be simpler, as all of the combined files are rendered ‘as one’ and chopping this single audio file to create the stutter edit takes a fraction of the time.
Similarly, if you decide that you want to treat all the sounds in your project to a shared filter treatment or whole-track effect, setting up multiple versions of the same plug-in on every track of your mix arrangement (or sending sounds to buses so that the effect can work simultaneously on every sound) will require a mountain of rerouting and complex automation.
Again, though, with a single stereo file, all you need to do is chop it up, assign the relevant section to another track and apply the effect you want for as long as you like.
There are several other processes that are similarly easier to carry out once your mix file has been created, including reversing and record stop effects, which we’ll explore in the following walkthrough.
Remember, it’s never too late to use extra creative elements to add interest to your tracks, so it’s always helpful to consider the mix stage as a step towards completion rather than the final result.
For a complete guide to improving your mixes, check out Computer Music Special 54: Make Over Your Mix, which is on sale now.
NEXT: 7 finishing touches to add to your stereo mixdown
The mix
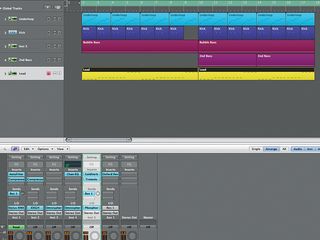
Step 1: Our starting mix is only 16 bars long but it demonstrates a typical build and drop. Stylus RMX provides an underloop, and there’s a separate sampled kick, two Omnisphere instruments running basslines and Audio Damage’s Phosphor providing the understated lead sound.
Bouncing down
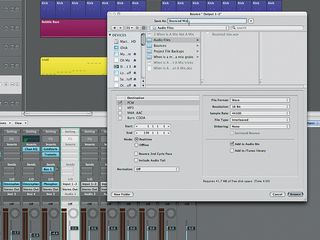
Step 2: With the mix balanced, we bounce the track down as an audio file (click here to download). At this stage, make sure the levels of the combined elements don’t cause your master output channel to overload - drop all faders by the same amount if this is happening. We don’t want to apply any maximiser-type effects to the output channel as these will come later.
Setting up the effects
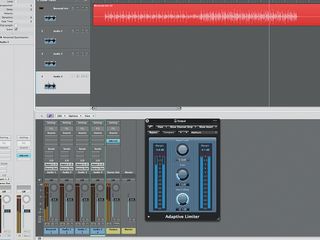
Step 3: We place the bounced file on a stereo audio track in a new project. Now we can easily apply different effects tricks to specific sections of the file. We set up four new stereo audio tracks in advance of these effects being applied and insert Logic’s loudness maximiser, the Adaptive Limiter, into the final slot of the output channel.
Finishing touch 1: the chop drop
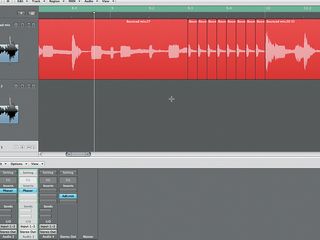
Step 4: We want to emphasise the transition from the first half into the second half, so we chop the audio file at bar 9, beat 3. We chop again at the start of bar 10 and shorten this two-beat section until it’s only a 16th-note long, then repeat it eight times between bar 9, beat 3 and the start of bar 10.
Finishing touch 2: wide phasing
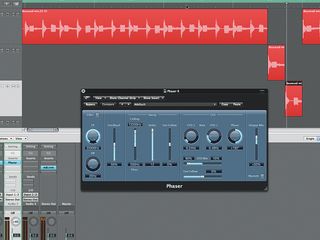
Step 5: Let’s create a wide stereo effect in bar 5. We chop on beats 3 and 4 of this bar, and on beat 1 of bar 6. We then take the slices on beats 3 and 4 and move them to audio tracks 2 and 3 respectively. We pan these -40 and +40 and apply a phaser effect to both tracks.
Finishing touch 3: the high-pass filter
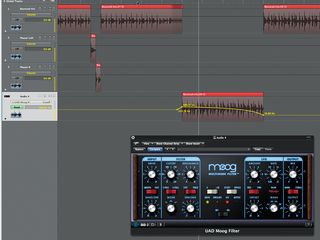
Step 6: To create timbral variation, we chop around the four-bar section starting at bar 10 and ending at the start of bar 14 and drag this to audio track 4. We use the UAD Moog filter in High-pass mode and automate the Cutoff so that the sound starts off trebly and thin and slowly regains its bass going into bar 14.
Finishing touch 4: the slow down
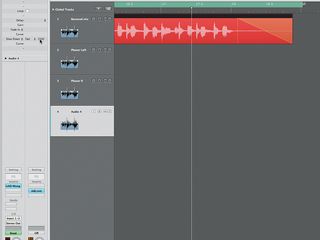
Step 7: A record stop at the end will give the impression that the track has ground to a halt. In Logic we change Fade Out to Slow Down and set the length of time over which this should happen to 1500ms. We then adjust the region end to start the slowdown straight after the final hit.
Finishing touch 5: the white noise sweep
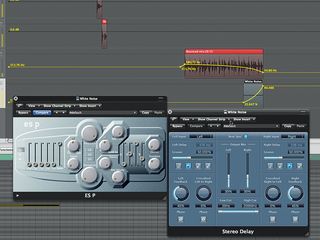
Step 8: Just because we’ve mixed the track doesn’t mean we can’t add whole new elements. Let’s throw in a white noise sweep as the filtered section ends. Logic’s ESP synth provides the source sound, then we scoop out some bass using EQ, add stereo delay and treat the sound to reverb via Auxiliary 1. We automate the filter cutoff upwards through this one-bar effect.
Finishing touch 6: the reverse
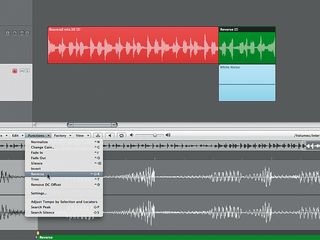
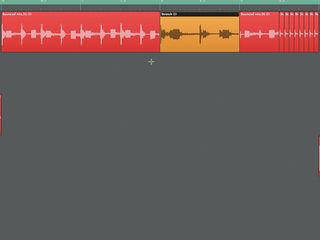
Step 9: To emphasise the effect, we reverse the audio file above the white noise sweep to make it play backwards. We use offline editing to save this section as a new audio file and choose the Reverse command in Logic’s audio editor.
Finishing touch 7: the stretch
Step 10: For one final trick, we select the bar before the chopped edit (bar 8) and chop at the beginning of that bar and then at Bar 3, deleting the second half of the bar. We select the first half and apply timestretching so that it plays back at half-speed, using the first half of the bar to fill up the deleted section.
Liked this? Now read: 10 tell-tale signs of an amateur mix
Connect with MusicRadar: via Twitter, Facebook and YouTube
"If I wasn't recording albums every month, multiple albums, and I wasn't playing on everyone's songs, I wouldn't need any of this”: Travis Barker reveals his production tricks and gear in a new studio tour

“My management and agent have always tried to cover my back on the road”: Neil Young just axed premium gig tickets following advice from The Cure’s Robert Smith

"If I wasn't recording albums every month, multiple albums, and I wasn't playing on everyone's songs, I wouldn't need any of this”: Travis Barker reveals his production tricks and gear in a new studio tour

“My management and agent have always tried to cover my back on the road”: Neil Young just axed premium gig tickets following advice from The Cure’s Robert Smith

