12 digital mixing tips and tricks
Get the most out of your DAW's virtual desk

The mixing desk is the hub of the recording and mixing environment; the centrepiece that brings together all the different sound signals into one tactile mixing surface of faders and pots, giving the studio engineer unparalleled control over any source.
The hardware mixing desk is essentially a big fat board of knobs and faders that you use to balance and mix your different sounds together, and our DAW's mixer is really no different. Although daunting at first, it can be easily dissected: one vertical column, known as a channel strip, is cloned many times over - so imagine a 24-channel desk as the same channel strip duplicated 24 times.
You'll have one incoming signal per strip, and each strip has its own input gain, volume fader, pan pot, plus buttons for solo and mute. These channels are then routed to a master channel, which combines the signals and outputs your overall mix to your audio interface, to be heard on your monitor speakers or headphones.
In the hardware world of analogue sources and outboard gear, you'd need to collect together a multitude of external signals, mix and reroute them, patch in an external delay or reverb unit, then record your final mix. Printing (recording) to the noisy medium of tape required the signals had to be loud enough to be above the level of the tape noise but not so loud as to cause distortion.
Who cares about all this now that we work only in the digital domain? Well, you've likely cottoned on that your DAW's mixer bears at least some resemblance to this multiple-fader-to-output concept, and there's a reason why: it's the most intuitive way to combine, route, process and, well, mix stuff together.
Here we've compiled 12 quick tips to send you on your way - though if you want to really dive in and become the mix master, check out the November issue of Computer Music (CM 197).
Reset modifier
It's worth remembering that most DAWs will feature an easy way to reset a parameter to its default value. The actual method itself will be different depending on your host - Cubase employs a Ctrl/Cmd-click method, Live uses the Delete key, and so on - but it's universally handy when experimenting with extreme volume or pan sweeps to test out an idea for a setting, as you can quickly reset it back to zero with no fuss.
Get the MusicRadar Newsletter
Want all the hottest music and gear news, reviews, deals, features and more, direct to your inbox? Sign up here.
Wet and dry
Effects such as parallel (aka New York) compression or parallel distortion are traditionally set up using return channels then mixed in alongside the dry channel using your DAW's mixer faders. However, many modern plugins now feature a wet and dry mix so you can achieve this effect directly on your intended channel, making for easier bypassing, re-leveling and mixer tidiness.
Think outside the box
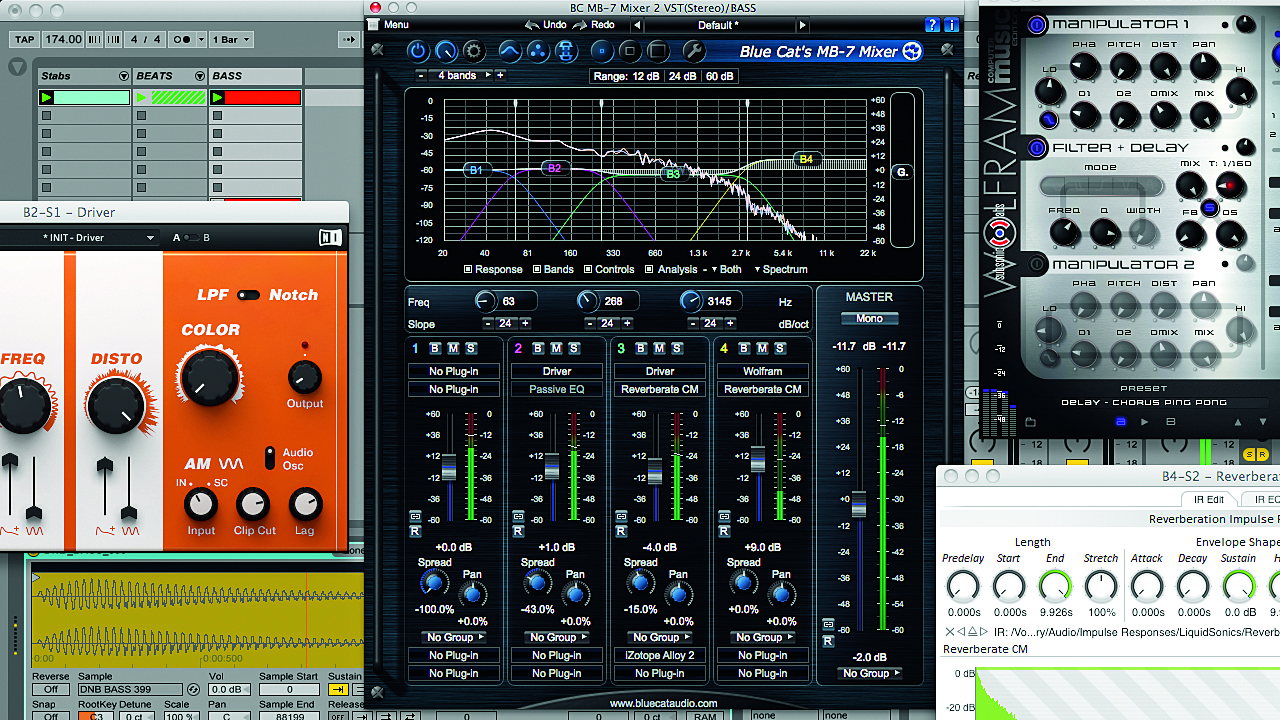
Want a mixer in your mixer? Blue Cat Audio's MB-7 Mixer 2.0 is a multiband mixer plugin that opens up on one of your DAW's tracks as an insert. It splits down your signal into multiple frequency bands, letting you change the volume, pan and stereo information of each band separately. Better still, you can load up third-party plugins across each band, effectively letting you use a regular plugin effect across several frequency ranges!
A lot to gain
Here's a common problem: you spend ages carefully automating a channel's volume fader, perfecting your channel's level throughout a mix. At a later stage, you want to boost the channel's overall level by a dB or two, but instead your automation makes the fader snap back to your automated positions! Get around this dilemma by inserting a dedicated gain plugin to automate, and your actual fader will remain free for later tweaks.

Feedback-back-back-back
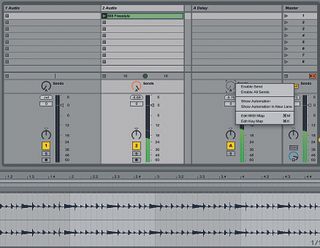
As with hardware mixers, some creative send and return routing can yield crazy results. Ableton Live's mixer allows you to route some of a return track in parallel to another return track. Simply right-click on a return's send dial and select Enable Send. Try routing a parallel delay's return signal into a second return's delay, and back again!
Wise to customise
As mentioned earlier, virtual consoles offer some great saving options so you can recall your favourite mixer layouts or plugin chains. If you have your favourite metering, analysis or mastering plugins stacked up on your master channel, save that particular chain for use in other projects. And Cubase offers three customisable mixers, so you can have three setups and flick between them easily. Try audio tracks on one, instrument/MIDI tracks on another, and aux/groups on the third!
Two screen or not two screen
Nowadays practically all DAWs (even including Ableton Live's 9.1 update) allow you to spread your projects' windows out over two or more screens. Whilst it's easy to make do with one, there's really no contest when weighing up the relatively low cost of a second monitor against the ability to have your all-important mixer on view at all times. You'll never go back to one!
Widen your options
It's a good idea to get a firm grip on your virtual mixer's resizing features and meter resolutions. If you use only a handful of tracks, consider widening all of your mixer channels to spread out your available functions and make the most of your space. If you like to cram in lots of tracks, narrow them down to fit more into one screen at a time. Some DAWs also let you mix and match sizes, so your most important strips show more information and stand out from afar. Your DAW's manual will have the lowdown.
Decidedly average
Most digital channel meters (known as Peak Program Metering, or PPM) will monitor incoming peak values, which means they'll only show you the highest points in the signal at any given time. The way our ears perceive volume, though, is more in line with average (or RMS) levels of a signal over time, similar to what you'd see on old-school VU meters. If your software offers RMS meteringm then give it a go, as you'll get a better overall feel for the overall loudness of the actual mix.
Don't be afraid of the dark
Despite the previous point, it's important to switch off those jumping green meters once in a while and use your ears. Having a visual indication of what's going on across your tracks is definitely a good thing, but remember that your eyes should come second to your ears. Take time to turn off your screen altogether, kick back and simply listen. If it sounds right, it probably is.
Out of phase
Send and return routing gives you a wealth of options to thicken up sounds using parallel distortion, compression and frequency splitting. Be careful, though: due to the nature of mixing two copies of the same signal over each other, some odd phasing artifacts can sometimes occur. Listen out for weird cancellation or modulation, and consider using a linear phase EQ when processing to minimise cancellations.
Master and apprentice
Sometimes you may want to process your whole mix with some overall master processing on your master output, but if you've got a few reference tracks of your favourite commercial mixes loaded up, these will be subject to those effects. Get around this by creating a final group bus, then route all your mix channels to that as a sort of 'pre-master' output. Any reference music can then be sent to the main out unprocessed.
Computer Music magazine is the world’s best selling publication dedicated solely to making great music with your Mac or PC computer. Each issue it brings its lucky readers the best in cutting-edge tutorials, need-to-know, expert software reviews and even all the tools you actually need to make great music today, courtesy of our legendary CM Plugin Suite.

"If I wasn't recording albums every month, multiple albums, and I wasn't playing on everyone's songs, I wouldn't need any of this”: Travis Barker reveals his production tricks and gear in a new studio tour

“My management and agent have always tried to cover my back on the road”: Neil Young just axed premium gig tickets following advice from The Cure’s Robert Smith


