Best audio interface 2024: For home recording, podcasting, and streaming - tested by experts
Our tried and tested pick of USB and Thunderbolt interfaces for Mac and PC across every budget, plus full reviews, in-depth testing, and buying advice
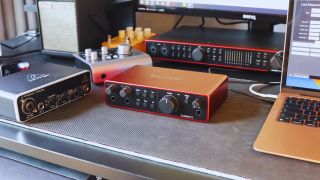
If you’re looking for the best audio interface for your particular music or content creation needs, then you’re in the right hands with this guide. I’ve tested 15 audio interfaces in the past year alone for MusicRadar, but my home recording journey began 16 years ago when I picked up my very first audio interface - an M-Audio M-Track 2 - and a copy of Cakewalk to make demos for my band. By today’s standards, it was a primitive setup, but it started me on a music-making path that remains a huge part of my life today. Over the years I’ve been hands-on with countless interfaces, recording bands and artists that cover the gamut from jazz and hip-hop to rock and metal.
Speaking of hands, I’ve had mine on every single interface in this guide, and in my opinion, there isn’t that much difference between audio interfaces at this level. I’m recommending audio interfaces for home producers, not multi-thousand-dollar rack mount units for professionals in studios - the pros already know what they like. The interfaces I’ve picked are manufactured by major brands with a history in the professional recording space. This means all of them will do a brilliant job of their primary task - capturing audio. Where they differ is in their features, so while one interface could be perfect for podcasting, it might not excel for vocal recording.
If you want a way to gauge each of my picks I’ve got you covered there too. I’ve personally tested each of the best audio interfaces in this guide, alongside a team of reviewers, looking primarily at the latency figure at various buffer sizes. For me, low latency performance is a critical metric for any audio interface, so each product in this guide has been tested on the same MacBook Air M1 for an accurate comparison. If you want to dive into my testing methodology (or fancy trying it out for yourself) check out the how we test section in this guide.
While all the interfaces presented here will get the job done, if you had to push me to choose just one, I’d go for the Focusrite Scarlett 2i2. For me, it delivers super clear preamps, excellent dynamic range, and a huge selection of features that make it great for all engineers and producers. For absolute beginners, the Audient iD4 MkII delivers superb bang-for-buck performance, with awesome quality preamps and a beginner-friendly price point. And finally, if budget is your primary concern, I’d recommend the Behringer U-Phoria UMC22. It’s not the most feature-packed, but for recording good-quality audio on a shoestring budget, it’ll get the job done.
If there are terms you don’t understand or you need more guidance, I’ve included a glossary that unlocks key phrases and a handy FAQ section to this guide.
- Looking for epic music gear bargains? We're tracking all of this year's biggest savings over on our Black Friday music deals page. If you’re in the market for a fresh audio interface, check out our Black Friday audio interface deals hub.
Top picks
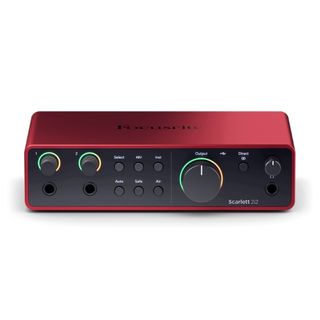
For me, it doesn't come much better than the Focusrite Scarlett 2i2. I love its combination of excellent quality preamps, huge feature set, rock-solid drivers, and a generous software bundle. It’s a brilliant all-rounder and my top recommendation for any level or style of home recording and production.
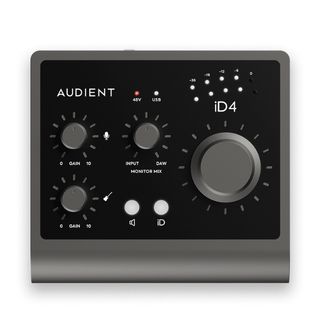
If you're getting into recording for the first time, I recommend something easy to use, but with enough features to grow into. The Audient iD4 MkII ticks all of these boxes, delivering exceptional quality preamps, an ultra-low noise floor, and loads of useful features - all at a price that is phenomenal value for money.
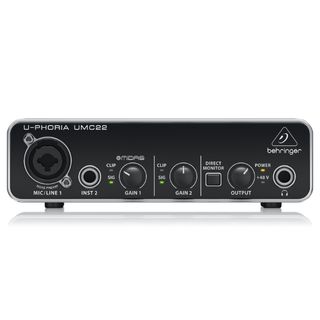
If money's tight or you'd rather spend your budget on a decent microphone, the Behringer U-Phoria UMC22 is my pick for those who want champagne recordings on a beer budget. The MIDAS preamps sound great and although there's no dedicated Windows driver, it’s easily the best value audio interface for you can buy right now.
Best overall
Specifications
Reasons to buy
Reasons to avoid
✅ Buy if you want an easy-to-use interface with loads of features: With its small size but top-quality preamp and huge feature set, the Scarlett 2i2 is the perfect companion for recording instruments at home.
❌ Avoid if you don't like software: For some features, the 2i2 relies on the Focusrite Control app, which can be annoying for users who prefer button controls.
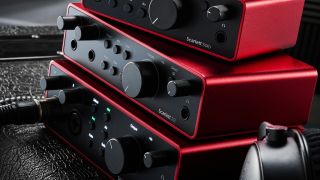
🎛️ The Focusrite Scarlett 2i2 4th Gen is one of the most popular audio interfaces ever made for good reason. Feature-packed with transparent preamps, it's a master of all trades and in my opinion, the best audio interface for home recording.
Overview: Focusrite’s ubiquitous red box is probably the most popular audio interface ever made, and it certainly captured my attention when the Gen 1 landed back in 2011. I used it to record a bunch of bands at University and as a testament to its excellent durability, it still works today. We’re on Gen 4 now and the Scarlett 2i2 has come a long way since that first iteration, with improved preamps, excellent low latency performance, and an ultra-low noise floor.
Features: One of the things that impressed me the most about the 2i2 4th Gen when I tested it was the huge number of features. As well as your more run-of-the-mill stuff like phantom power and a combination of line and mic inputs, it now comes with three flavours of preamp mode. The first is a basic, super clean, and detailed sound from the preamps. With a push of the ‘Air’ button, you can add a presence boost to your signals, increasing the high end. A second press gives you a mid-range harmonic boost which is useful for adding a little more punch to things that need to stand out in the mix.
Auto-gain mode allows you to ‘train’ your interface on your particular input by playing/singing/drumming for a few moments while it detects the signal level. The interface will then automatically set your input gain to the sweet spot for recording, usually around -6dBFS. You also get a clip-safe mode, which is useful for very loud sources like acoustic drums. It stops your input levels from getting overloaded which can potentially ruin a take, and will be super helpful for beginners who aren’t as experienced in setting their input gain.
Software: Scarlett’s drivers on Windows deliver phenomenal low latency performance that’s only really limited by your computer or laptop specs. I found on my relatively old Windows PC I could set my buffer settings super low, and nail rhythmic parts without having to account for any delay or edit takes in post. On Mac you can go a step further and utilise something called ‘codeless kernel extension’ This allows you to drop your latency to below the 5ms mark which is a frankly incredible number considering the cost.
The Scarlett 2i2 comes with a dedicated ‘Focusrite Control’ app that enables totally hands-free use, which I personally found super useful. If you’ve got a more permanent setup then you’ll love being able to select your channels and set gain levels with a few clicks of the mouse, and it also automatically installs any firmware updates for your interface.
The Scarlett 2i2 4th Gen comes with one of the better software packages of the interfaces in this guide, including Ableton Live Lite, a 3-month Pro Tools Artist subscription, and a 6-month FL Studio Producer Edition which should cover the vast majority of DAW needs. It also comes with the Hitmaker Expansion which contains synths, amp modellers, VST drums, and a selection of EQs and compressors. One thing it does lack is any effects like reverb or delay plugins, so you’ll need to use those that come as stock in your DAW.
Performance: I found the Scarlett 2i2 4th gen to be super easy to set up and I really enjoyed those extra little features that make recording life a little easier. The sound of the preamps is as clean and clear as you could hope for at around the $/£200 mark, so as long as you’re feeding it a quality signal from your instrument or microphone you won’t be shy of recording quality.
Ultimately, there’s a reason that so many home producers are using a Scarlett, and if everyone is using one, well you probably should too. Whether you’re an absolute beginner making your very first recordings, or you’re a more established producer looking for something to mix on the go, I couldn’t recommend the 4th Gen Scarlett’s enough.

“The reworked preamps have an impressive 69dB of gain, which I found ideal for low-output mics such as ribbons. The two stages of enhancement - presence or presence with harmonic drive are ideal for livening up vanilla DI electric guitar or bass. Although they look similar to previous iterations, the new Scarletts are slicker audio interfaces with better specs and more options.”
Read more: Focusrite Scarlett 2i2 review
| Test | Results | Score |
|---|---|---|
| Connectivity | Excellent, no MIDI | ★★★★☆ |
| Features | Auto gain, clip safe | ★★★★★ |
| Software | Generous software bundle | ★★★★★ |
| Usability | Fantastic performance | ★★★★★ |
Best for beginners
Specifications
Reasons to buy
Reasons to avoid
✅ Buy if you want your first audio interface: Combining excellent value for money with an easy-to-use interface and plenty of pro-level features, the Audient iD4 is the perfect choice for first-time recording artists.
❌ Avoid if you need MIDI: There are no MIDI connections here so one to avoid if you need to integrate MIDI control into your setup.
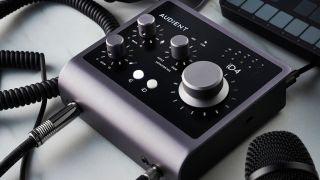
🎛️ The Audient iD4 MkII is perfect for beginners, combining high-quality preamps with easy usability. Despite the relatively low cost, it's packing premium-grade components to deliver quality recordings.
Overall: One of the best audio interfaces under $200, the Audient iD4 MkII is my top pick for those who are completely new to recording. It’s super easy to use, relatively cheap at around the $210/£120 mark, and yet it uses the same preamps found in Audient’s much more expensive studio-grade hardware. I’ve used Audient hardware in professional studios, so they’ve got a huge amount of knowledge to draw from when creating their more home recording-specific gear.
Features: Probably the most useful feature I found with the Audient iD4 is its ultra-large encoder knob on the front. It does a multitude of different things, from setting the output level, to controlling certain parameters within your DAW. A press-down allows you to ‘dim’ the headphones and main outputs, which can be useful if you need to talk to a collaborator in the studio. It can also be used to set the left/right balance of the input monitoring when you press the speaker and iD buttons together.
I also love the dual headphone outputs which can be used simultaneously for collaborative recording and mixing sessions. It’s a small touch but you’ll find most interfaces at this cost only have a single headphone out. Because it is USB-bus powered, you’ll need a USB 3.0 port to get the best out of it. It makes the iD4 great for a travel rig, but will limit its compatibility with certain machines depending on how old they are.
Software: In keeping with its beginner-friendly ethos, I found the Audient iD4 to be simple to install, with a very good driver for Windows users. It also features one of the most complete software offerings of any of the interfaces here, with Cubase LE3, Sonarworks, Strymon BigSky reverb plugin, Two Notes Torpedo Wall of Sound Speaker Emulator, and even 3 free online courses from Produce Like A Pro. Again, this is why I would heartily recommend it for those who are taking their first steps into music production.
Performance: I’m primarily a guitarist, so of course I love the JFET instrument input for plugging in an electric guitar or bass, which delivers similar characteristics to the input of a tube amp. It provides an excellent base tone for using guitar VSTs, and the mic preamp is super transparent with a healthy 58dB of gain. This means there’s plenty of gain for quieter dynamic microphones whether you’re recording vocals or other traditional instruments.
The iD4 MkII delivers a solid update to its predecessor, making improvements in all the right places. It’s still pretty basic as far as the feature set goes, particularly compared to products like our best overall pick the Scarlett 2i2 4th Gen, but as it's intended for beginners I think this is actually a strength, as you can get to recording in a simple, easy way with a minimum of fuss.

“The mic pre is very transparent and you’ve got 58dB of clean quiet gain. But it’s the instrument input that’s the star. The JFET design is quiet and punchy with plenty of headroom and if you happen to clip the input, the distortion is natural and pleasing.”
Read more: Audient iD4 MkII review
| Test | Results | Score |
|---|---|---|
| Connectivity | Needs USB 3.0, no MIDI | ★★★★☆ |
| Features | JFET input, works with iPhone/iPad | ★★★★★ |
| Software | Generous software bundle | ★★★★★ |
| Usability | Fantastic performance | ★★★★★ |
Best budget option
Specifications
Reasons to buy
Reasons to avoid
✅ Buy if your budget is tight: Costing well below the $100/£100 mark, this is the perfect audio interface for those with cost at the forefront of their needs.
❌ Avoid if you prefer a dedicated driver: To keep costs down there's no dedicated driver support with this interface, meaning you'll need to rely on third-party software like ASIO4ALL.
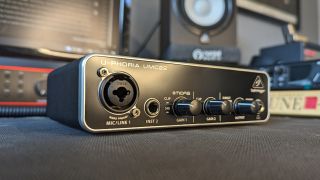
🎛️ The Behringer UMC22 is unbelievably cheap. Despite this, it still manages to do a fantastic job at the majority of tasks most musicians will ask of an audio interface, perfect for the budget-conscious out there.
Overview: I was so skeptical about the Behringer U-Phoria UMC22 when I received it for review. Costing a measly $/£40, it’s the cheapest interface I’ve ever used by some measure, so surely it couldn’t be any good? Well, I’m perfectly happy to admit I was completely wrong about it, and you can absolutely get some fantastic recordings with this uber-cheap interface.
Features: Now, this is an interface that costs less than your average synth plugin, so it's not exactly feature-packed, but it does give you all the basics. Phantom power, a single mic preamp, a line-level instrument input, studio monitor outs, and a studio headphone output. It’s got a very Spartan appearance compared to others and one of the things that impressed me is how compact it is.
Alongside the ins and outs, you get individual gain knobs for both inputs alongside an output knob that controls both the monitor and headphone volume. You can’t separate the two either, so if you want to monitor your low end via headphones then you’ll need to separately mute your speakers to prevent any bleed causing issues in your mixing. A direct monitor button allows you to jump between your DAW mix and input signals.
Software: Software is where I found the major flaw with the UMC22. On a Mac, it works great, although I had to separately set the I/O in Pro Tools as it didn’t recognise it. On Windows, it’s a different story. Presumably to keep costs down Behringer hasn’t bothered creating a dedicated driver, which means you need to go 3rd party. I chose ASIO4ALL, but there are others you can use.
It means that the low-latency performance of the UMC22 isn’t as good as those with dedicated drivers, and depending on your setup, you may only be able to get one sound at a time with the driver engaged. That means no easy switching between what’s coming out of your DAW and Spotify if you’re looking for inspiration on your latest tune. There’s also no software bundle to speak of, so you’ll have to buy your own separately or use free plugins.
Performance: I used to use a Behringer UMC 1820 for rudimentary drum recordings and this unit features the same MIDAS preamps as that. They’re not the quietest out there, but if you’re just cooking up demos or basic recordings, you’re probably not going to notice that. Just make sure you’ve got your gain staging right and it’ll do just as good a job as many other interfaces on this list.
There are issues with the UMC22 I won’t deny that, and if you’re a Windows user you’re going to have to do a little extra work to get it going. Once you’re up and running however, it’ll deliver good-quality audio for an extremely low price. I’d absolutely use one for demo work and songwriting collaboration on a budget, and it’s undoubtedly the best budget audio interface available right now.

“Behringer gear gets a bad rep from musicians online - unfairly in my opinion. The UMC22 is a brilliant example of not having to spend huge amounts of cash to get something that just works. Yes, the drivers on Windows are an issue, and I probably wouldn’t use one for professional production, but for demos and rough recordings to help you collaborate with others, it’s the best value for money you can get.”
Read more: Behringer U-Phoria UMC22 review
| Test | Results | Score |
|---|---|---|
| Connectivity | Only what you need | ★★★★☆ |
| Features | Does the job | ★★★★☆ |
| Software | No additional software | ★★★☆☆ |
| Usability | Excellent performance for the money | ★★★★☆ |
Best for Mac
Specifications
Reasons to buy
Reasons to avoid
✅ Buy if you want one of the best audio interfaces for Mac: A UA interface and a Mac or Macbook are a tried and tested combination in the world of sound recording, whether you're a pro engineer or just making music at home.
❌ Avoid if you're on a tight budget: The UA Apollo Twin X isn't cheap and doesn't even include a Thunderbolt cable, making it a tough ask for those on a small budget.
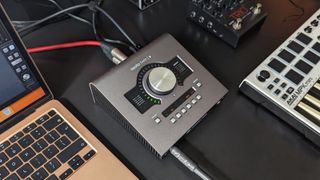
🎛️ The Universal Audio Apollo Twin X is one of the best-quality audio interfaces available at the home recording level. Its DSP power ensures minimal latency when using plugins on the way in, and its Thunderbolt-powered integration into the Mac ecosystem delivers unreal performance.
Overview: For me, the Universal Audio Apollo Twin X is the definition of a ‘prosumer’ audio interface. It’s high-quality enough for professionals, yet accessible enough for those who demand the best in the home recording space. I’ve worked with more than a few pro engineers who used one as part of their home or travel rig, as it delivers superb-quality recordings, fantastic dynamic range figures, and comes with some of UA’s most-loved plugins.
Features: The Apollo Twin X is a DSP interface, which means it uses its own processing power rather than just that of your computer. That means you can run preamp and outboard gear emulations in real time, giving you the workflow of a traditional analogue studio. It comes in Duo and Quad versions, which give you more or less power depending on what your requirements are.
I absolutely loved using the Apollo Twin X during my testing and I’m currently using a Universal Audio Apollo X4 Gen 2 as the centre of my home recording rig. On the face of it, it’s not too different from any other desktop-based interface here, however, the clever bit is how the Unison preamps utilise that DSP processing. This means you can load in a vintage Neve channel strip (or whichever flavor of preamp/EQ/compressor takes your fancy) which will modify the behavior of the analog input for some uncanny recreations of 'proper' recording studio channels.
Software: Being a Thunderbolt interface predominantly (although it is available in a USB 3 version) it’s much better suited to Mac users. Those on Windows, especially if you’ve got an older machine, may find their motherboard isn’t compatible, which might mean purchasing a pricey Thunderbolt card in order to use it. If you’ve got a newer machine however, you’ll be fine.
The installation process on Macs is also a bit of a minefield if you’re not already part of the UA ecosystem. Be prepared for many restarts, endless accepting of pop-up windows, and delving into the system menus of your MacBook in order to get it up and running. Admittedly, it’s totally worth it once you’re done, as you get access to incredibly accurate plugins like the legendary LA-2A and 1176 compressor plugins, Pulteq EQ plugin, and amp modellers in the form of Marshall Plexi for guitars and Ampeg SVT for bass.
Performance: The UA Apollo Twin X is one of my all-time favorite audio interfaces to use, precisely because of its analogue-style workflow. One of the crucial things that many home producers miss is that you need to start with a great sound before you get a great mix. The Apollo encourages this older art of recording, which inevitably leads to better results in the final mix.
Granted it’s not cheap, retailing around the $/£1,000 mark, but ultimately you’re paying a premium for more processing power than a cheaper interface is capable of producing. Some will argue DSP power isn’t a necessity nowadays thanks to the high-powered Apple silicon chips that are getting cheaper and cheaper, but for me it’s the variety of plugins the UA ecosystem provides, and thus the versatility in recording that make the Apollo Twin X perfect for home producers who want excellent quality sound.

“There are times when I’m reviewing gear that I really don’t want to send it back, and that was exactly the case with the UA Apollo Twin X. For me, it’s a beautiful hybrid of traditional recording techniques with the flexibility of modern production, gently coercing you into getting your sounds right at the source, and thus resulting in a much higher-quality production overall.”
Read more: Universal Audio Apollo Twin X review
| Test | Results | Score |
|---|---|---|
| Connectivity | Excellent, but no MIDI | ★★★★☆ |
| Features | Excellent range of features | ★★★★★ |
| Software | Powerful DSP software | ★★★★★ |
| Usability | Amongst the best | ★★★★★ |
Best for guitar
Specifications
Reasons to buy
Reasons to avoid
✅ Buy if you only want to record guitars: With loads of guitar-centric features, this is the perfect audio interface for recording high-quality electric and bass guitars.
❌ Avoid if you're not recording guitars: Of course, a guitar-specific interface probably isn't the best choice if you're using your interface for vocals or recording in the box.
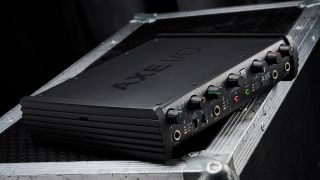
🎛️ The IK Multimedia Axe I/O is the perfect companion for the recording guitarist. Packed with guitar-friendly features like a JFET input and super-easy reamping feature, it's one of very few guitarist-specific interfaces on the market today.
Overview: I’m predominantly a guitar player, so you can bet my interest was piqued when I came across the IK Multimedia AXE I/O for testing. It’s a pure guitar audio interface, designed for four-five-six-seven-eight stringers who want to focus on getting great guitar tones. It’s a hefty thing with a rugged design that's reminiscent of other guitar gear like pedals and amps, which means you can use it to lay down ideas or supplement your live show on the road.
Features: I’m seeing more and more interfaces featuring JFET inputs, such as the Audient iD4 and the Blackstar Polar 2. The idea is to recreate the type of input you’d get on a guitar amp to help deliver punchier DI guitar tones. It certainly worked in my tests with the AXE I/O, helping me get some sizzling-sounding guitars alongside my amp modelling software. JFETs are great for guitars, but it’s not exactly a unique feature these days.
The input is switchable between ‘pure’ and ‘JFET’ which gives you the option of a pure clean tone, or to utilise that JFET input for extra harmonics. You can also switch between active and passive pickup-equipped guitars, which can be super helpful if your guitar collection has both and you don’t want to keep resetting your gain level. Finally, there’s an impedance knob that goes from ‘sharp’ to ‘bold’ or in simpler terms, bright to warm.
Software: Being a guitar-specific audio interface, the AXE I/O comes with Amplitube 5 SE and Tonex SE, so you’ve got some of the best amp models and captures around for your recordings. I’ve used AmpliTube many times in the past for in-the-box guitars and it absolutely delivers on accurate amp tones, as well as providing a huge amount of effects to play with. Similarly, I also reviewed the IK Multimedia Tonex One and its accompanying software, and honestly, those captures are some of the best sounds I’ve heard in the past few years.
Performance: For those recording guitars only, you’ll feel totally at home with the IK Multimedia AXE I/O. I found it super easy to get up and running in my DAW, and I really loved the amount of connectivity options you get as well. Alongside the two front-mounted instrument inputs you’ve got dual microphone inputs on the rear, multiple outs for two sets of studio monitors or sending a signal elsewhere, as well as dedicated outs for external pedals or controllers.
Admittedly the built-in guitar tuner feels like a bit of an afterthought and doesn’t work as well as it could, but it’s useful in a pinch. One of the most undervalued features of the AXE I/O is the dedicated re-amping output, which makes this super useful technique for improving your recording guitar tracks nice and simple. The integration with AmpliTube also extends to a preset knob which allows you to change your sound without clicking your mouse.

“Where many simply have a one-size-fits-all instrument input, the dedicated Number 1 guitar input here made a real difference in the quality of my guitar recording. Not just that, the Amp Out facility makes getting a signal to my amp and back into the DAW a real doddle.”
Read more: IK Multimedia AXE I/O review
| Test | Results | Score |
|---|---|---|
| Connectivity | Good range of connections | ★★★★☆ |
| Features | Guitar orientated features | ★★★★☆ |
| Software | Comes with amp modellers | ★★★★☆ |
| Usability | Great for guitars | ★★★★☆ |
Best for vocals
Specifications
Reasons to buy
Reasons to avoid
✅ Buy if you want the best audio interface for vocals: Boxing up that SSL sound into a compact interface, the SSL 2+ gives you phenomenal sounding preamps plus two headphone outs that make it great for working with vocalists.
❌ Avoid if you want a premium feel: As it's made out of plastic some would say the SSL 2+ feels a little cheap in places, especially the 4K button which admittedly feels a little flimsy.
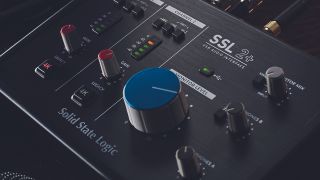
🎛️ The SSL2+ is our choice for recording vocals at home. SSL preamps are world-renowned for their studio quality, and the SSL2+ delivers amongst the cleanest we've heard at the home recording level.
Overview: The SSL 2+ aims to bring affordability to that 'SSL' sound, packing pro features and connectivity into an audio interface that's within reach of the everyday musician, taking the SSL console designs from 7-figure recording studios and making them available for everyone. I love this interface for tracking vocals thanks to its excellent preamp quality, and there’s nothing more ‘pro’ feeling than pushing the 4k button and adding some extra top end when your vocalist asks for some more ‘vibes’.
Features: There are two combi mic/line inputs with Hi-Z (impedance) options for switching between guitar and bass signals or those from synths or drum machines, as well as MIDI connectivity should you need it. A +48v phantom power option also allows the connection of both condenser and dynamic mics. With great monitoring, recording quality, and connectivity the SSL 2+ comes highly recommended by me.
Software: The SSL2+ comes with a nice software offering, with plenty to help you start making full productions. Featuring BFD drums, Native Instruments synths and Antares Auto-Tune for perfect vocal performances, it's a nice complement of tools for you to make great music. You'll also get three months of free access to SSL and Slate's Complete Access, which features over $12,000 worth of plugins to get your mix perfect.
Performance: It's a fairly standard 2-in, 2-out configuration that keeps things nice and simple for home users, and as always the SSL preamps deliver top-quality performance. I found little to no noise on the mic pres, even with the input gain cranked. The monitoring sound is fantastic too, delivering an up-front and honest tone that you'd normally find on much pricier interfaces.
The 4k button adds some extra presence and high-end zing, making your recordings feel a little bit more 'pro'. It's a subtle effect, it's not going to make anything leap out of the speakers at you, but nice to have in a pinch. More important for working with vocalists are the two headphone outs with dedicated volume knobs, allowing you to adjust the headphone mixes of both singer and engineer independently.

“Recording-wise, it’s crystal clear and there was little or no noise apart from when I cranked up the input on a not-so-clean source. The SSL’s monitoring sound is right up there with interfaces that cost twice as much - and even better in some cases.”
Read more: SSL2+ review
| Test | Results | Score |
|---|---|---|
| Connectivity | Has MIDI and RCA connection | ★★★★★ |
| Features | Very complete feature set | ★★★★☆ |
| Software | Excellent software bundle | ★★★★★ |
| Usability | Fantastic performance | ★★★★★ |
Best for podcasting
Specifications
Reasons to buy
Reasons to avoid
✅ Buy if you want the best audio interface for podcasting: Easy to use for the potentially less audio-savvy podcaster, yet packing enough depth to provide rewarding performance, the Rodecaster is perfect for getting a tip-top production out of your podcast.
❌ Avoid if you don't like software: You'll need to get to grips with some in-depth software to get the best out of this interface, so one to avoid if you don't like exploring on your computer.
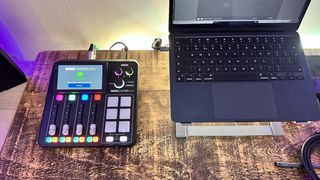
🎛️ The Rode Rodecaster Duo is an amazing option if you're starting a podcast, or you want to add some more professional sheen to an existing one. The powerful software and quality preamps make it a breeze to get up and running, but there's plenty of depth on offer here too.
Overview: Podcasting is one of the fastest-growing forms of media right now, and if you want to start your own or upgrade one that’s already existing, the Rode Rodecaster Duo is my top choice. For me, it strikes the perfect balance between features and connectivity for use in a permanent setup, whilst also being small enough to take out on the road should you need to do your podcast on the move or travel to a guest.
Features: The preamps are ultra-low noise, and deliver a hefty 76dB of gain, which is plenty to power a Shure SM7B without a Cloudlifter. The two combi input connectors are Neutrik, which are well known for being the industry standard, so you can rest assured that they’ll stand the test of time. It also features a wireless receiver that will connect two Rode wireless mics if you want to reduce your cable use.
The colourful front panel features four faders for controlling your levels which feel lovely and tactile in your hands, and allow excellent tactile control. My eyes were immediately drawn to the six pads that allow you to trigger one shots, loops, and even MIDI commands. There are three banks which gives you 18 triggerable sounds in total, plenty for even the most trigger-happy podcasters out there.
Software: The software does take some learning if you’re used to using something different, but it's powerful and well worth the investment of time. Various 'Wizards' can guide you through this initial setup, great if you're new to podcasting, but there's a huge amount of depth on offer to tweak things to your liking if you're more experienced.
You can save presets as ‘shows’, so if you’re the prodigious type you’ll be able to instantly recall settings from different podcasts. This could be anything from mic levels to devices connected via Bluetooth. Having these on hand makes your podcasting more efficient, leaving you free to concentrate on actually creating content.
Performance: Armed with an SM7B and an Audio Technica AT2040USB I found the mic preamps to be fantastic quality, with plenty of clean gain to drive podcasting microphones - even the notoriously quiet SM7B. The noise floor is ultra-low, as you’d expect from a company that manufactures some of the most popular microphones in the world, which means you get high-quality spoken word.
The whole unit is extremely well made as I’d expect from Rode gear, and it feels super high quality and plenty durable enough for working on the go. There’s a huge array of connectivity options available too that should cover most use cases, but if you feel you need more mics for a bigger podcast, then the Rodecaster Pro II is also available with four inputs.

“I loved the amount of different connectivity options, and I was extremely impressed with the sensible approach to supporting less confident producers through the setting up period. To sum up, the RodeCaster Duo is great for two-person podcasts - in fact, possibly the outstanding choice on the market today for this specific use case.”
Read more: Rode Rodecaster Duo review
| Test | Results | Score |
|---|---|---|
| Connectivity | Good for podcasting | ★★★★☆ |
| Features | Great features for podcasts | ★★★★☆ |
| Software | Very powerful control software | ★★★★★ |
| Usability | Excellent preamps | ★★★★★ |
Best 8-channel
Specifications
Reasons to buy
Reasons to avoid
✅ Buy if you want to start recording drums: 8-channels is plenty to start doing drum recordings, giving you inputs for individual drums, overheads, and a room mic. The 18i20 has loads of useful recording features too.
❌ Avoid if you're not recording bands: With a huge amount of ins and outs, this would definitely be overkill for home-based producing recording mainly in the box.
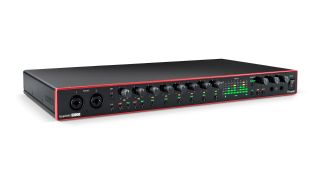
🎛️ The Focusrite Scarlett 18i20 is great for producers and mixers who've outgrown their first two-channel interface, and want to start moving on to recording drums and multi-miking individual instruments. It also works brilliantly to expand the I/O of an existing setup.
Overview: If you want to expand the connectivity of your home studio and get into recording bands and acoustic drum sets, my number one choice would be the Focusrite Scarlett 18i20. For me, it’s the perfect 8-channel audio interface thanks to a huge array of connectivity and features, but not so overwhelming you’ll feel out of your depth. Admittedly if you are a complete beginner, I would recommend getting started on something smaller before you make the jump to this many ins and outs.
Features: If you’re confused by the 18i20 moniker, that’s because that number includes virtual inputs or those available by connecting an external mic preamp. To make things clear you get 8 actual microphone inputs and 10 physical line outs, which is plenty for getting great multi-mic recordings of drums and other instruments.
It also features MIDI and S/PDIF connections for extra flexibility, 24-bit/192 kHz converters for top-quality sound, and a built-in talkback mic. It’s a list that makes it feel a lot more ‘pro’ than others in this guide, and it comes with rack fittings to put in a proper studio rackmount system, although it can still sit it on your desktop if you have the space.
Software: Like all Focusrite interfaces the 18i20 uses the Focusrite Control App, and in fact you have to use the app to access all of the features. The layout isn’t the most straightforward out of all of those I’ve used, but a quick perusal of the manual will get you where you need to be. It comes bundled with Ableton Live, Pro Tools Artist, and plugins from XLN, Landr, and Softube amongst others which is a nice touch, but I’d imagine if you’re at this level you’ll likely have your favourite plugins already nailed down.
Performance: Getting the 18i20 setup was surprisingly easy considering it's designed for more professional applications. Even chaining an additional mic pre via ADAT is nice and simple, and you can use the 18i20 as the master clock with a BNC cable to ensure everything is recording and playing back at the same rate. Most DAWs will recognise the 18i20 immediately, so you’ll be up and running in no time.
The preamps sound fantastic, again to be expected from Focusrite. A 56dB gain range on the inputs is plenty for the majority of home studio uses, delivering superb quality recordings. The ‘Air’ button on each channel adds a nice presence boost to the channel in question, perfect if you’re finding the tones you get are a little more muted than you’d like. It probably wouldn’t cut it in a pro studio, but for getting more inputs at home I think it's one of the best out there.

“I found the 18i20 is competitively priced for a unit that delivers such excellent results. It tackles the 'studio hub' role successfully, bringing together input, output, software monitoring, and hardware monitoring.”
Read more: Focusrite Scarlett 18i20 review
| Test | Results | Score |
|---|---|---|
| Connectivity | Excellent connectivity | ★★★★★ |
| Features | Huge range of features | ★★★★★ |
| Software | Decent software bundle | ★★★★☆ |
| Usability | Excellent preamps, low-latency | ★★★★★ |
Spec comparison
If you're struggling to decide which interface to choose, here's a side-by-side spec comparison of our interface recommendations. This gives you all the major features in one place, including the result of our low latency testing performance:
| Model | Resolution | Inputs | Outputs | MIDI | Connector | Latency at 16 samples |
|---|---|---|---|---|---|---|
| Focusrite Scarlett 2i2 4th Gen | 24-bit/192kHz | 2 | 2 | No | USB-C | 5.782 |
| Audient iD4 MkII | 24-bit/96kHz | 2 | 2 | No | USB 3.0 | 6.213 |
| Behringer U-Phoria UMC22 | 24-bit/48kHz | 2 | 2 | No | USB 2.0 | 10.363 |
| Universal Audio Apollo Twin X | 24-bit/192kHz | 2 | 4 | No | Thunderbolt 3 | 8.617 |
| IK Multimedia AXE I/O | 24-bit/192kHz | 2 | 4 | No | USB 2.0 | 8.367 |
| SSL 2+ | 24-bit/192kHz | 2 | 4 | Yes | USB-C | 8.095 |
| Rode Rodecaster Duo | 24-bit/48kHz | 2 | 2 | No | USB-C | 16.938 |
| Focusrite Scarlett 18i20 | 24-bit/192kHz | 8 | 10 | Yes | USB-C | 5.896 |
Also consider
For me, the above interfaces are the ones you should be spending your money on. That said, there's a wide world of interfaces that are available these days so if they didn't quite cut it for you, here's a selection of other audio interfaces we've tested:
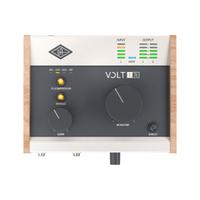
Universal Audio Volt 176
USB-C | 1 in | 2 out | 24-bit/192kHz
The Universal Audio Volt 176 is a compact interface perfect for simple home recording. It's got some excellent features though, thanks to its built-in 76-style compressor and 'vintage' button which adds a gentle touch of high-end to your signal.
★★★★½
Read more: Universal Audio Volt 176 review
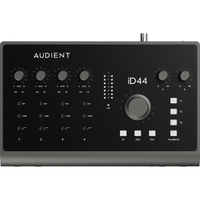
Audient iD44 MkII
USB-C | 4 ins | 8 outs | 24bit/96kHz
This new version of the Audient iD44 MkII ramps up the performance even further and adds a handful of nifty new features. Loopback lets you record audio from a computer on separate channels to your mics, providing a lot of versatility when mixing.
★★★★½
Read more: Audient iD44 MkII review
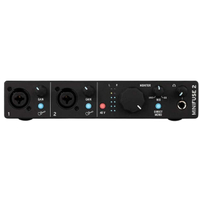
Arturia MiniFuse 2
USB-C | 2 ins | 2 outs | 24-bit/192kHz
MiniFuse is Arturia’s super compact interface range. It's a 2-in/2-out, USB-powered unit with mic/line/instrument options for both inputs, MIDI I/O, and a headphone output. It also incorporates a USB hub, although the power draw must be 250mA or less.
★★★★½
Read more: Arturia MiniFuse 2 review
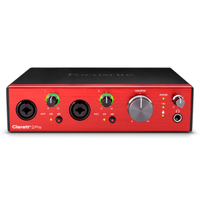
Focusrite Clarett+ 2Pre
USB-C | 2 ins | 4 outs | 24-bit/192kHz
Clarett is Focusrite’s premium USB range with three models and a decent bundle of software including Focusrite’s Red 2 and Red 3 plugins and Plugin Alliance’s bx_console Focusrite SC. Clarett+ focuses on improving audio performance with crystal-clear mic preamps.
★★★★½
Read more: Focusrite Clarett+ 2Pre review
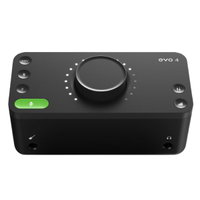
Audient Evo 4
USB 2.0 | 2 ins | 2 outs | 24-bit/96kHz
The compact Evo range was launched to much acclaim. You’ll find two combi mic/line inputs around the back of the EVO 4, and one instrument level input at the front for connecting guitar or bass, which then overrides the first input around the back.
★★★★½
Read more: Audient Evo 4 review
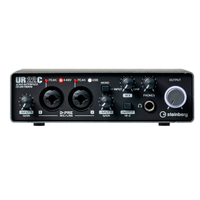
Steinberg UR22C
USB-C | 2 ins | 2 outs | 32-bit/192kHz
The UR22C is a 2-in/2-out audio interface. You get a couple of balanced Neutrik combo inputs, each of which sports a Yamaha D-PRE mic preamp, and two balanced line outputs. A rugged metal outer shell makes it a great option for taking on the road with you.
★★★★½
Read more: Steinberg UR22C review
How to choose
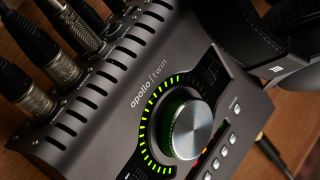
The number of interfaces on offer for those recording at home is simply staggering these days. When I first started recording, the field was much narrower, and your choices were even more limited if you had a small budget. Thanks to the ever-advancing march of technology, today you can get the kind of quality preamps 14-year-old me could only dream of for a few hundred dollars or pounds.
I spent five years in music retail, working for Dawsons Music and Northwest Guitars, so I’ve spent a lot of time helping musicians choose the perfect kit for them. While I can make recommendations, ultimately it's down to you to decide what best suits your needs. If you’ve still got option paralysis just looking at the 8 interfaces I’ve suggested in this guide, these are steps I use to recommend gear to musicians, and it works a treat.
1. What do you need?
Think about what you actually want to achieve with your music-making. Are you recording an album? Or are you just doing guitar demos for your band? Your goals will tell you what you need from your interface. I've sorted the interfaces in this guide via use case, which should give you a good head start. That said, you may find multiple interfaces cover your needs, so your first step is to start making a shortlist.
2. Read reviews
Once you have selected the small handful of interfaces that meet your needs, your next step is to read reviews on them. We have reviews for all of the audio interfaces in this guide which can help you make a more informed decision. You may also wish to read reviews on forums or the product pages of retailers' websites - just be advised these aren't likely to be truly impartial.
There’s an inherent bias from a lot of people who’ve bought something and written a review because they don’t want to appear to have made the wrong decision. This means they’ll overlook certain flaws to justify the decision. Our reviews are completely impartial, and as we review practically every new interface launch, we’re able to compare across the whole category. Speaking of which…
3. Compare your interfaces
If reviews haven't narrowed down your choices enough, you'll want to compare the interfaces to one another, with your particular use case at the forefront. Many articles do direct comparisons, like our Focusrite Scarlett 2i2 vs Focusrite Scarlett Solo article, but if you can't find something similar for your interfaces, then looking at our specs table will be useful.
Again ally this process with your music-making goals. There’s no point buying an 8-channel interface if you’re recording singer-songwriters. Alternatively, making a personal list of the pros and cons of each can help determine a winner if you’re considering a selection of similarly spec’d interfaces.
4. Choose your retailer
Now that you've got all the information on your chosen interface, it's time to go shopping! You might have a favourite retailer you use, but we'd always advise shopping around for the best price. The retail widgets you see in this guide are designed to present you the best prices at retailers we trust in your territory.
I’ll often use the filters on a retailer's website to sort things by price, brand, or whatever else I’m looking for to help me see what the best deal is. There’s also Google Shopping’s feature which lists various prices of a particular product in one handy list, although be advised you can encounter prices that change when you click through to a website.
5. Wait for a sale
If you're not in a rush, it's totally worth waiting for a sale before you purchase to get a discount on your interface. I’m currently in the market for a new MacBook Pro, so I’m waiting for the big Black Friday music deals, as this is when you’ll typically see the largest discounts. Depending on the time of year, you will always find retailers offering discounts on gear. This could be a spring or summer sale, Memorial Day or Presidents' Day sale, or just a flash sale on a particular weekend.
How we test audio interfaces
When deciding which audio interfaces to include in this guide, I opted to start by separating them according to their most popular use case. Audio interfaces cover a vast spectrum of creatives, from recording musicians to those looking to create podcasts, so it made sense to me to include a broad selection that would cover options suitable for various uses.
There are two main factors that go into the way we test audio interfaces for this guide, the first is the reviews process, which applies to all the gear we test here at MusicRadar. The second is latency testing, something that is specific to audio interfaces.
Reviews
MusicRadar's got your back
With anything I, or the MusicRadar team review, there are many factors to consider so we take a meticulous approach to testing. Our reviewers are all real-life musicians and creatives, so we endeavor to test these audio interfaces in the exact same way any musician, streamer, or podcaster would.
Here is a list of the main aspects I look at when testing the best audio interfaces:
1. Features
First and foremost I'll get a good overview of the features the audio interface has. This might be the number of inputs and outputs, the buttons on the front, what brand preamp it features, plus any other physical qualities.
2. Build quality
Next, I'll check the build quality of the interface. Is it made of plastic or metal? Does it feel as though it will put up with heavy use in a live scenario? I'll be looking at how well it's put together, whether it's heavy or light enough that a cable might pull it off the desk, and checking the solidity of all the buttons and knobs too.
3. Installation
I test all audio interfaces as any user would, which means installing them on both PC and Mac and taking notes of how easy or difficult the process is. Are there any lengthy software or firmware updates that need to be undertaken? Compatibility issues with certain OS types or Windows drivers? These are all factors I'll consider, alongside testing any software that's included with the interface in question.
4. Usability
Arguably the most important phase of the review, I'll use the interface in question as any musician might use it. This could mean recording vocals or acoustic guitar with a condenser mic, multi-miking guitar cabinets or drum kits if it has the requisite number of inputs, or just working in the box with plugins and a DAW. I’m looking at how easy it is to use the interface and associated software in the day-to-day, aiming to replicate how the majority of users will be utilizing it to see if I encounter any issues.
5. Sound
Finally, the most subjective of things, the sound. As I've mentioned throughout this article, there isn't actually that much difference between consumer-level interfaces when it comes to sound. Instead, I’m looking at the quality of results we're able to achieve, which could include the sound of the preamps, how well any extra features like added presence boosts work, or just how easy it is to switch between monitoring modes.
We'll spend an average of two weeks testing any audio interface we review. This enables us to use it in a variety of scenarios, always taking note of how it performs to inform our final review. From the day-to-day tasks of listening back to audio, to taking it to bespoke recording spaces to see how it performs when multi-miking instruments, we're careful to run similar tests with these interfaces to give them a fighting chance against one another.
Latency testing
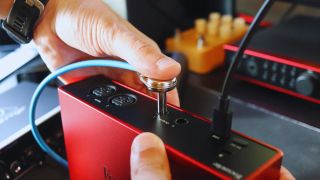
To provide a more direct comparison, I also opted to perform round trip latency (RTL) tests on every single interface in this guide. Low latency performance is one of the most important aspects of any audio interface performance, so having a measurable figure for comparison is very important to help you choose the very best unit for you.
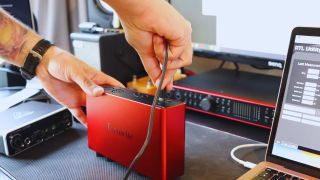
Our latency testing uses the Oblique Audio RTL Utility, a freeware program that measures the round-trip latency of your own audio interface in a few simple steps. It’s a test you can perform on your own computer at home using the following methodology:
1. Download and install the software
2. Connect your interface to your computer
3. Plug a short cable from input one of your interface to output one
4. Select the sample rate and bit depth for your test
5. Make sure your gain and output knobs are turned up
6. Run the utility
7. See your results!
When performing this test for the guide, to keep things scientific I used the same MacBook Air M1 for every audio interface to ensure parity. So while the specs of your computer can have an influence on this type of performance, for this guide we have a methodology that ensures the conditions are the same for each interface, thus giving me an accurate result.
Here are the full results:
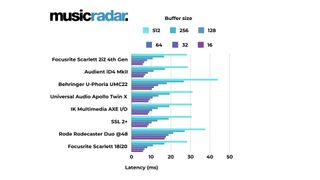
The most surprising thing about my testing was how close all of the interfaces were in terms of performance. It backs up my point in the intro of this article that selecting an audio interface for your music-making is more about the features that impact your particular workflow, rather than any actual performance metric.
If you want to learn more about the process, then you can read more about how we test audio interfaces at MusicRadar.
Glossary
Confused about some of the terminology we've used in this guide? If you don't know your DAW from your dynamic range, this glossary will get you up to speed.
DAW
DAW stands for Digital Audio Workstation, which is software used to create, arrange, and edit music. A DAW gives you a visual way to manipulate audio on your computer, whether that’s the act of recording itself, mixing using EQs and compressors, adding effects like delay and reverb, and mastering your tracks for release.
Mic Preamp
Often referred to as ‘mic pre’ or simply just ‘preamp’, the mic preamp of your audio interface boosts the small electrical signal received from an instrument or microphone into something much louder, making your music audible. Mic pres can be designed to impart a certain colour on a sound, or as you’ll find in the case of most interfaces, to be as clear as possible for an accurate translation of your original sound.
Dynamic range
Dynamic range is the difference between the loudest and quietest parts of your sound. It’s expressed in decibels (dB) and a good way to think of it is the example of an orchestra. Orchestras can go from whisper quiet to incredibly loud, so they have a large dynamic range.
Noise floor
Not quite as important in digital recording as it was in the era of tape, the noise floor is the base level of noise at the bottom of every recording. Back in the tape days, if your recording was too quiet you’d hear the noise of the tape during playback, potentially ruining your take. Nowadays modern interfaces have a very low noise floor, which makes it unlikely you’ll run into this issue so long as you pay attention to your gain levels when you record.
Latency
Latency in terms of audio interfaces is the time it takes for your analogue signal to be converted to digital, processed by your DAW, then turned back into an analogue signal for playback through your speakers. If the interface has a low latency, then when you record a sound you’ll hear it back instantly. If it has high latency then the sound you record will take a second to come back out of the speakers, leaving you with a delayed or phased sound.
Buffer
Buffer is the time we allow a computer to process the audio from an audio interface. A higher buffer is easier on the computer but can result in latency. A lower setting means less latency but is harder on the processing of the computer. Ideally, you’ll want a low buffer setting for recording and a higher one for playback, but this depends on your computer’s performance.
Why trust us
✔️ Over 150 audio interfaces tested
✔️More than 9,500 reviews on-site
✔️17 years of product testing
Since 2007 MusicRadar has been helping musicians of all kinds, whether they're guitarists, drummers, producers, keyboard players, or DJs. We've been testing music gear for a long time, and our team of highly experienced industry professionals collectively have over a century's worth of knowledge from real-world music-making.
MusicRadar has been the go-to place for musicians looking for the latest news, best gear reviews, and how-tos for 17 years and counting, irrespective of your particular instrument, or favourite music genre.
As well as providing the best online music content, MusicRadar also hosts content from stalwart magazine brands including Future Music, Computer Music, and eMusician. We receive three million visitors per month, making us the preeminent destination for music makers and lovers worldwide.
Meet the experts
Our writing team consists of real-life musicians with a huge amount of collective experience. Meet our expert team of gear reviewers:

Matt has been recording bands since the mid-noughties, cutting his teeth with an M-Audio M-Track 2 and a copy of Cubase on Windows XP. Since then he's used countless audio interfaces to record music for bands across the UK, covering everything from djent to jazz. As a MusicRadar writer, Matt has reviewed 15 audio interfaces in the past year alone, and over 50 different products including guitars, amps, and pedals. Before becoming a writer, he spent five years in the music retail industry working for Dawsons Music and Northwest Guitars, providing expert advice to musicians. He’s currently studying Music Production at Spirit Studios in Manchester, UK.

Andy is an expert on music production and technology having started out writing for Music Technology magazine in 1992. He has been an editor for Future Music, Keyboard Review, MusicTech, and Computer Music, which he helped launch in 1998. He regularly reviews gear for MusicRadar, ranging from the best audio interfaces and synthesizers to pro studio hardware and software.

Si takes care of the reviews on MusicRadar and Future Music magazine, although you may have also spotted him on camera conducting gear reviews for the MusicRadar YouTube channel. As well as making sure our writing team have the latest gear for review, he's been regularly testing instruments and accessories for well over 15 years, putting audio interfaces, studio headphones, synthesizers, laptops, and much more through their paces.

Jon is a London-based platinum award-winning mixer, producer, composer, and club remixer with a diverse CV that spans dance, pop, rock, and music for media. He’s also a long-term contributor to MusicRadar's music technology tutorials and reviews. Whether working alone or collaborating he usually handles final mixdowns, so you’ll also find MusicRadar peppered with his handy mixing tips.
FAQs
What is an audio interface?
To put it simply, an audio interface is a device that connects your musical creations to your computer. Plug your chosen instrument into the audio interface, then plug the audio interface into your computer, and you’ll be able to start making music. There’s a little more to it than that of course, but at the very basic level that’s what an audio interface does.
How does an audio interface work?
To answer this question, we spoke to Tom Waterman, Senior Product Marketing Manager at Universal Audio.
“An audio interface is a device that connects to your computer – and in some cases, your mobile device – to transport audio to and from your host running a Digital Audio Workstation, such as a phone, tablet, Mac or PC computer and the outside world.
“Your microphones are analogue transducers that convert acoustic sound energy into small voltages, and your headphones and loudspeakers are transducers that convert these small voltages back into acoustic sound energy in order for us to hear recorded sound in the analogue domain.
“The primary function of an audio interface is to convert these small analogue signals into digital 1’s and 0’s with a high degree of accuracy (A/D and D/A converters), so that digital audio can be transferred to and from your computer, recorded (stored), processed (plug-ins / digital mixing) and played back.
“Once this basic primary function has been covered, audio interfaces take things further by offering a variety of connection formats for both analogue and digital signal types, they offer features like microphone preamps and headphone amplifiers, with various forms of signal conditioning and sonic enhancement, such as compression and built-in FX like reverb, delay or creative processing.
“Ultimately, the audio interface is the heart of the modern recording studio.”
If you want to go more in-depth on this, check out our article: what is an audio interface and how does it work?
What are audio interfaces used for?
Audio interfaces are primarily used for recording audio, by providing a link between real-world sounds and the digital realm. You can use an audio interface for creating music, handling the audio portion of a podcast, or recording the audio on a live stream. Whichever audio-related task you need to do, chances are you’ll need an audio interface at some point.
How do I use an audio interface?
You can use an audio interface in a lot of different ways, they’re really quite versatile devices. Of course, the main usage is to record music alongside a computer into a Digital Audio Workstation, whether that’s instruments, vocals, or both. But an audio interface can also be used for creating podcasts, as part of a live streaming set-up, or just as a way to play your instruments through a pair of studio monitors.
How do I connect an audio interface to my computer?
Most audio interfaces connect via USB, although higher-end interfaces often use Thunderbolt as it’s a faster connection. To connect to your computer you’ll need to plug the USB from your interface into your computer’s USB slot. If you’re a Mac user, then the interface should just work straight away. Windows users will need to install a driver, which can usually be found on the manufacturer's website.
For more information, have a look at how to set up a new audio interface.
How do I connect my studio monitors to my audio interface?
On the back of your audio interface, there will be connections listed as ‘monitor’ or sometimes just ‘outputs’. You’ll need to use two balanced audio cables to connect these outputs to your studio monitors, giving you left and right channels for your audio. There are varying types of connectors, but the most common on an audio interface is a 1/4-inch jack. You might find your monitors have something different on the back however, for example, an XLR input.
For a deep dive on this topic, check out our article: How to connect studio monitors to your audio interface.
How do I connect a MIDI keyboard to my audio interface?
You don’t connect a MIDI keyboard to your audio interface, instead, it gets plugged into your computer. Despite the name, modern MIDI keyboards don’t typically connect via MIDI. Back in the day, you’d find MIDI connections on these devices but nowadays they use USB. To connect you’ll simply need to plug it into the appropriate USB slot on your computer. You may need to install a driver or companion software, and there are also probably some steps you need to take in your DAW to ensure it recognises it as a controller.
If you need some more help with this, check out our article: how to connect MIDI hardware to your computer.
How do I connect my mixer to my audio interface?
If you want to use a mixer with your audio interface, you’ll need to take the stereo outputs from your mixer and plug them into the inputs of your audio interface. This will allow you to connect multiple instruments to the same two outputs but reduces the amount of control you have over each. We’ve got a great article that lists all the pros and cons of using an audio interface vs a mixer.
Will my audio interface improve sound quality?
In short, not really. A better audio interface might give you less latency, which results in a better performance and thus better sound, but ultimately it’s what goes in that counts. There’s a popular saying in the pro audio industry ‘get it right at the source’. This means if you capture a great sound or performance, the mixing will be easy as you’ll just be adding a little extra on top. If your recorded sound is bad, the most expensive audio interface with the highest quality preamps won’t make a bit of difference.
We go in-depth on this subject in our article: Will upgrading my audio interface improve sound quality?
How long will my audio interface last?
I’ve owned many audio interfaces over the years, from my M-Audio M-Track to my first ever Focusrite Scarlett 2i2 1st Gen. I donated my M-Track to a friend in 2011 and it was still working despite four years of not exactly great treatment. I still have my Focusrite Scarlett 1st Gen and surprisingly it still works. Considering it was released 13 years ago, that’s pretty impressive, and a testament to the durability of the modern audio interface. So, if you invest wisely, you should have a piece of kit that is with you for the long haul.
Should I use forums and user reviews for my research?
User reviews and forums can be a great source of information. However, there is a caveat here as you never know who you're talking to online, whether they actually know what they're talking about, or whether they even own the product. Some retailers feature 'verified' user reviews to show the person has actually bought the product, but many don't which means you can get conflicting or potentially completely incorrect information.
Forums like Reddit are a great source of information if you're looking for a solution to a problem, but you can't always trust the information is correct. There's a well-known Reddit phenomenon known as 'hivemind', whereby one opinion that seems popular gets heavily upvoted despite it being completely wrong. The psychology behind it is that people look at an opinion, see that it's heavily upvoted, and then presume the information must be correct so they too upvote. This can happen the other way too, with perfectly legitimate information getting pushed to the bottom of the page because it gets downvoted a few times by those who disagree.
Bots are also a problem on forums and social media platforms. They look and act like regular users, but are in fact programs designed to reply to comments with a canned response. These can be abused to shift the balance of conversation in a particular way, post links to low-quality websites, as well as spam posts to send unwanted information to the bottom of the pile. With the advent of AI in the last couple of years, bots have become even more powerful, as they are ever more convincingly able to imitate human behaviour.
We'd always advise doing as much research as possible when buying a new product, but just always be sure to bear in mind where that information is coming from. With MusicRadar, you know that your review is written by an actual musician, with a lot of experience in their particular field.
Latest updates
Recent updates
24/10/24: The guide has received a top-to-bottom audit, significantly increasing the scope of the content. Each product has now undergone individual latency testing and we've added a glossary of terms, expanded our FAQs, and brought in expert advice from Universal Audio and Oblique Audio. We've added a new entry for best 8-channel interface, and removed the PreSonus Revelator which is now discontinued.
03/07/24: We've added more detail to our product descriptions, adding categories to make them easier to navigate. Star ratings have been introduced for each of these categories so you can get a more granular view on our opinions of critical features. An overall specs table has also been added for easy comparison between different interfaces in the guide.
Read more:
- Our pick of the best laptops for music production
- Explore the best budget studio monitors
- These are the best PCs for music production
- Organise your recording space with the best studio desks

Korg’s PianoRec gives you a simple way to make high-quality recordings of your digital piano, and the built-in mic means that you can capture your voice, too

Calling all recording fanatics, you don't want to miss this epic Black Friday interface deal - bag up to $800 off select Universal Audio devices from Apollo to Volt
Get the MusicRadar Newsletter
Want all the hottest music and gear news, reviews, deals, features and more, direct to your inbox? Sign up here.

Matt is a Junior Deals Writer here at MusicRadar. He regularly tests and reviews music gear with a focus on audio interfaces, studio headphones, studio monitors, and pretty much anything else home recording-related. Matt worked in music retail for 5 years at Dawsons Music and Northwest Guitars and has written for various music sites including Guitar World, Guitar Player, Guitar.com, Ultimate Guitar, and Thomann’s t.blog. A regularly gigging guitarist with over 20 years of experience playing live and producing bands, he's performed everything from jazz to djent, gigging all over the UK in more dingy venues than you can shake a drop-tuned guitar at.
- Simon ArblasterVideo Producer & Reviews Editor
- Andy Jones

Korg’s PianoRec gives you a simple way to make high-quality recordings of your digital piano, and the built-in mic means that you can capture your voice, too

Calling all recording fanatics, you don't want to miss this epic Black Friday interface deal - bag up to $800 off select Universal Audio devices from Apollo to Volt
