10 steps to more effective transitions
Bridge those gaps with the help of these essential transitional techniques
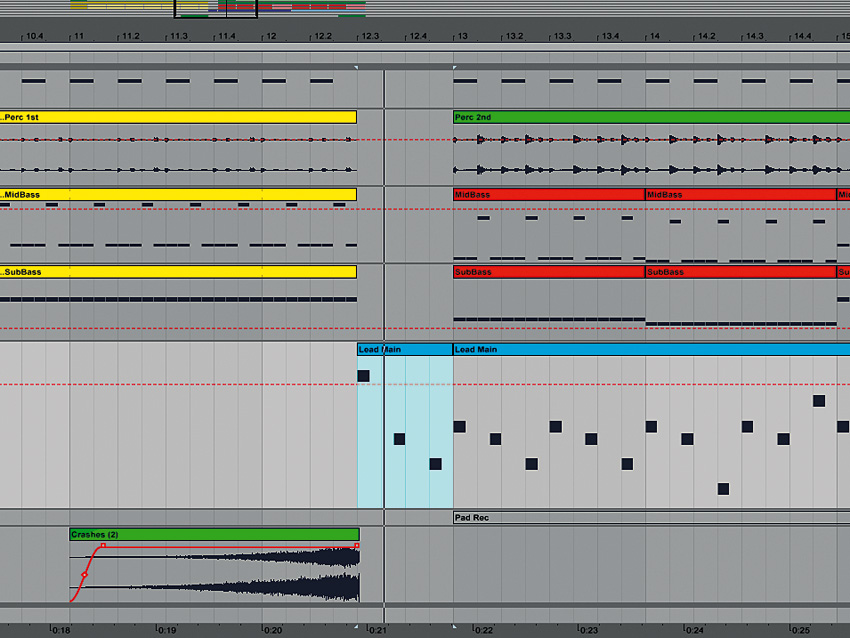
There are many ways to get from A to B
Transitions and fills can be defined as passages, riffs, rhythmic sections or sounds that connect contiguous musical sections together. You will have heard many of them - indeed, there was probably at least one in the last song you listened to, whether it was a smooth segue between verse and chorus, or an attention-grabbing fill before a drop.
Placing a crash cymbal on beat 1, muting track elements and inserting crazy drum fills are just three ways to join disparate sections of a song, but arrangement-bridging methods come in a vast array of forms, depending on the context in which they're used - especially as new plugins emerge and techniques evolve.
Having said that, there are many tried-and-true methods that, when employed correctly, never fail to connect with the listener - and we're going to show you ten of them here.
Our examples are by no means exhaustive, and we're certainly not trying to suggest that there's any 'one-size-fits-all' approach, as every track and situation is different. Rather, we're demonstrating a variety of ways in which you can bridge the gaps between separate sections in your tracks.
What's more, these techniques aren't at all genre-specific, so you can follow along and brush up on your arrangements no matter what style you're producing.
You'll find tutorial videos for all of our tips with issue 208 of Computer Music magazine, which is on sale now.
NEXT: Crashes and reverse cymbals
Crashes and reverse cymbals
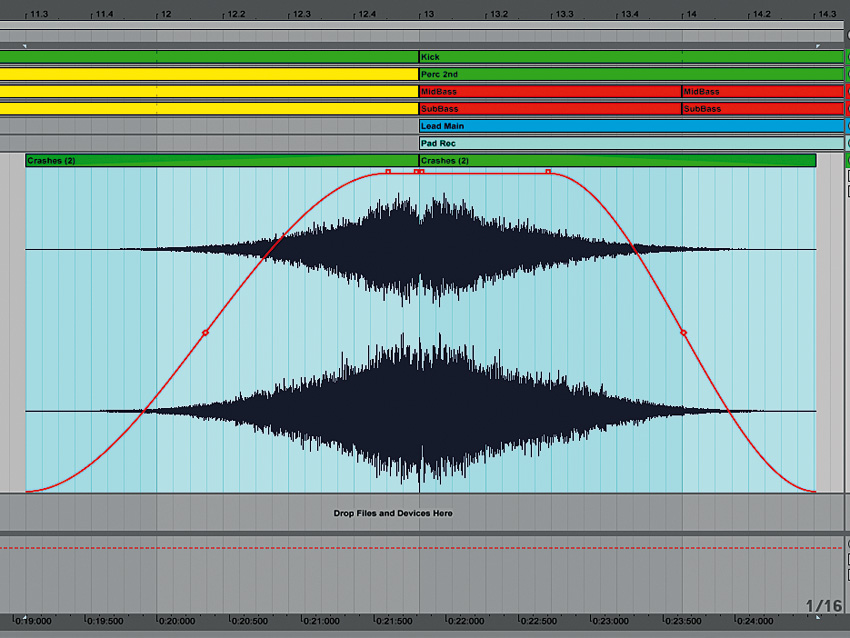
The simple cymbal on beat 1 is a staple of all musical genres. It can be likened to a musical ‘capital letter’ of sorts, signifying the start of a fresh musical sentence, generally placed at the start of an eight- or 16-bar section.
While it might seem like an easy addition to an arrangement, the crash cymbal can actually be quite a tricky one to get right, so it’s often worth auditioning several samples in the context of the track to find the right one. Careful EQ, filtering, delay and reverb will help blend a crash into a mix.
Dance genres will also often make use of a reverse cymbal swell at the end of eight- or 16-bar sections. You can either use a reversed copy of your main crash or a different sample for contrast. For a more floaty effect, try muting the forward cymbal, then carrying over the reverse cymbal with reverb or delay.
NEXT: Drum fills and rolls
Drum fills and rolls
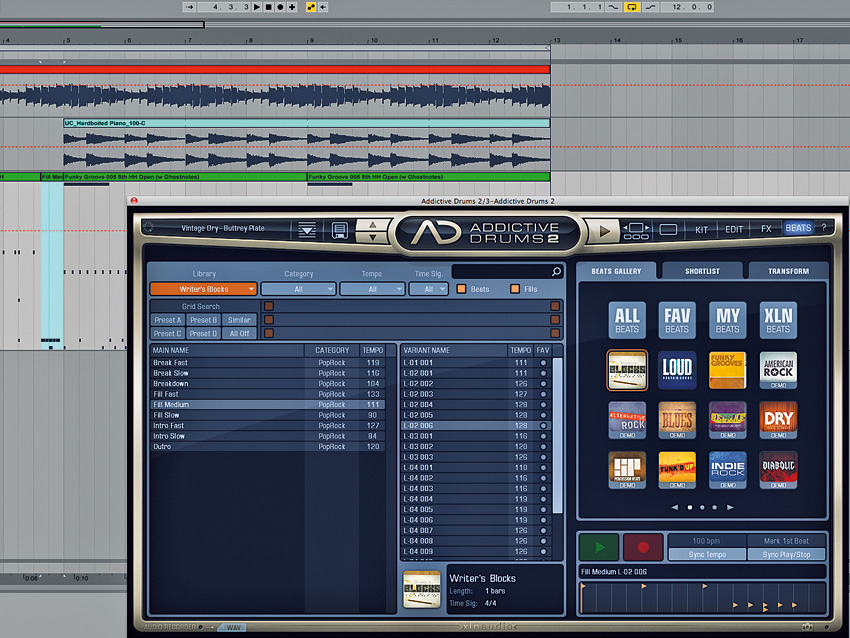
A drum fill is a short rhythmic variation used to ‘fill’ a gap before a new musical phrase is introduced. It’s a tried-and-tested way to provide a burst of excitement, letting the listener know that “something” is coming.
In electronic music, you can repeat drum hits as you see fit, but it can be a challenge to program realistic live drum fills in software. Drum ROMplers such as EZdrummer 2 and Addictive Drums 2 include preset MIDI drum fills to spark transitional inspiration.
NEXT: The classic 16th-note snare roll
The classic 16th-note snare roll
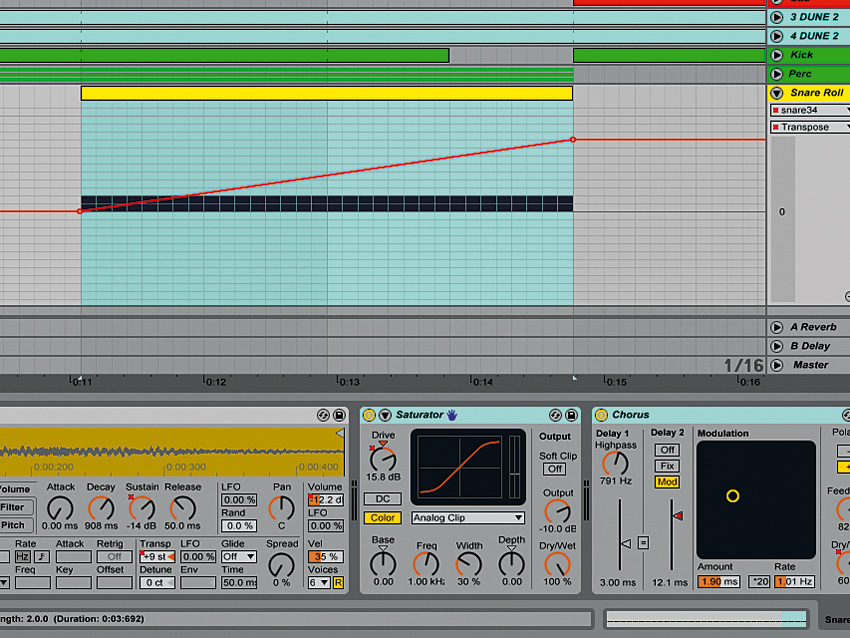
Electronic music afficionados will recognise the classic 16th-note snare roll, but programming a smooth and effective transition using one isn’t always as easy as it sounds. Here’s how it’s done…
First, program a 16th-note snare pattern over the final two bars of an intro section that leads into a bass drop. By using a snare hit in a drum sampler, we can automate the sampler’s parameters for control over the roll’s progression, giving it more life and dynamic movement.
Set the sampler’s amplitude envelope decay to around halfway and its sustain to minimum. Automating the sustain to rise over the two-bar duration opens out the rolling snares gradually. Some volume automation also introduces the roll, but this doesn’t always need to be a radical shift - often an increase of just a couple of decibels is enough.
To spice up your roll, try automating the sampler’s pitch/transpose control for a distinctive pitching up or down effect. Introducing saturation over time can also give snare fills a bit of extra beef; and subtle flanging, phasing or chorus can be mixed in as well, for a touch of weirdness.
NEXT: Selective muting
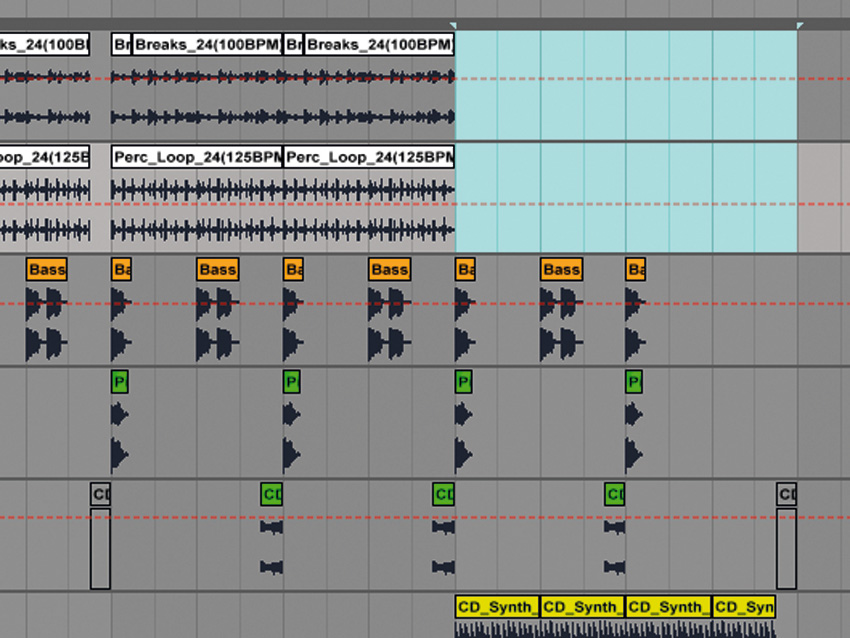
Selective muting
One of the easiest and most effective ways to transition between two sections of a track is to create rests and pauses by muting certain elements of the arrangement.
The ear becomes accustomed to repetition over time, so by removing a repetitive element for a split second using simple editing, you can create dynamics and interest.
This selective muting technique can be used in many different ways: you can mute a single drum element - such as a kick or snare - to lead into another track section; or entire track groups, such as drums or bass, can be taken out of the arrangement then dropped back in.
One particularly great trick (with origins in hip-hop) is muting drums or whole tracks for the very first beat or bar of a new track section instead of the last. You can also mute everything for just a few beats, and drop a new track element such as a vocal snippet, cool sample or bass stab into the created ‘empty’ space.
NEXT: Pitch variation
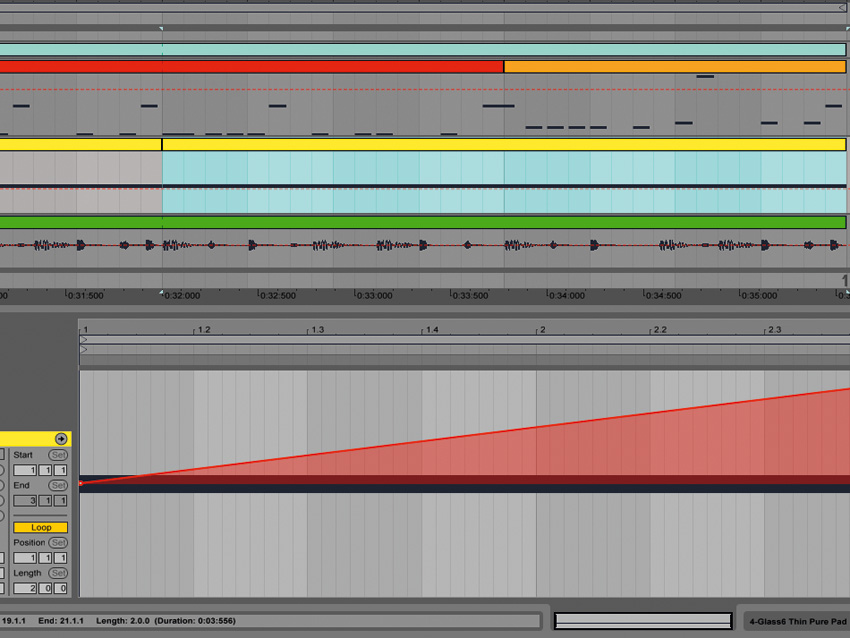
Pitch variation
Most of our transition techniques are based on rhythmic ideas or production techniques, but, of course, a change in the notes of your bassline, melody or chords can be enough to pique the listener’s interest between sections.
NEXT: Glitch-style edits with Eurydice CM
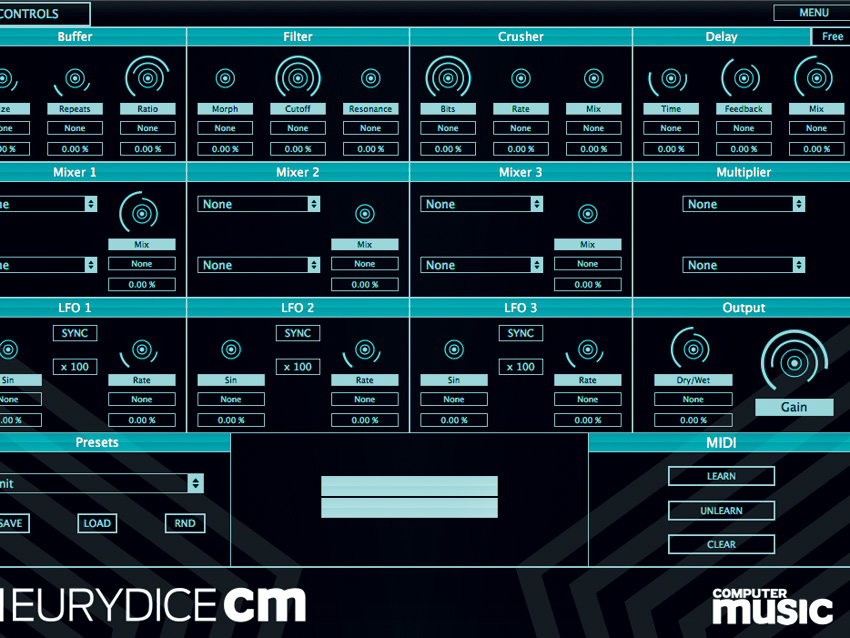
Glitch-style edits with Eurydice CM
If you’re really stuck for a way to transition between track sections, take a look at what’s already present in the arrangement. Chances are, you can render one or more elements to a new channel and apply some kind of crazy plugin or audio process for some interesting glitch-style edits.
One particularly useful tool in this scenario is Inear Display’s Eurydice CM, free as part of the CM Plugins included with every issue of Computer Music magazine.
Its four modules - Buffer, Bitcrusher, Filter and Tape Delay - can be used individually or combined for eccentric edits and transitional effects. It can be a wild beast to tame, though, so it’s a good idea to tweak its controls live and record the results onto a new audio track to chop up later.
NEXT: Delay on a return
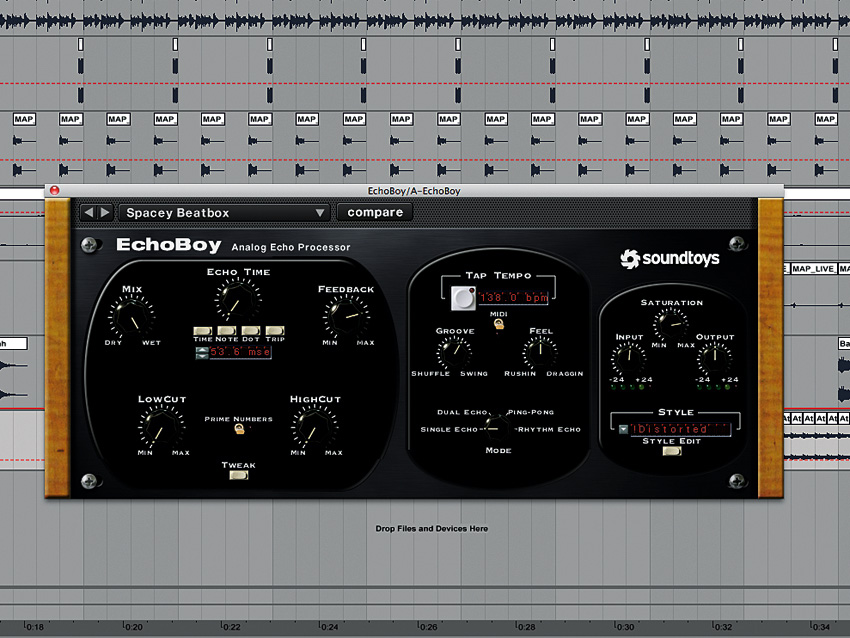
Delay on a return
Send/return busses offer a speedy way to create variations between track sections, especially when used with delay or reverb plugins - and it’s simple to render these tracks out for finer editing.
Say you have a tune that moves between two very different sections and needs a transitional effect to smooth the two. Rather than create entirely new FX sounds to bridge the gap, put a delay plugin on a return bus instead, and automate the send level to it from the ‘headline’ sound in the mix (the vocal, for example).
Select a delay preset that provides rhythmic floatiness and interest, set 100% wet. Basic delay plugins aren’t always your best bet here - reach for wackier ones with distinctive saturation, filtering or pitch modulation to add a dose of crazy character.
The delay signal carries the track through to the second section, and should fit perfectly because it’s been created from the main element of the track. Record the return as audio before muting that channel. The audio signal can now be chopped, processed and manipulated.
NEXT: Filtered noise
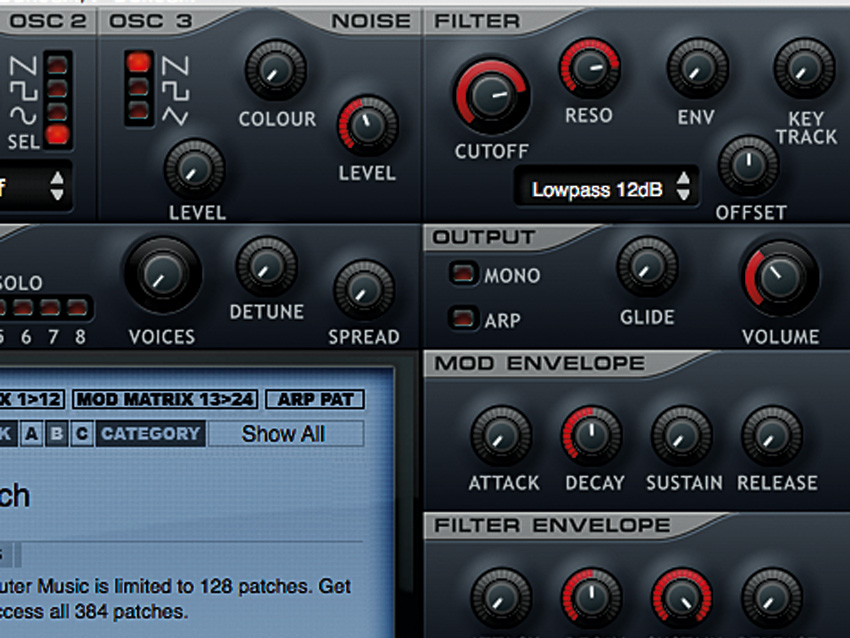
Filtered noise
We couldn’t discuss transition effects without covering the technique heard in a thousand dance tracks: good old filtered white noise.
Simply take a section of white noise (either as audio or from a synth), apply resonant low-pass or band-pass filtering, then add spatial effects to taste.
The trick with this kind of effect is either to keep it very subtle, or to customise the rising whoosh effect with plenty of saturation and metallic-style effects, such as extreme flanging, phasers or chorus.
NEXT: Anacrusis

Anacrusis
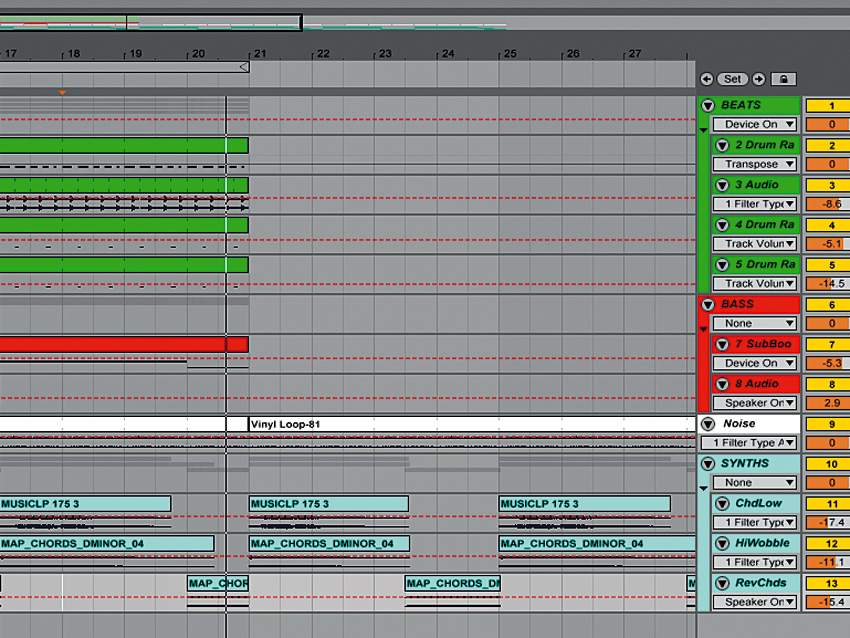
An anacrusis is a series of notes that leads into the first downbeat of a bar, so the melody effectively starts a beat or two early. Robert Miles’ Children and Tina Turner’s I Don’t Wanna Lose You are two examples.
In the screenshot, we have a verse section that goes into a main chorus drop, at which point a lead riff enters. To emphasise the anacrusis, we mute all the track elements for two beats just before the first downbeat of the chorus, to allow the extra notes to be heard on their own.
This can be combined with a drum fill, simple beat roll, reverse cymbal or any other transitional trick - whatever’s best for the track you’re working on!
NEXT: No transitions!
No transitions!
Often, the skill in making a track flow is knowing when not to add any extra embellishments, effects or fills.
More laid-back, chilled or progressive styles, especially, benefit from understated drifts between sections, letting the addition or removal of key elements do the talking.
If your track is particularly smooth and/or melodic, extra drum fills, muted parts, crazy effects or other such tricks may well actually detract from the relaxed feel. The occasional low-key reverse cymbal or white noise swell may be the best transitional element to use when absolutely necessary, but even then, there’s still a fine line between subtle swooshes and effects that just distract for the sake of it.

Computer Music magazine is the world’s best selling publication dedicated solely to making great music with your Mac or PC computer. Each issue it brings its lucky readers the best in cutting-edge tutorials, need-to-know, expert software reviews and even all the tools you actually need to make great music today, courtesy of our legendary CM Plugin Suite.