10 essential modern EQ techniques
Tips and tricks to expand your cutting and boosting horizons
All things being equalised
Whether you're after characterful vintage emulation or high-precision transparency, the current generation of EQ plugins put a degree of frequency-shaping power and personality in the hands of the computer-based musician that would have been utterly unimaginable just a few years ago.
While EQ isn't the most complicated of audio engineering tools to get to grips with, however, it can certainly be one of the most sonically damaging when applied incorrectly – no matter how brilliantly designed your particular plugin might be. With these ten tips, we'll help you keep your equalisations on the right track and give your plenty of filtering food for thought.
For much more advice on using EQ plugins, including walkthroughs, tips and 20 video tutorials, pick up Computer Music 215, which is on sale now.
Auditioning EQ cuts and boosts
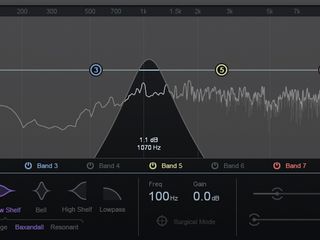
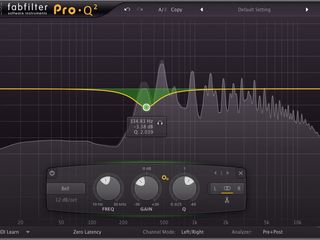
Many modern EQ plugins, such as Brainworx’ bx_digital V2, FabFilter’s Pro-Q 2 and iZotope Ozone 6’s Equalizer module, feature an ‘auto-listen’ or ‘solo’ mode that engages a temporary band-pass filter (with adjustable Q width) to isolate and pinpoint the frequency area under your mouse cursor.
If your EQ doesn’t have this, just add a band-pass filter as a separate band and sweep it around; use a dedicated plugin; or try the Alt-Solo function in Voxengo’s free SPAN. A related trick is to put a low-pass filter on your master output, to monitor the balance of bass frequencies in your mix. This can be applied to other frequency ranges too - useful for A/B-ing mixes’ sonic properties.
Zooming an equaliser's display for finer control
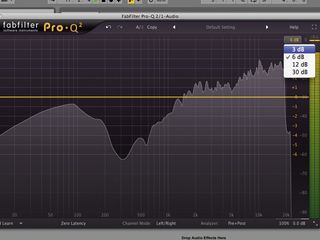
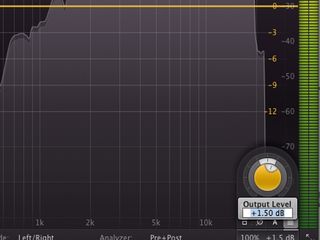
Pay attention to the vertical gain scale of a parametric EQ, as if the scale is too wide, you might overdo your cuts and boosts.
If your EQ allows, try a finer gain resolution - especially for mastering, when you want small, subtle adjustments. Some EQs let you zoom in horizontally, too, for greater frequency resolution.
Fair and accurate comparison
When EQing a signal, be aware that you’re also changing that signal’s overall level. Level-matching and accurate A/B comparison help you judge how successful your tonal changes are.

Step 1: The majority of EQ plugins feature an Output Gain parameter. EQ boosts will make a signal louder, and cuts will make a signal quieter. By adjusting the final output level of the EQ to compensate for these level changes, you can compare ‘before’ and ‘after’ settings fairly and accurately.
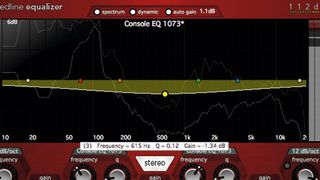
Step 2: Some modern EQ tools, such as iZotope Ozone 6’s Equalizer module, 112dB’s Redline Equalizer and FabFilter’s Pro-Q 2, house an ‘Auto gain make-up’ function. When activated, the EQ will intelligently adjust its output level in relation to any boosts or cuts you make, making it much easier to judge the tonal effects of your adjustments.
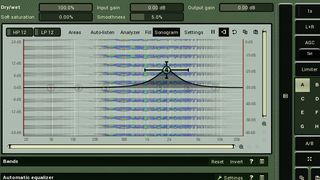
Step 3: You’ve probably come across the standard ‘A/B’ features found on many EQ plugins. By setting up different EQ settings on two independent displays, you can flick between them at the touch of a button. Some EQs take this even further, with up to eight comparison ‘slots’! MeldaProduction’s MAutoDynamicEQ, shown here, is one such example.
Combining multiple EQs
Frequency-sculpting is one of the most important production techniques out there, and there are a multitude of equaliser plugins on the market, so it’s vital that you know your tools and use each in the right situation.
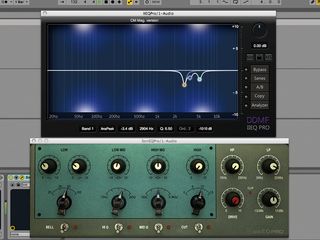
While there are no hard and fast rules, the accuracy of ‘precision’-style parametric EQs make them great for tight filters/cuts, pinpointing resonances and removing harshness. Analogue-modelled equalisers, while somewhat less accurate, usually introduce more ‘vibe’ and character, making them better for broad tonal tilting and shaping tasks.
Don’t think that you have to perform all of your EQing tasks within one plugin - instead, try using each for its respective benefits. Don’t get too carried away with multiple EQs in series, either, though. Make sure each performs a defined role in the plugin chain, or you may find your settings conflicting or fighting with each other - for example, boosting the treble on the first EQ, then cutting treble on the second one to “fix” this bright treble.
The 'pocketing' EQ method
So, what is the ‘pocketing’ EQ method? When composing, keep your instruments’ key ranges to within one octave. You can then use an EQ and analyser to find each element’s fundamental frequency (the lowest, usually loudest harmonic) and cut it slightly with EQ. This lets you turn up each element’s level while improving clarity and density.
Resonating your low end
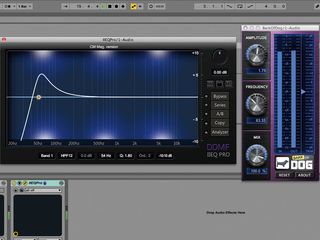
Little Labs’ Voice Of God - found in both hardware and UAD plugin form - is a “one-of-a-kind magnifying glass for low frequencies”. By adjusting its ‘frequency’ and ‘amplitude’ parameters, you can pinpoint and boost bass frequencies in a controlled, powerful way, ideal for accentuating the low ends of kicks or basses, or increasing ‘proximity effect’ weight in vocal recordings.
Voice Of God is great, but it’s actually just a resonant high-pass filter - you can mimic its effect with any EQ plugin that features a high-pass filter with Q control. Simply apply the high-pass filter to your signal, narrow the Q width, then set its frequency to boost the desired frequency range. Voila - focused, enhanced bass end! For a dedicated plugin imitation of the Voice Of God tool, check out Boz Digital Labs’ free Bark Of Dog.
Zeroing in on unwanted resonances
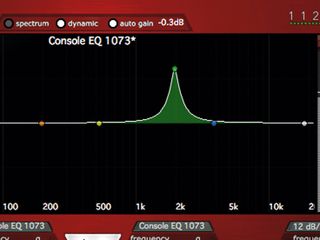
Equalisation is the go-to technique for removing harsh spikes in a signal’s frequency spectrum. Here are three ways to go about it.
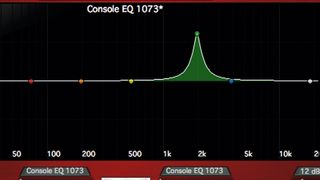
Step 1: The ‘seek and destroy’ method uses an EQ plugin with a tight bell boost. Sweep it across the spectrum, and when it hits an offending area, you’ll hear the excessive resonance ‘jump’ out. Now reduce the bell boost to a cut, notching out the harsh frequency.
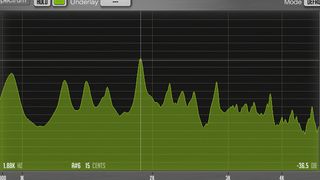
Step 2: Whether part of an EQ or housed as its own plugin, a frequency analyser is great for pinpointing resonant peaks. Just look for excessive spikes on the display, then notch them out with a tight EQ cut. Adjusting the resolution and/or averaging time may reveal more peaks and detail in the signal.
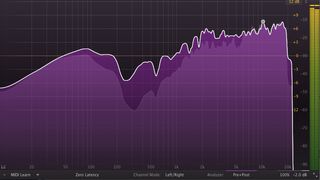
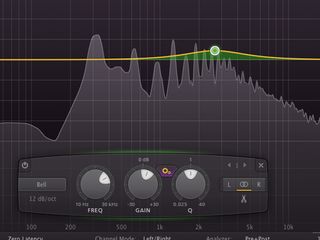
Step 3: FabFilter’s Pro-Q 2 offers a useful new ‘Spectrum Grab’ mode. When hovering your mouse over its analyser display for a few seconds, the graph will freeze and blank out any existing EQ curves. Now you can simply click and ‘grab’ a peak on the analyser, then pull it down to create a notch cut.

Proportional Q in action
As explained earlier, the gain and bandwidth of classic analogue equaliser bands would often be linked, tightening a band as the boost or cut got larger, and thereby adding a further gain change, providing a smooth, natural response synonymous with analogue ‘warmth’ and flavour.
Many modern EQ plugins now have a ‘proportional bandwidth’ option to emulate this. FabFilter’s Pro-Q 2 houses a ‘Gain-Q Interaction’ button, found between the Gain and Q knobs. When toggled, any gain boosts or cuts will introduce slight Q narrowing, and likewise, Q adjustments will result in a slight gain shift.
Automating EQ settings
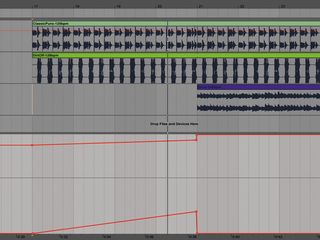
While EQ is usually applied as a fixed, static process, there are plenty of reasons to change EQ settings over time via DAW automation.
During parts of the track with fewer elements - the intro, for example - you might want to include the low frequencies of some elements that you’ve removed during a ‘busier’ section. When the track’s bass eventually drops, you can automate an EQ to carve the lows back out from those other elements, making space in the mix for the new low frequency element.
Elements can also be boosted or reduced with bells or shelves to alter the ‘focus’ of a chorus or bridge section.
Equalising and musical pitch
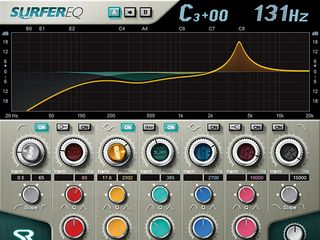
A signal’s frequency content directly relates to its pitch, so you may wish to boost or cut at a musical pitch’s precise frequency. To save you looking up frequency values, some EQs can display note values on a keyboard displayed along the horizontal frequency axis.
As the pitch of a signal changes, so, too, do the frequencies of all its harmonics. If you’re boosting or cutting a sound’s harmonics with tight Q filters, and the pitch of this sound varies, your adjustments will sound inconsistent. A time-consuming way to counteract this is by automating the frequency of your EQ boosts or cuts as the sound’s pitch and harmonics change over time. Sound Radix’s SurferEQ is designed to take care of this automatically by tracking a sound’s pitch and changing its EQ settings accordingly - a bit like a synth’s keyboard tracking filter, but for EQ!

Computer Music magazine is the world’s best selling publication dedicated solely to making great music with your Mac or PC computer. Each issue it brings its lucky readers the best in cutting-edge tutorials, need-to-know, expert software reviews and even all the tools you actually need to make great music today, courtesy of our legendary CM Plugin Suite.

"If I wasn't recording albums every month, multiple albums, and I wasn't playing on everyone's songs, I wouldn't need any of this”: Travis Barker reveals his production tricks and gear in a new studio tour

“My management and agent have always tried to cover my back on the road”: Neil Young just axed premium gig tickets following advice from The Cure’s Robert Smith

"If I wasn't recording albums every month, multiple albums, and I wasn't playing on everyone's songs, I wouldn't need any of this”: Travis Barker reveals his production tricks and gear in a new studio tour

“My management and agent have always tried to cover my back on the road”: Neil Young just axed premium gig tickets following advice from The Cure’s Robert Smith
