10 ways to get great guitar tones in your DAW
Nail those monolithic rock and metal guitar sounds and make your tone burn

Raise your game
Like practically every other genre of contemporary music, the production values of rock and metal continue to skyrocket. Producing a reasonable home demo is perfectly within the reach of practically anyone armed with a DAW, an audio interface and the will to record, but getting the kind of monster mixdown that’ll stand up to the scene’s best releases remains a challenge.
Virtual drum kits from the likes of Toontrack, XLN Audio and FXpansion make it easy to get studio-quality drums in the box, but that raises the stakes even higher for the rest of your mix, so you’re going to need an über-heavy, world- crushing guitar sound to truly seal the deal.
Never fear, as we're here to show you how to get one, with ten essential mix techniques and studio tricks. We’ve relied on the outstanding GrindMachine CM guitar amp simulator throughout (included with every issue of Computer Music magazine), but all the techniques can be applied to any amp sim software.
So strap on your axe and let’s put the pedal to the metal. For videos to illustrate all of these techniques, check out Computer Music 214, March 2015, which is on sale now.
Get good takes
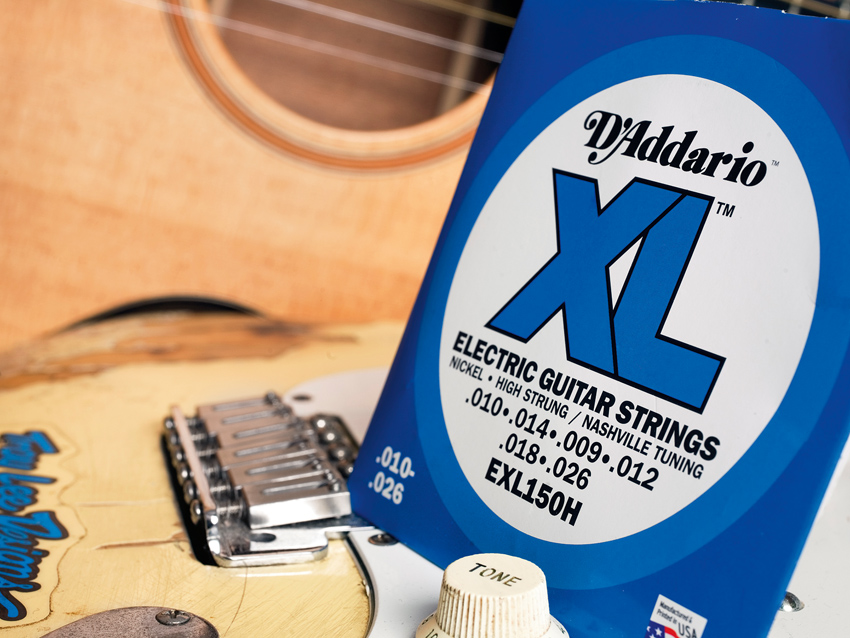
If you want your guitars to end up sounding killer, you need to get things right from the very start, and recording great takes from the outset will make mixing easier and the end result better. Put on fresh new strings, and make sure your guitar is set up to ensure good intonation and no unwanted fret buzz or other avoidable noise. For the majority of rock and metal, you’ll be recording with a good quality humbucker in the bridge position, so consider upgrading yours if it isn’t up to scratch.
Use a high-quality instrument cable plugged into the instrument input of a decent audio interface, with as low a buffer size as you can get away with, for low-latency monitoring.
Once you’re happy that your test recordings are of sufficient quality - and, of course, that your guitar is in tune - you’re ready to begin recording for real. Record the song in sections until each is as tight as possible, using a click track if it helps. If absolute tightness is your aim, don’t be afraid to punch in bar by bar, or even break a riff down into separate components and record them one by one. Use your DAW’s editing tools to finesse the result and fix timing issues.
Super-wide twin guitars
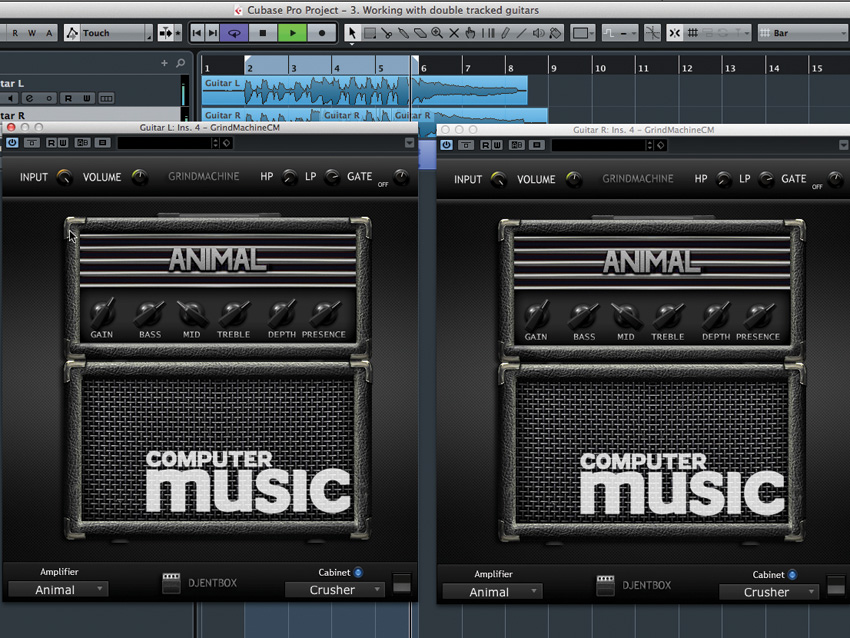
Double tracking is a key process in achieving those huge, thick, wide guitar parts heard in practically every rock and metal track of the last three decades.
All you have to do is record the exact same guitar part twice, then pan the two resulting recordings hard left and hard right, creating a dual guitar effect. Use editing to tighten the parts further if required. Note that duplicating the tracks in your DAW won’t have the same effect - it’ll just make the part twice as loud!
Double tracking tips
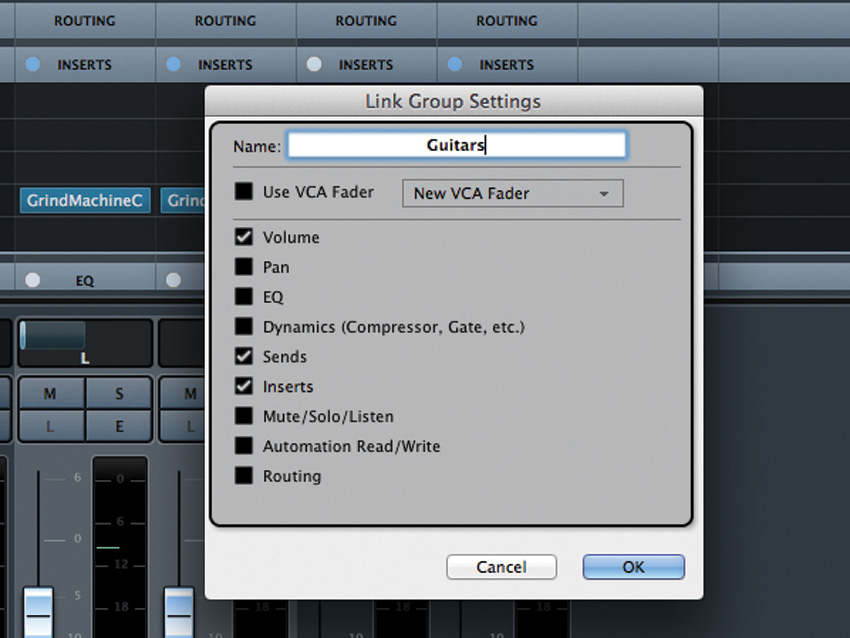
You’ll usually want your double-tracked guitar parts to use the exact same guitar sound on the left and right channels, with an amp simulator on each one. Consequently, every time you adjust the amp sim on one track, you need to do it on the doubled one, too. This gets tedious very quickly, and the problem worsens when you start recording with more than two tracks (see next tip).
Some DAWs feature a grouping or linking feature that allows the effects settings of all linked channels to mirror each other - the Group function in Cubase’s Mixer, for example. With such a function activated, you’ve only got to adjust one amp and the other will update to match.
Even if your DAW doesn’t feature channel linking, you can at least route both tracks to a common bus for overall processing, such as EQ, compression, reverb, and so on, which we’ll discuss in more detail later.
Quad tracking and dual amps
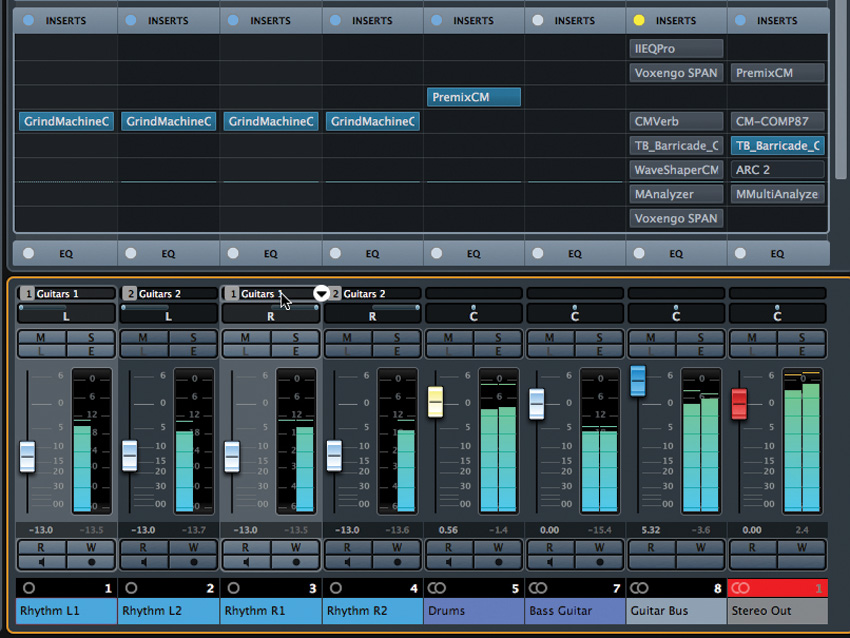
Take double tracking to the next level with quad tracking, comprising two pairs of hard-panned guitars. This opens up the option to use different virtual amp and cab settings for each pair. If you’re using effects grouping in your DAW, you’ll need to configure it to control two pairs of channels, rather than all four at once.
A simple trick is to use the exact same amp setup twice, but with high gain on one amp ‘layer’, for that all-out fuzzy sustain, and lower gain on the other, for clarity and articulation. You can, of course, use totally different amps and cabs - perhaps a bright, crunchy cab paired with a bassy, rounded one.
You can go beyond quad tracking, but the more tracks you use, the tighter the playing will need to be to convey the details.
Pedal to the metal
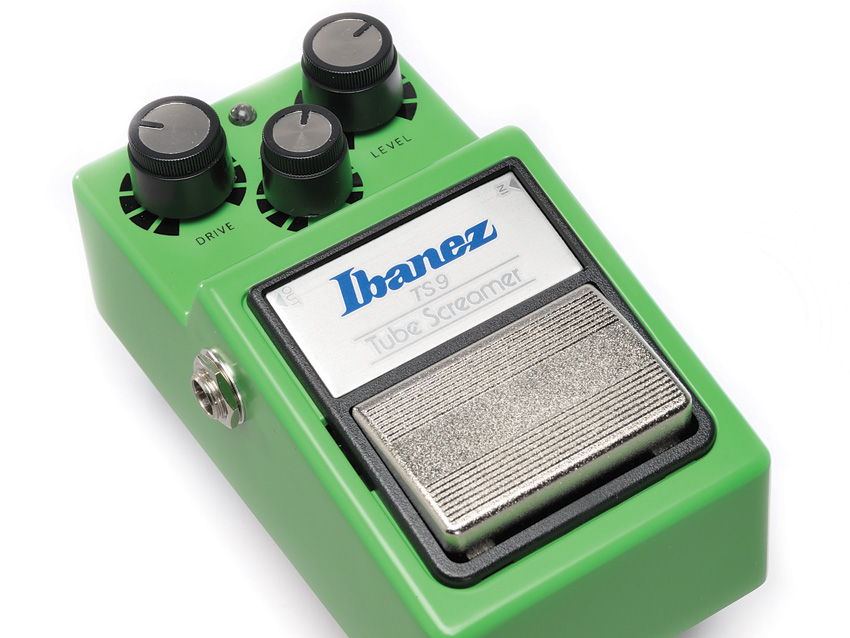
A popular studio trick for adding tightness, cut and low-end definition is to run an Ibanez Tubescreamer pedal before the amp, often with the drive control set very low - more a shaping filter than an overdrive.
There are some great free plugin Tubescreamer-alikes out there, like Ignite Amps’ TS-999. Alternatively, GrindMachine CM’s Djentbox gives a tight low end; or you can use a filter plugin.
EQing for clarity
Whether recorded via an amp simulator or using the real thing, high-gain guitar tones can greatly benefit from carefully applied EQ when it comes to controlling prominent, harsh or unmusical resonances. Here's how it's done
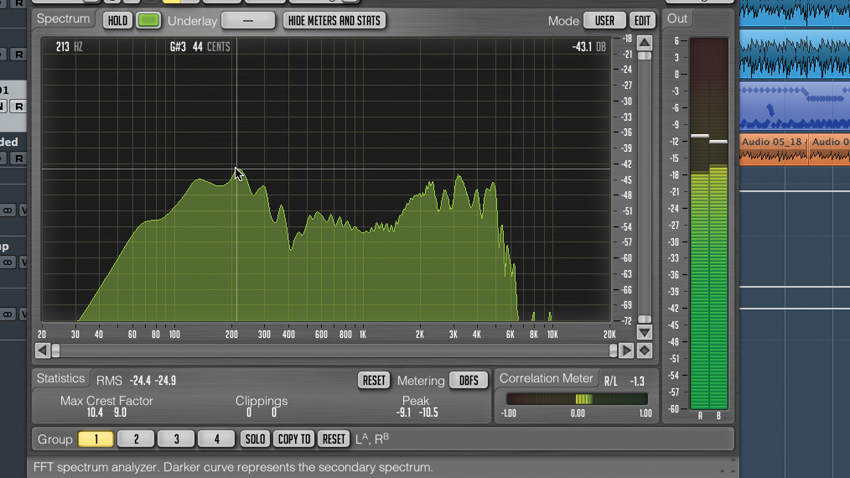
Step 1: To help locate problem resonances, we can use Voxengo’s free SPAN spectrum analyser. We click Edit and change Type to Avg to have SPAN calculate the average frequency curve of the signal over time, then let the guitar part play for a while until the graph settles.
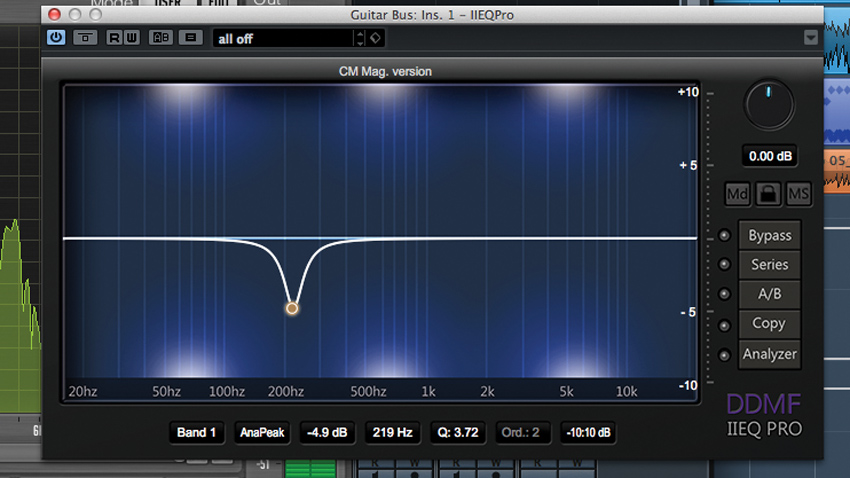
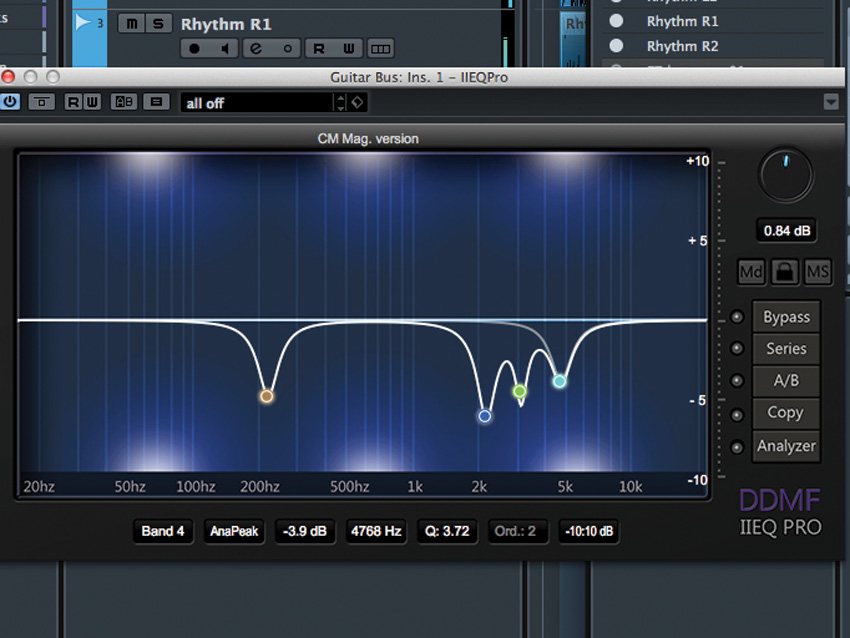
Step 2: There’s a peak at about 220Hz, so we use a small EQ cut in DDMF’s IIEQ Pro CM to reduce it. Zooming SPAN’s graph to show the 2-5kHz range reveals a set of annoying peaks. Our aim isn’t to flatten the graph, but rather to figure out which peaks can be attenuated to aid clarity.
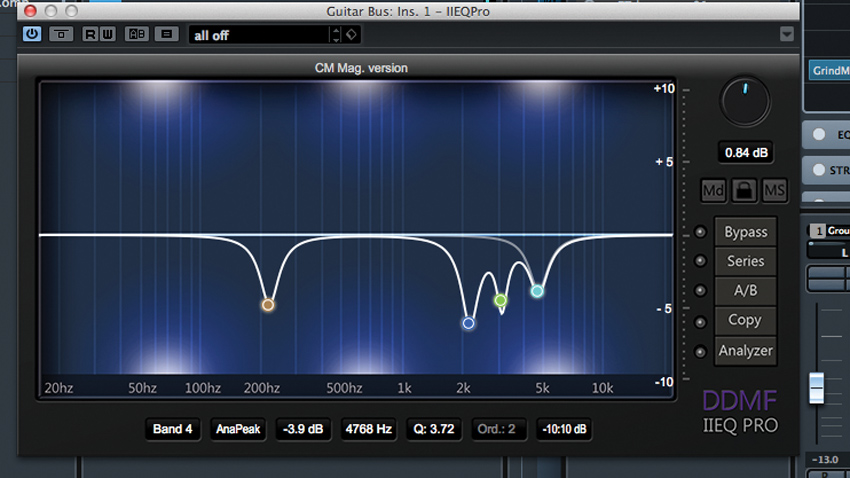
Step 3: We zero in on 2177Hz, 3139Hz, and 4769Hz, and cut cautiously - overdo the EQ and you’ll end up with a sound that fits in the mix but lacks bite. We also apply a high-pass filter to gradually roll off the lower frequencies - experiment with Q settings to give the low-end more ‘thud’.
Chugs away
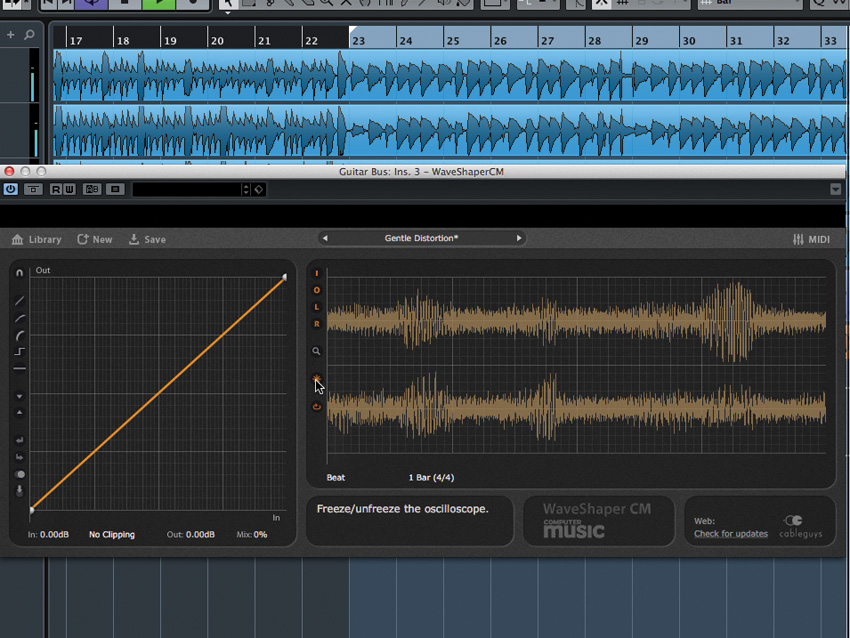
You may have heard it said that distorted guitars don’t need any kind of compression, since the distortion flattens the dynamics out anyway. This isn’t actually true, and palm-muted chugs in particular are likely to leap out in volume.
We can observe this using Cableguys’ WaveShaper CM. To get it under control, use a compressor or limiter to reign in unwanted peaks - such as Barricade CM. Set the Out ceiling - which is essentially the threshold in this limiter - so that the gain reduction meters only flash when there’s a bassy chug.
Room reverb
Guitar recorded through an amp sim plugin can sound too ‘direct’, lacking the ‘space’ or ambience of a real amp recorded in a room. A touch of ‘room’ or ‘studio’ reverb can gel rhythm guitars together and smooth their abrasive edge.
Acon Digital’s CM Verb, inserted on the guitar bus, offers a simple way to do this without messing around with send channels. It has built-in filtering, too, so you can roll off the low end to keep the bass tight and controlled, and cut the treble to make the reverb less obvious. The result is subtle, but it gives our guitar a slight push in the mids and makes it sound smoother.
Wah star
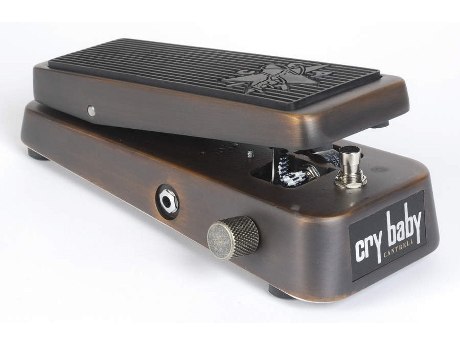
You don’t need to use a real wah-wah pedal in order to get terrific wah leads. Grab yourself a filter plugin and fire up your DAW’s automation system...
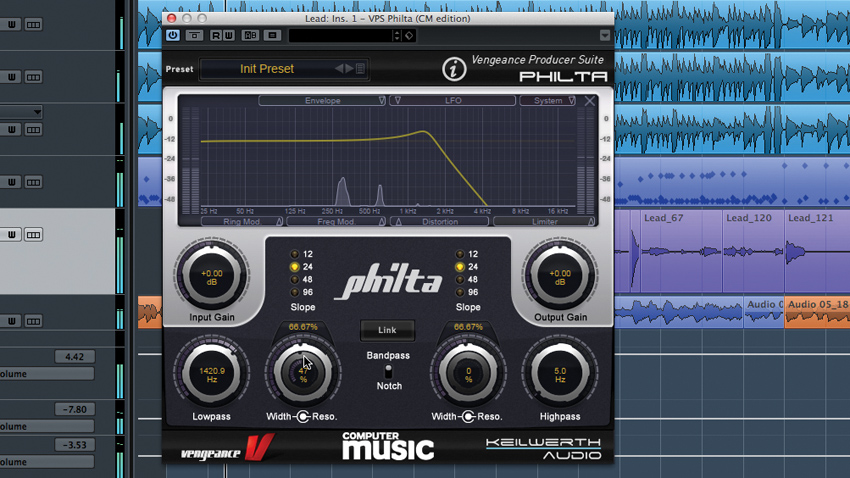
Step 1: A wah-wah pedal is just a resonant low-pass or band-pass filter, so to add one to your solo after it’s been recorded, all you need to do is add a filter plugin before your amp plugin, then crank up the resonance. We’re using Vengeance-Sound’s Philta CM.
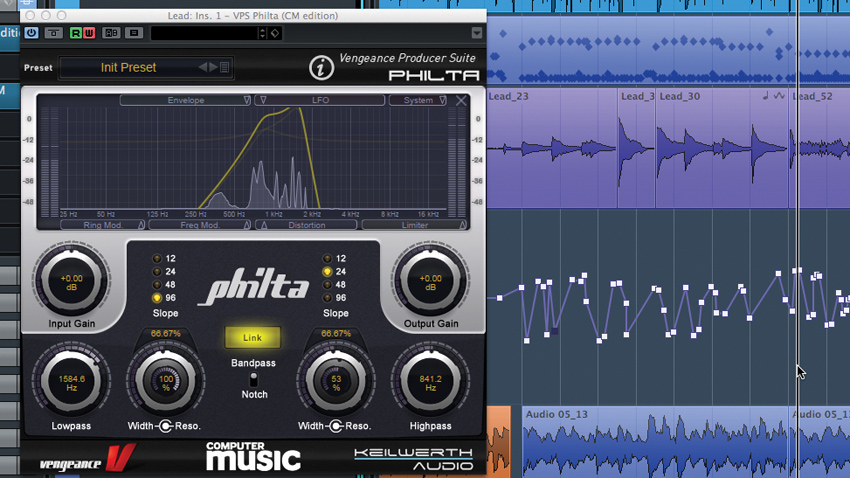
Step 2: Sweep the low-pass filter cutoff to hear the wah effect in action - we find that enabling Link mode to hook in the high-pass, creating a band-pass, gives the best results. Now, you can either record automation in live while the solo plays back, or program it in by hand using automation curves.
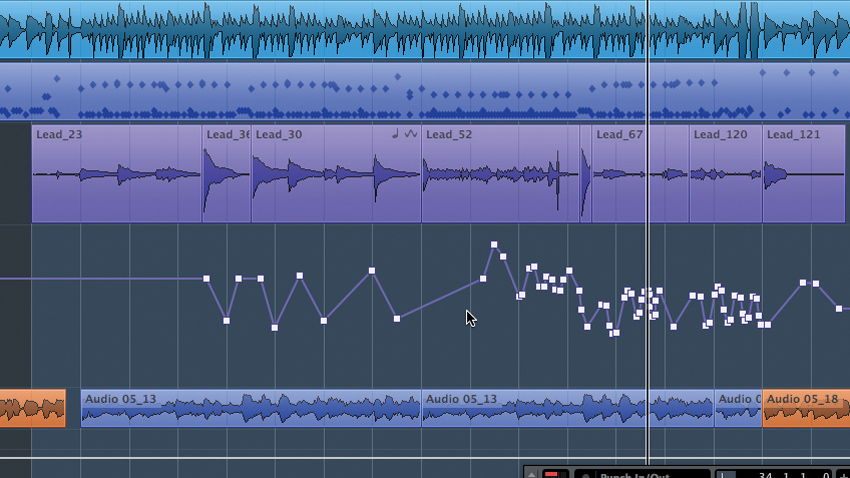
Step 3: For an authentic wah vibe, try recreating common wah pedal techniques like snapping the pedal closed just as a note begins, then opening it slowly throughout the sustain; or rapidly wobbling the pedal back and forth to make a chord or note ‘shimmer’.
Wide open leads
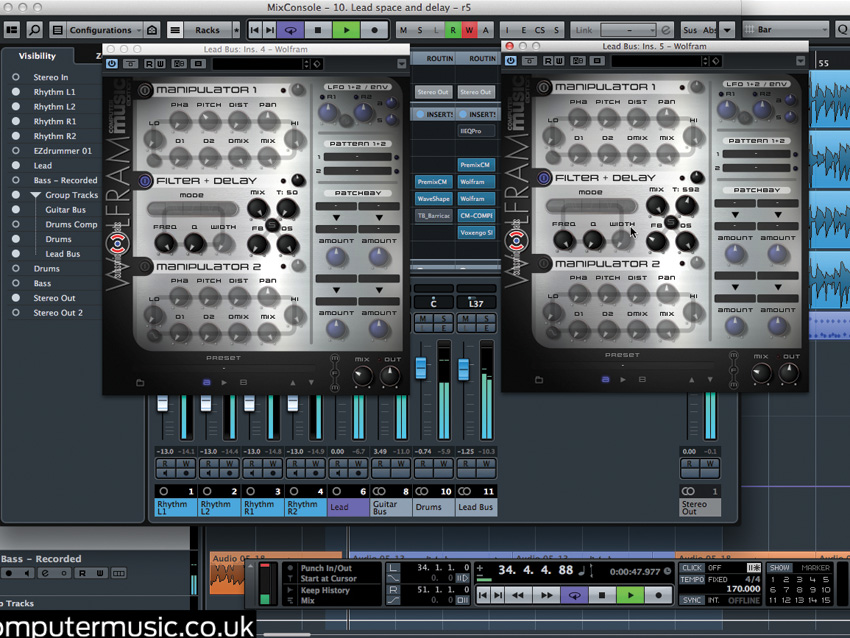
Delay can bring a lead guitar to life, giving it the 3D width and depth that a mono recording inevitably lacks. It can be difficult to find the right balance, though: too little and the guitar remains flat and one-dimensional, while too much clogs the mix up, clouds the details of the solo and just sounds a bit amateurish.
One approach is to use two delay plugins: the first set to super-short, hard-panned delays, the second to a longer delay for fully separated repeats. Almost any decent stereo delay will work. The first instance gives a Haas-style psycho-acoustic widening effect that gives the guitar a bolder presence in the mix. The second uses longer delays, for a more obvious echo effect. Using this method, you’ll be able to dial in subtler dry/wet mix settings but still achieve a big sound.
Computer Music magazine is the world’s best selling publication dedicated solely to making great music with your Mac or PC computer. Each issue it brings its lucky readers the best in cutting-edge tutorials, need-to-know, expert software reviews and even all the tools you actually need to make great music today, courtesy of our legendary CM Plugin Suite.
