Create glitchy drums
With glitchy drum tracks all the rage, we offer some pointers on achieving that lo-fi rhythmic fun

Creating Glitchy Drums

Creating Glitchy Drums

Creating Glitchy Drums

Creating Glitchy Drums
Originality is the key to any drum programming. The great thing about glitchy, lo-fi drumming, though, is that there's more scope for sonic exploration than with almost any other musical style. You're not forced to put snare drums on beats two and four for example, or even to use conventional kit sounds - the creative world is your oyster.
In this example, we've used Logic Pro as our sequencer and sound source and, as we'll see, we've used a number of features within the program to achieve the end result. However, nothing is exclusive to Logic, so read on regardless of which DAW you favour.
Drum pattern
First, we're going to need a programmed drum pattern. We've used Logic's Ultrabeat to create this, within which we've chosen an electro kit. You can see the programmed pattern in fig1. The drum kit is set out conventionally, with the kick on C1, snare on D1 and so on, but as you can see we've tried to vary each beat, so that while there's a clear sense of rhythm, there are also a few surprises along the way. The different colours represent velocity changes - volume variation is going to be as important as the note positions themselves.
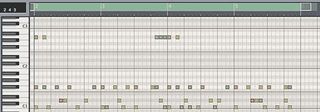
Fig1 - Programmed drum pattern
Once you've got a pattern you like, bounce it down as an audio file (see the audio samples at the bottom of this page). In order to create glitchy effects, the first technique is to chop parts of this audio loop up and use these individual hits to act as a construction kit in a new sampler instrument. This is easy enough - simply save the audio extracts as new audio files to create a little library of hits (fig2). We isolated a kick drum, a snare and the electro conga sound, which plays at the beginning of the loop. Once these individual hits are saved, we opened up a new sampler instrument (using Logic's EXS24) and mapped each sound to a number of keys. If you are using Logic, uncheck the box at the bottom of the sample window that 'hides' used samples, as you'll be using each sound a number of times.
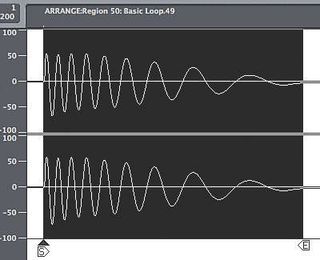
Fig2 - Audio files as a library of hits
Get the MusicRadar Newsletter
Want all the hottest music and gear news, reviews, deals, features and more, direct to your inbox? Sign up here.
Using the bass drum as an example, we mapped the bass drum audio file to C1, D1, E1 and F1. We can then 'treat' each key differently, so while the sample on C1 is unchanged, D1 is the same sound pitched up a few semitones, E1 features the sample reversed, and on F1 we set up a loop so that the waveform loops through a section of the sound, producing a pitched tone (fig3).
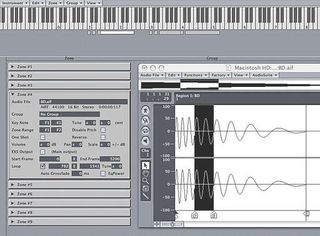
Fig3 - Set up a loop for a pitched tone
We then repeated the exercise with both the snare drum and the conga, creating construction kits for both. We wanted to create some stylistically typical 'pitched' tones for the snare, so we set the loop points close together. These become like synth oscillator waveforms - the selected waveform is so short that you get a pitched result. We've done this with two separate loops to create two pitches. You can hear all three in the audio samples.
Adding samples
Once you've got your samples together, you can start putting them in your arrangement, either adding them under the audio loop, or replacing bits of the loop as you see fit.
There are no rules, so be as creative as you like. We liked the bass drum looped tone a lot, so we used this repeatedly, saving a spot for our pitched snares, to make this a standout moment. We set up a bussed delay on the sampler instrument channel too, so we could add delay to the moments we liked best - again, the snares came in for some treatment here. One great thing was to create a pitched loop for the conga and then use the EXS24 instrument interface to set the pitch-bend range to an octave. Whenever this note plays, we've drawn pitch-bend information over the note, so that the sound swoops up or down (fig4).
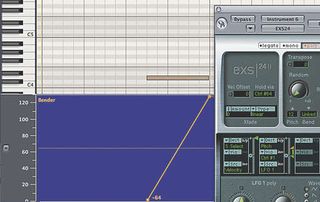
Fig4 - Pitch bend info
Once we'd programmed my new sounds in, we turned my attention to audio processing. We grabbed little bits of the original loop, chopped them up and reversed them, so that some hits are pre-empted by their reversed 'brothers'. In other cases, we chopped a short section and repeated this several times within one beat. This creates some great buzzy effects, which work nicely against the more pitched sampled sounds.
Then, when all the edits were done, we grabbed short sections of the loop and moved them down to different audio tracks. Over these we inserted different effects, some of which we've automated. For example, we created the crackly, panned section by moving a set of repeated hits down to track two, putting a bitcrusher over the channel and increased the amount of downsampling across that beat (see the audio samples).
We put some pan automation on it too, so the sense of stereo shifts at just that point. You can hear the final result in the audio samples.
There's no end of variation possible, but the more you try, the more likely it is that you'll create something genuinely your own.
Audio samples:
Final glitch loop
Basic Loop
Bass drum construction kit
Snare construction kit
Congas
Bitcrushed extract

