In Pictures: English Rogers snare restoration project
English Rogers snare finds a new home, and a new lease of life
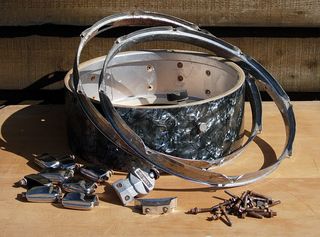
In disarray
There exists a very fine network of vintage drum collectors and shows in the UK (including the National Drum Fair). This is where Rhythm tracks down a lot of the gems that feature in our monthly Vintage View column. Back in January 2010 we featured a 1960s English Rogers kit, owned by Jeremy Peake. Unfortunately there was no matching snare, but a good Samaritan changed all that. Over to Jeremy…
"This story began back in March when I received an email from Rhythm's Geoff Nicholls, saying that a very generous reader wanted to give me a snare drum. Bolton drummer John Dagnall had seen my 1960s English Rogers kit in the January edition of the magazine and noticed that it didn't have a matching snare. It just so happened that he had a dismantled ER snare drum languishing in his shed and he decided to contact Rhythm to see if I'd like it. Being an amateur vintage drum restorer with a penchant for 1960s English drums, I jumped at the chance.
"I live in the East Anglian fens, I needed some help getting the snare down from Bolton. Through being a member of the excellent Mike Dolbear forum and a regular supporter of drum shows such as the National Drum Fair (where Geoff had spotted my ER kit on display last September), I'm fortunate to have some great drummer mates across the UK. One of them, Andy Cash, very kindly offered to pick the snare up from John. He passed it on to Manchester drummer Andy Perfect, who was good enough to deliver it to me at an event last month.
"When Andy P dropped the snare off, it was in a poor way. There was a grubby looking shell, which had been painted inside, and a plastic bag full of very rusty looking parts. John had warned me on the phone that I shouldn't get too excited! It looked like a lot of hard work lay ahead but, on the plus side, the shell was sound and the wrap wasn't damaged. I took it home, emptied out the carrier bag on the bench and set to work.
"A closer look revealed that the shell had been painted inside with cream gloss paint and silver spray paint. There was no sign of the snare lever and a chrome on brass lug was broken. The lugs, known as bread and butter lugs, are notorious for self-destructing. An email to English Rogers expert Alan Watt resulted in the generous donation of some replacement parts to the cause. This was an enormous help, as parts for these old snares are very hard to come by.
"Restoring the snare took many hours of very enjoyable work. I covered the outside of the beech shell to protect it and gradually removed the interior paint with paint stripper, finishing it with fine wire wool and clear furniture wax. Years of grime was then cleaned from the wrap, using paint cutting compound, after which it was treated with furniture polish. Being chromed brass, the lugs cleaned up very easily with metal polish. I dismantled the dampener and cleaned off all the paint and rust. The strainer and butt plate were taken apart, cleaned with 0000-grade steel wool, then re-assembled. The very rusty hoops were also left in the dip and then worked on with a brass brush, metal polish and the ultra fine steel wool. I replaced the square ended tensioning lugs with new ones.
"Once I was happy that the parts were as good as they were going to get, I put all the hardware back on, fitted new heads and a strainer and a replacement badge and tuned it up. It sounds superb and I'm really pleased with it. It'll certainly be going to my next gig and it will be great to use a full matching set of these vintage beauties. I'd like to extend my warmest thanks to John Dagnall for giving me the drum, Andy Cash and Andy Perfect for getting it to me, Geoff Nicholls and the Rhythm team for alerting me, and Alan Watt for the parts. If drummers weren't such a helpful lot then none of this would have happened. Thanks lads!"
Jeremy Peake May 2010
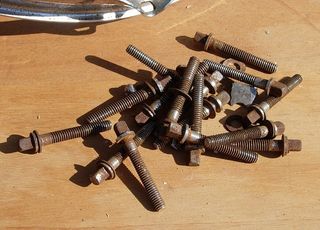
Rusty rods
"I removed the rust but eventually decided to replace them with new ones," says Jeremy.

More grubby parts
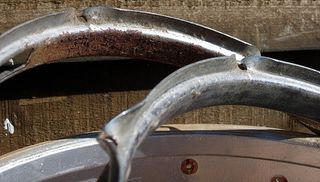
Hoops
"The hoops were in poor condition, especially the bottom one," says Jeremy.

The inside of the shell
The inside of the shell was painted with cream gloss paint and sprayed silver...
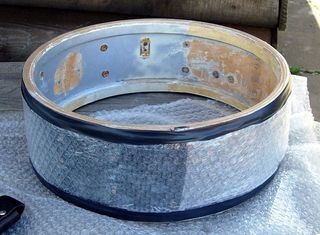
The clean-up begins
Before the cleaning began Jeremy protected the exterior of the shell with bubble wrap.
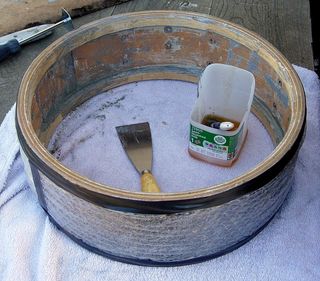
Removing the internal paint
Jeremy removed the paint, gradually, with paint stripper.
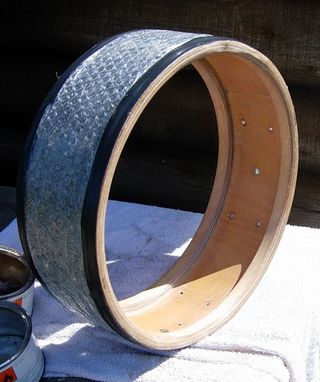
Post paint-removal
The inside of the shell with the paint removed. Wax polish was applied to the wood to seal it.

The wrap before cleaning
The wrap was cleaned using T-cut and Mr Sheen!

During the cleaning

Replacing the hardware
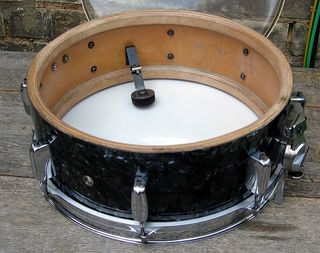
One hoop on...
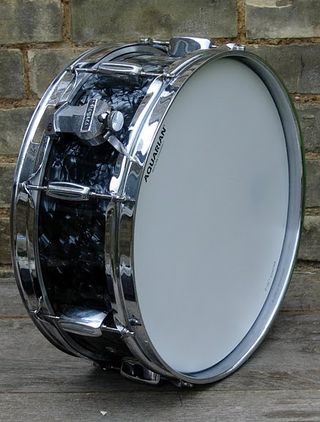
The finished product!
And with new heads, strainer and a replacement badge the drum is breathing again. Many thanks to Jeremy for taking the pictures and for talking us through his restoration process.
If anyone else has something similar they would like featured on the Rhythm website then send us an email to rhythm@futurenet.com. We want to hear your stories!

I'm MusicRadar's eCommerce Editor. In addition to testing the latest music gear, with a particular focus on electronic drums, it's my job to manage the 300+ buyer's guides on MusicRadar and help musicians find the right gear for them at the best prices. I dabble with guitar, but my main instrument is the drums, which I have been playing for 24 years. I've been a part of the music gear industry for 20 years, including 7 years as Editor of the UK's best-selling drum magazine Rhythm, and 5 years as a freelance music writer, during which time I worked with the world's biggest instrument brands including Roland, Boss, Laney and Natal.
