The 40 greatest synth sounds of all time, No 20: Orbital - Chime
Recreate the sound of the Hartnoll brothers' Orbital debut
One of UK dance music’s most seminal early records, Chime was the first single released by the Hartnoll brothers under the name Orbital, and reached number 17 in the UK singles chart following its re-release on Pete Tong’s FFFR in 1990 – not bad for a record quickly knocked up before a trip to the pub!
Originally recorded in their home studio, which was under the staircase of all places, Chime was mastered onto the Hartnoll family cassette tape player, which ran a little too quickly, making the final record slower than intended – an anomaly that wasn’t fixed until the Orbital boys re-recorded the track in a professional studio for the re-released version a year later.
As with many rave records made at the time, Chime combines a selection of samples taken from an old instrumental record with synths, alongside a drum machine track. We’re focusing on the chunky bass taken from a Yamaha DX100.
So, let’s run through how to make our own homage to this sound using the brilliant ThornCM.
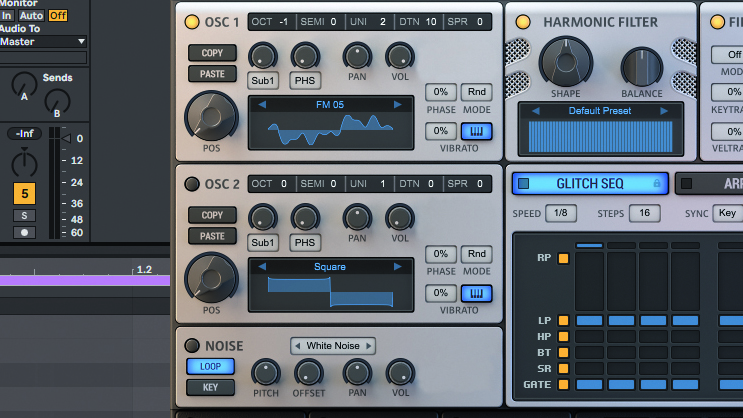
Step 1: Set Osc 1’s waveform to FM 05, a similar timbre to the sound we’re recreating. Next, pitch the oscillator down by an octave, so the sound sits in the right register. We’ll increase the Unison Voices to 2, and push the Detuning amount up to 10 to thicken the sound.
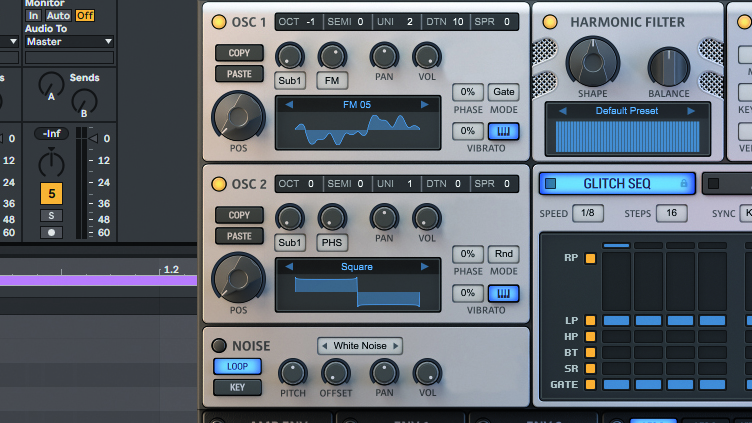
Step 2: Set Osc 1’s Phase mode to Gate to make it consistent, as the oscillator starts the wave at the same place for each note. Turn on Osc 2 and choose the square wave. Turn the Volume down to 0, then increase Osc 1’s FM Amount to 62, using Osc 2 to modulate the frequency of Osc 1.
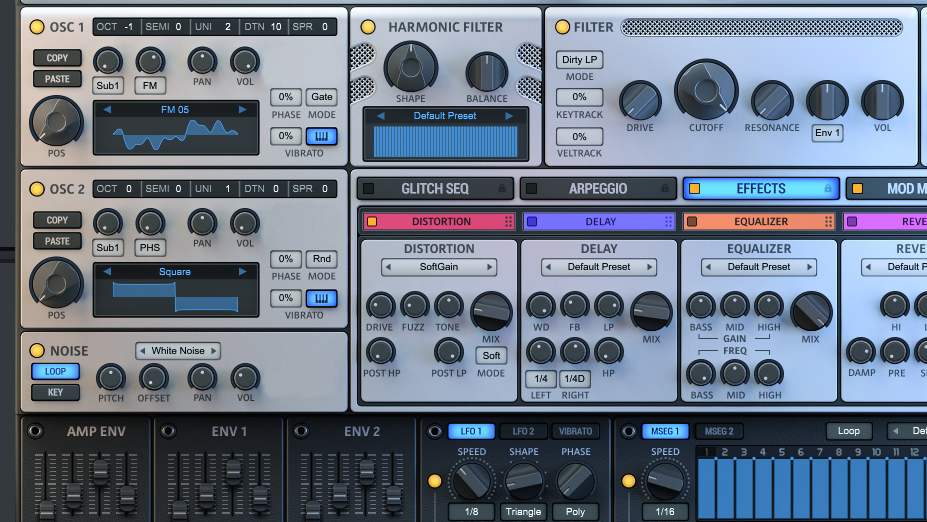
Step 3: Turn on Noise generator, and set the Vol to 30%; this adds some fizzy crunch. We’ll turn on the distortion effect, select the SoftGain preset and reduce the Mix to 20%; this adds saturation, giving the sound a rounded tone. Next, shape with the filter – choose Dirty LP.
Get the MusicRadar Newsletter
Want all the hottest music and gear news, reviews, deals, features and more, direct to your inbox? Sign up here.
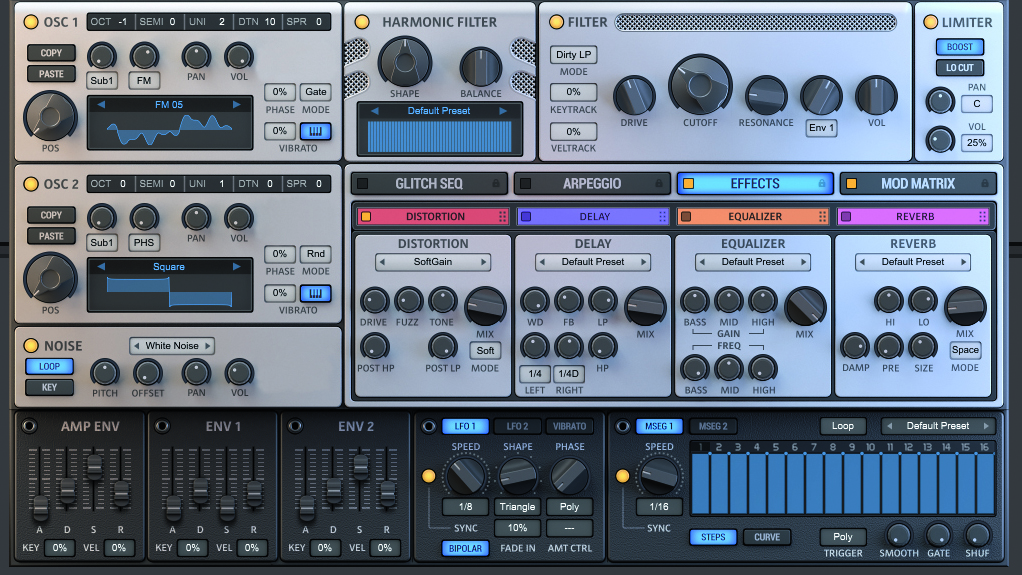
Step 4: Set the Cutoff to 200Hz, and the Res to 40%. Increase the Env 1 Amount to 20%, so the filter is modulated by the envelope. Reduce Env 1 Sustain to 0% to make the modulation subtle. Increase Filter Drive to 10dB; this makes up the gain lost from applying the filter, while adding crunch.


Computer Music magazine is the world’s best selling publication dedicated solely to making great music with your Mac or PC computer. Each issue it brings its lucky readers the best in cutting-edge tutorials, need-to-know, expert software reviews and even all the tools you actually need to make great music today, courtesy of our legendary CM Plugin Suite.


