What's new in Reason 13?: "For any ex-users considering a trip on the nostalgia gondola, Reason has become even more worth it"
See and hear what’s new in the latest upgrade to the legendary virtual studio DAW
Reason was one of the wave of innovative DAWs that blew in sometime around the year 2000, others being Ableton Live and Cakewalk Sonar. These DAWs were catching the winds of change as computers were becoming viable platforms for producing digital music.
While Live’s innovation was Session View and its quantised clip launching, Reason offered a more analogue taste – a rack full of virtual devices, the cables to connect them as you liked, and a way to sequence it all to make music. It was one of the most innovative, powerful and fun ways to make music as the 21st century dawned.
On its path to 2024, Reason went through many changes – as did the landscape of other DAWs. Reason grew to add recording capabilities, third-party rack devices, an entire SSL desk emulation, VST plugin support and more mod cons, all while keeping the rack that started it all, along with many more ‘stock’ devices to boot.
We’ve just seen the launch of Reason 13, and with it the continuation of the DAW’s story. This upgrade will bring existing Reason users more useful ways of working and the means to get more creative behind their favourite sequencer. For those who haven’t tried Reason before and are wondering whether to get up and running, there are improvements that bring it more into line with its competitors. And for any ex users considering a trip on the nostalgia gondola, Reason has become even more worth it, and its whole rack is even available as a separate plugin.
In this article, we’ll take you through the new features in Reason 13, showing them in action and providing audio examples.
What's new?
First up, Reason’s Polytone synth is a dual-layer subtractive synth that’s somewhat reminiscent of Subtractor (more on that later), but boosted for modern DAW users. Polytone is a two-layer synth, and there’s a crossfader to blend the layers, giving access to some pretty neat tricks. We’ll get into this first.
Next, the Ripley Space Delay is a full-featured delay unit with reverb processing, effects, and some real signal chain flexibility. It’s useful to have this as a bigger brother to both The Echo and RV-7 Reverb, which are both great but long in the tooth.
Get the MusicRadar Newsletter
Want all the hottest music and gear news, reviews, deals, features and more, direct to your inbox? Sign up here.
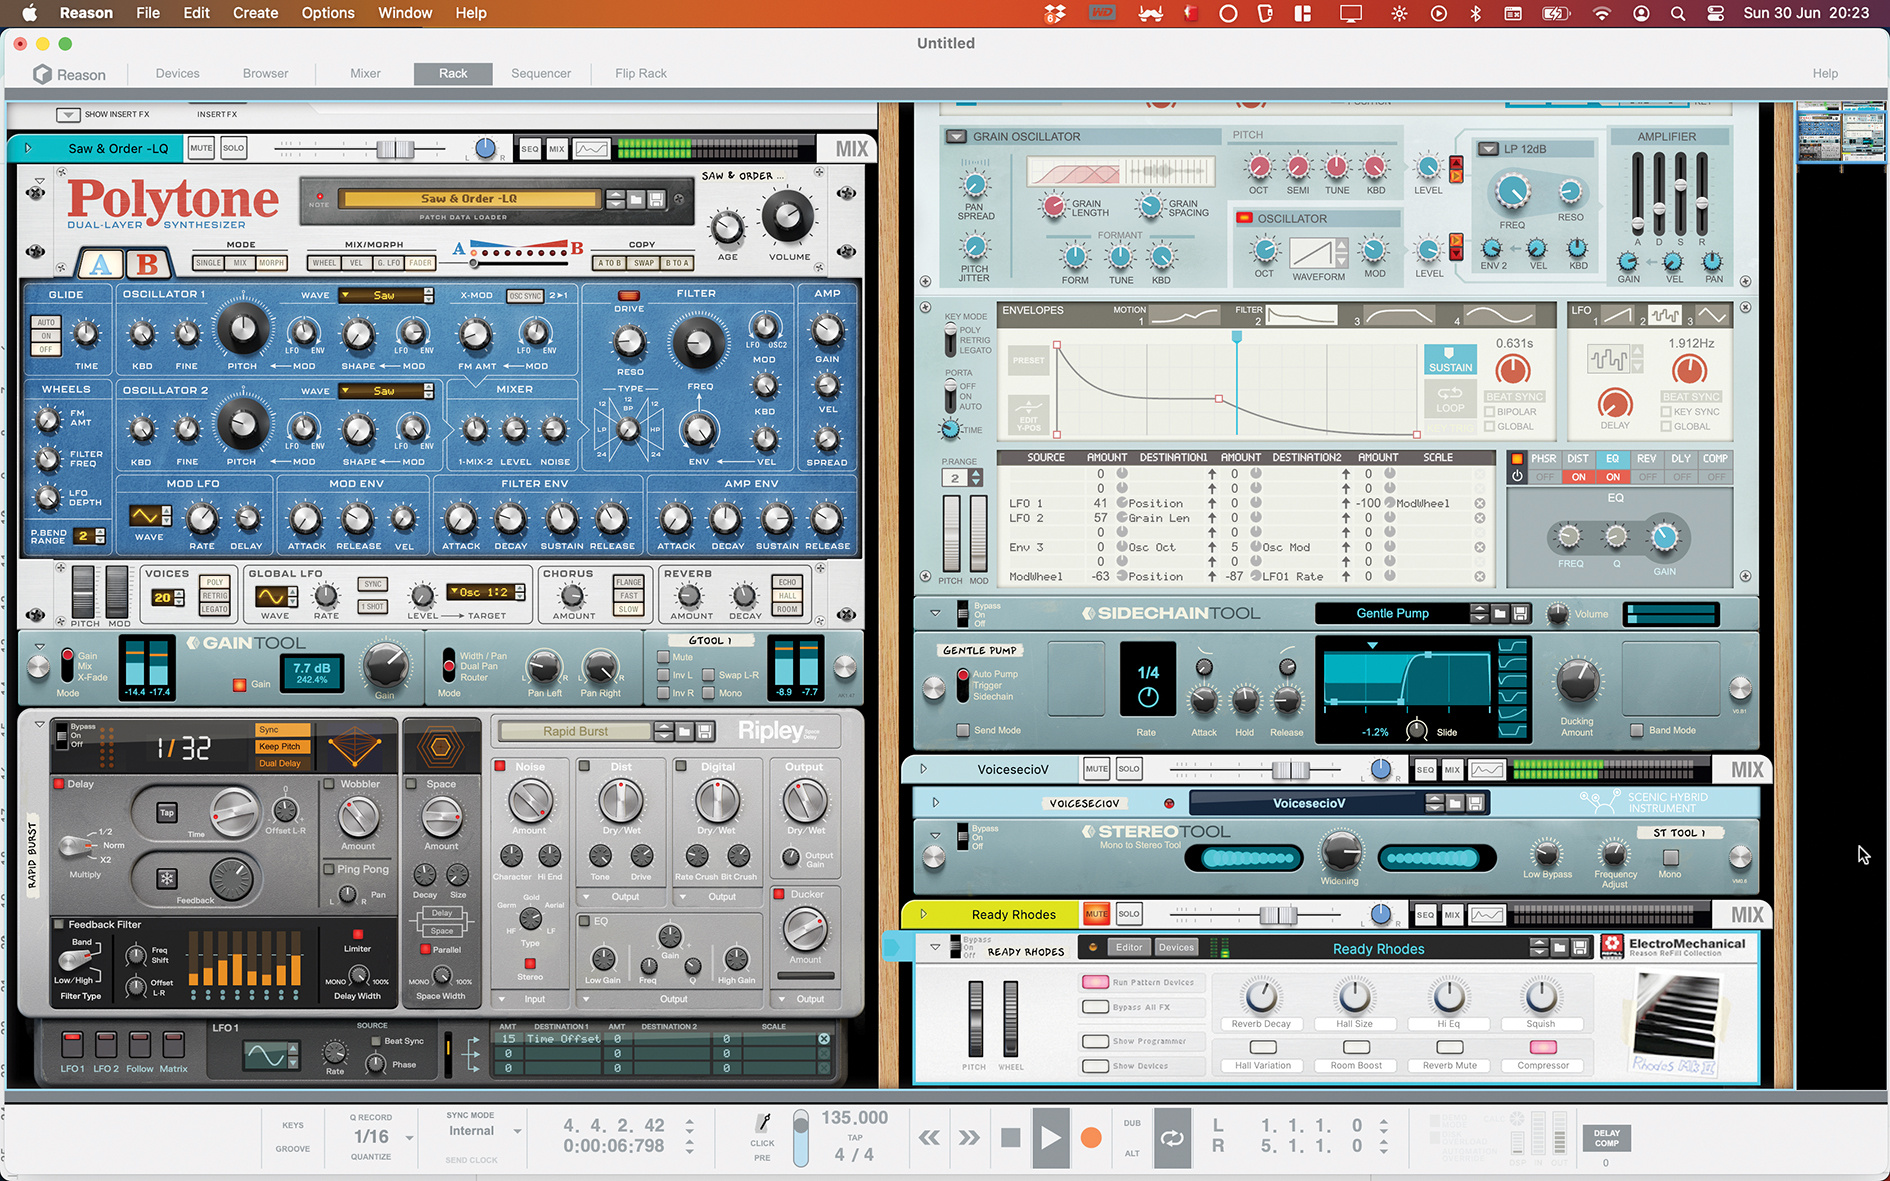
Three ‘utility’ units come next, with Stereo Tool, Gain Tool and Sidechain Tool providing new ways to improve your signals. Of the three, Sidechain Tool is the most notable, providing volume-shaping for sidechain-style pumping, but tooling up the effect with some advanced features, but the other two have some quite insightful uses.
Bringing up the rear, Reason 13 sees a bunch of UI tweaks, quality-of-life improvements and a new Browser window (the panel previously known as the Browser is still there and now known as the Devices panel). We’ll take you through the headline features here as well, concluding your briefing for this new version.
Learning Polytone, Reason 13’s dual-layer synth

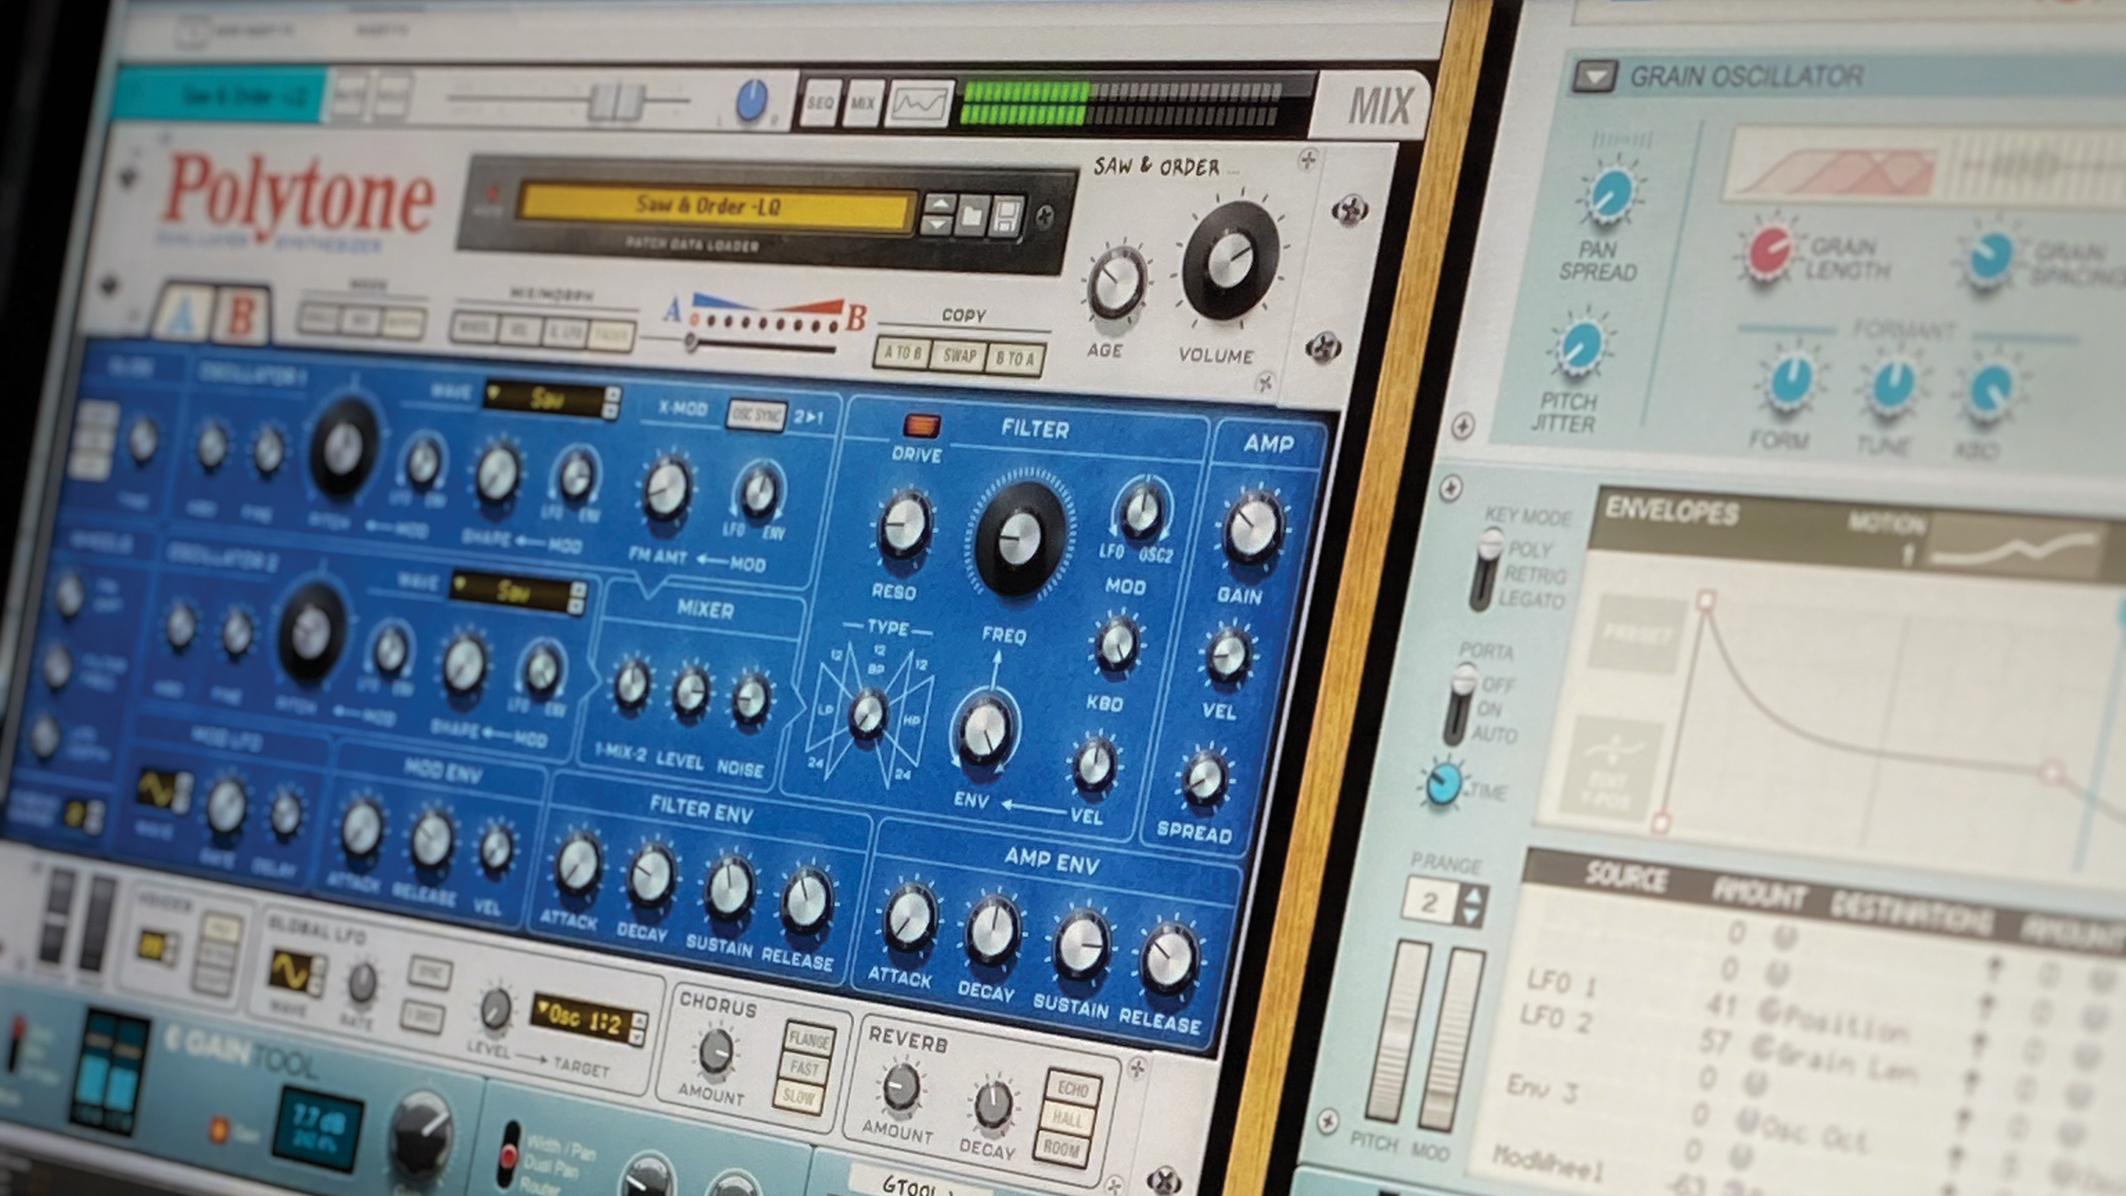
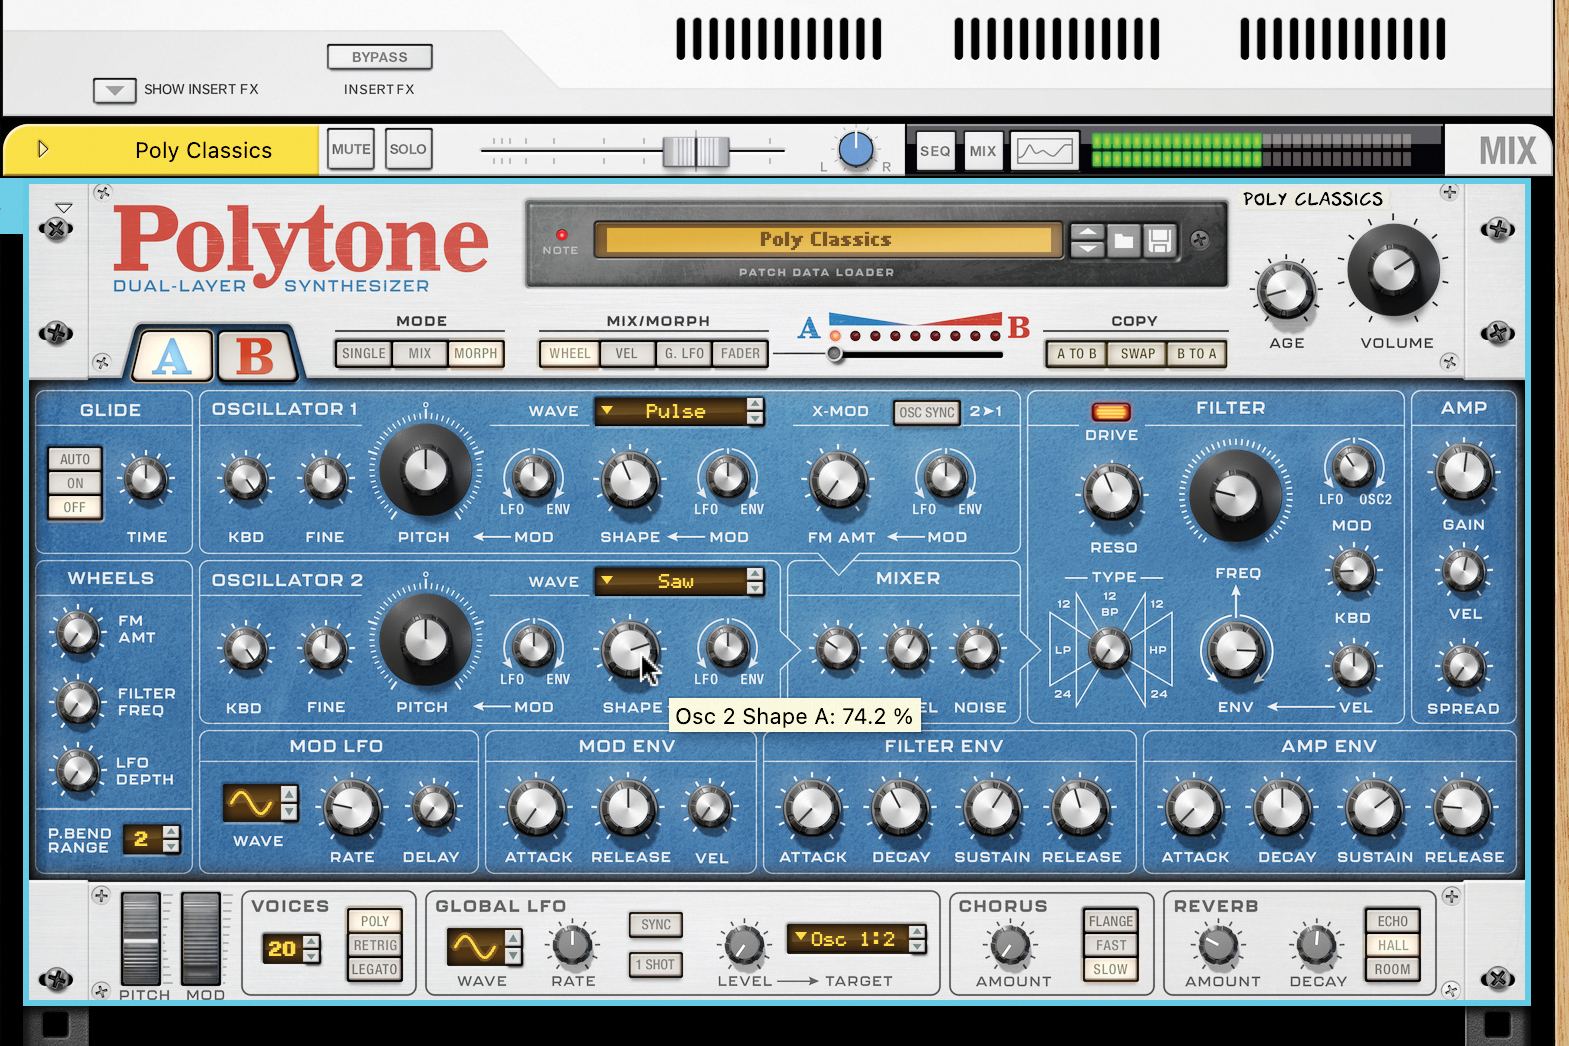
Here’s Polytone, the new synth in Reason 13. Among the ever-so-slightly more out of the ordinary are the oscillator Shape modifiers, FM between the two oscillators, and oscillator sync. So far, so ordinary, really.
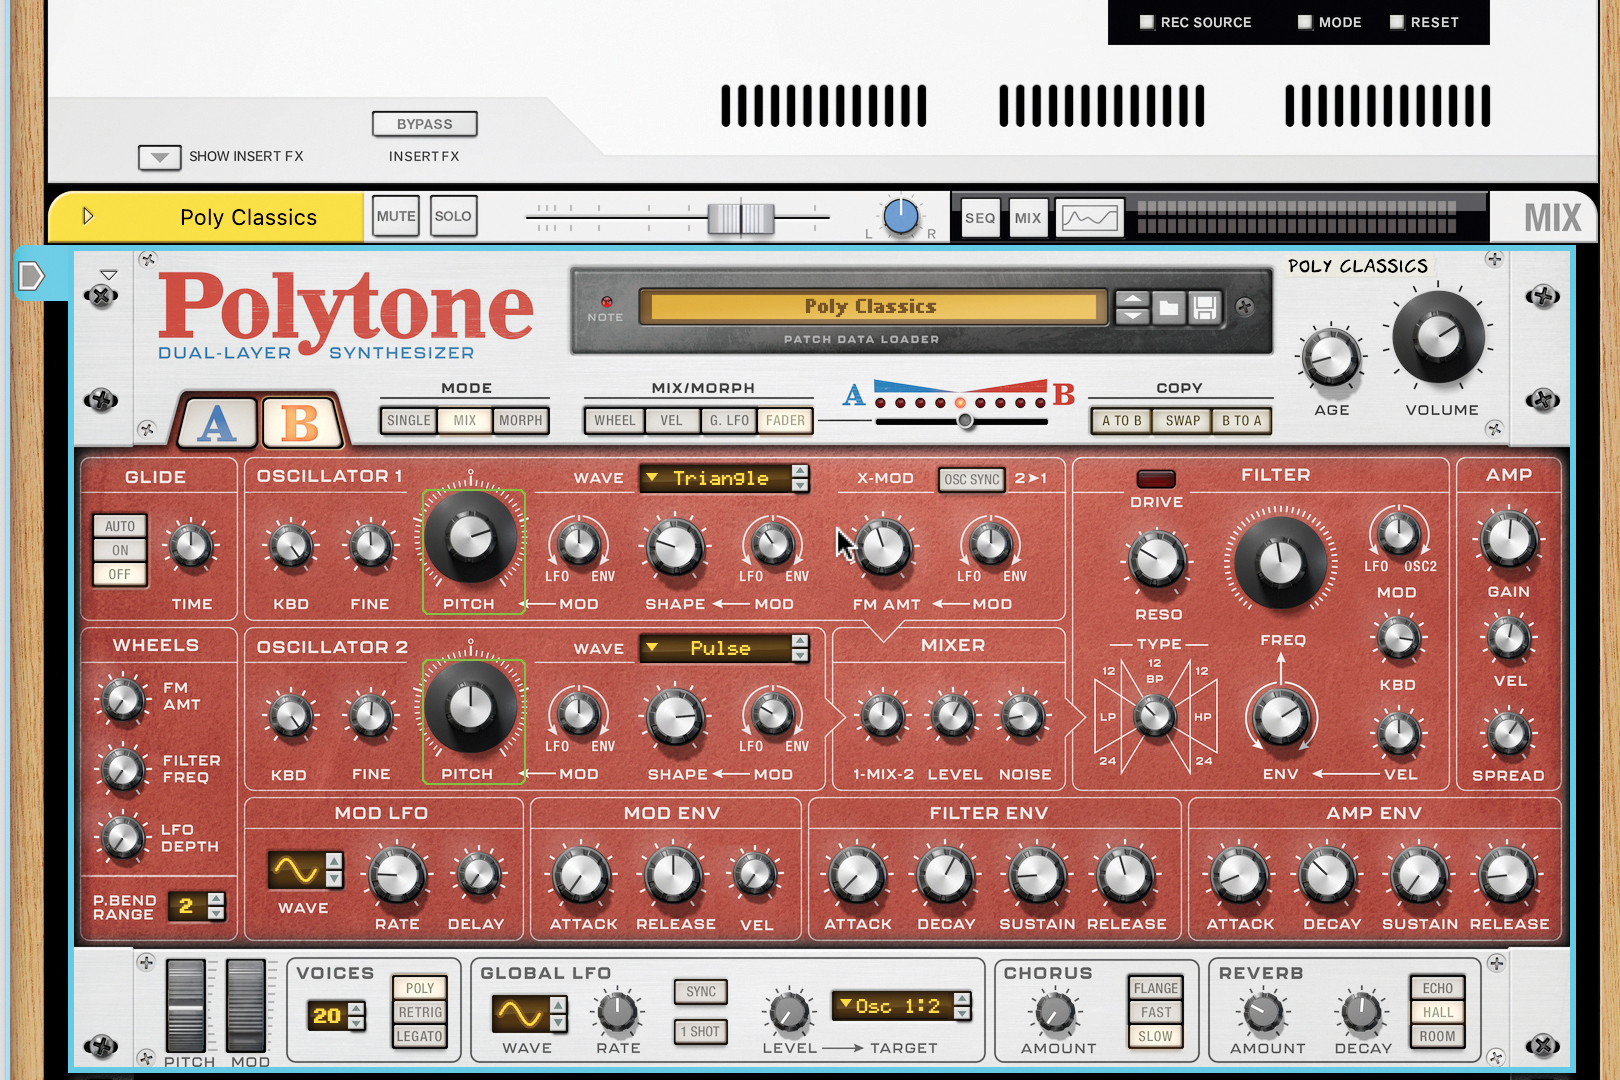
But that was just Layer A. Layer B gives you a duplicate of the exact same setup, and with the Mode set to Mix and the Mix/Morph type set to Fader, the crossfader at the top-middle blends between your A and B sound.
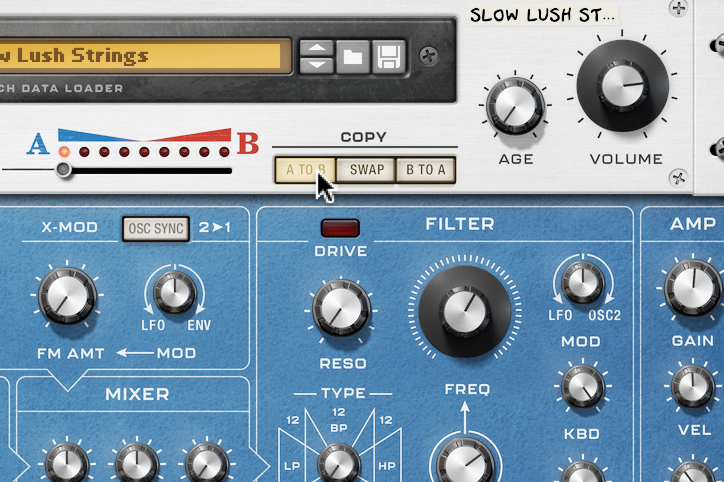
You get Copy options, including Copy A to B and Copy B to A (to paste settings between layers), and Swap (to switch layers). Here we take an included preset’s Part A, and duplicating it to Part B to homegrow our own layer.
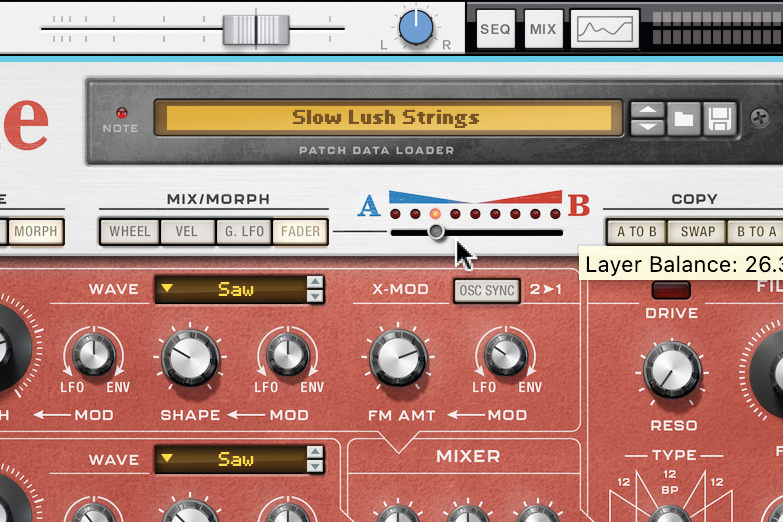
More than just mixing two layers’ signals, Morph Mode takes the two settings and makes the crossfader move from one to the other, interpolating settings to the halfway point of the crossfader, halfway between each layer.
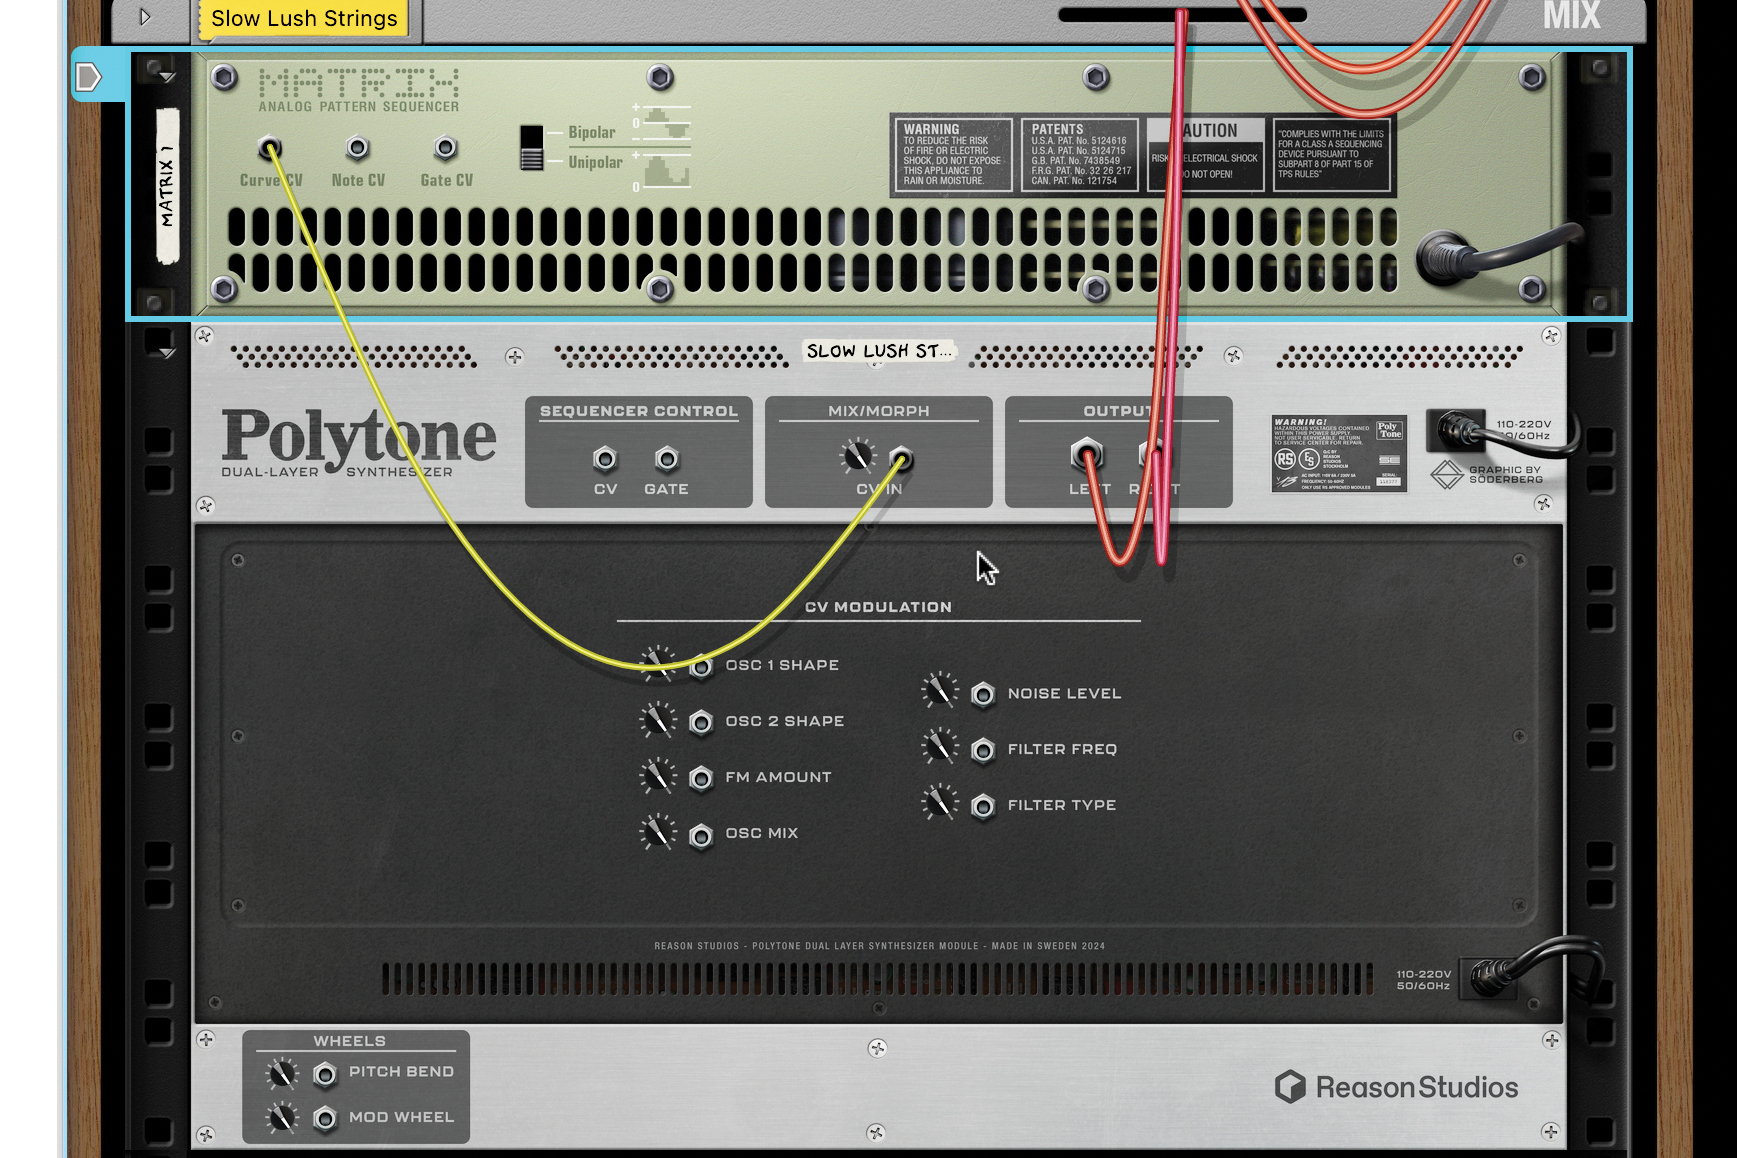
There are various ways to move the crossfader. Polytone lets you do it via the Mod Wheel, Note Velocity or the synth’s Global LFO. And, as it’s Reason, remember, you can use a CV signal to control movement.
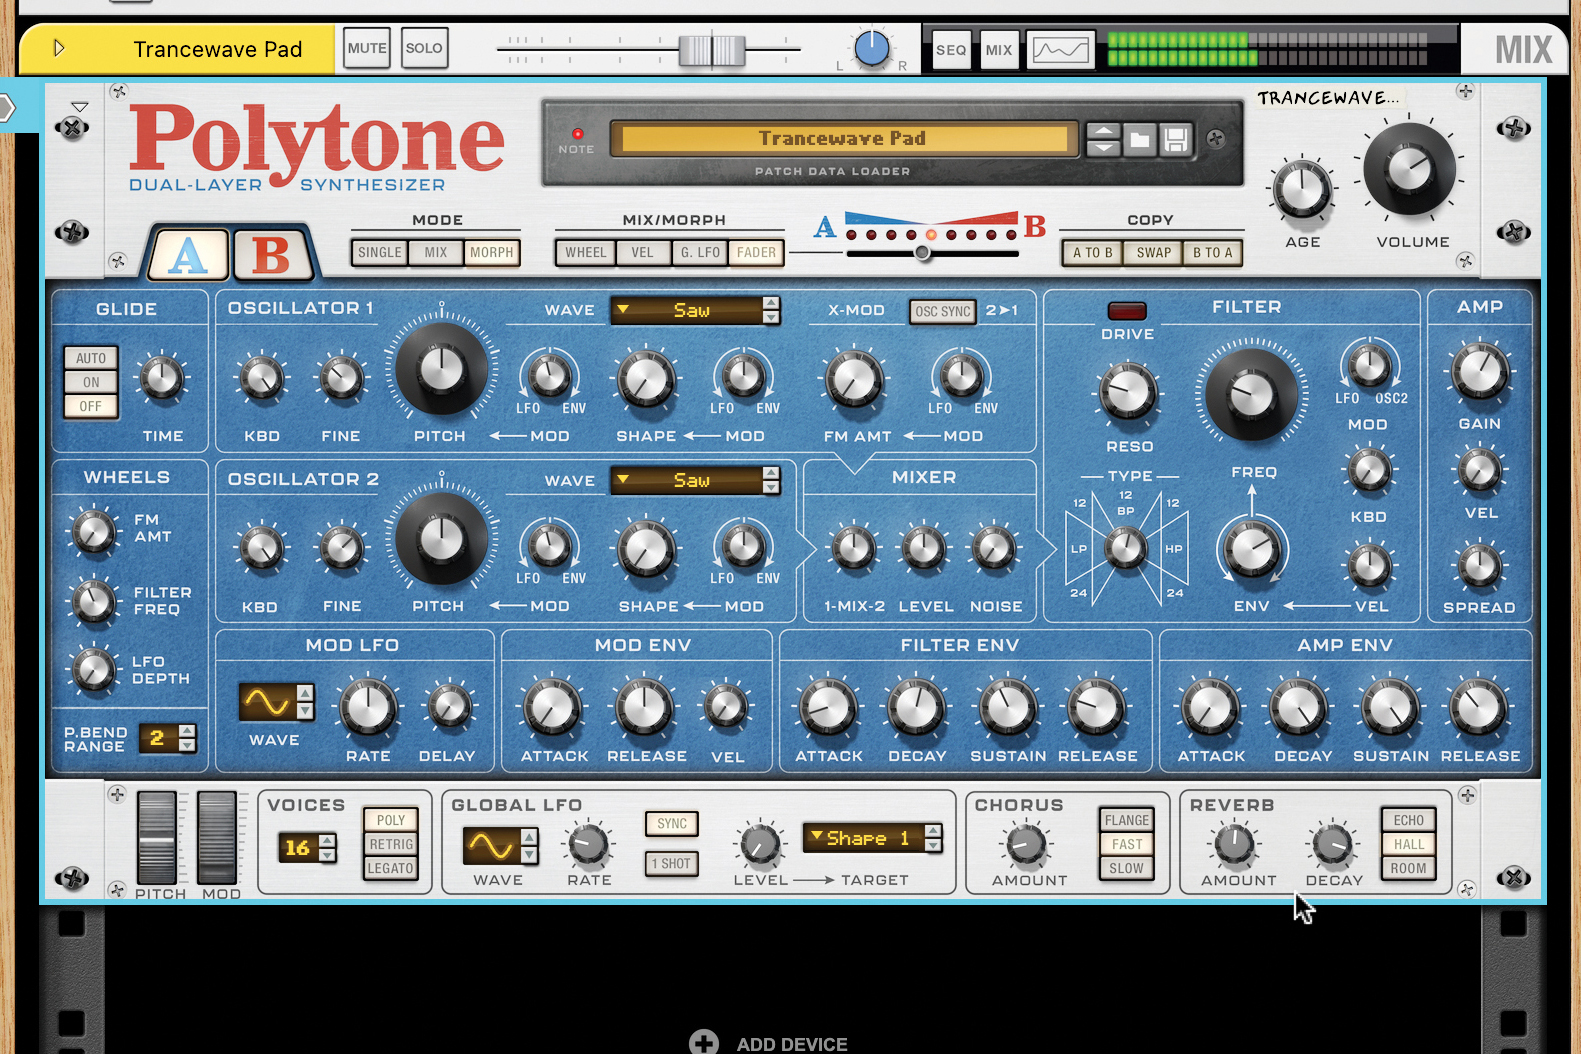
Finally, there’s a global section, with an extra LFO (helpful as there’s only one per layer), plus a Chorus and Reverb on output. A nifty Age control makes the virtual circuitry more prone to crunchy, analogue-style sonics.
Exploring the new Reason Browser
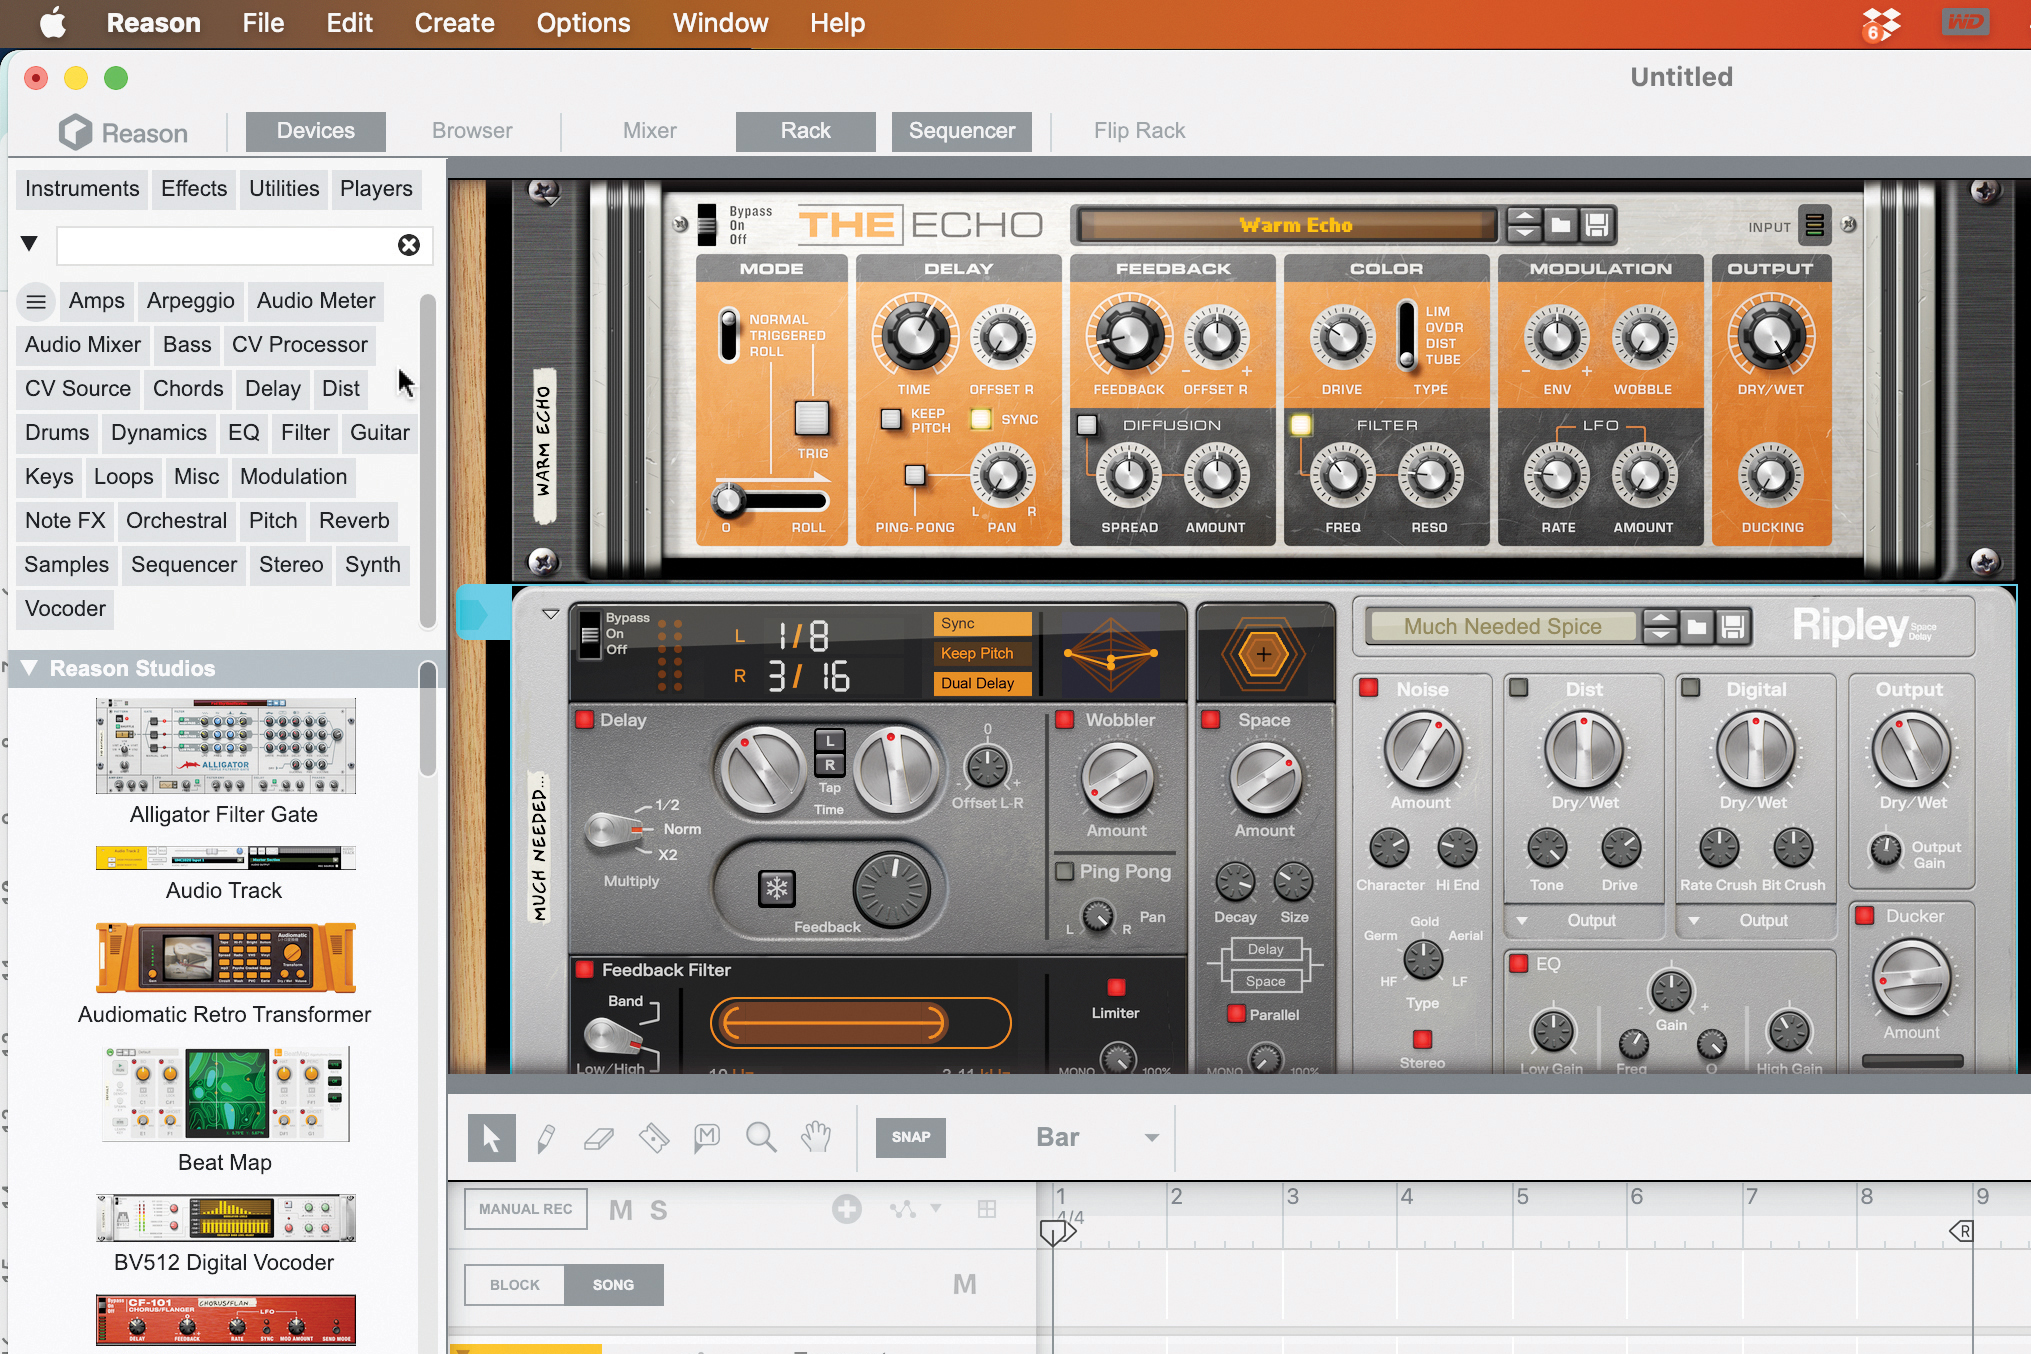
Reason’s left-hand panel is now the Devices rack. Here you can narrow down the display to Instruments, Effects, Utilities and Players, and all Reason Devices and third-party plugins are tagged. Alt-click to unfold/fold all headings.
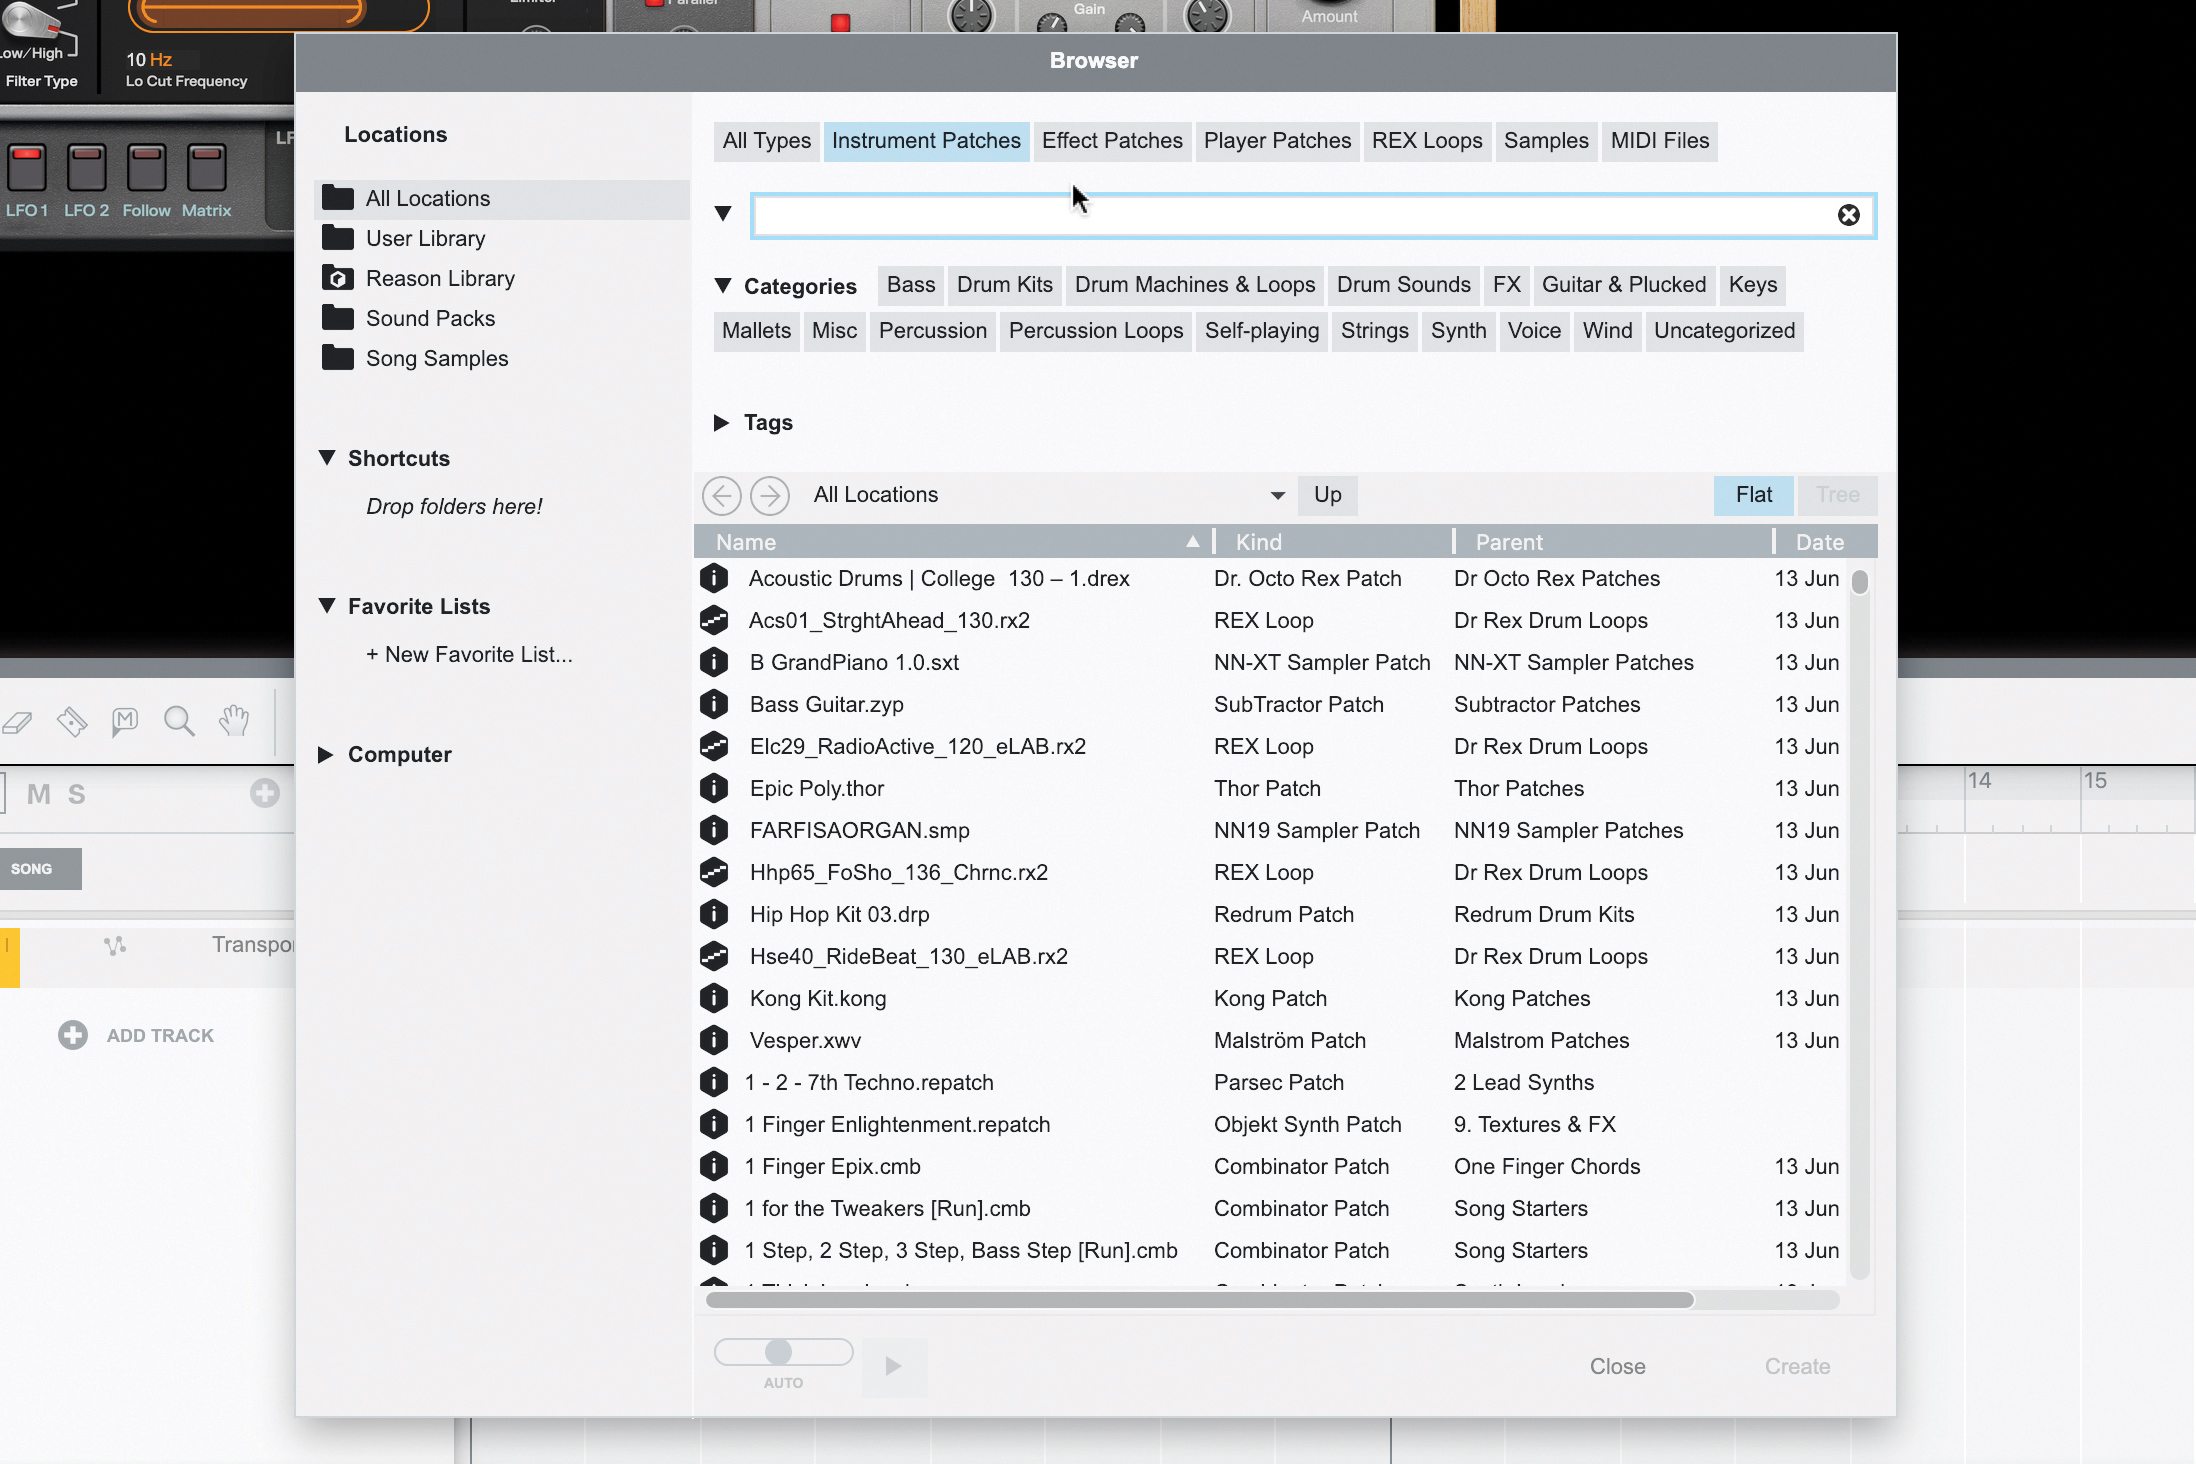
The new browser is where we have access to all devices in Reason, but context is different: this time we’re searching on the patch level for individual sounds; no matter which instrument or Combinator generates them.
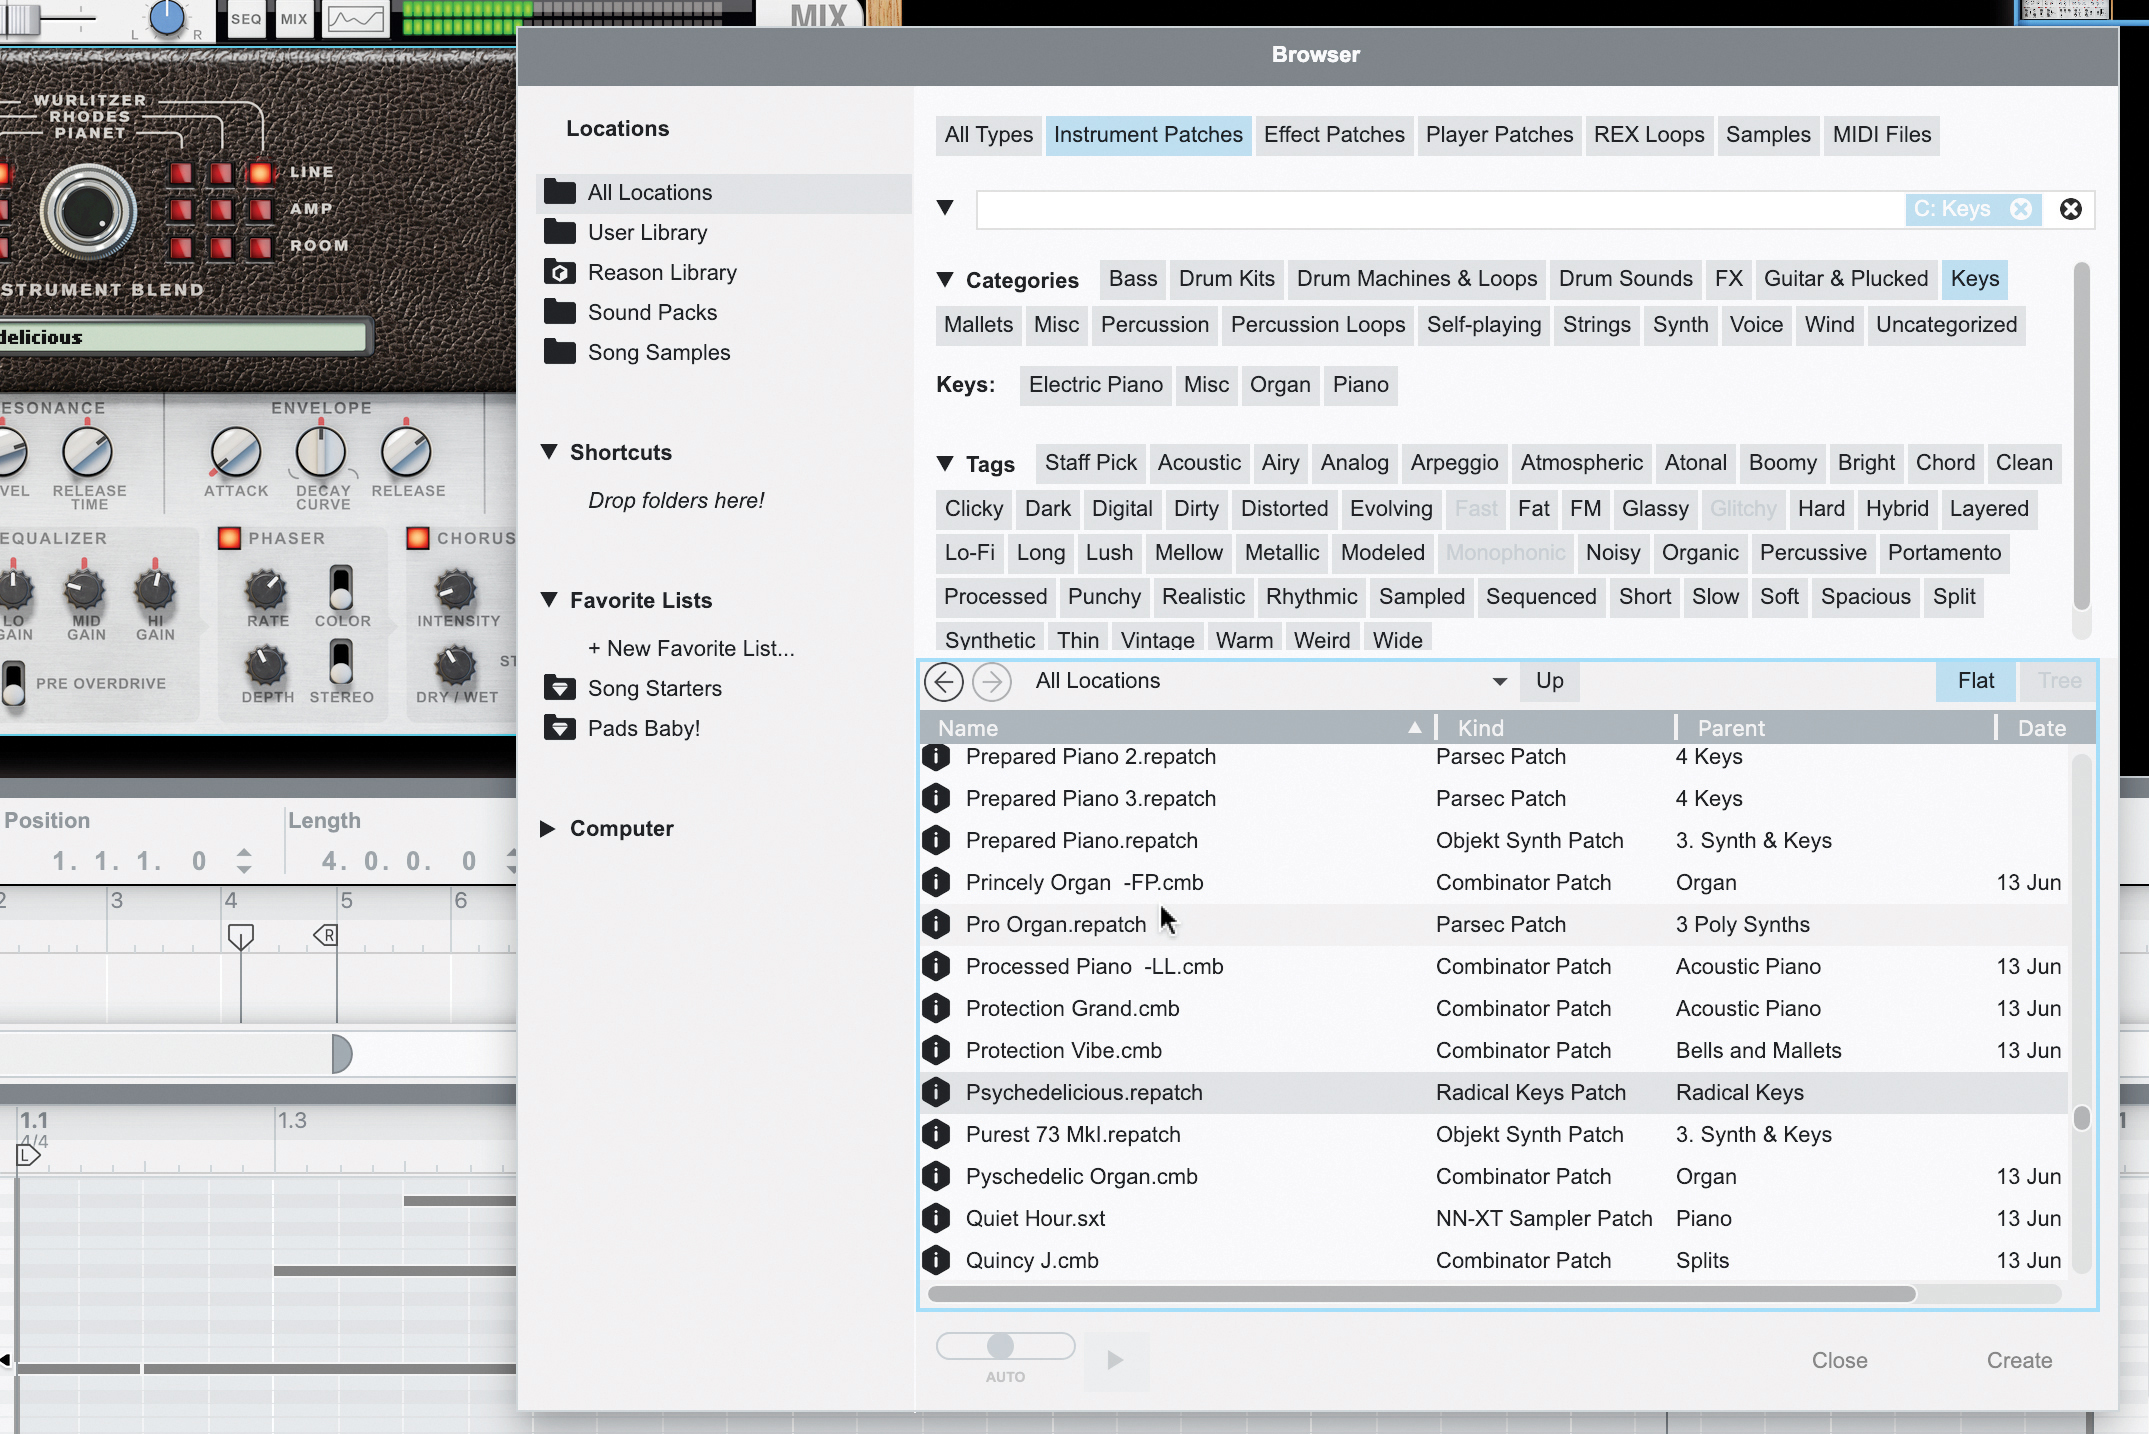
In the Categories selector, you choose a general instrument type, like a bass, synth or drum kit, then subcategory. Unfold Tags to choose from: Fat, Glassy, Layered, Clean, Synthetic, Noisy, and many more besides.
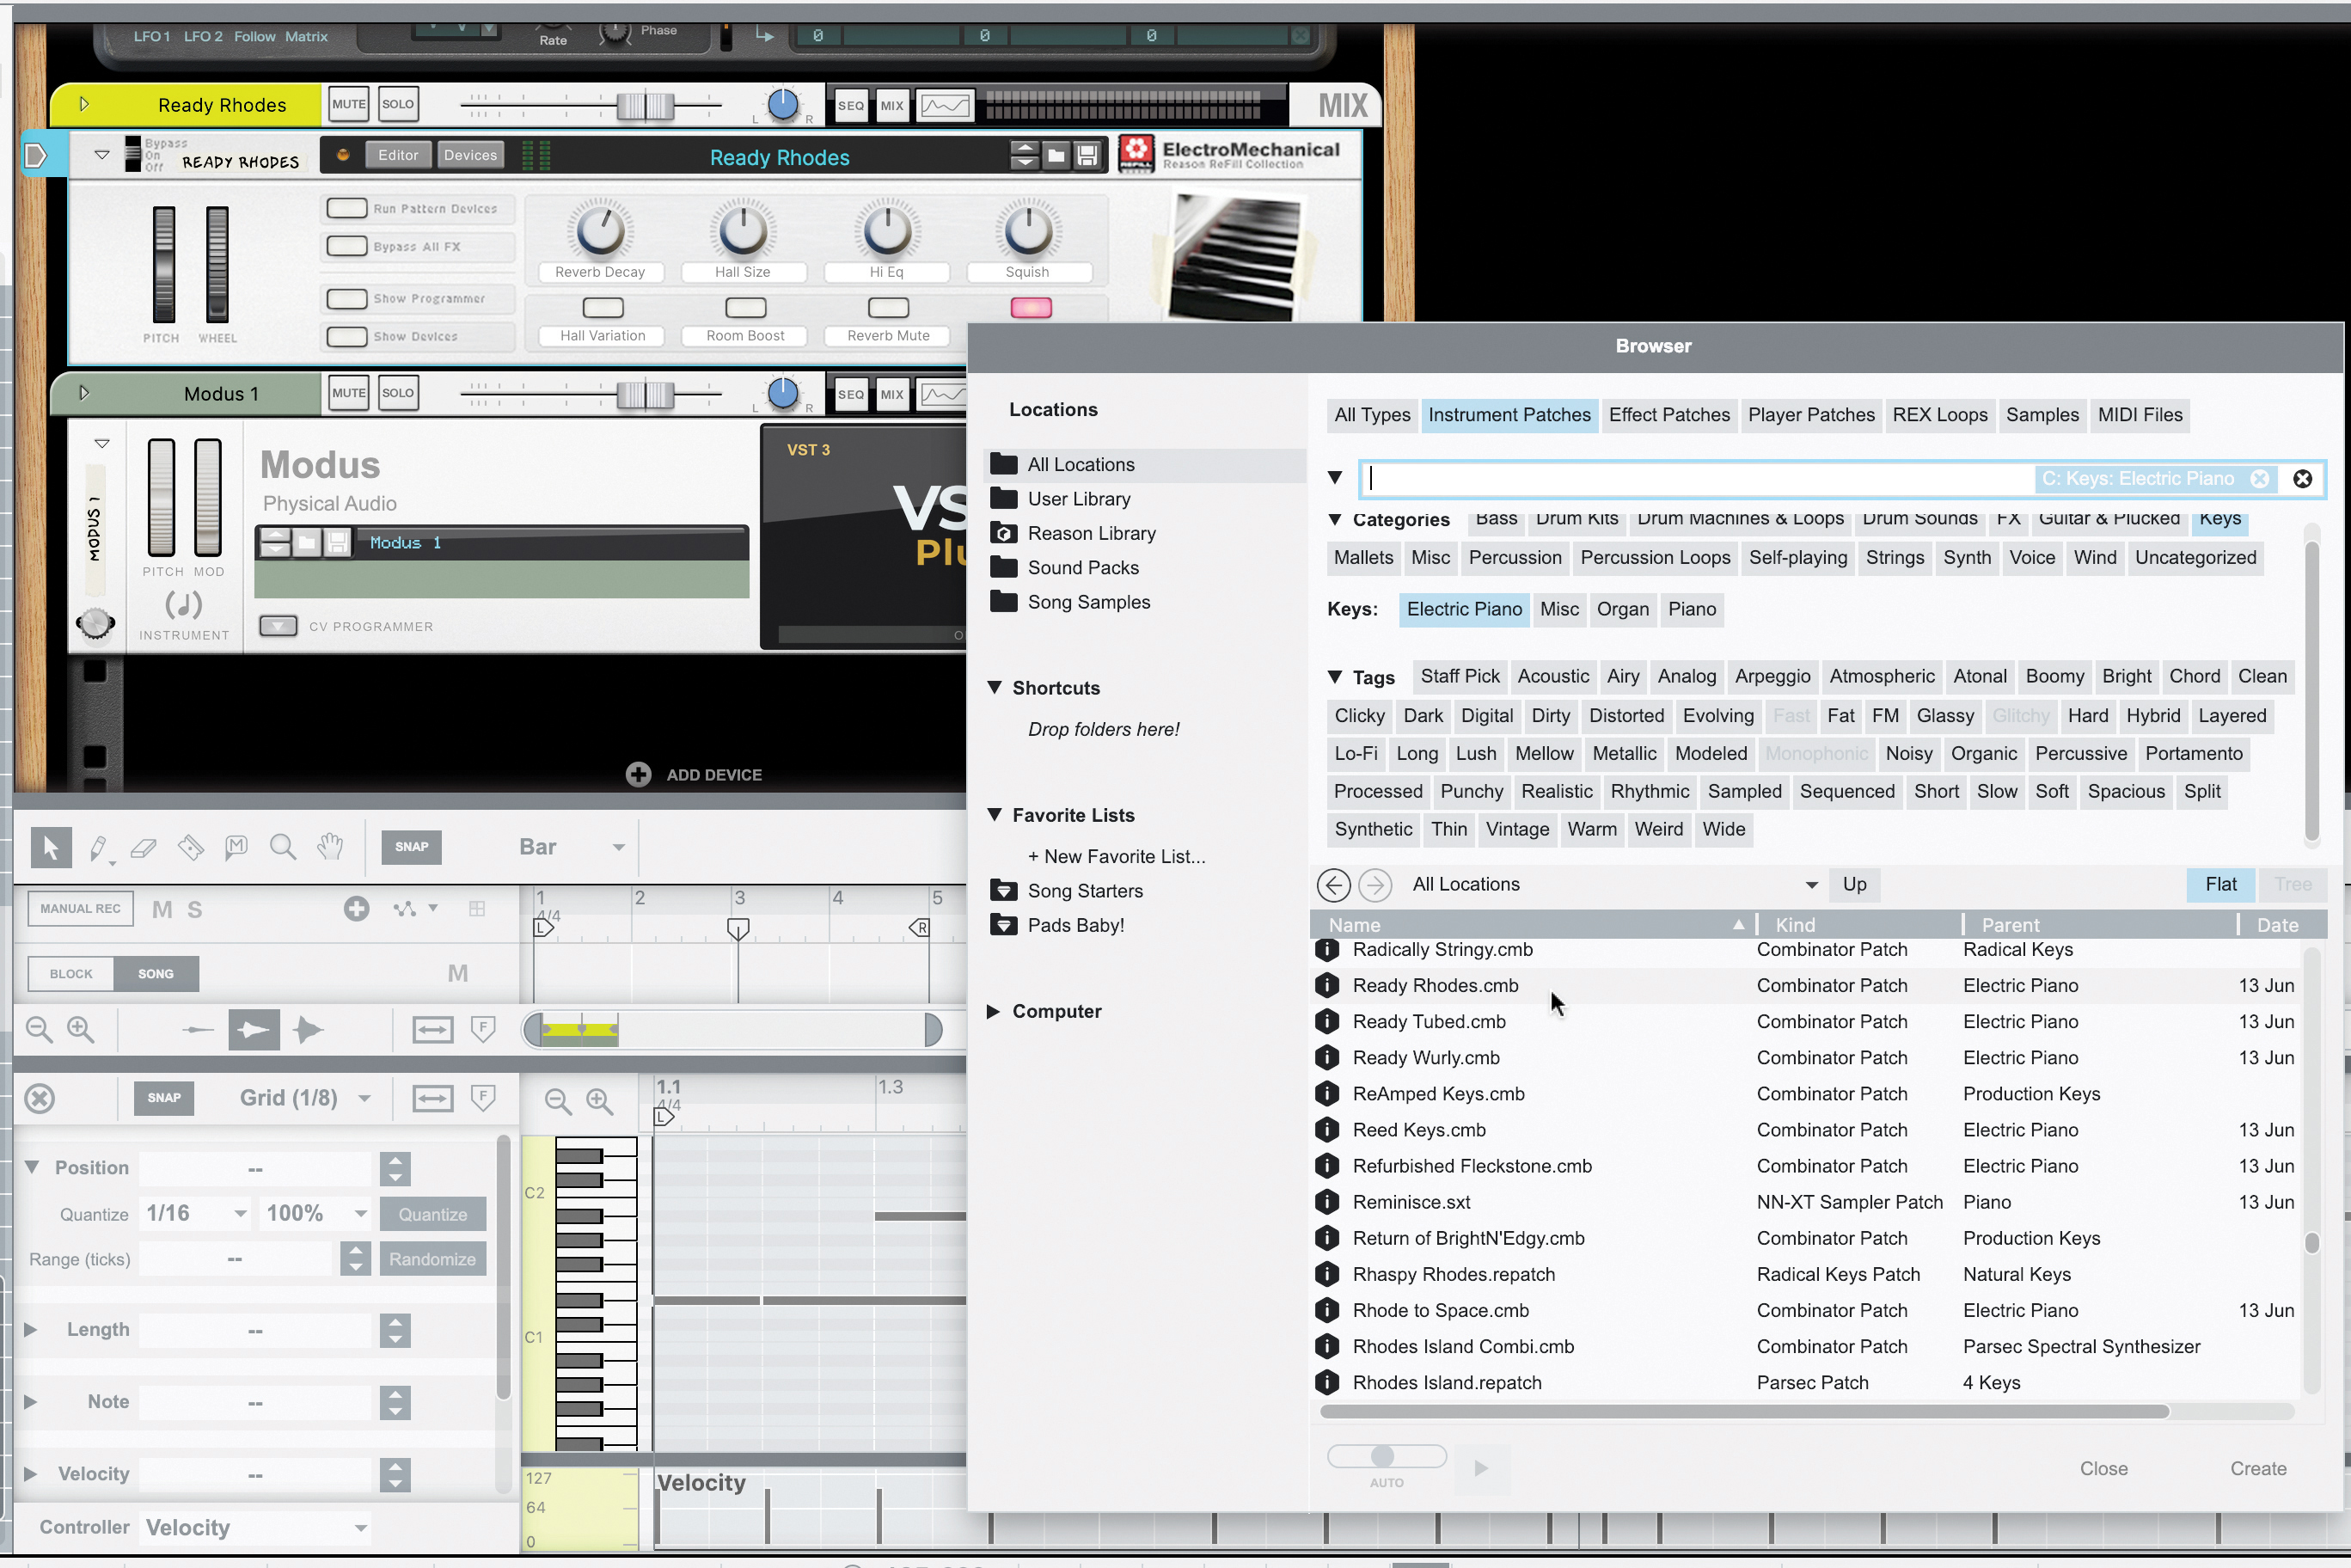
Drag patches from the Browser to the rack to audition patches. Your own VST plugins must be saved and tagged before they’ll appear, but it’s nice that the entire Reason factory bank has been tagged for this purpose.
Making mono sounds stereo with Stereo Tool
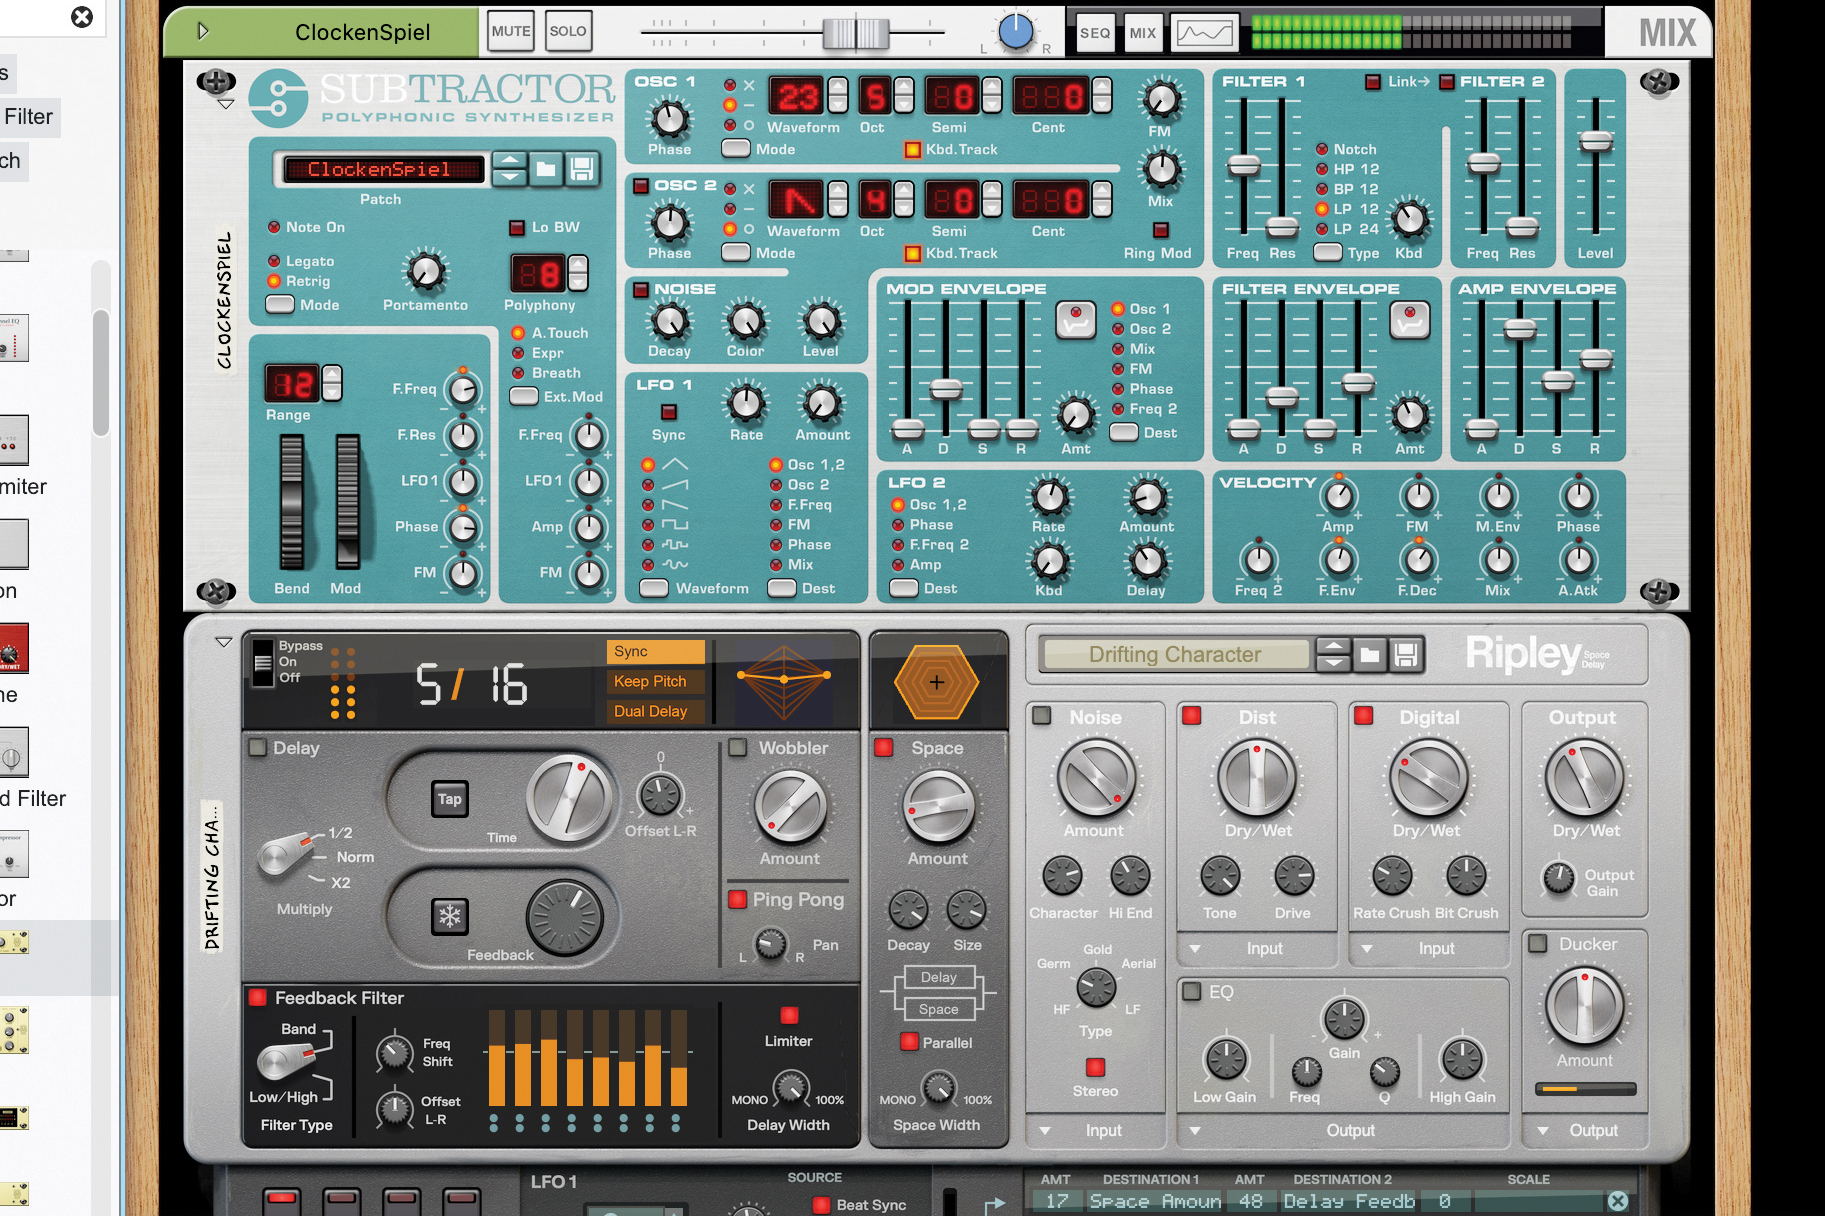
Any long-time Reason user will know the Subtractor synth, and its major flaw: its single output. Fortunately, Reason 13’s Stereo Tool was created for overcoming just this flaw: it turns mono sound sources into stereo ones.
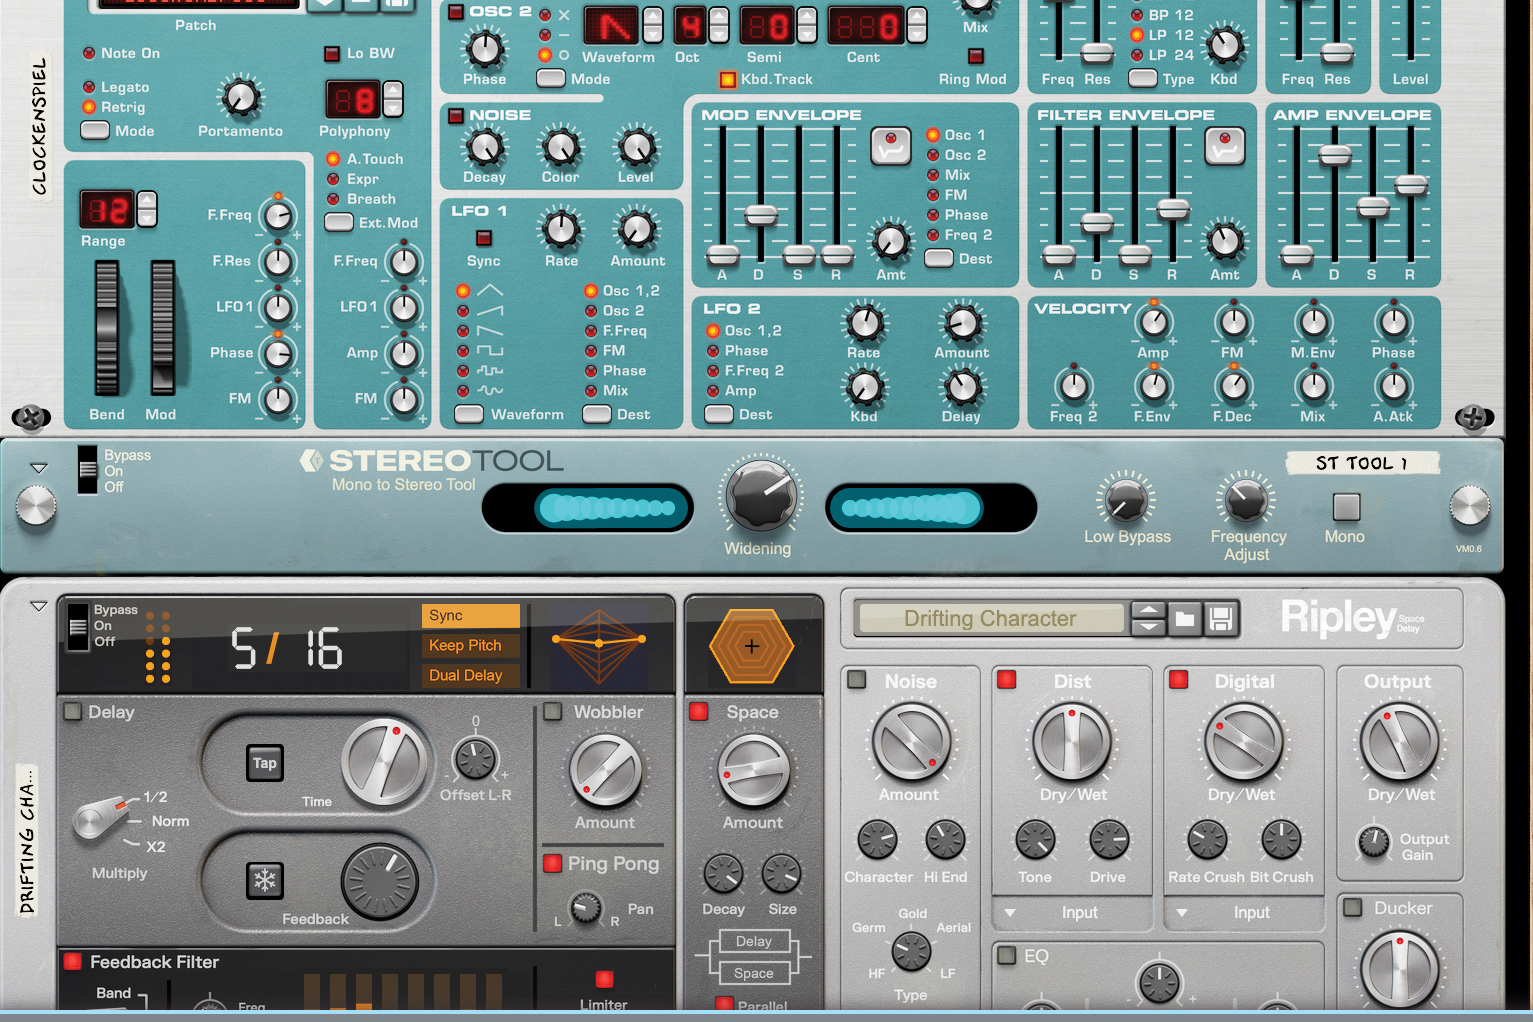
With Stereo Tool added, there’s a single Widening control to increase channel width. Tailor this widening with the Frequency Adjust knob and keep the bass safe from the process via the Low Bypass control.
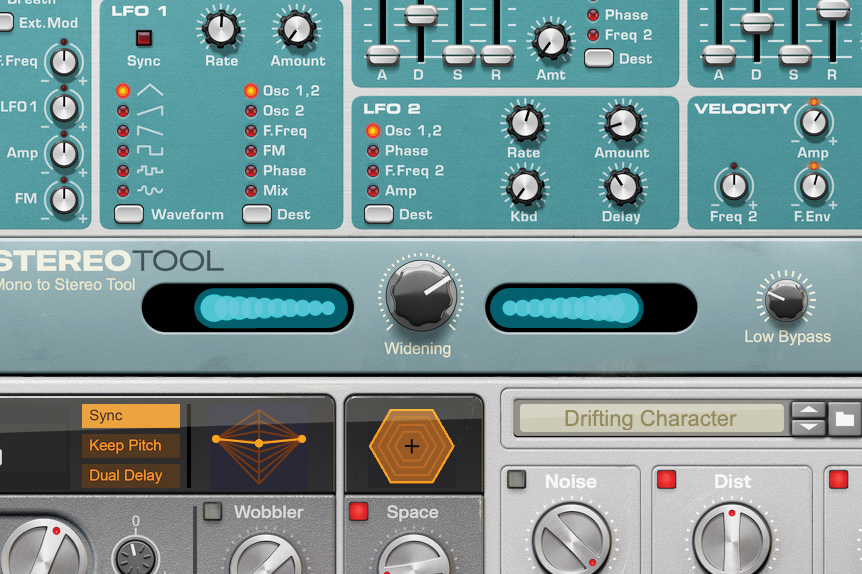
Stereo Tool uses a way of widening that supposedly keeps the signal safe when collapsing to mono later in the chain – avoiding the phase correlation issues that can often arise when artificially widening a mono sound.
Inspector gadgets
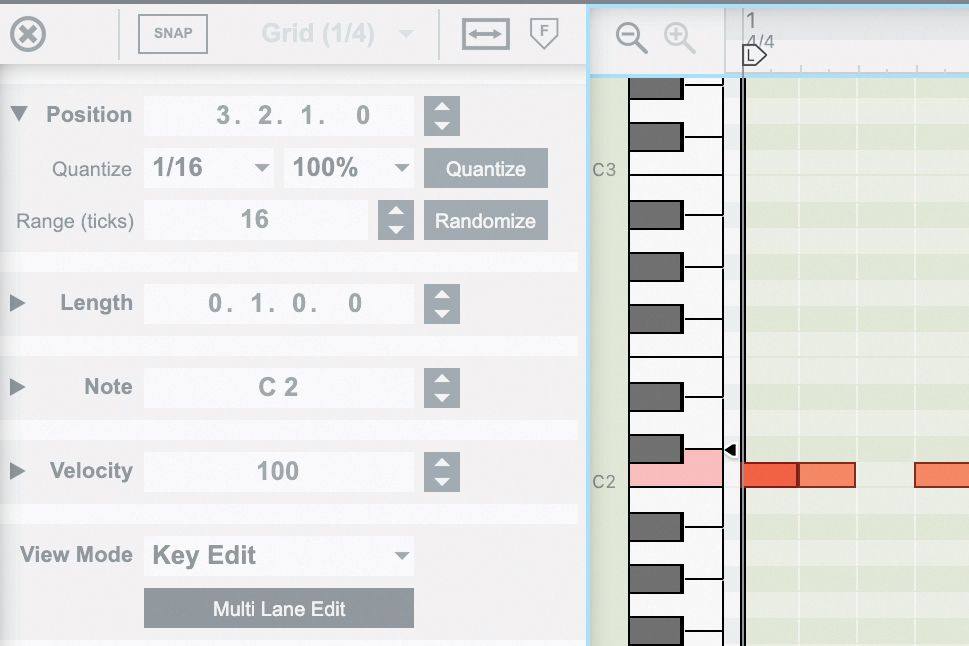
The sequencer has had a general rejig, with note editing and tracks visible at once in a split screen. In the note editing part, there’s a new inspector on the left, for access to note properties that were previously in a strip above the piano roll.
There are also randomisation options for notes and velocities, with properties to set how much each is randomised per click. Velocity settings also include the Make Ramp button, letting you set Lower and Upper velocity bounds and then make the values build over the range of the selected notes.
Sidechain Tool brings instant ducking to Reason
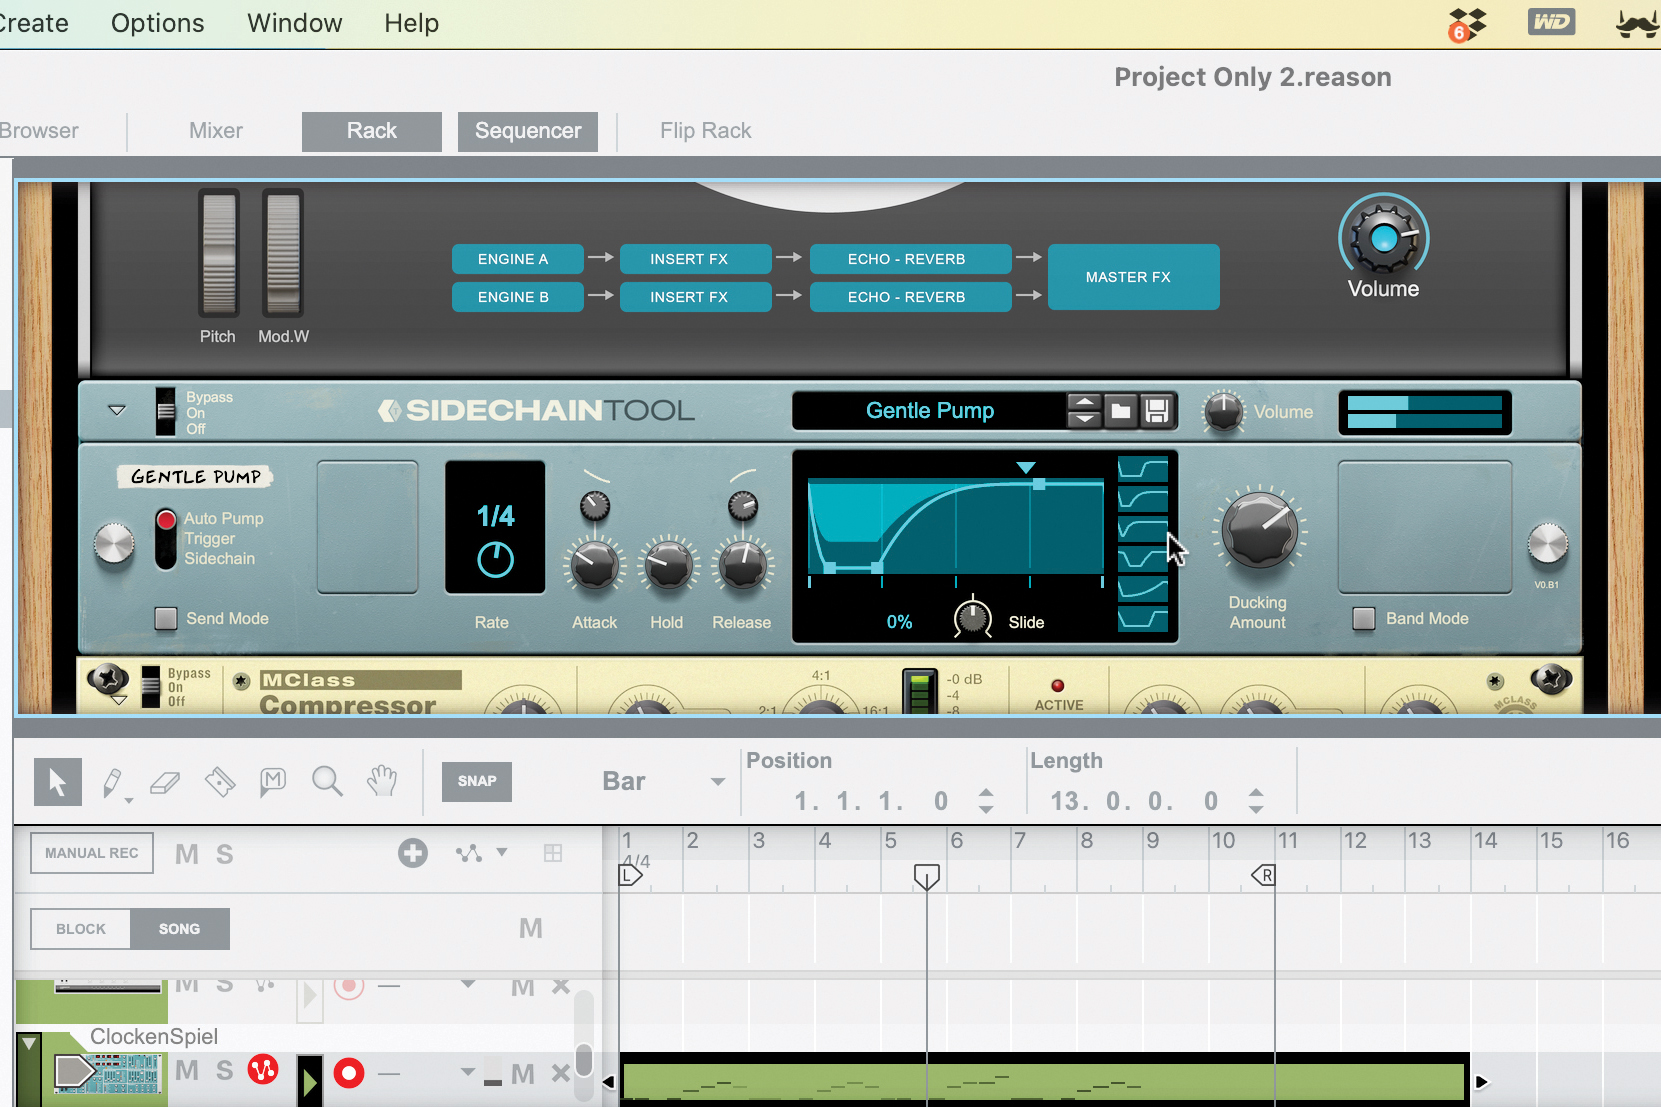
The word ‘sidechain’ has grown to have a second meaning – it’s the ducking effect caused by intentionally compressing a track using a kick or other repetitive element as the sidechain input, causing a rhythmic pumping effect. The original trick used a full-on compressor, but a dedicated tool was an obvious advantage, and many solutions have sprung up over the years, including Kickstart, Cableguys’ VolumeShaper, Xfer’s LFOtool and Devious Machines Duck. Now in version 13, Reason has its own dedicated ‘pumper’ – Sidechain Tool.
This tool packs a lot into its short Rack format, giving a choice of preset curves and basic curve editing (Attack, Hold, Release and a control over the curve of either end). There’s also an Amount control to determine the extent of the ducking effect, and a Band Mode that lets you duck only the low or high band, with your choice of frequency split.
Trigger and Sidechain modes take things even further. Trigger unhooks Sidechain Tool from its DAW Sync, instead only playing the envelope as a one-shot when it’s triggered by the incoming audio. It can also be triggered by incoming MIDI, which can be especially useful for those who are triggering ducking from the kick or at completely custom times.
Finally, Sidechain mode brings a full compressor architecture into view, offering easy analysis over the signal behaviour in order to help set the controls.
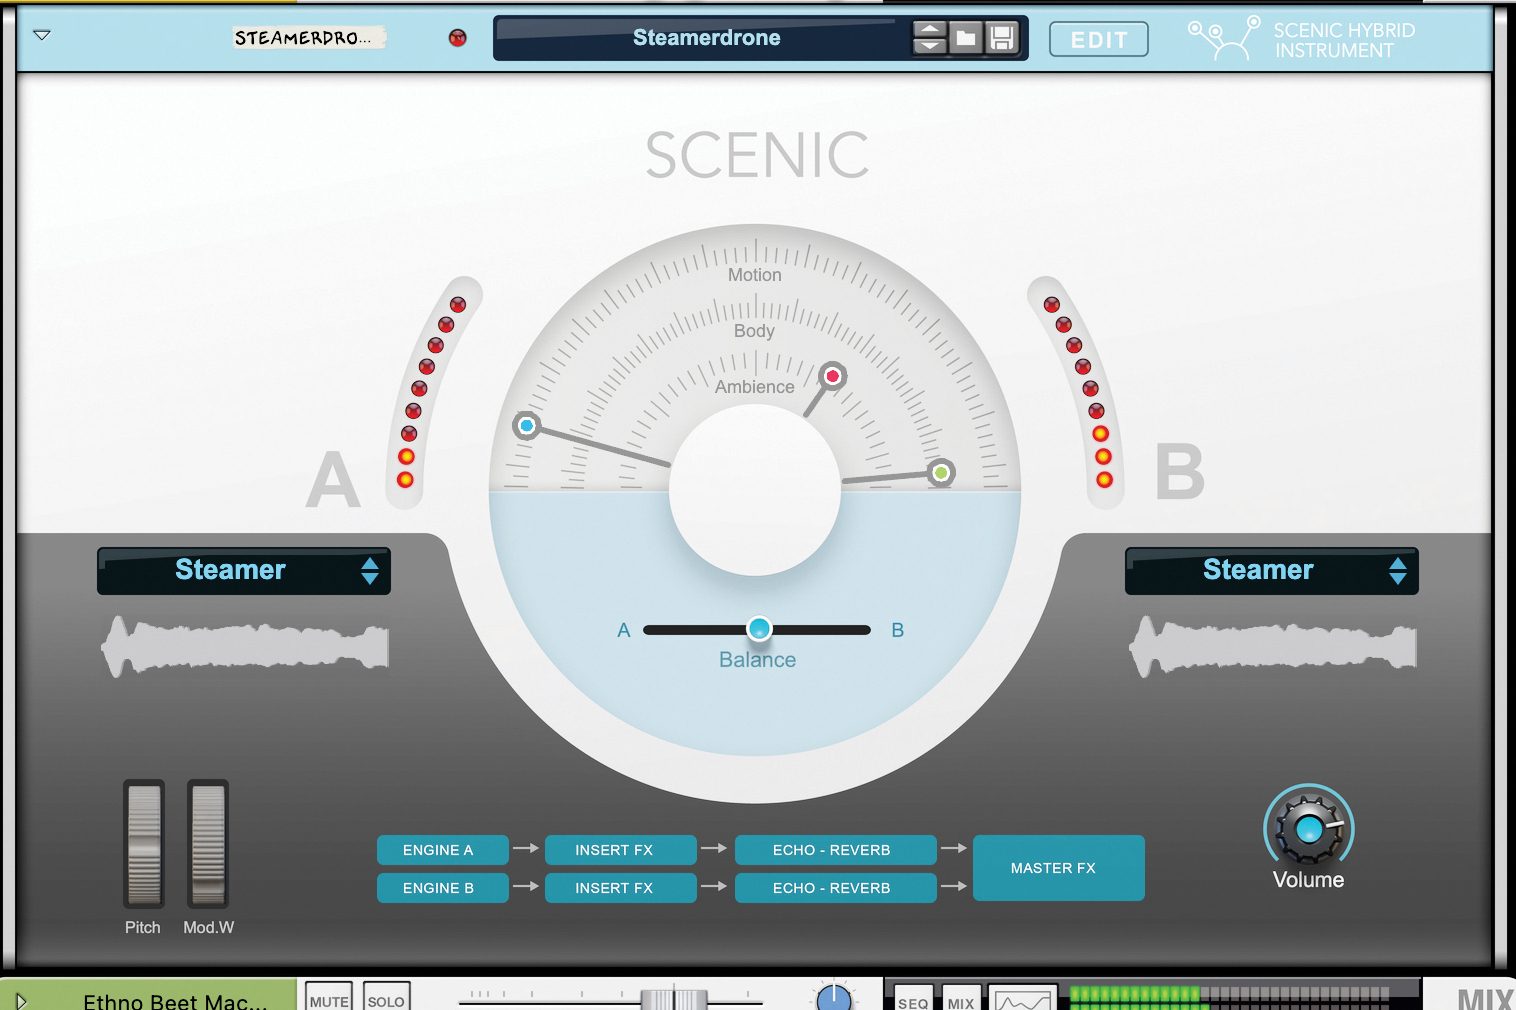
Here’s a Scenic Hybrid Instrument patch, a sustained, organic sound that evolves a little as it goes on. We’re going to transform this sustained sound by adding the new Sidechain Tool from Reason 13.
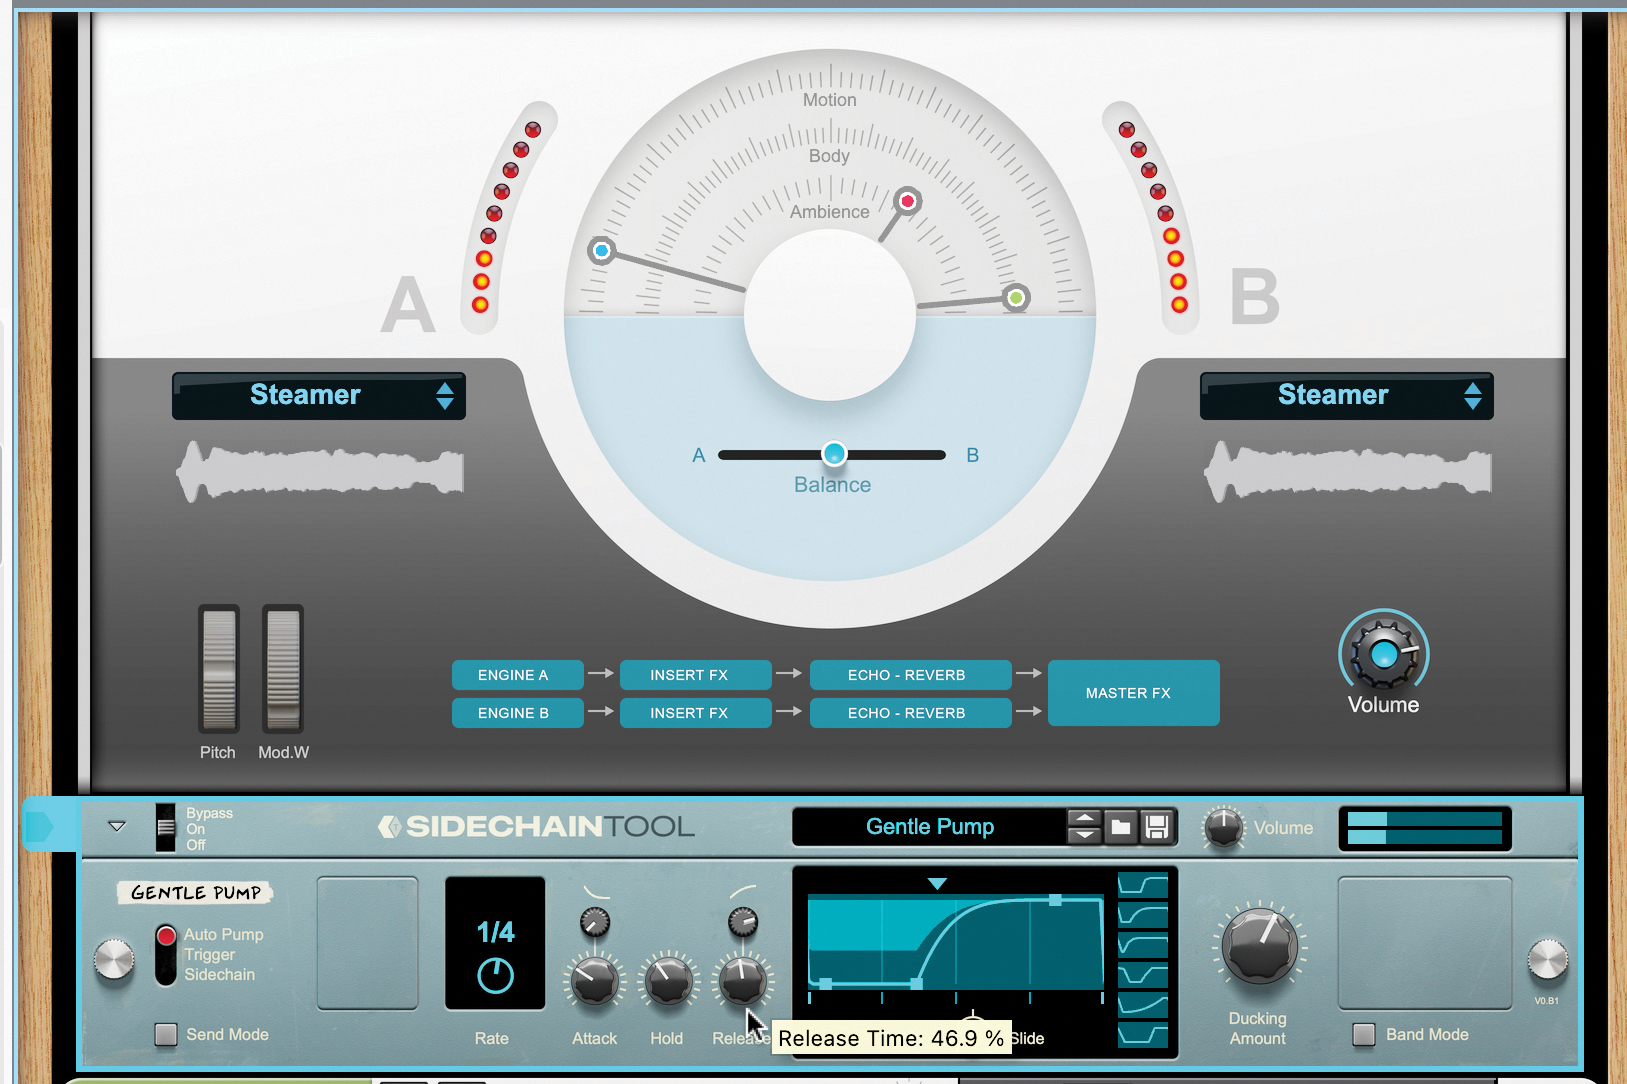
If we add Sidechain Tool to Scenic, the sound gets pumping with offbeat swells. Change shape/movement by tweaking the envelope display or Attack, Hold and Release controls. There are preset shapes too.
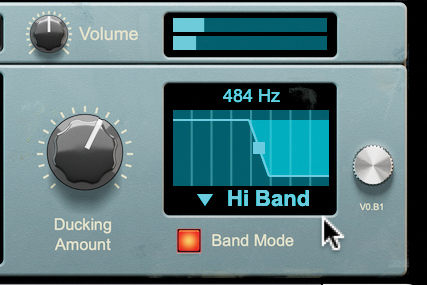
On the right, you find Band Mode, ducking only the Lo or Hi Band, and choosing exactly where the crossover will lie between the two bands. Great for, say, keeping movement without compromising on low-end stability.
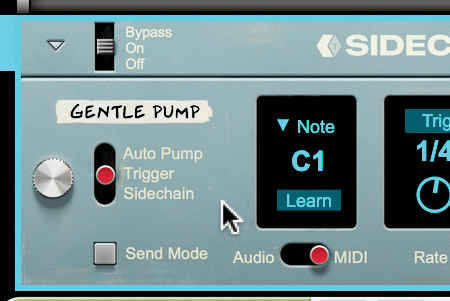
Trigger mode unhooks the device from its looping nature, and instead lets you trigger the sidechain duck with either the audio or a MIDI signal. If triggering the one-shot curve using MIDI, you can pick an exact note to do it with.
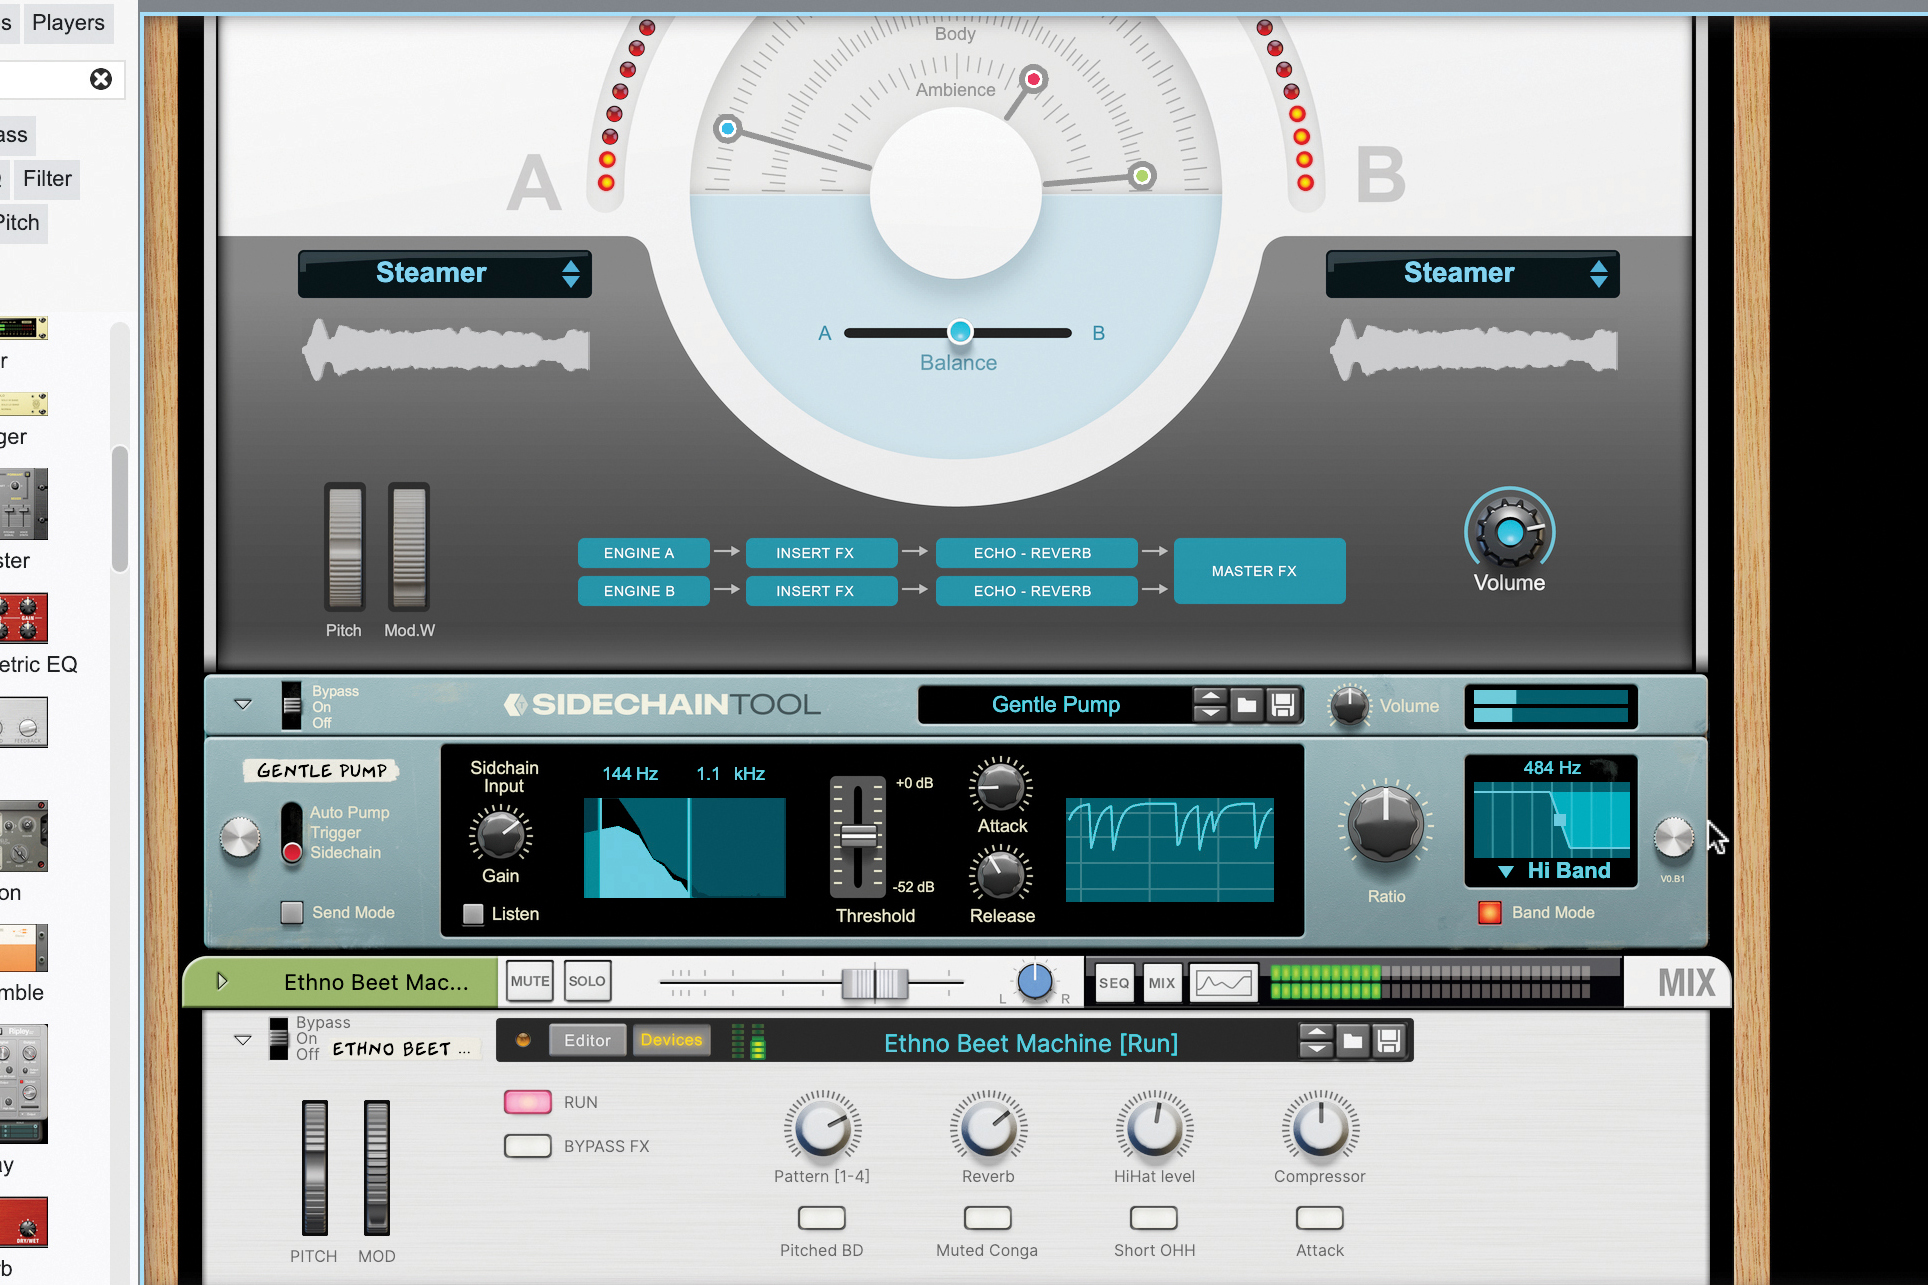
In Sidechain mode, you’re basically presented with a classic compressor-style sidechaining formulation. Here we’ve run our kick into the back of the device to feed it in as a sidechain input, choosing Sidechain mode.
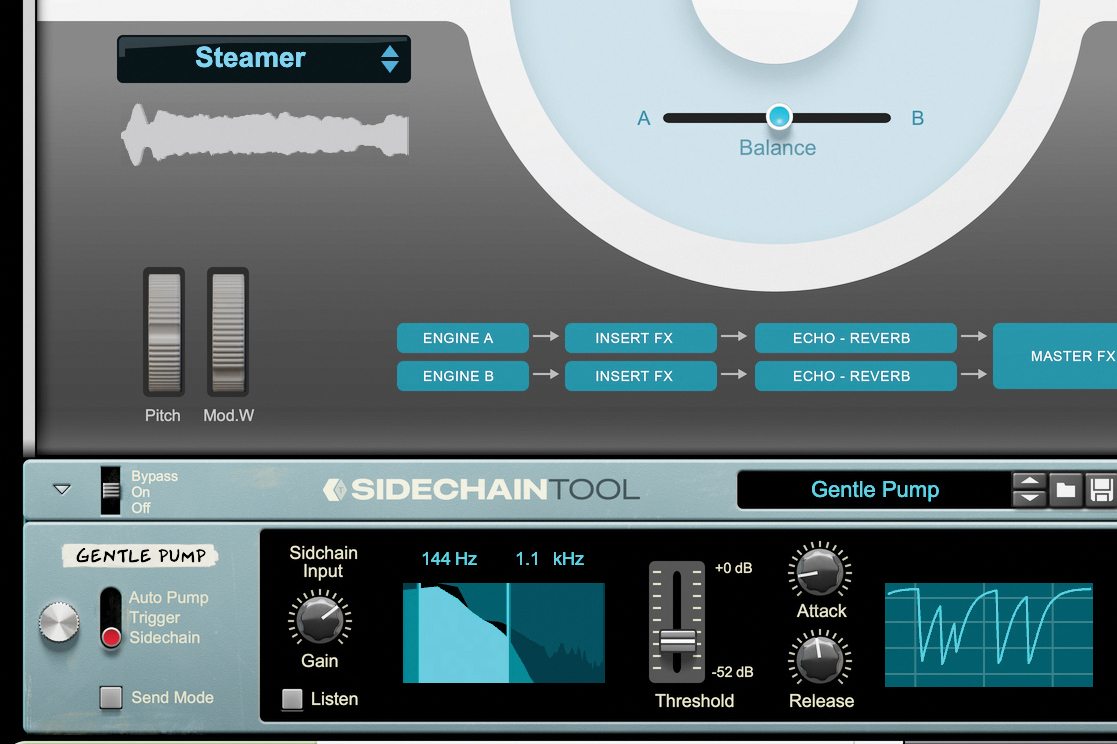
You can gauge the Input Gain of the sidechain, and filter the frequencies that it’ll let through. Sidechain like a compressor, using Threshold, Attach, Release and Ratio, while checking the response on the oscilloscope view.
Exploring Reason 13’s Ripley Space Delay
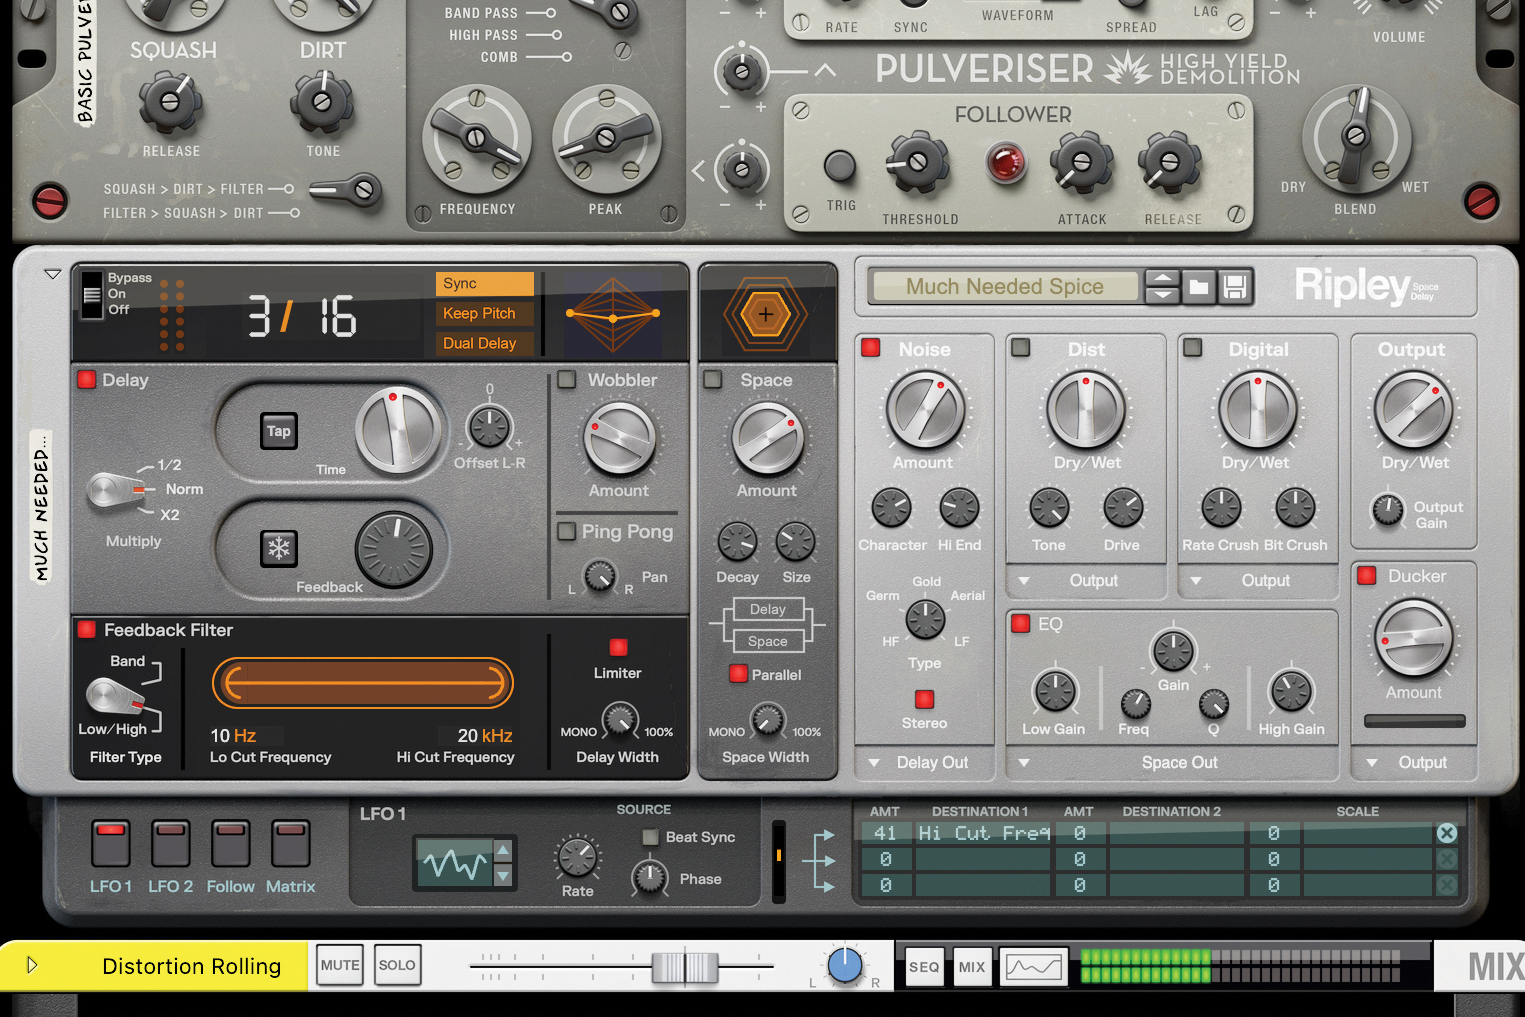
Let’s put the new Ripley Space Delay device onto a synth track and see what it can do. We come up with a patch that starts with separate delay times for the left and right channels, which is a nice feature, but it’s possible to disable it by deselecting Dual Delay.

Ripley gives you Time and Feedback controls, along with a Multiplier for delay time. Even if not in Dual Delay mode, use the Offset parameter to give a time difference between left and right channels. And then there’s a filter for the feedback loop to act on the delayed signal.
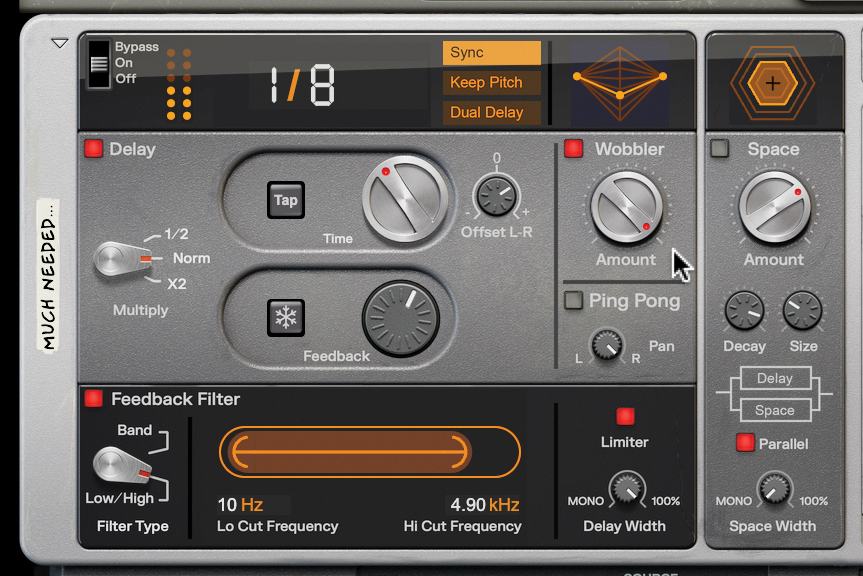
Activate the Wobbler and you’ve got some analogue-style drift in the style of a tape delay – a very broken tape delay indeed if you turn this one way up like we have. There’s also a Ping Pong option to give the signal some stereo bounce – we all know how that one works.
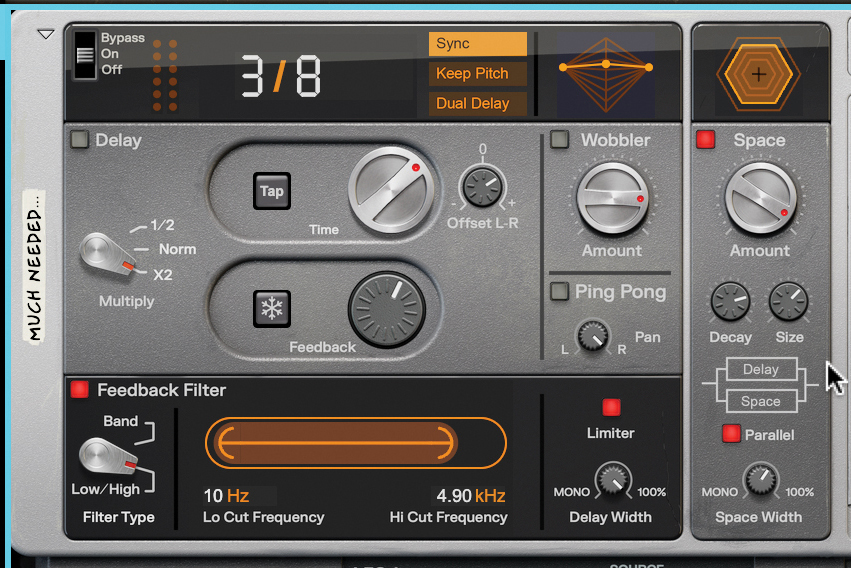
The name might not make it clear, but Ripley Space Delay isn’t just a delay; it’s got both Delay and Space components. We switch off the Delay now and activate the Space processor. It’s a simple reverb with Amount, Decay, Size and Width controls.
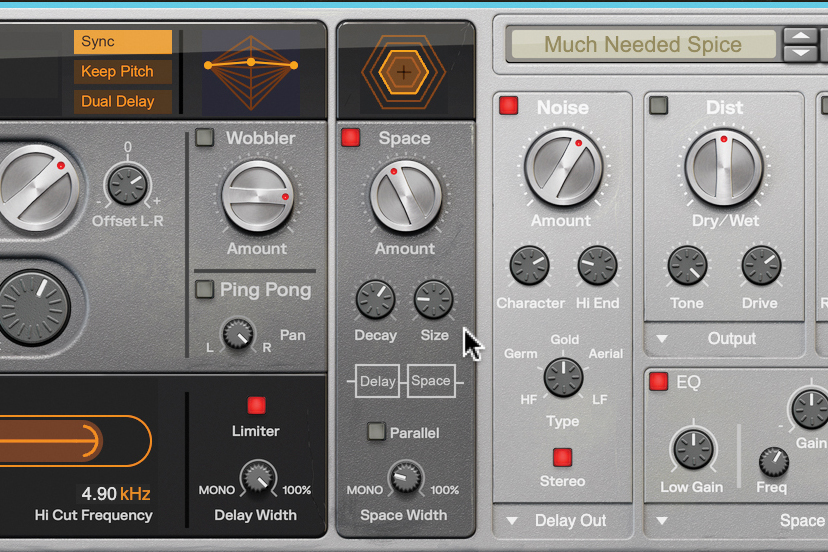
The point of the Space processor isn’t to have a fully-functioning reverb exactly, but to have one that works well with the delay processor. Those controls can all act to curtail the effect, and you can run the Delay and Space processors in parallel or in series.
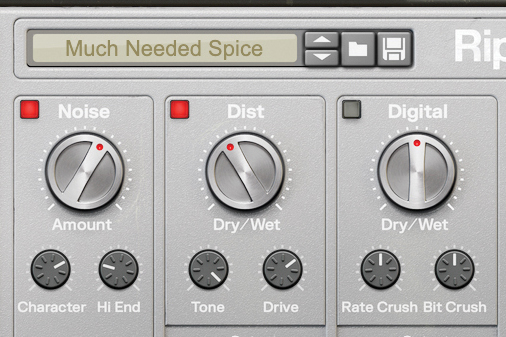
Noise, Distortion, Digital (bitcrushing) and EQ effects go into the signal chain too. Noise adds a textural layer, Dist is a standard drivey distortion, Digital has sample Rate Crush and Bit Crush controls, and the EQ is a low, mid, high affair. Nice to have…
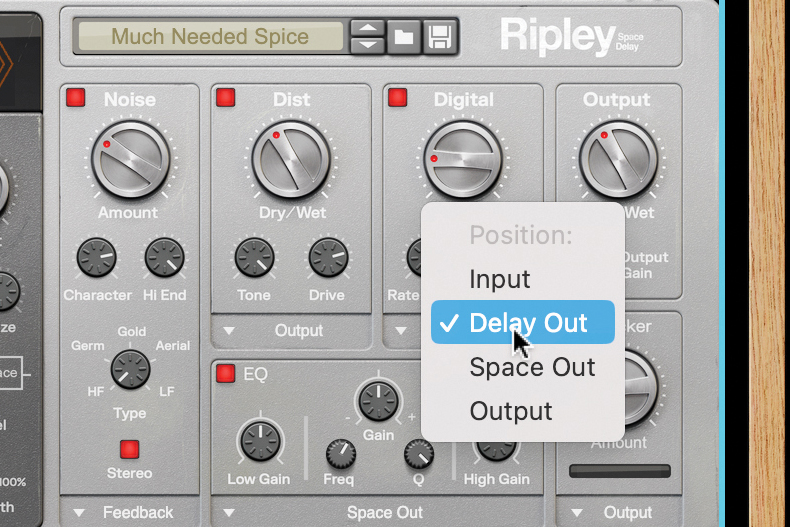
…but the special skill here is that each process can be assigned to an exact part of the chain – at input, feedback, output, or the output of one of the Delay and Space modules. This helps dirty the signal where needed, or EQ to emphasise certain parts of the signal flow.
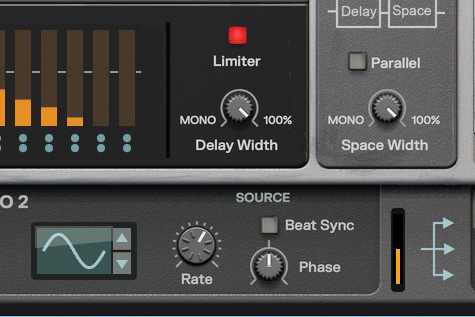
More convenient options in Ripley Space Delay include a Limiter, and Delay Width control, and a nifty modulation section with two LFOs, and envelope follower and a Matrix input (for macro-style assignments).
Pro tip
Ripley’s Ducker is a function that’s become standard in delays recently. Turn it up and the dry (input) signal will tamp the output of the wet (delayed) signal, making it more likely that a sound isn’t swamped by the effect. This was once achieved via a sidechain compressor over a delay, a process that doesn’t work unless the effect is placed on a return channel. Ducking is on by default – just goes to show.
Exploring Reason’s Gain Tool utility device
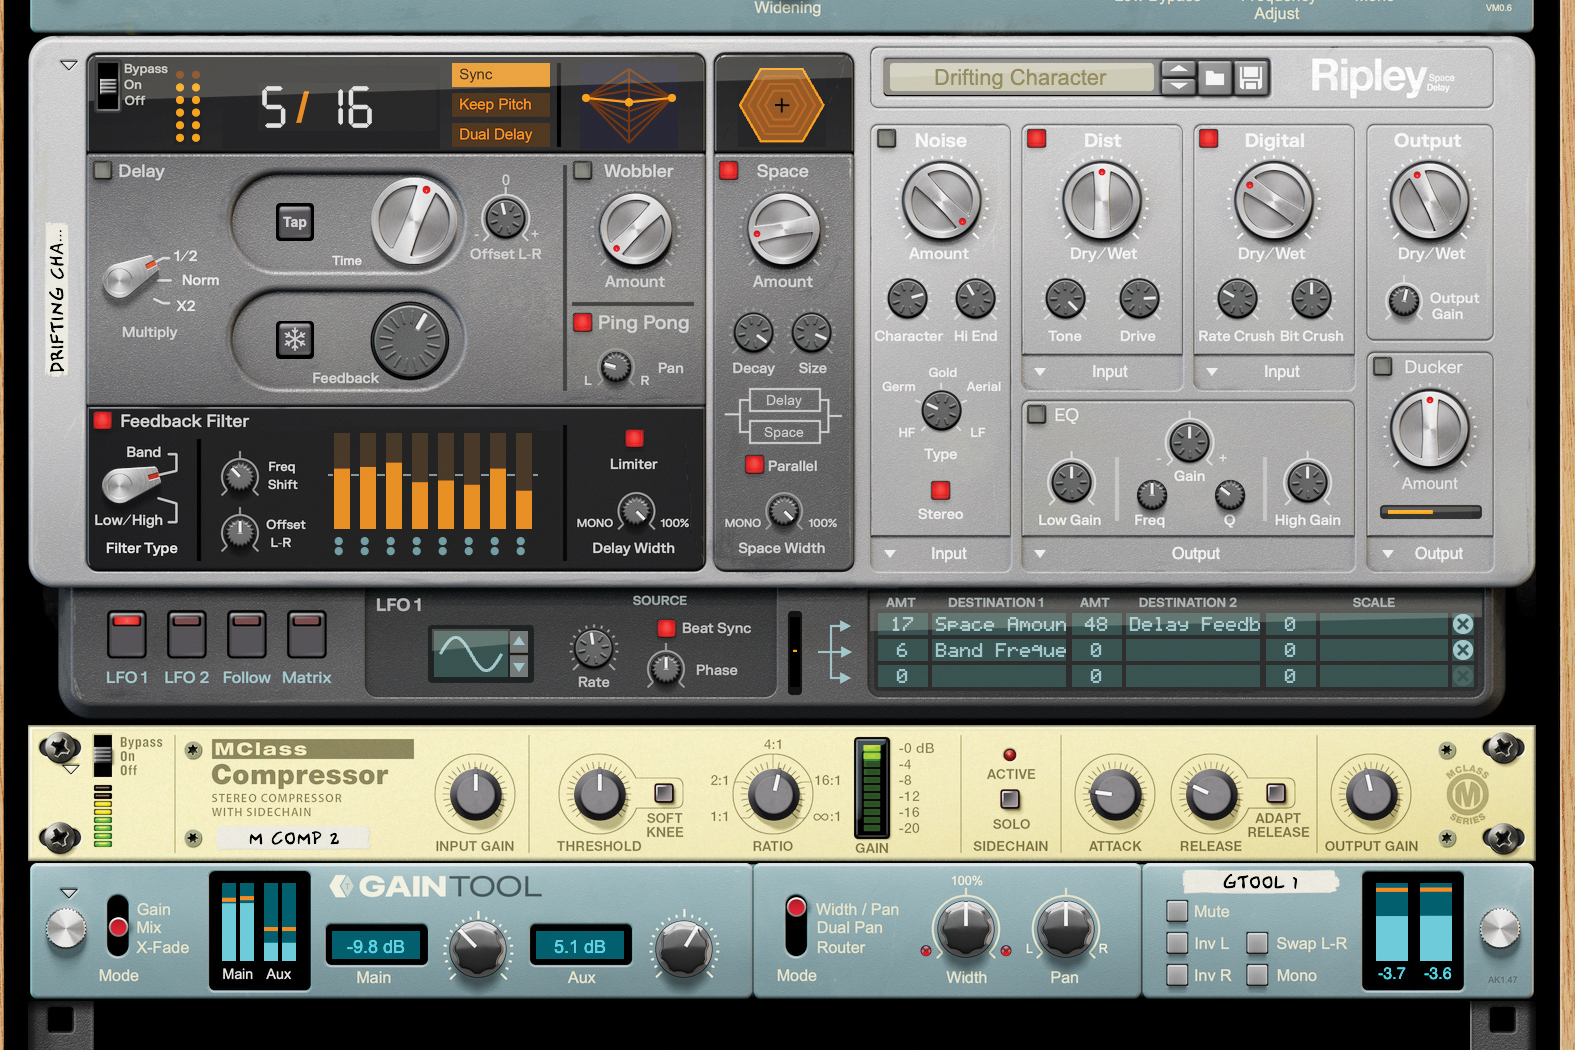
Gain Tool is a simple device to start on, with two sections – one on the left and right. Add it to a channel and you’ll instantly get to use the Gain control. Flip the left-hand switch to get a signal input mixer, with a knob for each input signal.
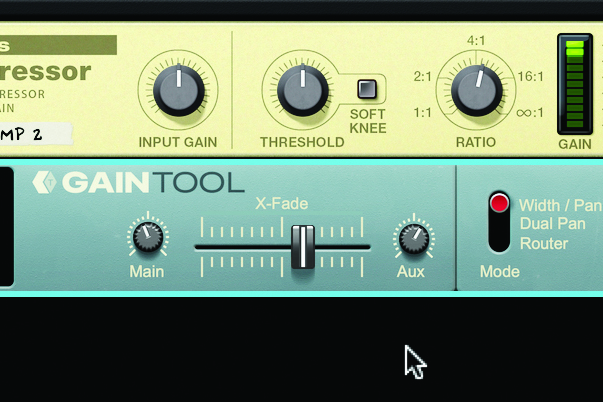
There’s also a huge crossfader to mix between these two inputs if you like, and this being Reason, you can control that crossfader with CV, helping you do anything from beat mixing to combining two synths, and more.
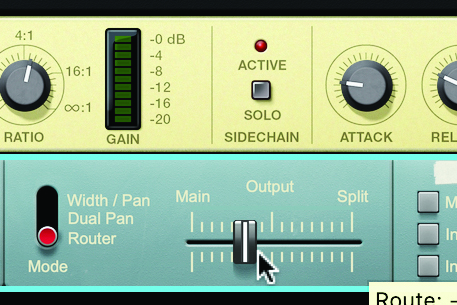
On the right, there’s Width and Pan controls to help with signal management, a Dual Pan that lets you set panning, and a Router, to let you split output stereo signal into two; like the dual input of the left side of the device.
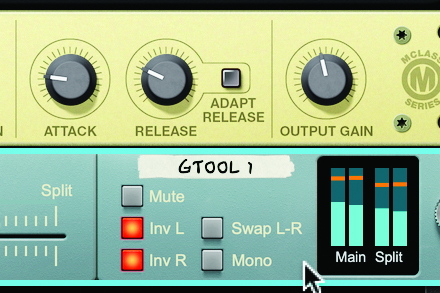
Finally, on the very right of Gain Tool, you’ll find some utility switches: Mute, Invert Left or Right channels (or both), swap channels, and Mono-ize the stereo signal. Plenty of useful capabilities are here.
Devices you may have missed in the rack
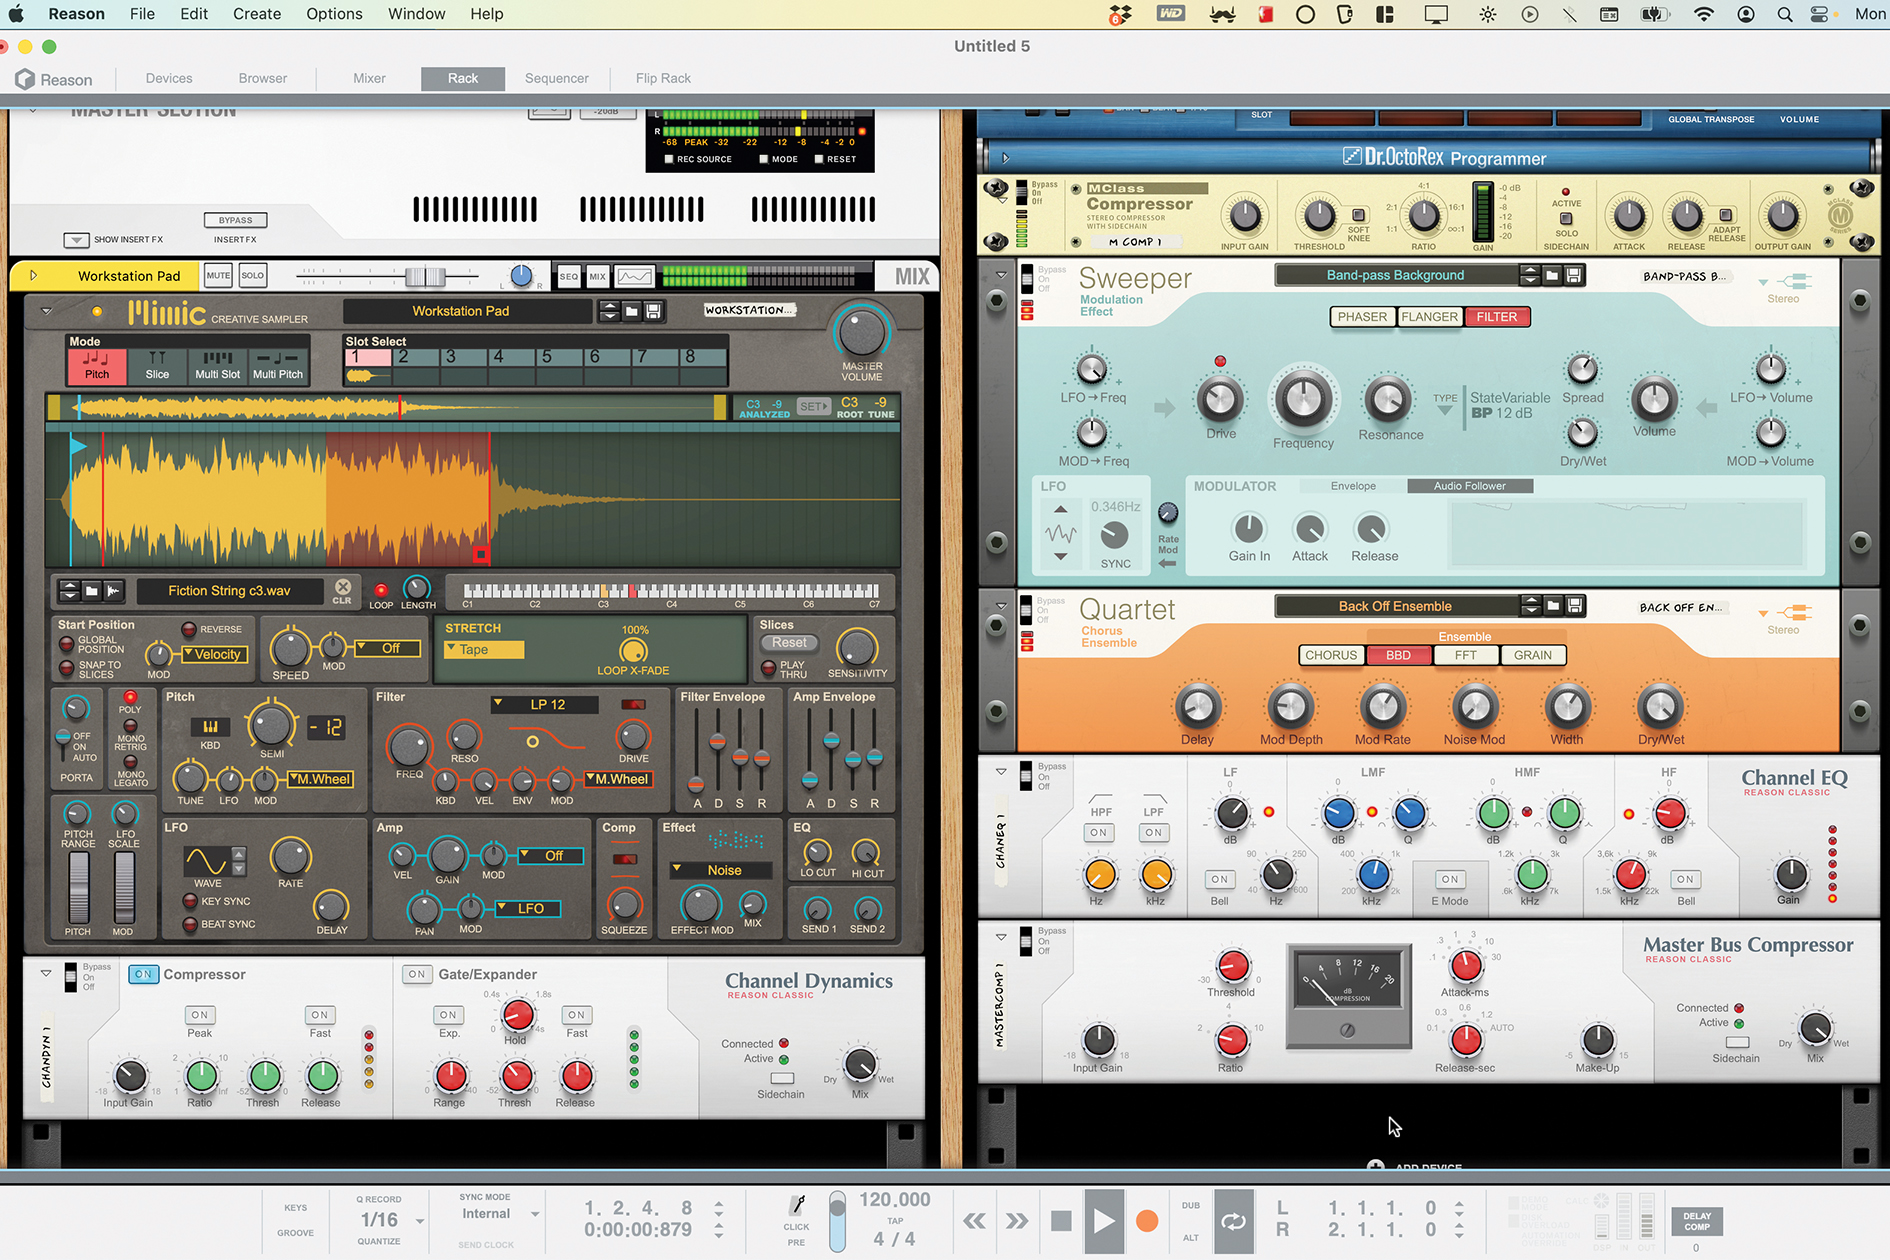
Recent updates have also stocked the Reason rack up with more devices, which anyone toting Reason 13 will have access to too. Version 11 introduced Quartet and Sweeper, two devices for modulation, with Sweeper handling LFO-driven phasing, flanging and filtering, and Quartet handling chorus.
Elsewhere for v11, the SSL Mixer’s compressor, EQ and bus compressor got ported to their own rack devices, for when you absolutely, positively need that SSL sound in the rack or in another DAW – which was another introduction for version 11: the Reason Rack Plugin now lets you use the rack – instruments and/or effects – as a plugin within another DAW.
The main launch in Reason version 12 was Mimic Creative Sampler, which offered a new way to work with samples, far beyond any of the previously available tools in Reason. All of this should make an upgrade price a little more bearable for anyone who holds a previous Reason version.
Three of the best alternatives to Reason
1. Ableton Live, £69 - £539
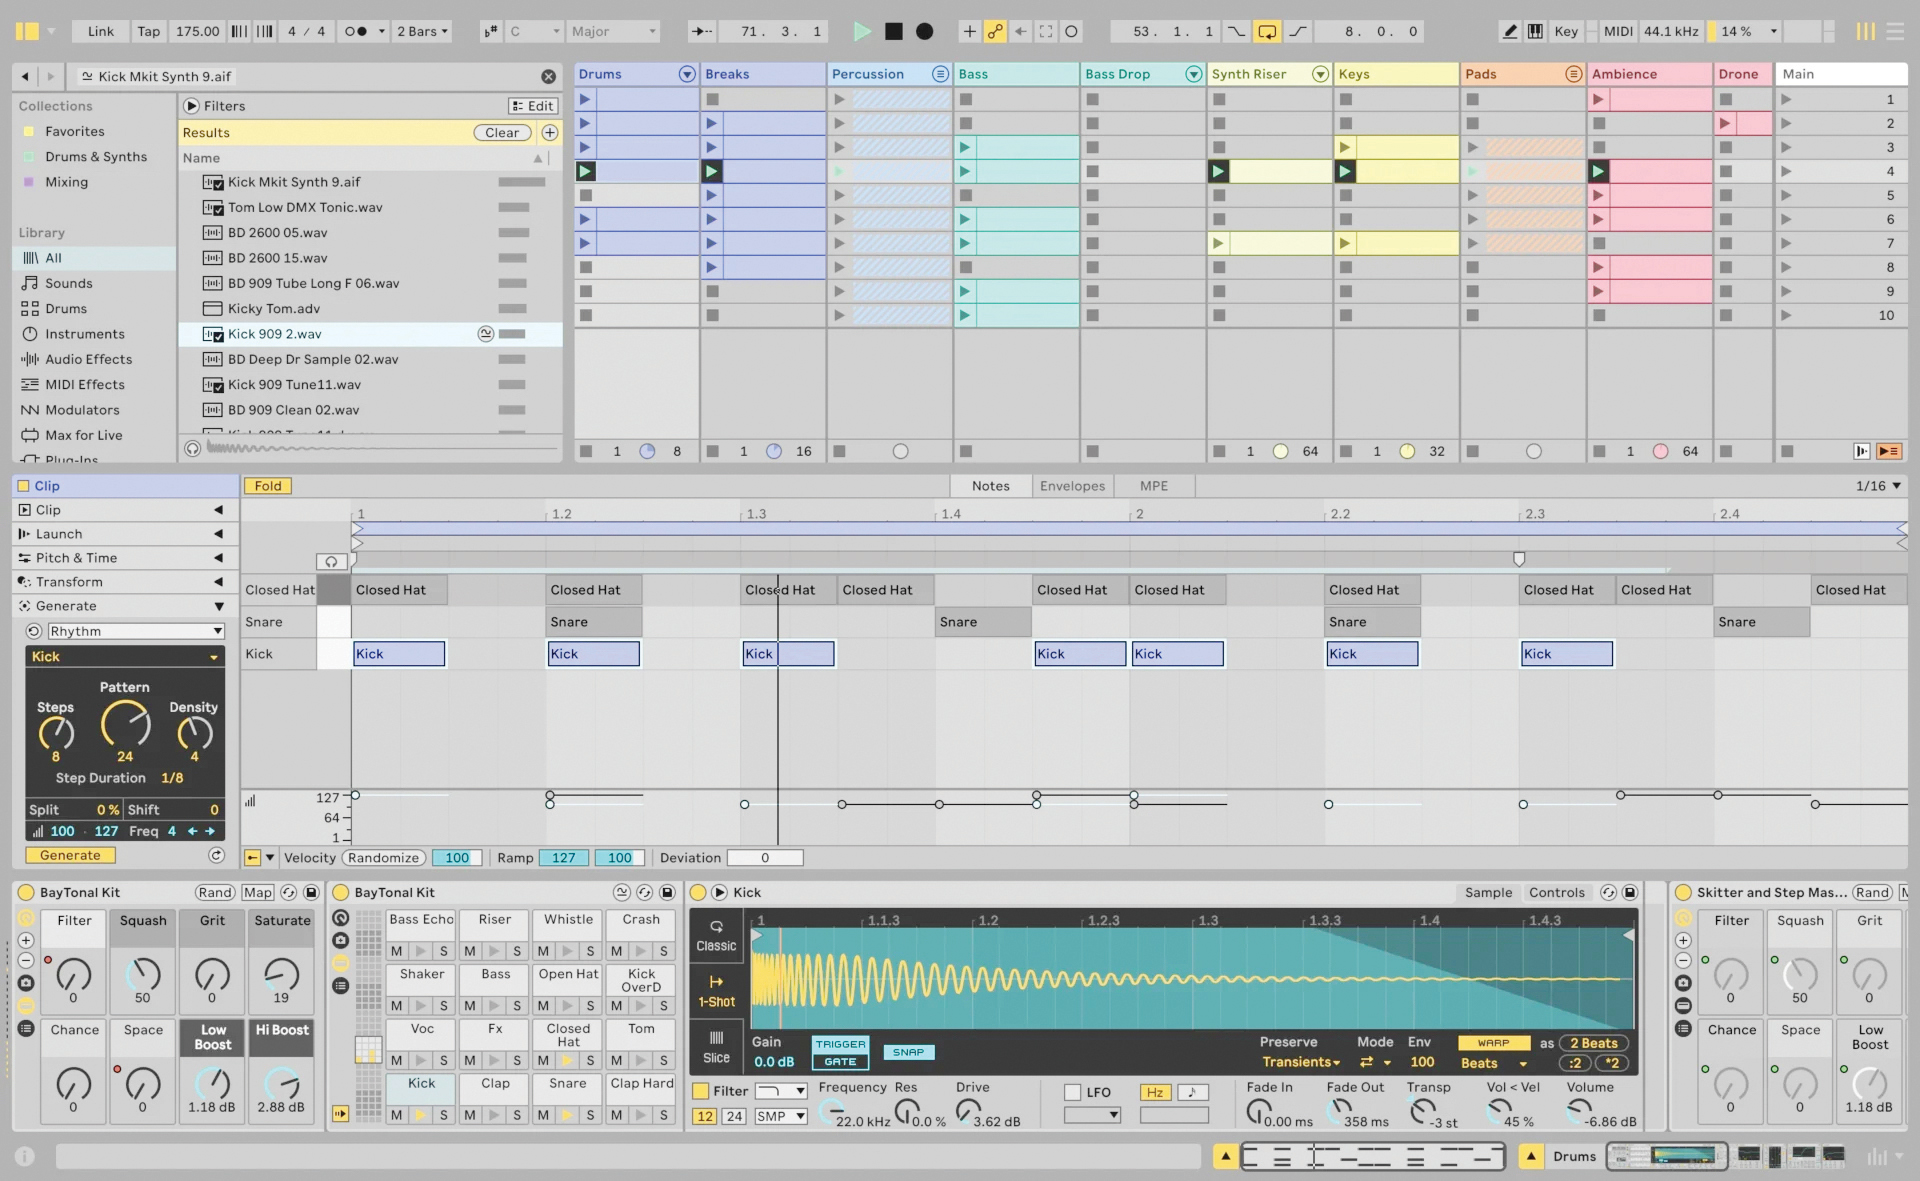
An adoring fanbase and a generally safe ecosystem that keeps up with the times – mostly. Live is forward-thinking, full of in-built creative devices, and has become a common DAW for producers in electronic genres.
2. FL Studio 21, £89 - £515
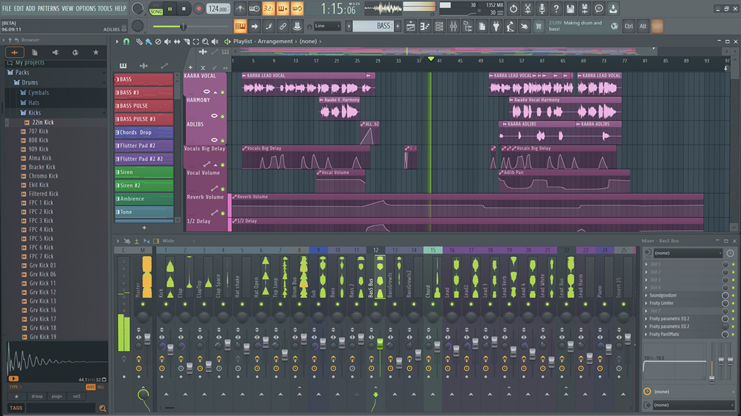
Lifetime free updates and a fun workflow, FL Studio is a veteran of the DAW world and has many adoring fans all over the world – and YouTube. It’s got its own way of doing things, but it’s still a valid package for making music.
3. Apple Logic Pro 11, £200
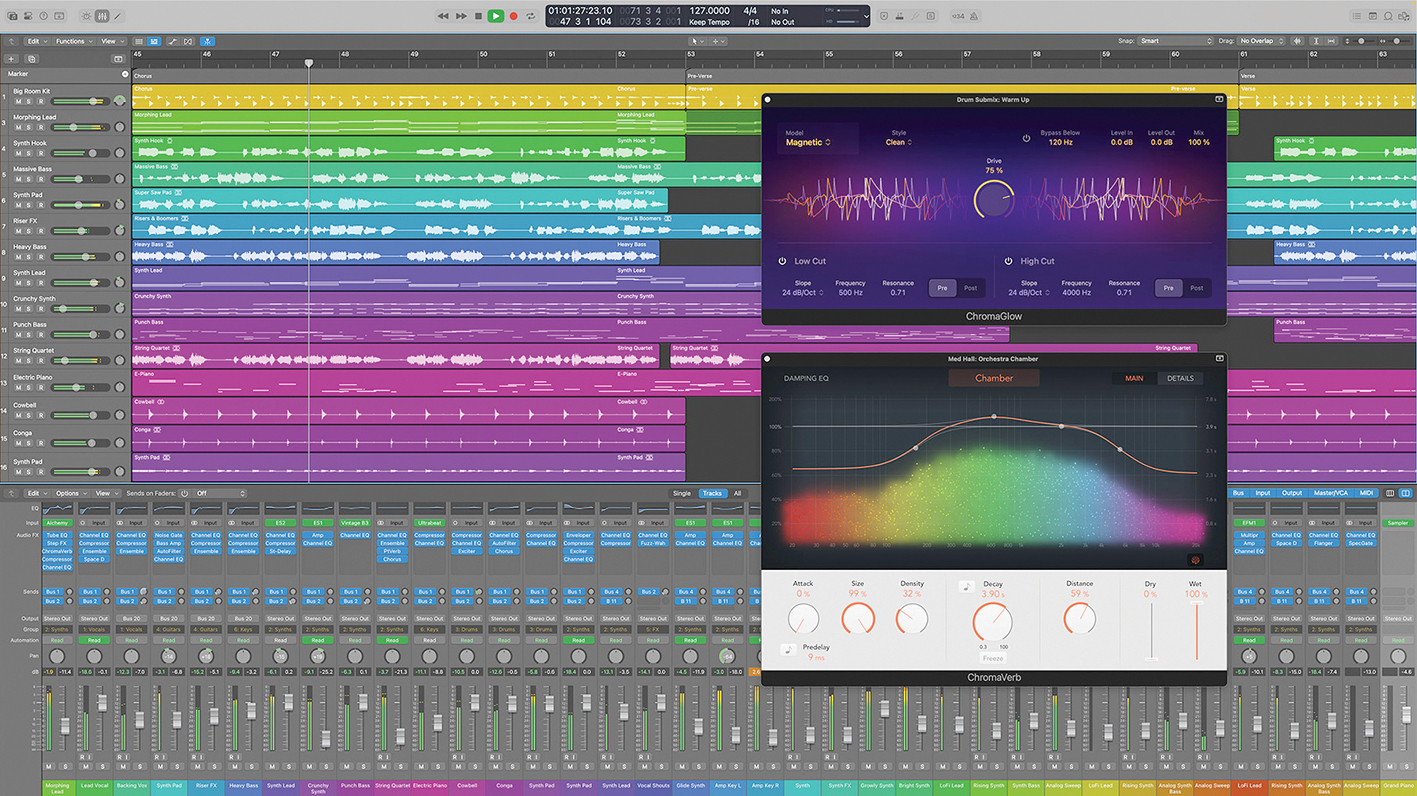
One of the industry standard DAWs, Logic is a shoe-in for those working with audio and recording. The price is lower for the full package than most others, albeit you’ll need to own a Mac.


Future Music is the number one magazine for today's producers. Packed with technique and technology we'll help you make great new music. All-access artist interviews, in-depth gear reviews, essential production tutorials and much more. Every marvellous monthly edition features reliable reviews of the latest and greatest hardware and software technology and techniques, unparalleled advice, in-depth interviews, sensational free samples and so much more to improve the experience and outcome of your music-making.


