The ultimate producer's guide to reverb
If you're struggling to separate springs from plates, you're confused by convolution or ailed by algorithmic processors, read on...

PLUGIN WEEK 2023: You might not know it, but you experience reverb all the time. as it's created by sound waves reflecting off surfaces in a space, gradually decreasing in intensity until they fade away and are absorbed into other materials. This effect situates sound in space, and contributes to how we describe the character of a sound.
There are lots of digital reverb plugins out there, but they’re mainly split into two groups: algorithmic and convolution. The algorithmic approach involves using a series of calculations that simulate reverb, either by imitating real spaces or designing new sonic environments. Convolution reverb, on the other hand, uses actual recordings of physical spaces and hardware units to generate a reverb profile.
The best VST reverb plugins 2022: make some space in your DAW for these amazing ambience processors
Using these two methods, reverbs can be conjured in a variety of styles, with each possessing its own distinct character. There are reverbs that emulate physical spaces, like room and hall types, which in the past would have had to be captured in actual rooms and halls.
As well as this, there are reverbs that imitate mechanical techniques from the pre-digital era that used hardware, like spring and plate. We'll get to these classic reverbs later.
The first commercial digital reverb – the EMT 250 – was created in 1976, and EMT, alongside Lexicon, continued to push the envelope, albeit with extremely limited computing power compared to today’s standards. Nowadays, we have the resources to do things that simply couldn’t be done during the golden age of studio reverbs, with shimmer, reverse, granular and more providing the basis for ever-more creative effects processing.
Algorithmic vs convolution reverb
In the mid ’70s, the EMT 250 Digital Reverberation unit became the first commercially available digital reverb effect. Since then, digital reverbs have become an imperative studio tool in the music production process. While there are a number of digital reverb types each, they mostly tend to fall into two different categories: algorithmic and convolution.
If you’ve used a few digital reverbs in your time, you may have already used an algorithmic reverb. The clue’s in the name, but algorithmic reverbs use computing power to follow a number of rules (some predetermined, some affected by changing settings) which emulate a natural reverb. Algorithmic reverbs tend to be less CPU-intensive than their convolution counterparts, and are particularly useful for more creative sound design tasks.
Get the MusicRadar Newsletter
Want all the hottest music and gear news, reviews, deals, features and more, direct to your inbox? Sign up here.
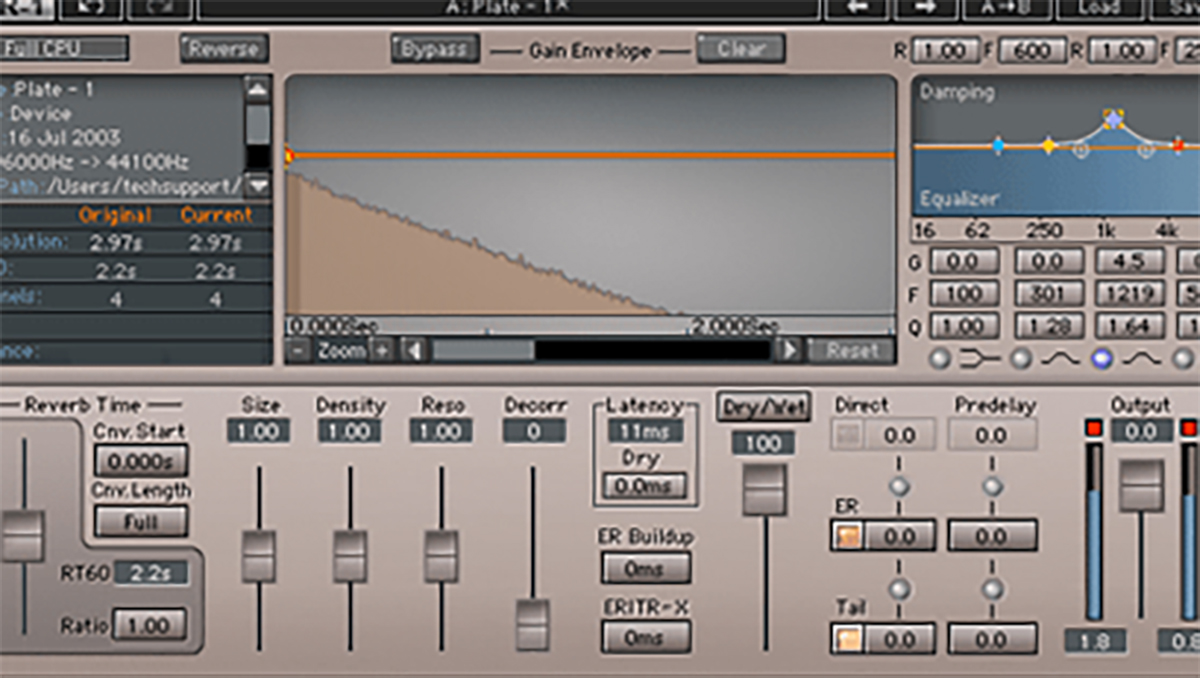
Convolution reverbs differ in that they are designed to emulate the sound of a specific space or object. This is achieved by taking an impulse response of a given space, for example an underground parking garage, capturing its acoustic and reverberant properties.
The impulse response is then loaded into a convolution reverb which interprets the data and applies a reverb accordingly. While convolution reverbs can use more CPU than algorithmic reverbs, they provide an accurate sonic imprint of the original source, and can even emulate non-reverb effects including vintage studio hardware.
Both algorithmic and convolution reverbs are able to simulate a variety of reverb types from physical spaces such as rooms, chambers and halls, to mechanical reverbs such as plate and spring reverbs.
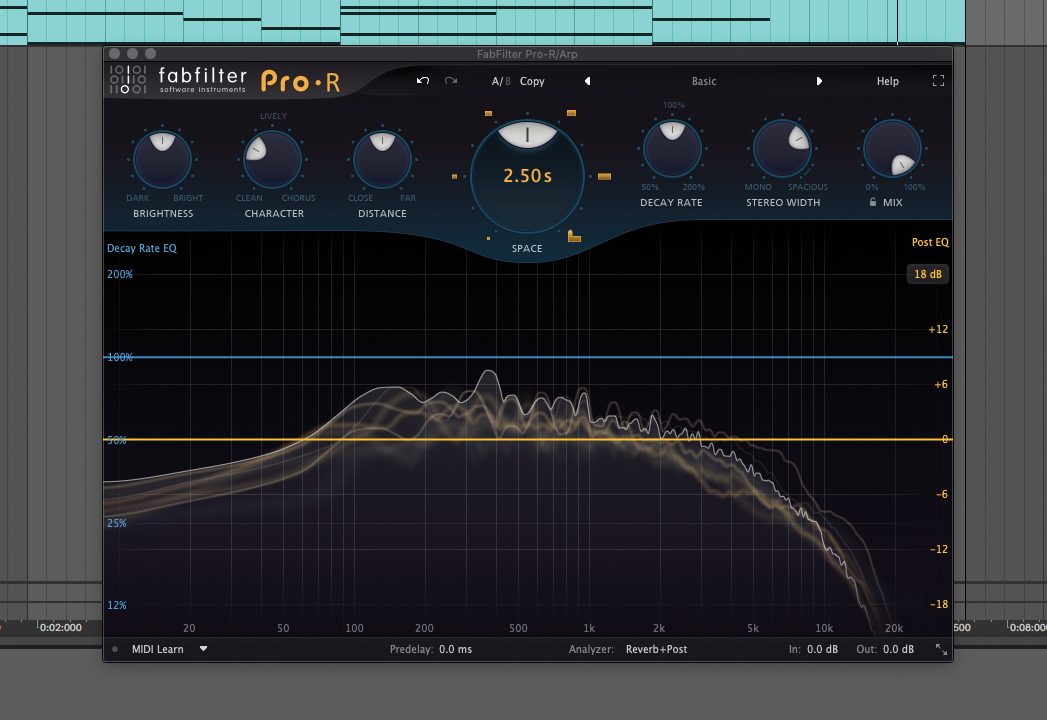
Step 1: Load your chosen algorithmic reverb plugin onto the element you wish to add reverb to. Here, we’re loading Fabfilter Pro-R onto a plucky arpeggio made in Ableton’s Wavetable, aiming to give the synth a feeling of more depth and space.
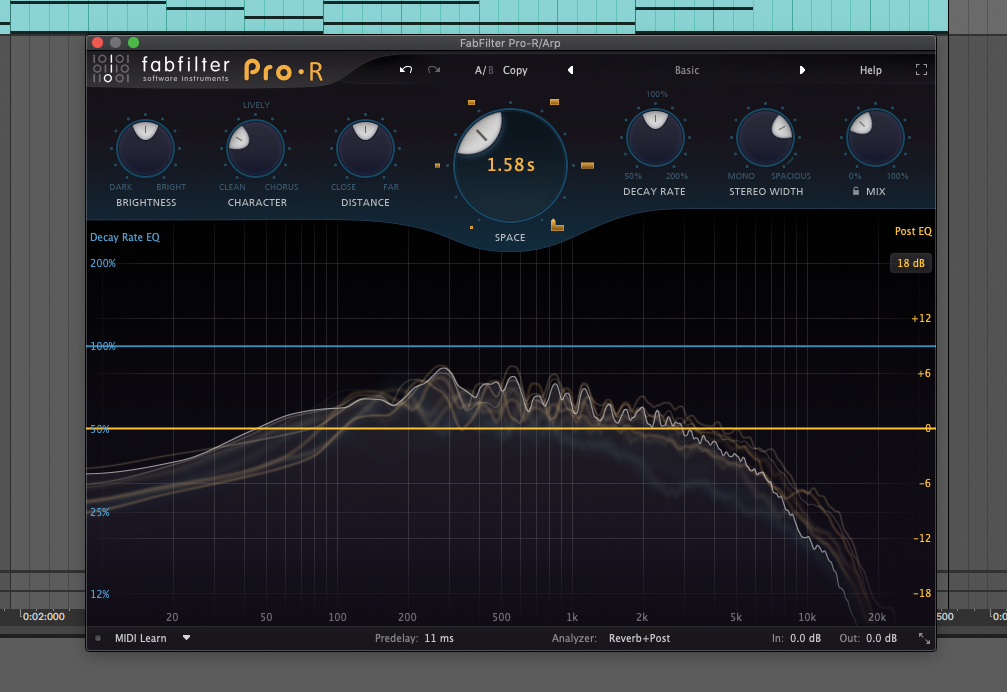
Step 2: Pro-R’s default preset has a Mix parameter set to 100%. Dial that back to 35%. The reverb is still prominent, so let’s reduce the decay time to 1.5 seconds. We can also add some pre-delay to separate the reverb from the arpeggio’s transients.
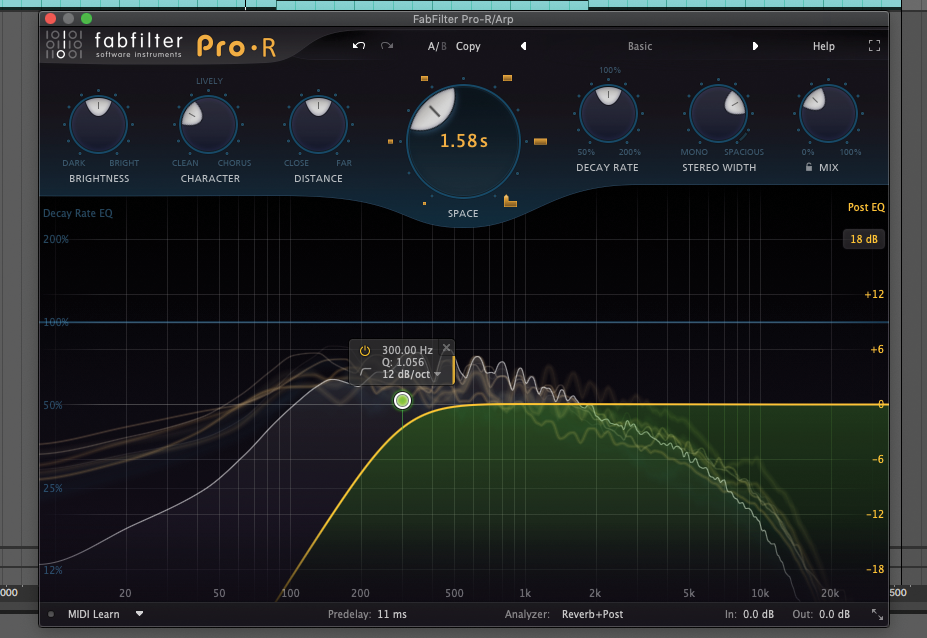
Step 3: The arpeggio contains low frequency content that muddies the overall mix with reverb applied. Many reverb plugins offer EQ control, so you only apply reverb to desired frequencies. Here, we cut the final reverb sound below 300Hz.
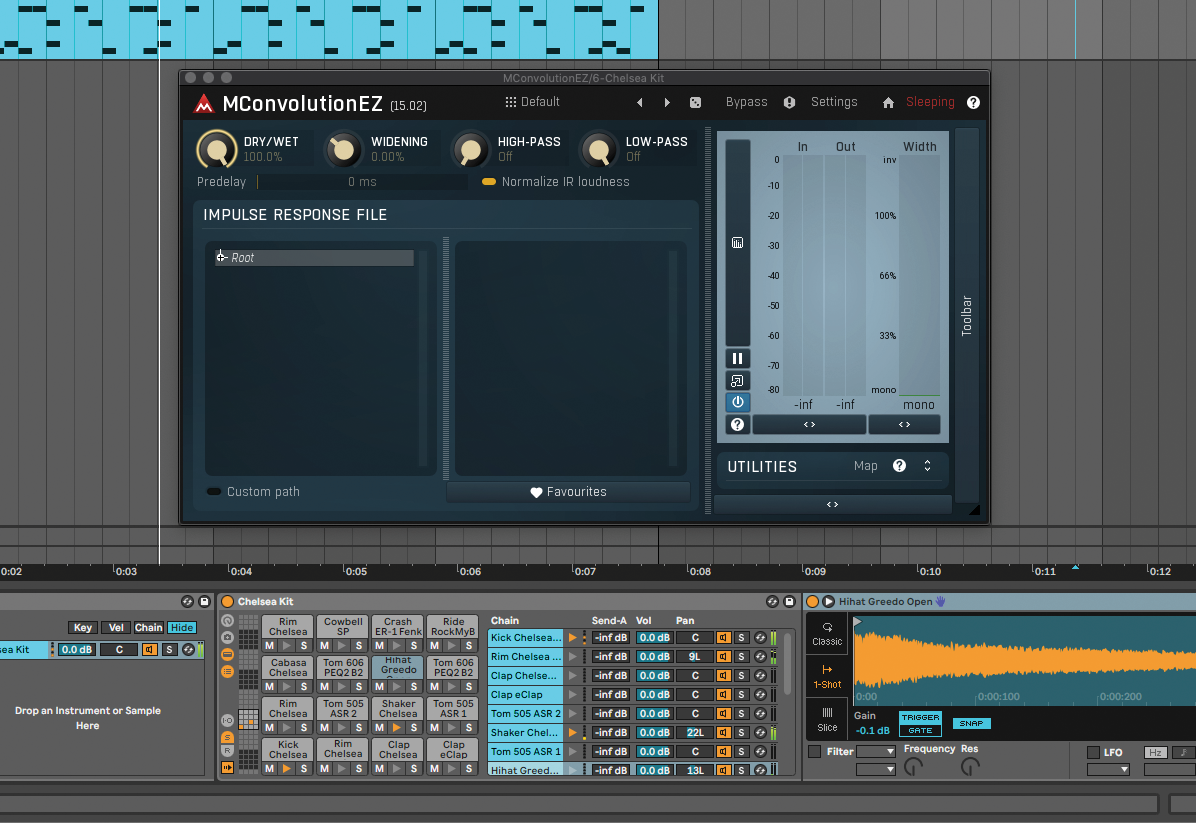
Step 4: Now we’ll try to give some drums a bit of life. We’ll put Melda’s MConvolutionEZ on a return channel in Ableton’s Drum Rack. This gives us more control over our mix, as we can send each drum part to the reverb at varying amounts.
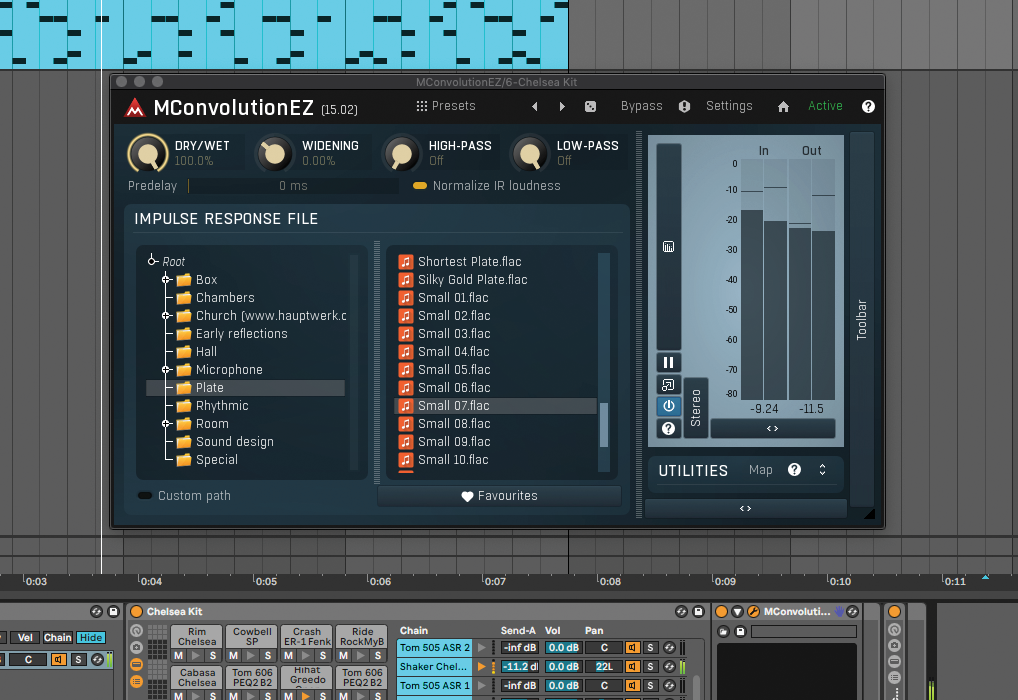
Step 5: Choose a short impulse response from the IR browser. We’ve chosen Small 07 from the Plate folder. You can then send your drums to the reverb. To retain clarity, it’s good practice to avoid sending low-frequency elements to your reverb.
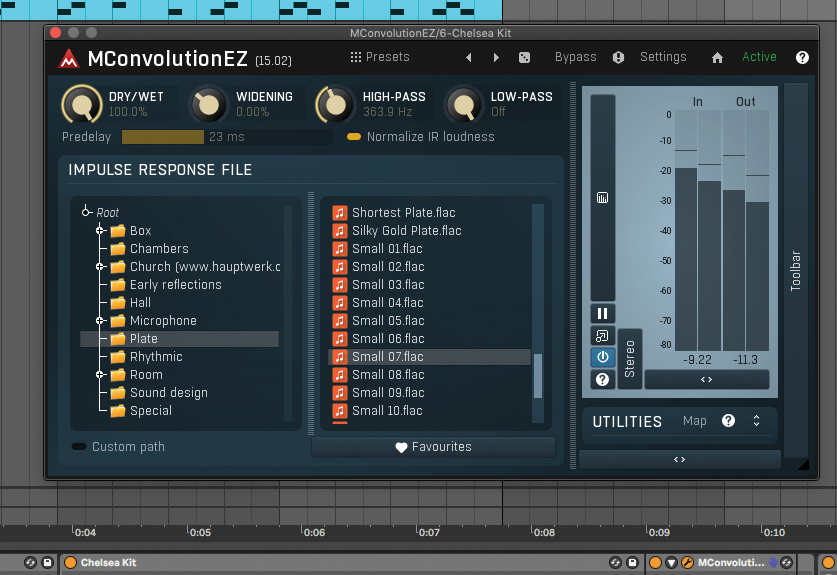
Step 6: Based on real-world spaces, convolution reverbs offer useful settings for dialling in sound. Like with Pro-R, let’s increase the pre-delay time and cut the low end. This will help to keep our reverb transparent and avoid reducing our drums’ impact.
Room, hall, spring and plate reverbs
Spring reverb started as a mechanical reverb, created by sending an instrument signal into one end of an actual metal spring. As the name suggests, the result of this process is a metallic, “springy” tone.
As the name suggests, plate reverb was created with units housing huge metal plates that were vibrated by a transducer (in the same way a transducer vibrates the cones in your studio monitors to produce sound). Plate simulation plugins have obvious advantages compared to the weighty original!
Back in the day, room or hall reverb was created by playing your sound and recording the audio reverberating around the physical space. Nowadays there are plenty of digital reverbs available that are designed to emulate the reverb of certain spaces – be it famous recording studios, cathedrals or caves.
Spring and plate
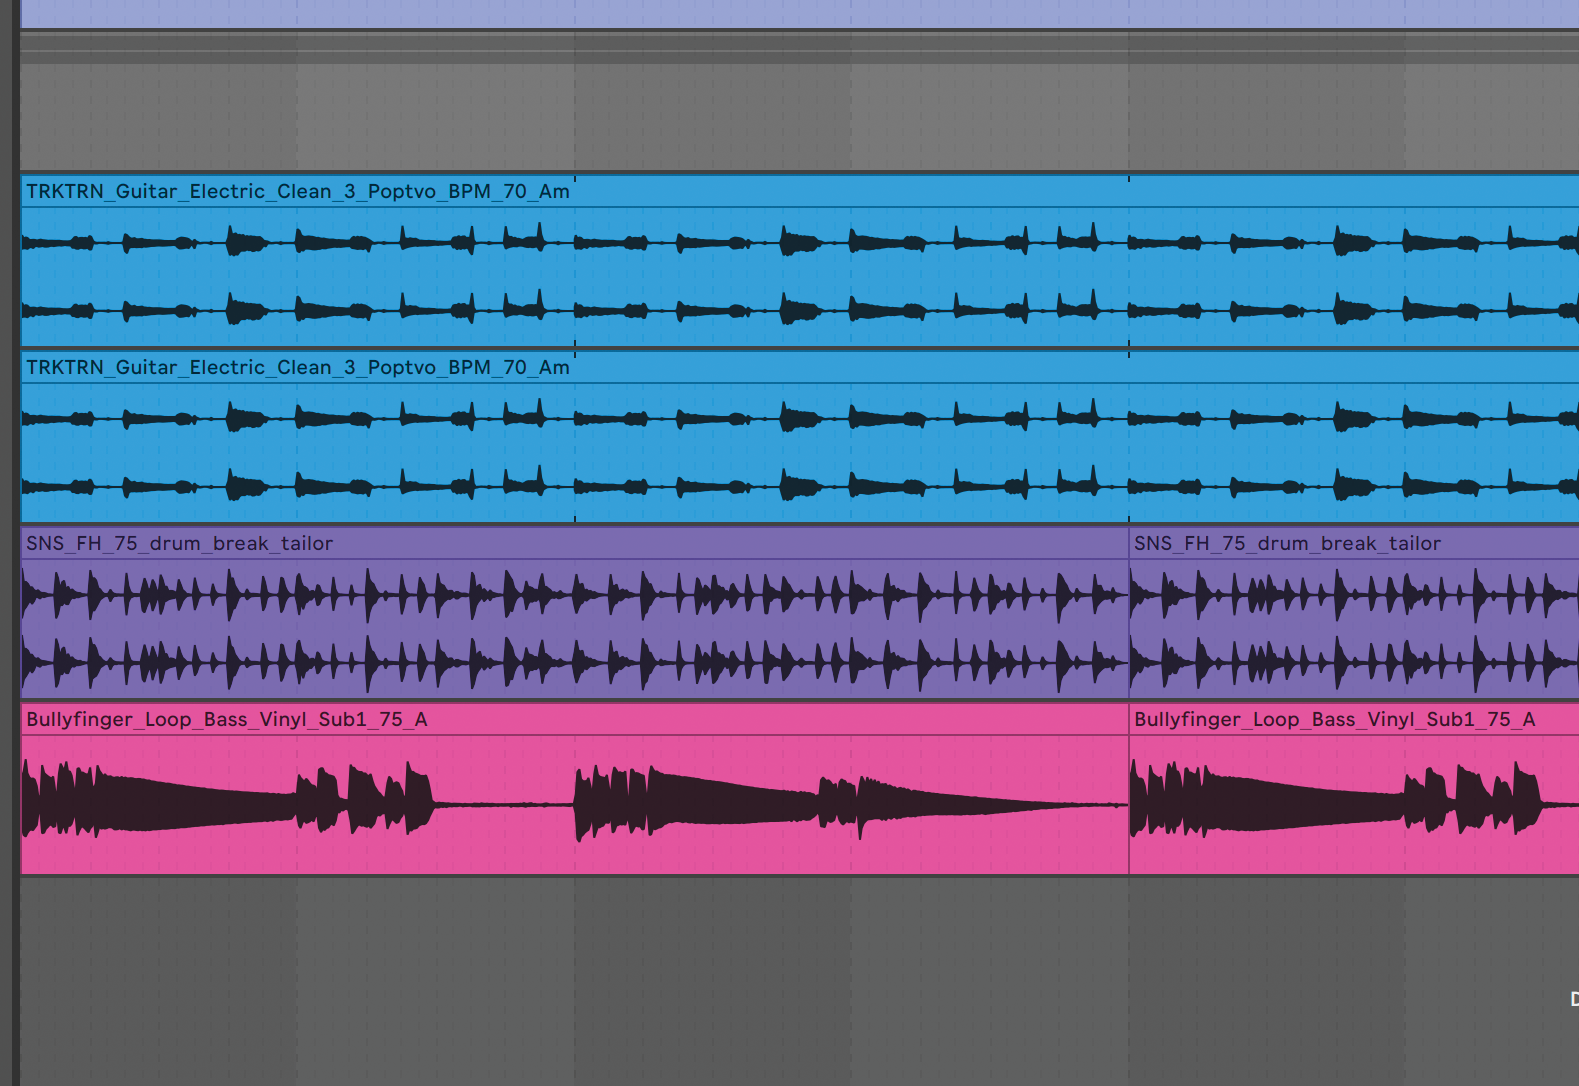
Step 1: Let’s apply a spring reverb to an electric guitar part to give it some character. We’re using Fuse Audio Labs’ VREV 666 Vintage Spring Reverb on a return track, to which we’re sending the dry guitar part to be processed.
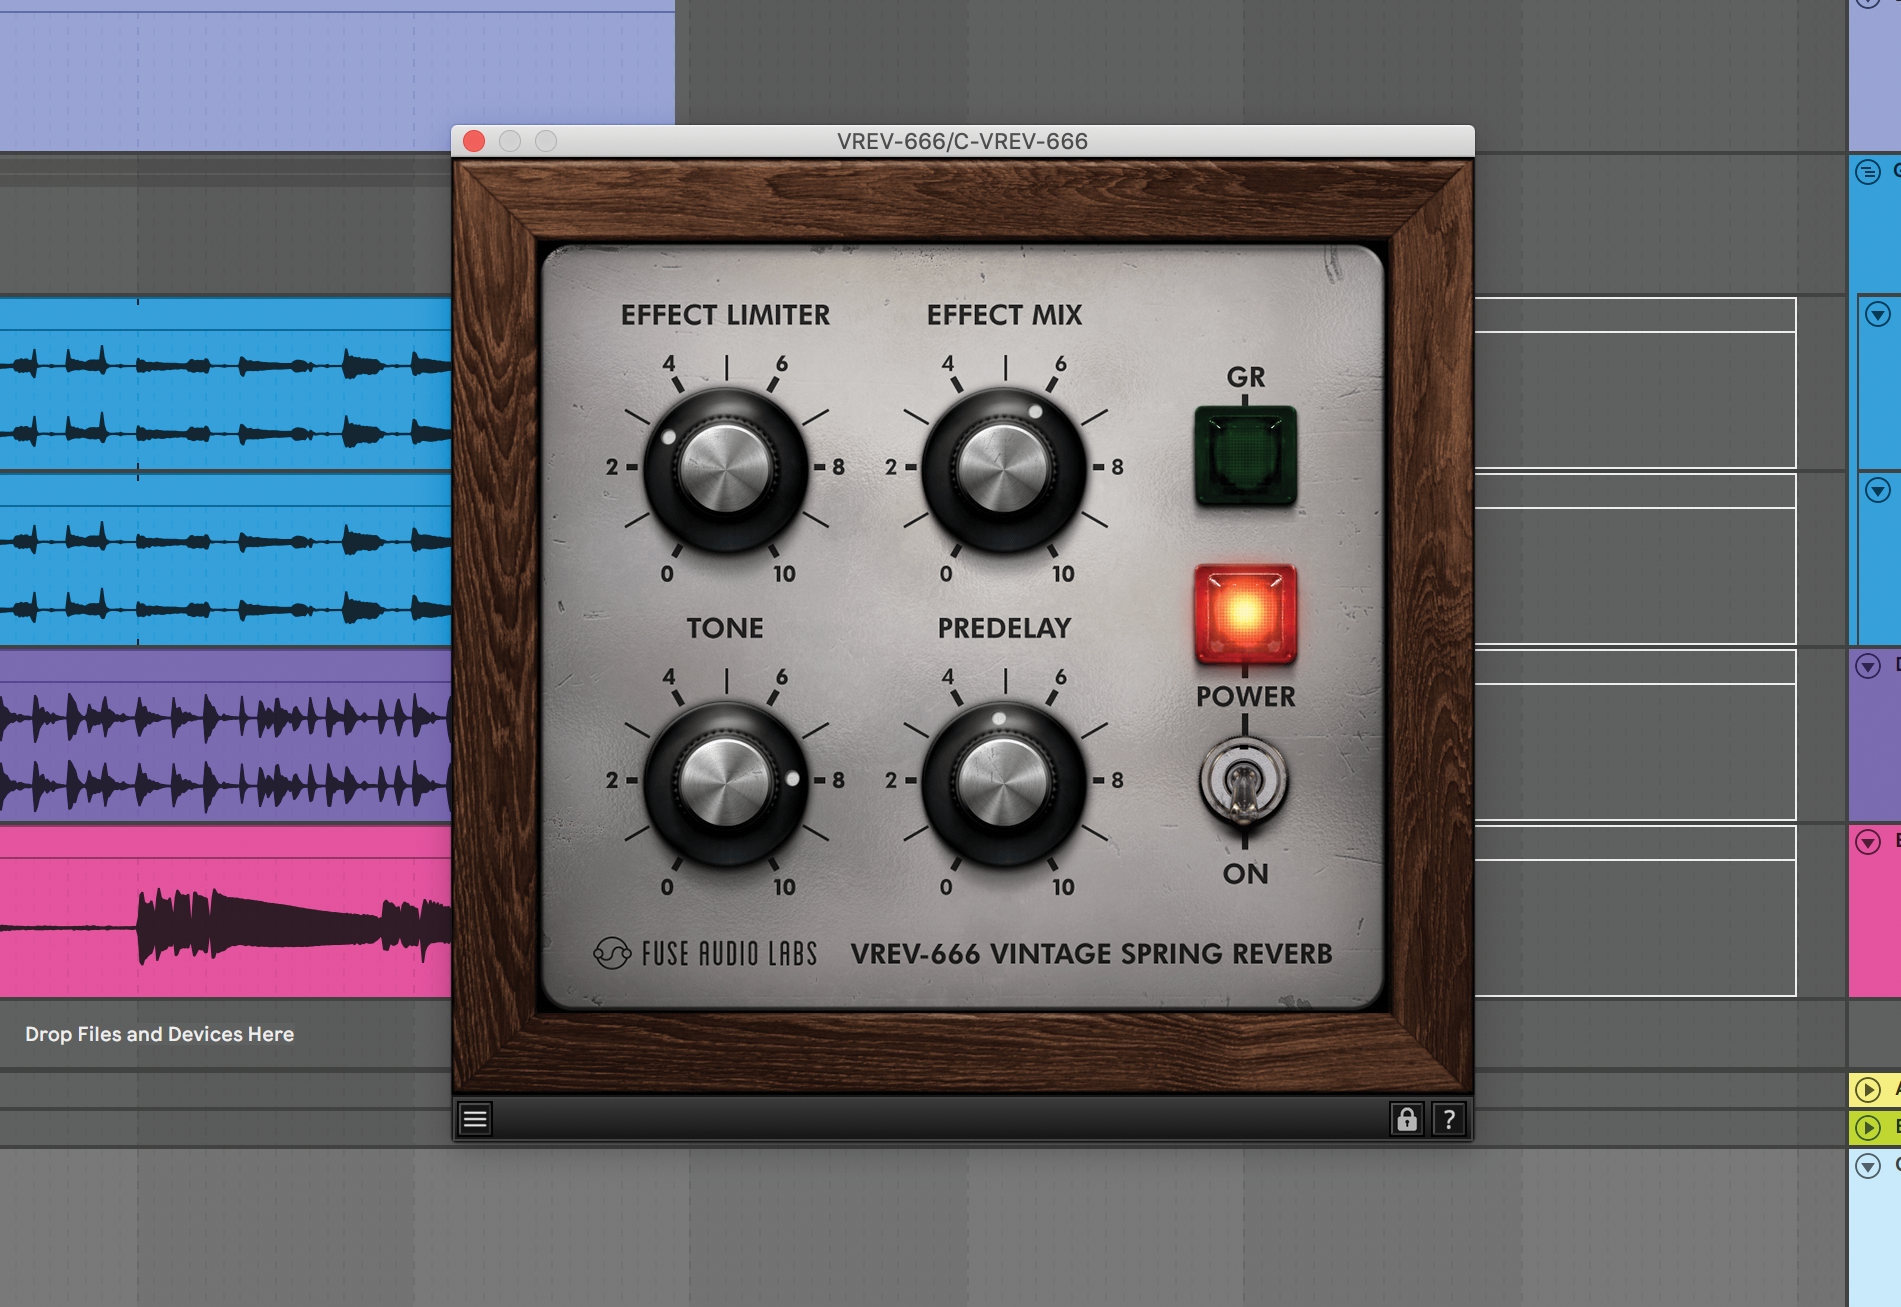
Step 2: The trick with spring reverb is not to overdo it, as too much can overcrowd your mix. Set the Effect Mix to 5, and use the Predelay knob to give the guitar time to breathe. We can also adjust the Tone to make it that bit brighter.
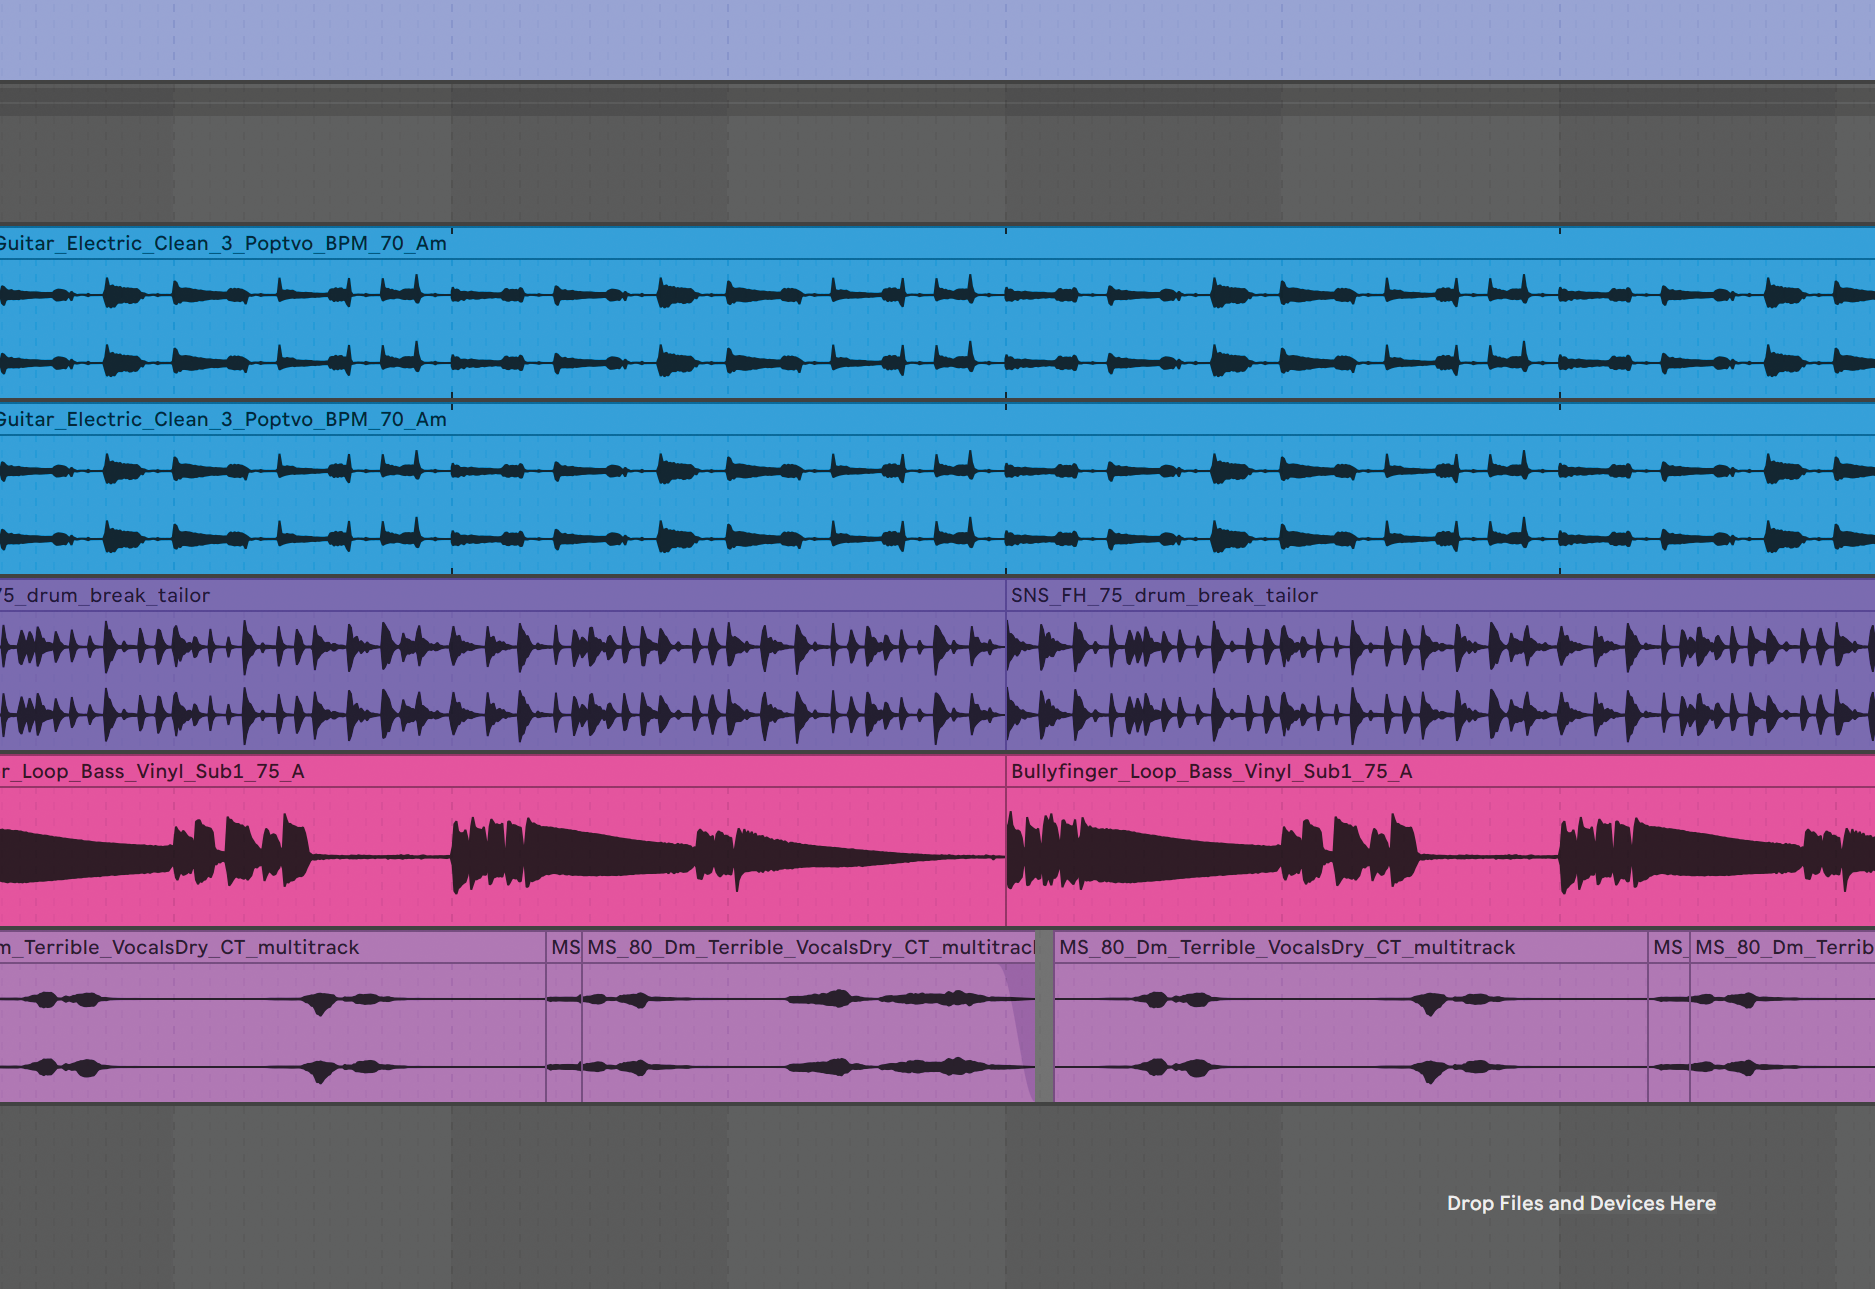
Step 3: Next, we’ll add a plate reverb to a dry lead vocal. We’re using Arturia Rev Plate-140 as an insert effect. The bright tone and slightly unnatural sound of this reverb gives the vocal size and really helps it to cut through the mix.
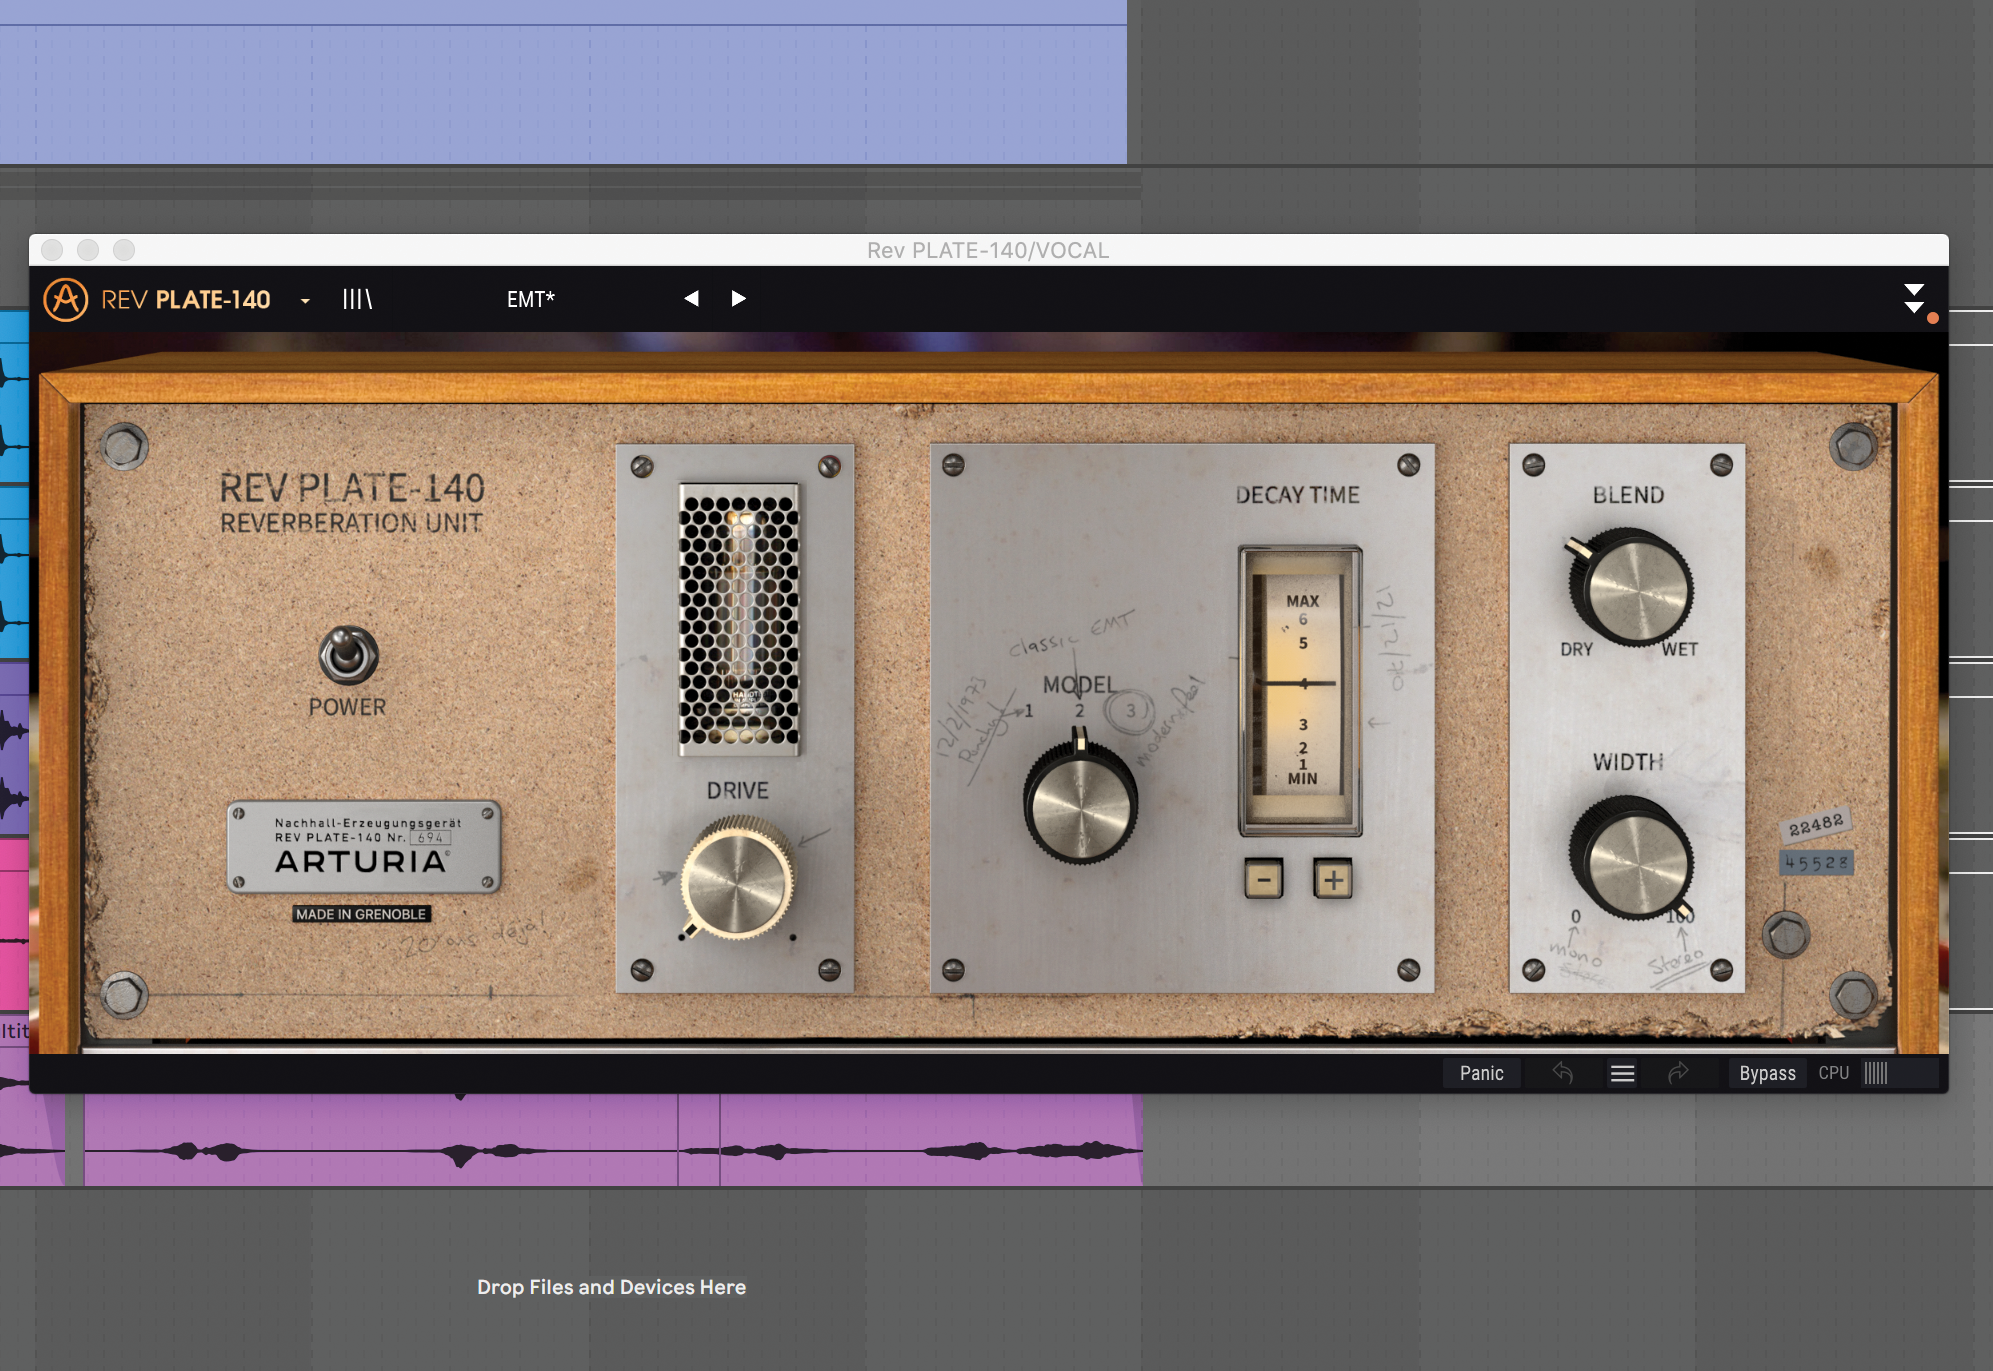
Step 4: Dial back the Blend knob to about 10 o’clock, and set the Decay Time to four seconds. We could lower the Width knob to really situate the vocal in the centre of the mix, but a spread out stereo sound really works well here.
Room and hall
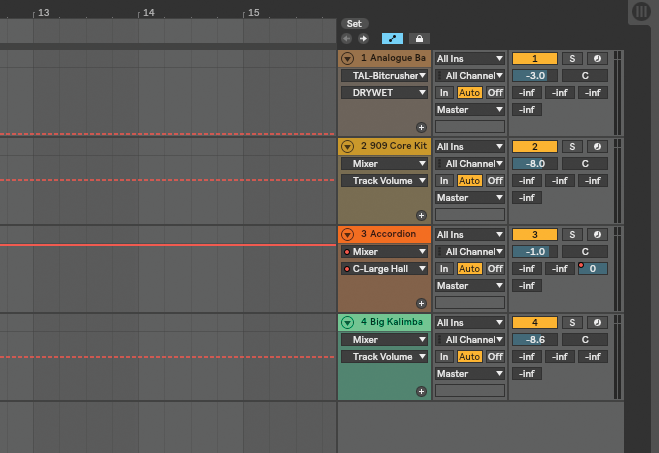
Step 1: Putting a hall reverb type on a sound will give it instant size and dimension. Here, we’ll use Ableton’s Large Hall reverb on some lifeless synth chords. Add it to a return channel, and adjust the send knob on the synth to blend it in.
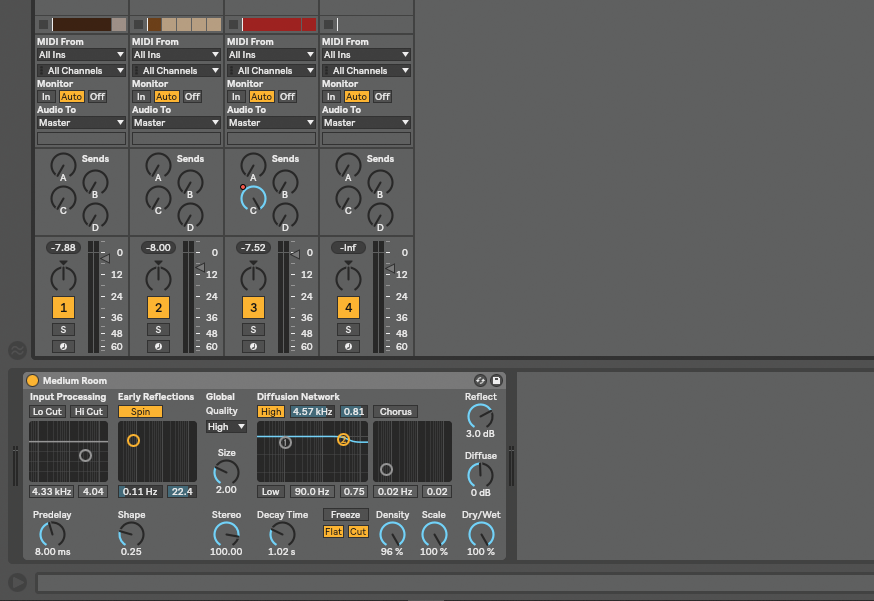
Step 2: Room reverbs are less cavernous than hall reverbs, but they can be great for filling out a sound and giving it a unique character. Let’s add Ableton’s Medium Room reverb onto a lead synth melody using a return channel like before.
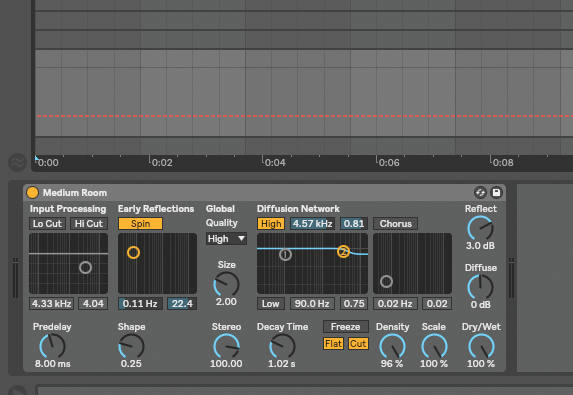
Step 3: The Medium Room reverb has a shorter decay time than the Large Hall reverb, which gives it a bouncy, reflective character. Automate the decay during builds to create movement, or use the Freeze button for ambient background drones.
The Lexicon sound
One household name in the world of digital reverb is Lexicon, in particular, its legendary 224 range, still in use throughout pro studios worldwide. Lexicon’s 224, 224L and 224XL are renowned for a number of desirable reverb characteristics, notably their long spacey tails, wide stereo image, and their ability to enhance a mix without impacting its clarity. While it may be tricky to get your hands on one of these reverb relics, there are now countless software recreations of Lexicon’s products which promise to match the quality of the real thing.
While digital tech wasn’t recognised widely for audio production until the ’80s, the Lexicon reverb was launched in 1978. Being a time-based effect, reverb was seen as an acceptable effect to incur the latency inherent in a digital system, as the conversion from analogue to digital (and then back again) was swallowed up by the expected delay of any given
reverb sound.
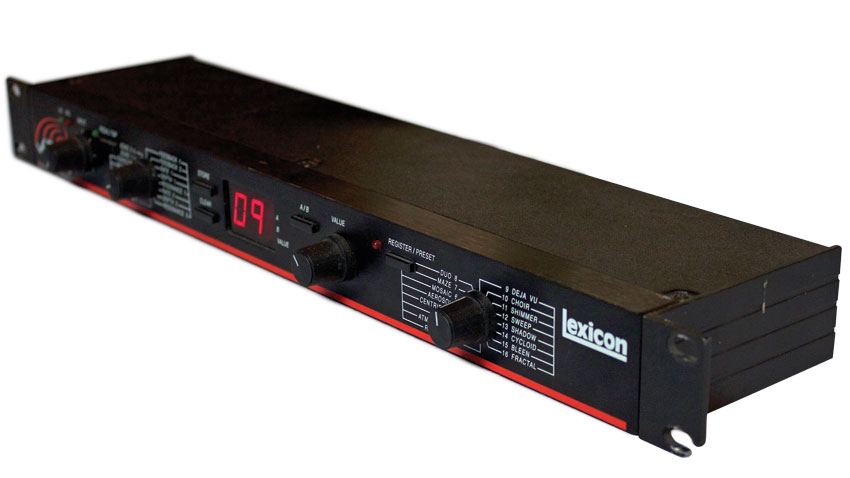
At core, the 224 is built around a system of banks, programs and variations, which let the user intuitively select a reverb type from a selection of digitally emulated spaces. Despite its age, the unit also offers many of the settings you’d expect to find on its modern day equivalent, plus many you wouldn’t. The usual suspects include Depth, Diffusion, Size and Predelay, along with a range of frequency-based parameters that allow for the careful crafting of reverberation for every mix scenario.
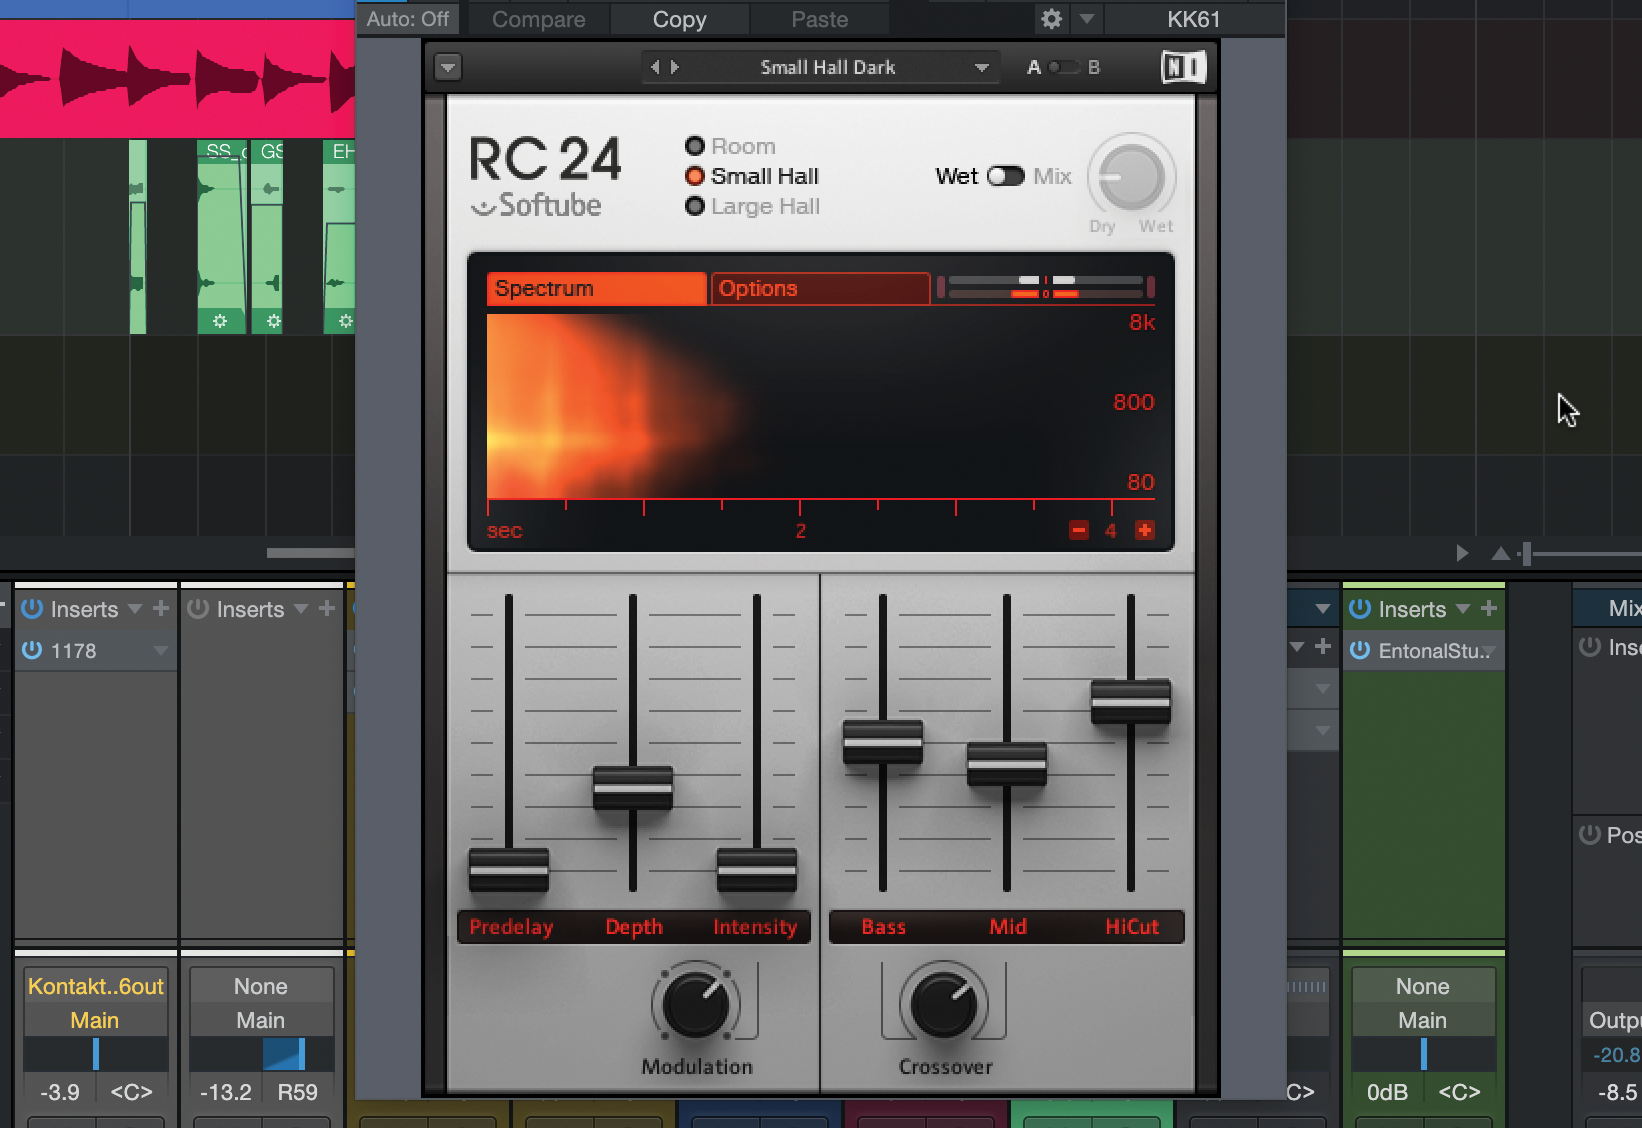
Step 1: The Lexicon gives a wide reverb tail with customisation options. Native Instruments and Softube’s RC 24 and 48 plugins help you get it hooked up in your DAW. Here’s RC 24 placed over a mix element. We want to add an otherworldly space.
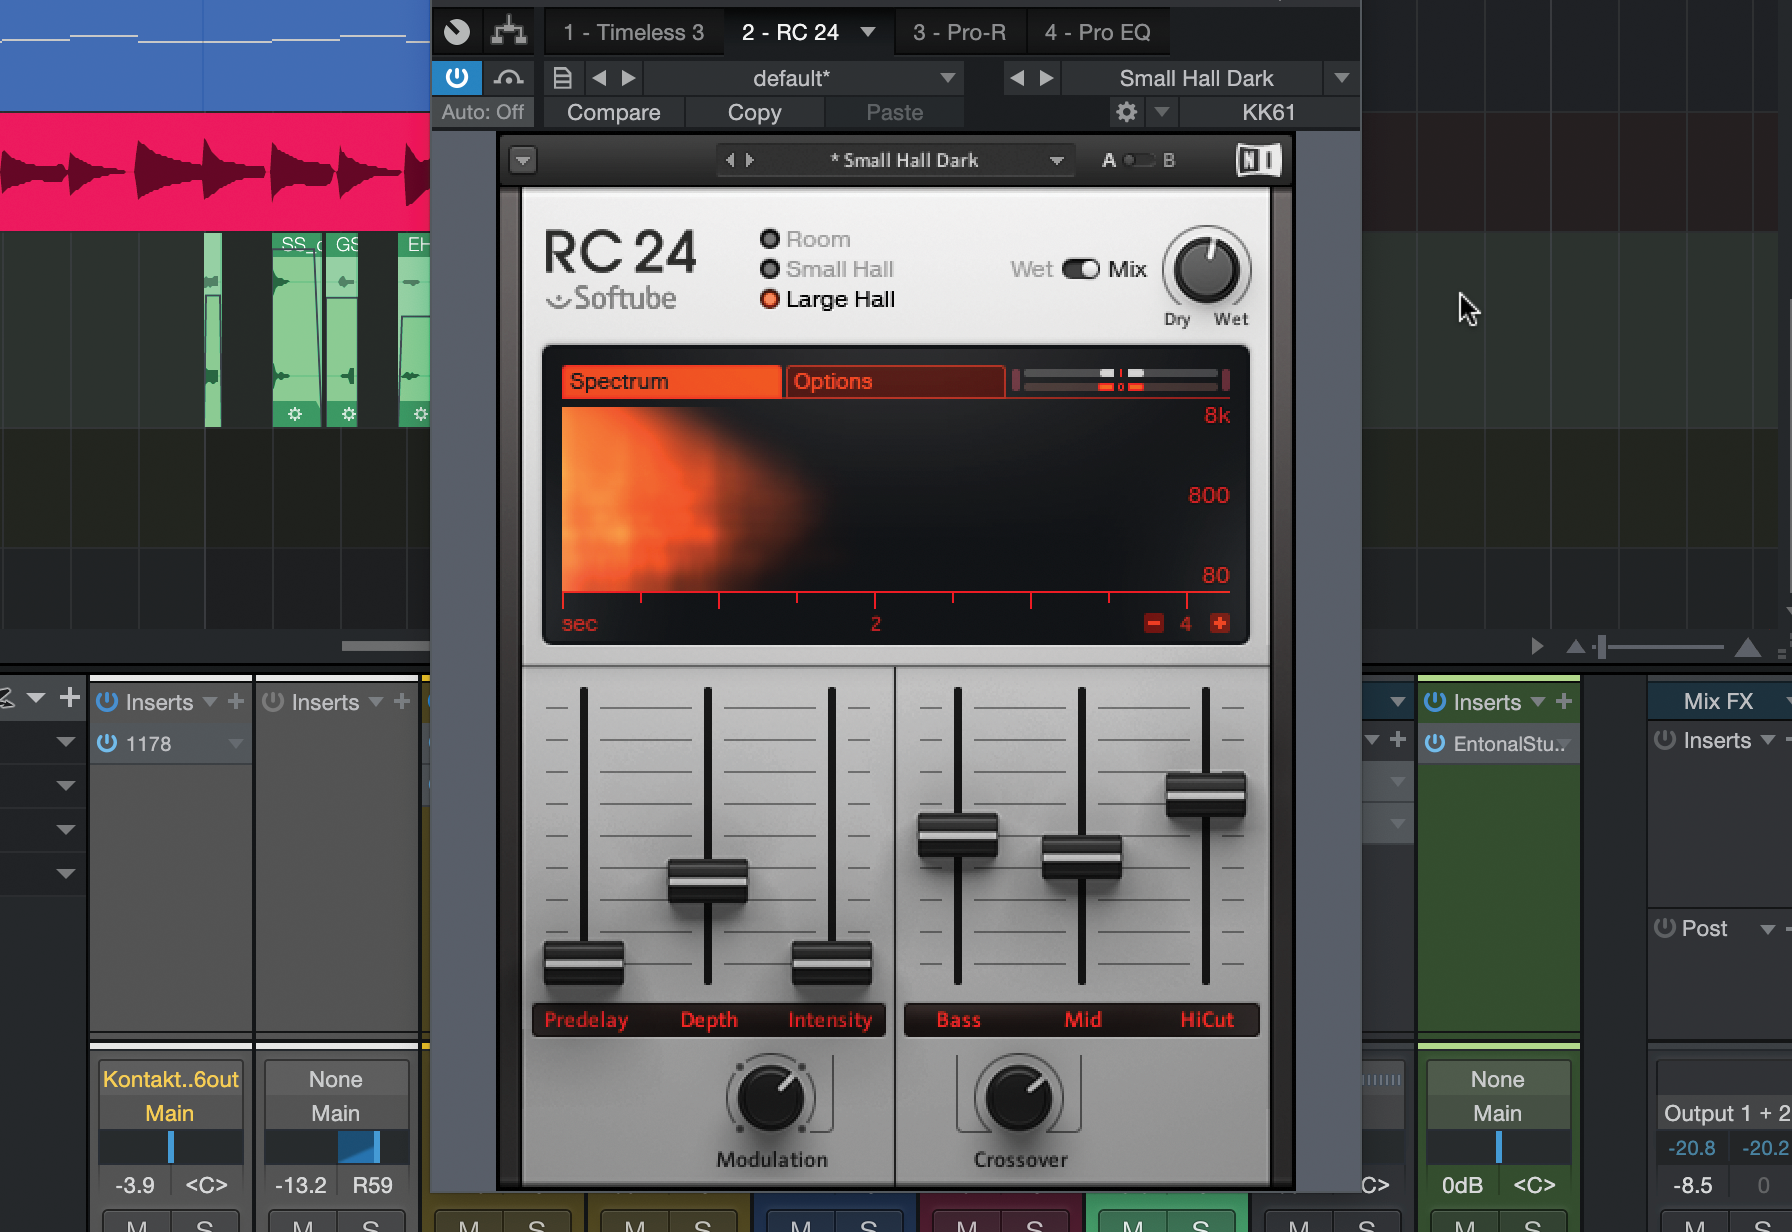
Step 2: We’ll head to the Large Hall space algorithm and put the plugin into Mix mode. The colourful Spectrum plot lets us see the reverb sound’s frequency content, build and die-off. Already, the reverb effect is deep and wide.
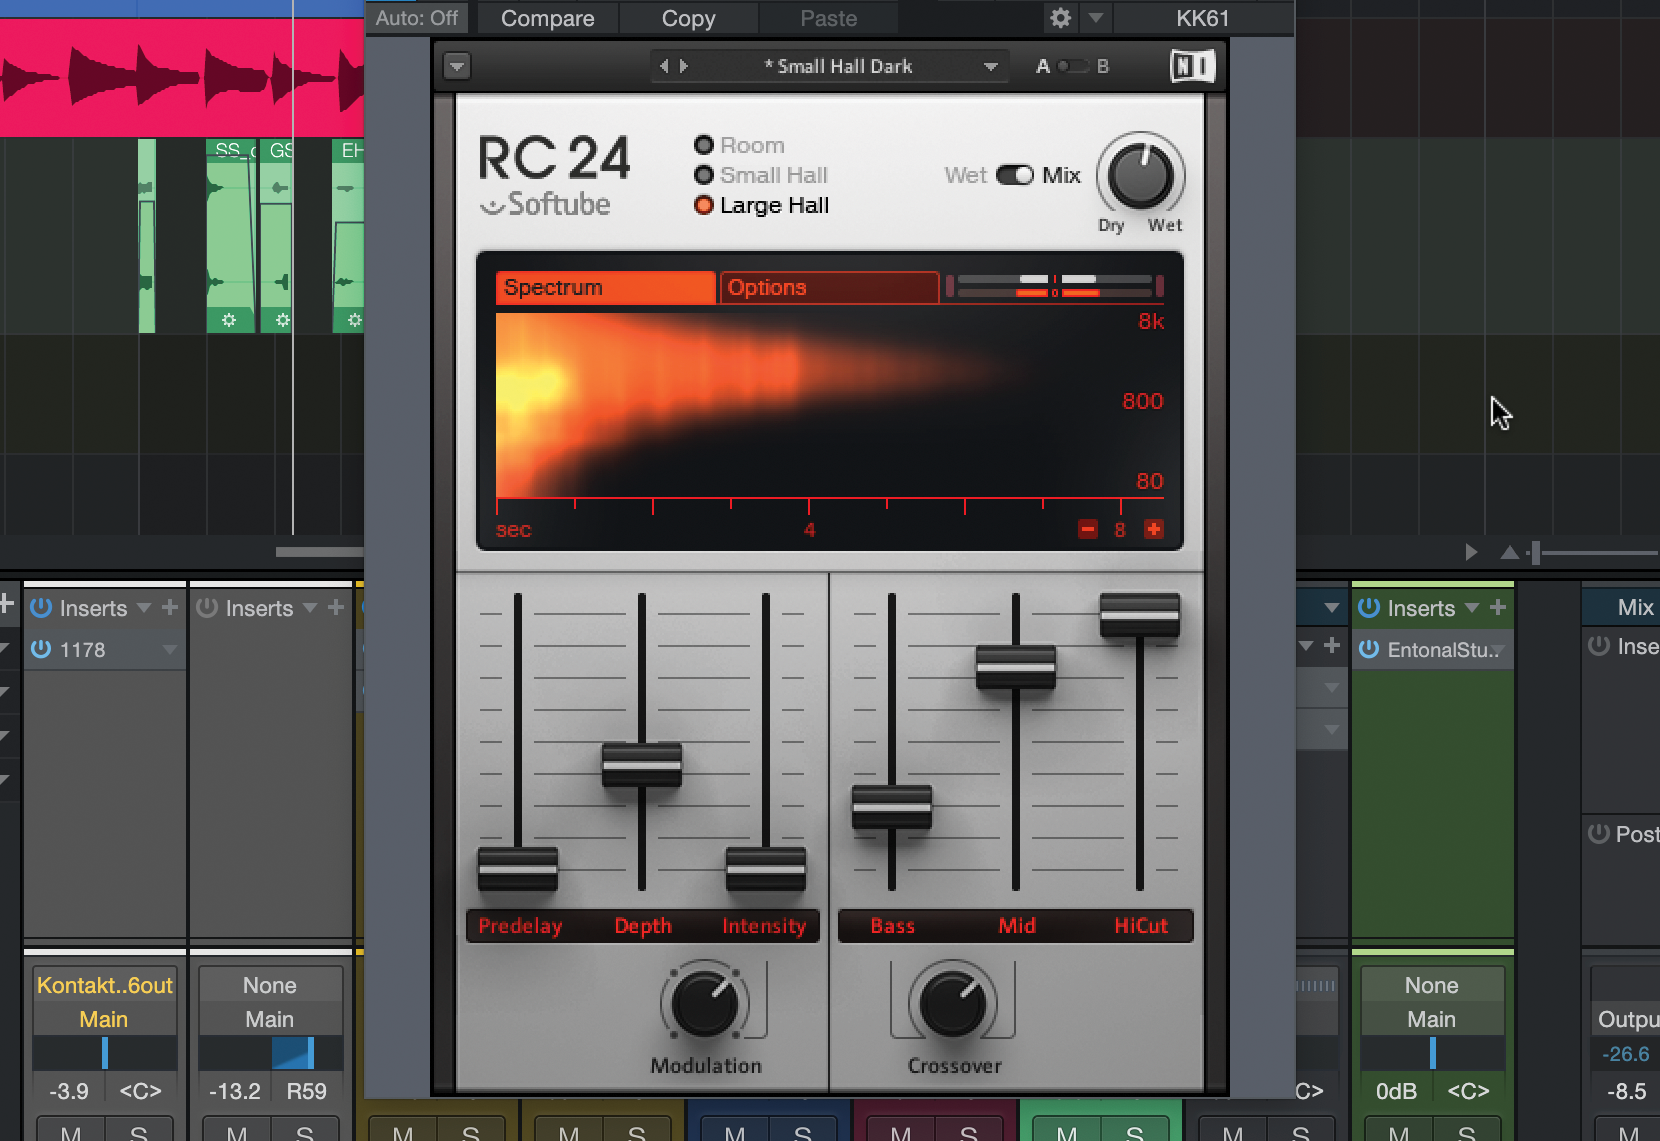
Step 3: We can go beyond a Hall sound using separate reverb timing sliders for Bass and Mid. These set specific times below/above a crossover frequency, which you also select below. We have a shorter bass reverb time below 660Hz than above.
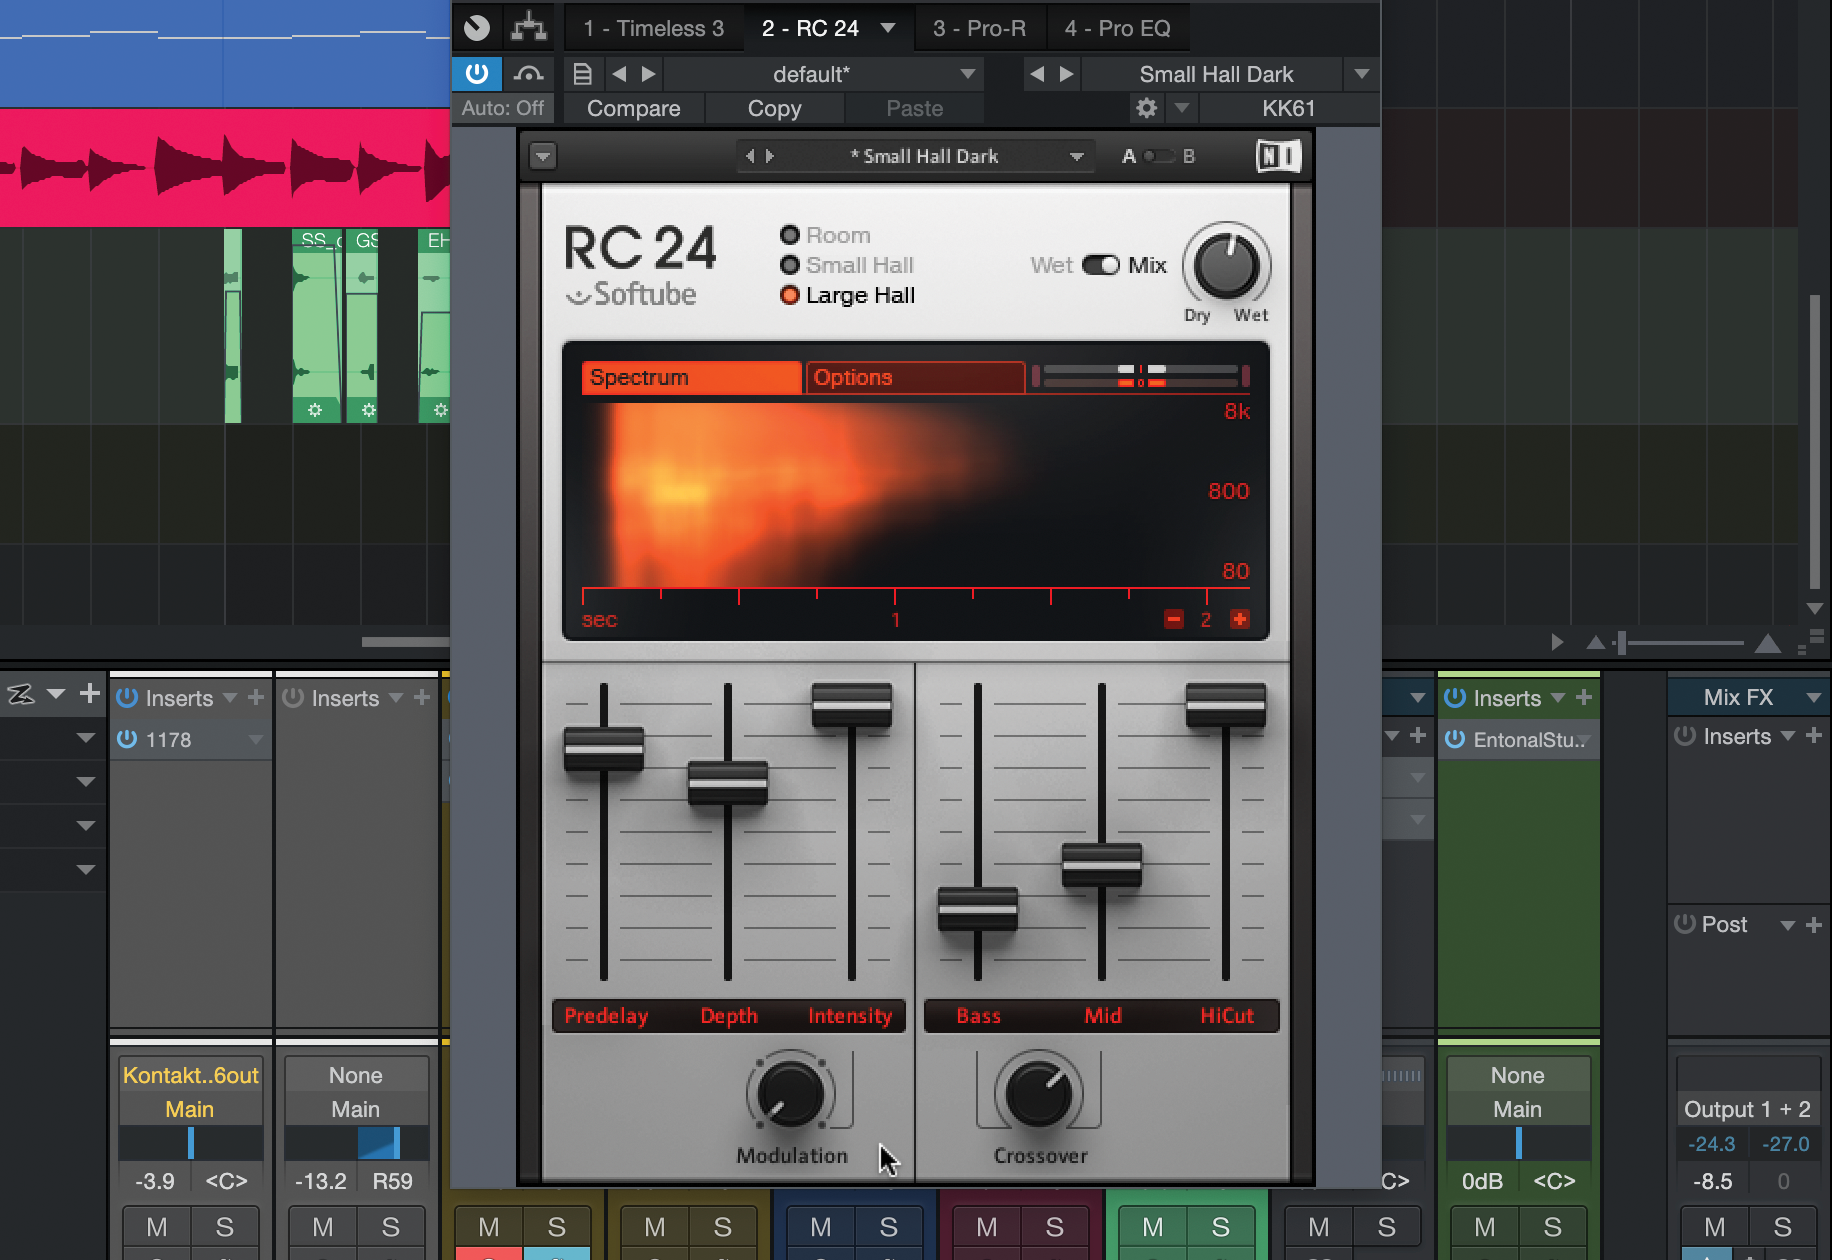
Step 4: Predelay is also visible, with a gap for low timebases. Depth refers to the ‘distance’ of the sound source, shown by the reverb signal. There are four Modulation types with an Intensity control showing how much your modulation is applied.
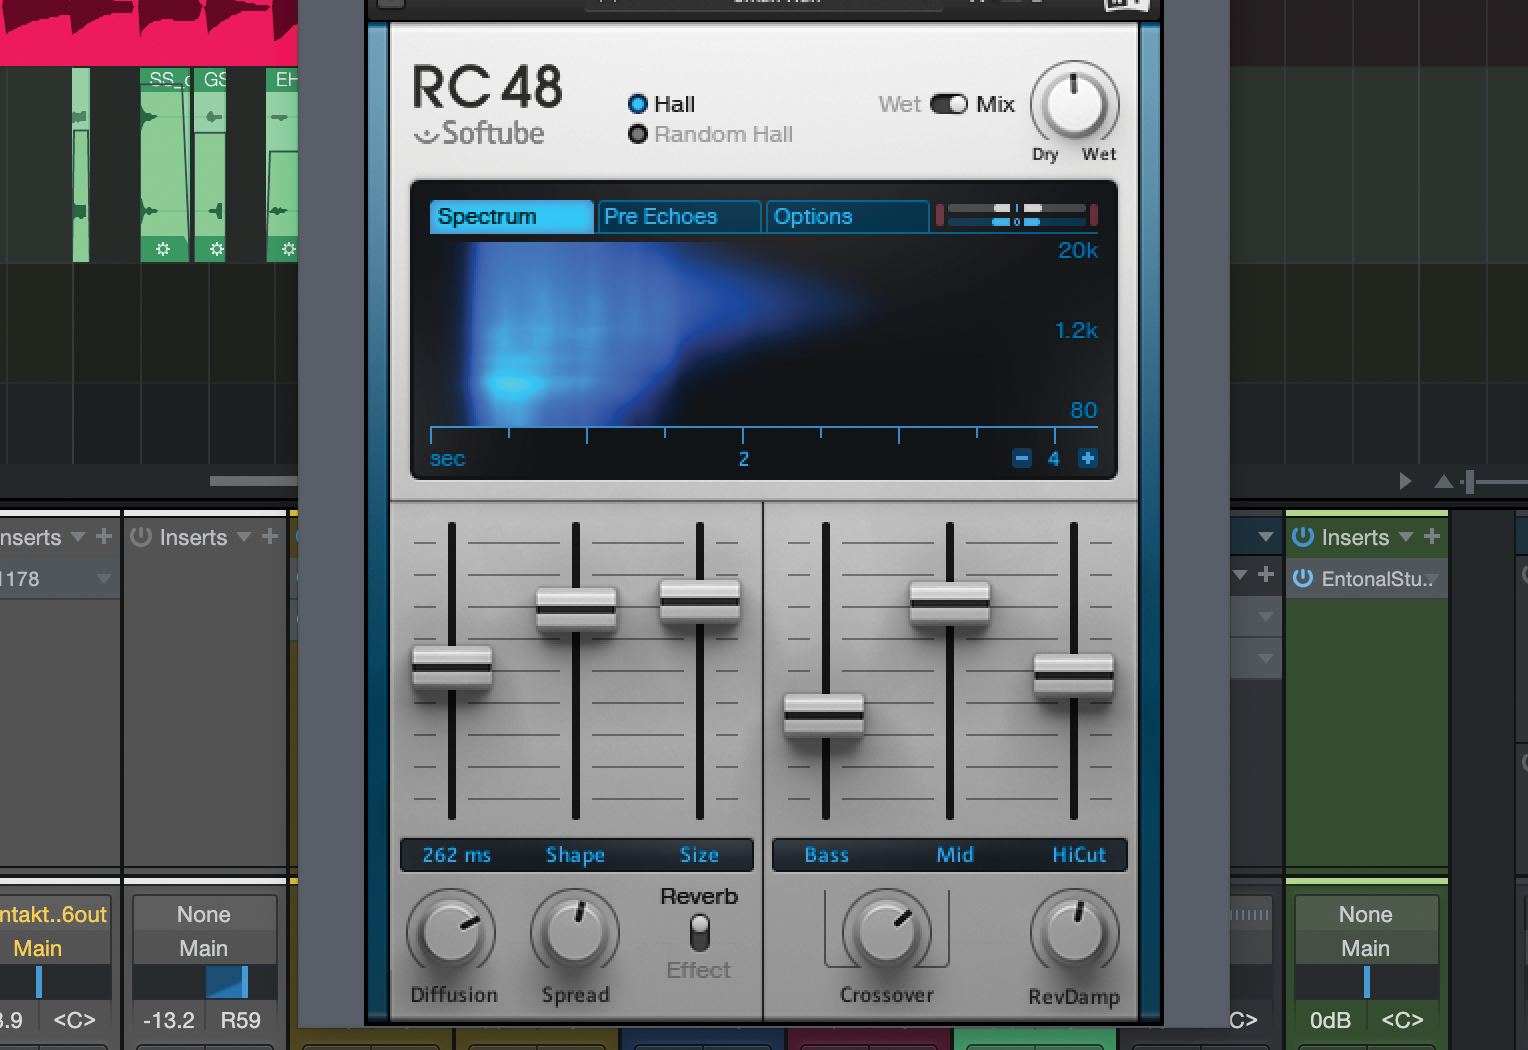
Step 5: Switching to RC 48, there are fuller Hall control sets, including Random Hall type/dampening. There are also more modern reverb parameters: Shape and Size cover the properties of the hall while Diffusion and Spread help you tweak things further.
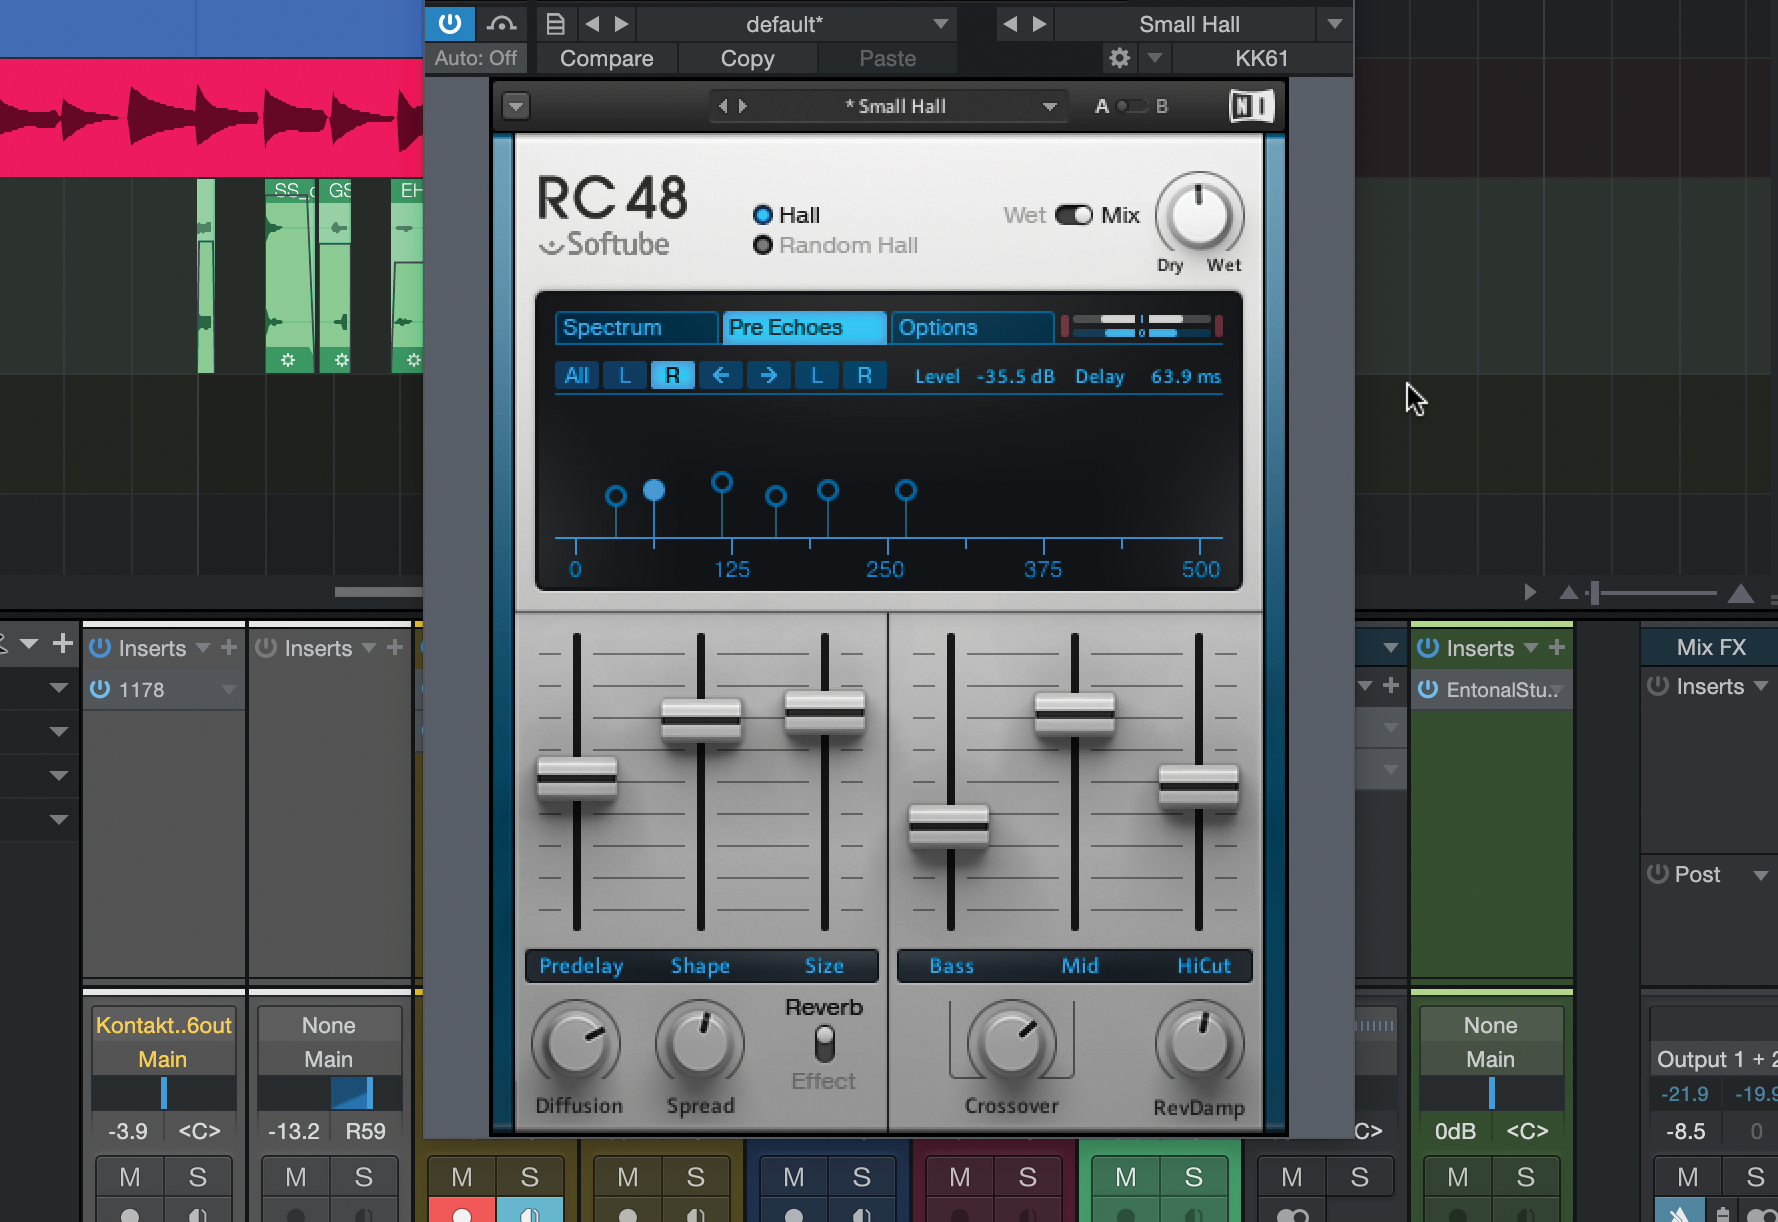
Step 6: The Pre Echoes tab lets you control timing of the early reflections, which carry a lot of positioning cues. These can be separately moved in time/level to achieve another sense of space, but you’ll have to know what you’re listening for!
Granular time effects
While not technically considered as reverb, granular effects can produce a similar sound that's worth exploring as a creative alternative to traditional reverbs. Let's take a look.
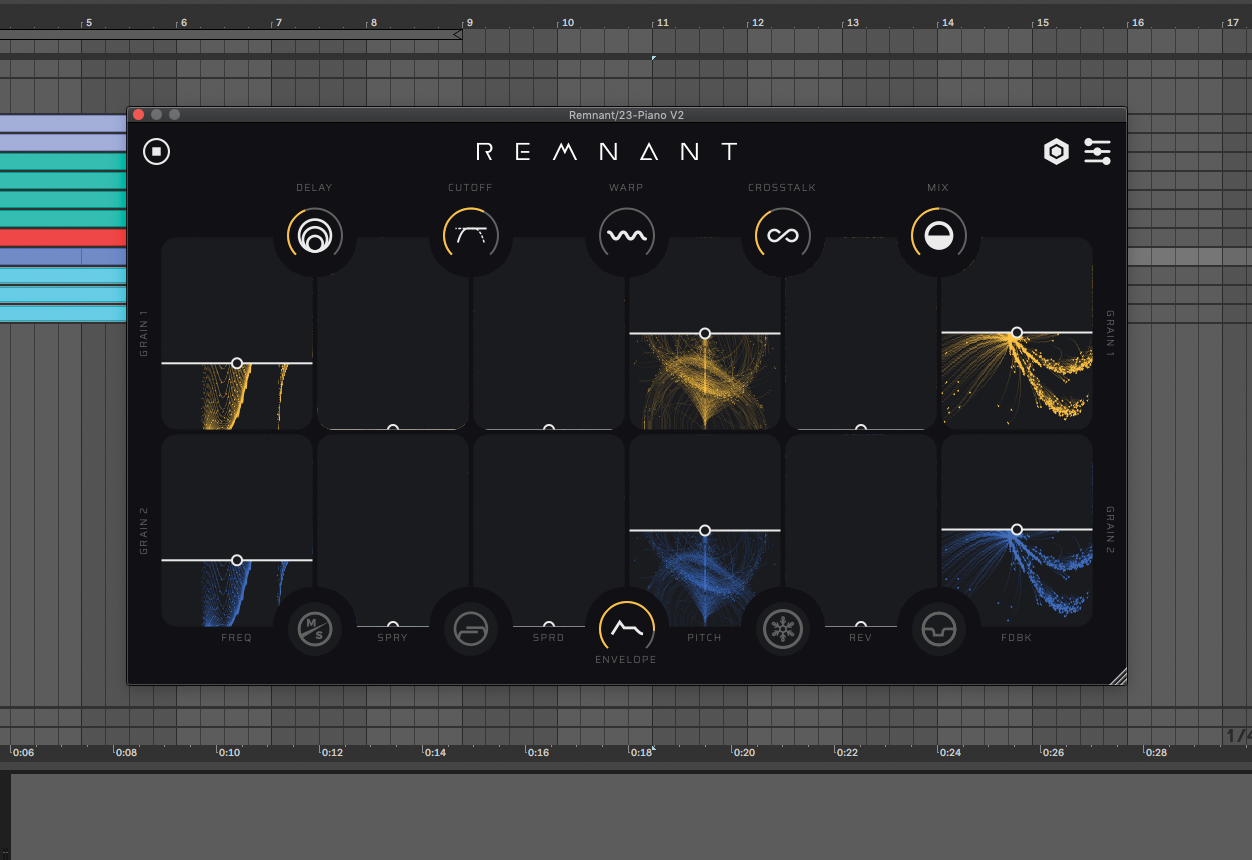
Step 1: Granular effects are so called because they split sounds into tiny ‘grains’ and play them back. With control over those grains’ properties and playback properties, there’s a lot of customisation on offer.
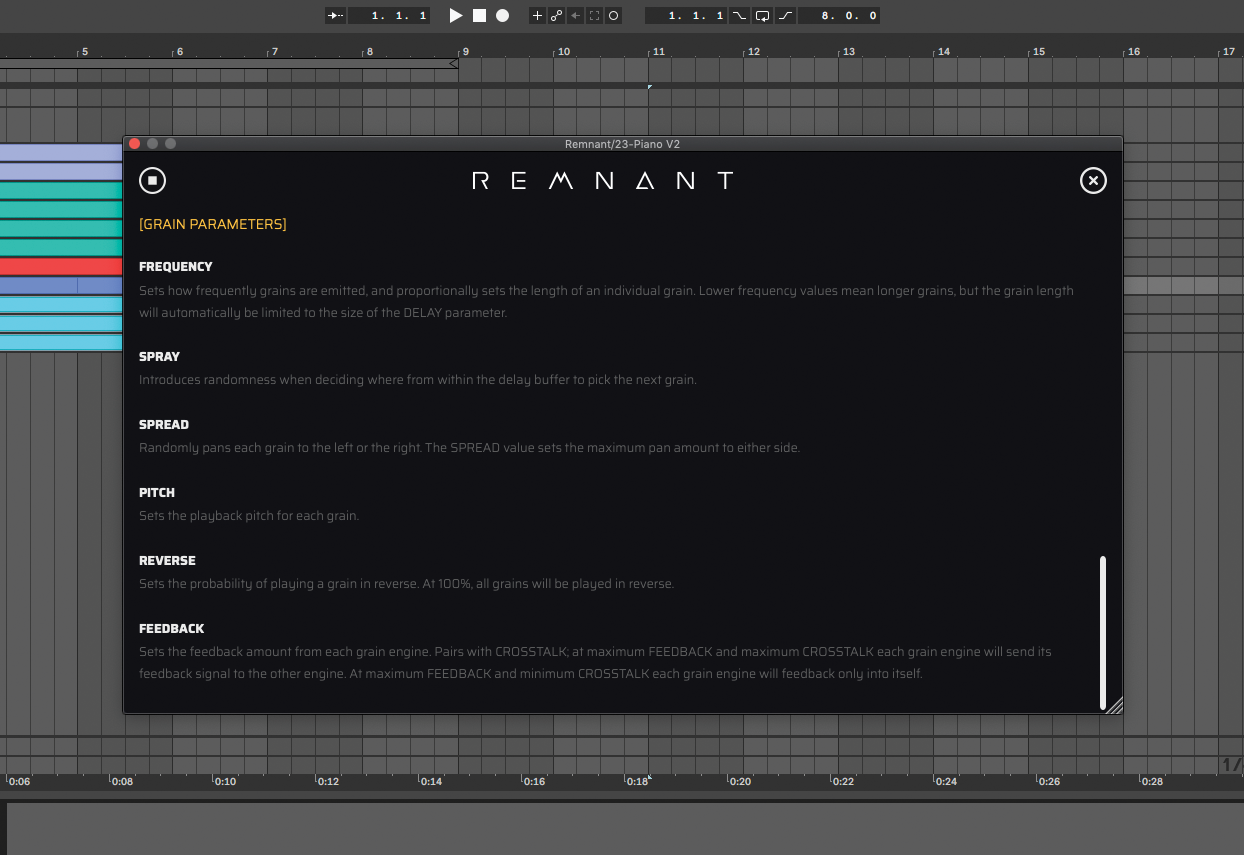
Step 2: To give this simple piano part more depth and space, we load Remnant onto the channel. While the default preset doesn’t quite have the sound we’re looking for, you can clearly hear how the effect is dissecting the sound into grains.
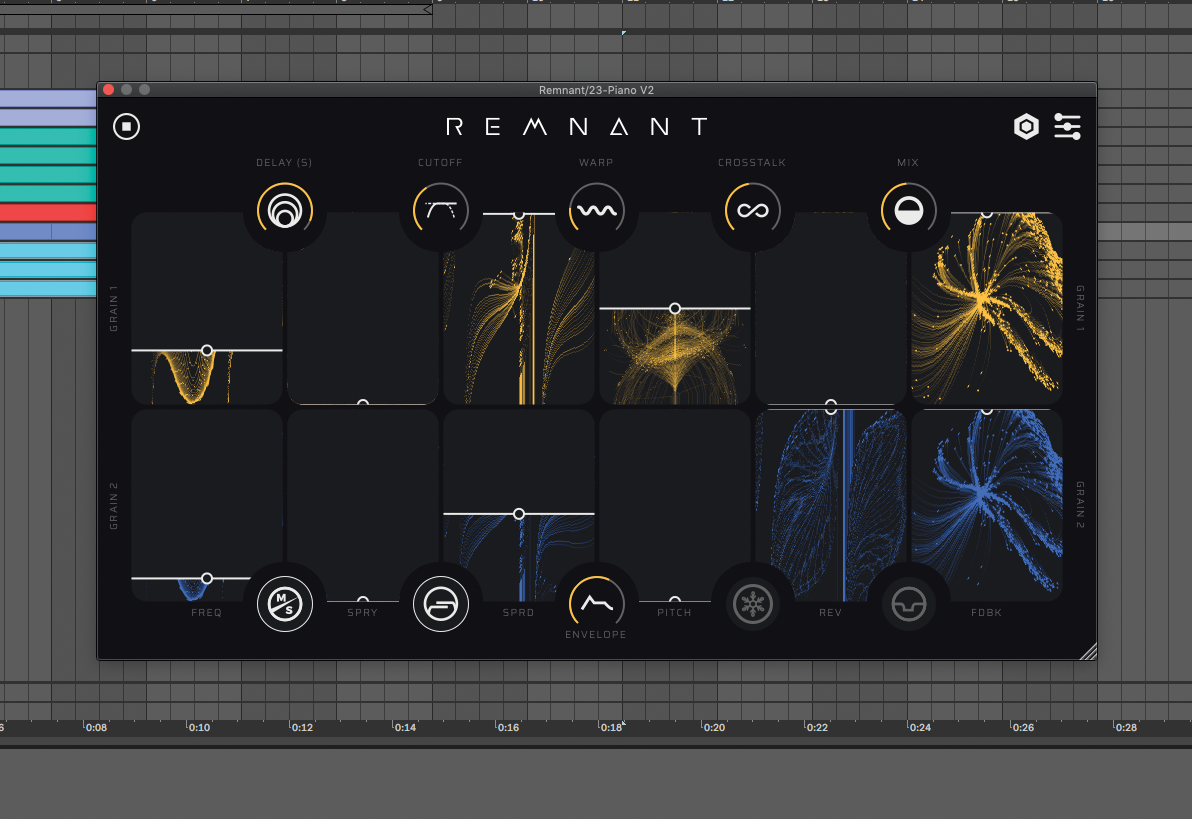
Step 3: In the case of Remnant, there are two independent grain engines with separate controls. To achieve the desired effect, we use different settings on each engine. For example, the delay times are slightly different and I have reversed and pitched Grain Two down an octave.
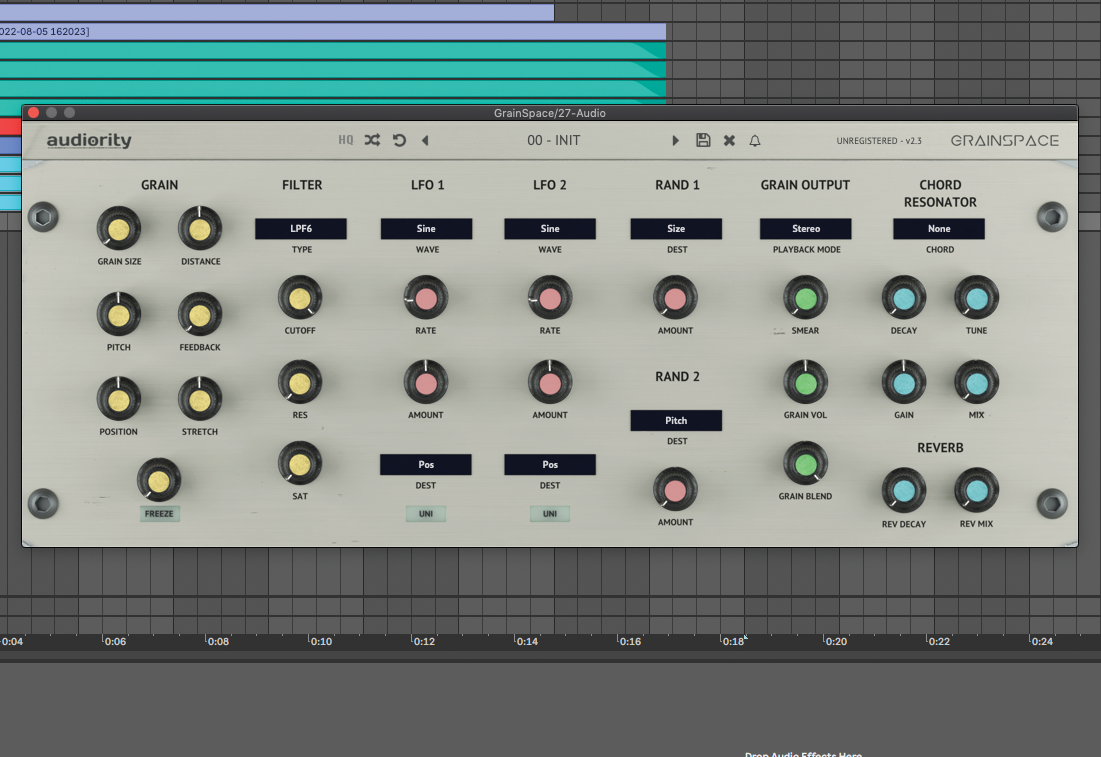
Step 4: Audiority Grainspace is another granular effect that can help to add exciting new sonic characteristics to previously dry sound. Or in this case, to create unique new textures out of them. Here Grainspace is at work over a dry vocal.
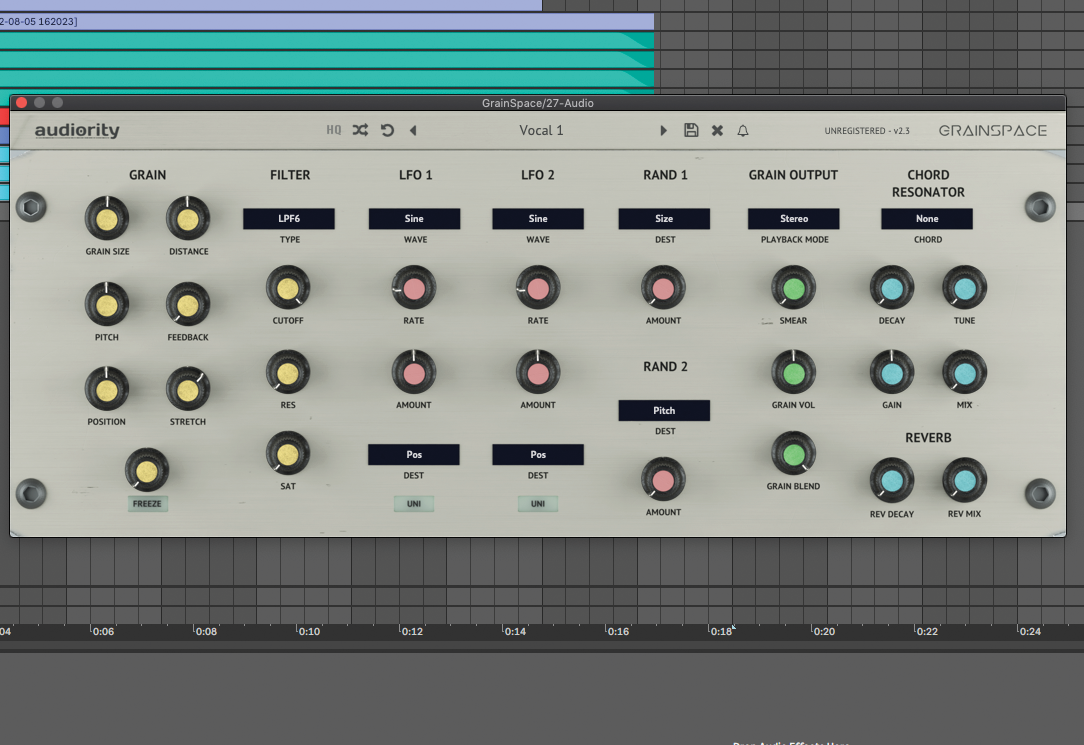
Step 5: The idea is to create a repeated stuttering part from the vocal by adjusting Grainspace’s Grain, LFO and Reverb parameters. Let’s start by bringing the Grain Size up to around 260ms and increasing the Stretch to 20%.
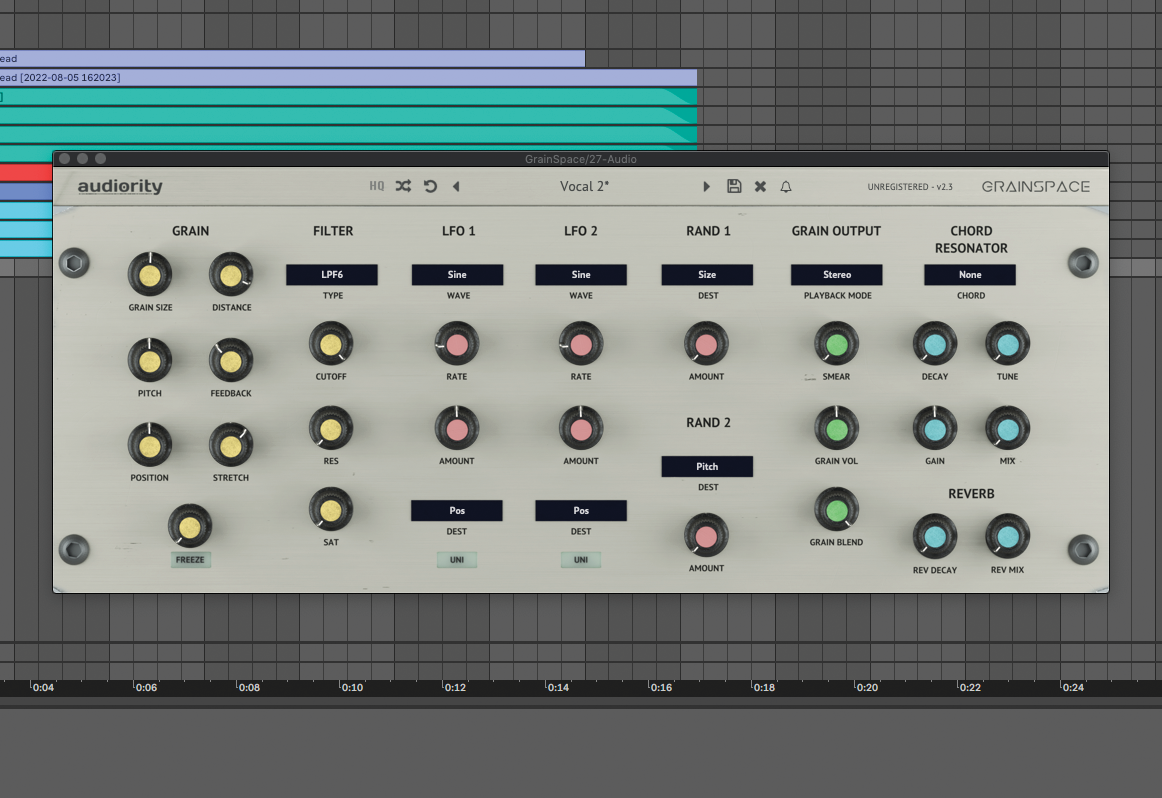
Step 6: This is starting to create a glitchy effect, but it would sound more fluid by increasing how often the grains repeat. We can achieve this by increasing the Distance amount to around 80% and the Feedback to 40%.
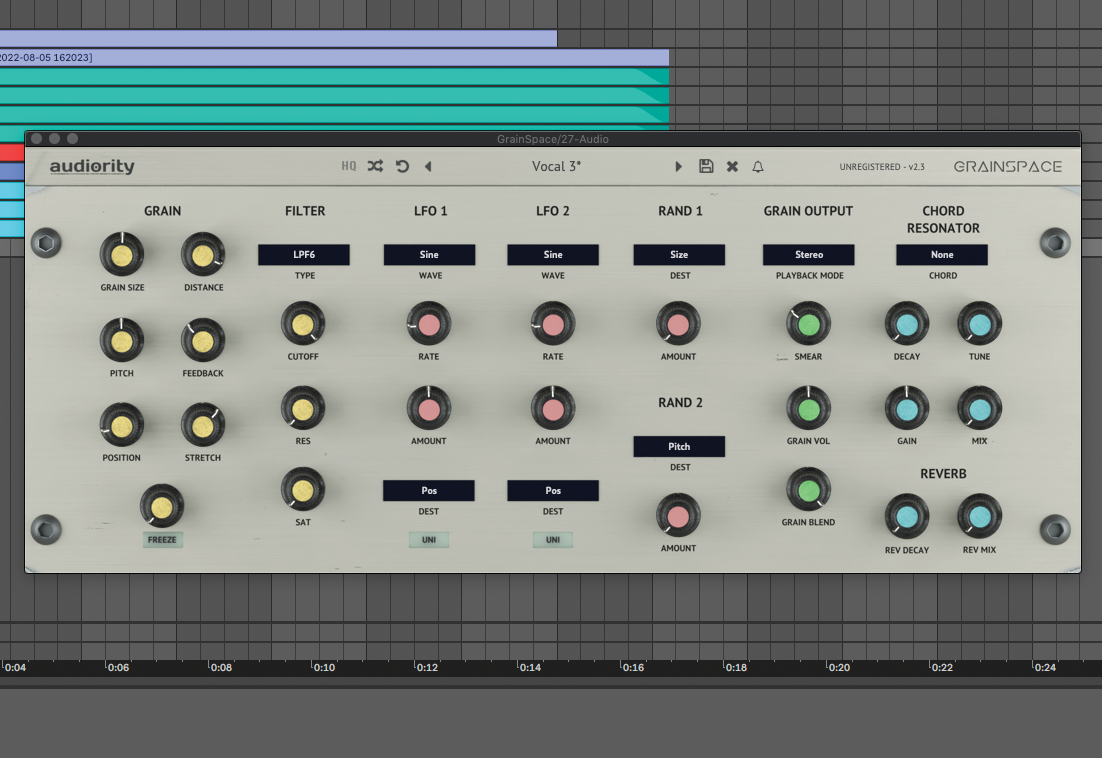
Step 7: We can make the audio stutter even more extreme by decreasing the Position amount by around 50%, which creates a reverse effect. By now we’ve got quite an extreme stuttering effect, but we can slightly soften the jittering by increasing the Grain Output Smear amount.
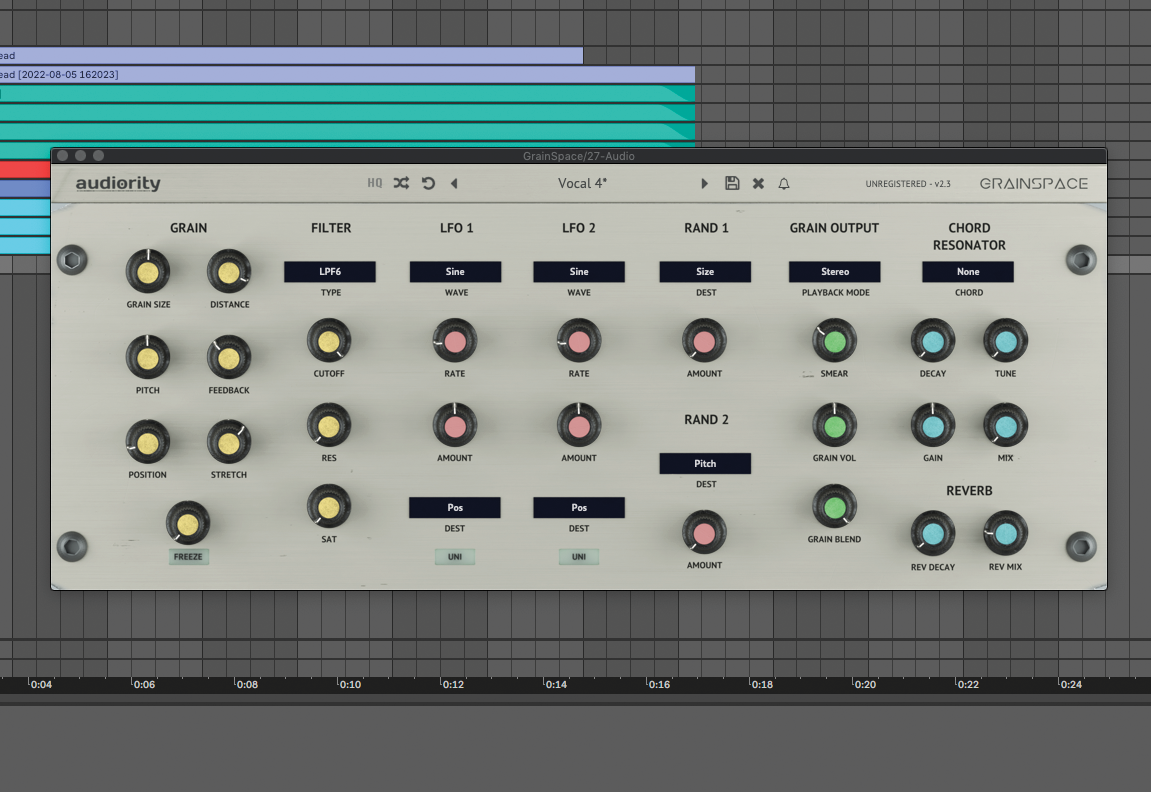
Step 8: We can soften the jittering even further and create some space for our new texture with Grainspace’s in-built Reverb. Increase the Rev Decay and Mix dials to taste. In this case, we’ve gone with a short decay at around 30% wet.
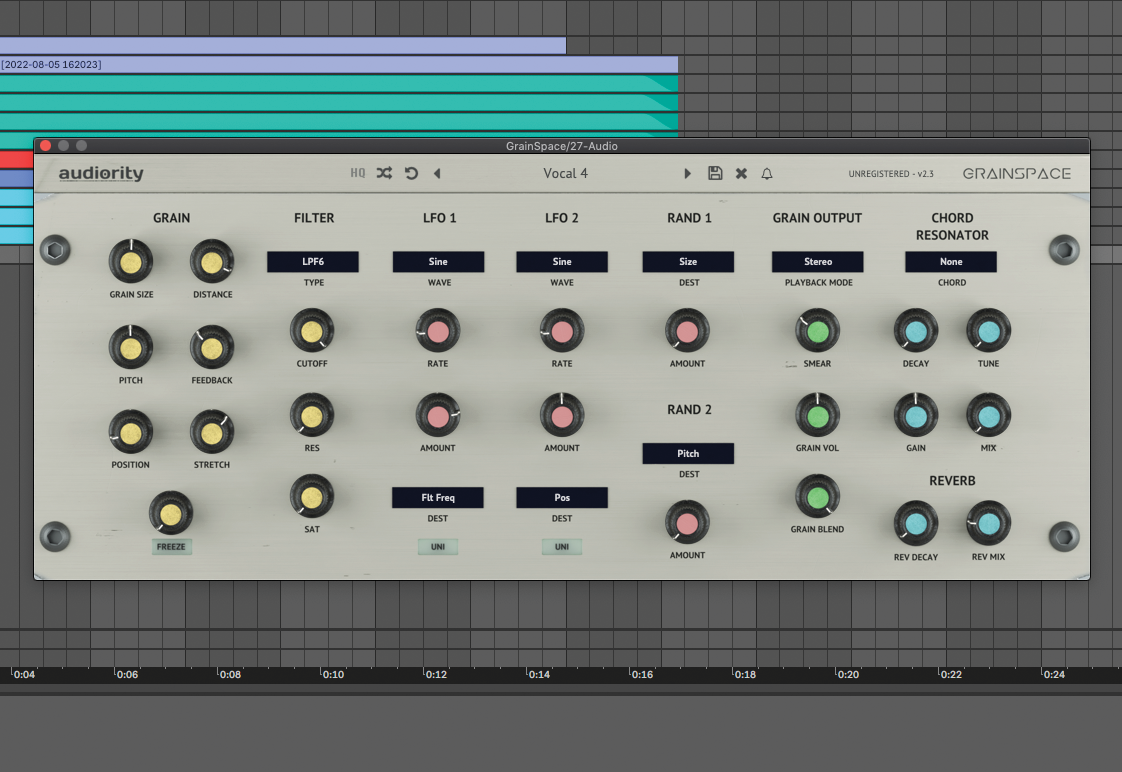
Step 9: To add some movement and variation to this texture, we can use one of Grainspace’s two built-in LFOs and assign it to the position dial and increasing the LFO Amount. This causes the reverse effect to seemingly drift in and out for a more dynamic texture.
Physical modelling reverbs
Physical modelling synthesis refers to sound synthesis methods in which the waveform of the sound to be generated is computed using a mathematical model, a set of equations and algorithms that can simulate a physical source of sound, usually a musical instrument.
While a physically-modelled reverb could technically be considered an algorithmic one, you’ll find more meaningful controls to customise the sound of the reverb.
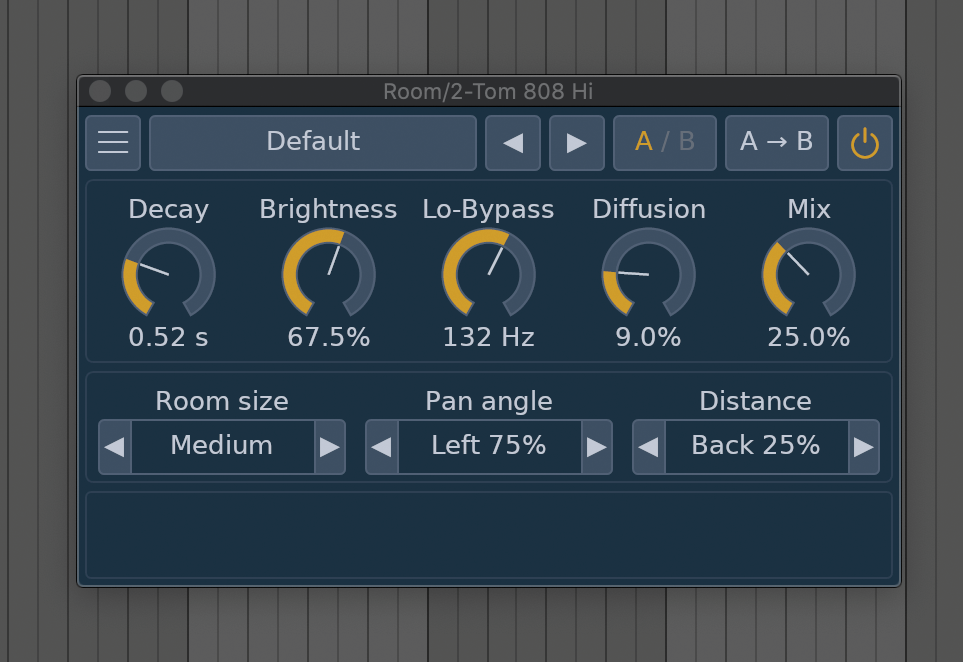
For example, ARVerb Room uses physical-based modelling to create realistic sounding room reverbs. You can affect the properties of the sound in the room by adjusting Room Size, Pan Angle and Distance. Physical Audio take another approach with their plugin, Derailer, built from mathematical models of strings, bars and spring connection elements. Variations can be teased out by manipulating physical parameters, with haunting and expansive results.
Pushing a normal reverb to extremes
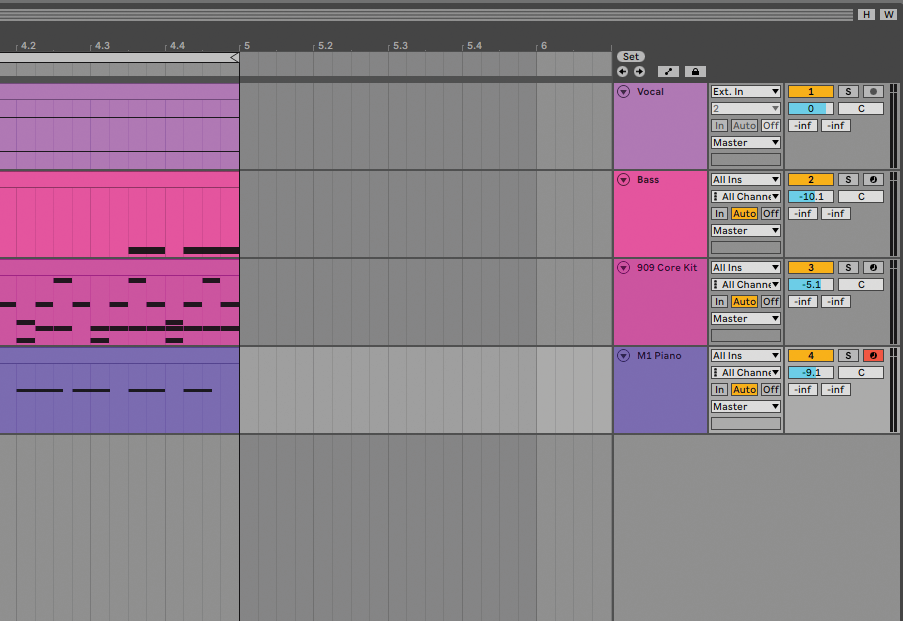
Step 1: Common reverb wisdom is that less is more. Generally, reverb should be used as a subtle glue giving elements space without changing their character. That said, reverb can be used creatively, and pushing it to extremes can yield inspiring results.
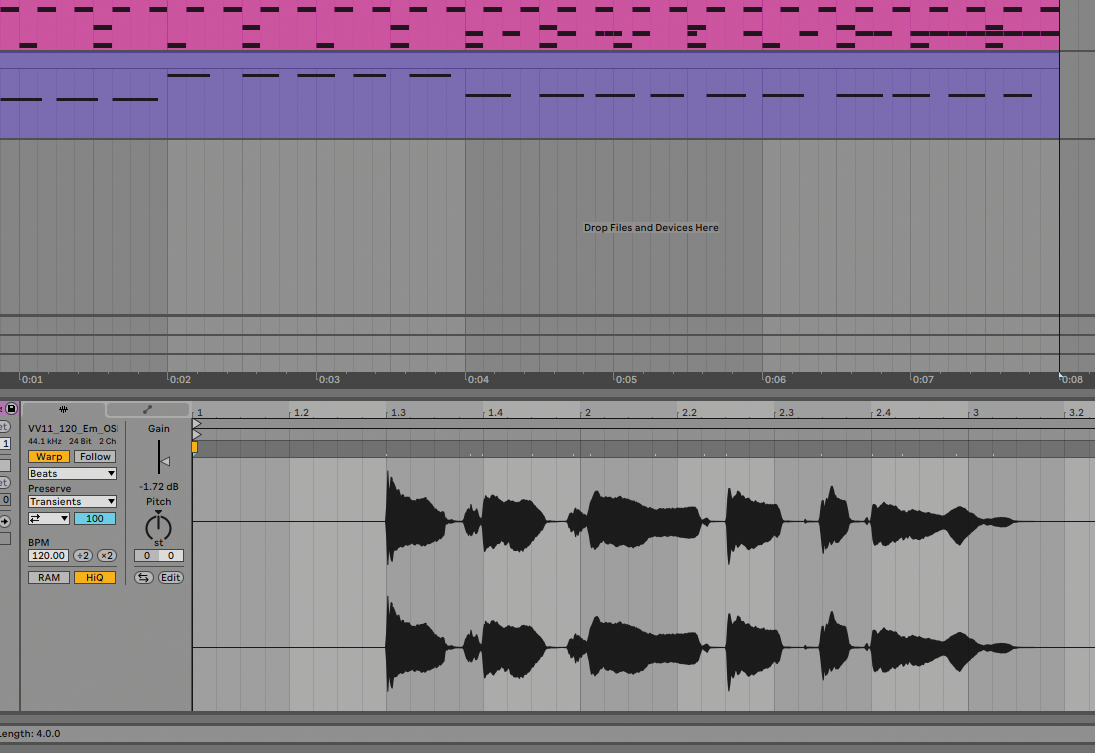
Step 2: Cranking reverb all the way up can swamp tracks, so to avoid this we’ll take advantage of D16 Toraverb 2’s ducking feature. We’re working with this vocal sample and we’re aiming to create a swell of reverb at the end of the four bars.
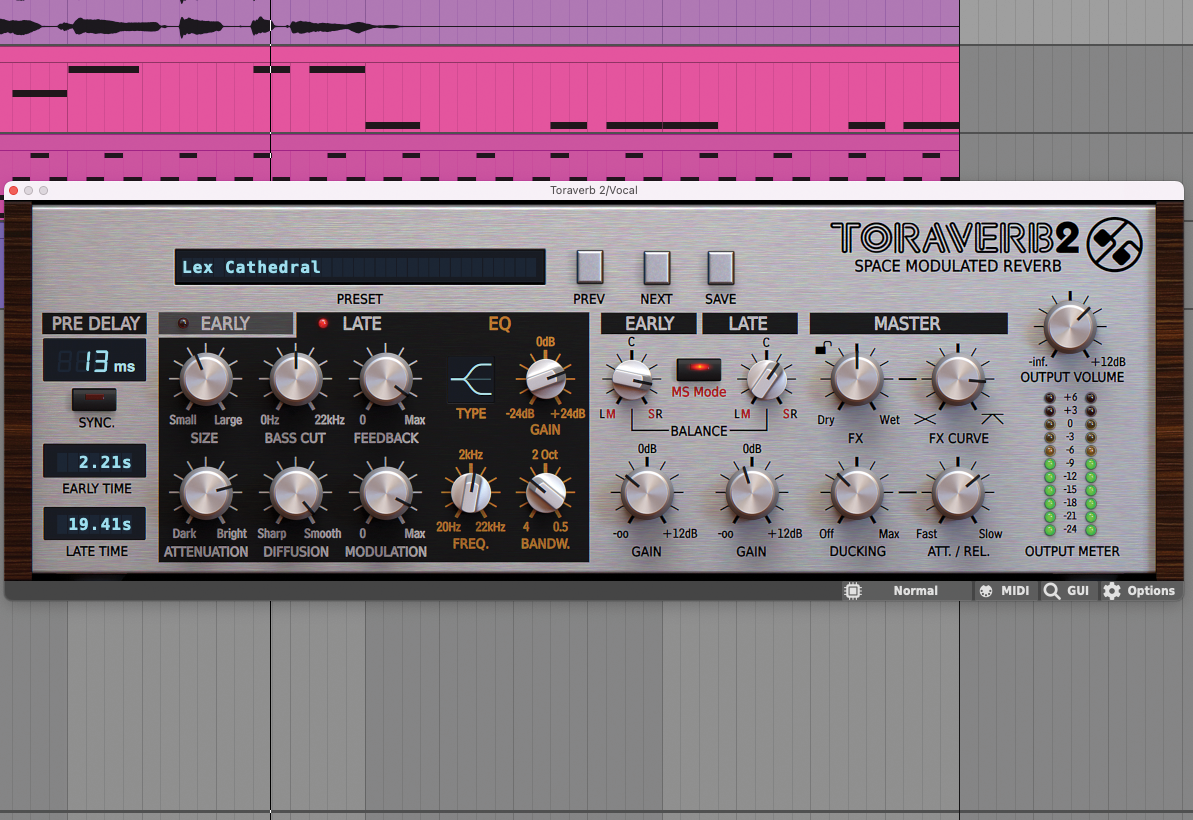
Step 3: Set the late reverb time to 20ish seconds. We’ve accentuated the verb with a boosted high shelf, cranked the feedback and modulation to near max and cut out all bass frequencies. This sounds big and euphoric, but the vocal is lost.
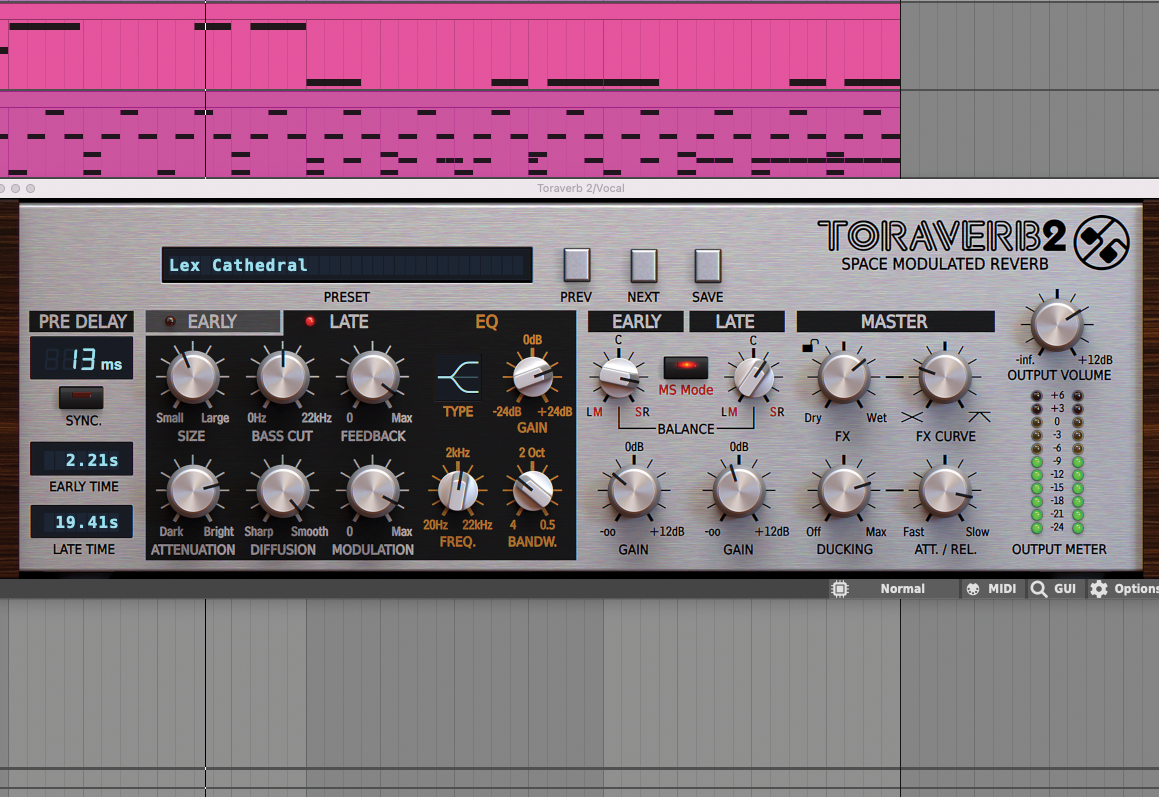
Step 4: Boost Ducking to 75% – this ducks the wet signal ducks out of the way of the dry. Turn down FX Curve and set Attack and Release to slow. Now we have a swell at the end of the phrase, almost like a white noise riser.
Three of the best reverbs
1. Valhalla Supermassive
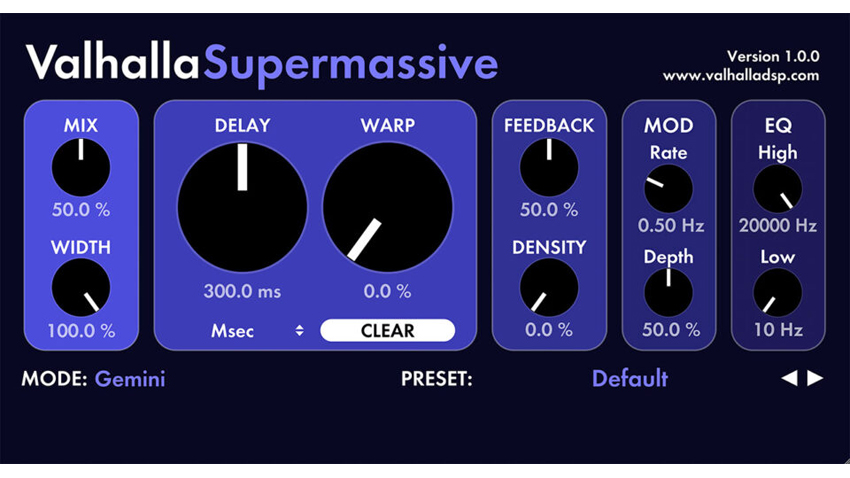
Price: Free | Download
Supermassive is a must. It’s free, fun and it pumps out unexpected sounds faster than the Millenium Falcon made the Kessel Run. They could easily charge $50 for Supermassive. It’s an inspiration machine, flick through the presets and you’ll have a track starter in no time.
2. Zynaptiq Wormhole
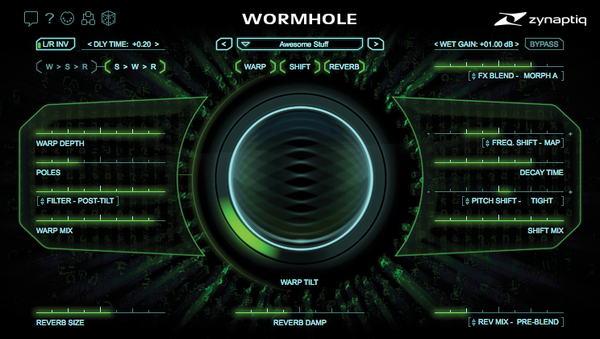
Price: $159/£139 | Buy
Also space-themed, Zynaptiq Wormhole is perfect for sound designers and musicians looking for extremes. With a UI straight out of a Halo game, Wormhole’s multi effect processing and randomisation options will take you to places where no one has gone before.
3. D16 Toraverb 2

Price: $70/£59 | Buy
D16 Group didn’t set out to emulate any classic hardware or recreate algorithms of days past – with Toraverb 2 they’ve created something entirely new. With dedicated early/late sections and mixer, it lets users create practically any algorithmic reverb.

Future Music is the number one magazine for today's producers. Packed with technique and technology we'll help you make great new music. All-access artist interviews, in-depth gear reviews, essential production tutorials and much more. Every marvellous monthly edition features reliable reviews of the latest and greatest hardware and software technology and techniques, unparalleled advice, in-depth interviews, sensational free samples and so much more to improve the experience and outcome of your music-making.

