How to master wavetable synthesis: "From the PPG Wave through to hit plugins like Massive and Serum, this is a synthesis method that has stood the test of time "
Get to know this synthesis method by its basics, then discover the more innovative sides of today’s forward-thinking wavetable synth plugins
Synthesizers all have their differences and their similarities. One crucial way to tell the difference and categorise different instruments is by the type of synthesis they employ. The history of these synthesis methods runs parallel to the development of the synth as a serious instrument, and to the development of sound and music itself.
Early synthesizers were chaotic and modular, but the first ‘small’ instruments, such as the Minimoog, offered a ‘subtractive’ synthesis type where a complex waveform was sculpted and filtered to create the main body of the sound. At the same time, West Coast synthesis got its start, with Don Buchla using low-pass gates and wavefolders to ends that were similar… but again, different.
Making waves
When the digital era hit, subtractive synthesis was obliged to move aside for two of the most exciting new digital technologies to vie for popularity. One was FM synthesis, which could combine its operators in dramatically different ways to make very new sounds. The other digital synthesis method was wavetable synthesis, which had its own way of doing things.
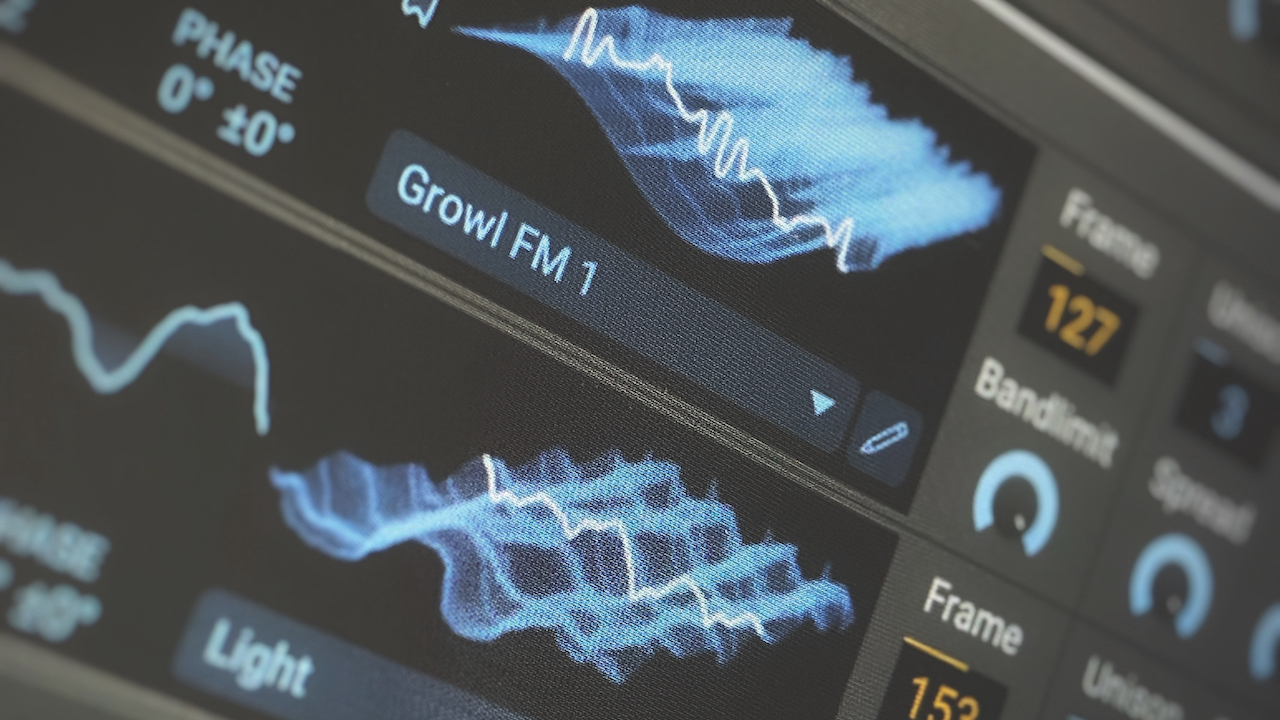
Wolfgang Palm was the main originator of the wavetable synthesis concept, and his PPG Wave instruments marked the beginning of the wavetable phase. The principles laid down by these instruments left most of the blueprint for wavetable synthesis as we know it today. So what are those principles?
How it works
Since this is digital synthesis, each oscillator waveform is stored as a single cycle. Be it a triangle, a sine wave, a square or anything more complex, the input note determines how many times per second that waveform is repeated – ie, its frequency; ie, its note.
This digital waveform storage means that the number of oscillator waveforms you can command is theoretically only limited by the amount of memory and storage on hand. It also means that you can flip instantly from one waveform to another, without too much bother.
From the PPG Wave through to hit plugins like Massive and Serum, and now Massive X and Vital, this is a synthesis method that has stood the test of time
Put many of these single-cycle waveforms together in a ‘bank’ or a ‘table’, and you have the eponymous ‘wavetable’. The main personality of a classic wavetable synth patch comes from flipping between (or ‘scanning’ through) different wavetables, changing the personality of the oscillator as you do. Add a second oscillator with a different wavetable loaded, and you’ve got a full start on a wavetable patch.
Get the MusicRadar Newsletter
Want all the hottest music and gear news, reviews, deals, features and more, direct to your inbox? Sign up here.
Modulation is a huge part of wavetable synthesis, helping to bring out the variation in waves through the loaded wavetable with LFOs, envelopes and so on. We’ll go through some strategies for using modulation to refine wavetable sound design over the course of this article. Similar customisation that you may find on a wavetable synth includes alternatives to wavetable scanning such as waveform bending – we’ll cover this too.
Wavetable synthesis is one of those great ideas that doesn’t easily go away, and in instruments from the PPG Wave through to hit plugins like Massive and Serum, and now Massive X and Vital, this is a synthesis method that has stood the test of time and seems set to continue to do so.
Try it for yourself…
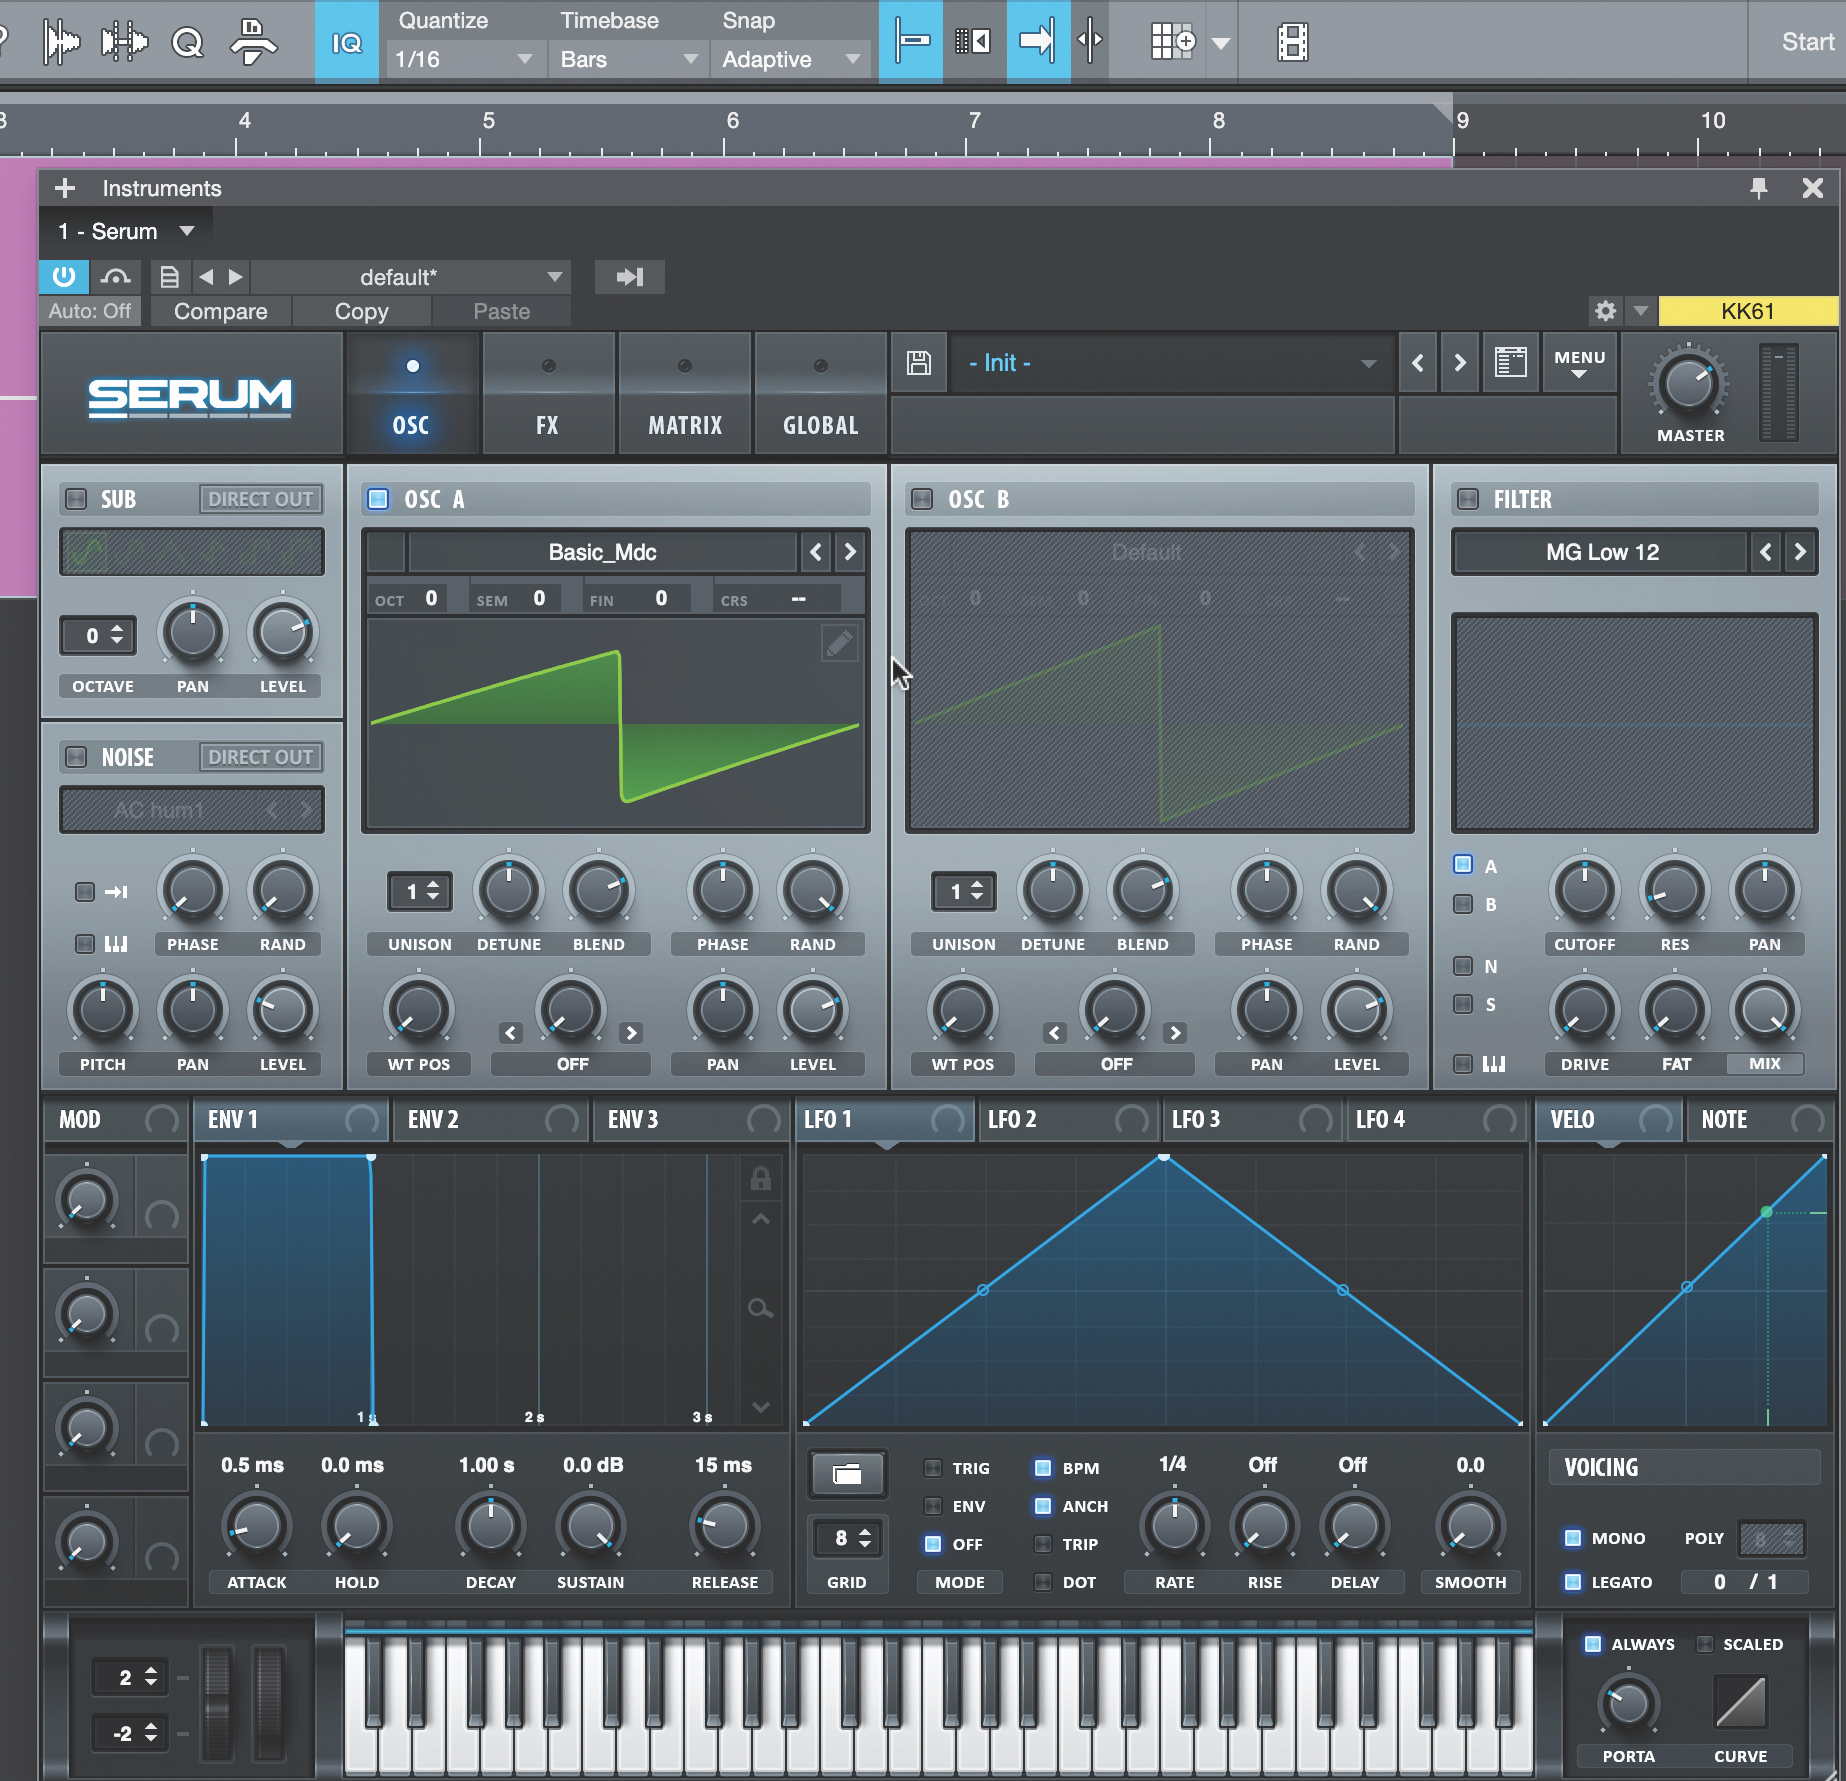
Load your synth and select a single wavetable oscillator. In Serum, we’ve gone for the Basic_Mdc patch in the Analog folder. Ideally, practically all processing should be switched off (or neutral), with no modulation or movement, to show how it works.
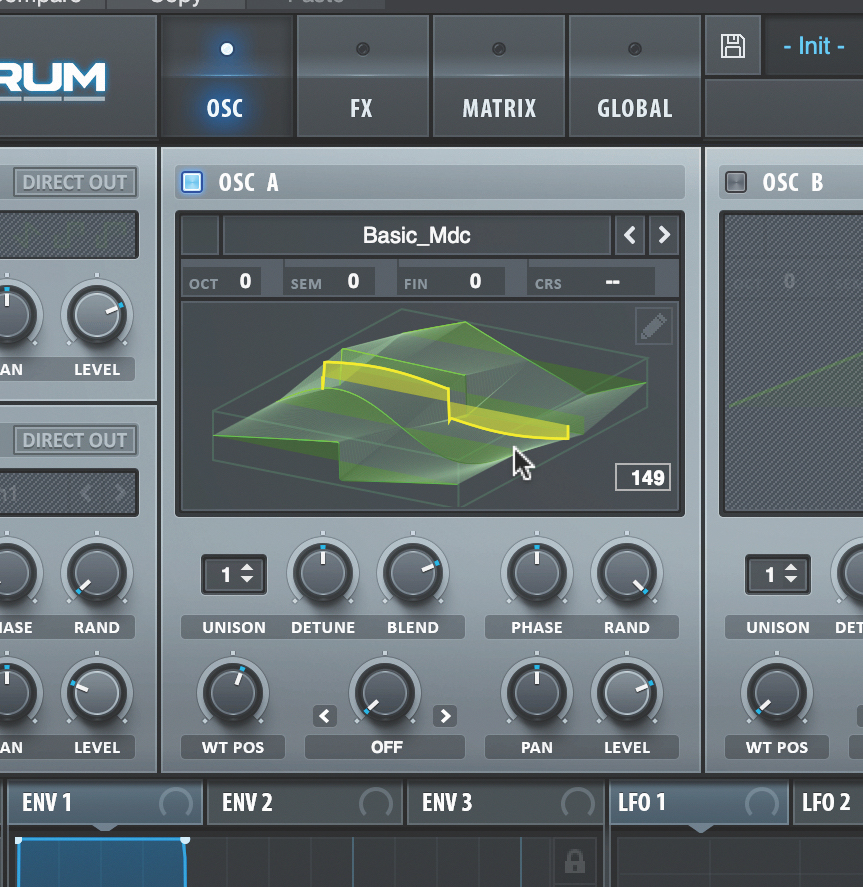
The original shape is a saw wave, but as we manipulate the WT Pos control, the shape morphs smoothly into other shapes. Clicking the oscillator once helps us see all the waves in the whole ‘wave table’, as each is selected one at a time.
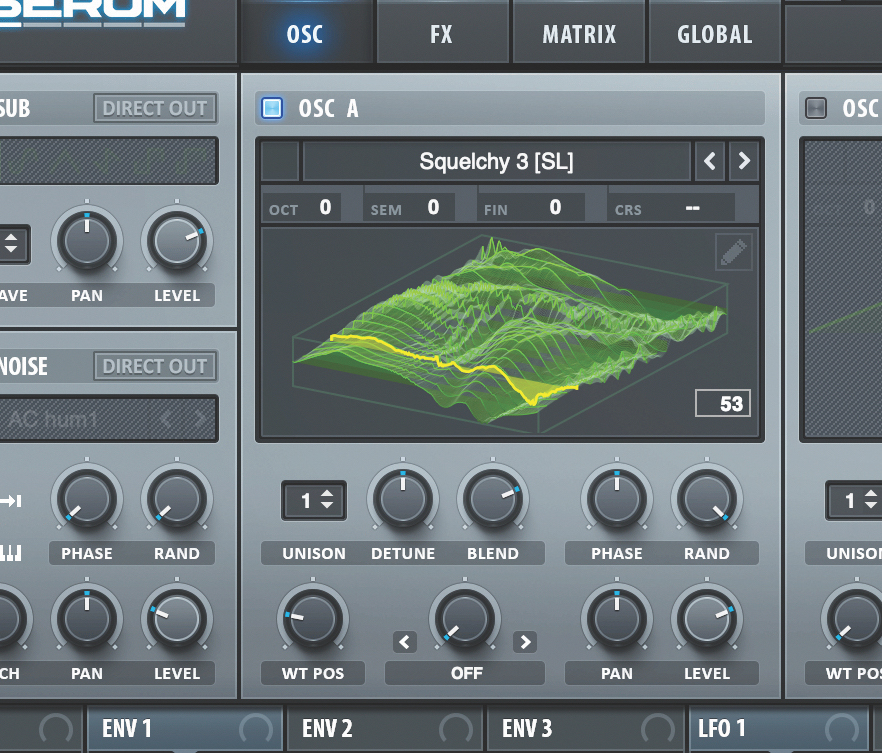
That wavetable was constructed of the four basic analogue waveshapes and the in-between stages as we morph through them. Now let’s try a wavetable that has a few more interesting shapes to get through. Squelchy 3 is a good example.
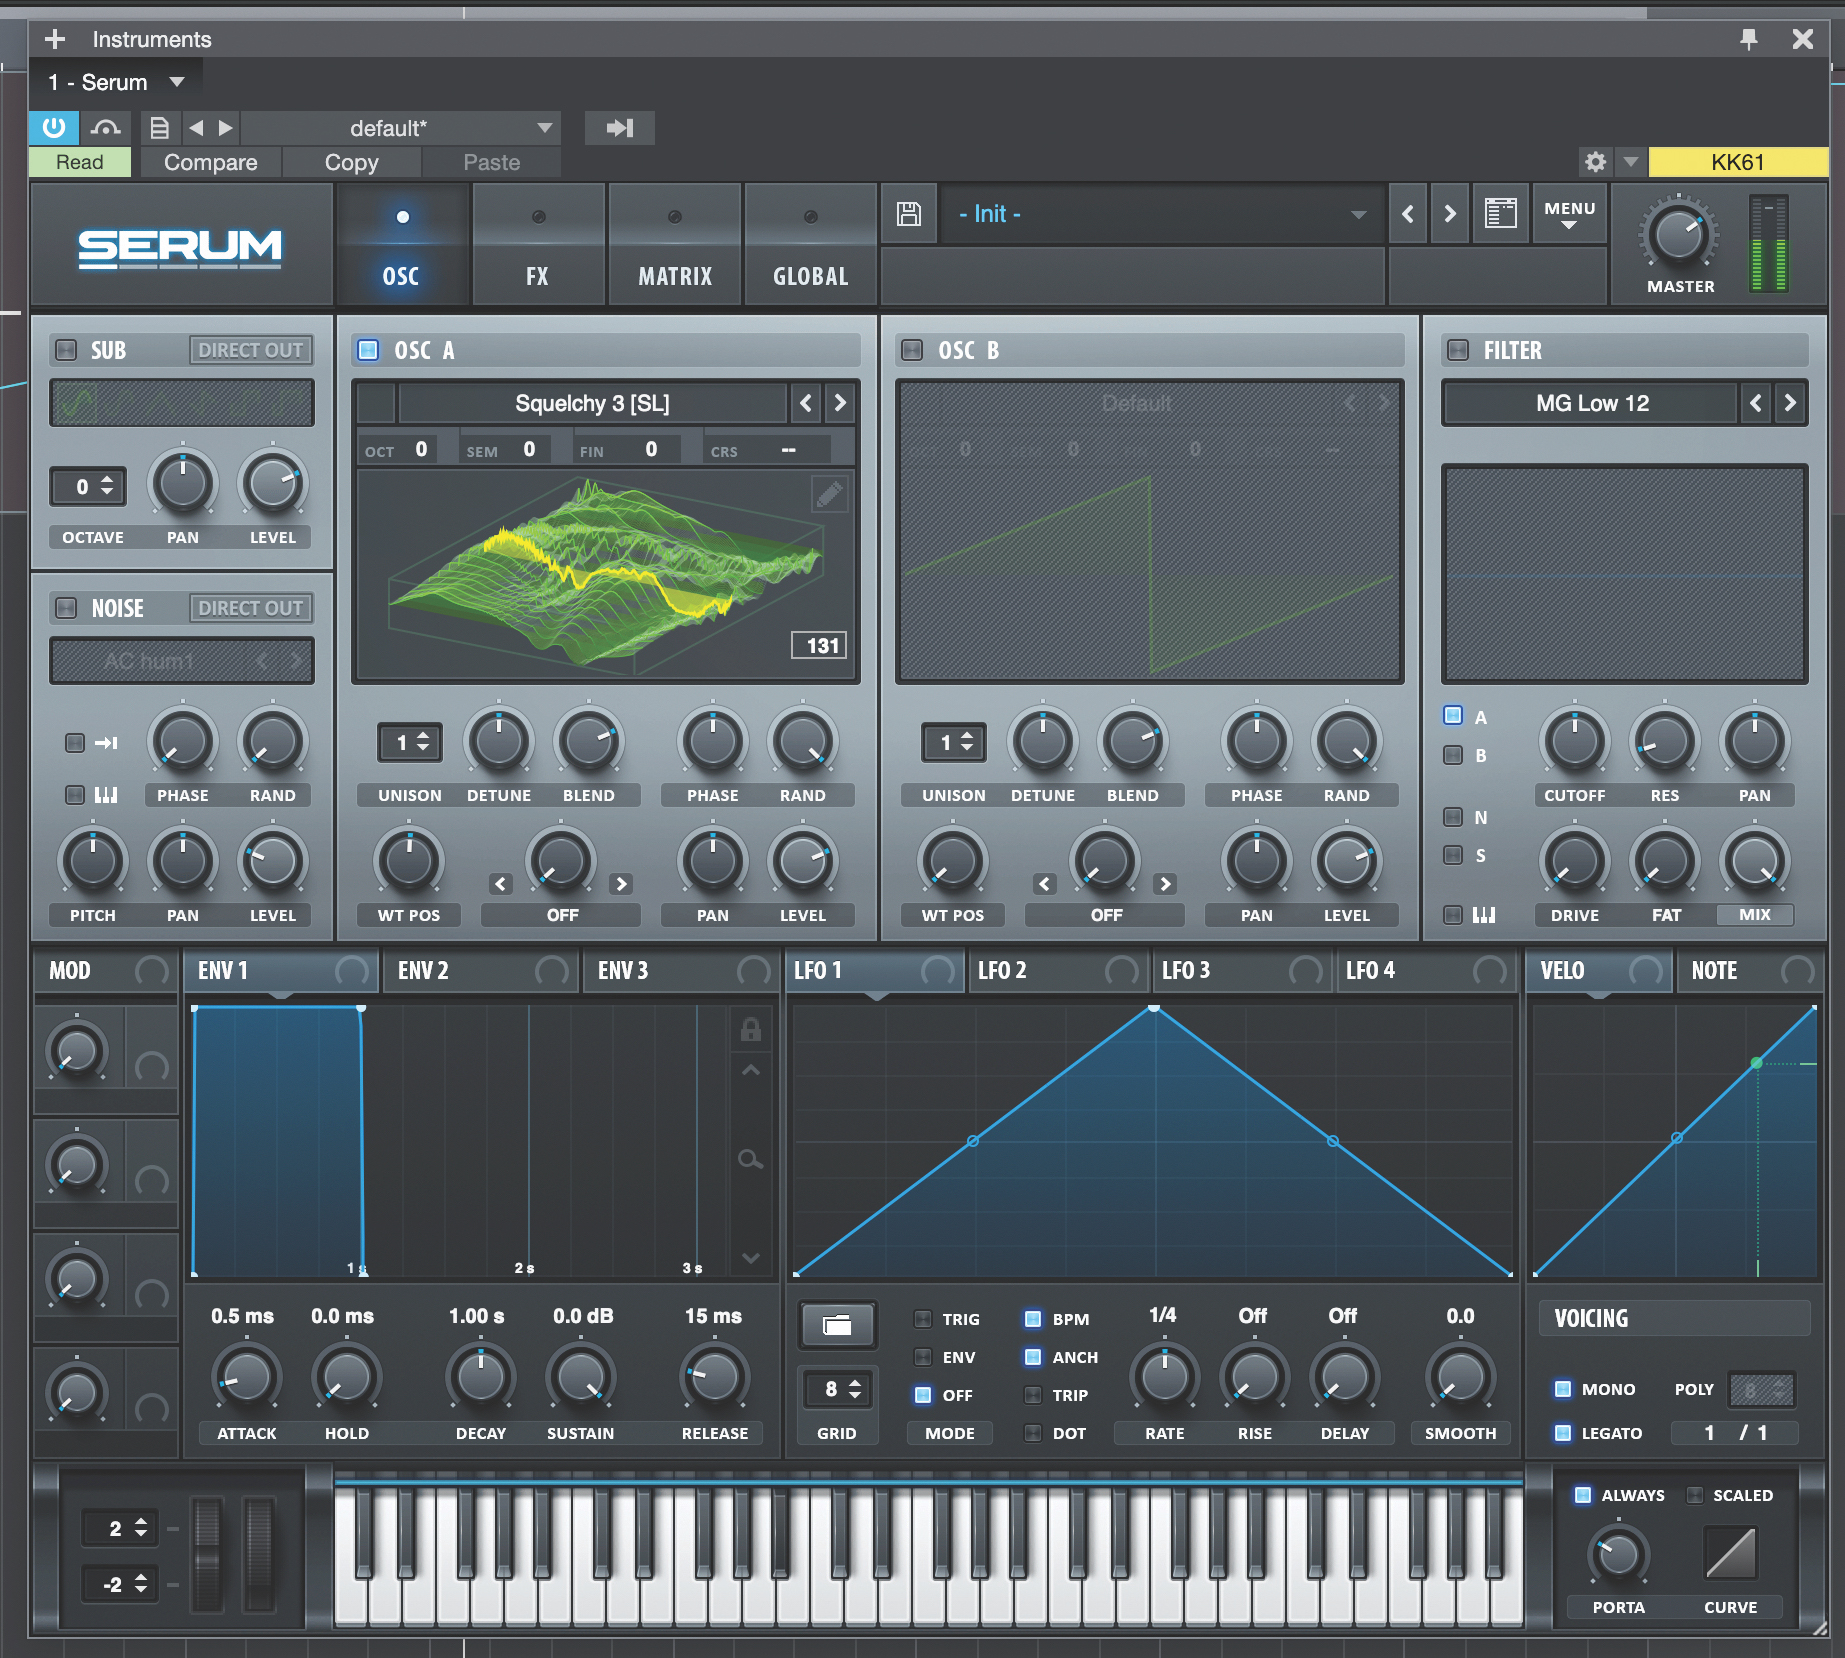
The audio files for this tutorial so far have demonstrated each wavetable with a single scan through the WT Pos knob over nine bars. But the special substance of wavetable synthesis comes out by playing with the parameter more musically…
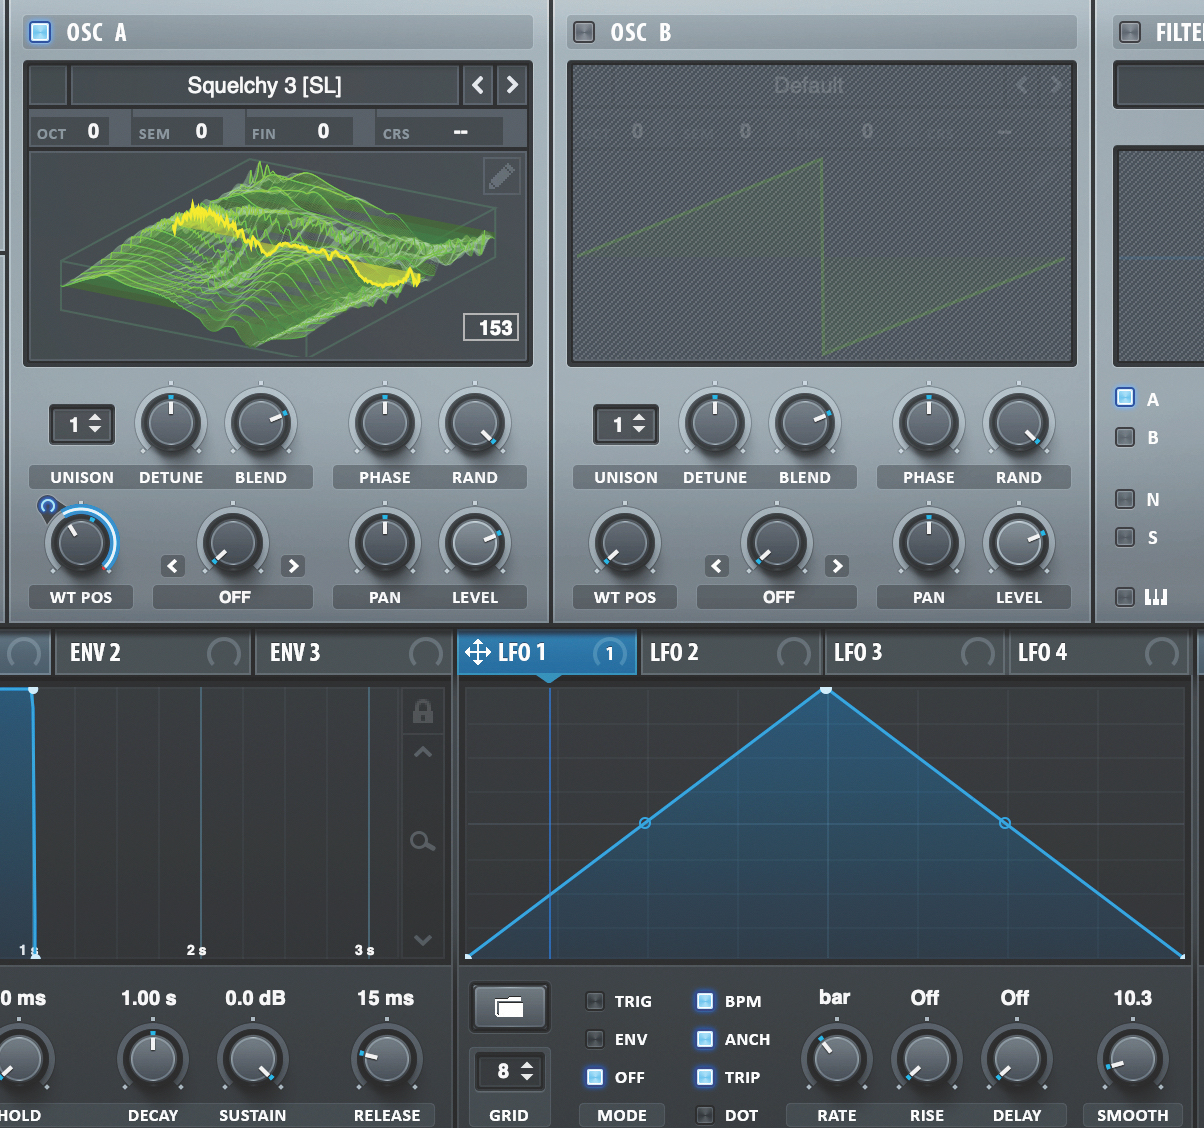
We could add an LFO to target the WT Pos control more regularly. As usual, depending on the speed, triggering and wavetable itself, this can have wildly varying results, but determining the results is a big part of the wavetable synthesis skillset.
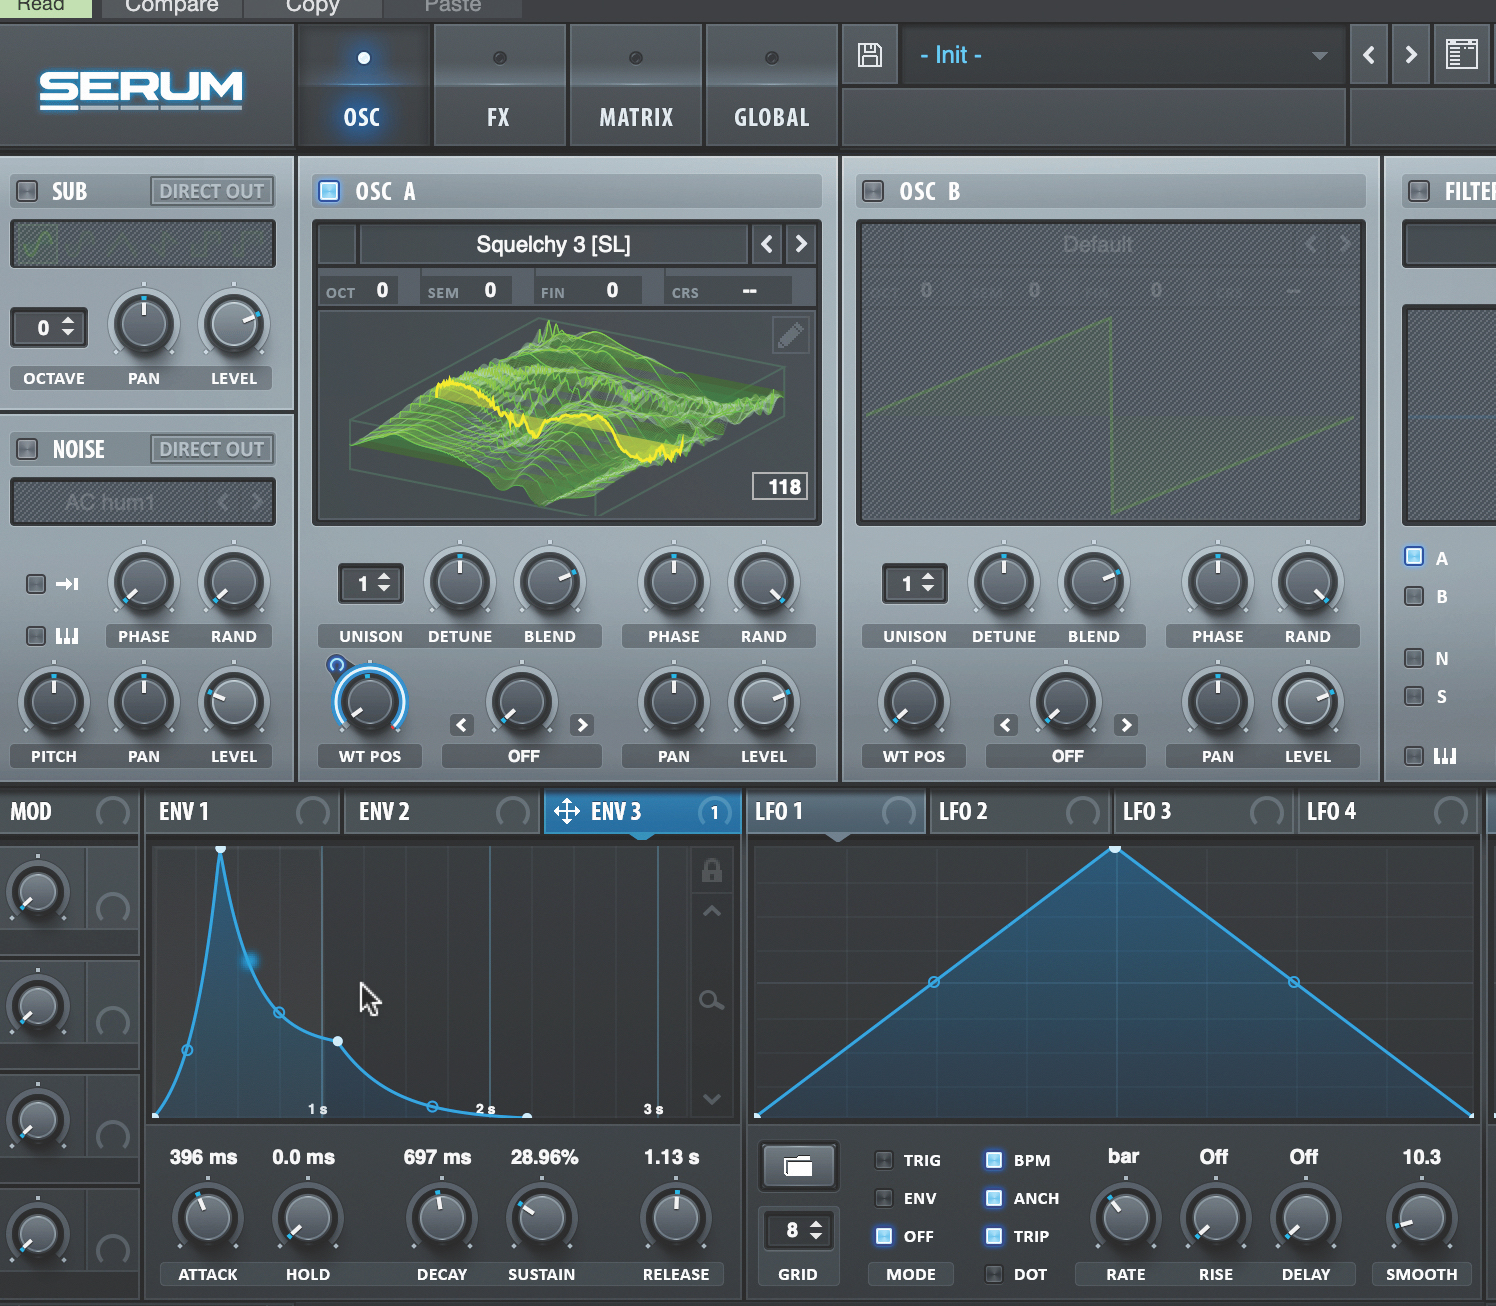
What about an envelope? By scanning through the wavetable as a note starts playing, and combining this and the existing LFO modulation, we get even more dynamic and variable. Careful with quick scanning moves, though.
Exploring modulation possibilities in wavetable synthesis
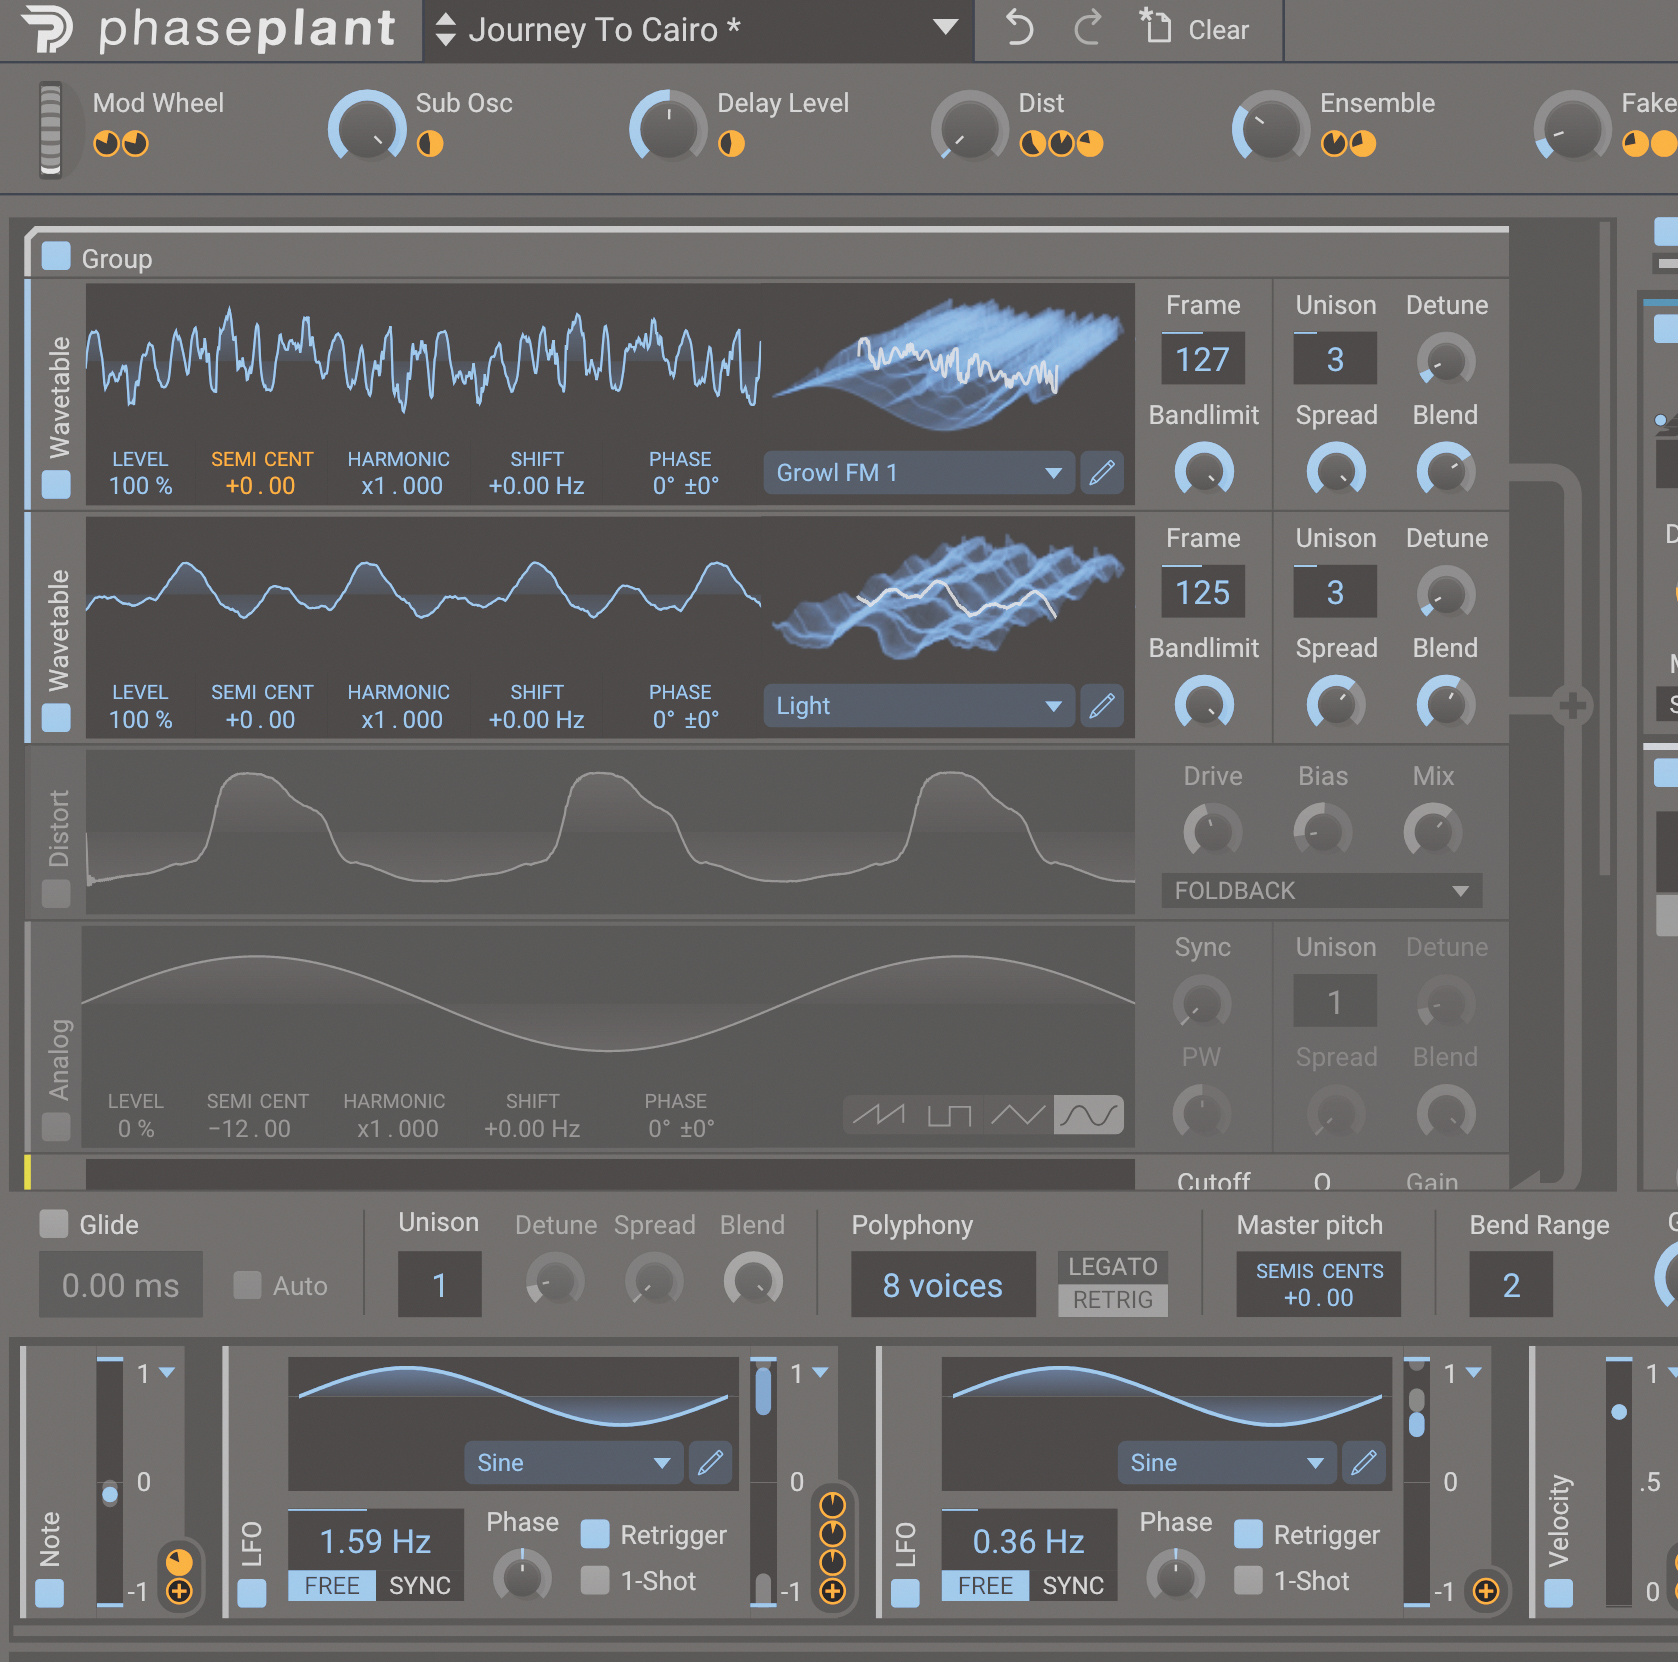
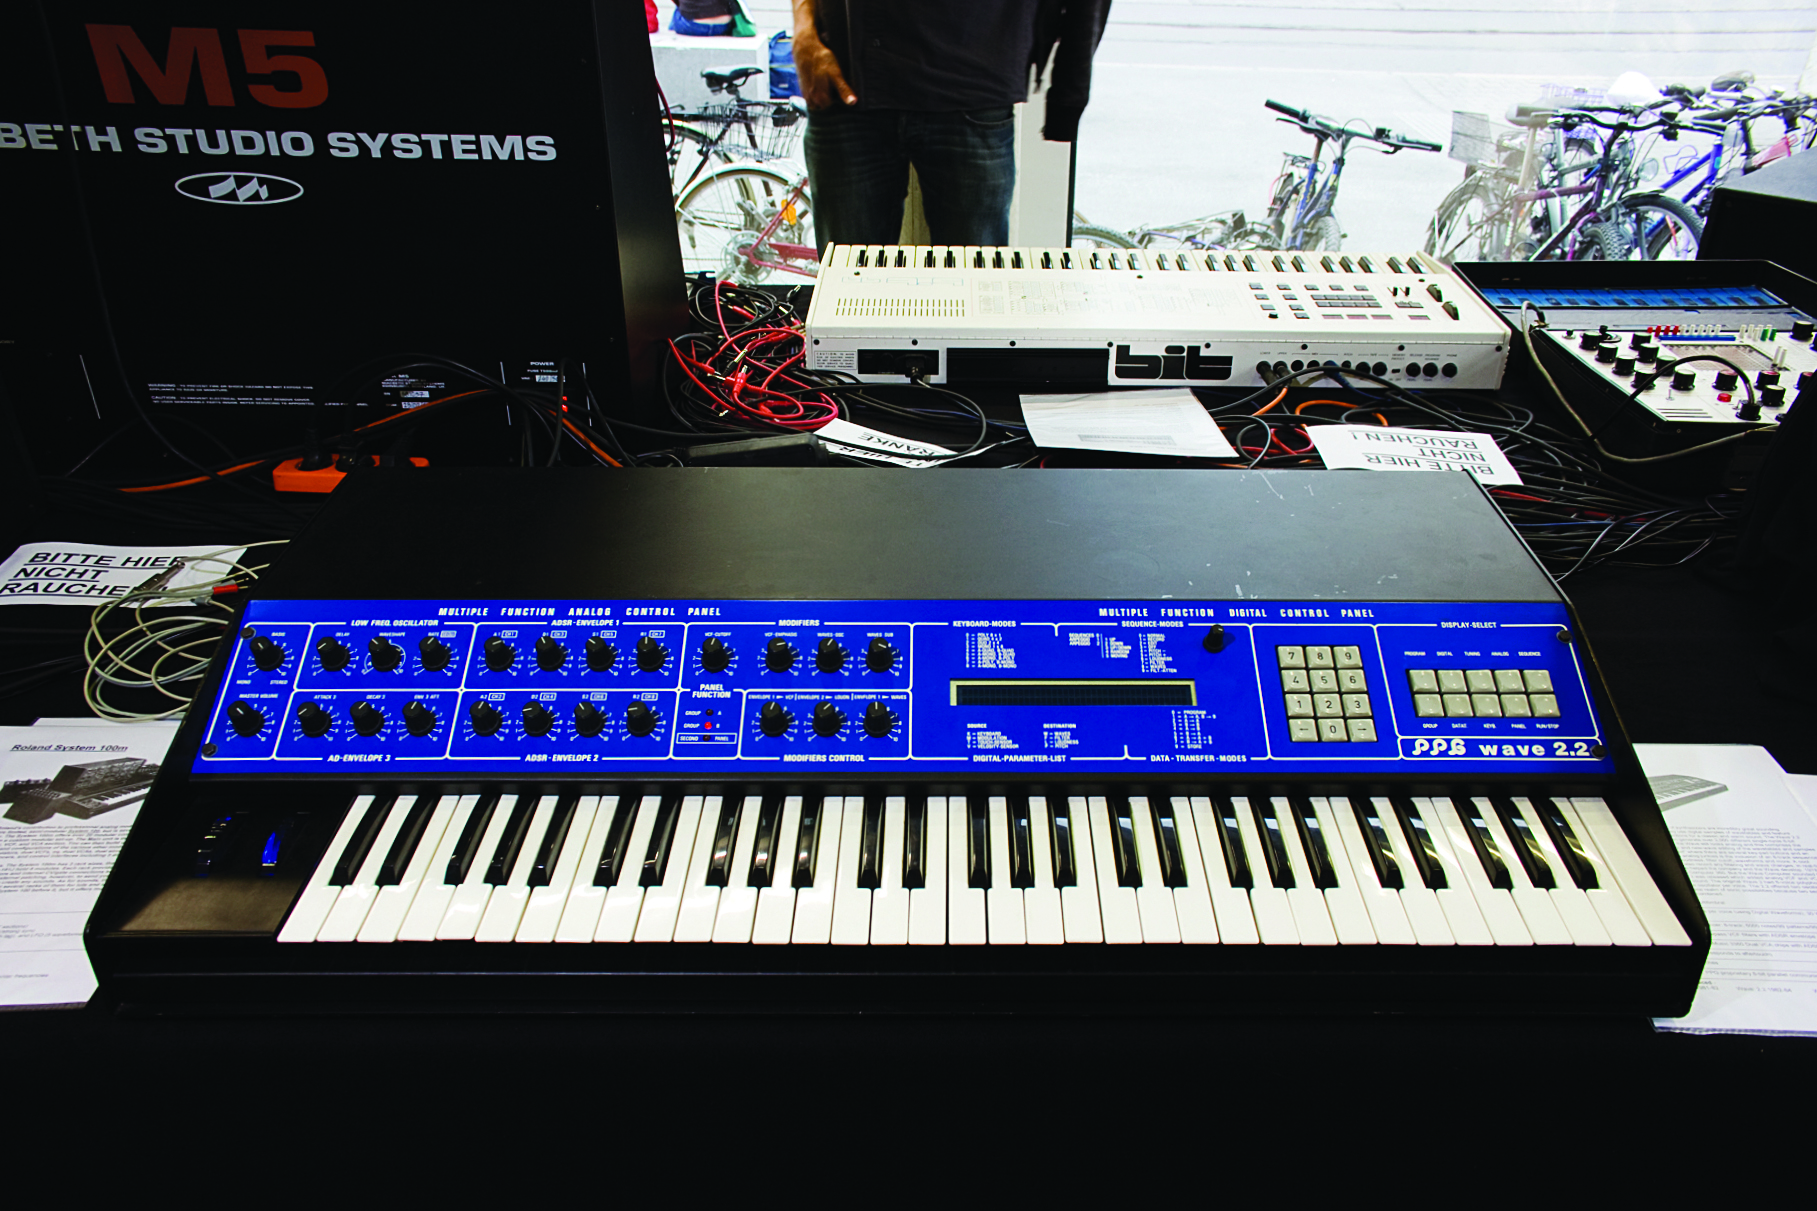
Here’s a patch in Phase Plant with two wavetable oscillators. We’ve removed all modulation from these, though the patch still has a lot of effects with modulation active. We’ll gradually apply modulation back to the wavetables to show the difference.
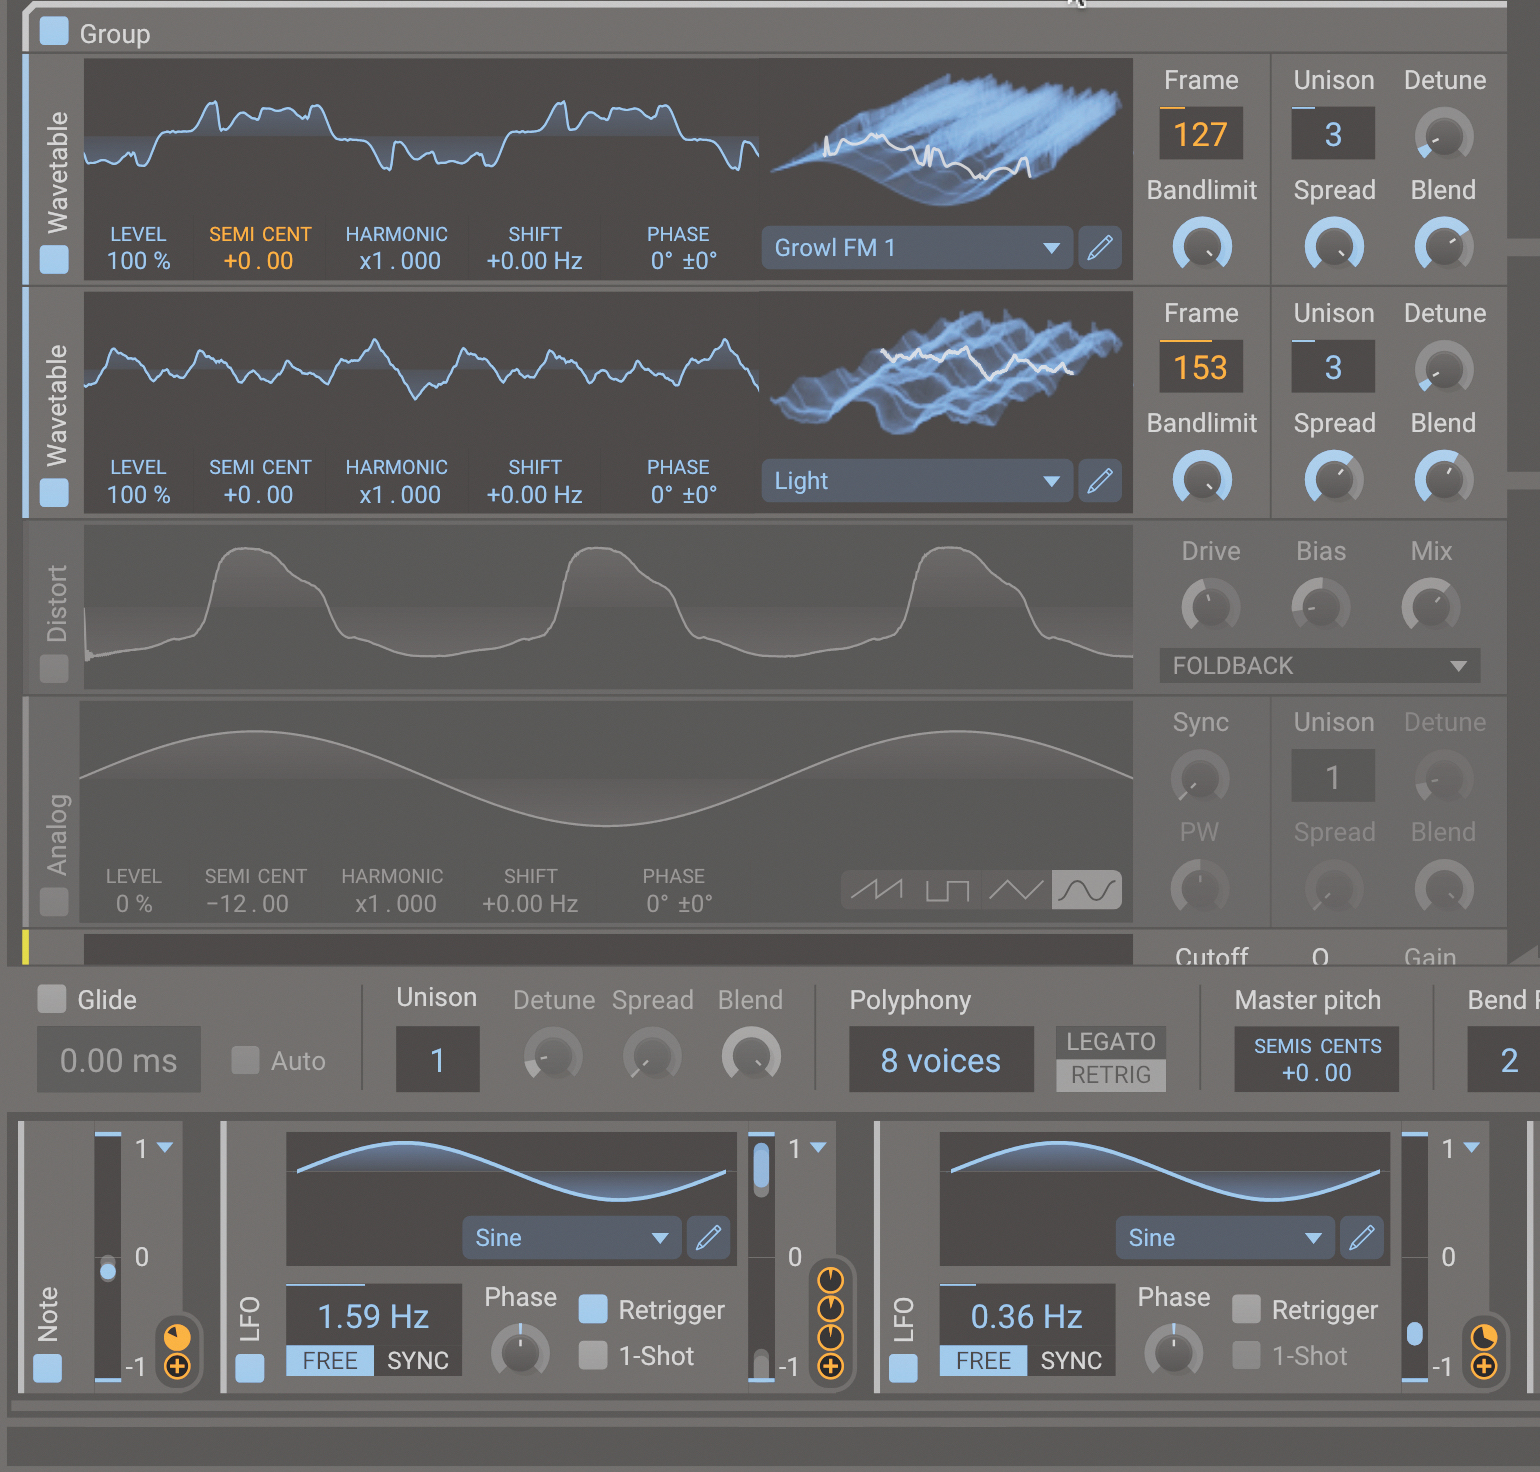
We apply the existing LFO to one wavetable’s Frame control (aka Position), and add in a second LFO to modulate the Frame on the other wavetable. Now we’ve got some instant polyphonic movement in both oscillators.
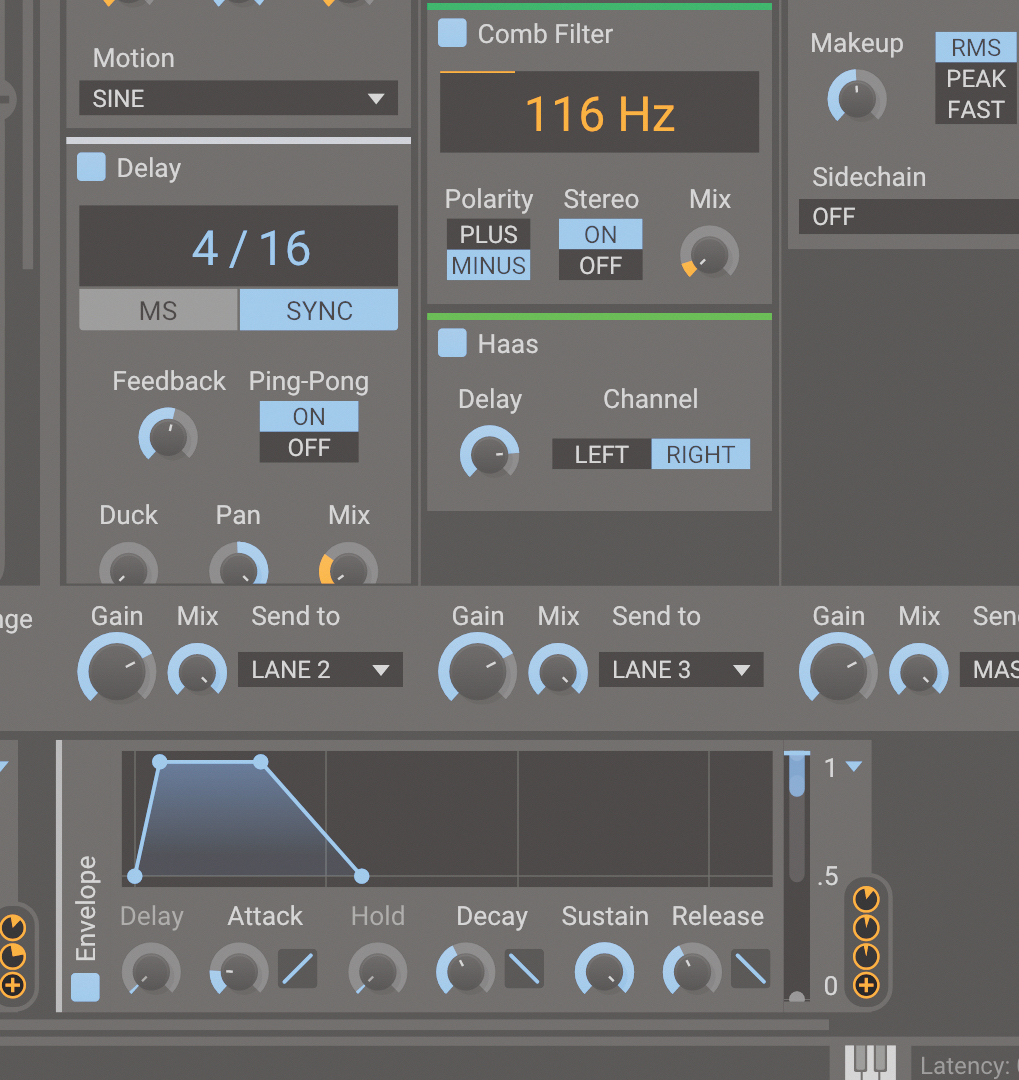
Getting more complex, we employ a third LFO to modulate each of those two LFOs’ Rate controls. Next, an envelope modulator adds instant pull on each Frame control with each new note, and also modulates one oscillator’s Detune control.
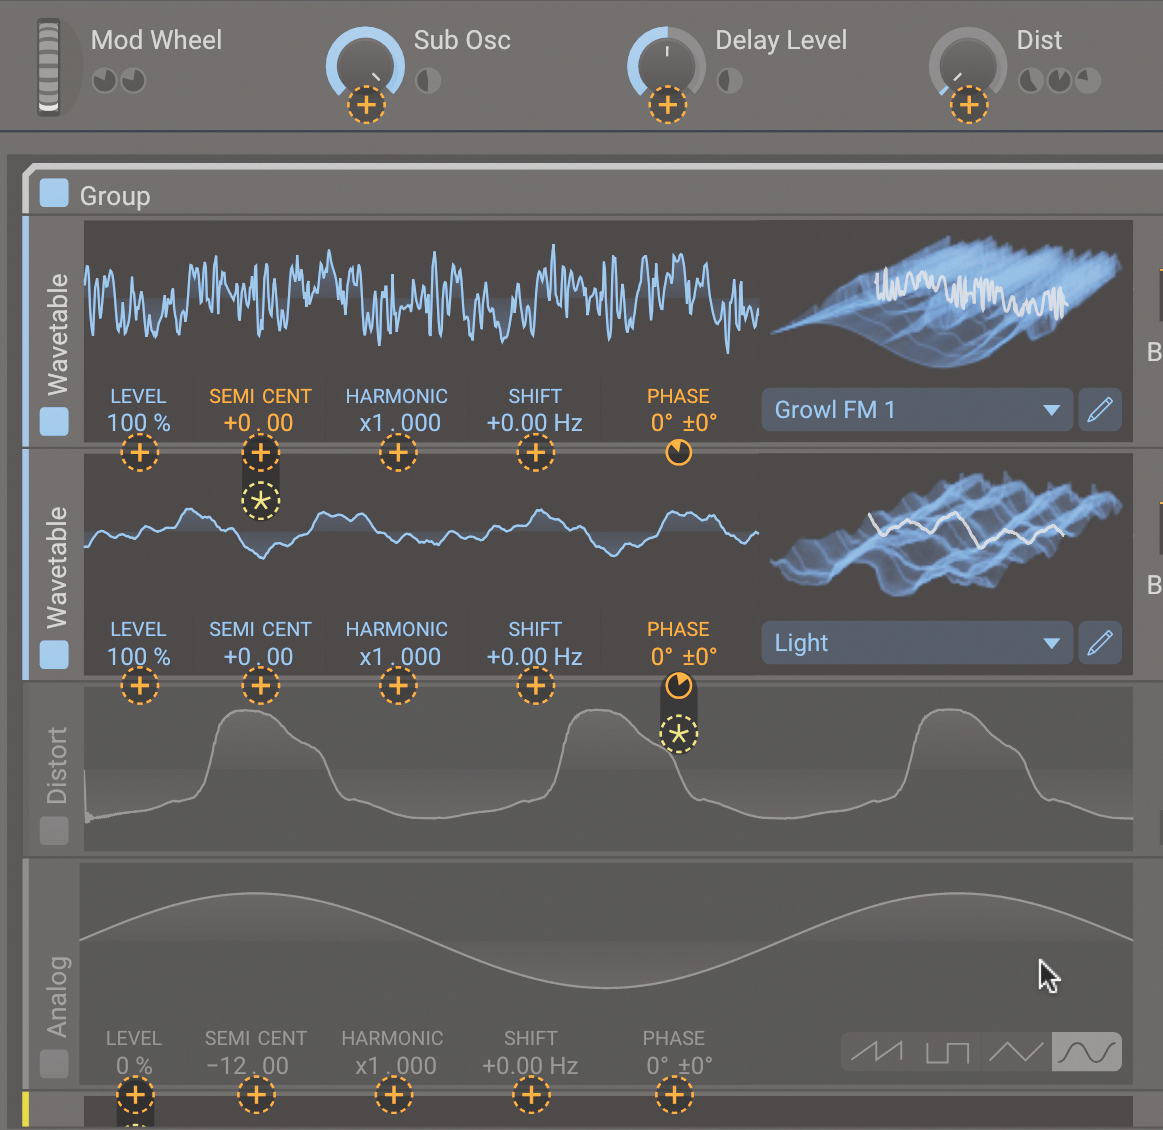
Other modulation destinations in Phase Plant’s wavetable oscillators include the Harmonic and Shift controls, although these are particularly extreme here. The Phase control gives a subtle way to modulate the wavetables across a new dimension.
Modulation in wavetable synthesis
With wavetable scanning using the ‘position’ dial, wavetable synthesis is a method that’s just begging for some creative modulation to be applied. Modulation could be applied to a wavetable that varies only slightly across its range, or to one that adapts a great deal as you travel through it – with appropriate and varying results.
It’s not just the position that acts as a modulation target, though. Any other wavetable-manipulating parameters your synth has are fair game for a bit of playtime, as we’ll show you in the lower walkthrough on this page.
But what should you modulate them with? The obvious answer is an LFO or envelope, as we demonstrate in these tutorials. You could try velocity or random modulator sources, but these will tend to reset and jump between values rather than moving smoothly between them, which would be the ideal type of movement for a wavetable patch.
Advanced wavetable scanning and manipulation
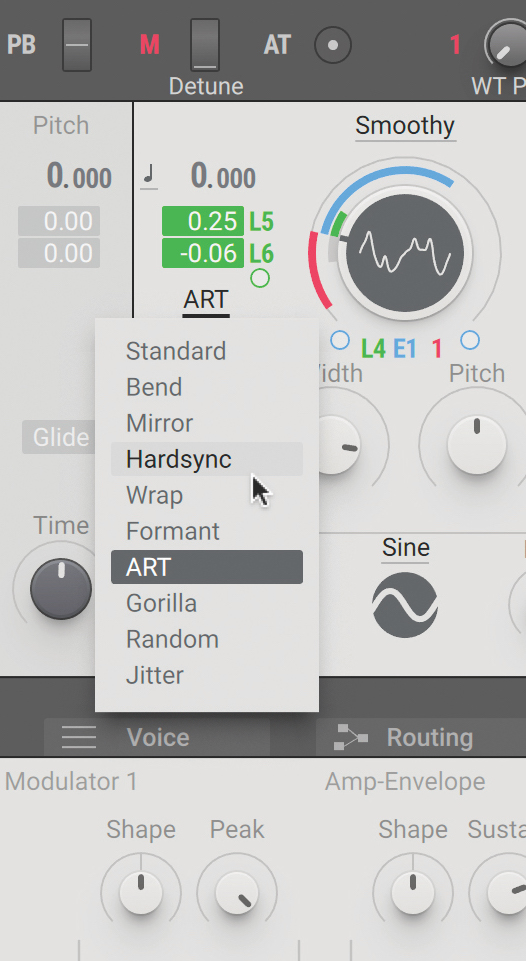
It’s not just a wavetable’s position control that deserves movement – some synths let you adjust other properties to skew any given waveform. Here in Massive X, each wavetable also comes with a choice of functions to manipulate it further.
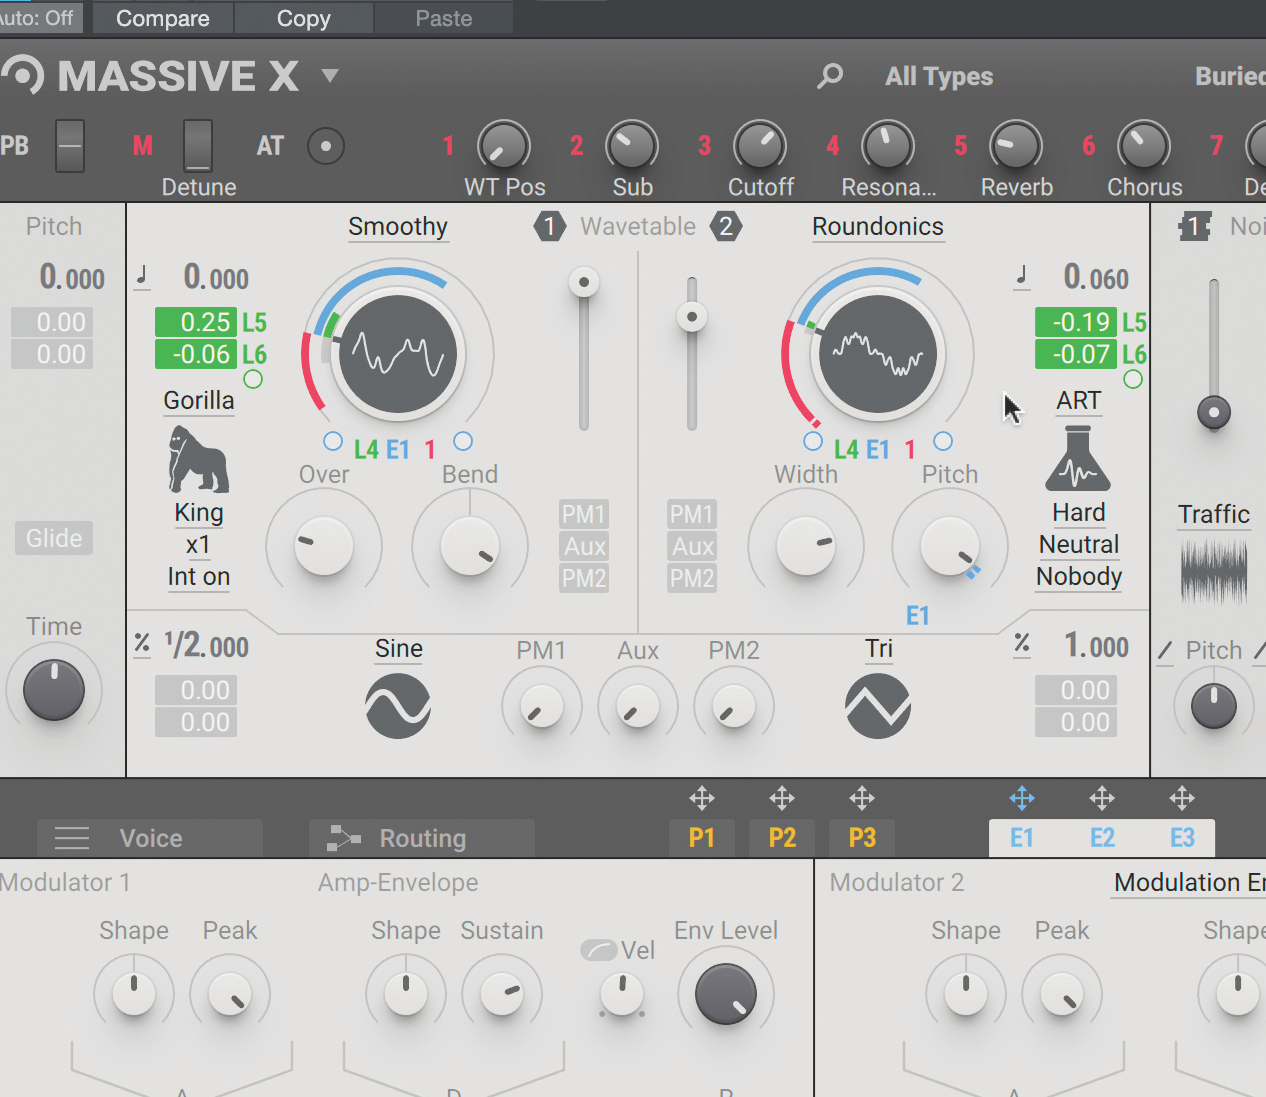
Here, with the Gorilla and ART types selected over our current wavetables, we get access to a way of skewing each one differently, in addition to the wavetable’s scanning that we’ve seen already as a fundamental of wavetable synthesis.
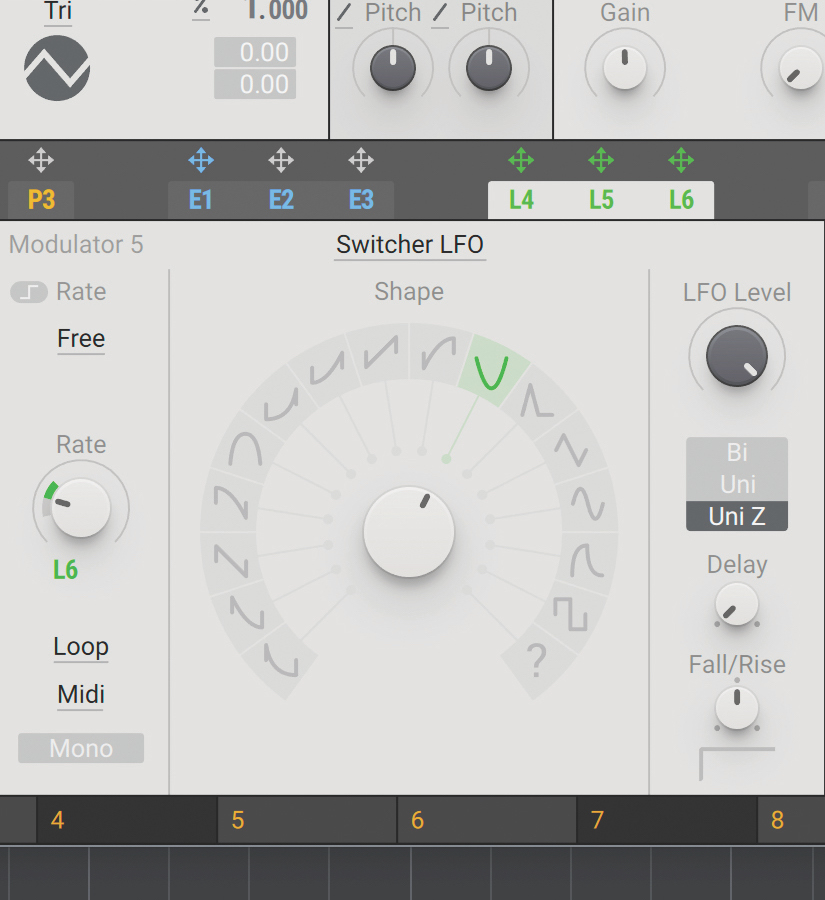
Of course, just like with the wavetable scanning, we can modulate these various parameters with our usual assortment of LFOs and envelopes, giving a second – or even third – dimension for each oscillator to move through.
Wavetable tips
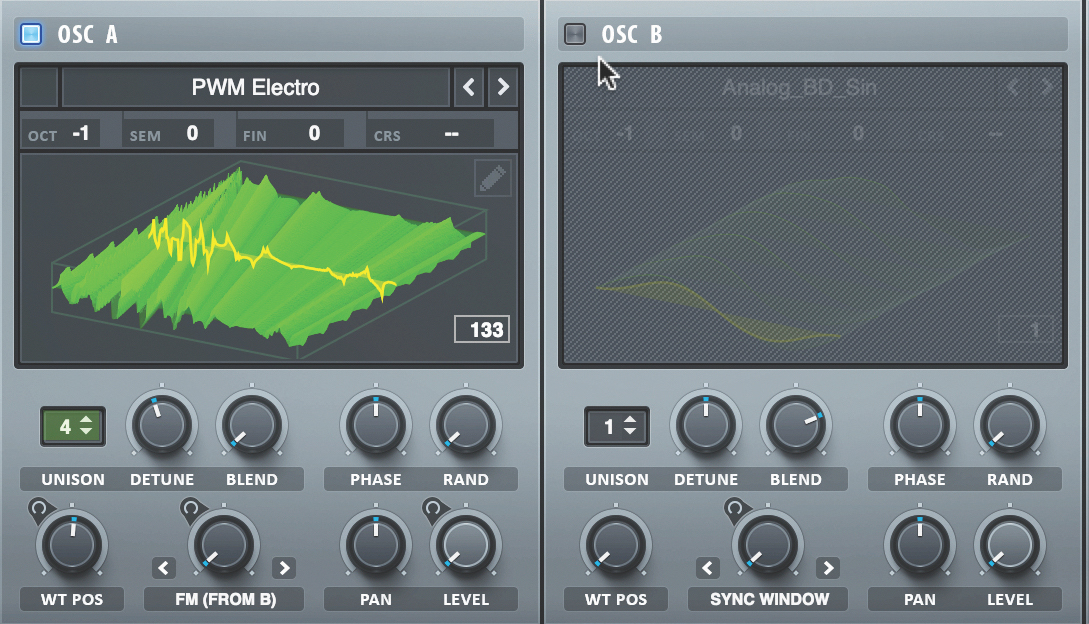
When modulating the position control in a patch, there are lots of considerations to make. What’s your starting position? How far will you move through the table?
Depending on the exact nature of your currently selected wavetable, the sonic results of your position selection could be huge, and so it’s well worth fine-tuning some of these aspects before you go on. Also, you can go back to key parameters like these and make changes once your synth patch has gone through some more stages of building with things like effects, to see how the sound will change now.
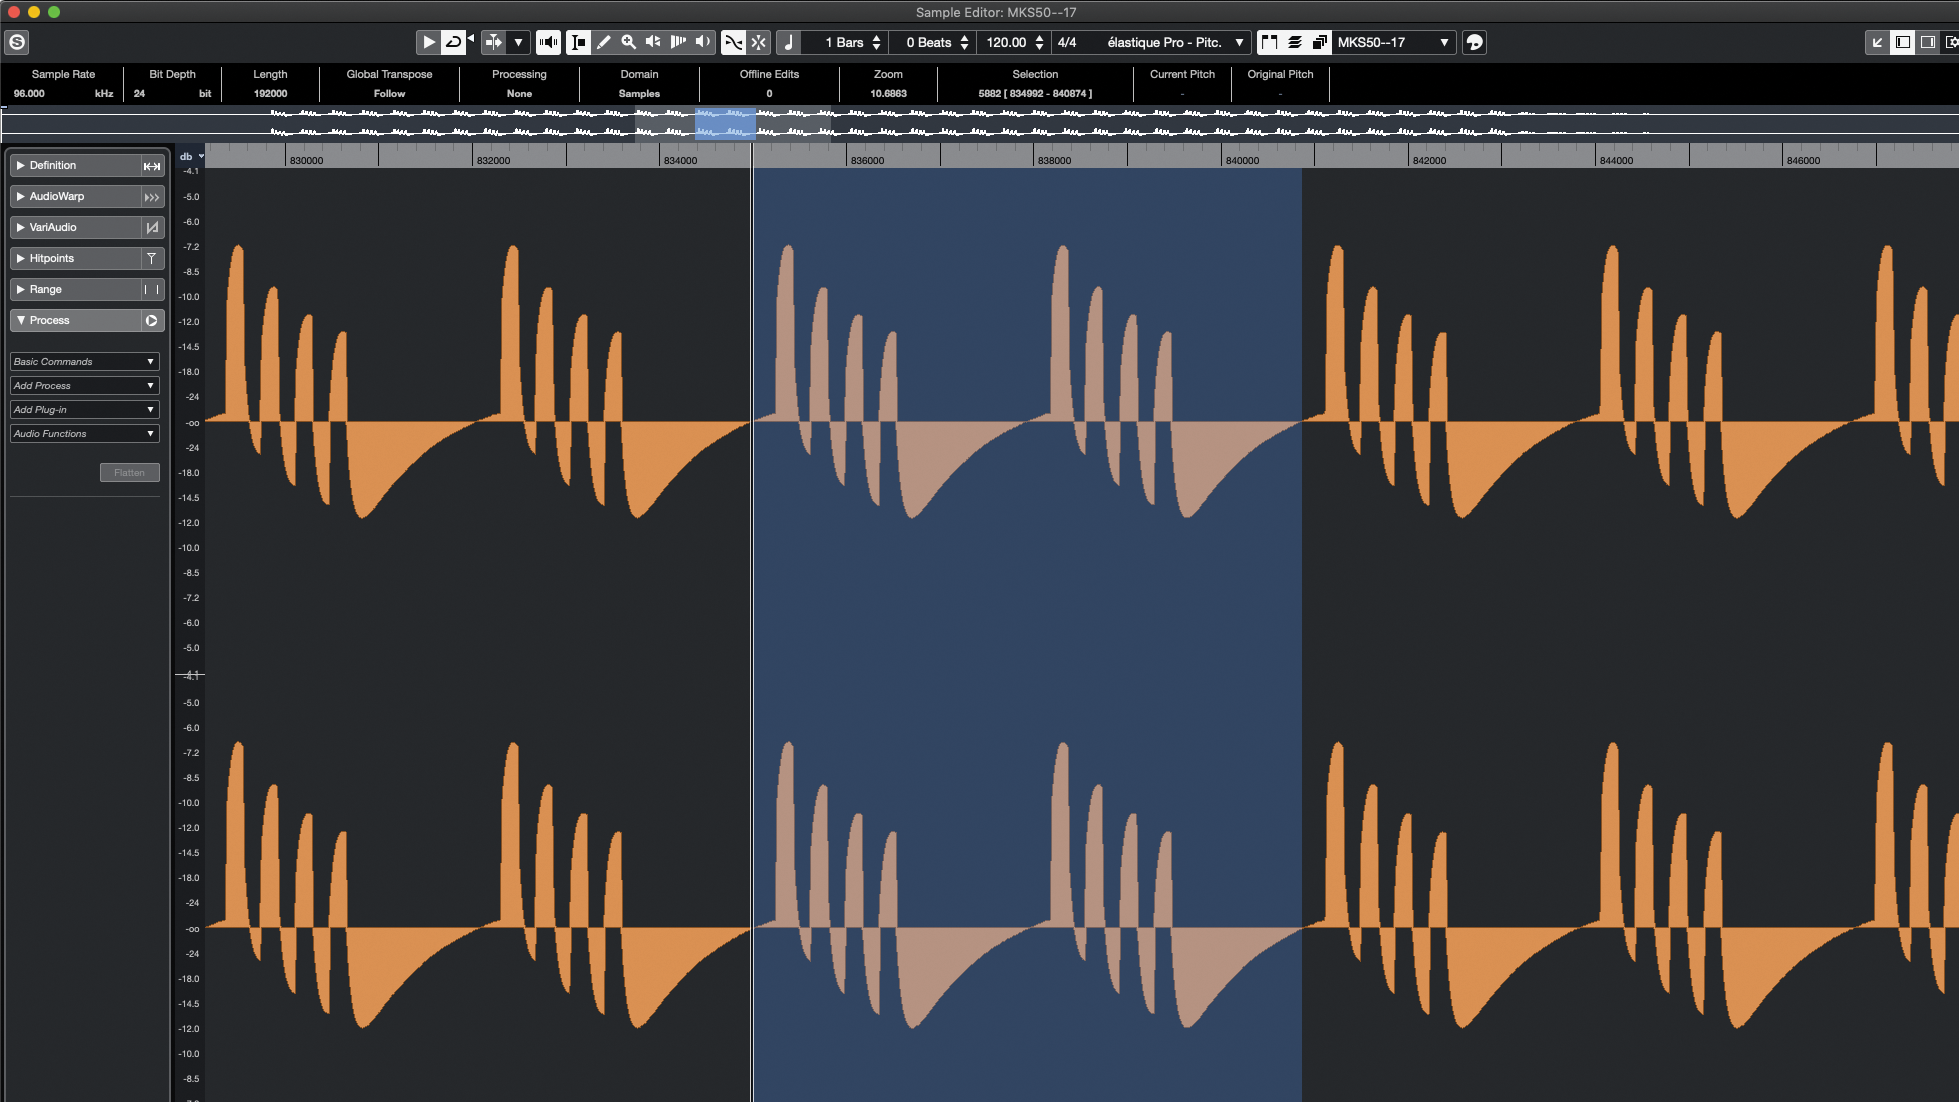
Most wavetable synths are equipped with a pair of wavetable oscillators, helping you balance and blend different sources. But do you really need two oscillators? That depends on the exact effect you want, as well as factors like how differently the oscillators are processed, filtered, panned and so on. If your oscillators have plenty of differences between them, that’s fine, but if that second oscillator is there out of obligation, consider the ‘less is more’ philosophy.
Finally, although ‘the done thing’ is usually to modulate and manipulate the wavetable’s position dial, consider whether the same modulation moves applied to effects and filter parameters may be best placed. A wavetable makes up the fundamental backbone of your sound, so you could argue that leaving this consistent when possible is often best. Just because you can, doesn’t mean you should.
Building a patch in the free SocaLabs Wavetable plugin
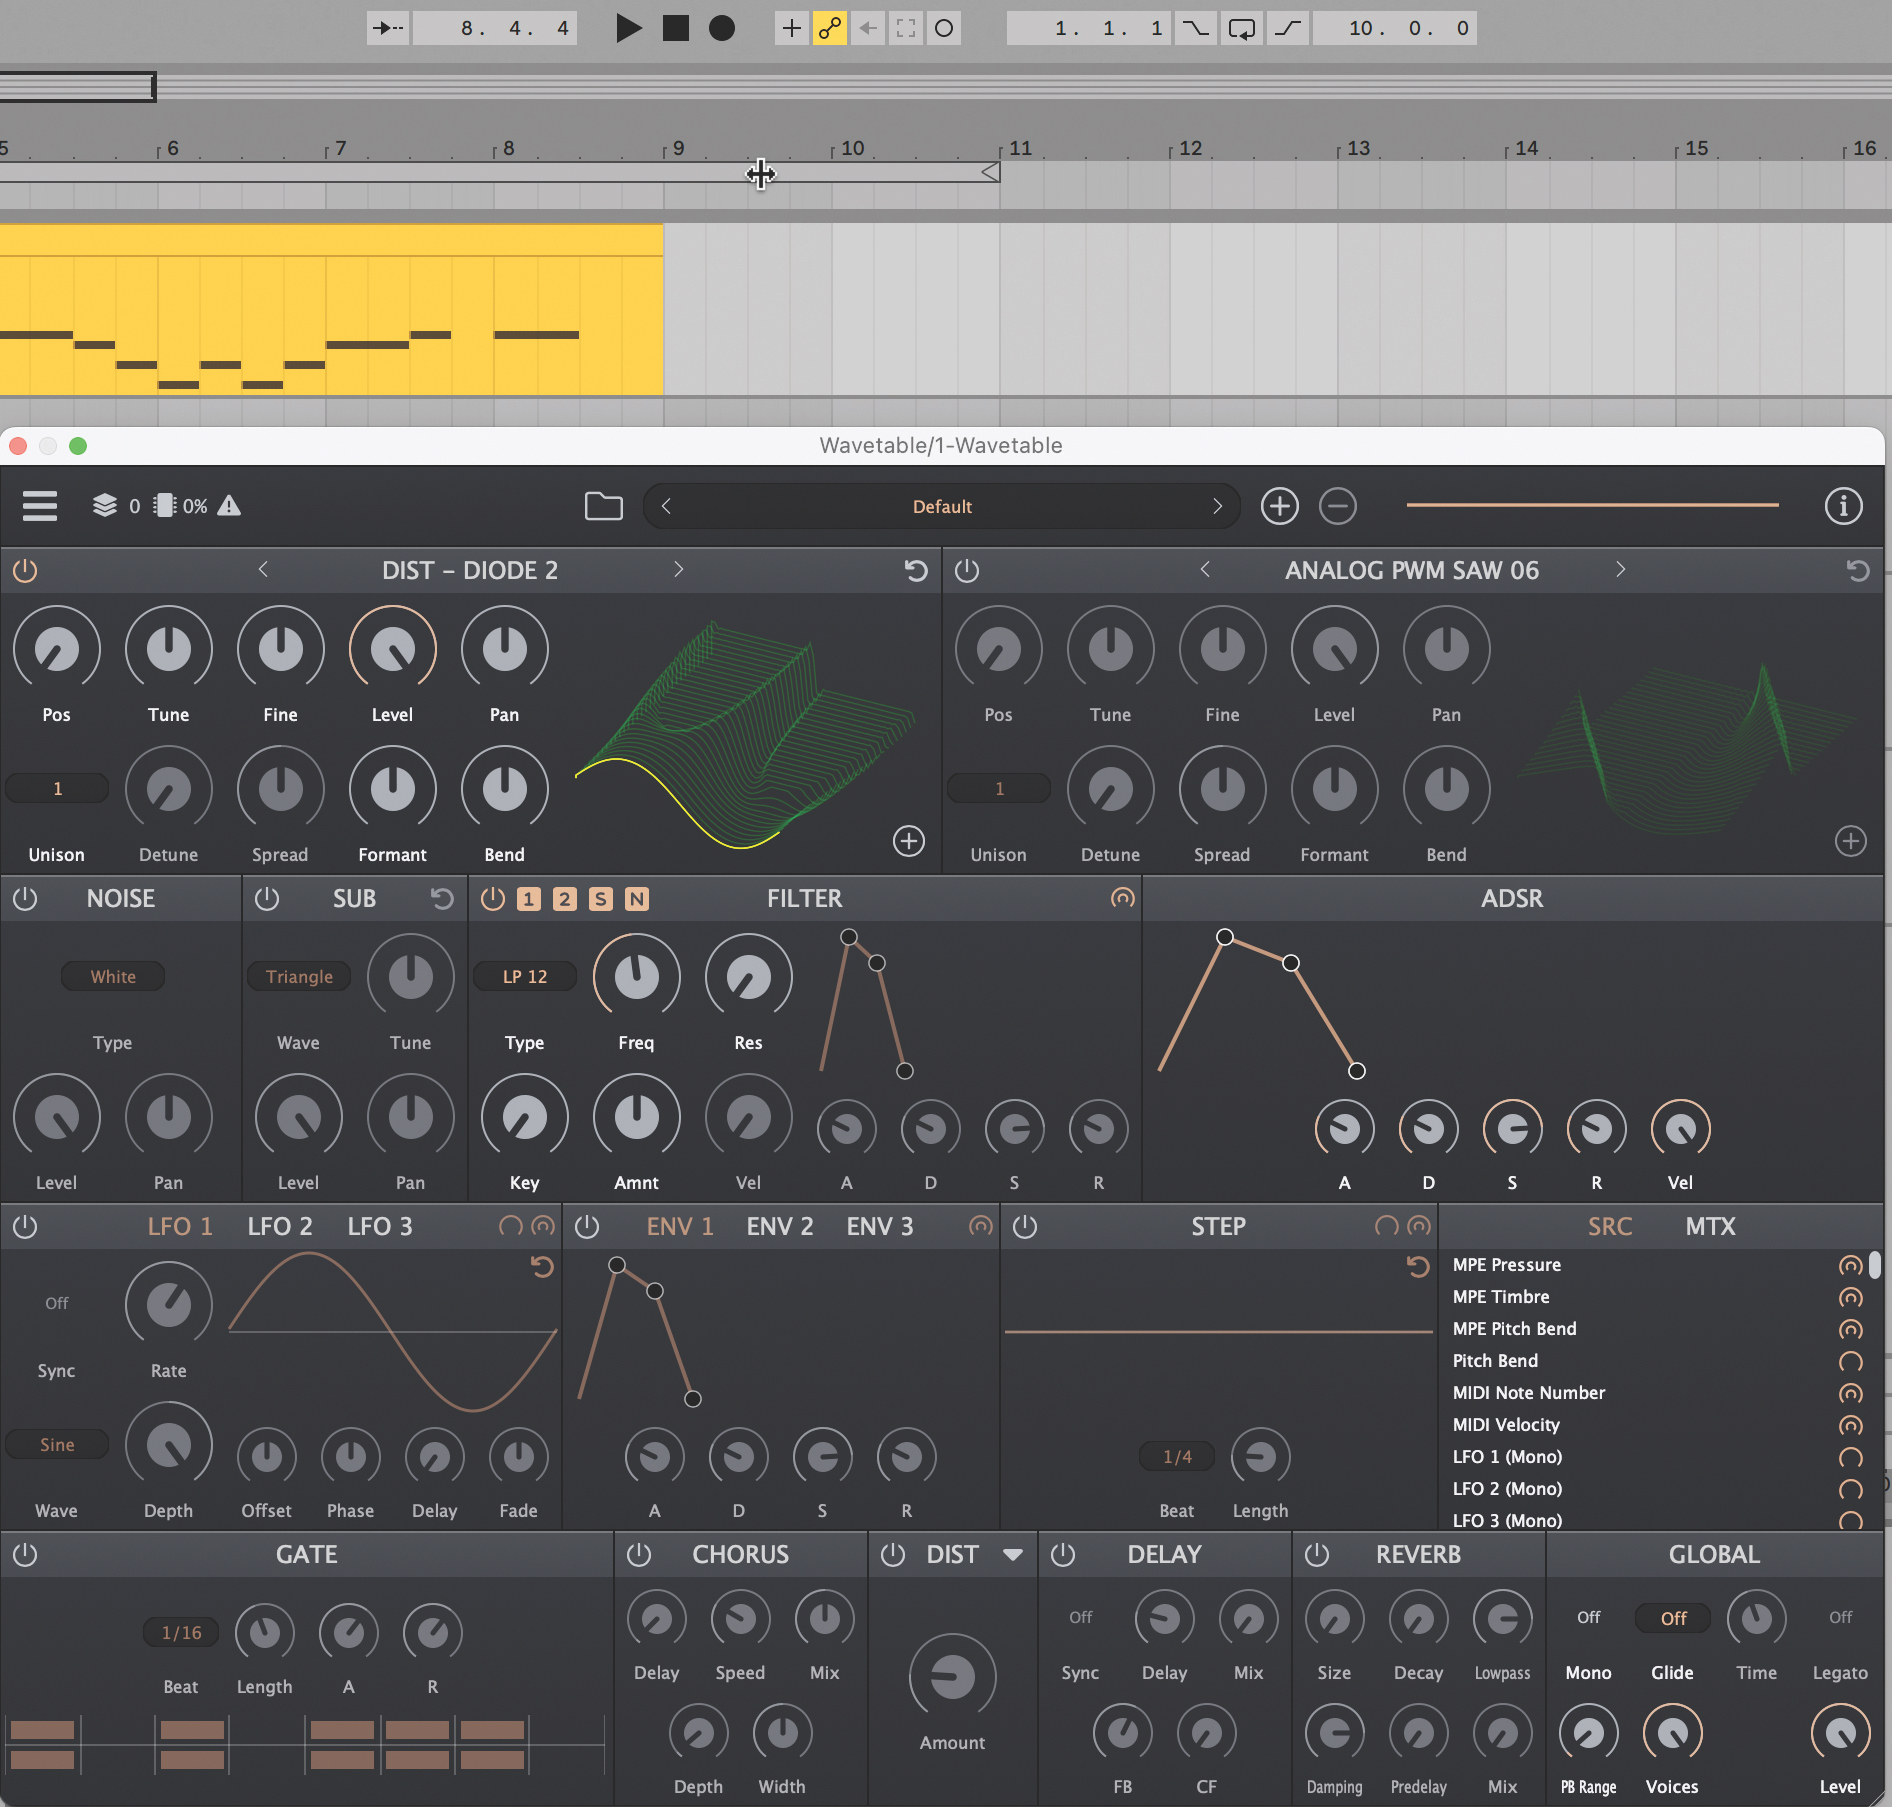
SocaLabs Wavetable is a free plugin synth offering a no-nonsense wavetable oscillator pair, noise, sub and a single filter. Let’s use it to build a patch, showcasing everything wavetable synthesis is good for as we do. We start with a basic sine patch.
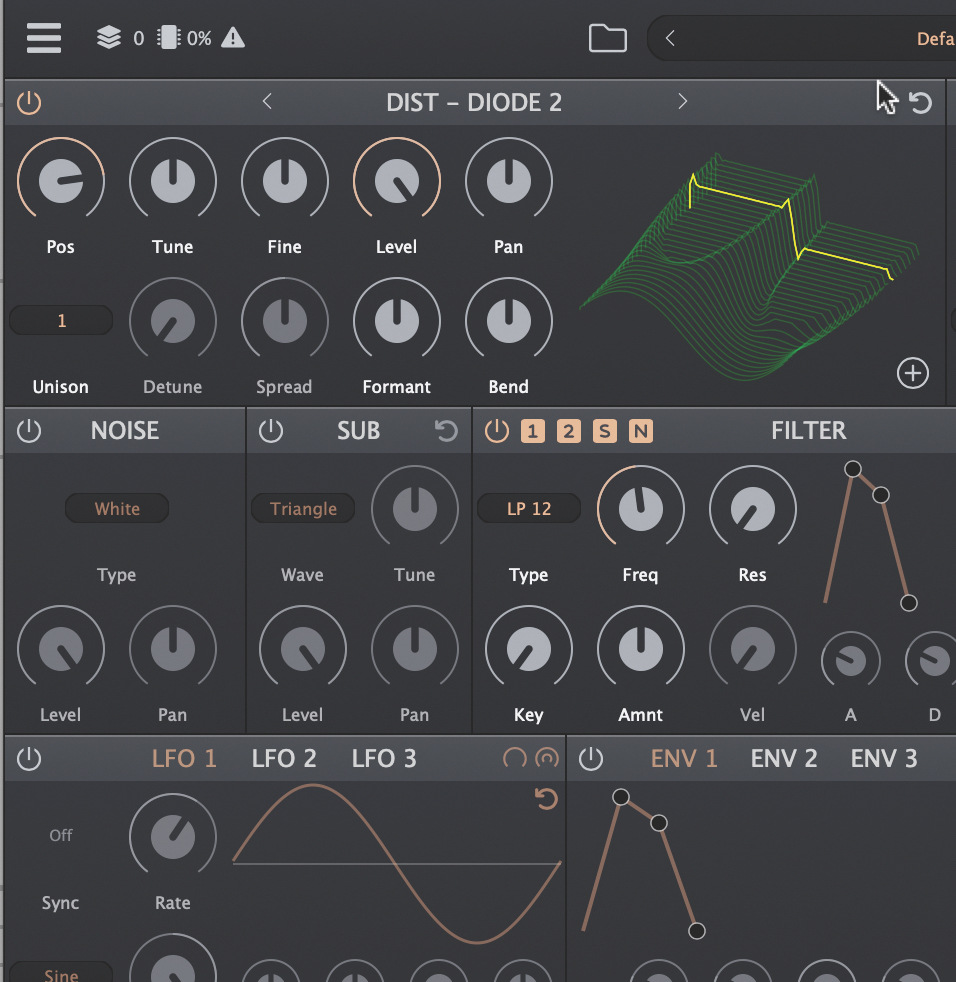
Starting with the oscillators, we move the Position of one (oscillator A) to a square-style wave, and browse wavetables for oscillator B to find something that suits. We could also mess with Level, Pan and Tuning here to establish a character.
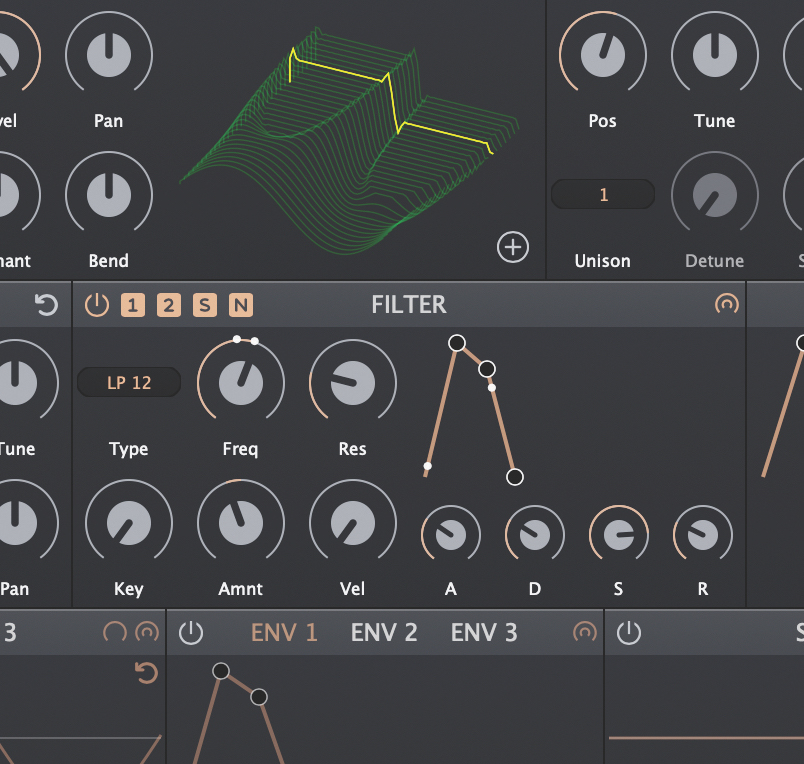
We add the Noise and Sub oscillators and then turn to the filter, adding a negative envelope signal to the cutoff to make it drop with each new note. There’s the usual ADSR envelope to set up too. So far, so normal where synths are concerned.
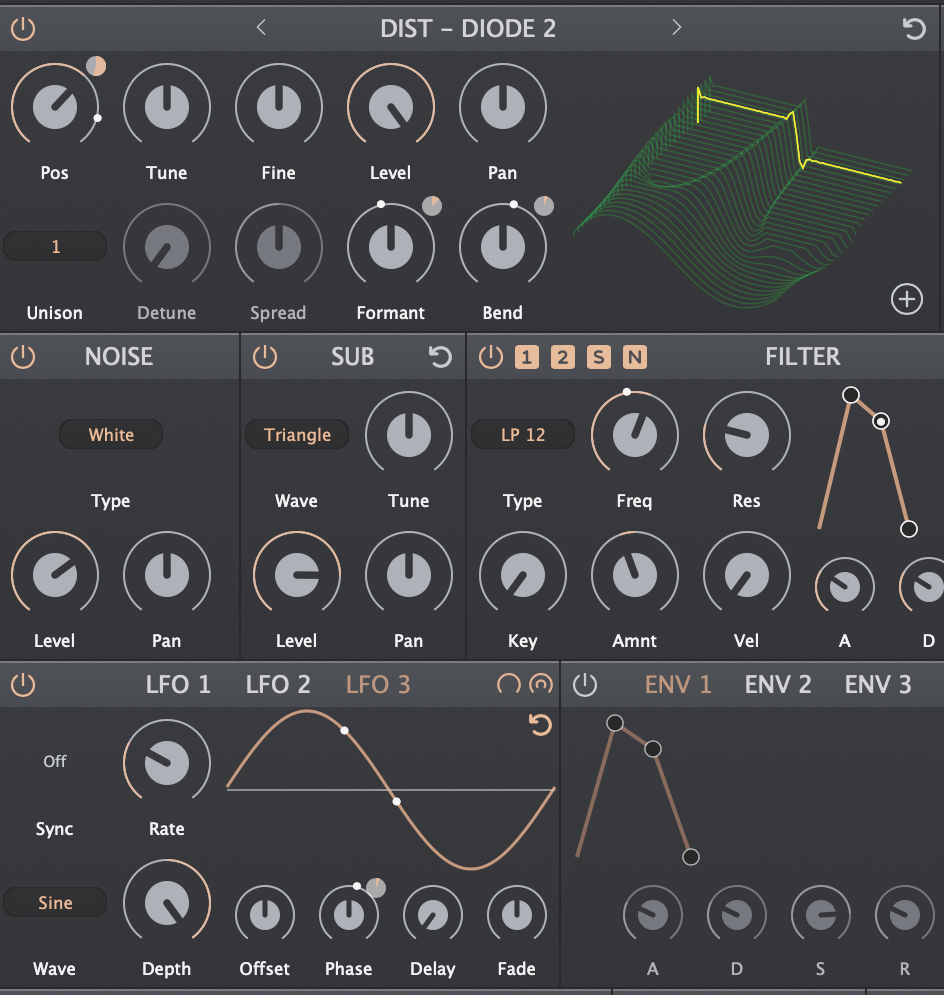
Time to bring some modulation. We apply a mix of three slow LFOs to parameters across the two oscillators, including their Position (obviously), Formant and Bend controls. We also apply a couple of LFO source to parameters on other LFOs.
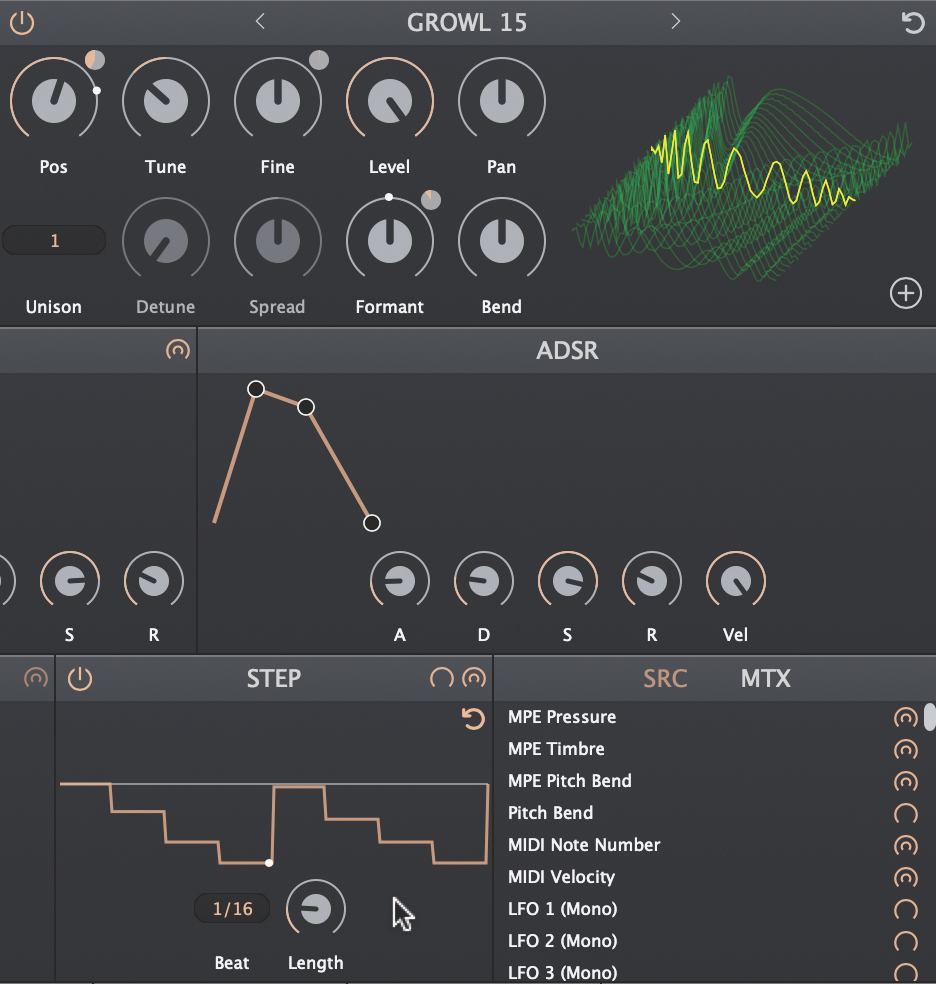
We add some modulation movement to oscillator B’s fine-tuning control, and set its Semi tuning an octave down. Next, we use this synth’s quite refreshing Step modulator to introduce some rhythm to the filter cutoff.
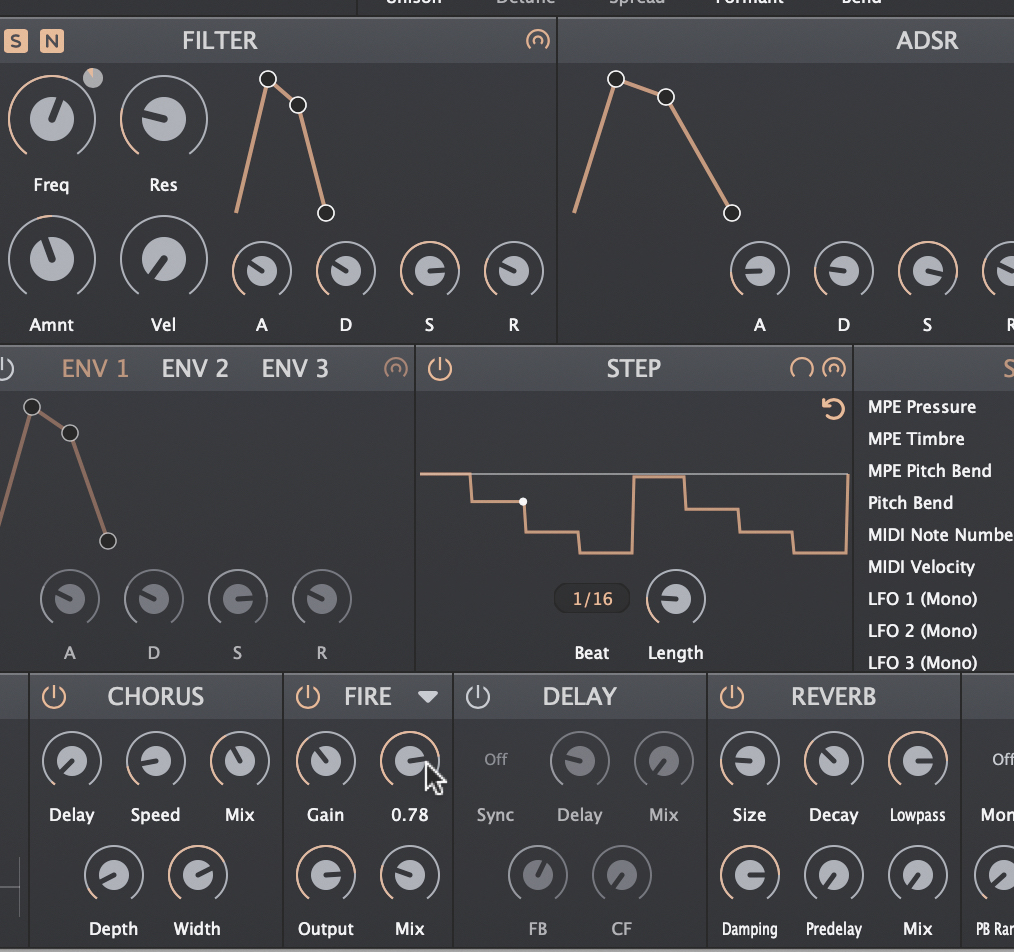
Now that we have a moving, evolving wavetable patch, we can set to work adding some effects to round it out. With some chorus, distortion and reverb, we can draw a line under things and save our patch.
Building an evolving sound in Cherry Audio Harmonia
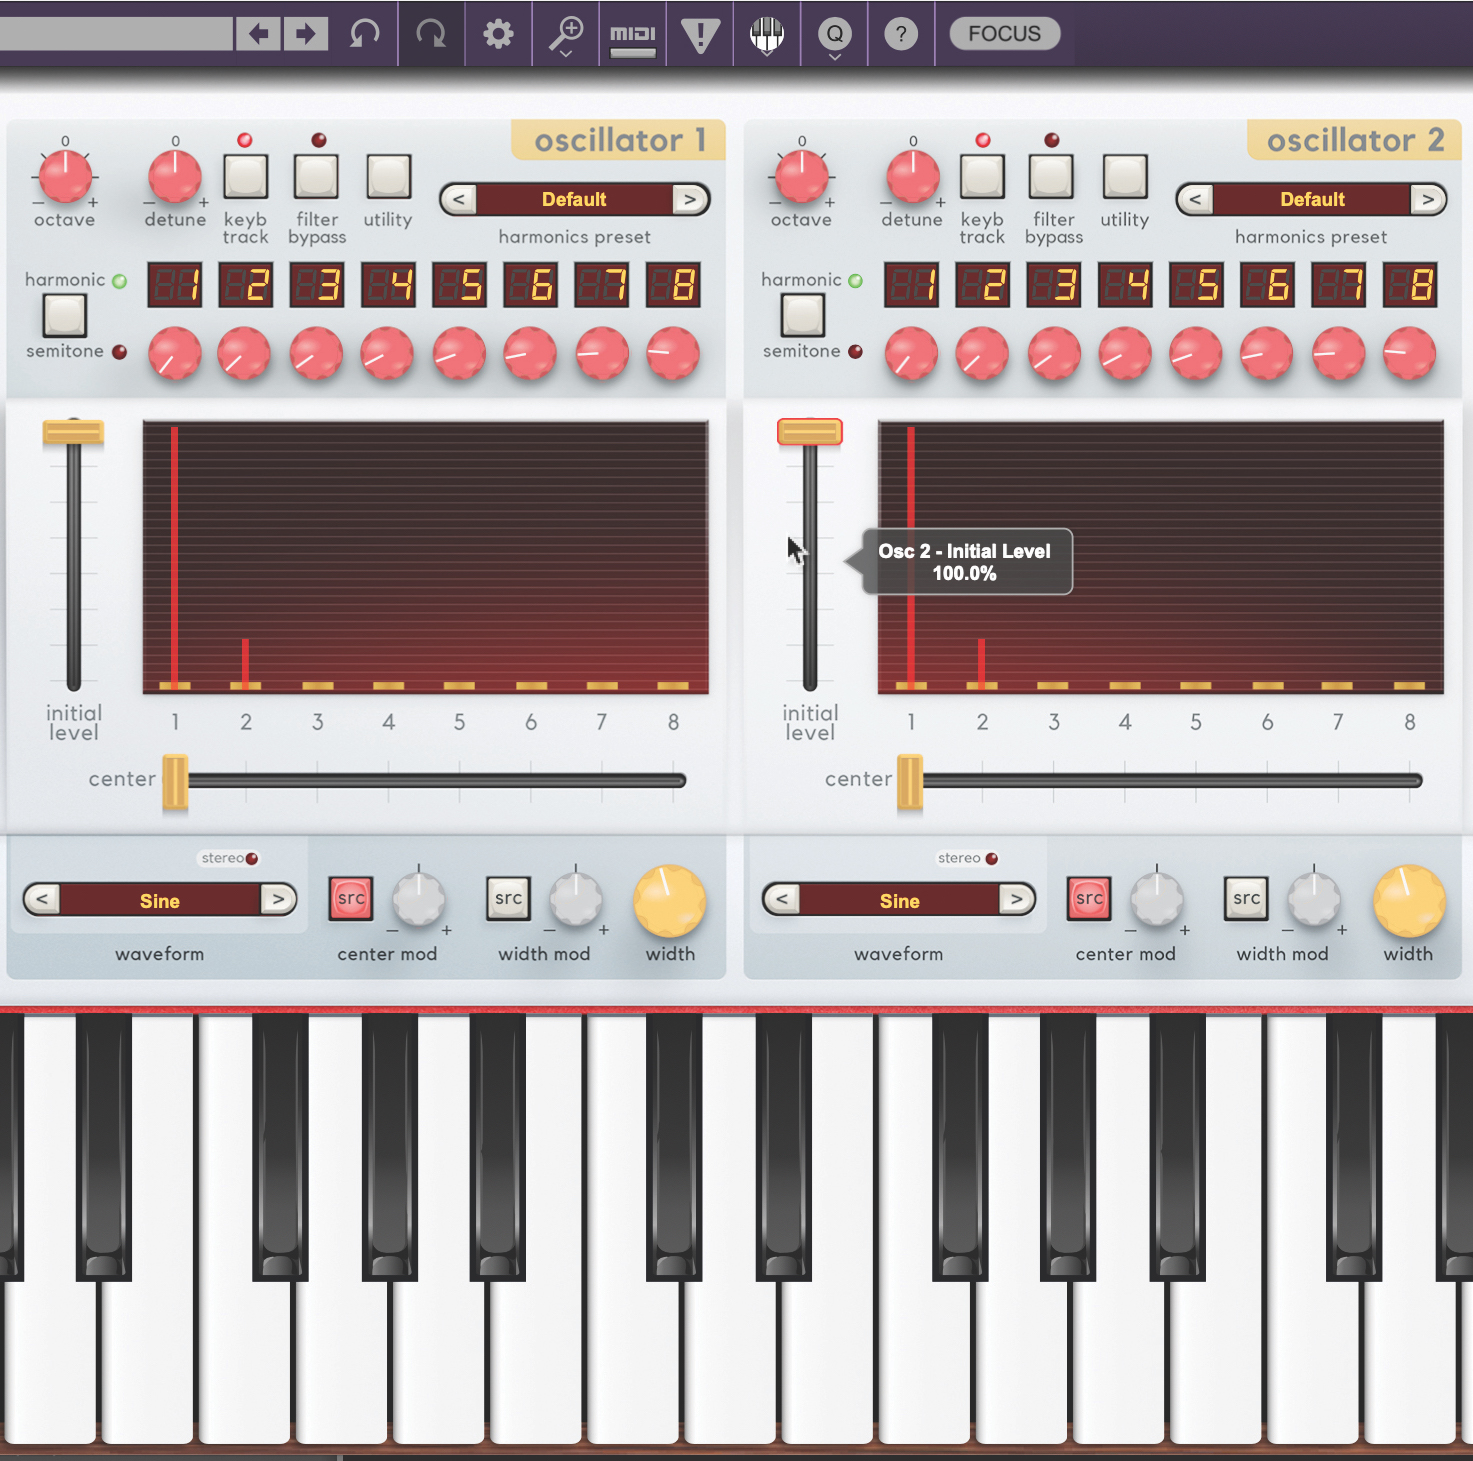
Cherry Audio’s Harmonia synth is technically an additive synthesizer, but it can do a fairly reasonable shot at wavetable synth, which we’ll demonstrate to give more insight into the wavetable mindset. We start with the plugin set to just sine waves.
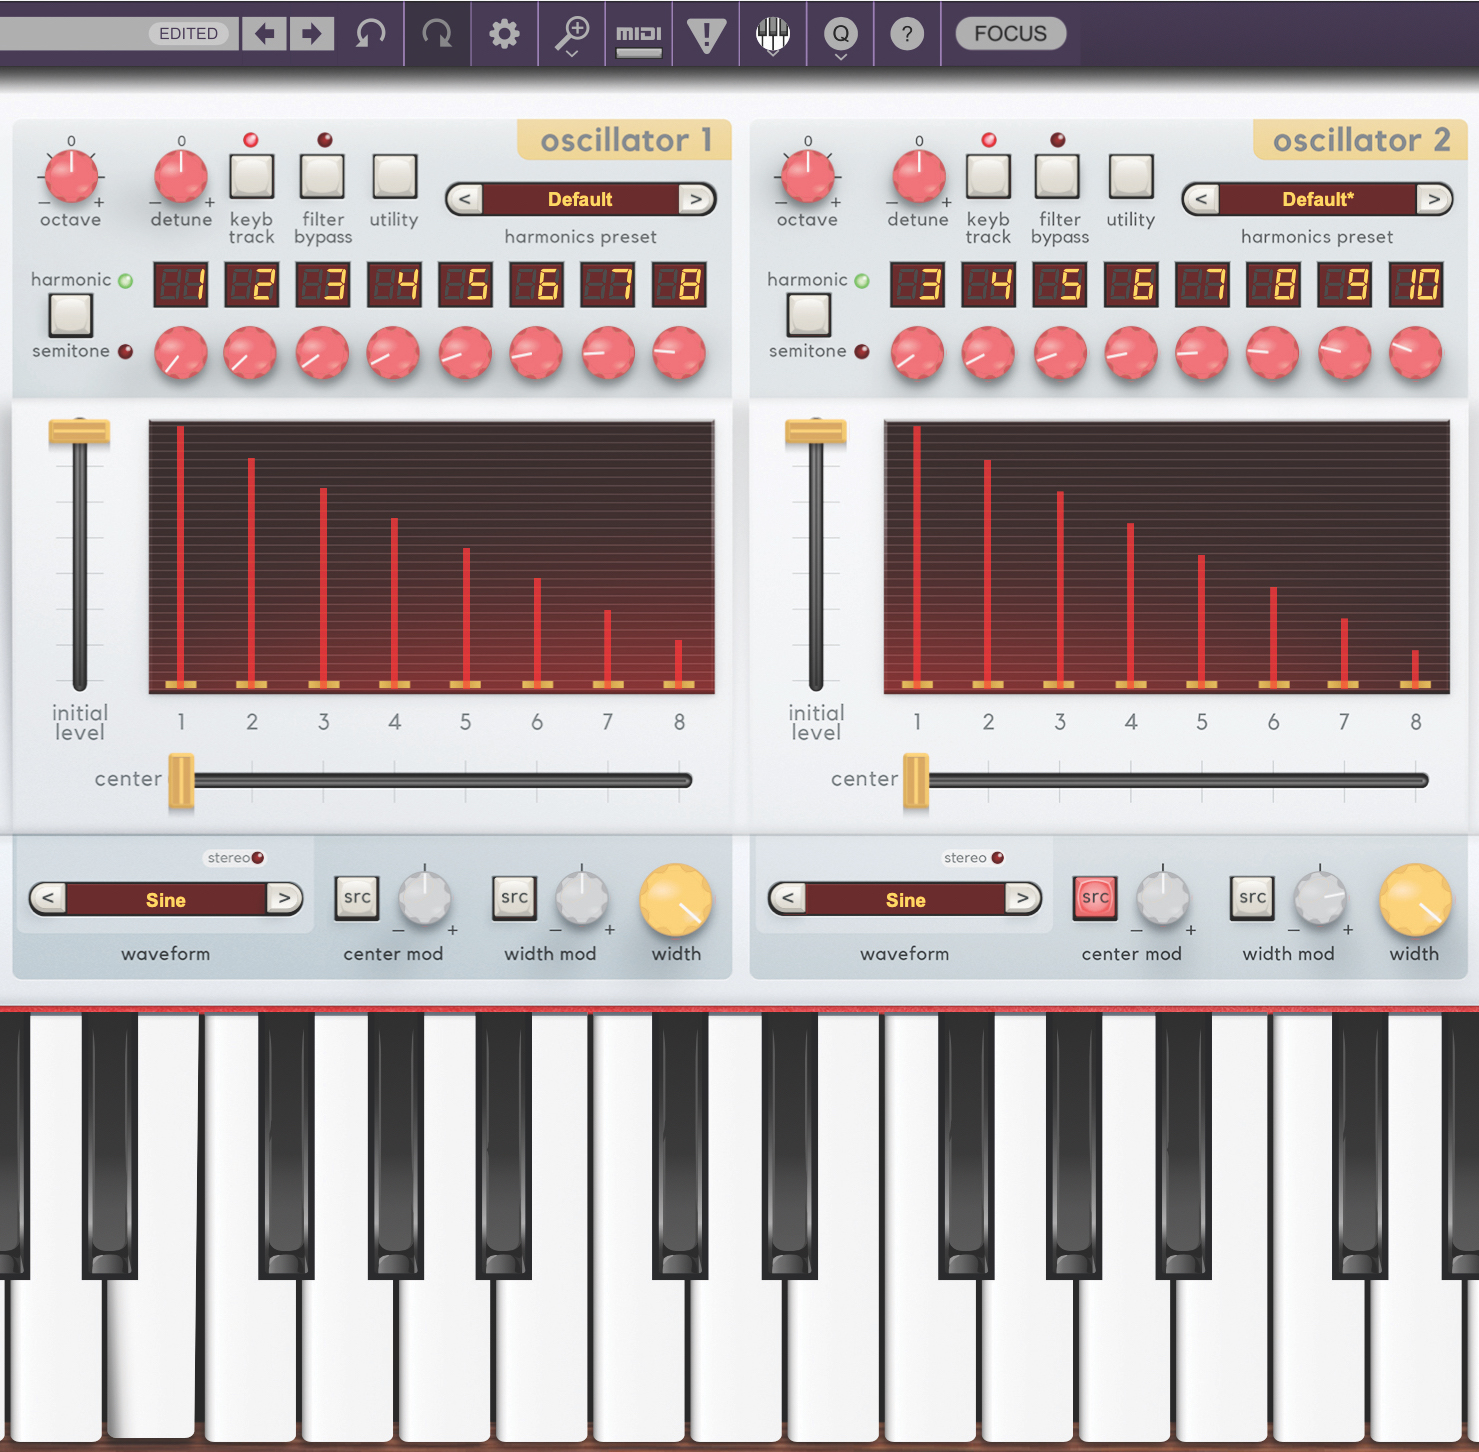
We raise the Width so that all eight partials are audible for each oscillator. We set the Harmonics for oscillator A as 1 to 8 (ie the first eight harmonics), and for oscillator B as harmonics 3 through 10. The result is a throaty, clinical sine-wave-built sound.
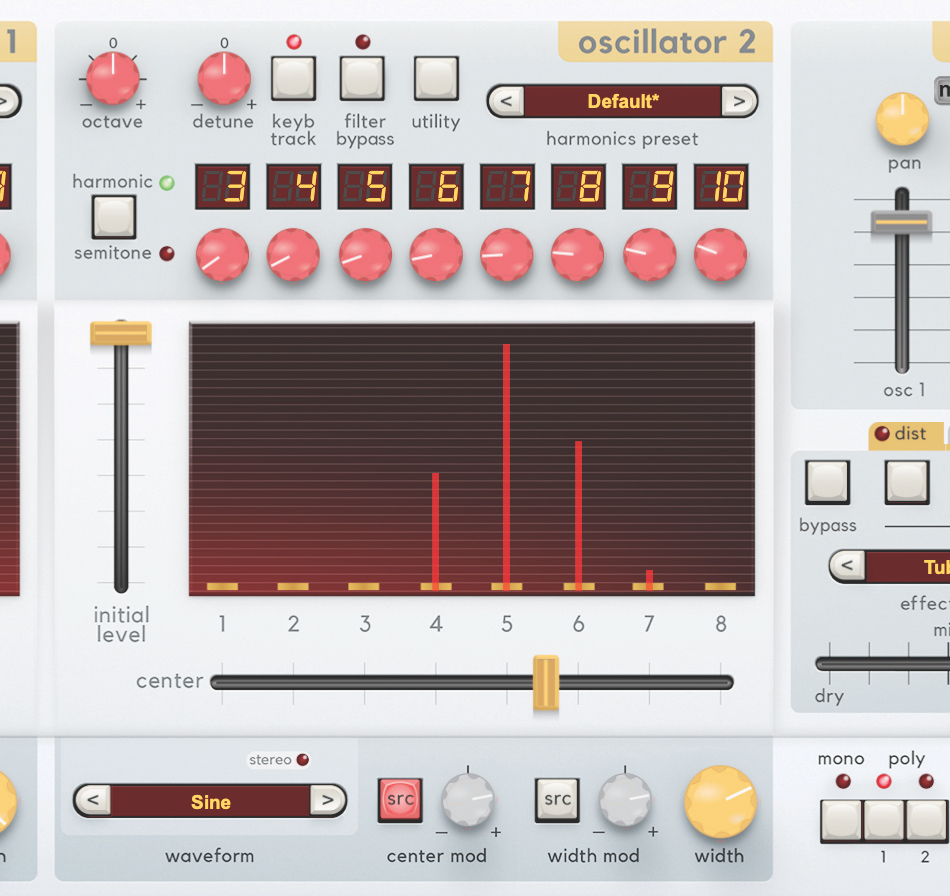
Now for oscillator B, we’ll reduce the Width of the range, and centre it around the middle of its range. By modulating this range of harmonics with an LFO, we get a movement up and down throughout the frequency spectrum.
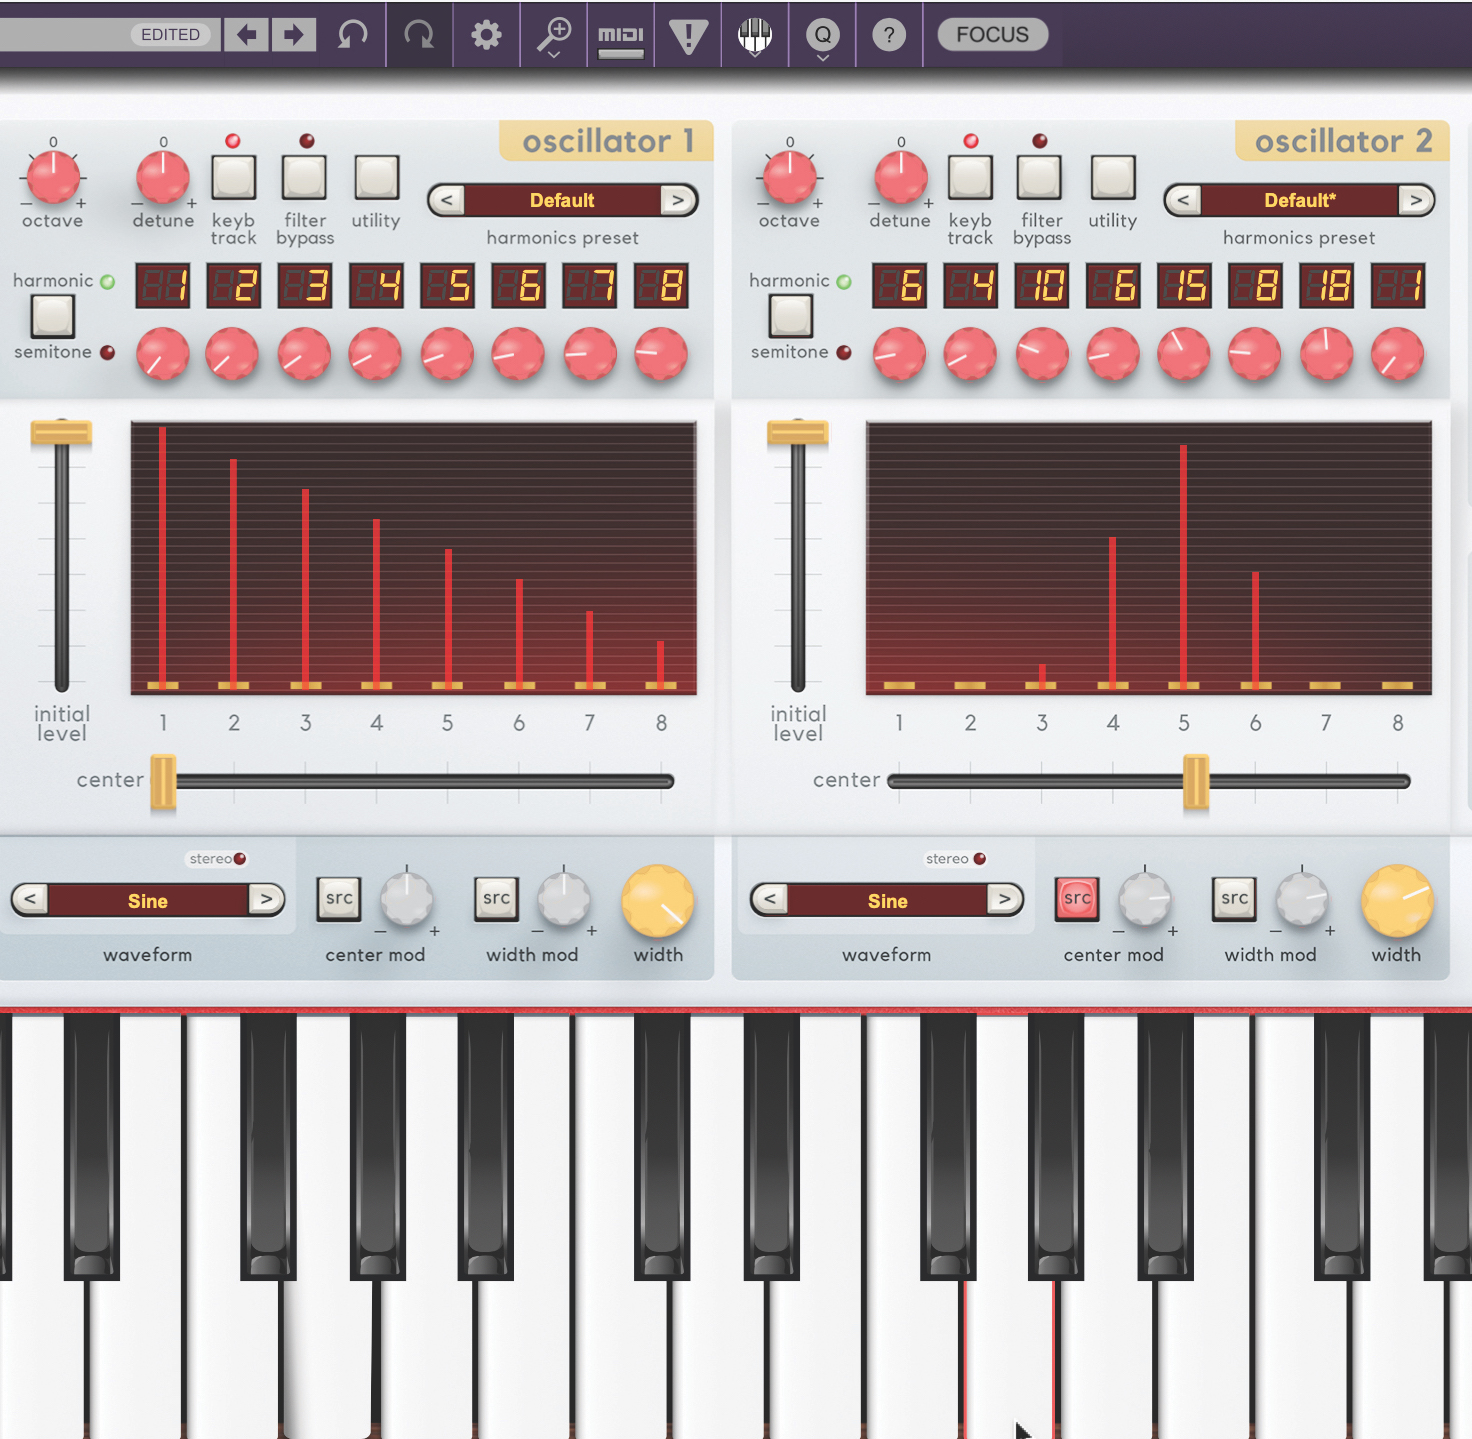
The way this synth works is that all eight partials can be set in tuning, up to quite high harmonics, as we’re starting to do here. But so far we’ve only been using sine waves to drive this thing. Let’s go further.
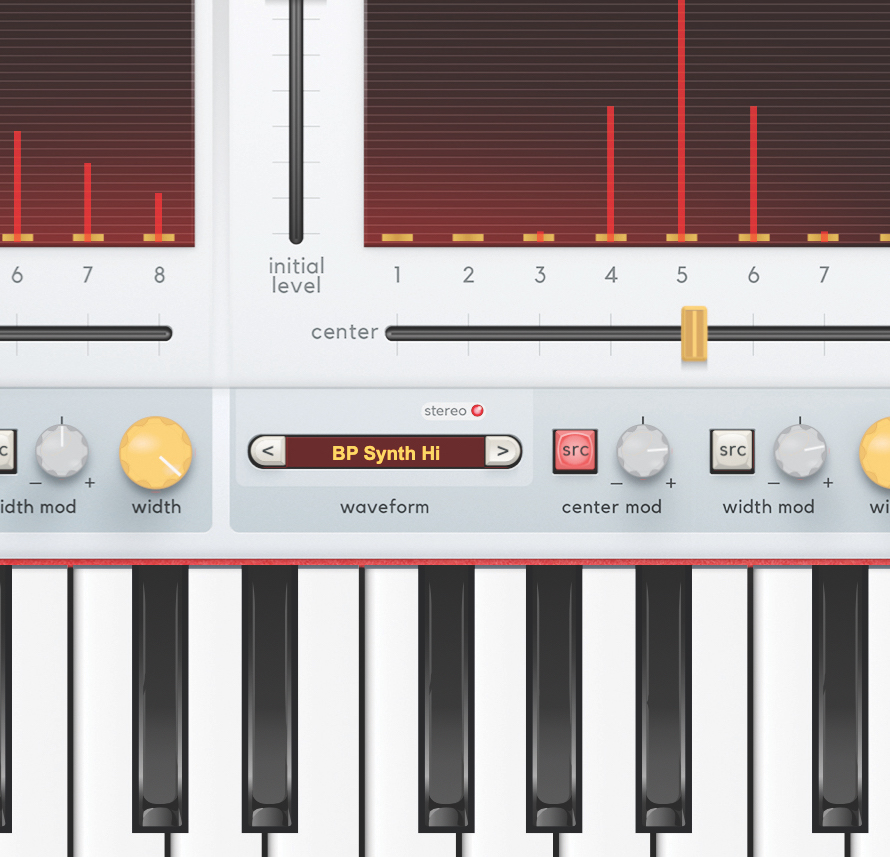
We can choose an alternative waveform per partial from the dropdown below the Center control. This brings an instantly more complex tone, and one that gets us closer to the spirit of wavetable (instead of just the spirit of additive).
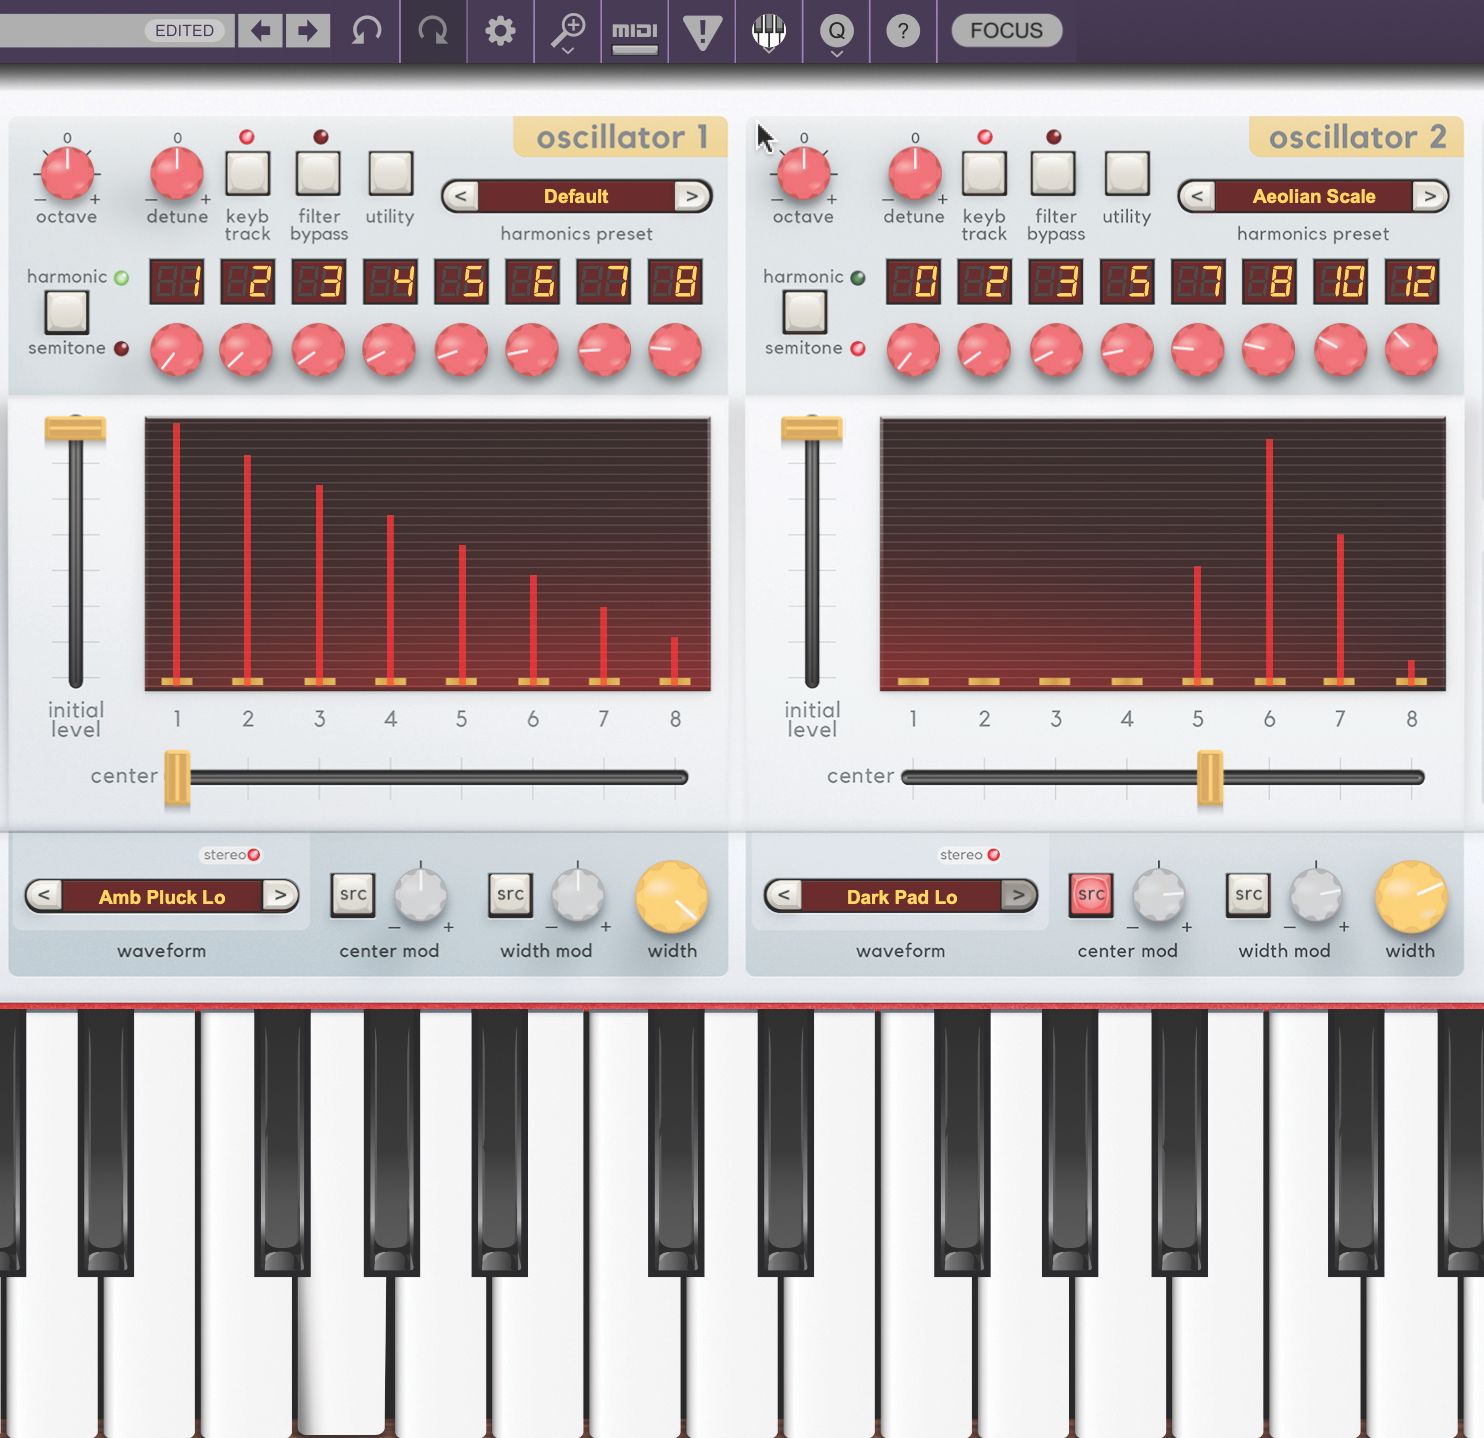
Here’s another formulation of two waveforms with differing harmonic overlays. With some pseudo-wavescanning, we get a similar tone and capability to a wavetable synth, only applied in quite a different way, and capable of a different range of tricks.
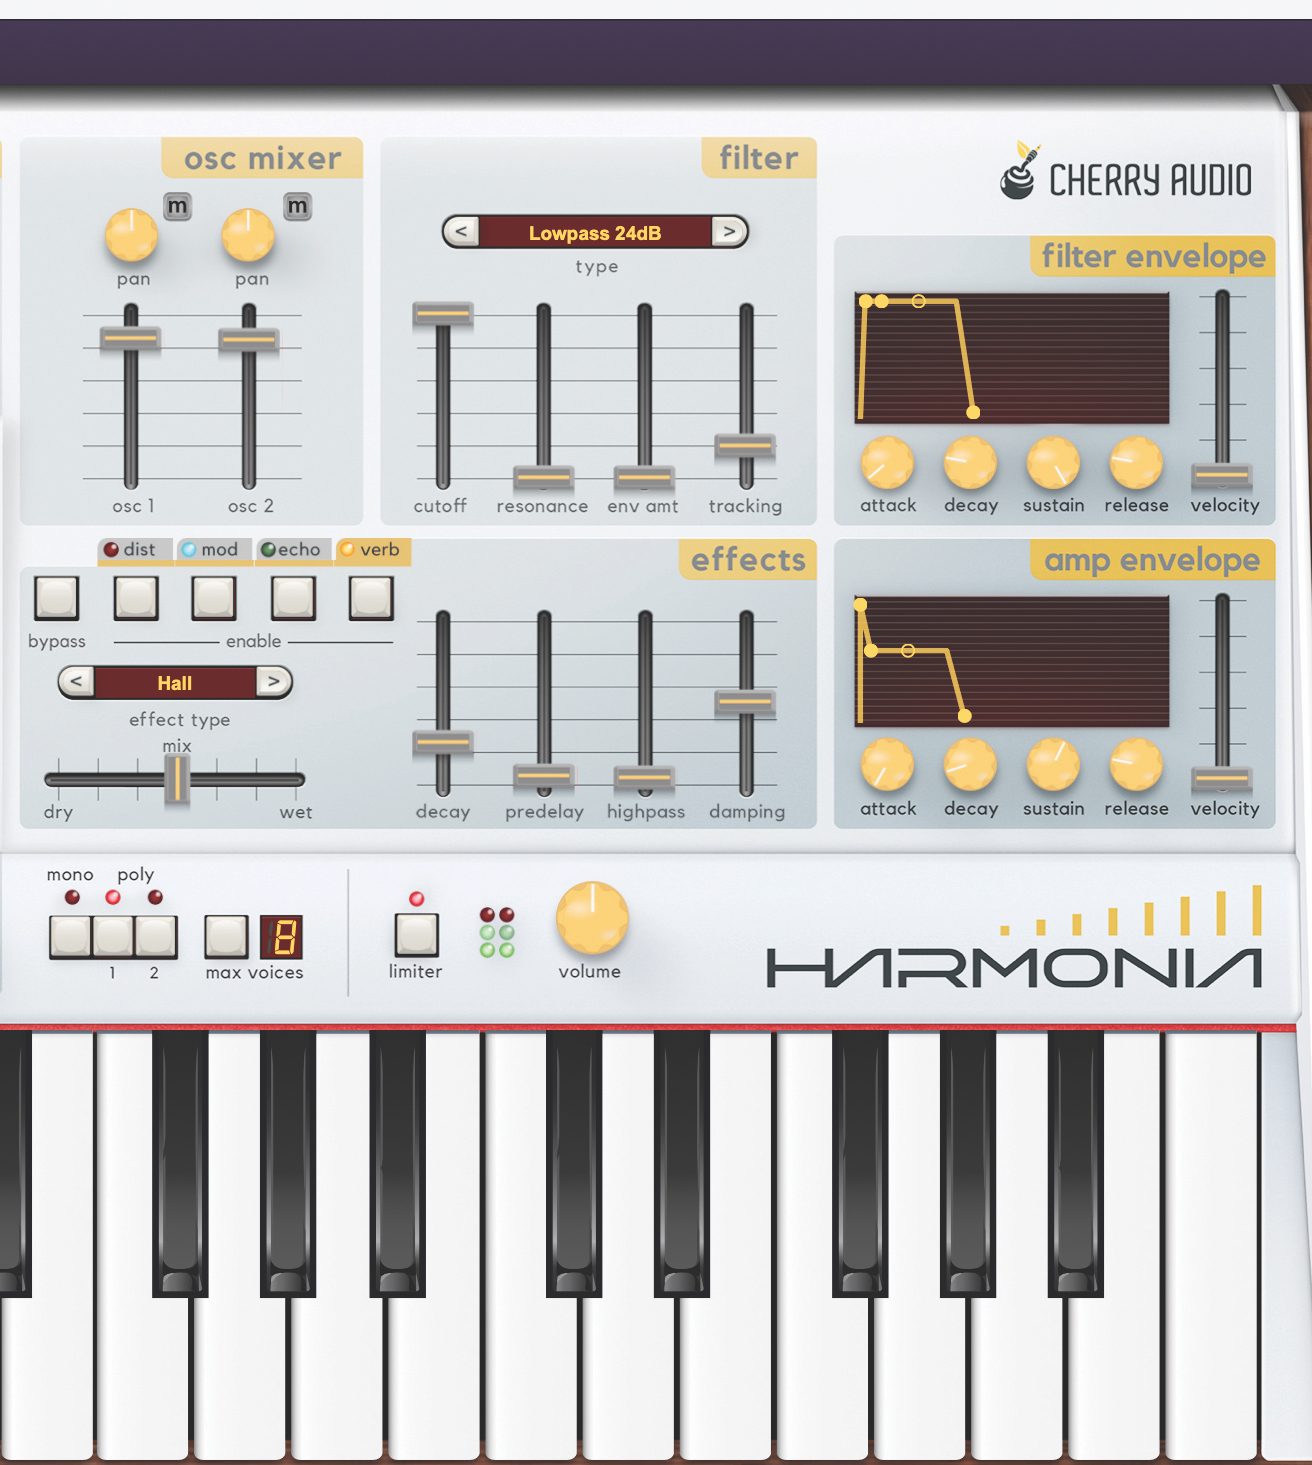
We can mimic some more wavetable standards, and go slightly leftfield with them, by modulating an oscillator’s Width control negatively from the amplitude envelope. There are also effects including chorus and reverb that we’ve applied here.
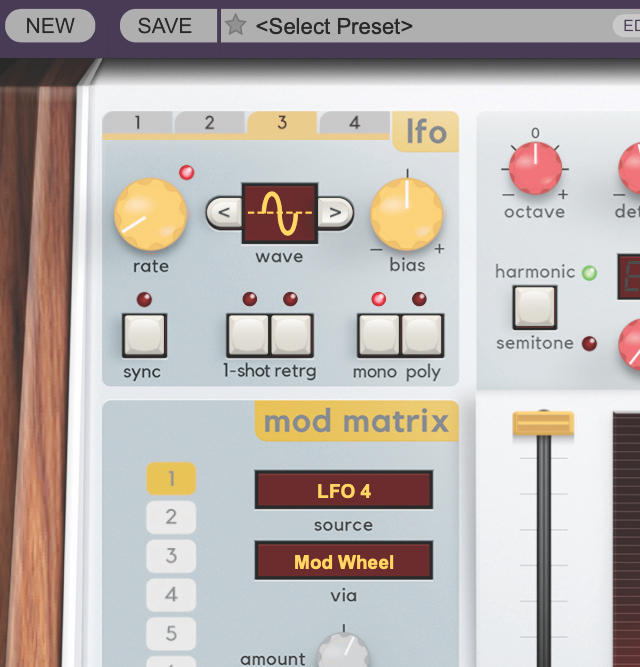
Wavetable oscillators should never stop moving, and so we hook up a couple more slow LFOs to various parameters to keep things interesting and ever-changing. From here, we can elaborate with more effects to follow up.
What next for wavetables?
From its start in the PPG Wave synths, through its successful plugin incarnations (Massive, Serum), wavetable synthesis seems like the correct answer to a question raised over and over again. So where will it go next?
It seems that today’s top power synths, which make their way by offering multiple oscillator types, are more than capable of providing wavetable oscillators as part of even larger setups. Wavetable is a no-brainer with so many top-flight synths using it for their sole source of power, that we’d be surprised to find the technique omitted in any serious multi-type synth.
We could look to single-use applications, where wavetable techniques could be perfect choices for all sorts of common audio ailments.
In the following tutorial, the plugin Thump One demonstrates the power of wavetable synthesis when applied to one instrument only: the kick drum.
Wavetable principles applied to kicks
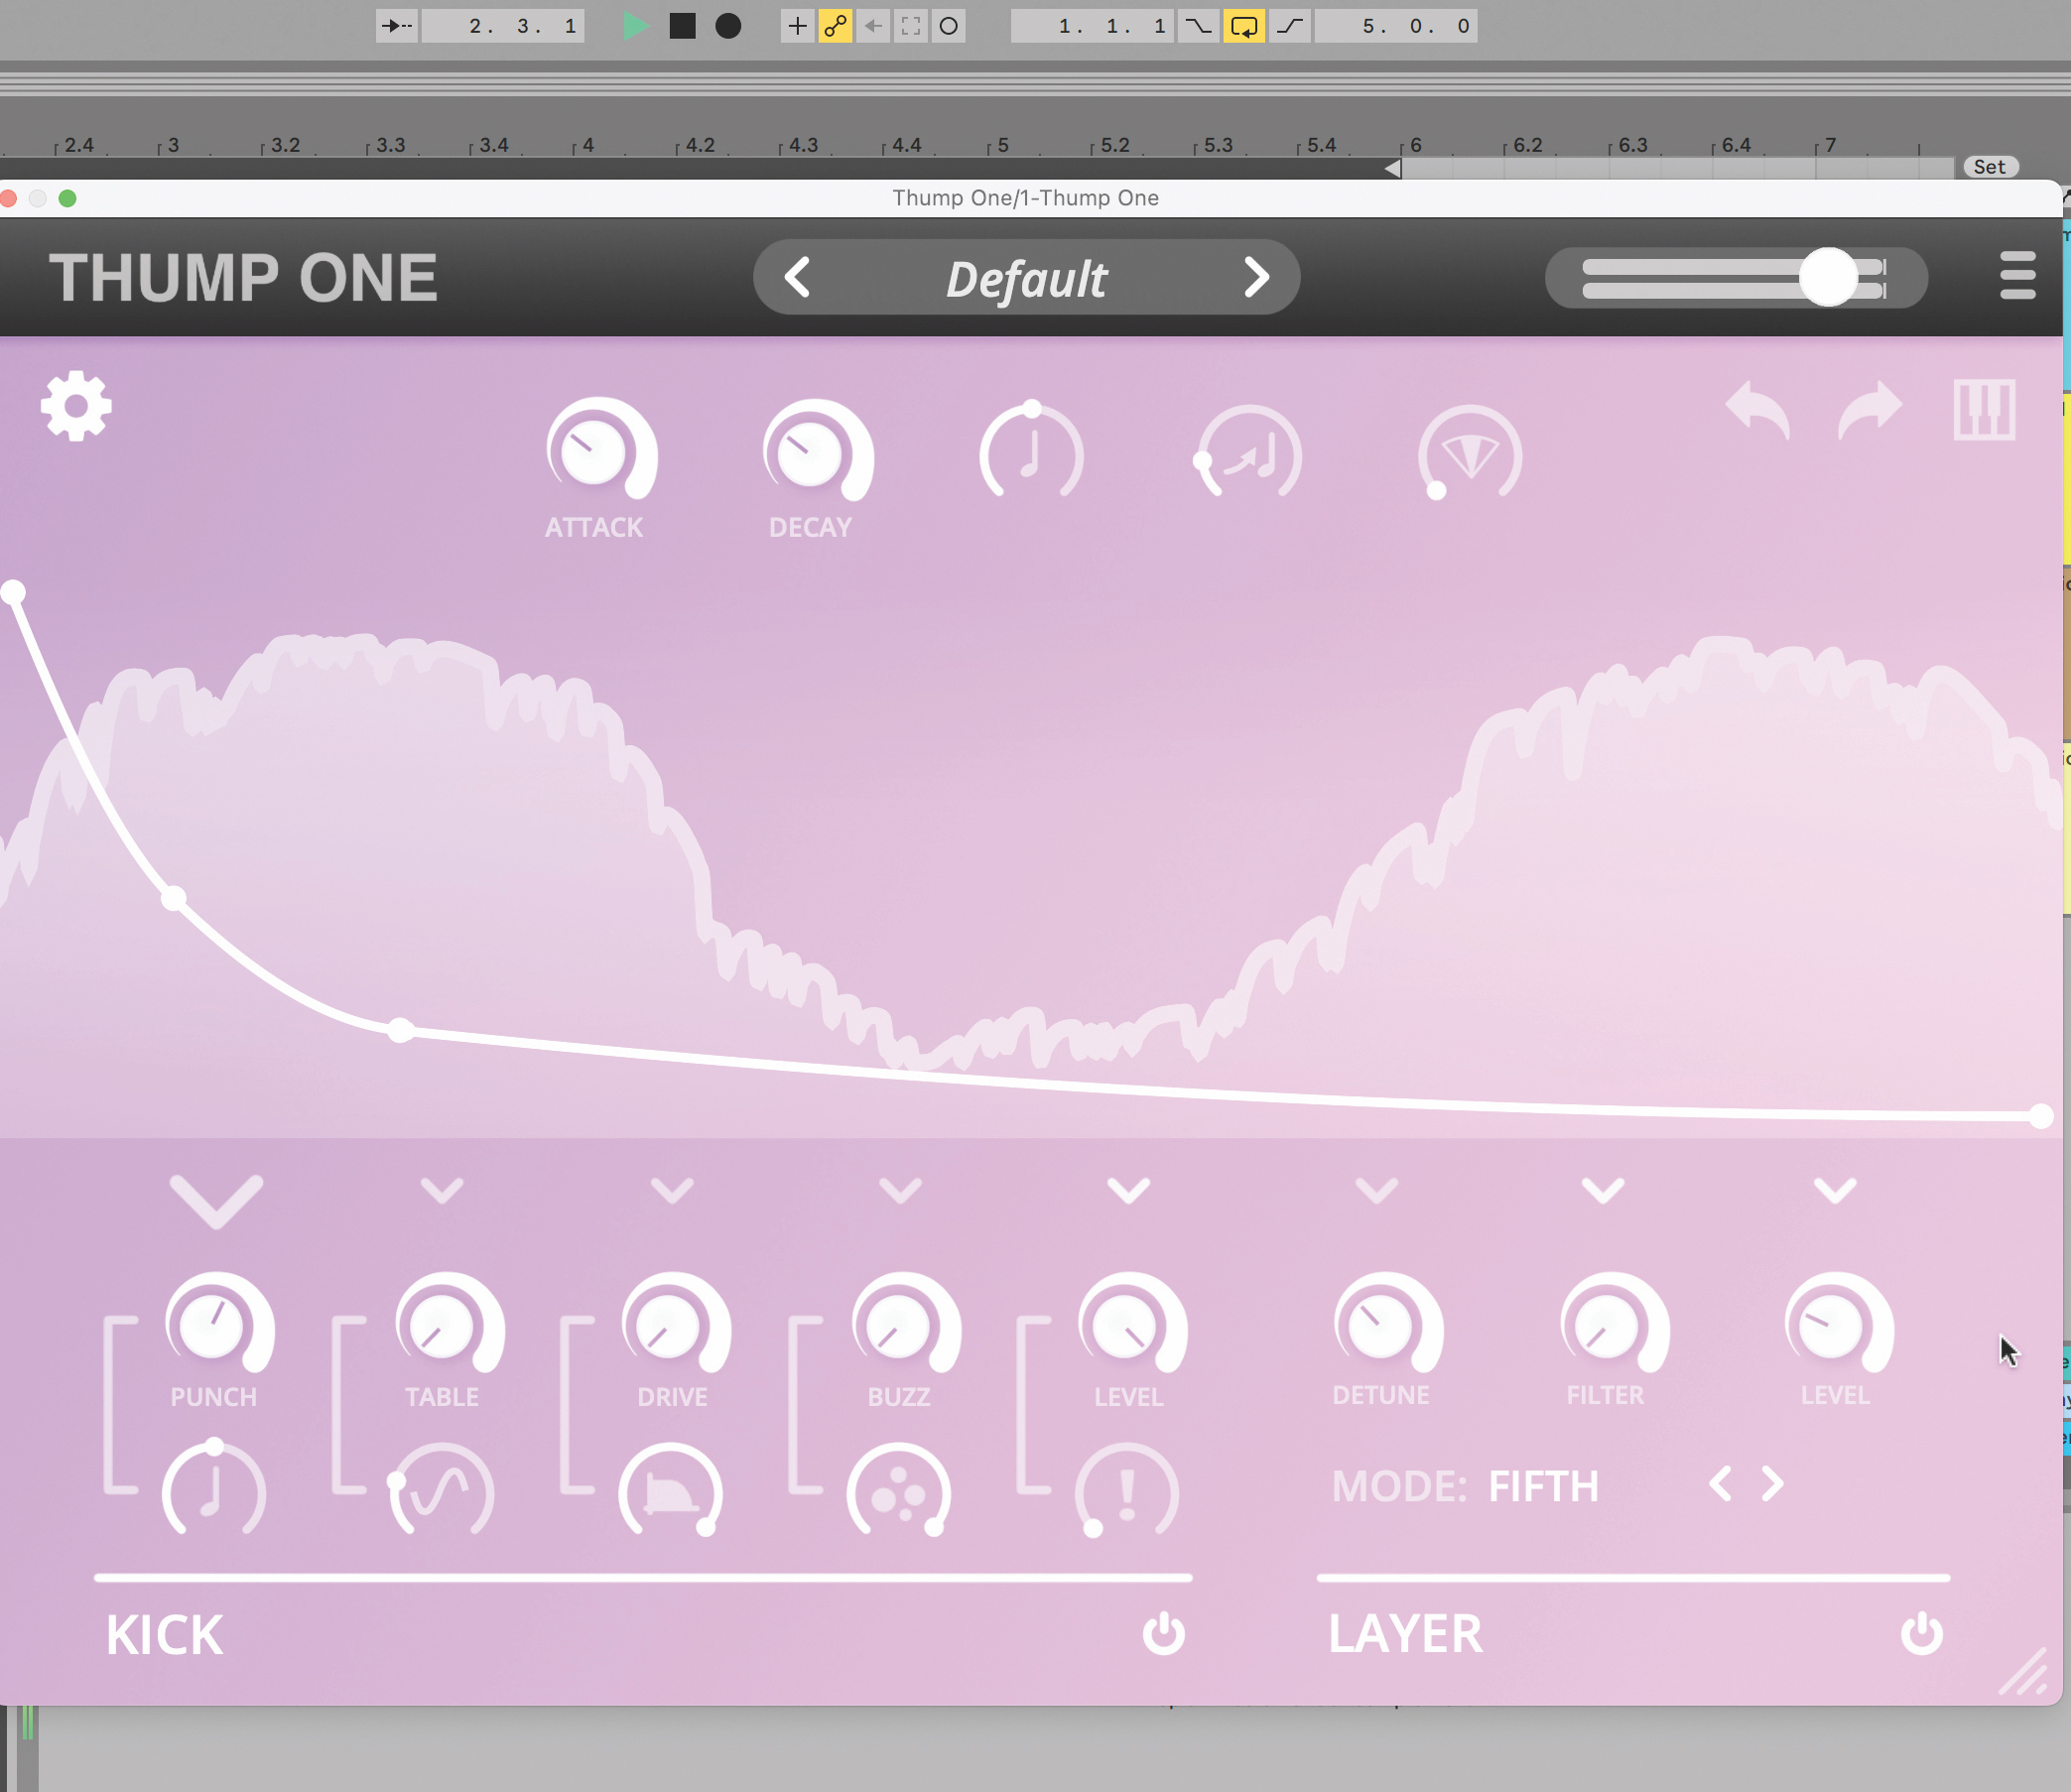
Toy Box’s Thump One is a plugin synth that specialises in kicks and big thumps. It’s got various properties that are controlled by envelopes, including kick punch and its pitch, and drive for the onboard distortion.
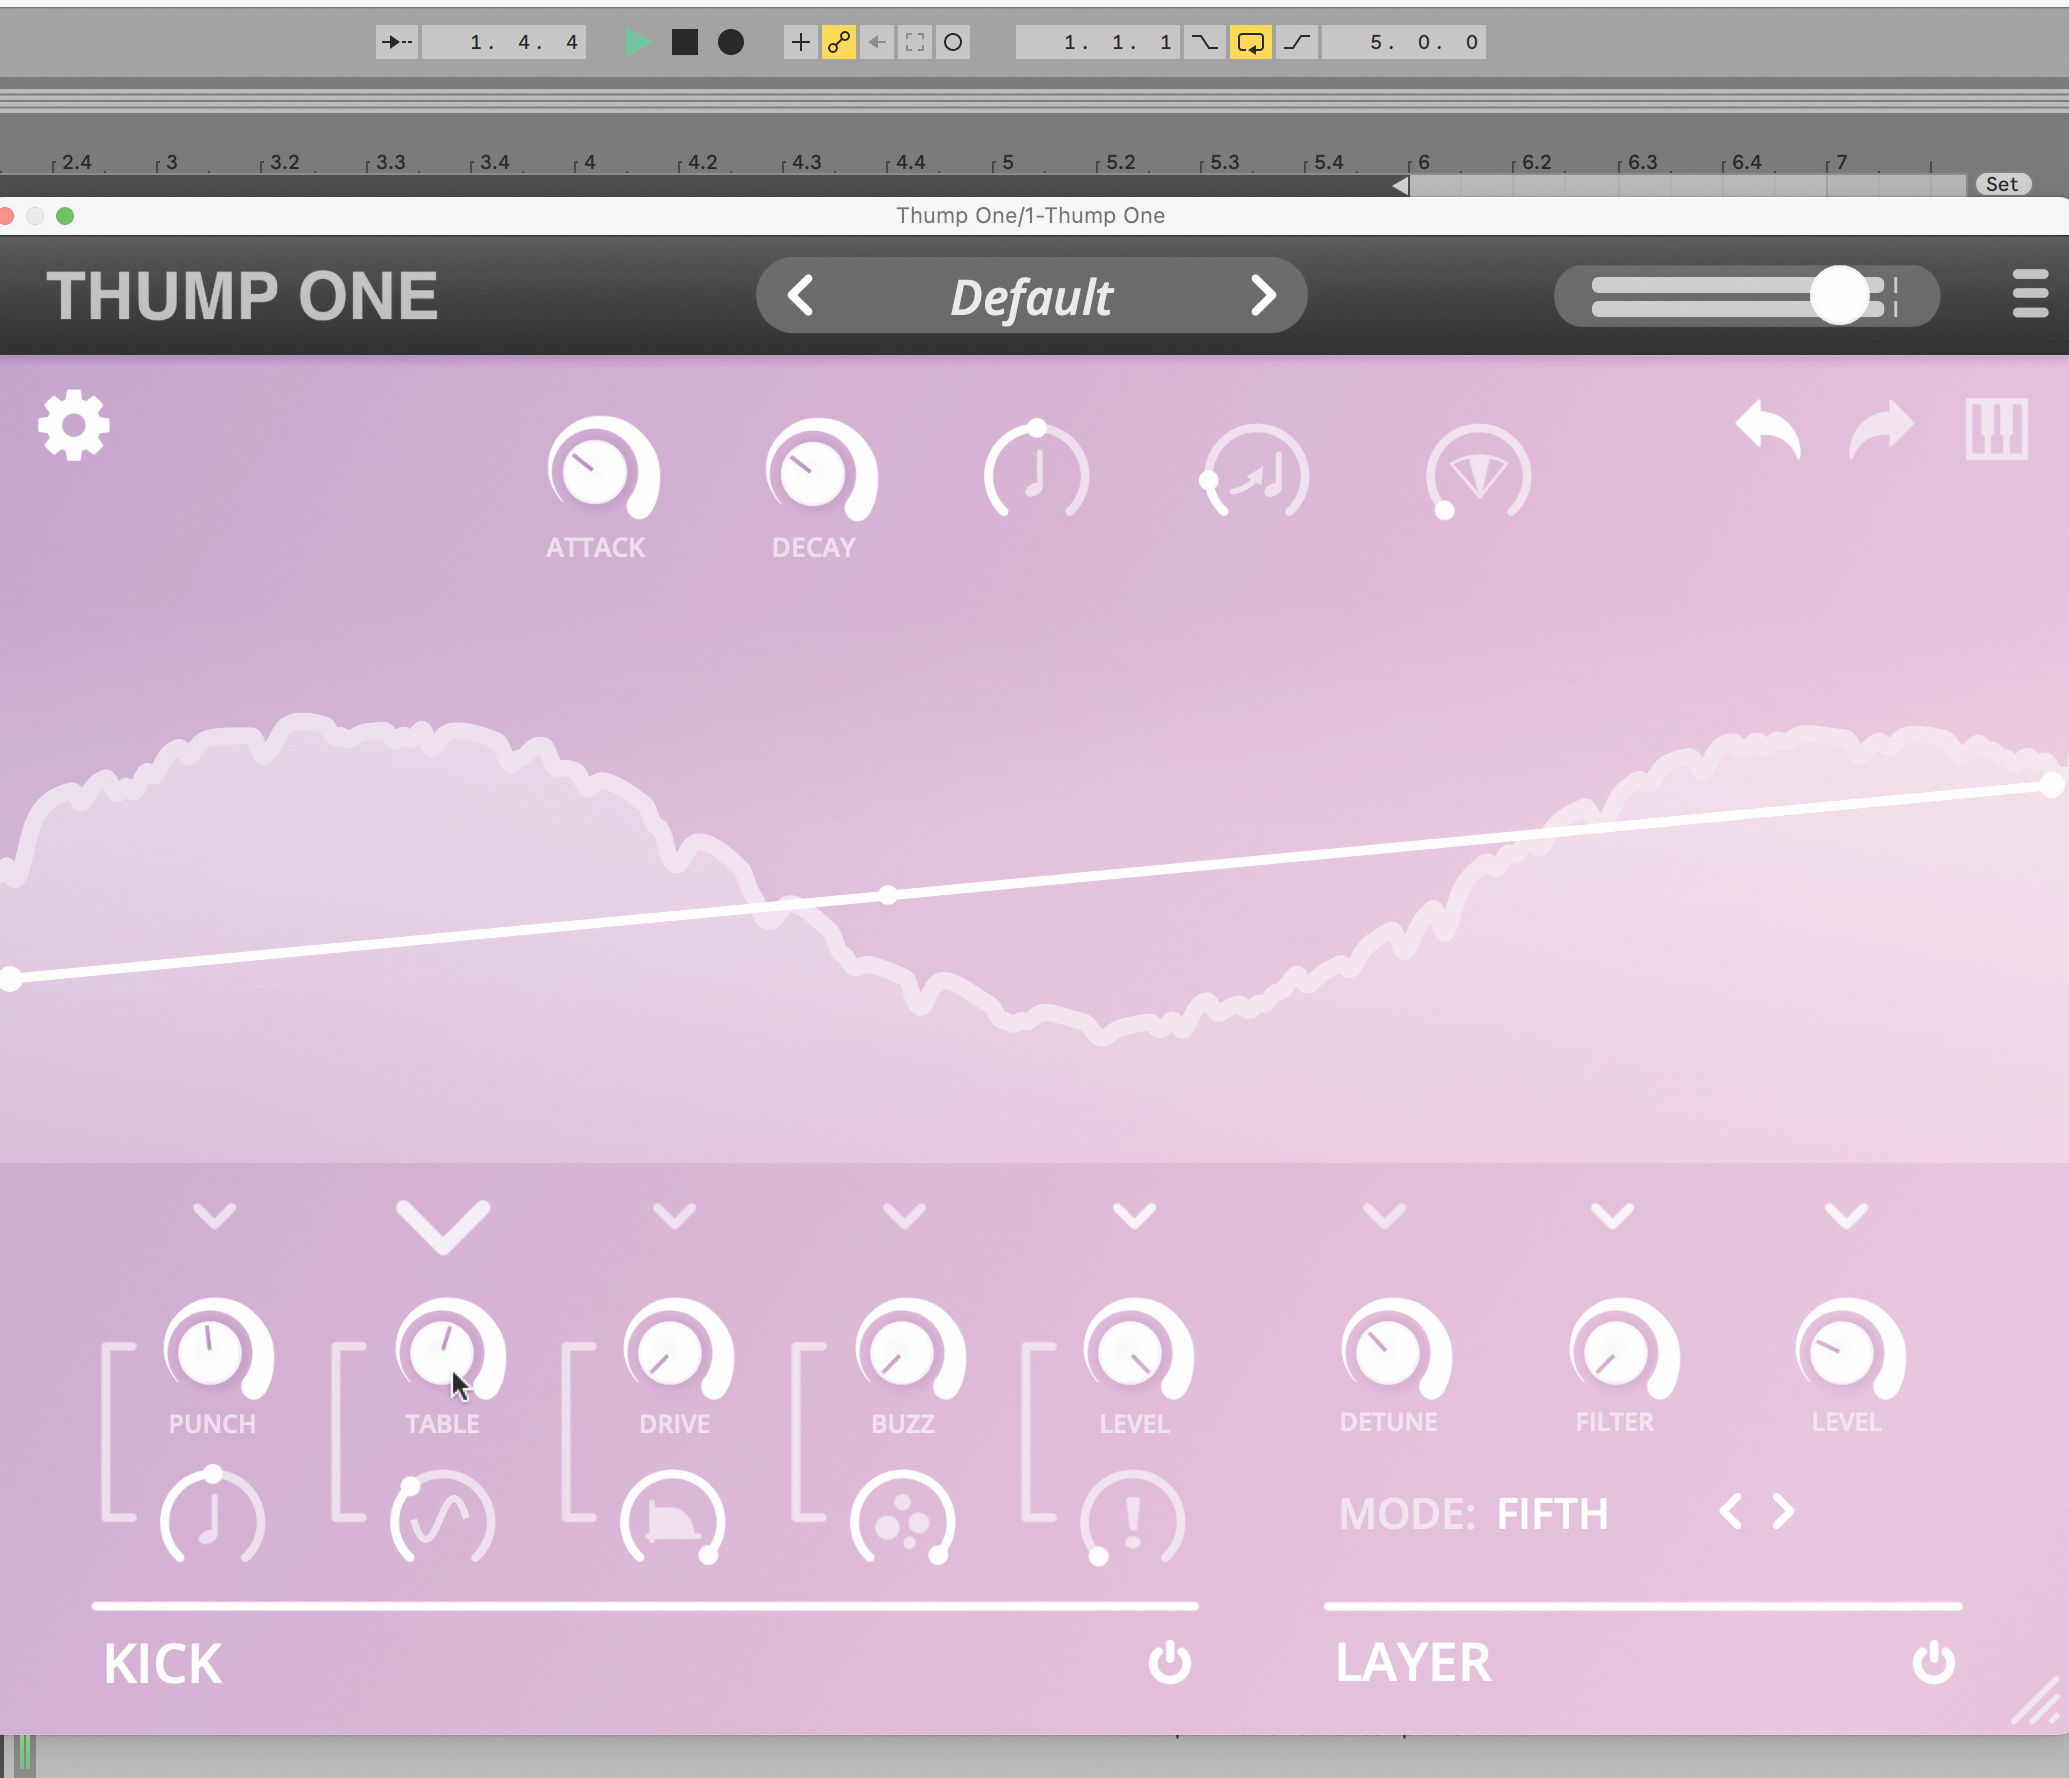
One of those envelopes controls the table parameter, which determines the position in a kick-centric wavetable. This can be modulated to move as the kick sounds, or simply set to a position of your choosing.
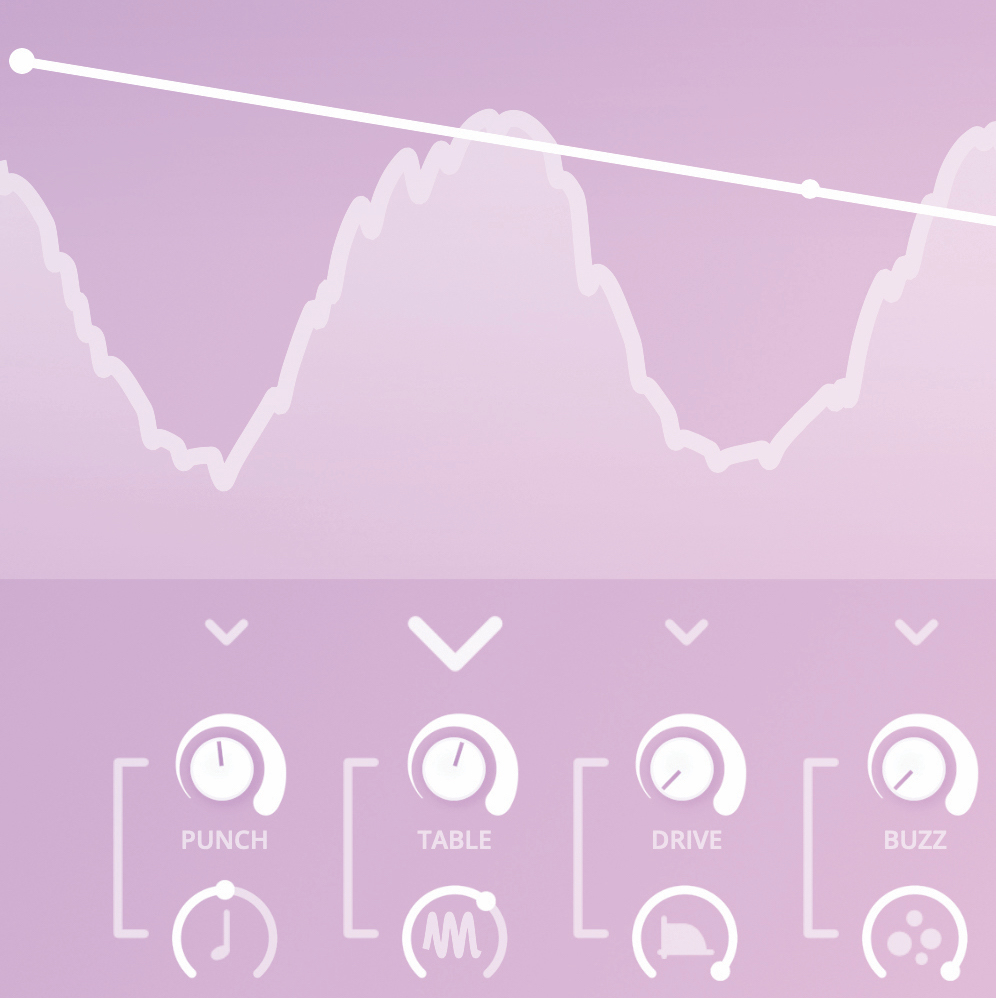
The actual wavetable itself can also be set here, and we get a huge choice of wavetables especially designed for kick duties, with plenty of weighty and ringing sines, but also more heavy-handed harmonic material.
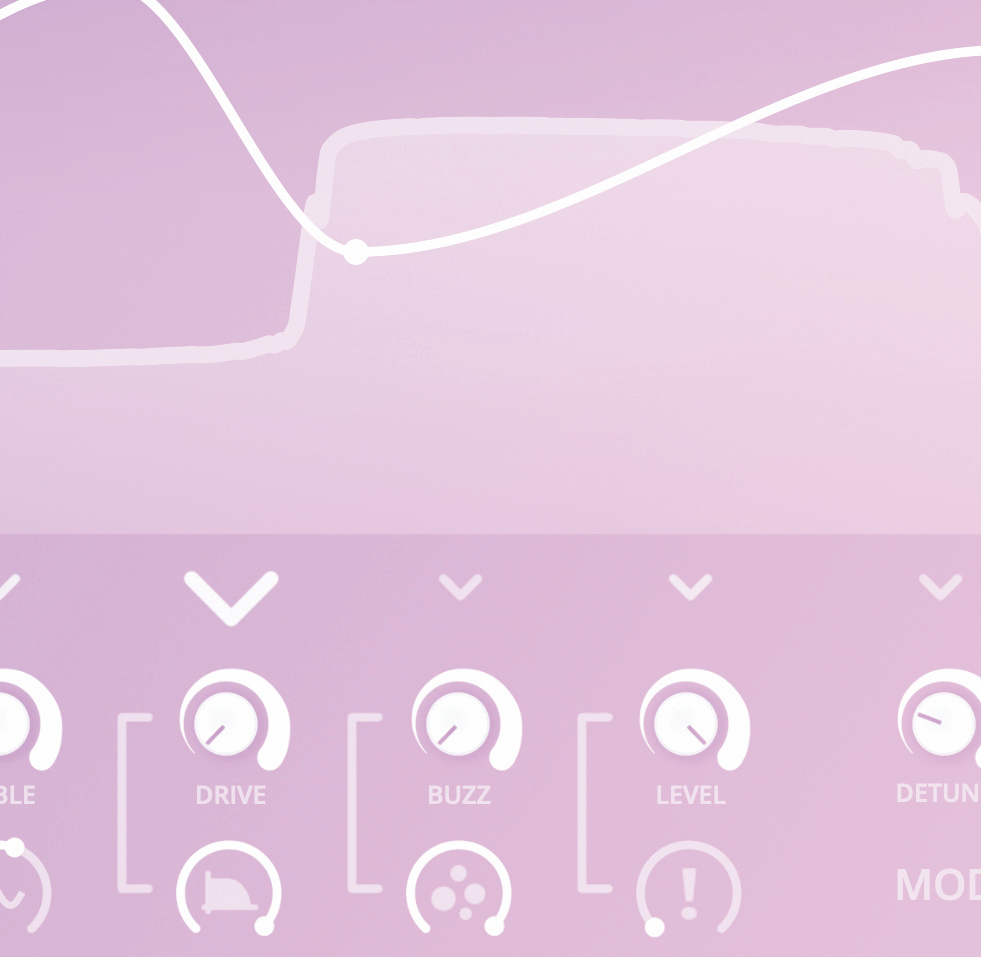
After this, it’s a case of playing with the other available parameters to find the right sound, getting through Tune controls, distortion parameters, and drawing envelopes for kick properties as well as its complementary bass layer.
3 of the best wavetable synths
1. Arturia Pigments
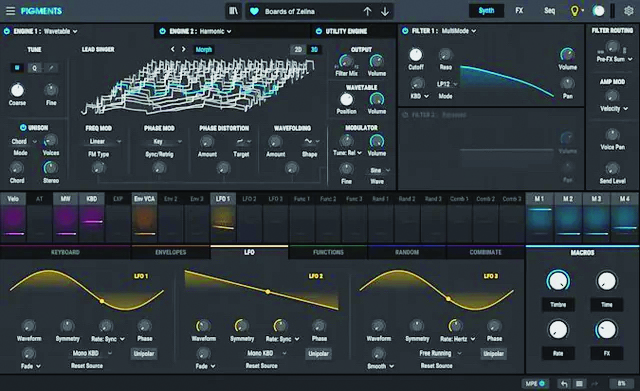
Wavetable synthesis is just one string to Pigments’ bow, but everything this synth does, it does with complete talent and comprehensive skill. Calling up a wavetable oscillator in Pigments is like having a full synth ready to go – and that’s not to mention the whole synth that was already there!
2. Universal Audio Opal
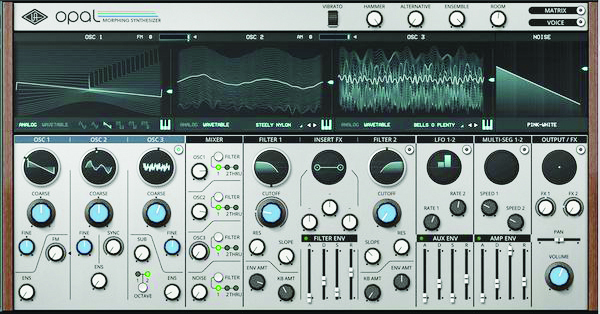
This ‘analog meets wavetable’ synth gives the best of both worlds, combining classic ‘analog shape’ sources with wavetable formulations. Given UA’s heritage in modelling analogue gear digitally, you’re in for a treat with the former, and the latter will excite too.
3. Vital
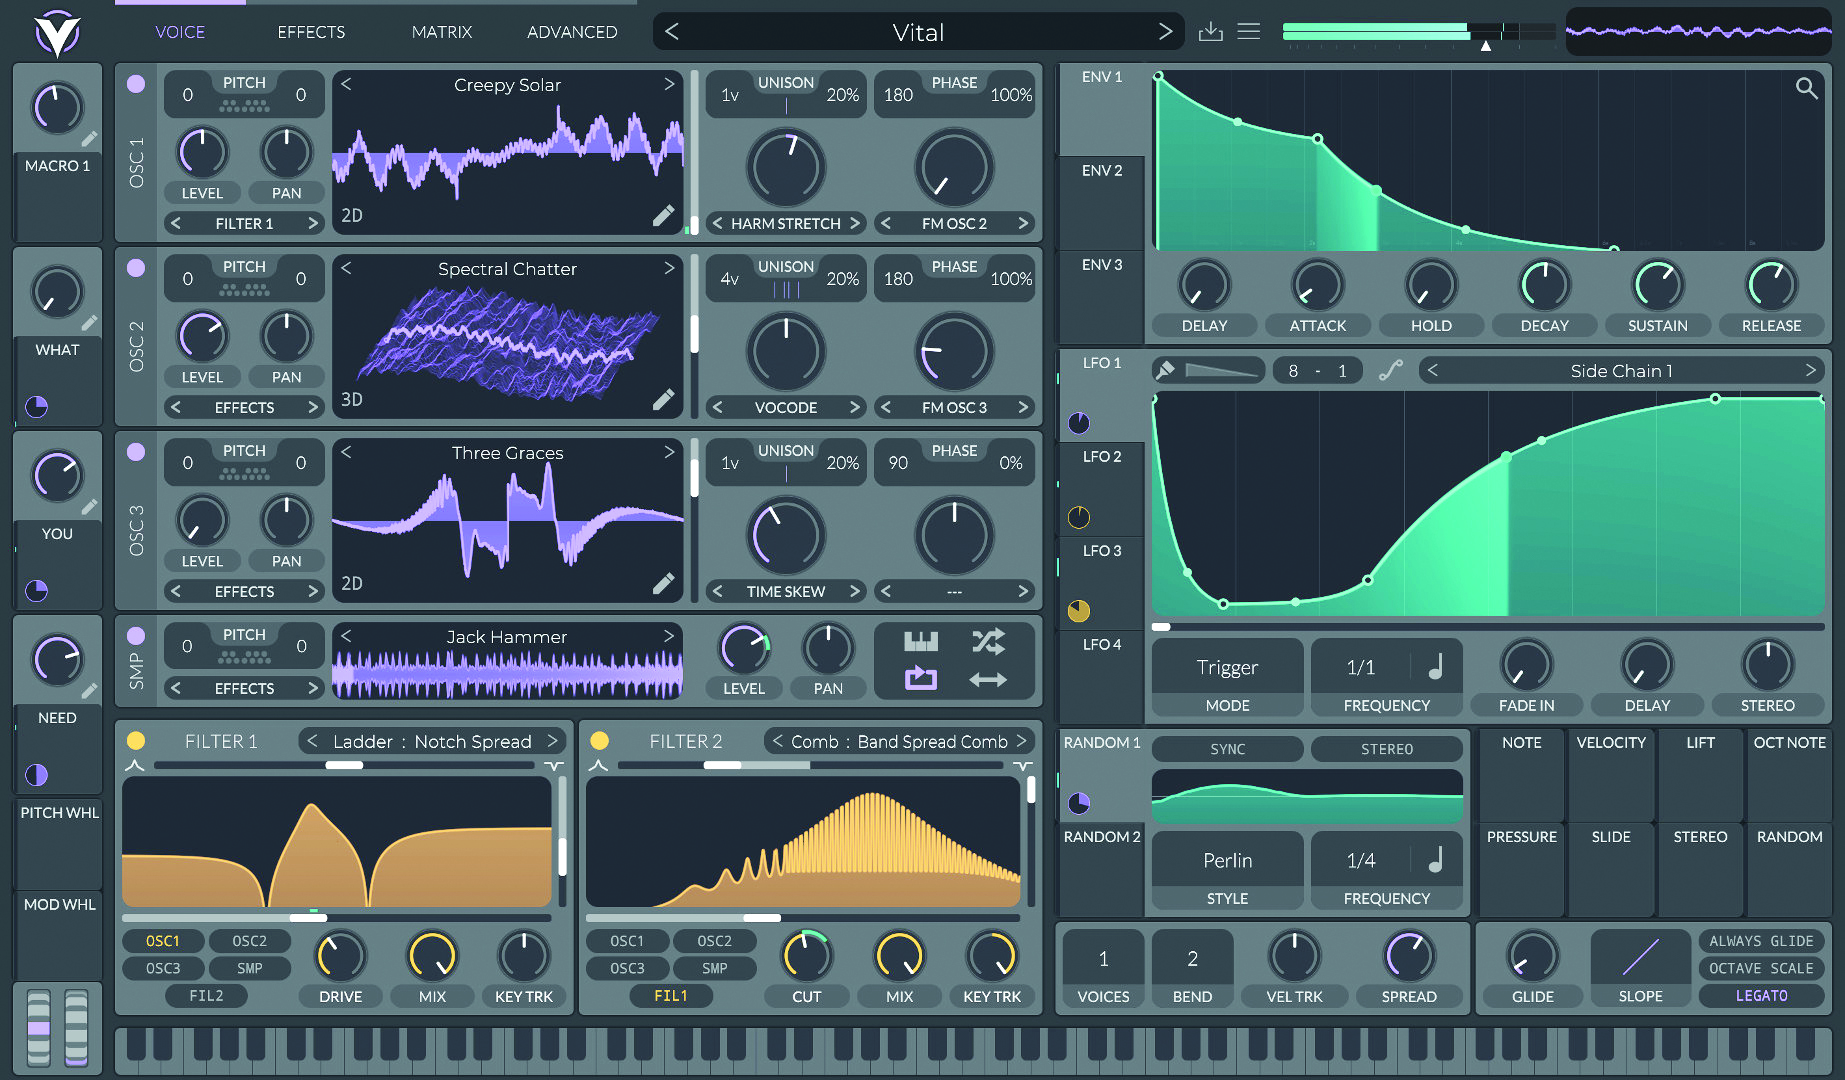
You might have heard of Vital for its ‘talking’ oscillators, or “text to wavetable” capabilities. These unusual takes on synthesis have to be seen and heard to be understood, but that shouldn’t be a big ask since Vital is a free synth plugin.


Future Music is the number one magazine for today's producers. Packed with technique and technology we'll help you make great new music. All-access artist interviews, in-depth gear reviews, essential production tutorials and much more. Every marvellous monthly edition features reliable reviews of the latest and greatest hardware and software technology and techniques, unparalleled advice, in-depth interviews, sensational free samples and so much more to improve the experience and outcome of your music-making.

