
Logic Pro not only includes a massive library of sounds, but also has a fine array of stock effects. These include a lot of standard processors such as parametric and classic EQs, a very well spec’d compressor, reverbs, delays and modulations.
However, when you want something a bit more creative it really delivers. In this tutorial we’ll look at the best of Logic Pro’s creative plugins and the more interesting and extreme effects they can deliver.
Individual effects
Most of Logic Pro’s plugins are individual effects. A good start point is Autofilter. This not only includes a great choice of filter shapes and slopes, but also envelope control, distortion and a tempo-syncable LFO that can create some impressive stereo effects. Check out the Stereo Rhythm preset for starters. Sticking with filtering, EVOC 20 Filterbank is the filterbank from the EVOC 20 vocoder and includes LFO-controlled formant shift among other features to deliver less run-of-the mill filter effects.
Article continues below 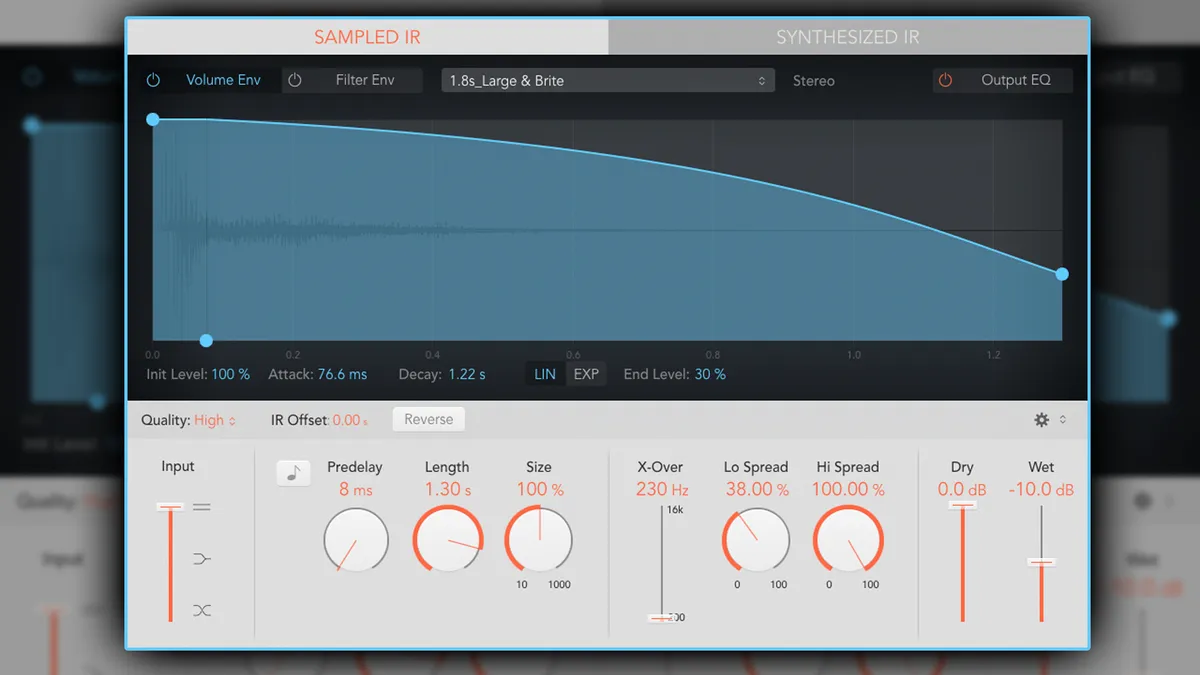
Fantastic (stock) plugins and how to use them: Logic Pro Space Designer
One of Logic Pro’s most creative plugins is Space Designer. Though mainly used for reverbs, its convolution engine and selection of transformative impulse responses are great for creating new sounds. For transformative effects, head to the Warped Effects preset folder and the Drone Tones, Moving Spaces and Textures folders. Or you can simply load in your own audio as an impulse. For full transformative outcomes remember to set the Dry level to its minimum.
Further plugins that offer great creative effects include Delay Designer, which has a large selection of presets (the Warped folder is particularly good), and Vocal Transformer, where the Robotize effect and Formant option offer handy ways to play with pitched sounds.
For better distortion effects, both Phase Distortion and Bitcrusher offer something different, and we look at the latter in the walkthrough. Meanwhile Ringshifter combines ring modulation and frequency shifting. It’s great for metallic effects and the onboard Delay and Envelope Follower expand the palette considerably. Check out the Warped folder for creative presets.

Combination effects
In addition to many creative individual effects, Logic Pro also has impressive multi-effects. Step FX and Phat FX are the big hitters, and we demo these in the walkthrough below. Step FX includes five key processing modules - Mod FX, Filter, Distortion, Reverb and Delay coupled with an assignable XY pad. Onboard effects control is via three assignable step modulators. Phat FX includes two filters (band-pass and filter), Distortion, Mod FX, Bass Enhancer, Compressor, Envelope Follower and assignable XY pad. Onboard control is via two LFOs.

Fantastic (stock) plugins and how to use them: Logic Pro Delay Designer
Logic Pro has a third more, performance-focused multi-effects. Remix FX includes filter, gate, downsampler and repeater coupled with tempo-synced scratch, reverse and tape stop effects. The Filter and Repeater use XY pads, the Gater and Downsampler use depth faders and spot effects are button-triggered. Effects are momentary, reverting to their bypass state when released, so overall the plugin works well when you capture moves with automation.
Although not categorised as such, Pedalboard is a single plugin multi-effects with a large choice of pedals including wah-filters, classic phasers and tremolos plus a big choice of distortion flavours. Primarily designed for use with guitar and bass amps, it’s actually a goldmine of interesting effects. What’s more, with an integrated flexible signal flow it’s a good opportunity for chaining effects in creative ways. Head to the Complete Pedalboard folder for ideas.
Finally, it’s worth mentioning Logic Pro’s raft of channel presets. These combine multiple plugins to deliver an array of pre-configured effects. Again many of these are designed for regular mixing tasks (vocals, guitars, drums or percussion). But for more interesting stuff head to the main Experimental folder. Here you’ll find a bunch of creative chains built from the stock effects.
Bitcrusher
Bitcrusher looks simple, but has all you need to degrade your sound precisely. The core processes are adjustable bit resolution (1-24 bit) and adjustable downsampling (1-40x). These are joined by Drive, output Clip Level and three clip Modes - Fold, Clip and Wrap. These control how signal behaves when it hits clip level. You can use Bitcrusher for static effects, but you can also try automating some parameters. Finally, you also get a global wet/dry Mix, which gives a great way to blend in more extreme effects.

Gradually reducing the bit resolution may not sound immediately obvious on transient heavy beats, however on sustained sounds, obvious noise creeps in until eventually you get the classic audio breaking up effect. Use the Drive control in conjunction with the Resolution and Clip Level to get the desired amount of distortion.

Downsampling reduces the sample rate and Bitcrusher’s control divides down the rate for each setting. For example at x10 the sample rate is a tenth (4.41kHz for 44.1kHz audio). Downsampling gradually reduces the high frequencies but also produces a nice array of ringy artefacts. Find a sweet spot for each source sound.

Automating static changes or dynamic moves for the resolution and downsampling parameters either individually or collectively is a great way to create breakdown effects. We’ve used automation to get lower resolution and set up a gradual change to the downsampling over a two-bar section of our beat loop.
Get creative with Step FX and Phat FX

Step FX includes three step modulators each with up to 128 steps. These are the key to creating controlled and evolving effects. We’ve created a reasonably simple patch that combines a low-pass filter and reverb. It assigns the cutoff, resonance and reverb mix to the three step modulators and each modulator sequence is a different length - 128, 32 and 16 steps respectively.

Step modulators not only set values for parameters but also duration. You can see here that our Reverb Mix sequence has a bunch of levels and durations. Use this to create a gated feel to a part, or momentary effects. Steps can also be tied, and there’s an envelope for each step modulator.

Once you have this set up, the final piece of the puzzle is the XY pad. The XY pad lets you assign two parameters to each axis for further collective manipulation. Here we’ve set up ours so vertical (Y) movements control output panning, and horizontal (X) movements control the modulation depth of the filter cutoff step modulator.

Phat FX offers easy effects modules with twin LFO control. Here we’ll transform a basic pad sound using both LFOs to create a rhythmically interesting pulsing pad. We’ve set up a tight band-pass filter (150Hz-1kHz) and a steep 24dB low-pass filter. We’ve set the low-pass cutoff at about 800Hz and assigned LFO 2 to control it, with a ramp-down shape and ¼-note-synced rate.

Next up, we’ve added the Compressor module, assigning LFO 1 with a ramp-down shape to the compressor amount. Setting LFO 1 to a 3/8 note synced rate with a high depth creates a pumping effect from the compressor and in combination with the main filter you will find you get a pulsing polyrhythmic effect.

The final stage is to incorporate the XY pad controls to make collective parameter changes. For the X axis our main assignment is the Downsampler setting in the Distortion module, and for the Y axis it’s the Mod FX Mix level. We’ve also added the compressor amount to the X axis with a negative depth, so its amount reduces as the downsampling increases.
