"Without LFOs, synth sound design would restrict us to constant waveforms and effects with no movement": The ultimate guide to LFOs
Master a staple modulation tool that's been used by professional audio engineers across the globe for decades
What’s a sound without movement? LFOs are likely the most common tools at our disposal for creating movement when creating sounds or applying effects. LFO stands for low frequency oscillator – specifically, an oscillator whose frequency is typically below the human audible range (under 20Hz), although these days that frequency limit is by no means hard-coded.
You’ll most likely see LFO settings incorporated into each synth in your toolkit because of how common they are and how many creative options they provide us. We can map them to modulate most synth patch parameters (like pitch, volume, filter cutoff, and effects processing–like reverb) although some synths are designed with LFOs fixed to one or multiple parameters.
Unlike the single cycle of an envelope filter (another similar modulation tool featured in most synths), LFOs allow us to add constant cycling movement, texture, and depth to our sound designs by consistently modulating their mapped parameters across time, according to their specified frequencies. An envelope signal typically ‘plays’ once alongside a note, starting and ending coincident with it, while an LFO signal often feels more constant, oscillating even when a note hasn’t yet been played.
Some LFOs – including the one in Ableton’s Auto Filter – also allow us to set the LFO rate at a musical measurement (like 1/4 bars or 1/2 bars), instead of a fixed frequency, so the modulation applied will automatically be in sync with your project tempo. This is especially helpful when creating a desired rhythmic pulse. Many LFOs also allow us to change their wave shape (eg, sine, triangle, and sawtooth) to customise them further.

Without LFOs, synth sound design would restrict us to constant waveforms and effects with little room for tailoring the sound. We’d also have to always rely on manual automation, which can be tedious and hard to apply extensively with precision.
Since their inception, LFOs have become a staple part of sound design, and like all technology in music, audio, and sound engineering, they’re continuing to be implemented by developers in fun and experimental ways, expanding their creative potential and applications.
As digital tools and software have let developers push through new boundaries, modulation has become more and more open-ended
But as digital tools and software have let developers push through new boundaries, modulation has become more and more open-ended. The serious synths of today features LFOs and envelopes, but they’re so customisable that they’re arguably the same thing – a multistage envelope that can be set to loop and an LFO that can be set to trigger once, for example. Plugins that offer custom, draw-your-own shapes for their LFOs can be put to work in a variety of ways, making things more ambiguous.
Get the MusicRadar Newsletter
Want all the hottest music and gear news, reviews, deals, features and more, direct to your inbox? Sign up here.
Identity crisis or not, in this feature we’ll look at some modern-day LFOs. While some of these may blur the boundaries of modulation and modulators, they can be used for a huge number of sound-design applications, and what results they make possible.
Controlling the custom LFOs in ShaperBox 3.5
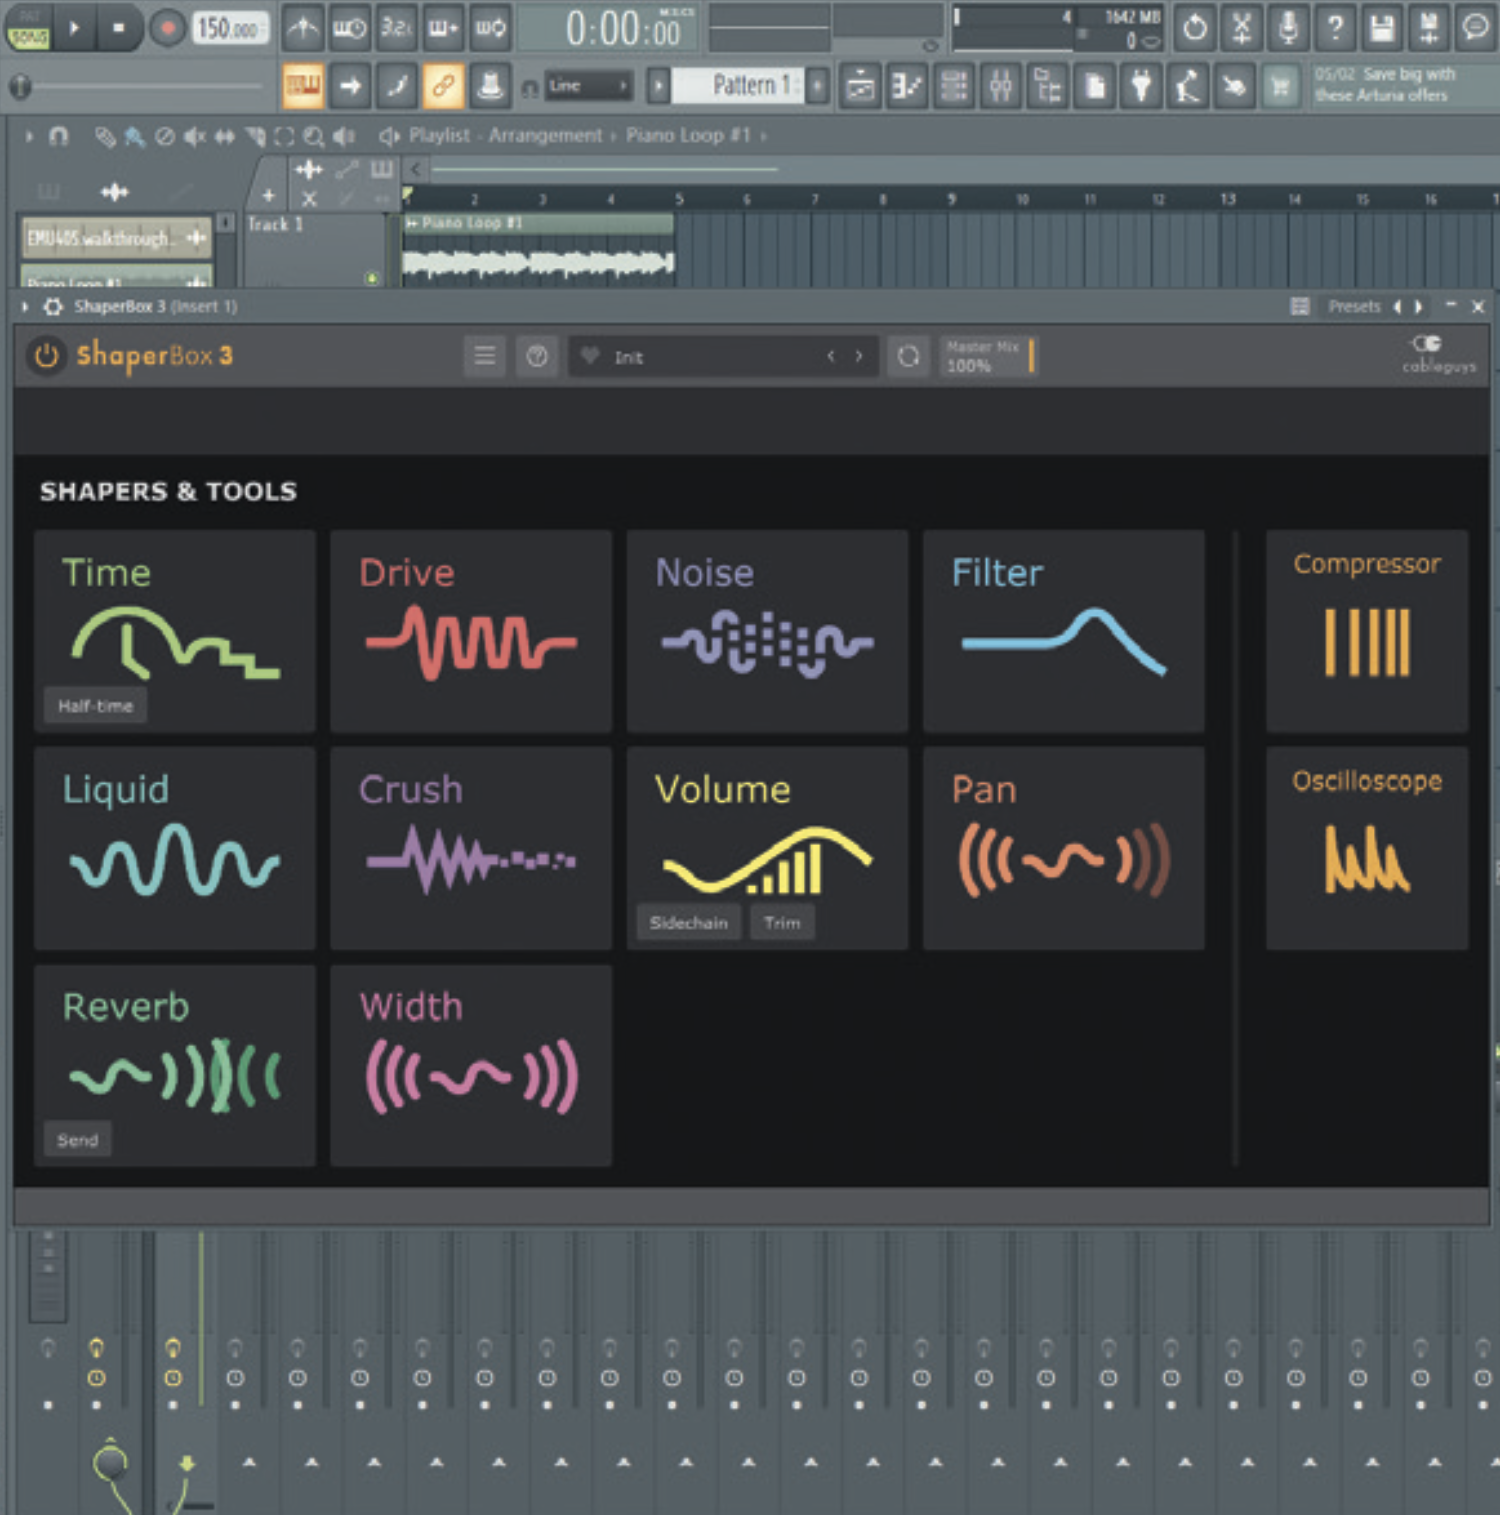
ShaperBox is an effects plugin, rather than a synth. This means you can make use of its talents on any incoming signal. Load up anything that gets your head nodding, ensure your project tempo is set correctly, and open ShaperBox on the target channel.
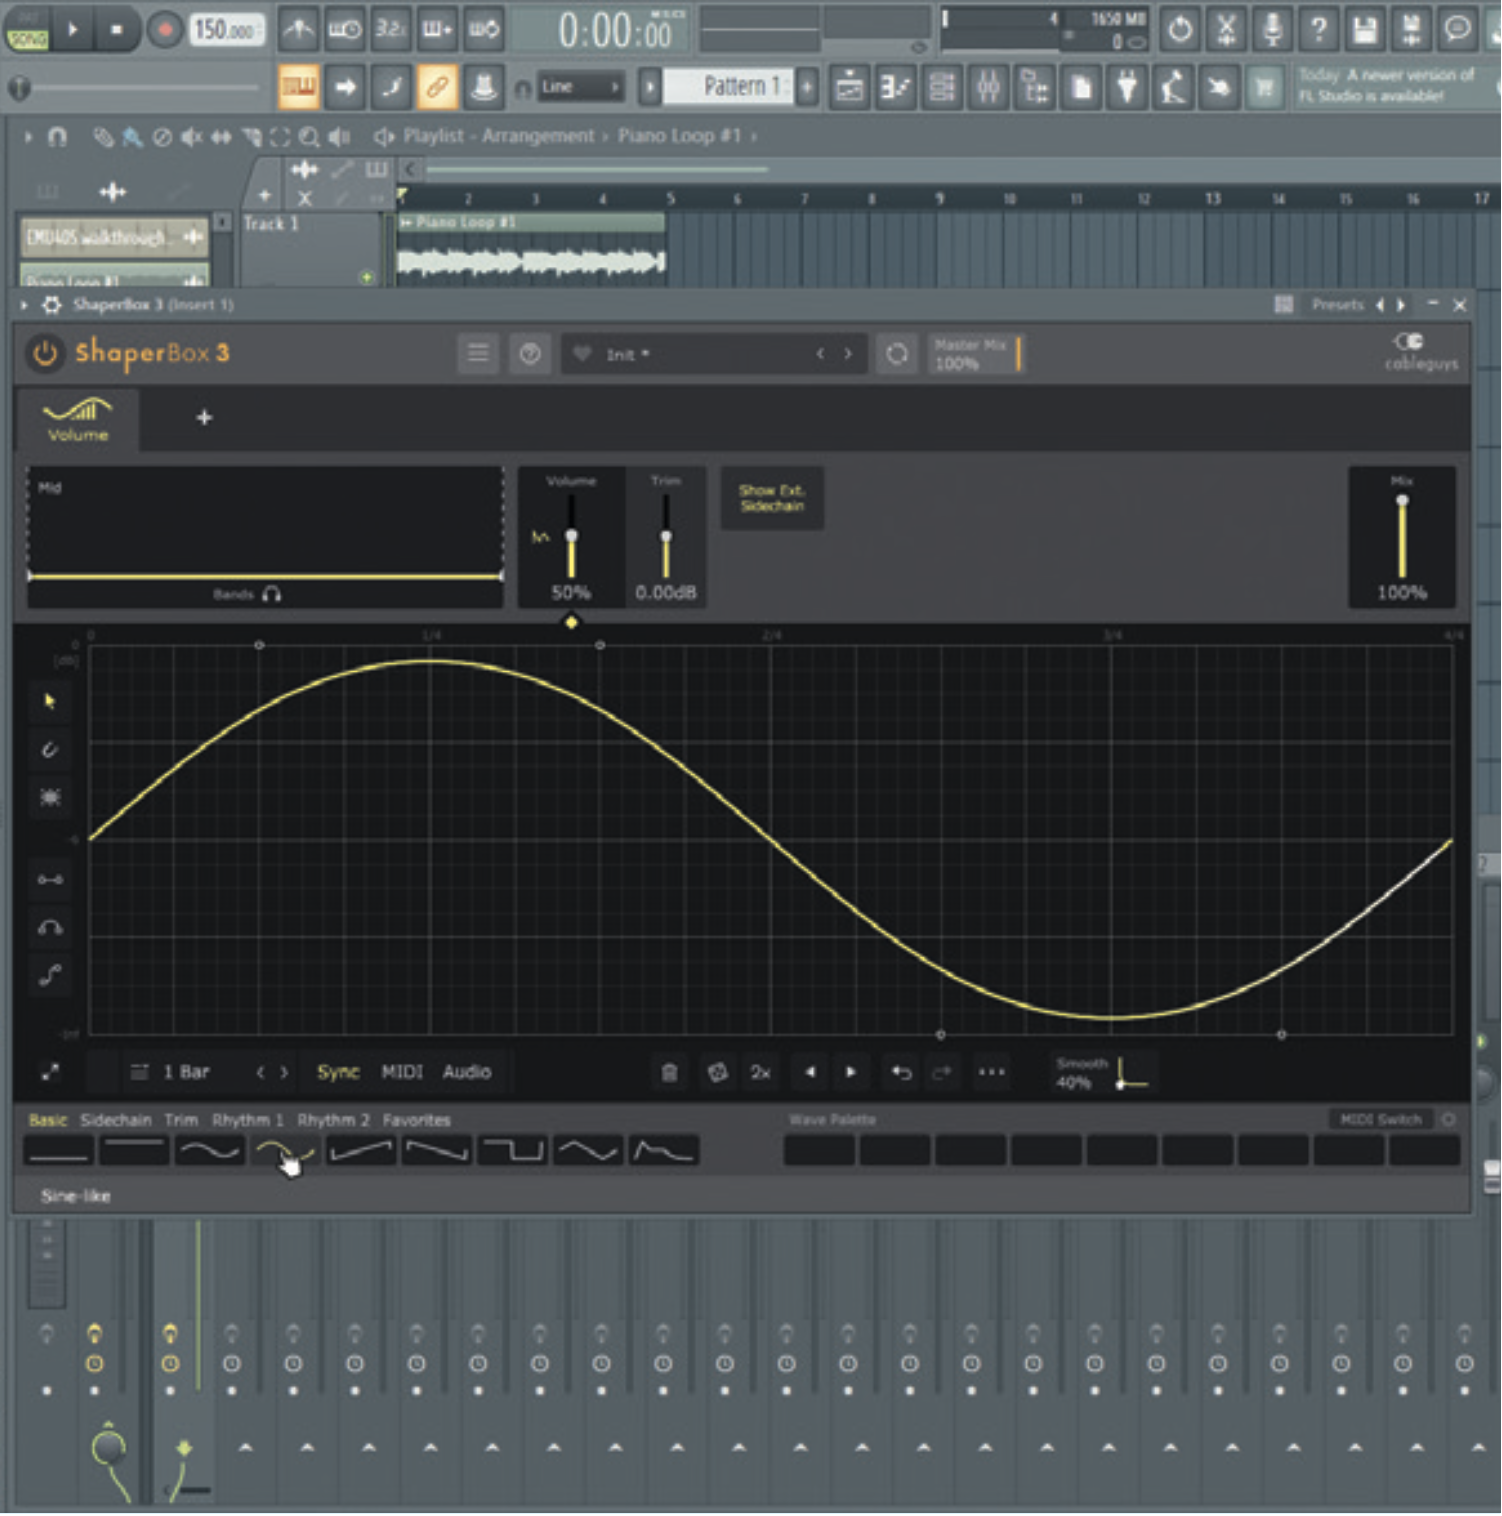
ShaperBox has 10 LFO-controlled effects (‘shapers’). For now, let’s click on the Volume shaper to add it to the chain. This LFO will modulate the volume of the incoming signal. You can choose a starting waveform from the bottom-left.
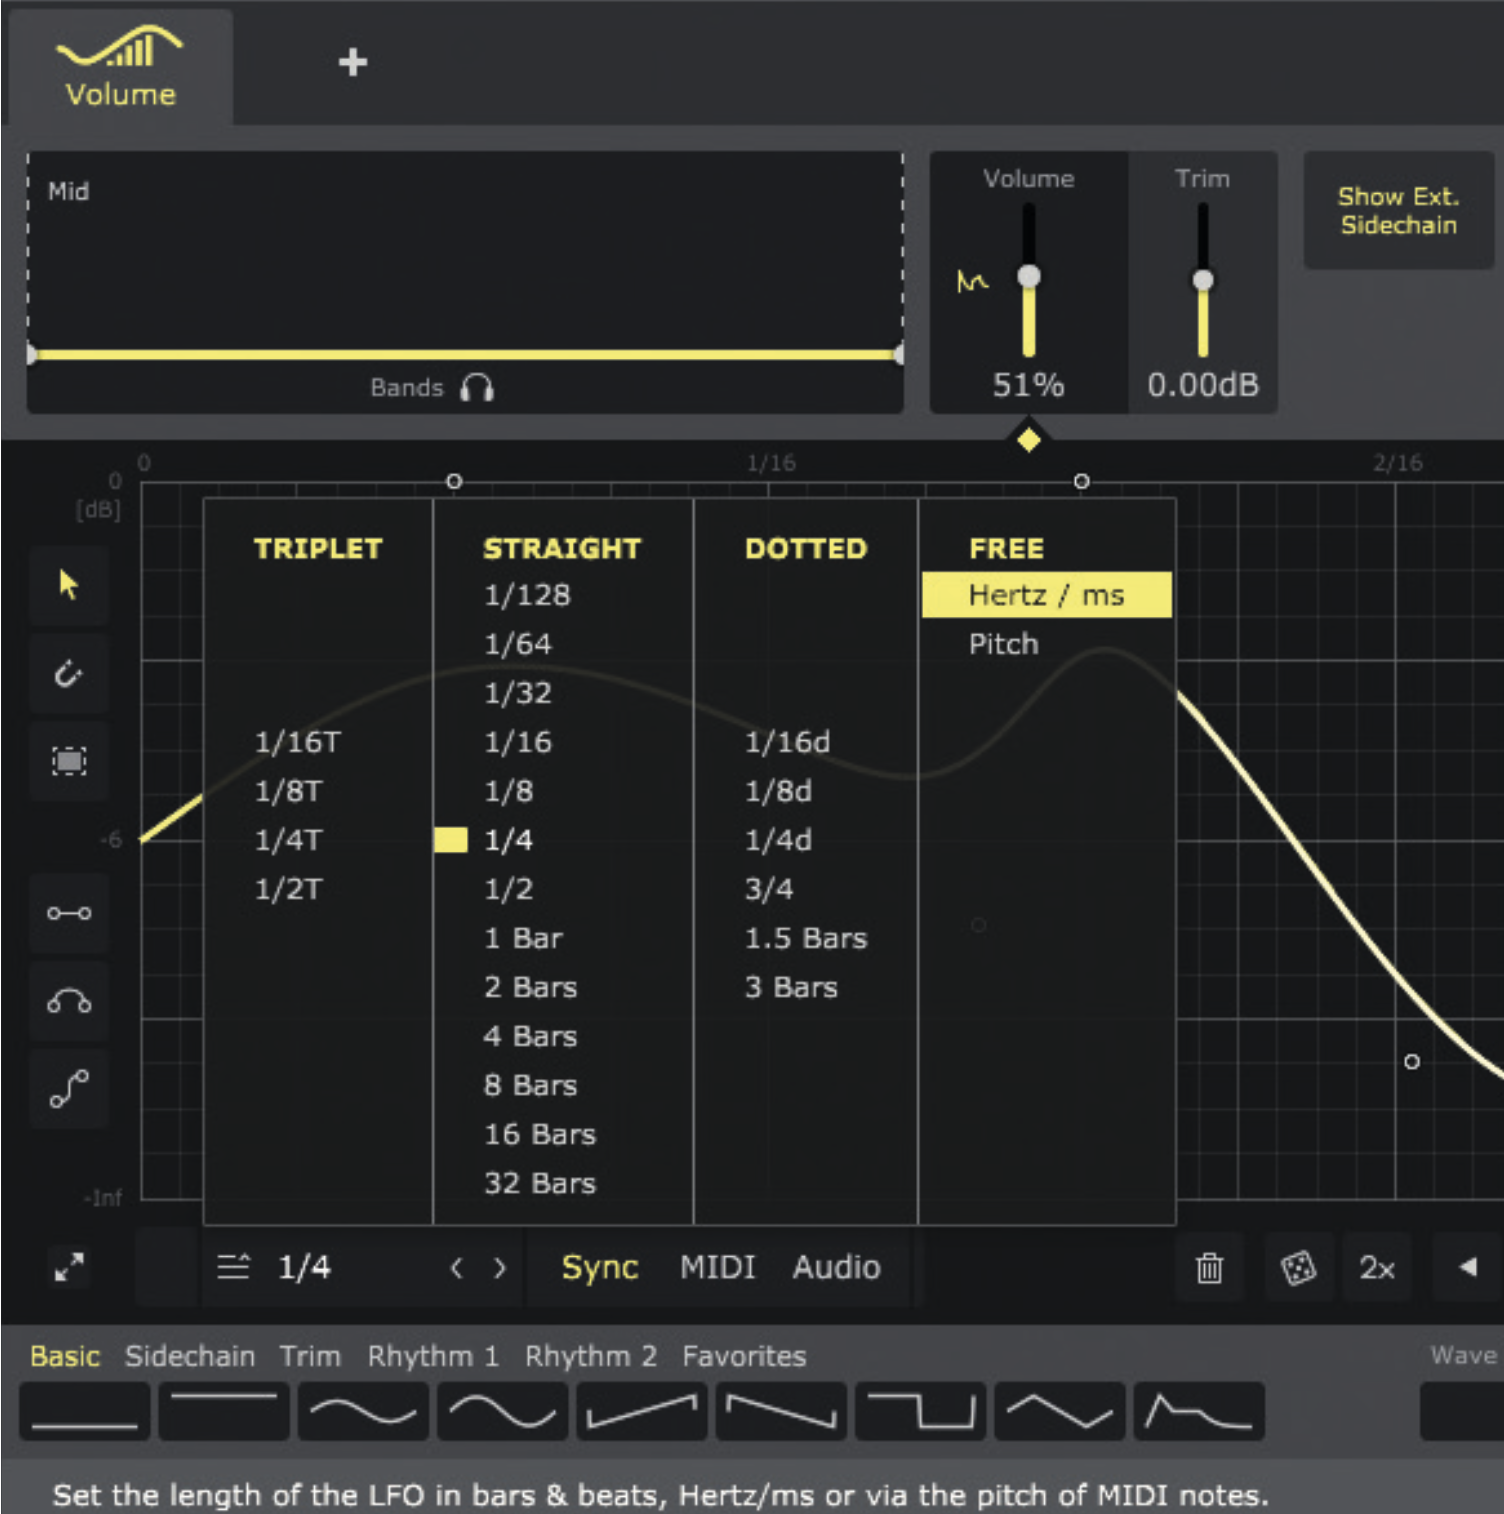
We can customise the LFO envelope by clicking to add points and dragging to move them. We can change the rate using the dropdown menu in the bottom left. You can set the rate to a free-running frequency measurement, too.
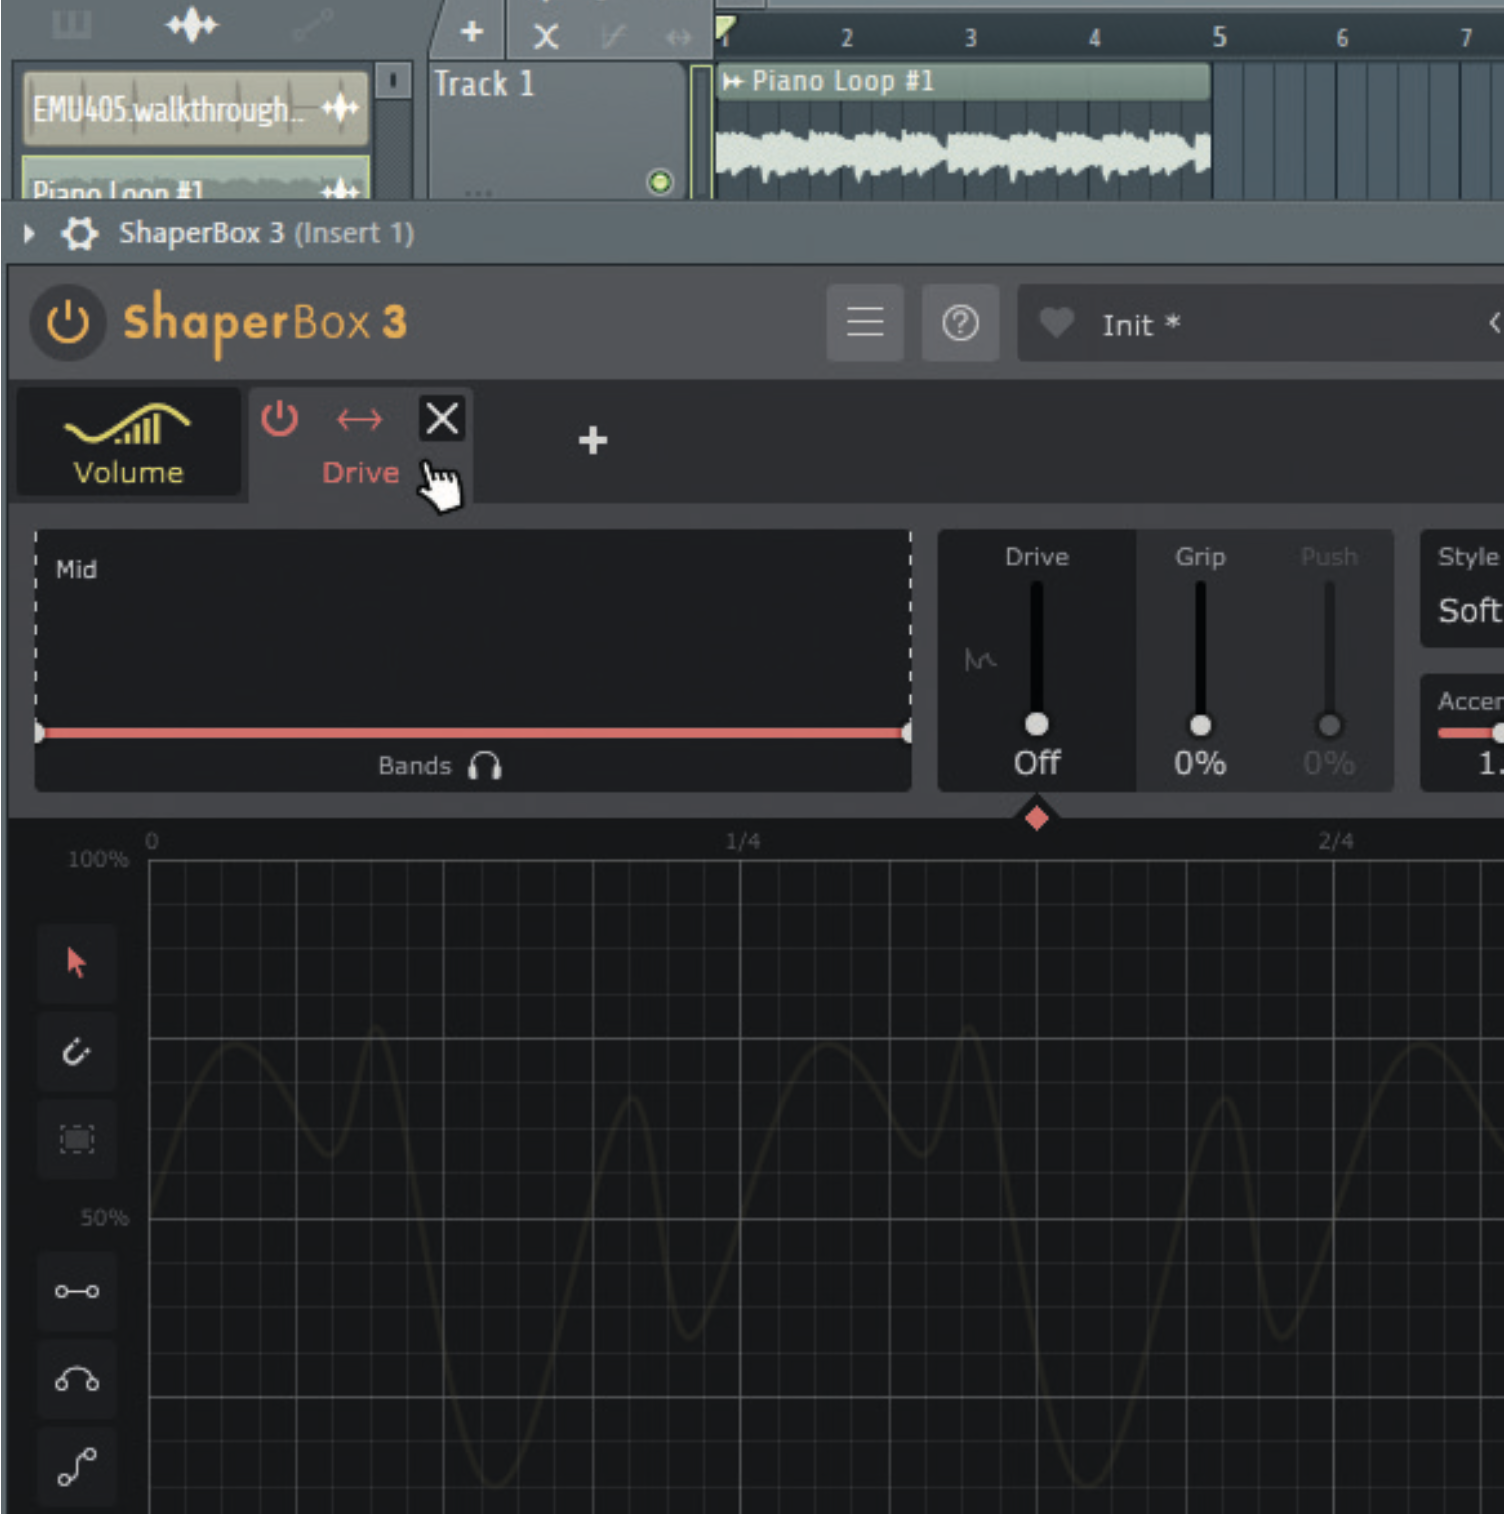
Next, we can add another LFO effect by clicking the plus icon in the top-left corner. We’ll go for the Drive this time to add some distortion. It’ll stack on top of our Volume shaper, adding Drive at an intensity controlled by its LFO path.
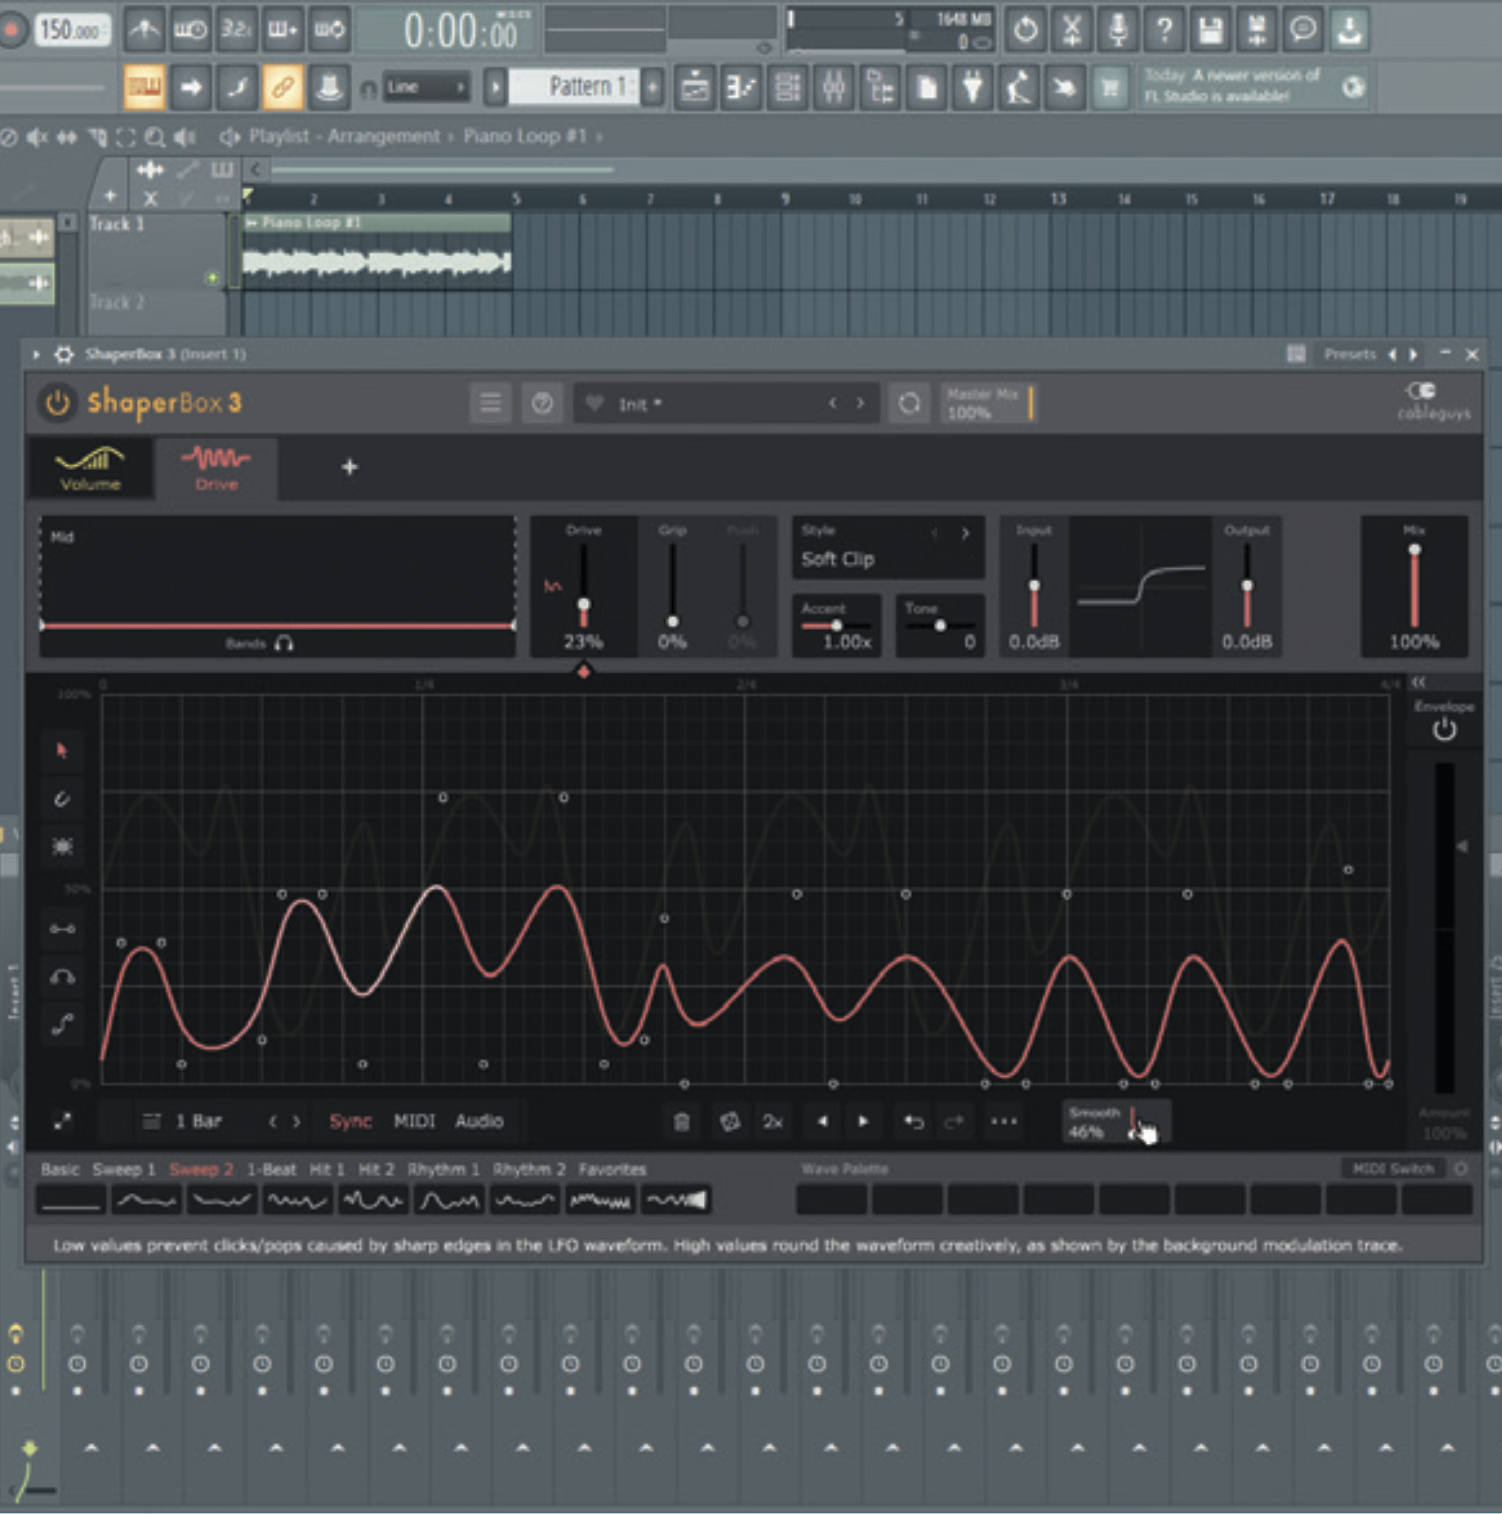
We can choose another LFO shape from the bottom left. Let’s go for something more complex. If the result is not organic-sounding enough, we can use the Smooth control to take the ‘jagged edges’ off – literally and figuratively.
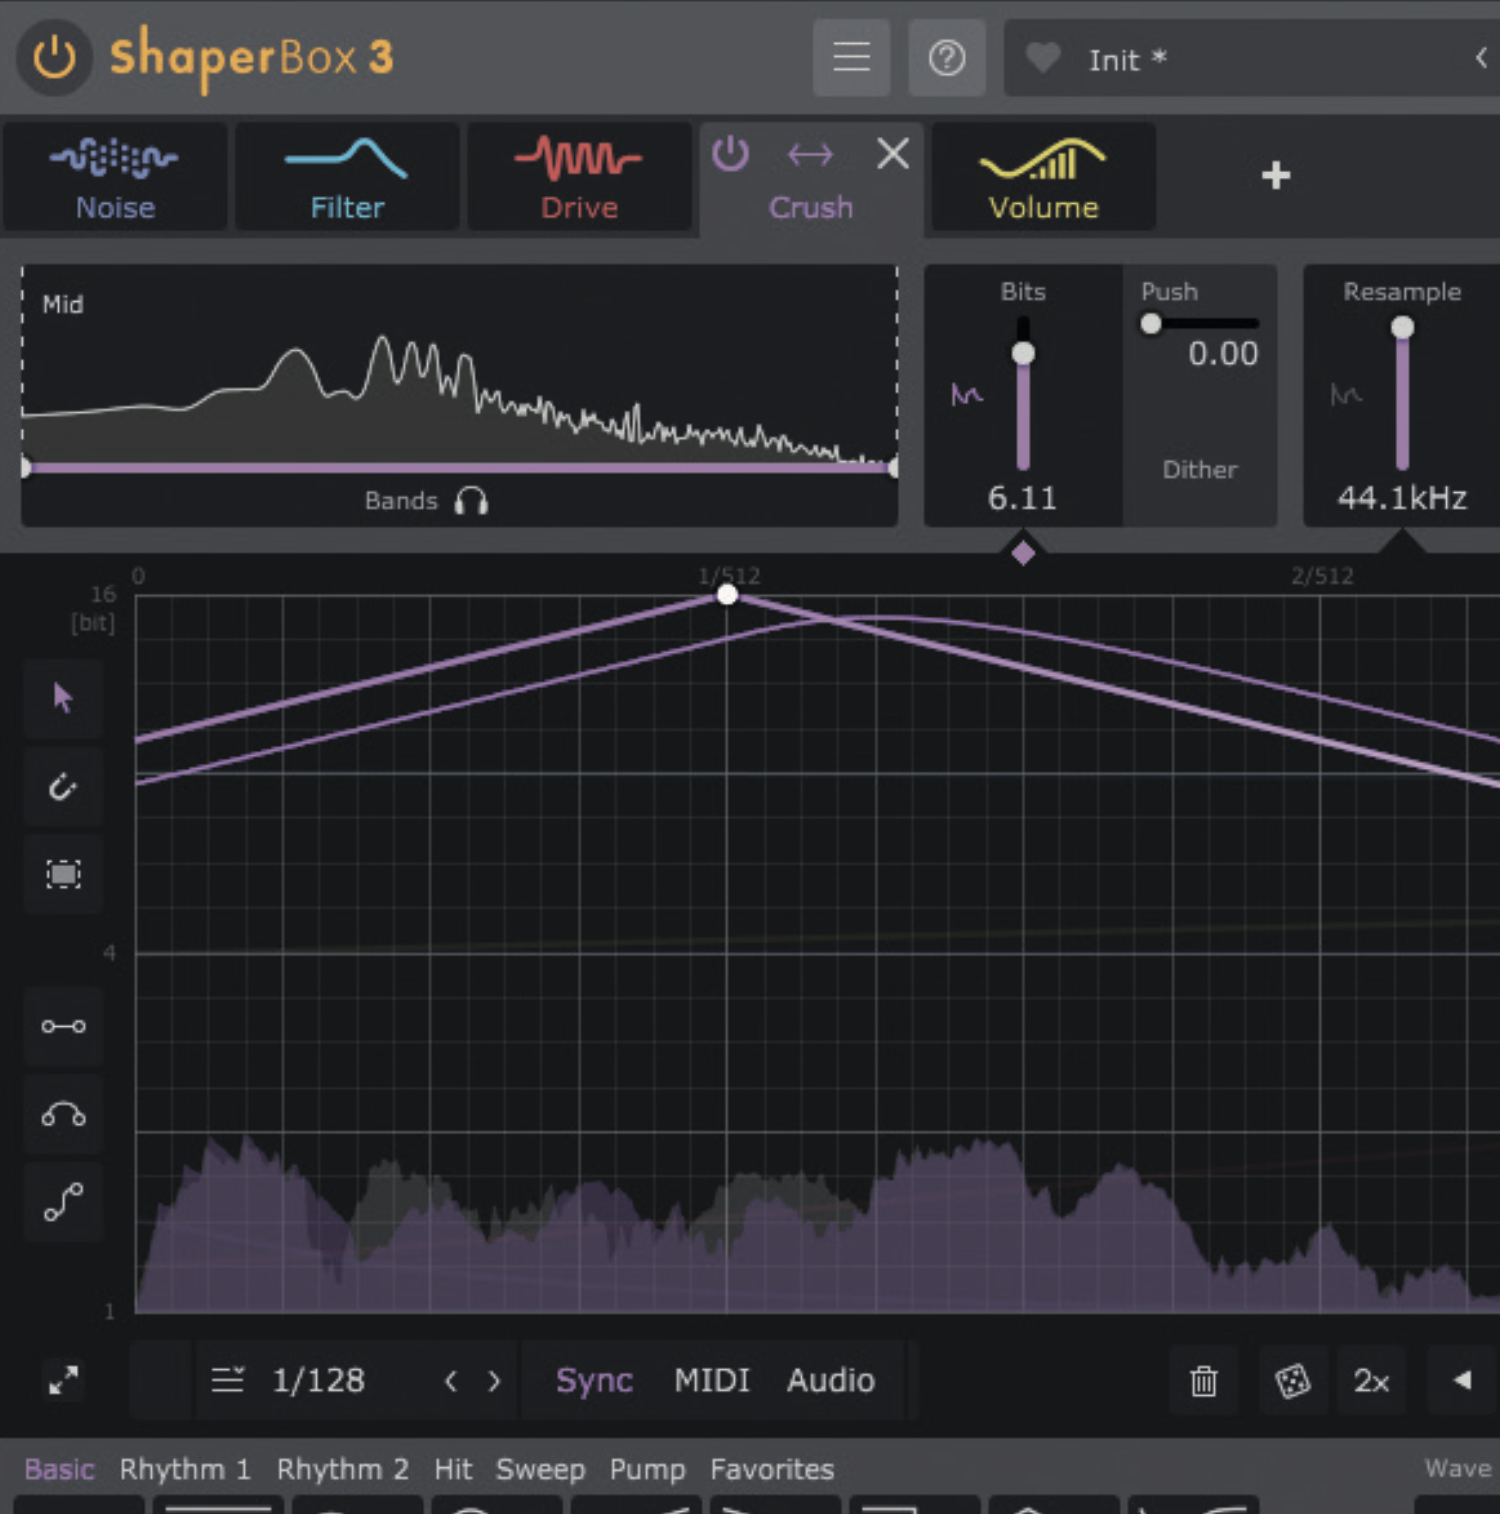
You can add one of each shaper per instance of ShaperBox, and rearrange their order by clicking and dragging them from the top menu. There’s a goldmine of factory and user-created patches to explore for new ideas, too.
Exploring Vital’s LFO functionality
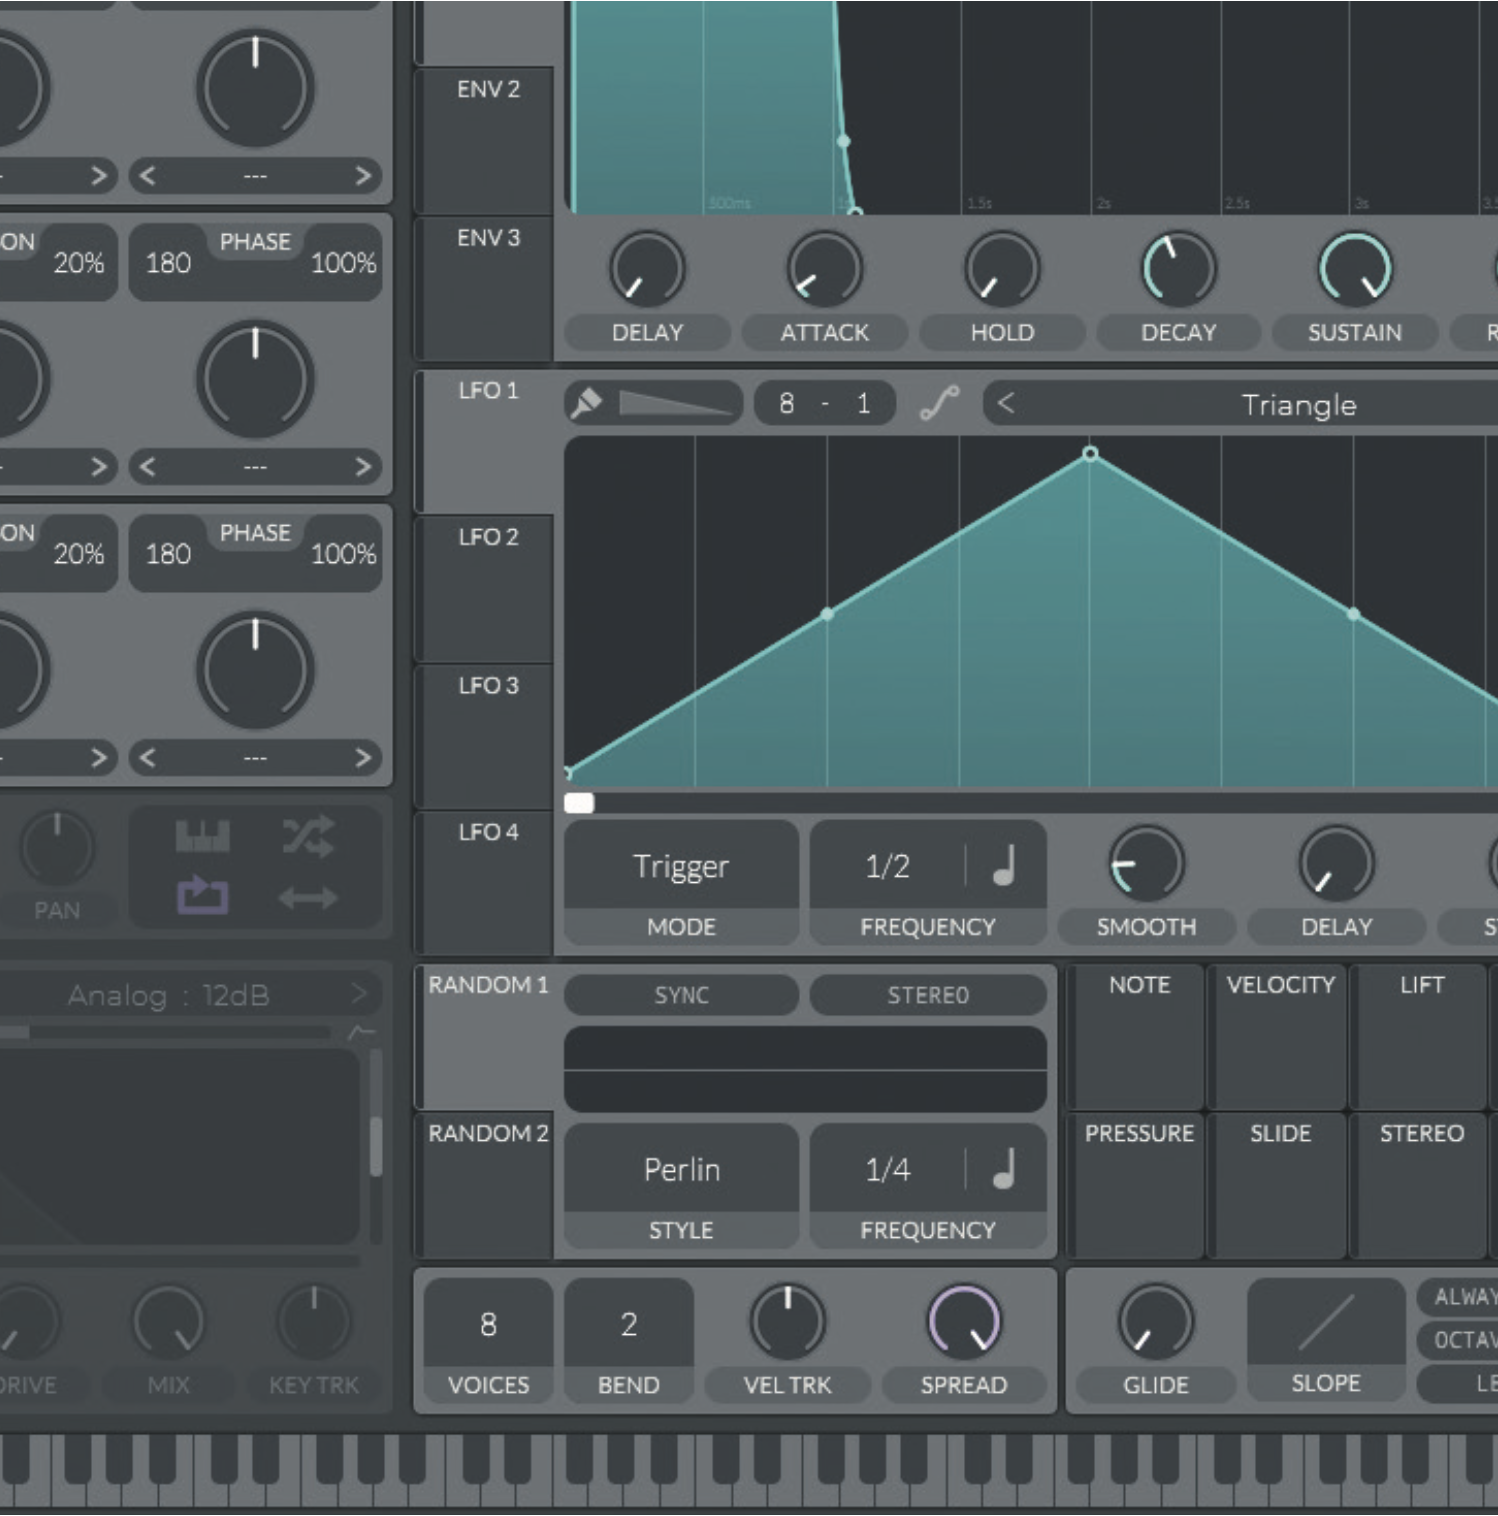
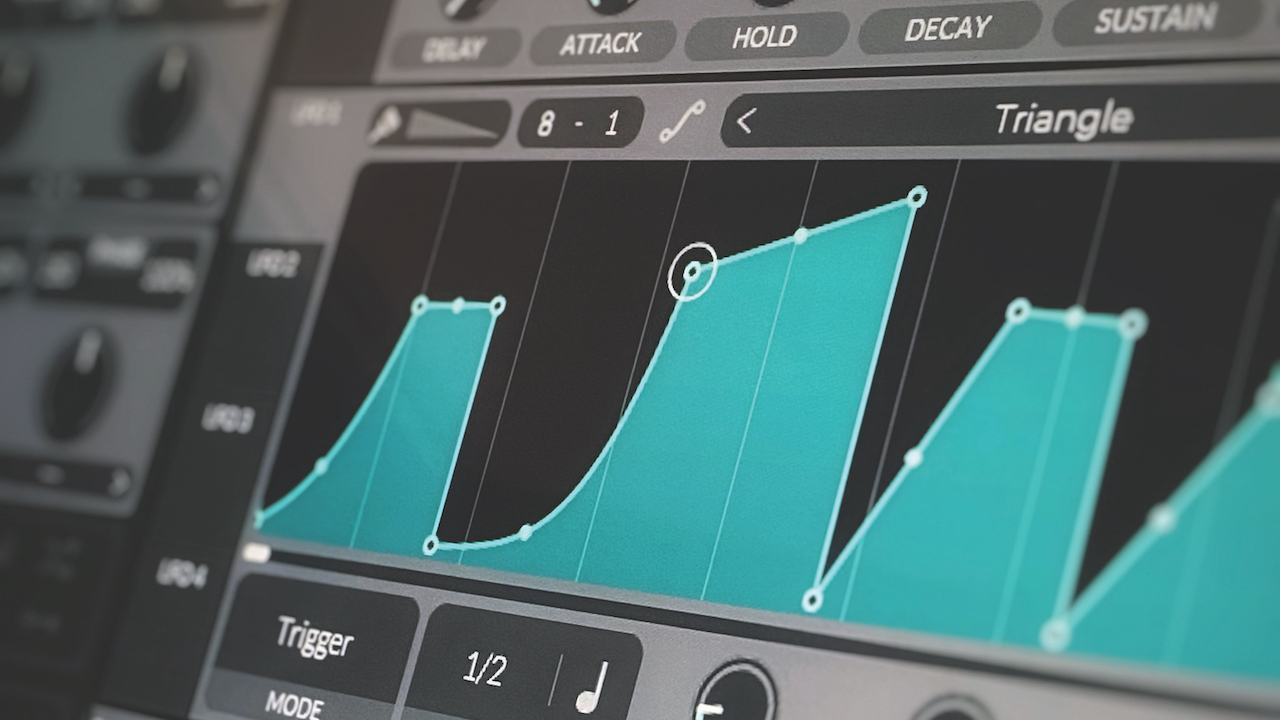
Vital is an excellent free synth plugin. Upon opening Vital, you’ll notice the LFO settings on the right-hand side. To get started, let’s load up our three oscillator wavetables with some differently shaped waveforms and then set our LFO shape to Triangle – ready to be customised next.
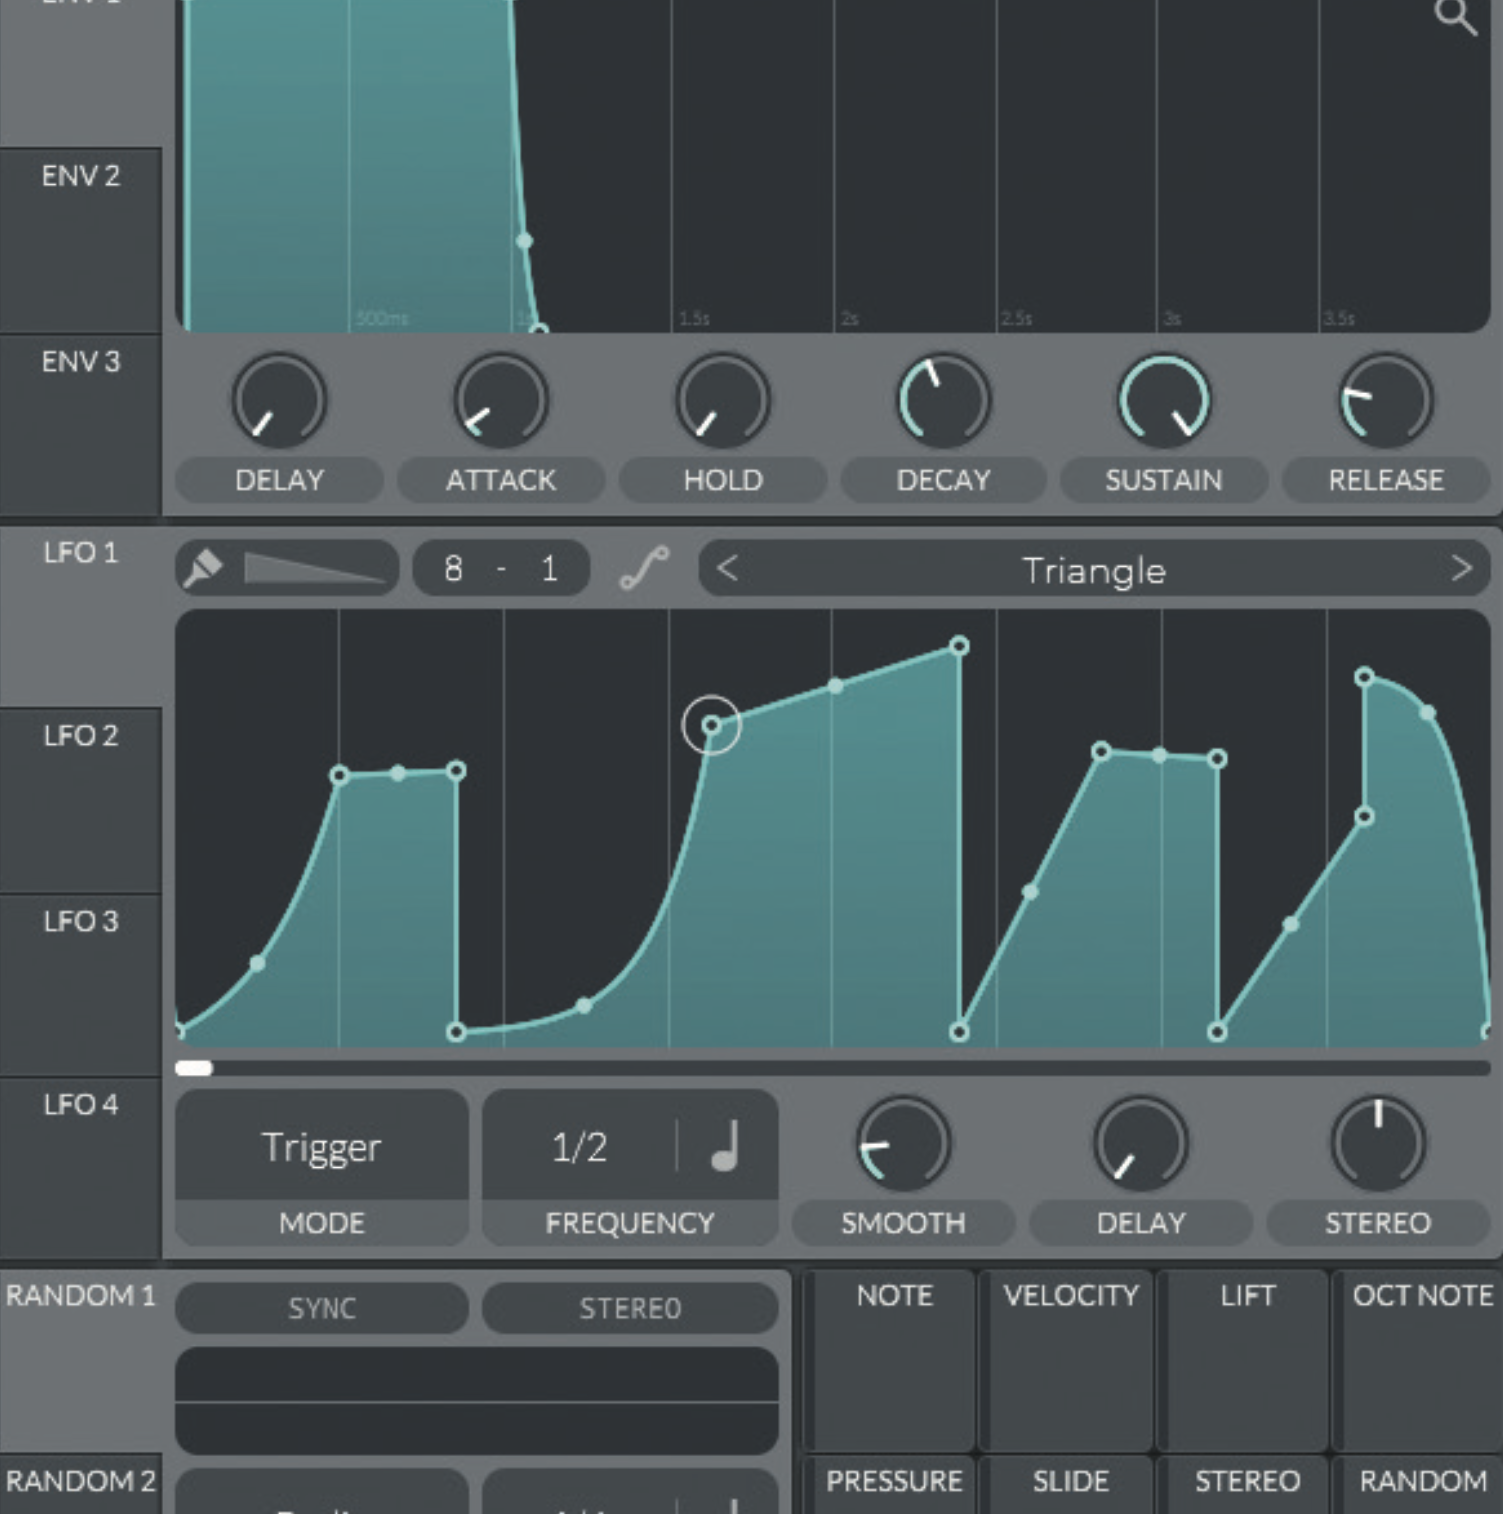
Vital allows us to customise each LFO’s wave shape in detail by drawing onto the envelope. This represents one cycle of the LFO. To draw, double-click to add a point, then click+drag the connecting lines.
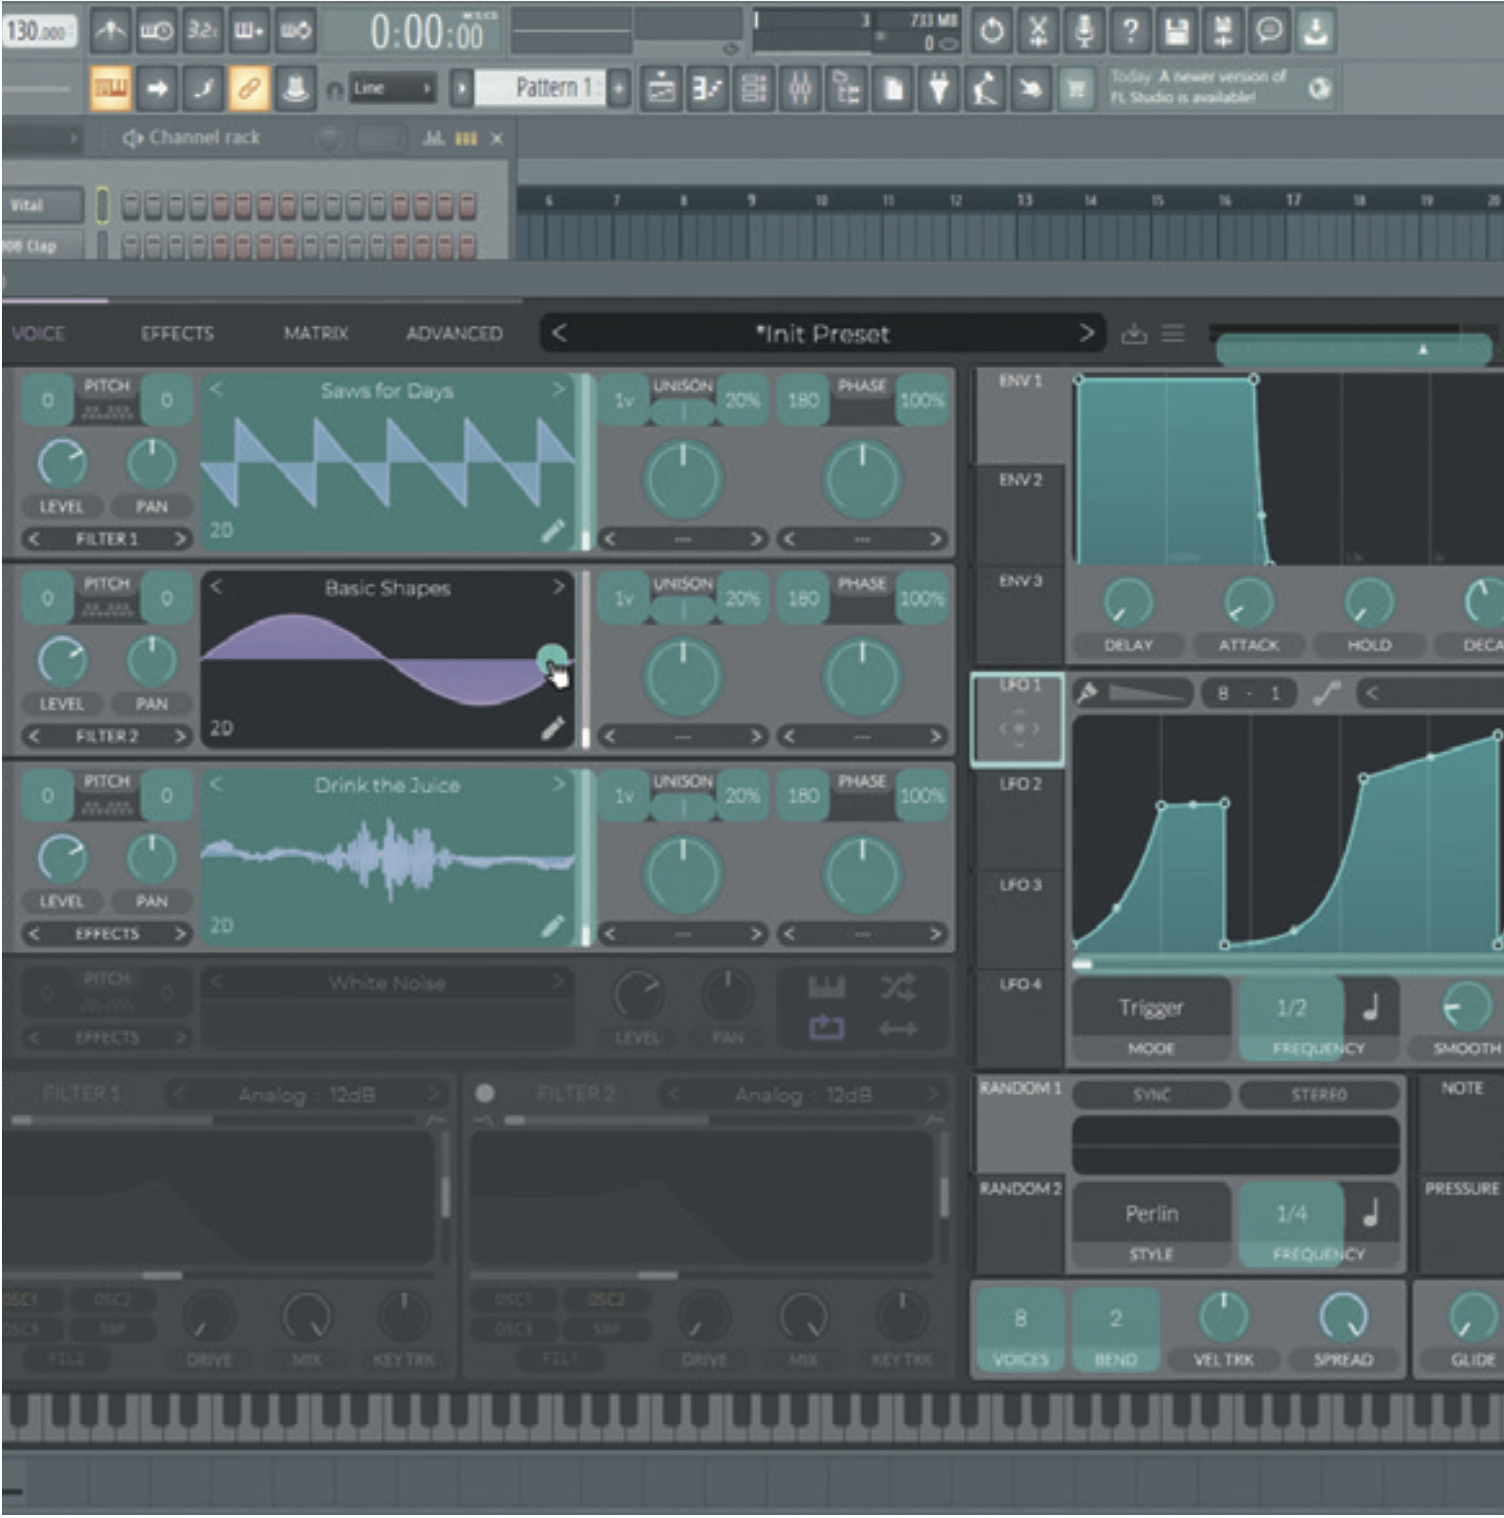
Map the LFO to a specified parameter by clicking and dragging it from the LFO sidebar to the desired parameter. Let’s go ahead and connect our freshly-shaped LFO to our second oscillator wavetable. You can also set your LFO’s rate using the Frequency tab.
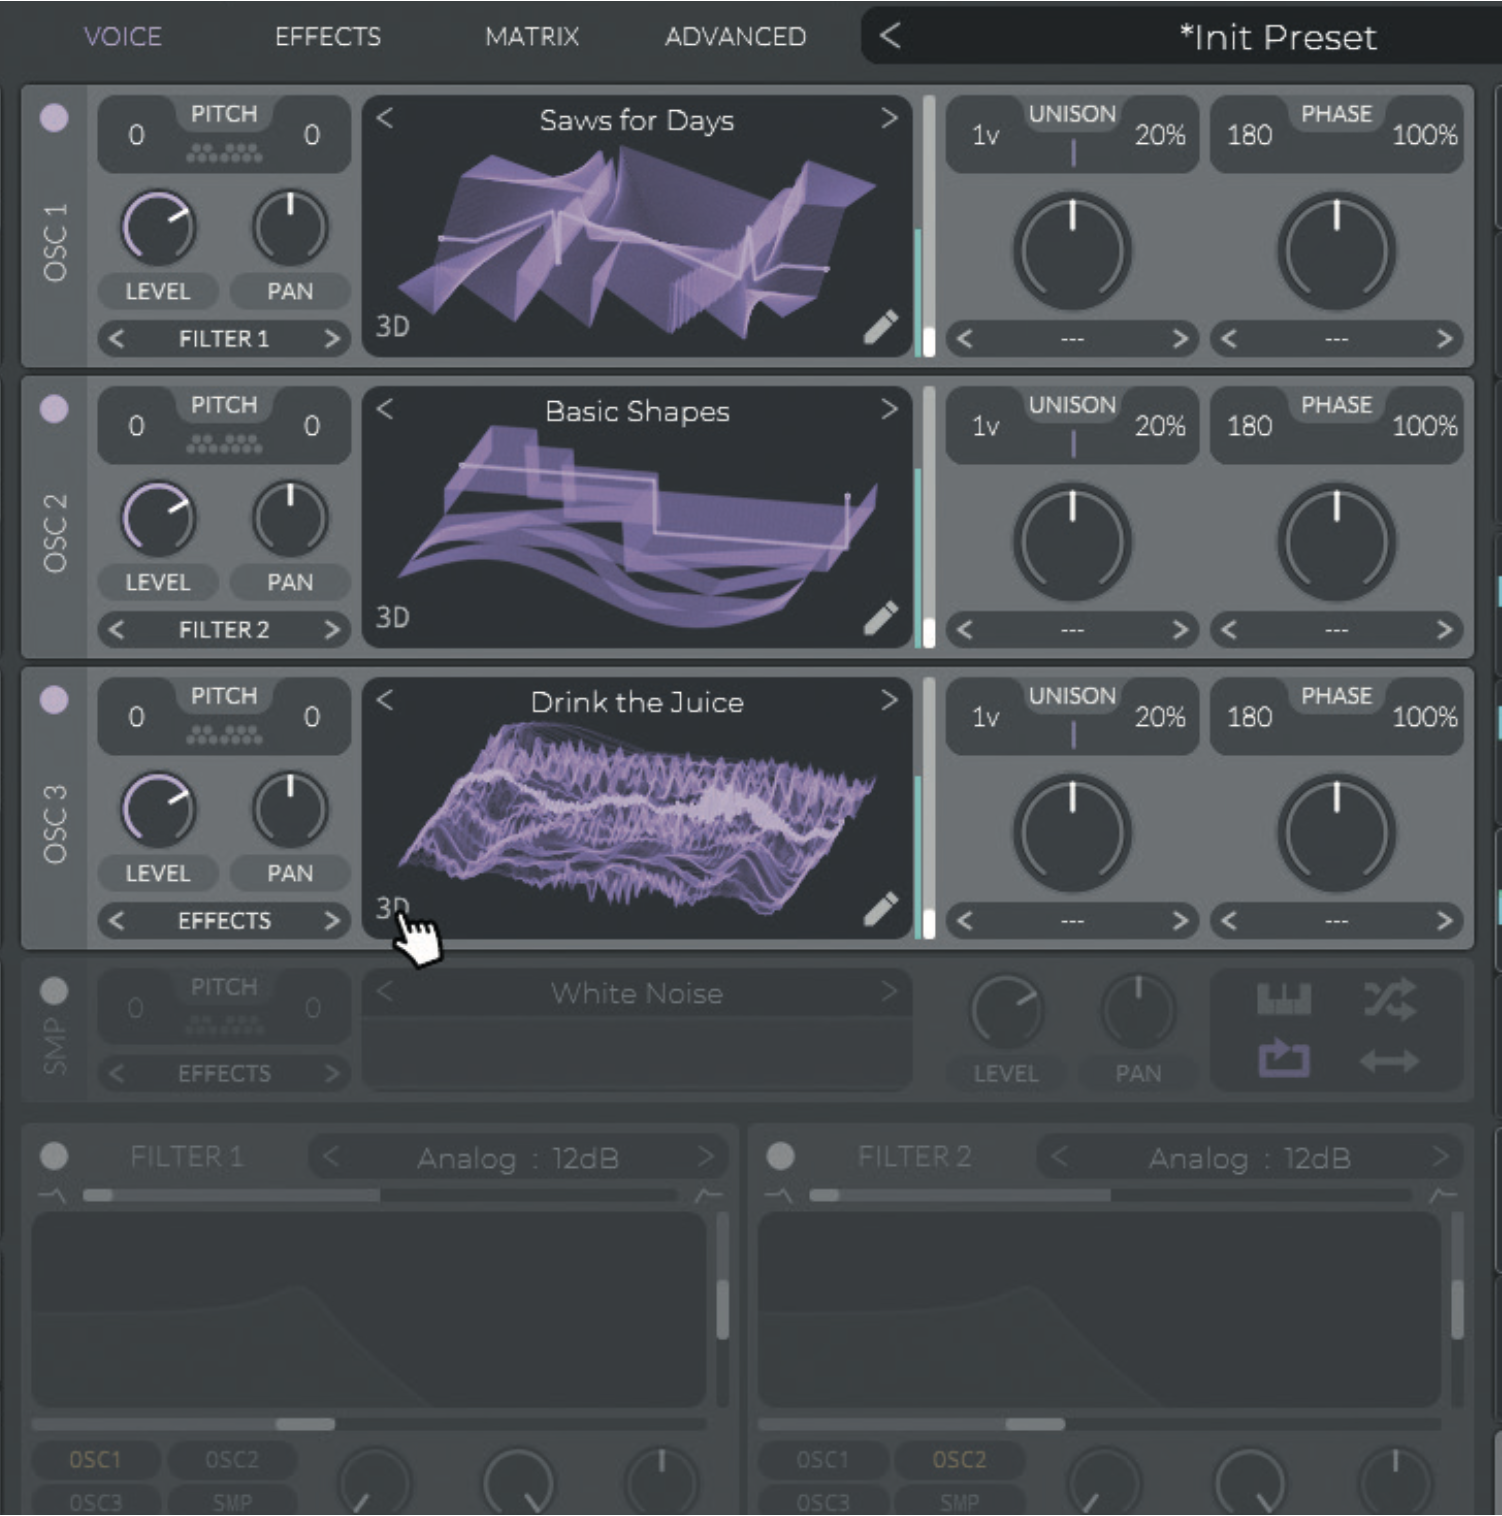
Remember, mapping your LFO to any parameter will affect the sound in various ways. Mapping an LFO to any oscillator’s wavetable will cause the wavetable to cycle its waves at the frequency and envelope of the LFO. Change your wavetable view to 3D to see it cycle in action.
Massive X’s LFOs
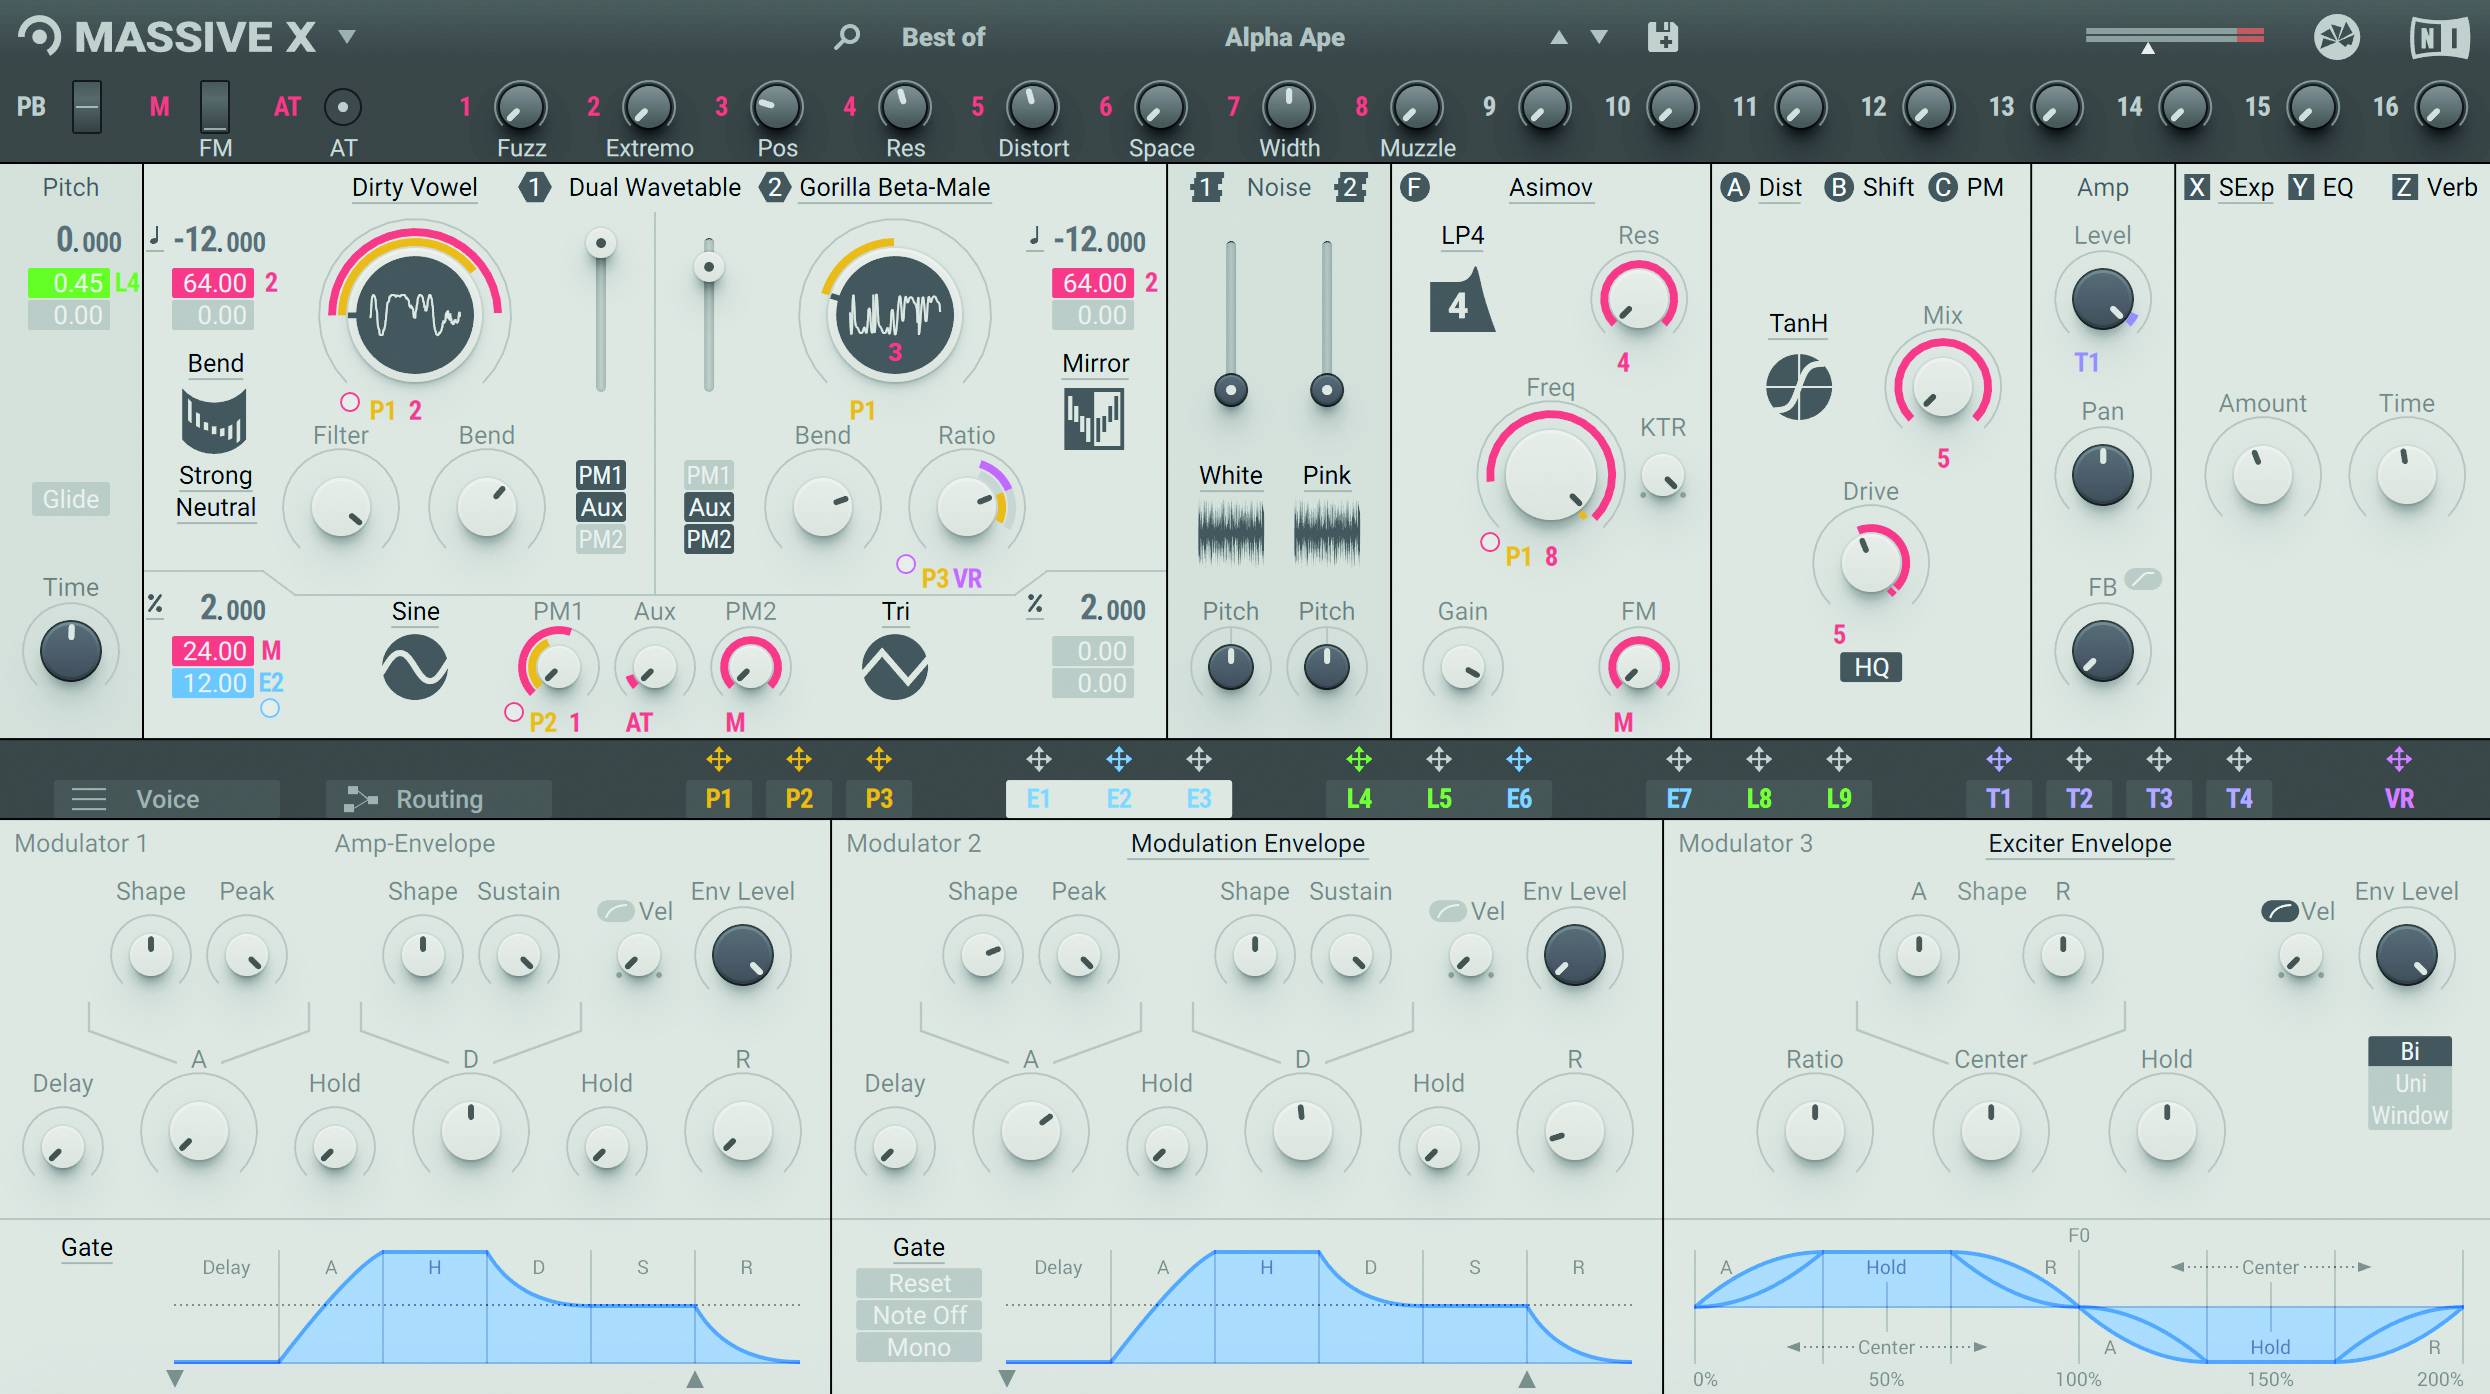
Massive X is a great example of modern synthesis done right. Thanks in part to its LFOs, the synth has an extensive abundance of sound design possibilities.
Here, we take a look at Massive X’s Wavetable modes (a unique feature), paired with LFO modulation, and how the two go hand-in-hand to expand our creative palette. The Wavetable modes in Massive X are just one of many features that make this synth a force to be reckoned with.
Massive X’s LFOs go a little more advanced too, though. First there’s the Switcher LFO, with its identifiable choice of waveshapes around a circle, which can be modulated itself. How about the Random LFO, which can get you anywhere on a spectrum from all-out randomness to subtle variance. And then, the Performer, the mixture of LFO and draw-your-own modulator that takes the wobbly signal-shaping heritage of Massive into its next incarnation.
Modulating Massive X’s unique features through LFOs
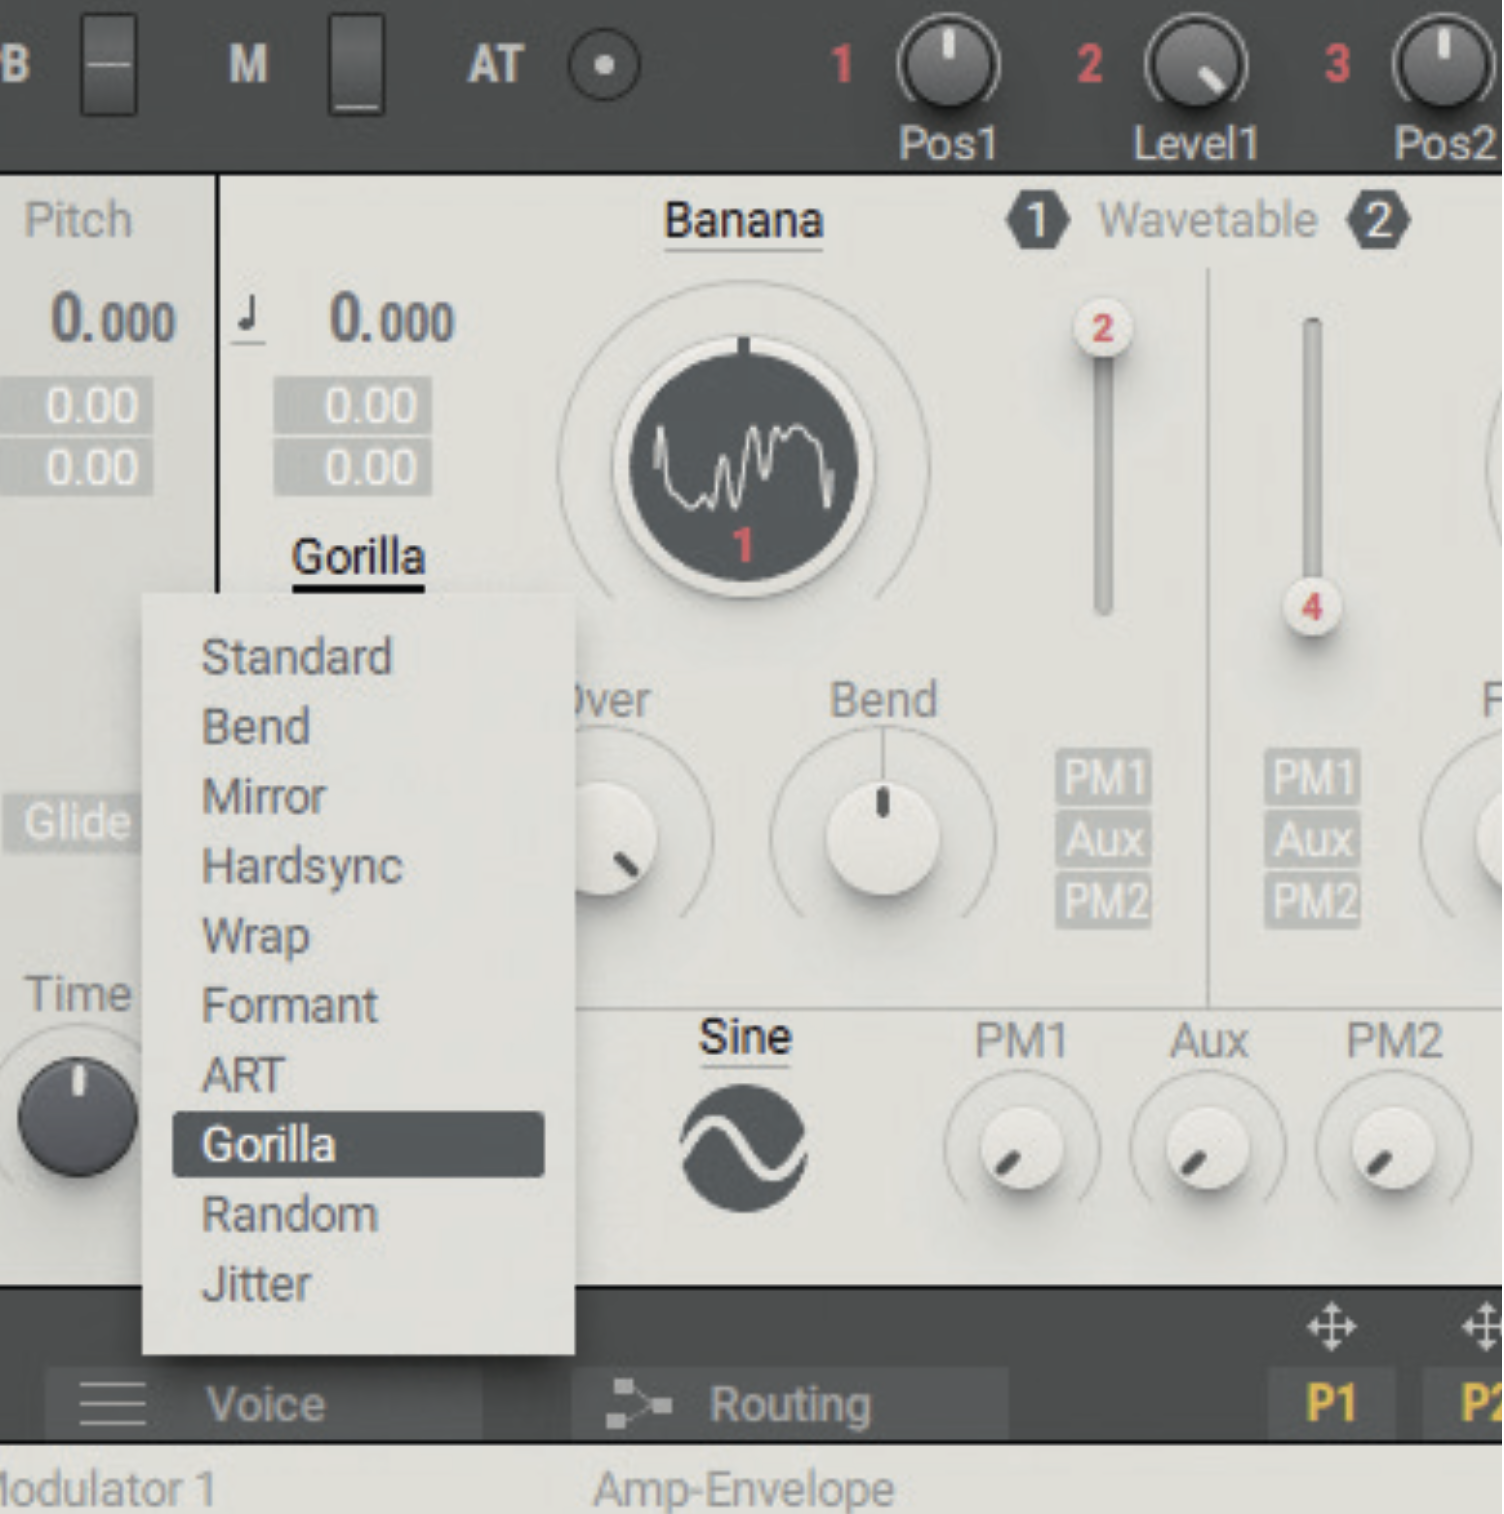
All wavetables in Massive X have different modes that alter the wave cycling behaviour. Combining these with LFO modulation makes for some unique sound generation. Open up Massive X and choose a wavetable for Osc 1.
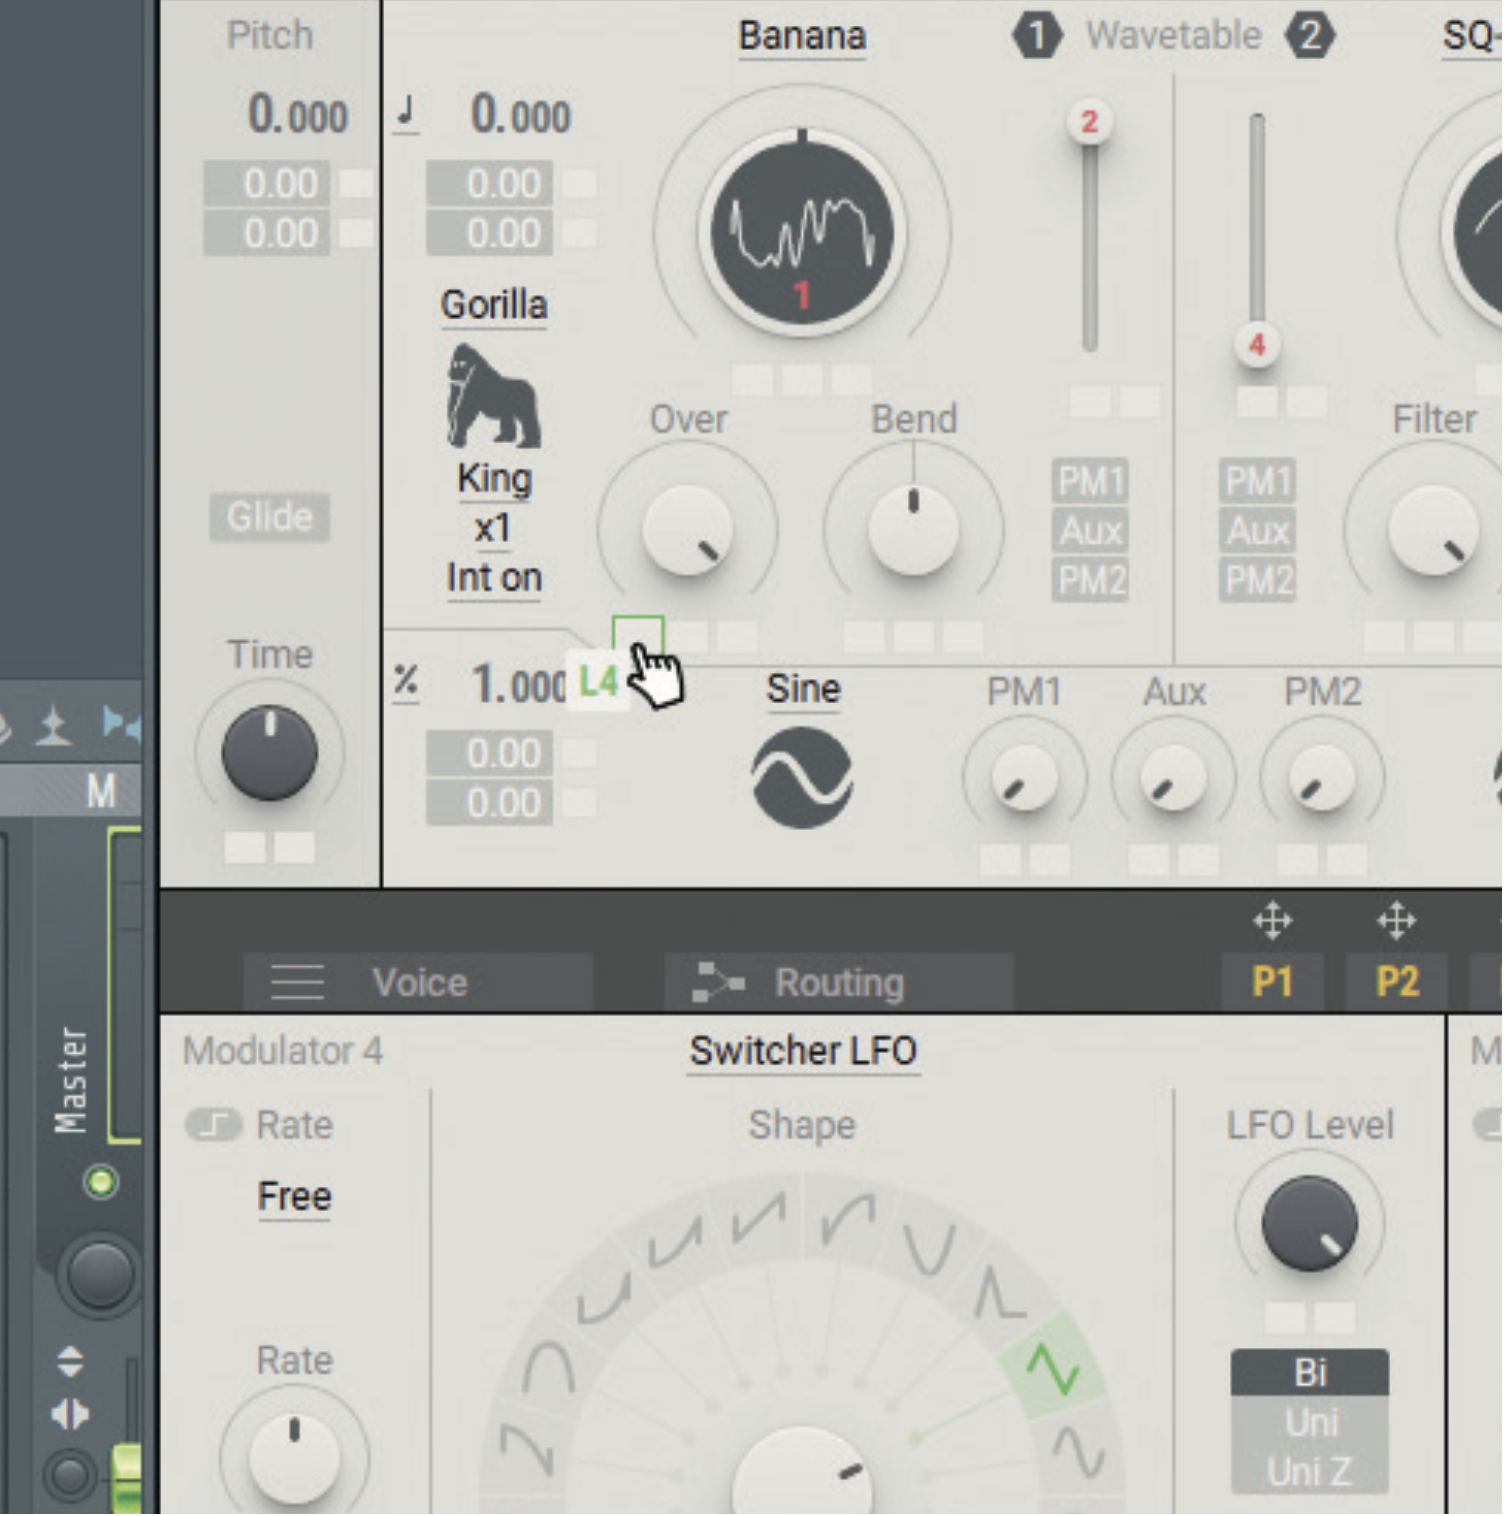
You can then use the modulation panel (the interface’s bottom half) to select an LFO slot and map it to one of the wavetable’s mode controls (Over or Bend). To do this, click and drag the LFO’s corresponding slot.
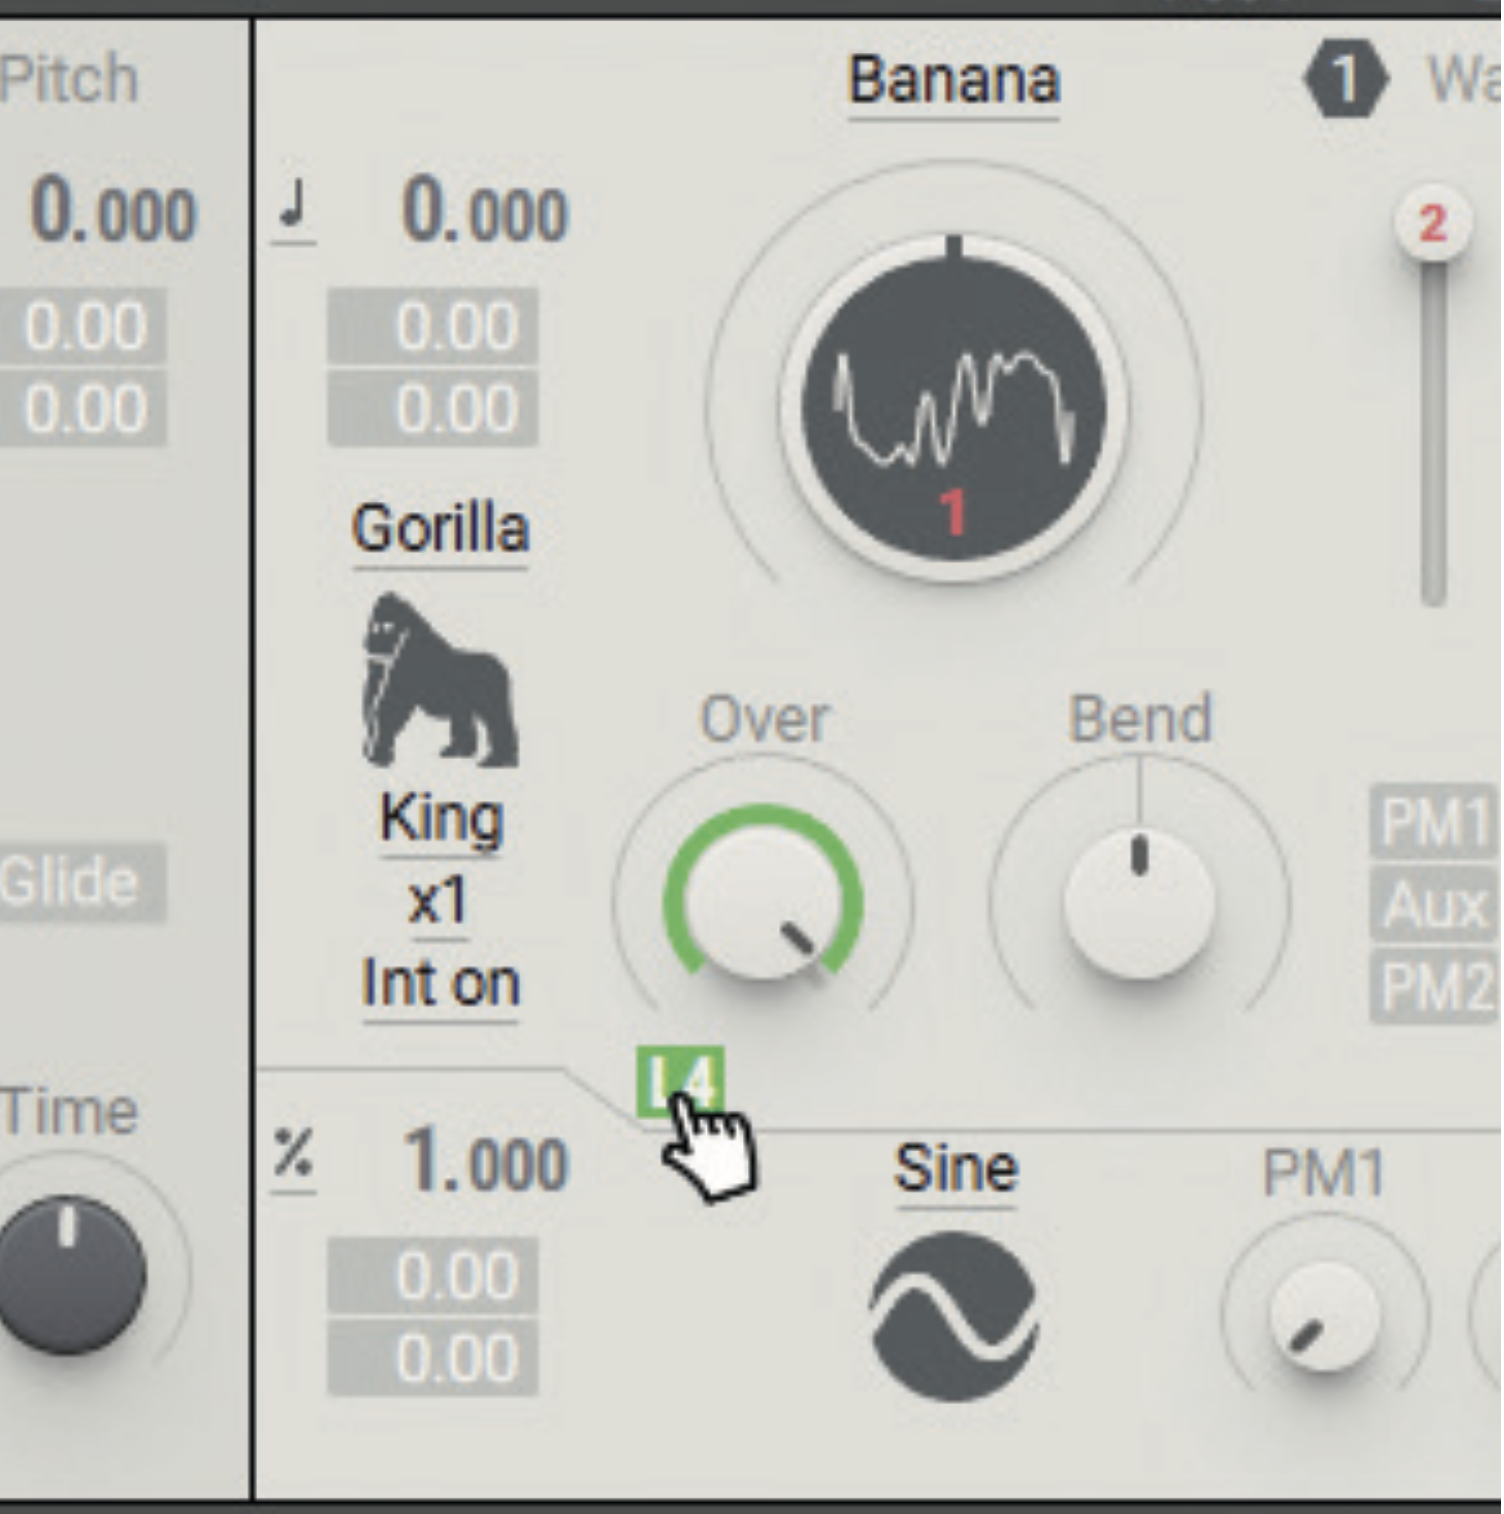
Then, adjust the LFO amount by clicking and dragging the newly-lettered slot next to the specified mode parameter. You can now hear the LFO modulation in action when played. Feel free to mix and match LFOs to other parameters on the synth.
Exploring FabFilter’s modulation
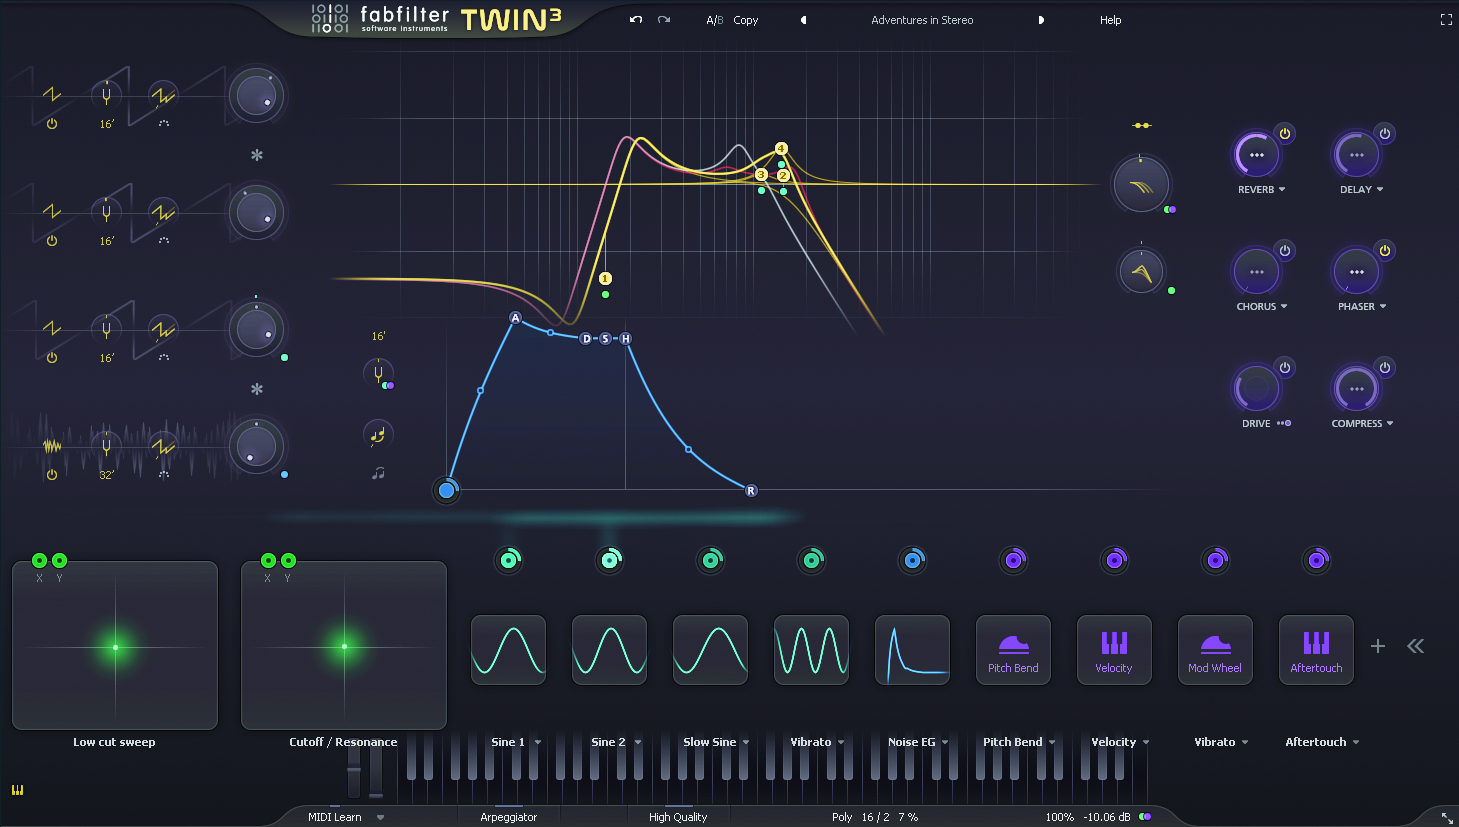
The company may have gained most of its reputation from effects, but Twin 3 is FabFilter’s flagship synth, and sculpting sound using this plugin, with its familiar FabFilter interface, should be simple for anyone who knows the modulation grammar from other Fab’ plugins. Perhaps one of the standout modulation features is its XLFO modulation effect.
XLFO (the X standing for extra) can function as any regular LFO, with some pretty neat bonus functions: it can be turned into a step sequencer with up to 16 customisable steps.
Where some LFOs allow you to draw their envelope shape using typical automation dot points and interpolation lines, the XLFO’s step sequencer provides a more intuitive approach with advanced controls capable of intricate refinement.
You can add or remove steps at your own leisure by selecting a step and clicking the plus or minus button. Each step also has its own Glide knob, shaping the interpolation point to its sequential step, and a Shape setting, which you can change to either Linear, Sqr, Sqrt, or Sine.
There’s also a Value knob to specify the height of each step’s transient with a toggleable Random switch, in case you want the step to play randomly each cycle. Other than that, you’ll find all the usual LFO settings in a neatly packed panel to the left of your LFO display.
This unique feature makes Twin 3’s XLFO stand apart from other LFOs and is a great example of modern tech pushing old concepts into new territory.
Using FabFilter’s XLFOs in context
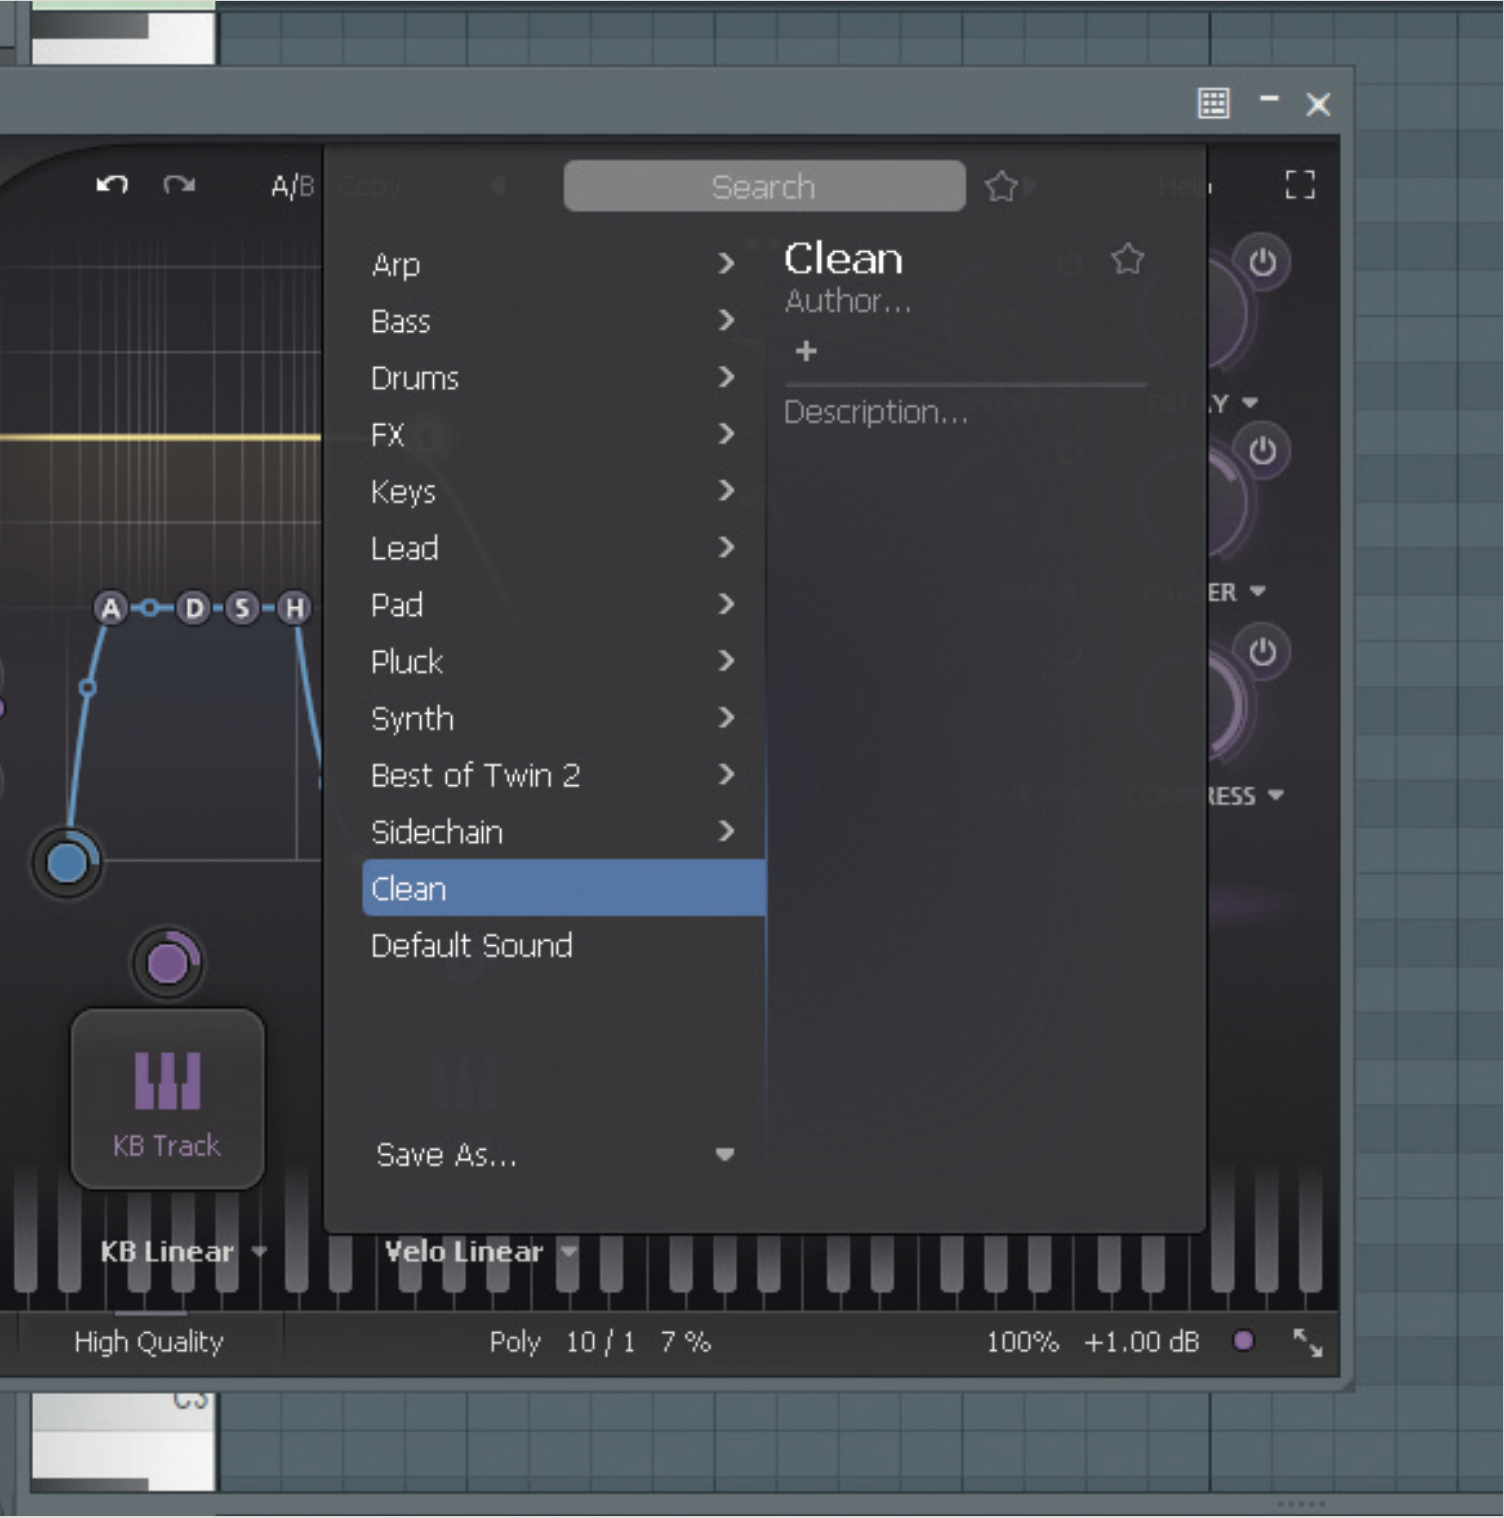
For this example of Twin 3’s XLFO, we’re going to be using the Clean preset, which starts with a basic, single-wave oscillator. Don’t worry, we’ll spice things up in the following steps.
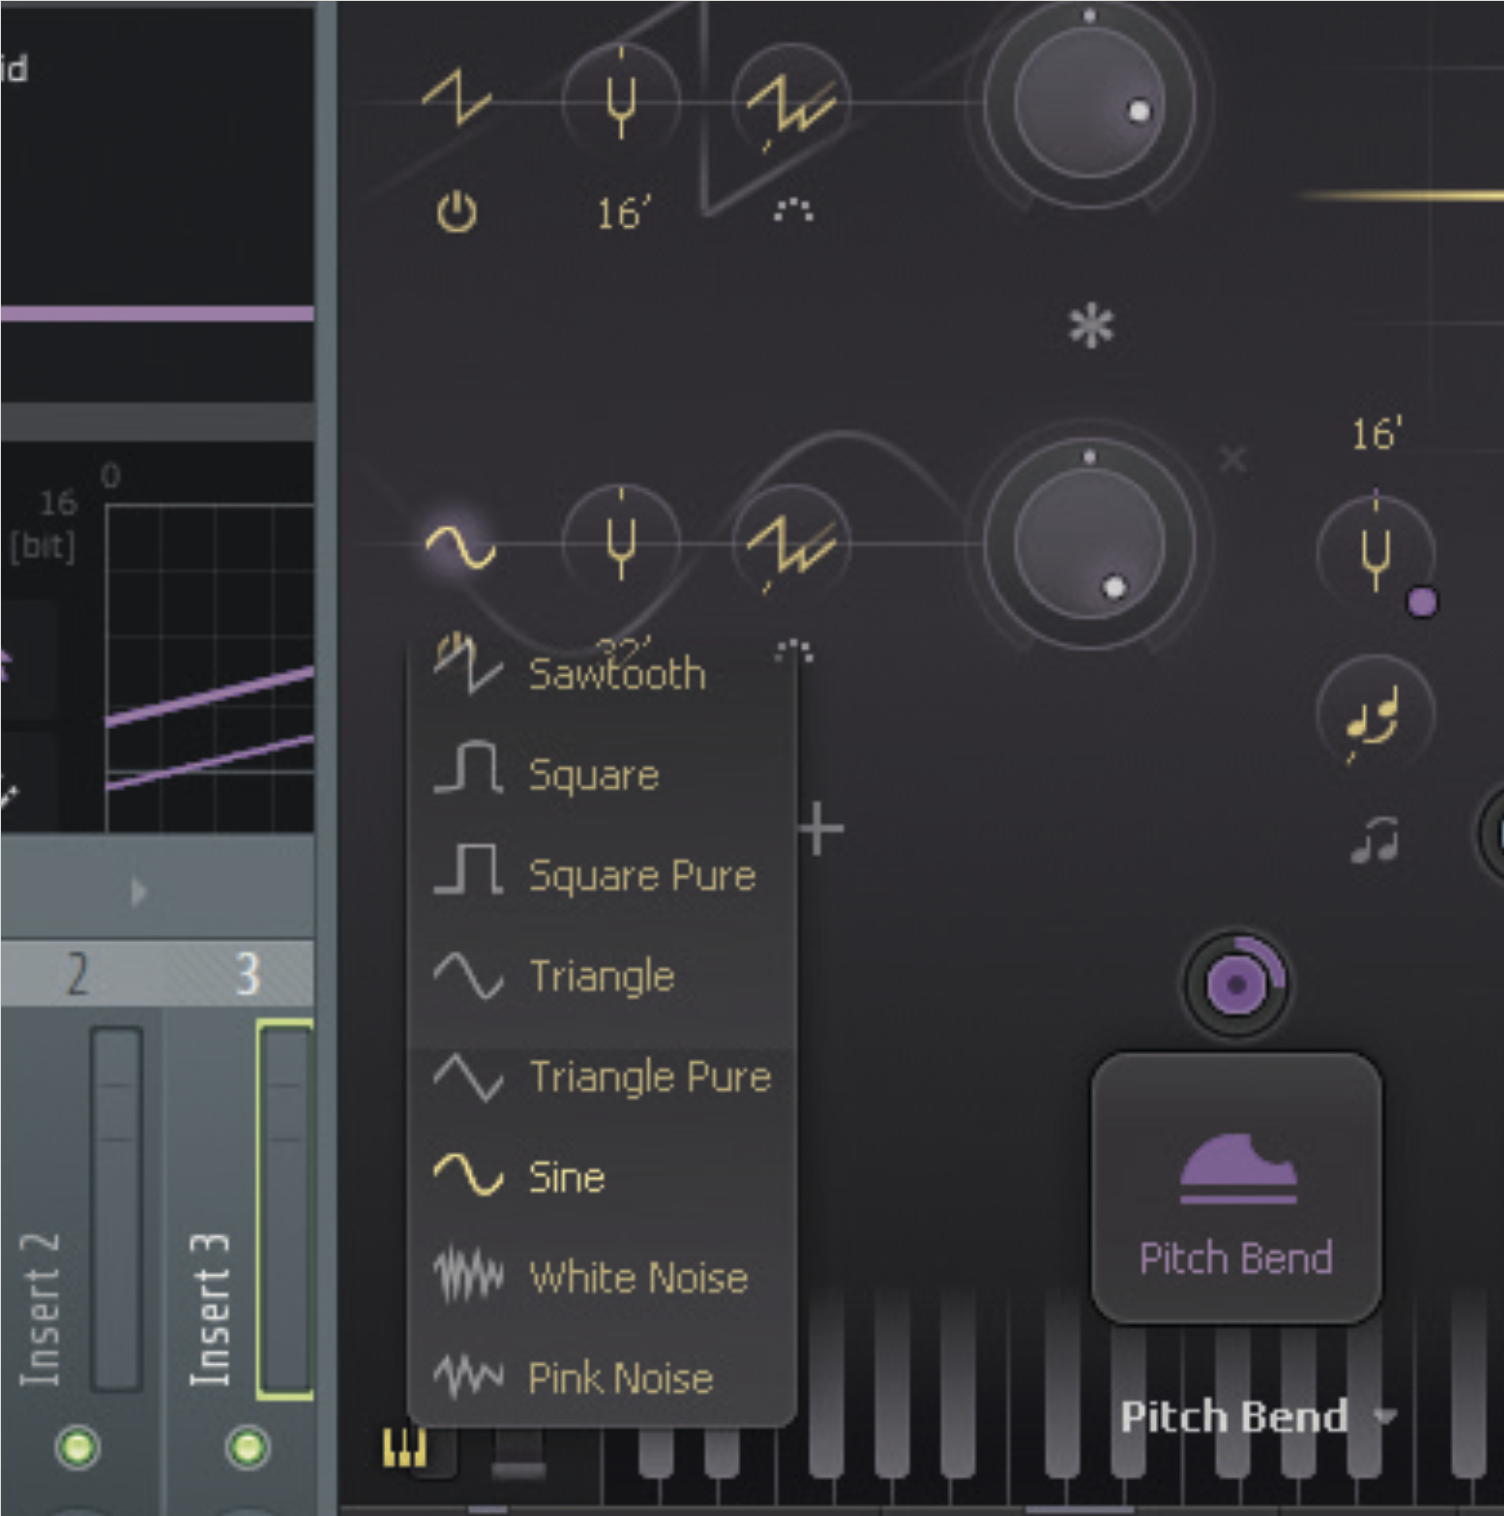
Click the plus button to add another oscillator. You can also change the shape by clicking its waveshape button. You can add up to four oscillators within Twin 3 and customise each of their shapes. We’ll be linking these to an XLFO soon.
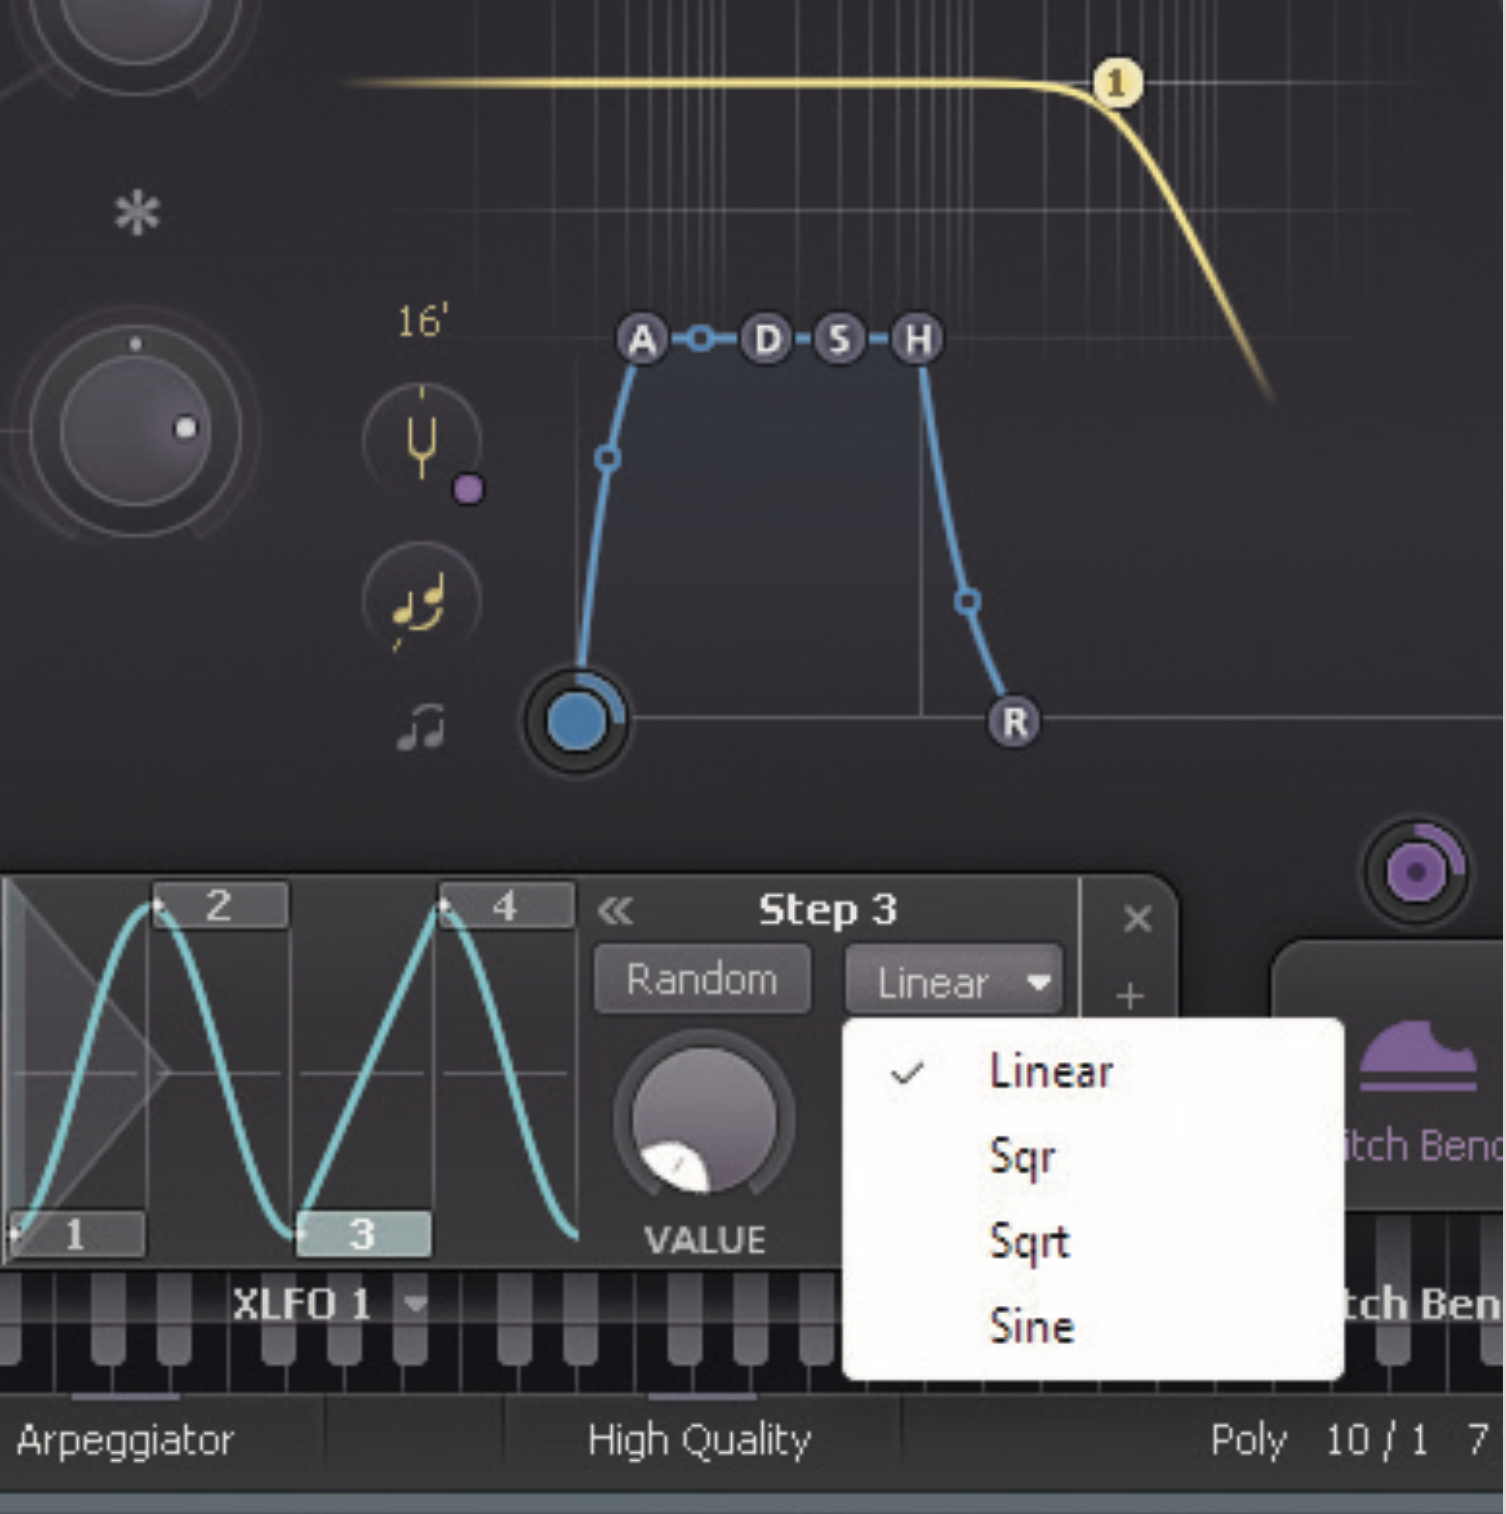
Next, click the plus icon in the Modulation panel and select New XLFO. By default, the XLFO will have two steps. Click plus on the right and add two more steps. Then click and drag the third step down and change its shape to Linear.
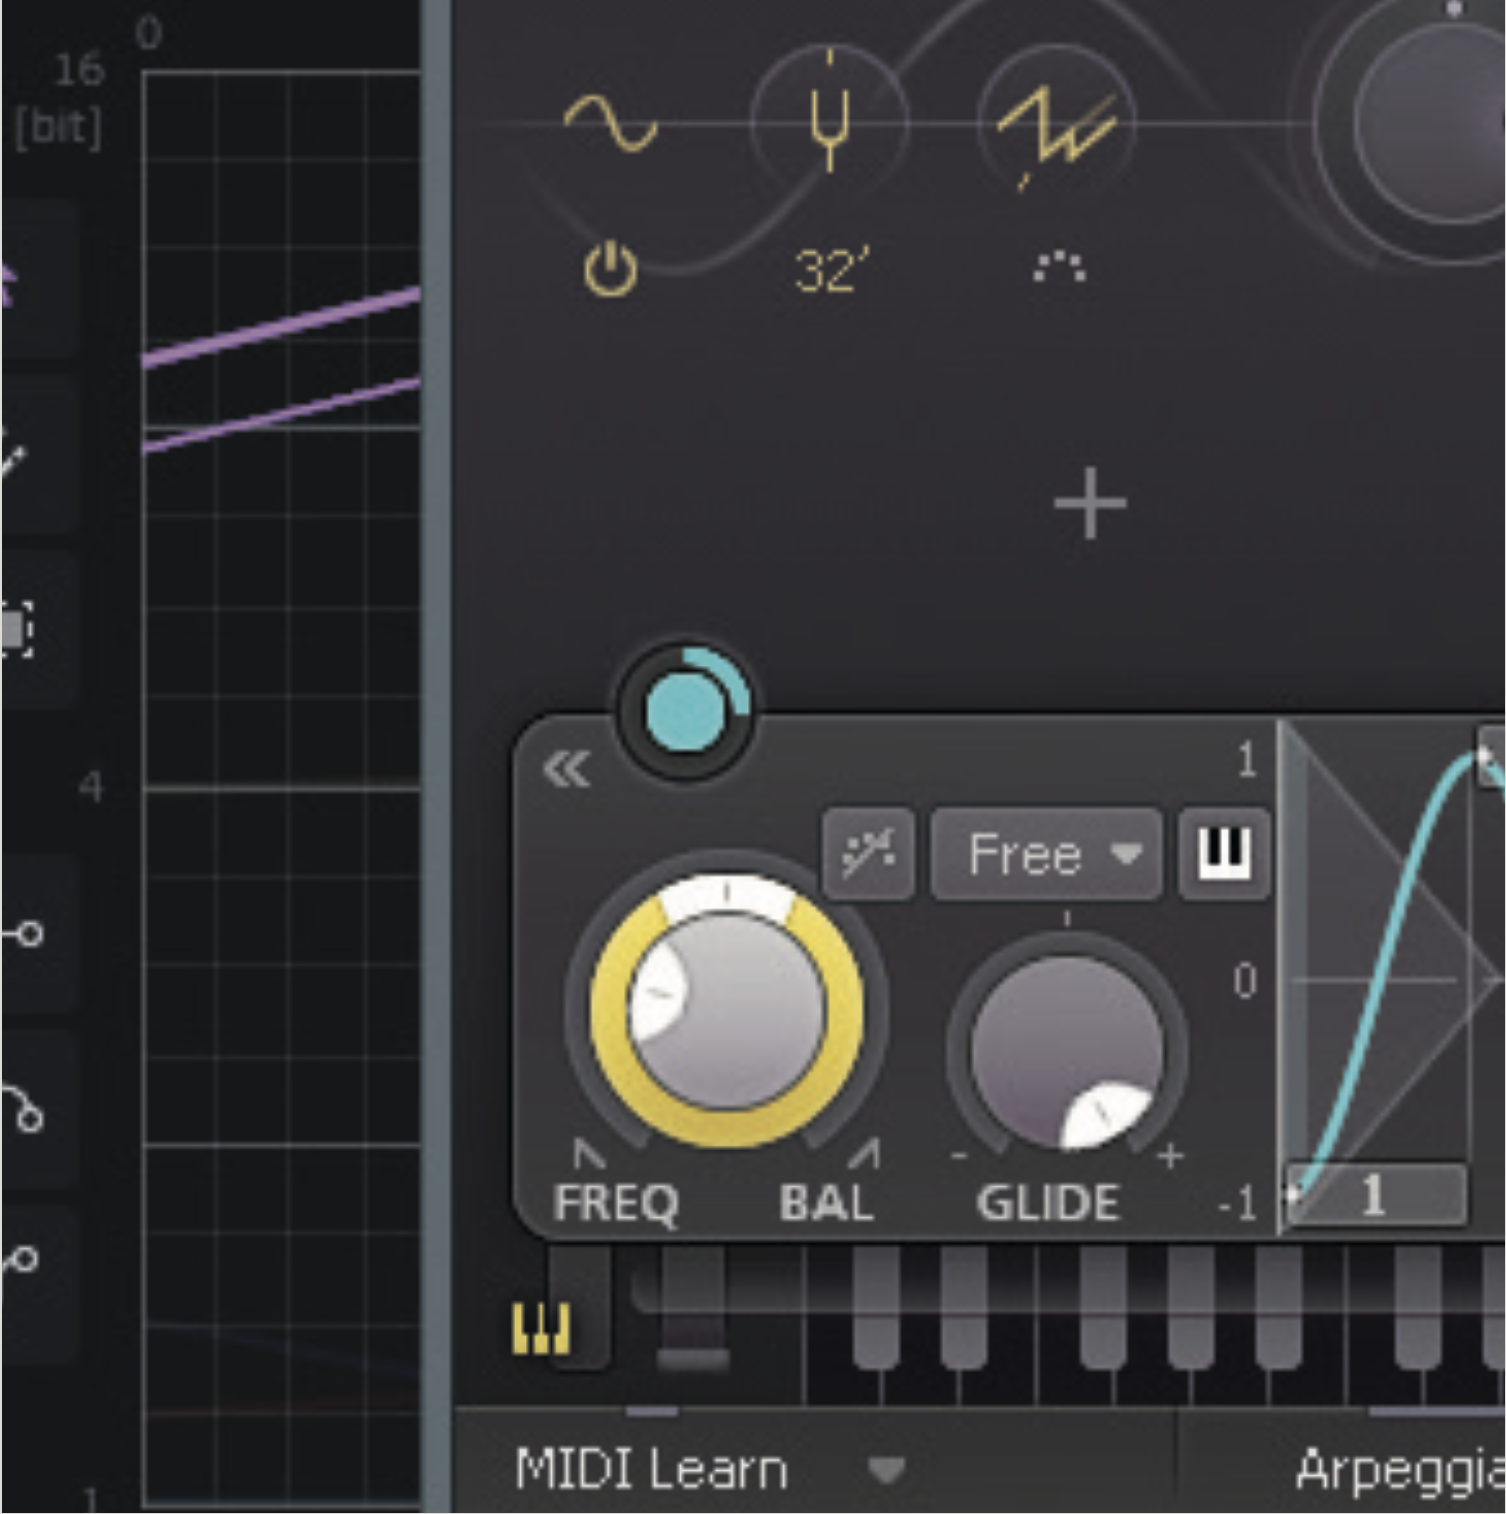
Now, click and drag the XLFO’s pulsing blue button and connect it to the Volume of both Oscillators. You can adjust the intensity of the XLFO by clicking and dragging the pulsing blue button’s outer circle. Drag the slider to the value 2.000.
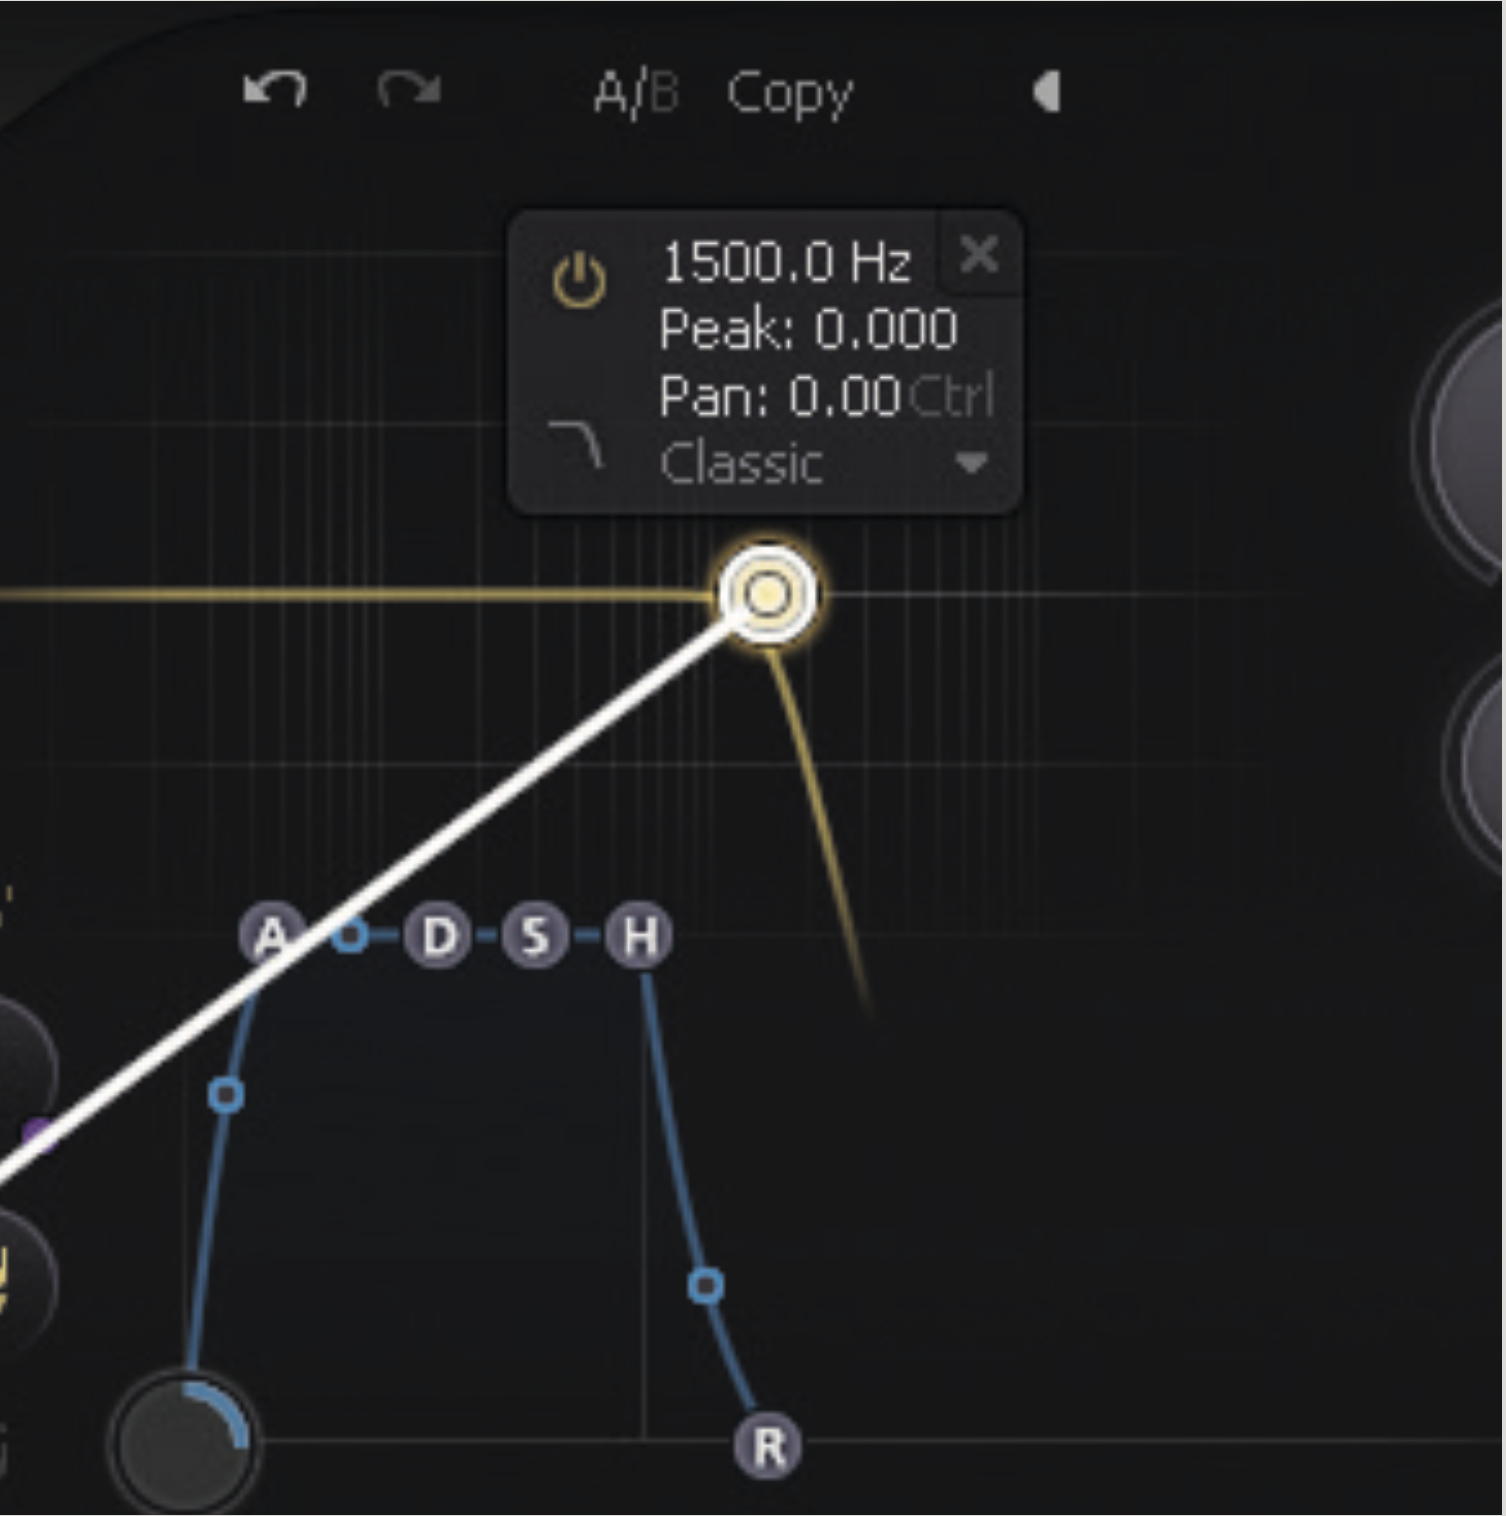
Double-click Filter Point 1 and change the value to 1,500Hz, making the high-cut a bit more noticeable. Add another XLFO and link it to the low-pass filter by clicking and dragging the pulsing blue button. This LFO will now affect the filter.
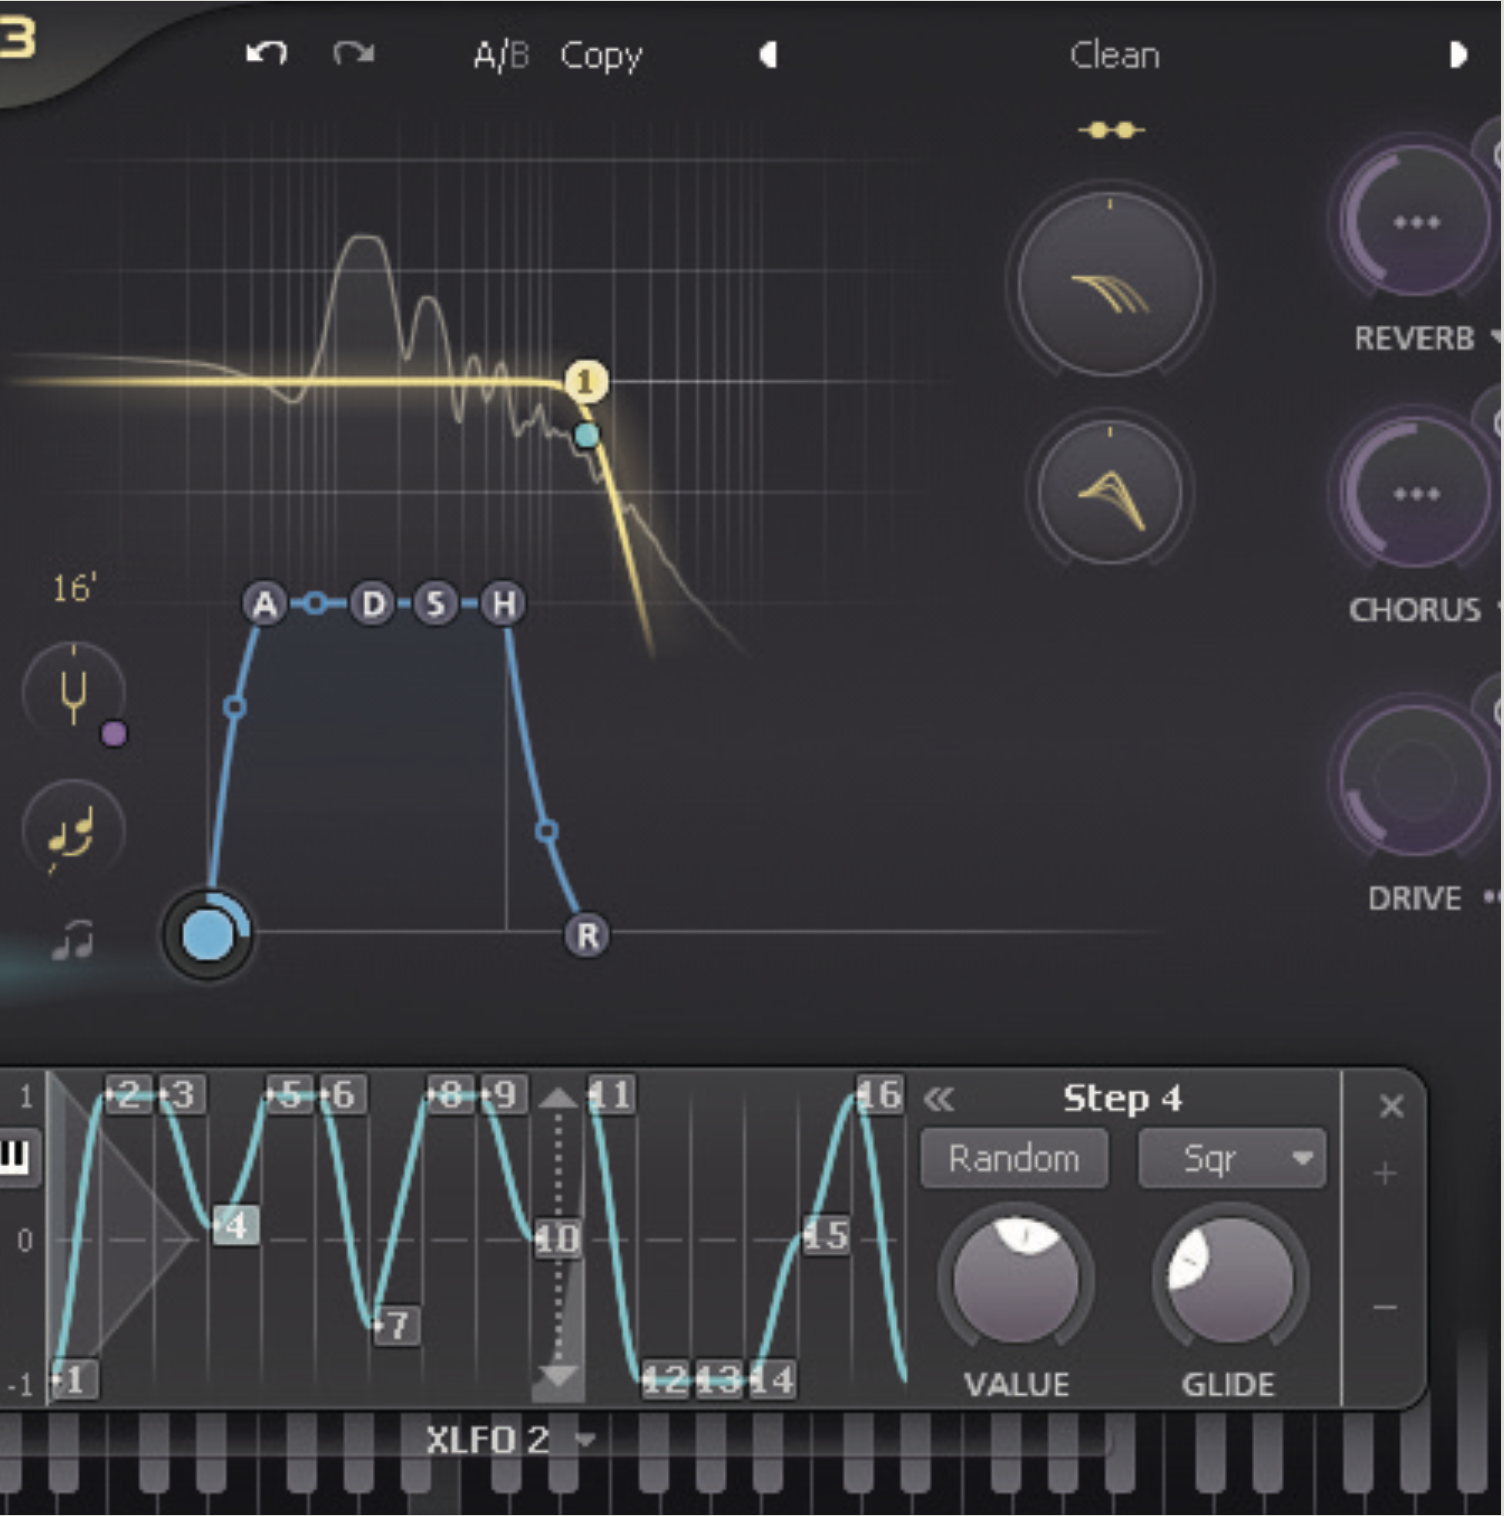
Click the plus button until it reaches 16 steps. You can then shape the steps as you see fit. Interact with the Glide knob of each step to alter how smoothly each step interpolates to the next one. You can also adjust the frequency.
Using Infiltrator 2’s custom LFOs to wreak havoc
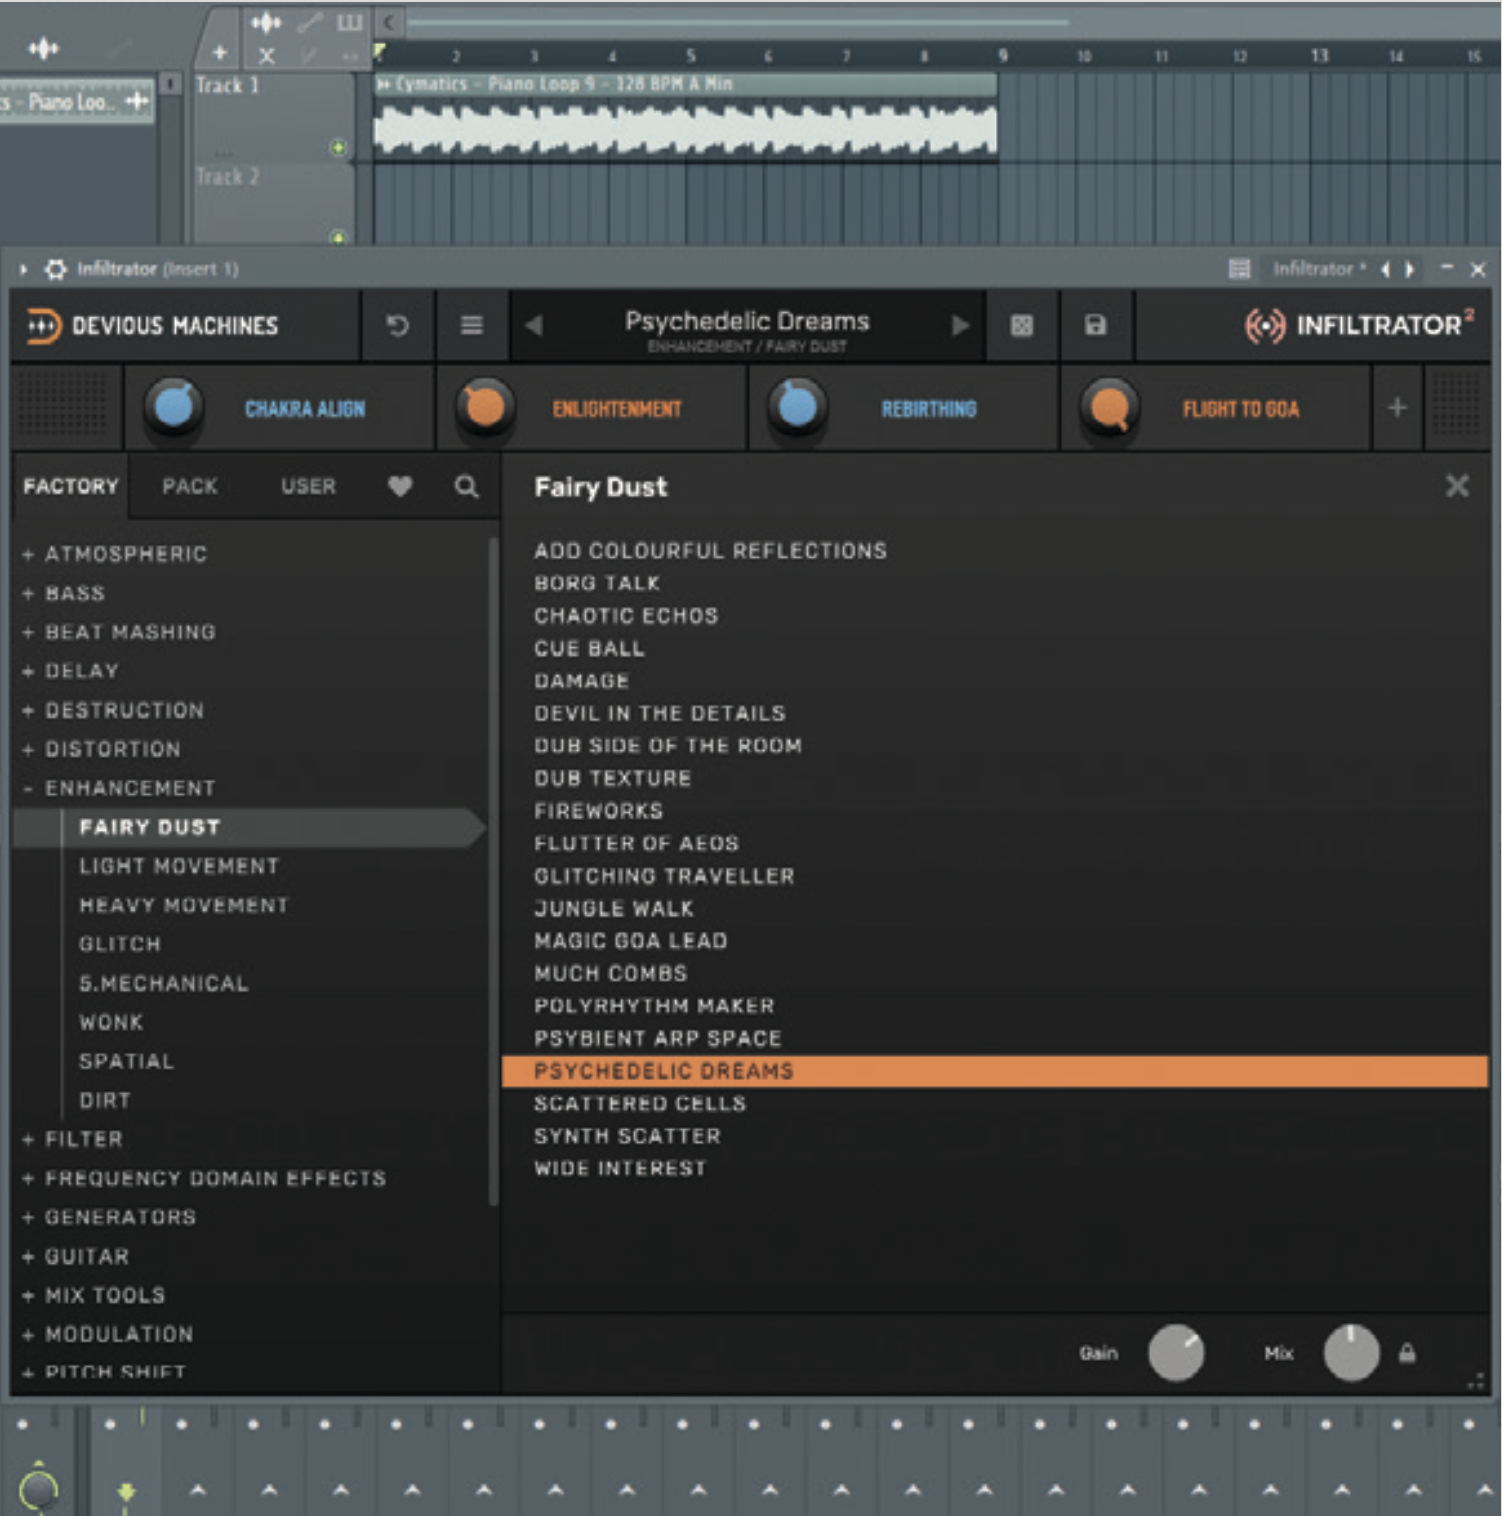
Infiltrator is an example of a plugin that throws many of the features we’ve covered so far into one. Infiltrator works as an effect plugin, so load a sample loop into your project and then open an instance of Infiltrator on its mixer track. Click on the dropdown menu, and select the preset Psychedelic.
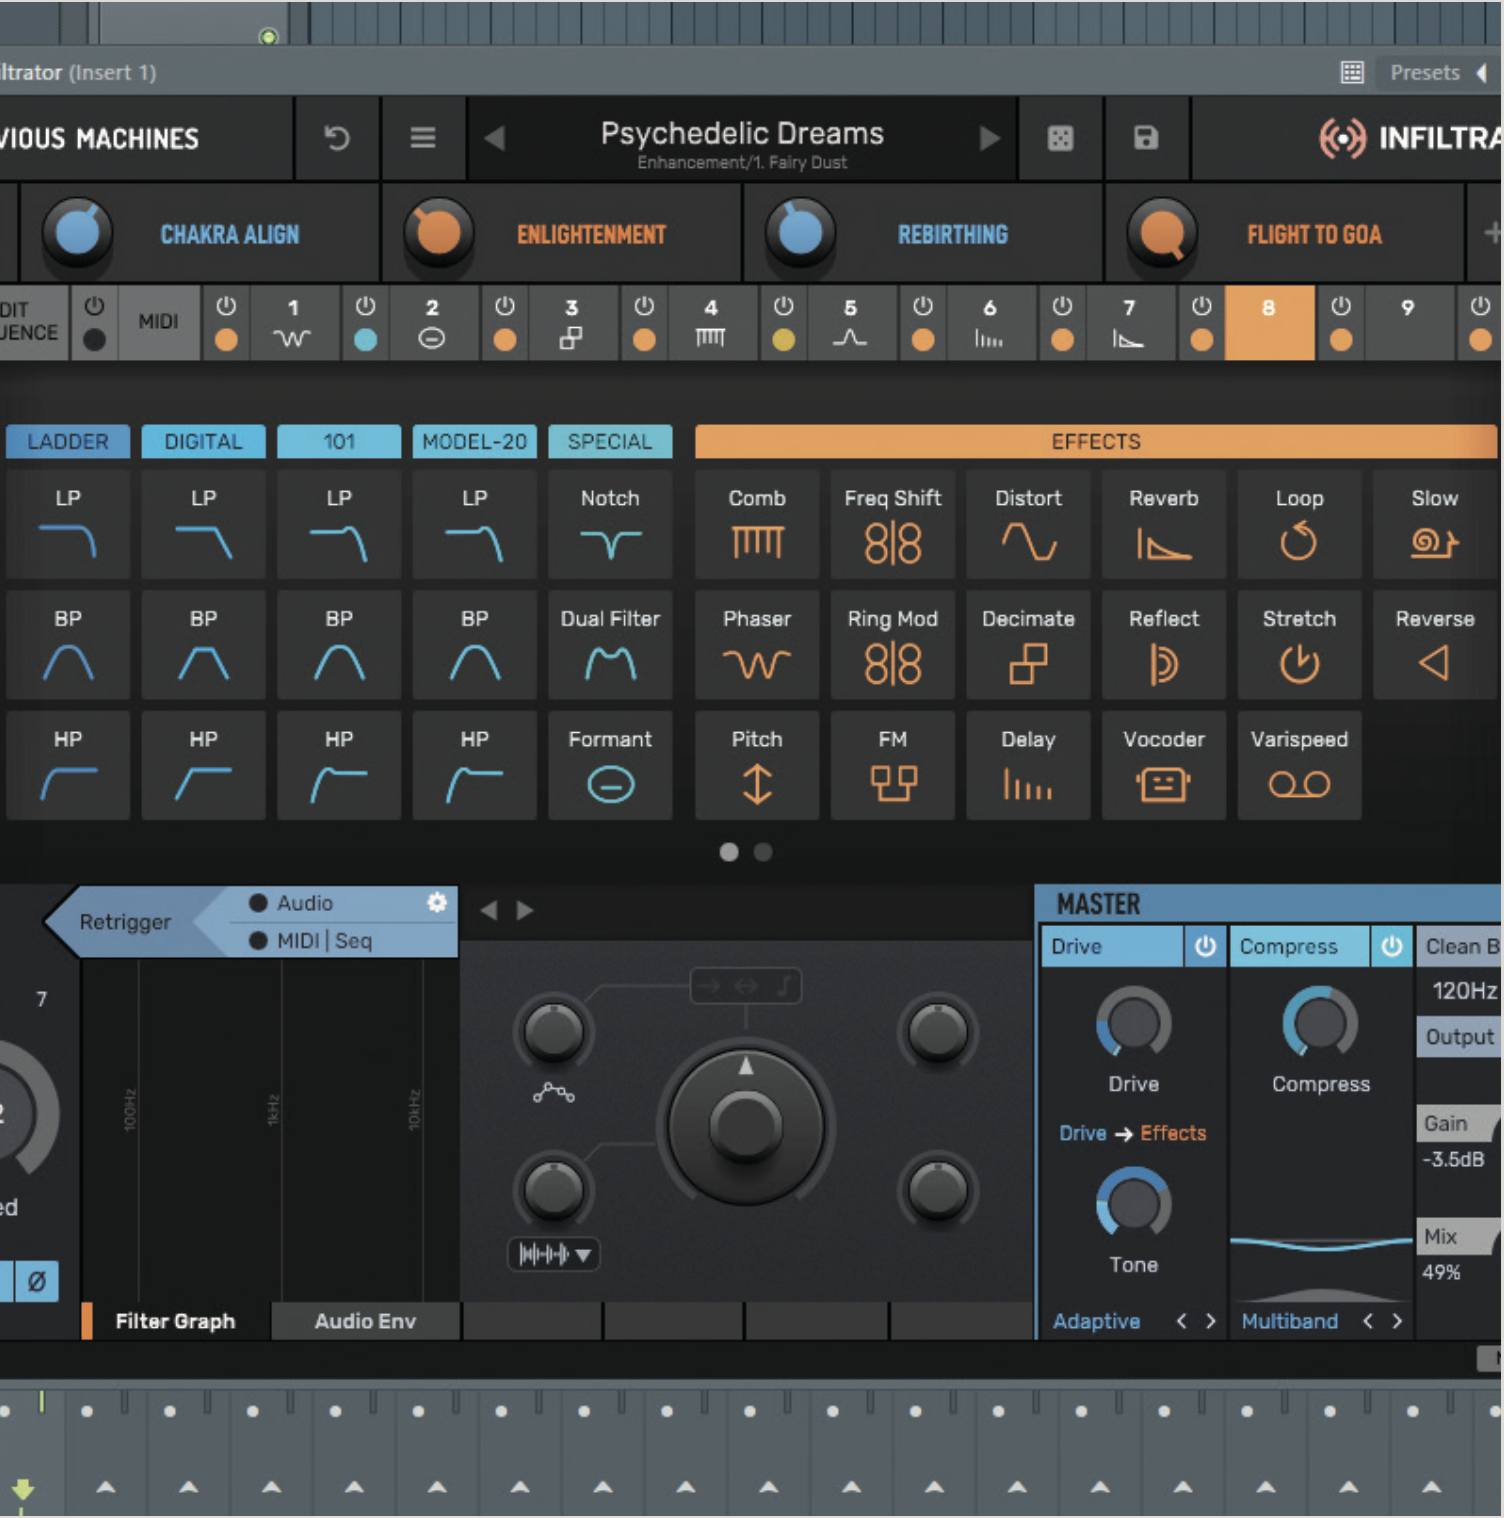
The Psychedelic Dreams preset uses seven out of ten effect slots available to us. You can click any of the slots from the top menu to open and edit them. You can also add a new effect to a blank slot by clicking on it. Open up slot 8 now to preview the effect.
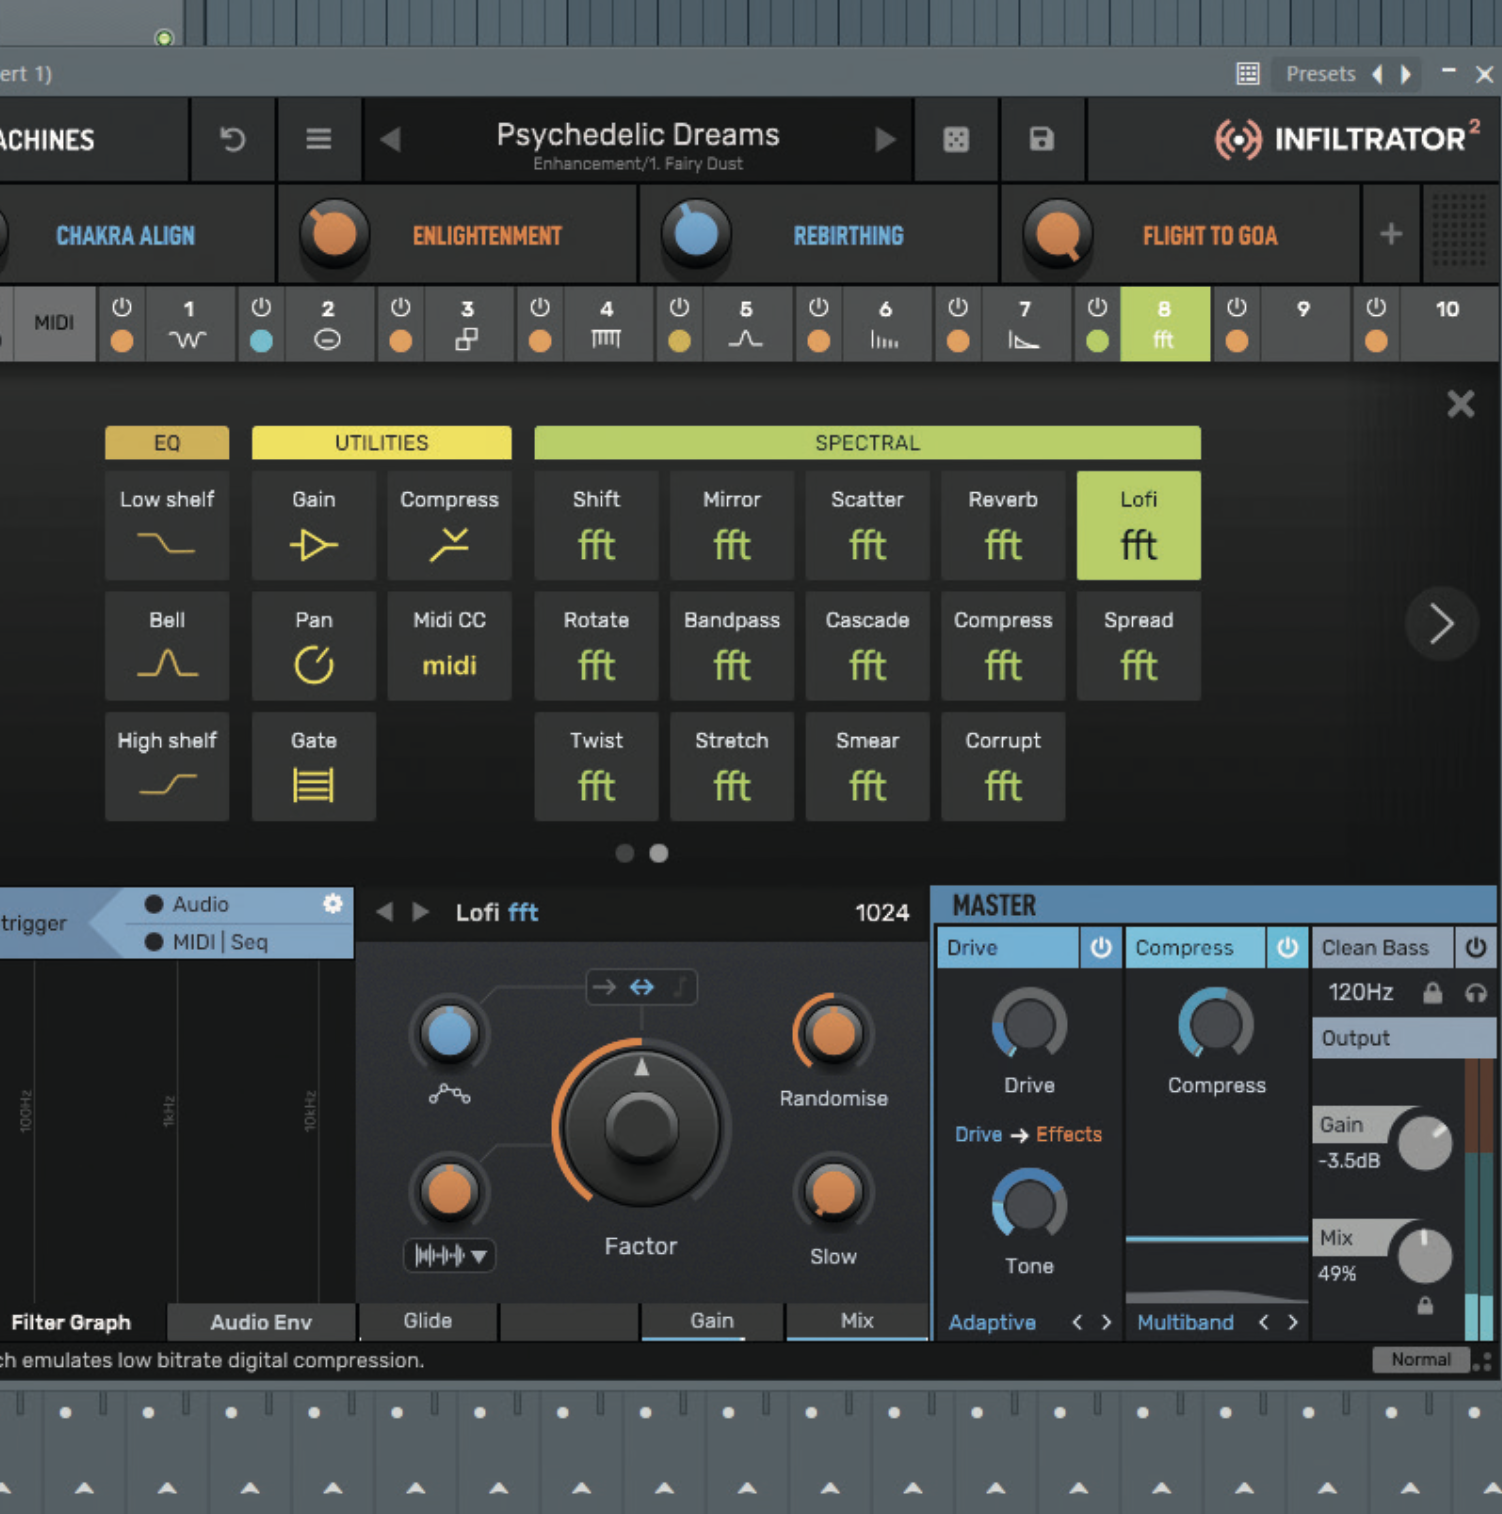
From the effects menu, you have two pages containing effects in the following five categories: Filters, Effects, EQ, Utilities, and Spectral. Scroll between pages by clicking the arrows. Go ahead and open up the Lo-fi effect from the Spectral category onto slot 8. Notice a change in sound.
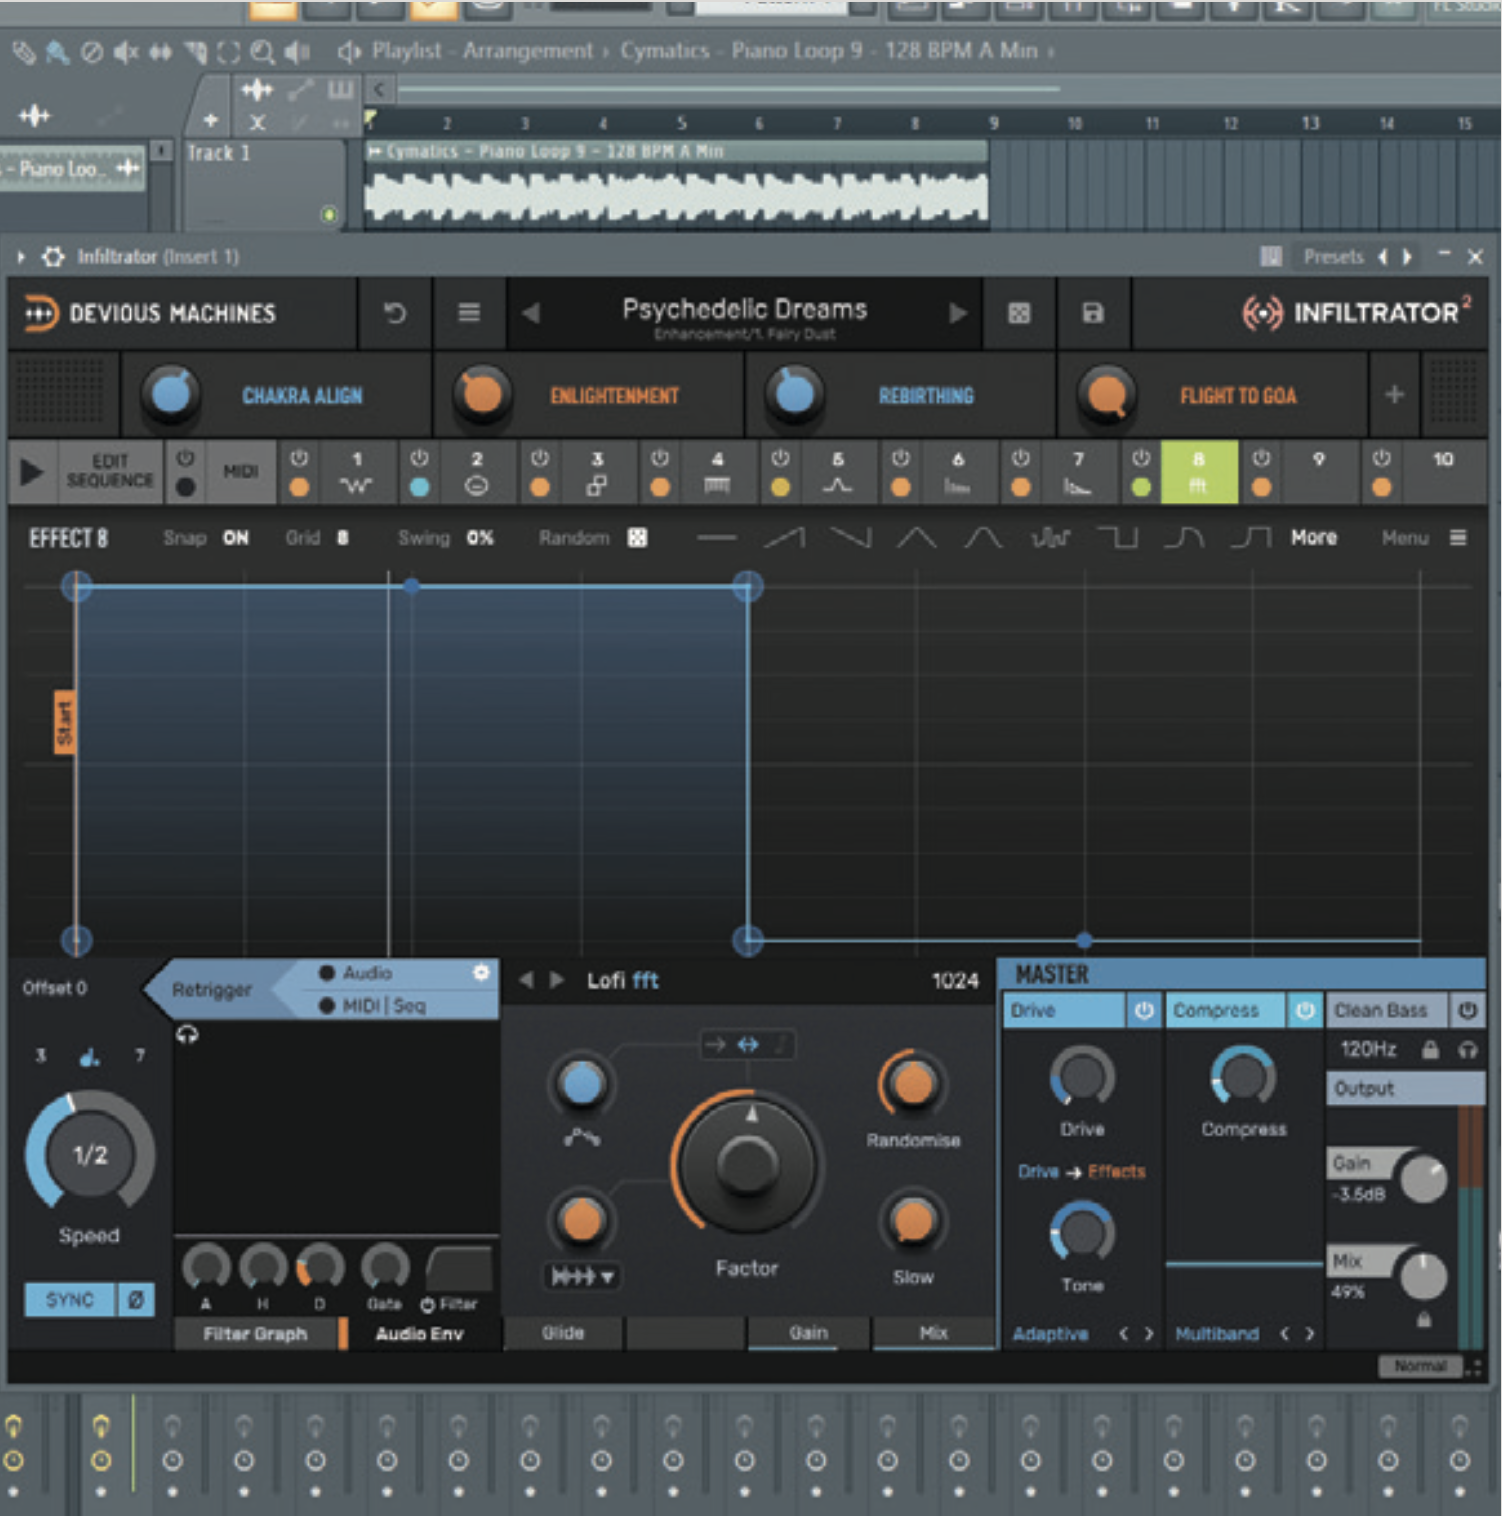
You can adjust the order of your effects by clicking and dragging them in the top menu. For now, let’s leave our Lo-fi effect in slot 8. With slot 8 selected, you can begin interacting with the effect’s controls, including changing its LFO filter and enabling/disabling it. Choose an envelope shape from the menu, below the effect slots.
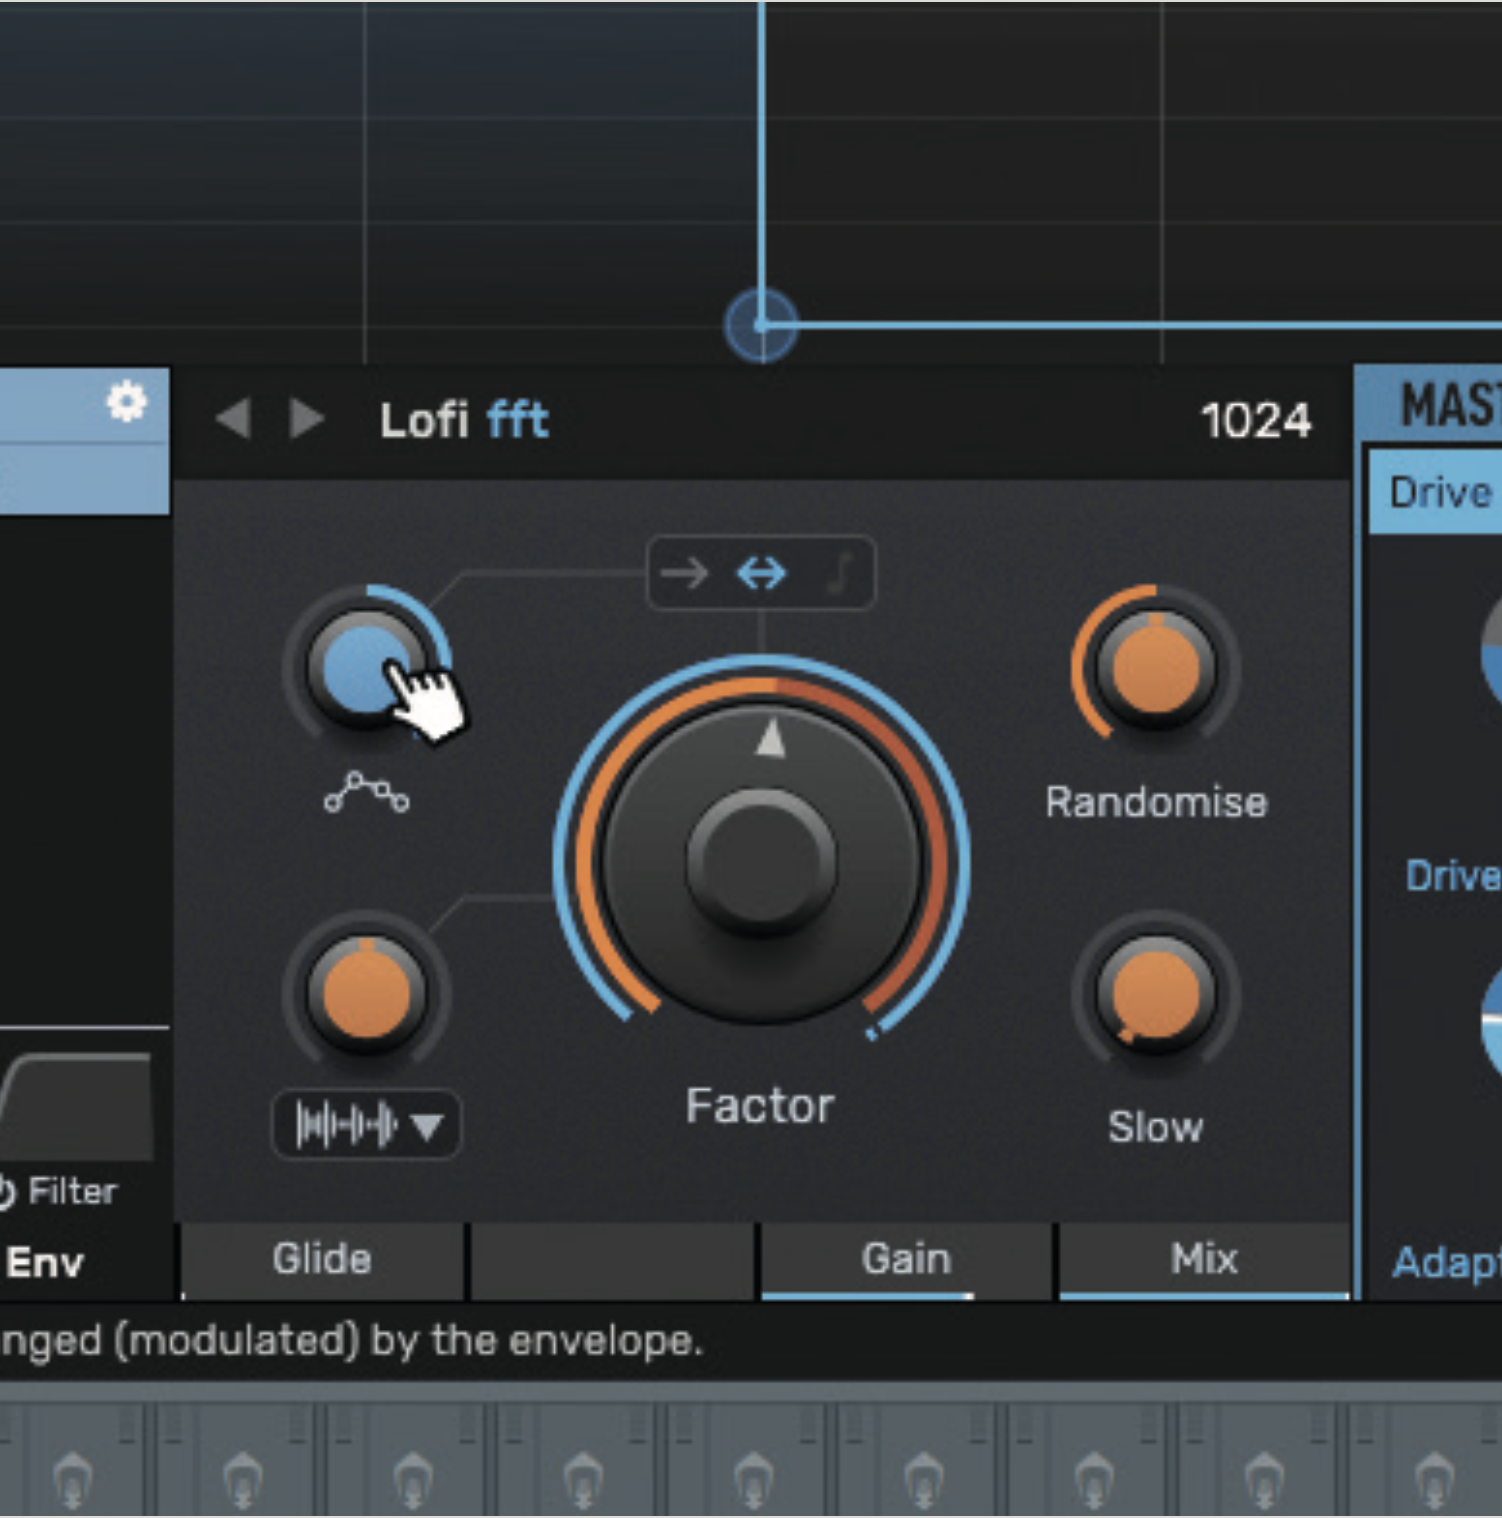
You won’t be able to hear the LFO working until you enable it. To do this, click and drag the blue knob in the central control panel. You can set the blue knob from value -100% to +100%, which will change the Envelope Amount. Any negative value will invert the LFO envelope. Set it to +100 now.
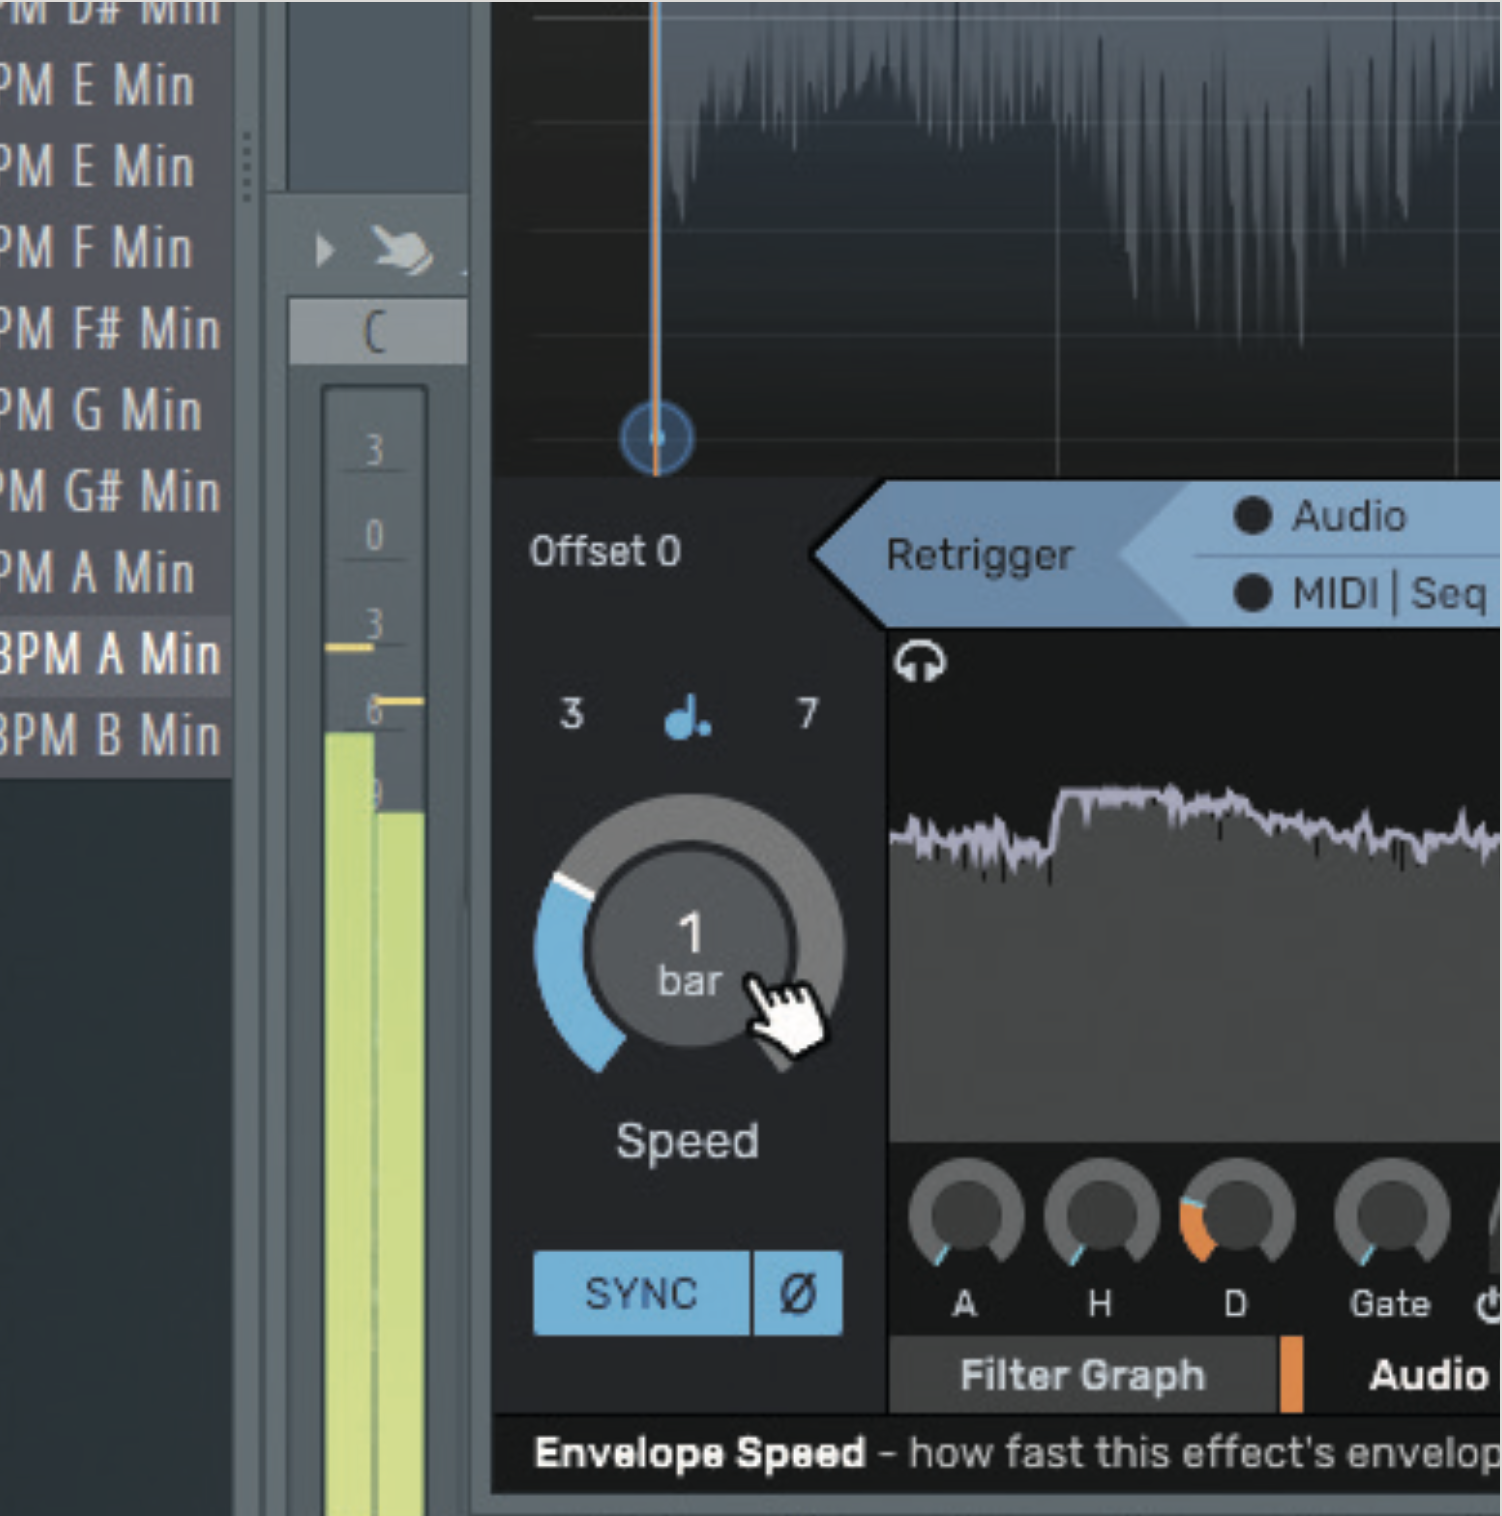
You can now hear the Lo-Fi effect activating according to the LFO envelope shape you selected. You can change the frequency of the LFO by interacting with the Speed knob on the bottom-left of the interface. By default, it’s set to ½ beats. You can change the measurement from Hz to project tempo, by clicking the Sync button.
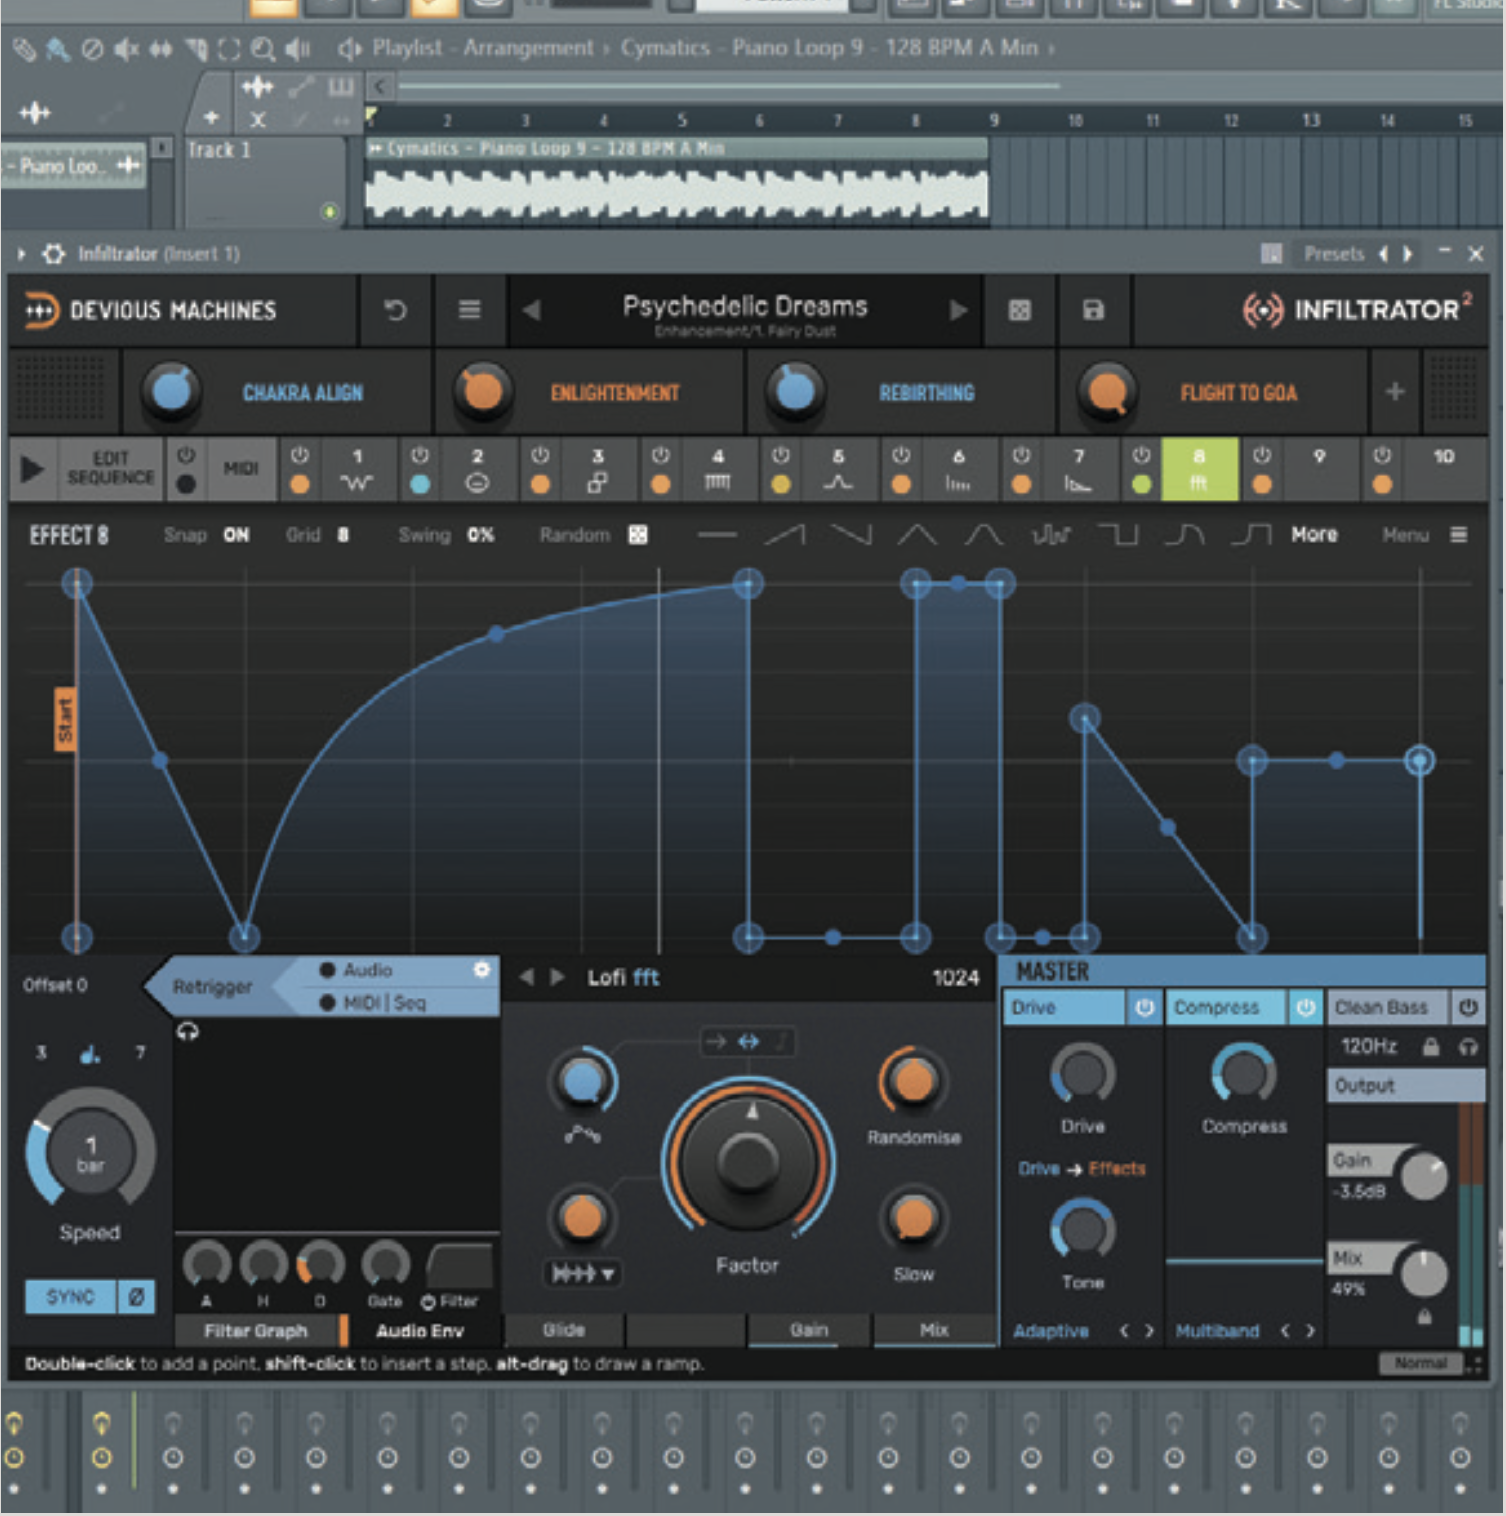
Now that we’ve enabled our Lo-fi LFO, we can further customise the LFO’s shape by adding manual points on the envelope’s display. To add a point, double-click. You can then adjust the interpolation lines by clicking and dragging. For more precise adjustments, you can toggle Off the Snap setting.
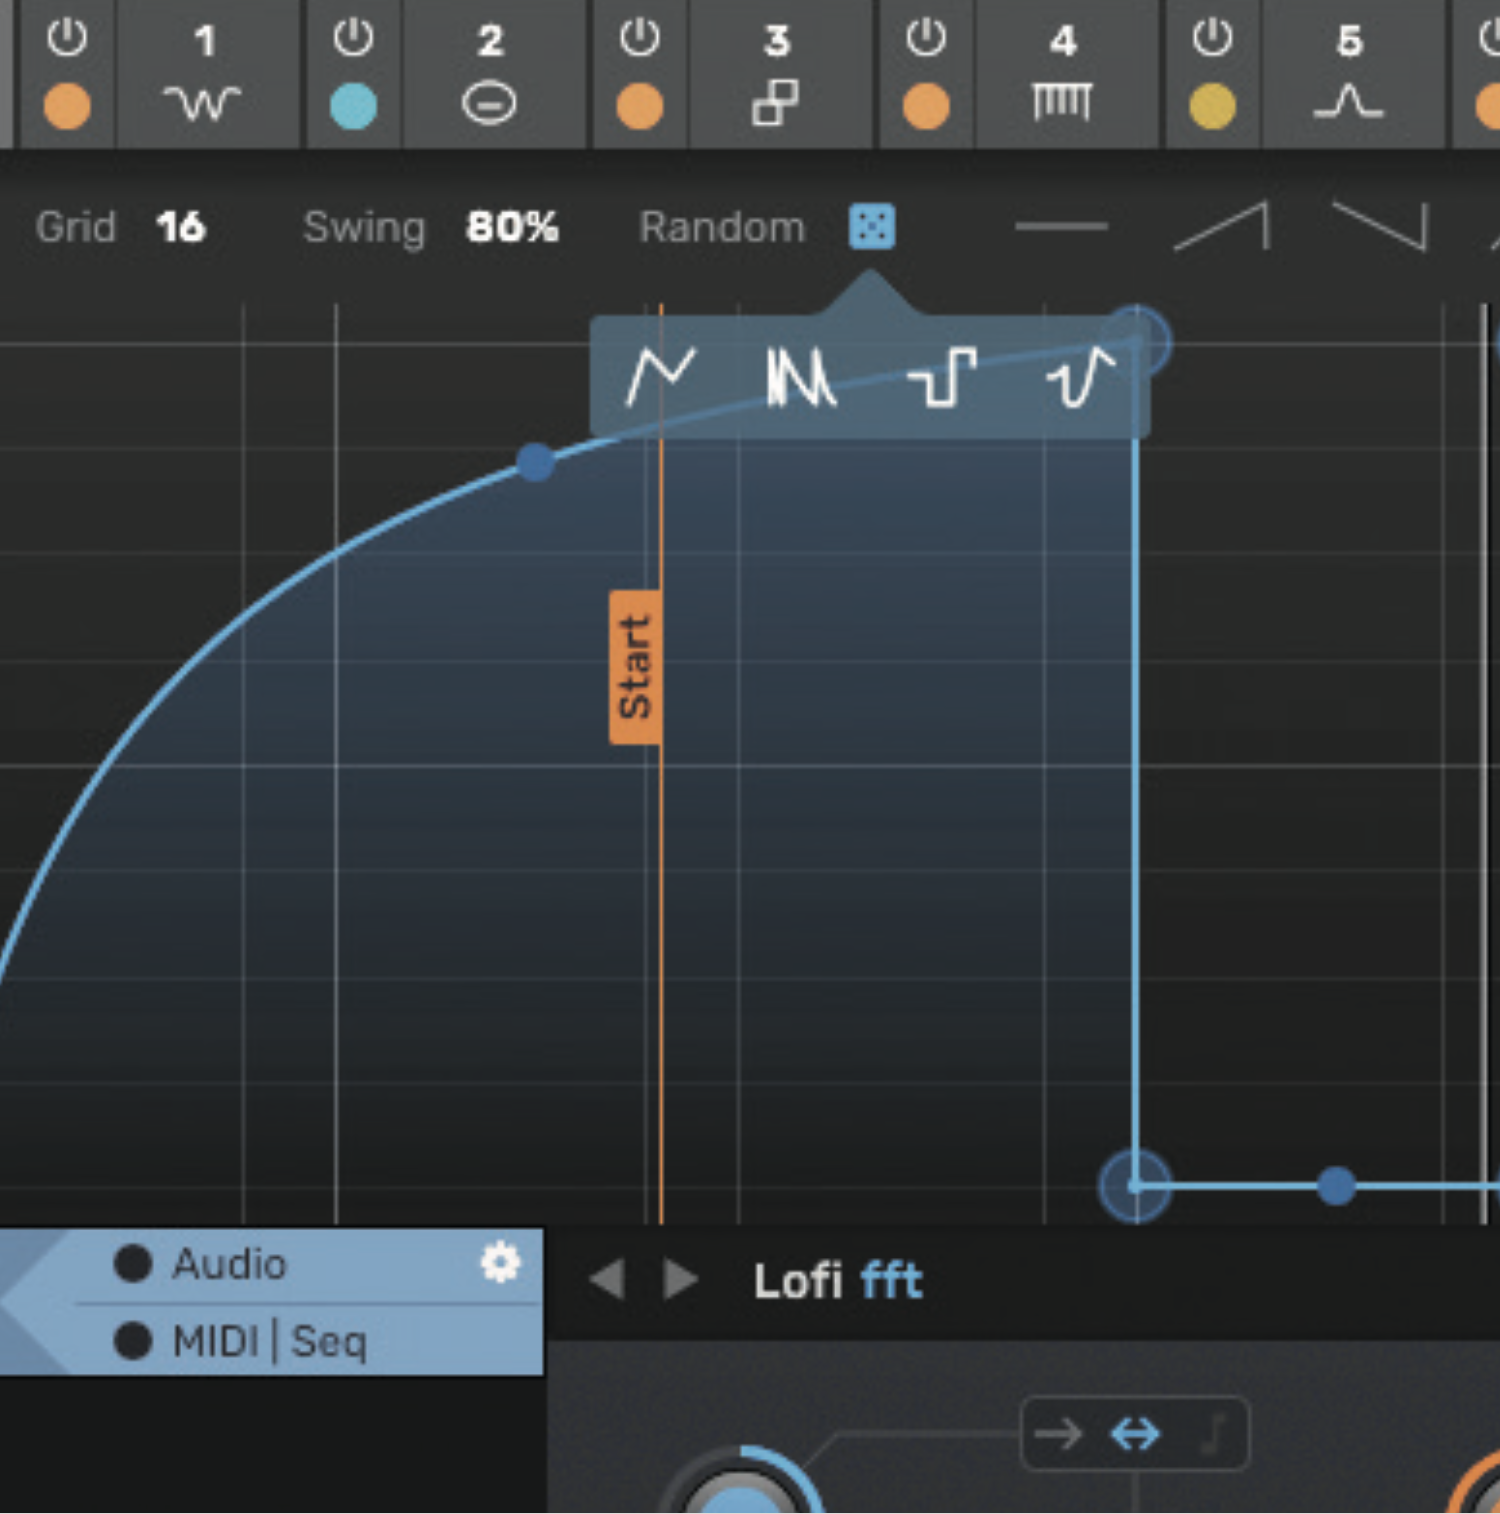
You can add a bit of swing to your LFO grid steps by dragging the Swing setting. You can also change the point of the envelope in which your LFO starts sweeping by dragging the orange Start slider. If you really wanted to, you can even randomise your LFO shape using the Random menu.
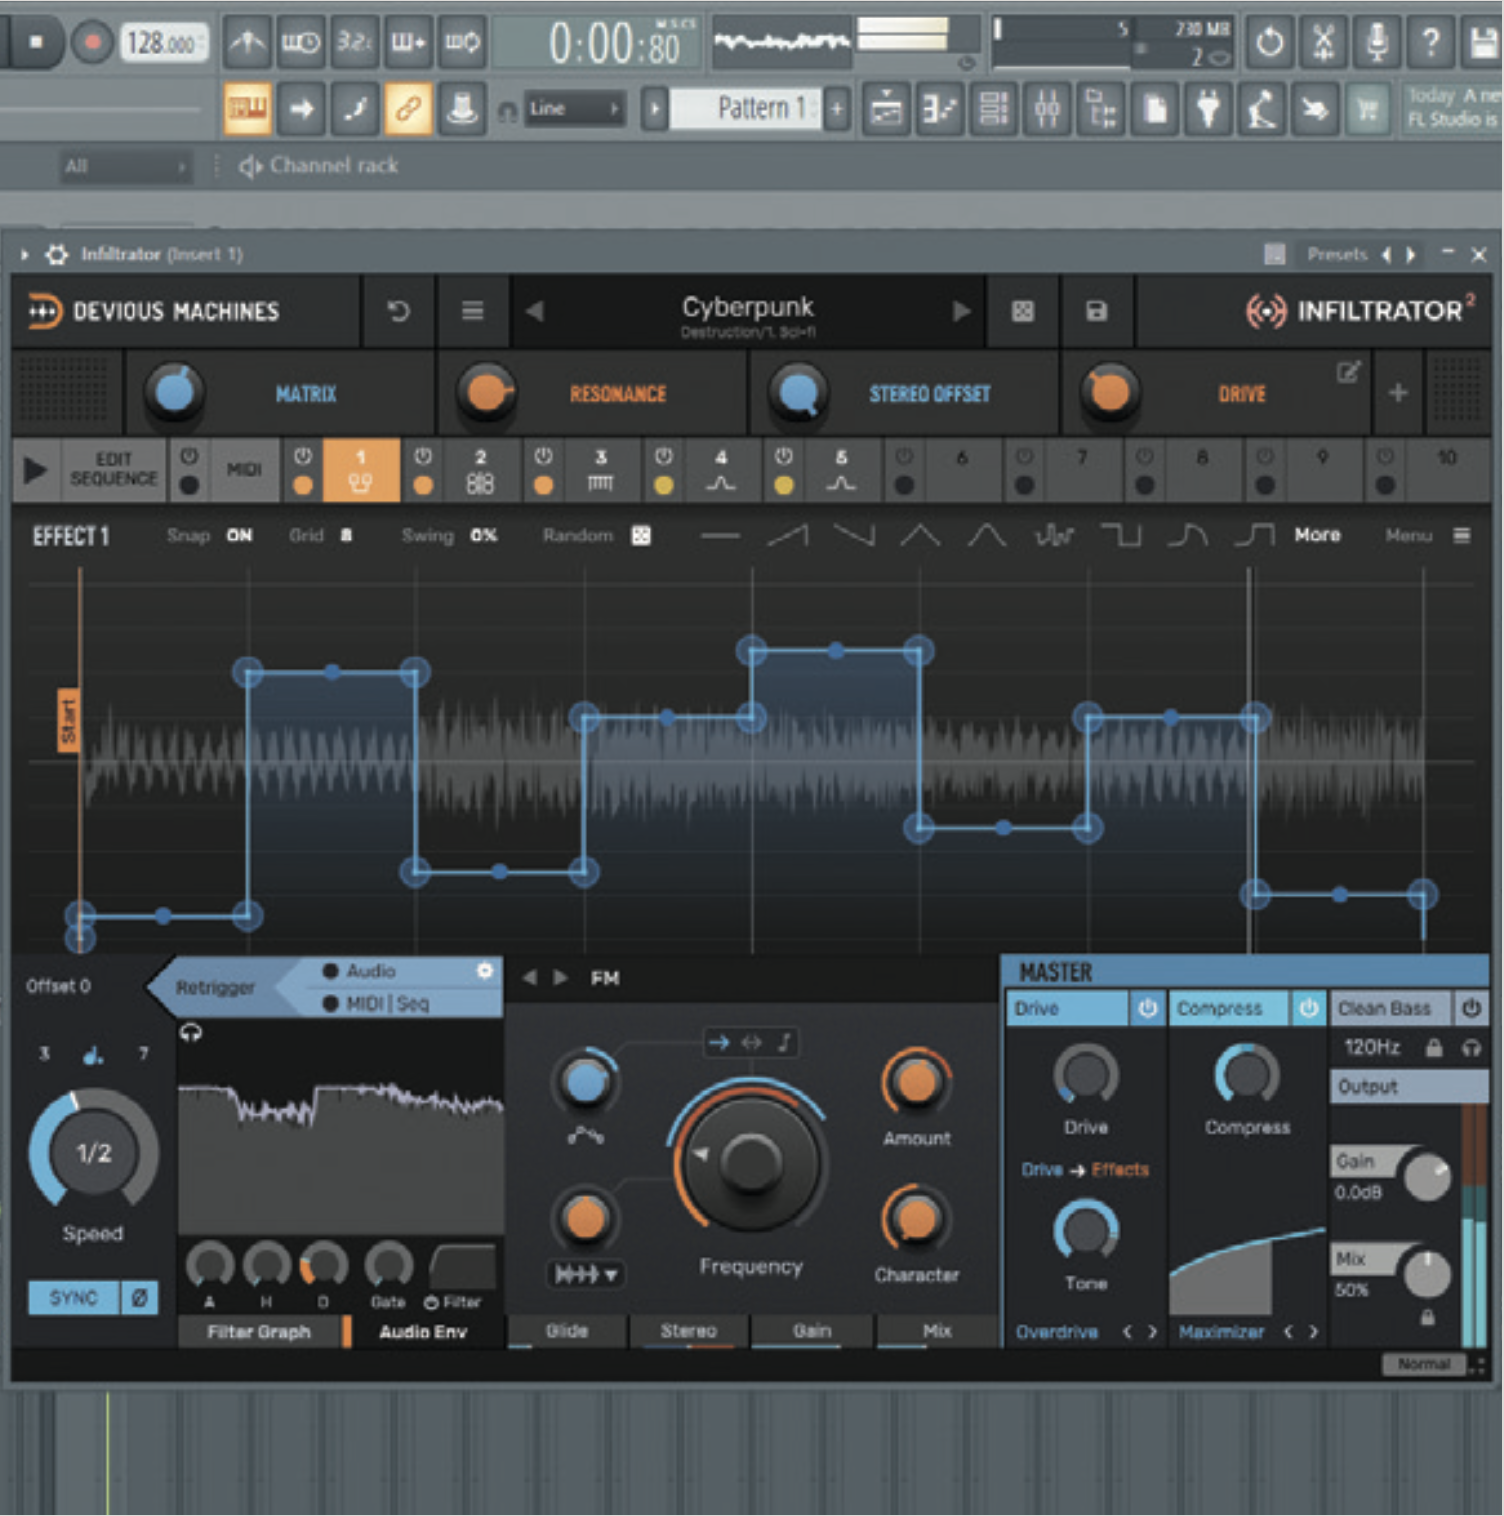
Now you have a comprehensive understanding of Infiltrator’s LFO controls, why not jump into the Psychedelic Dreams preset’s pre-loaded effects and play around? Or you can explore the other presets. Infiltrator’s wide range of effects, mixed with advanced LFOs, makes for interesting combinations.
Other DAWs that expand modulation
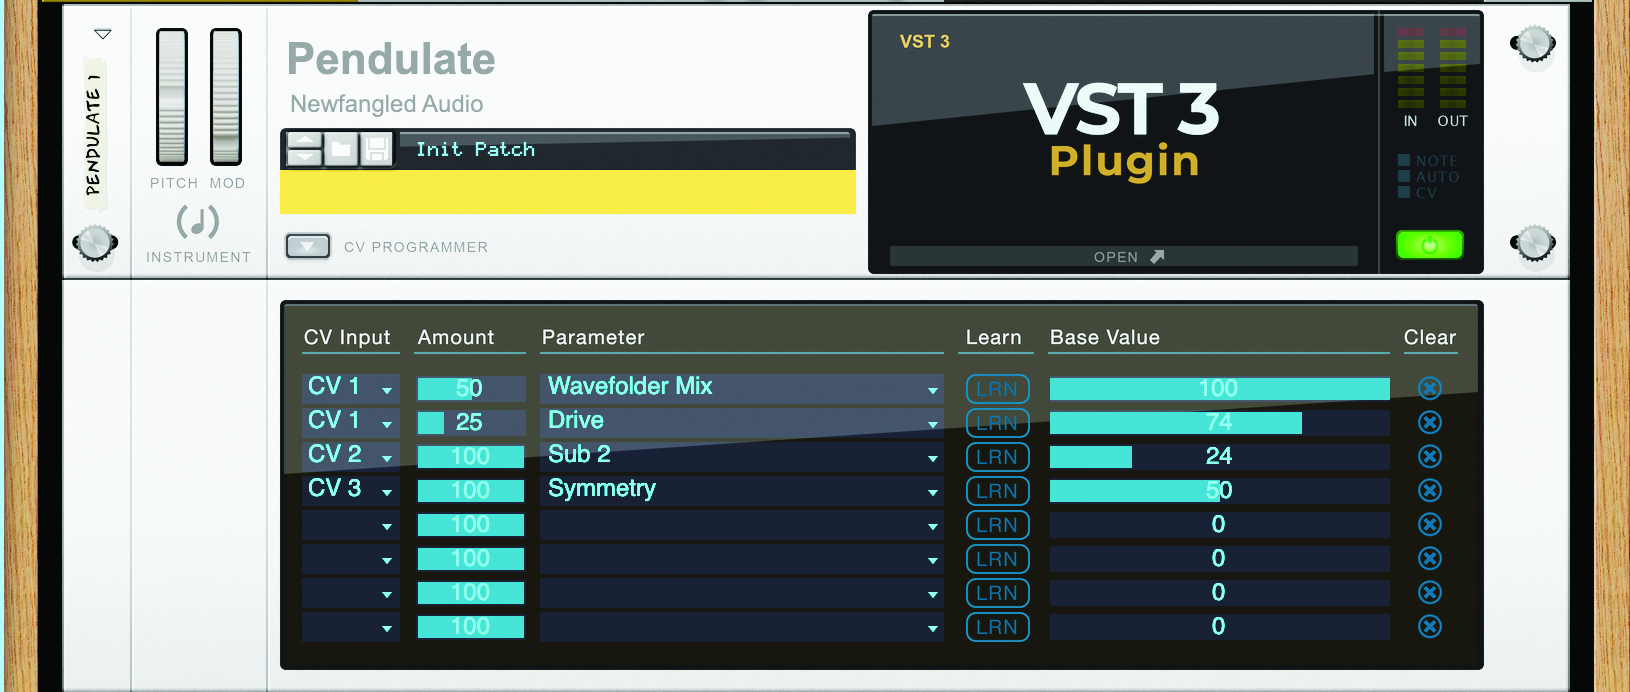
We show below how Bitwig Studio can use its inbuilt LFOs to modulate parameters within a plugin – even if the plugin doesn’t feature LFO modulation of its own. This kind of host modulation stems from plugins giving the DAW access to their parameters to be able to automate them, and the idea isn’t just seen in Bitwig: there are more places you may find it.
Tracktion’s Waveform DAW has a number of its own devices that can modulate whatever they’re pointed to. The LFOs, envelopes and even sequencer can be useful and creative sources for a whole host of effects. Meanwhile, when Reason started its support for plugins, it built into its VST host device the ability to modulate assigned plugin parameters using its virtual CV signals, expanding the possibilities and supplementing users with new LFOs.
Modulating the unmodulatable
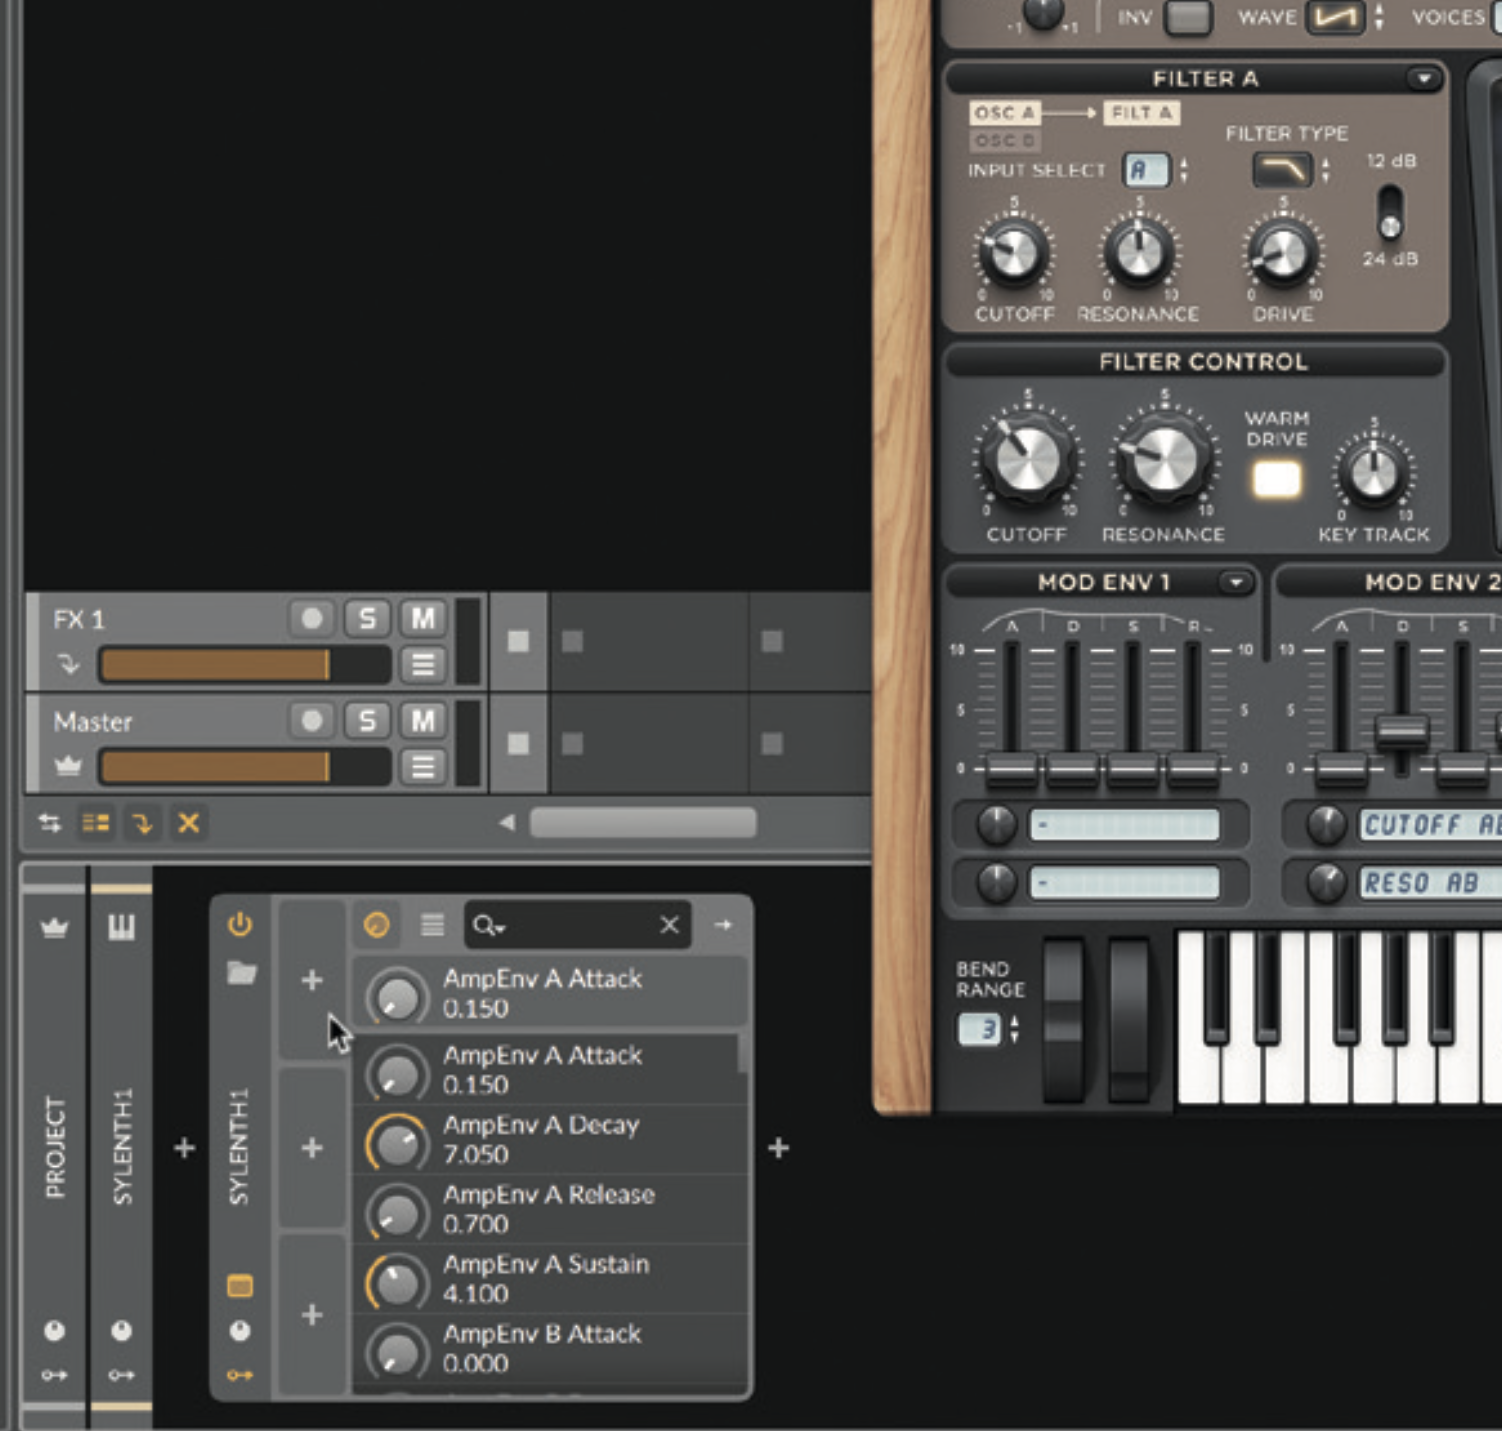
Let’s go back to the good old days of Sylenth1! Our old friend has most of what we need to program a synth patch today, but what if we wanted to add some modulation that it wasn’t capable of back then? In Bitwig Studio, we can Show Modulators on the device, and click to add a new one.
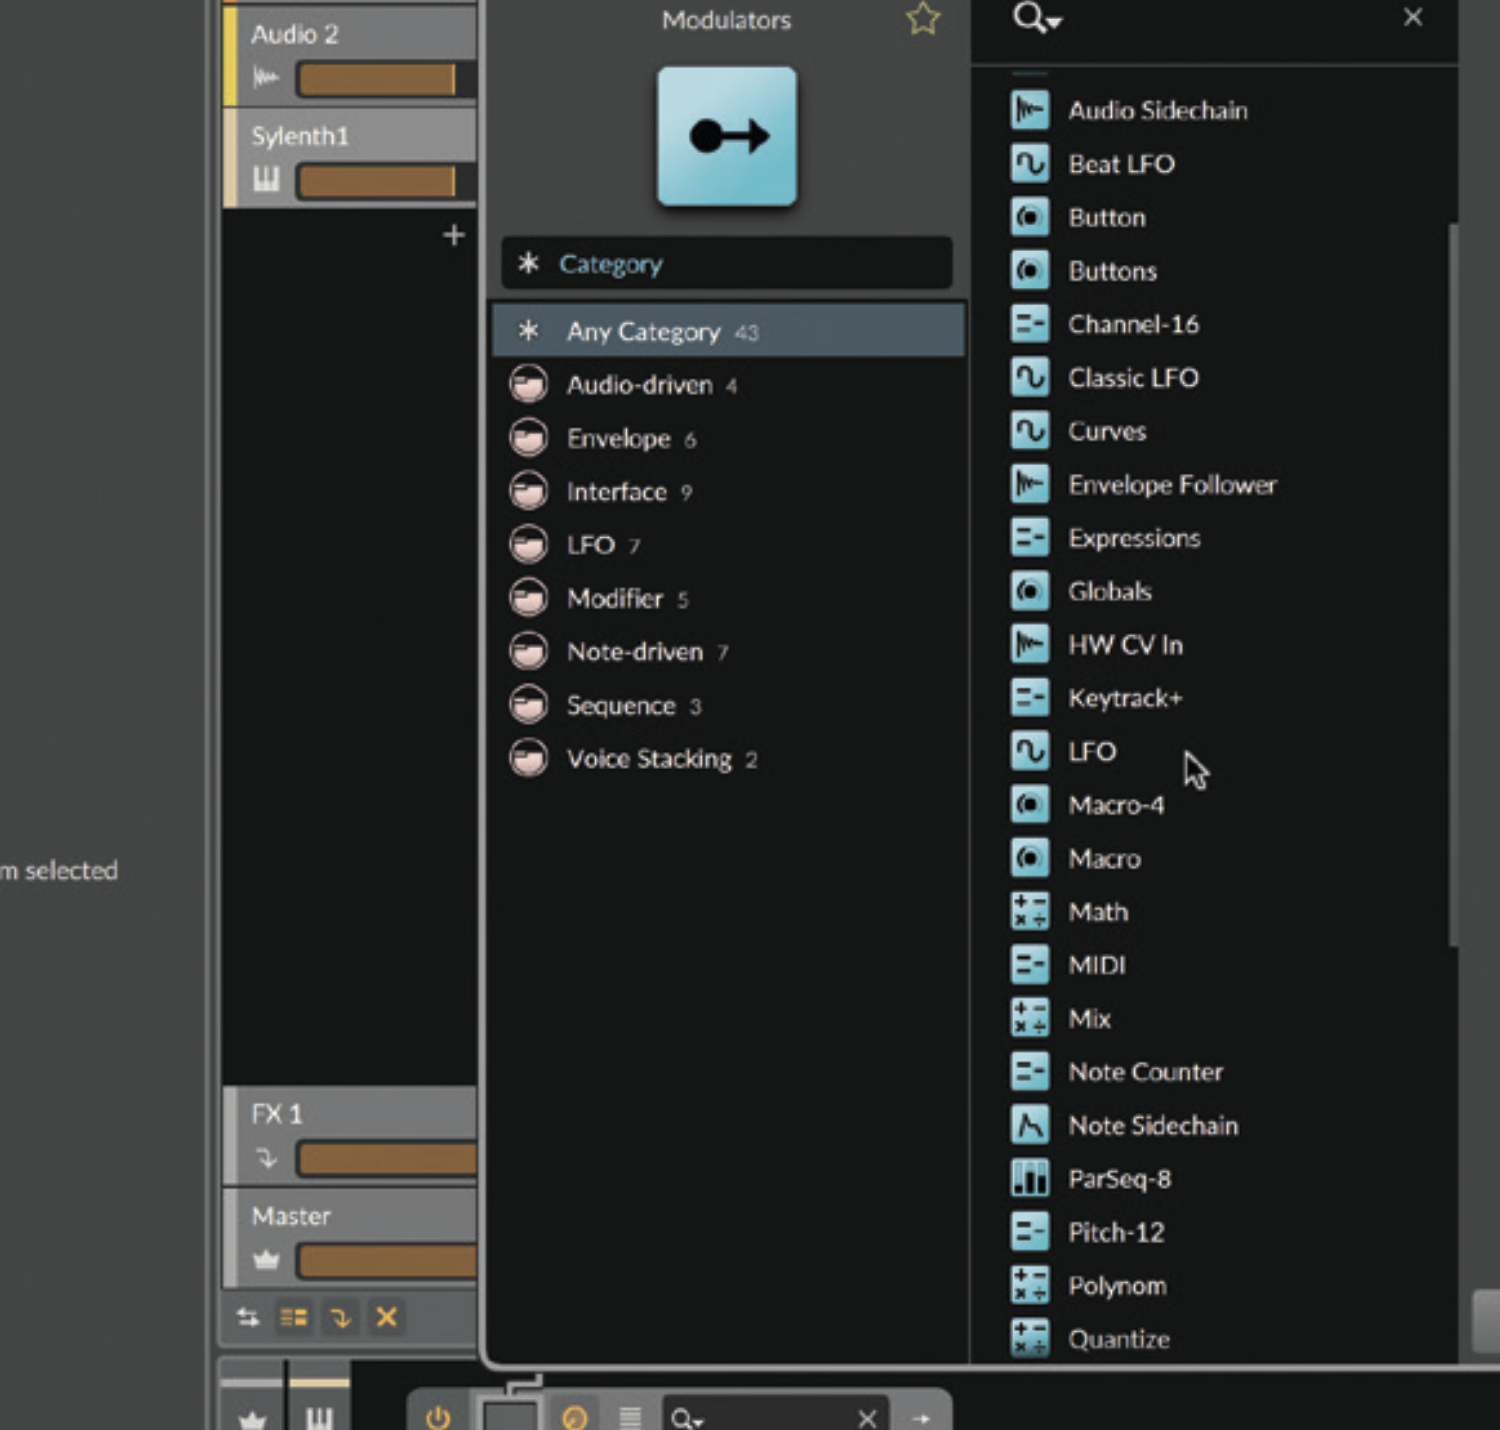
Here we’re given a list of modulators that we can install in front of the synth. We’re writing about LFOs here, so we go for the LFO, but other notable modulators include Buttons, Macros, various Math units, even Voice Control.
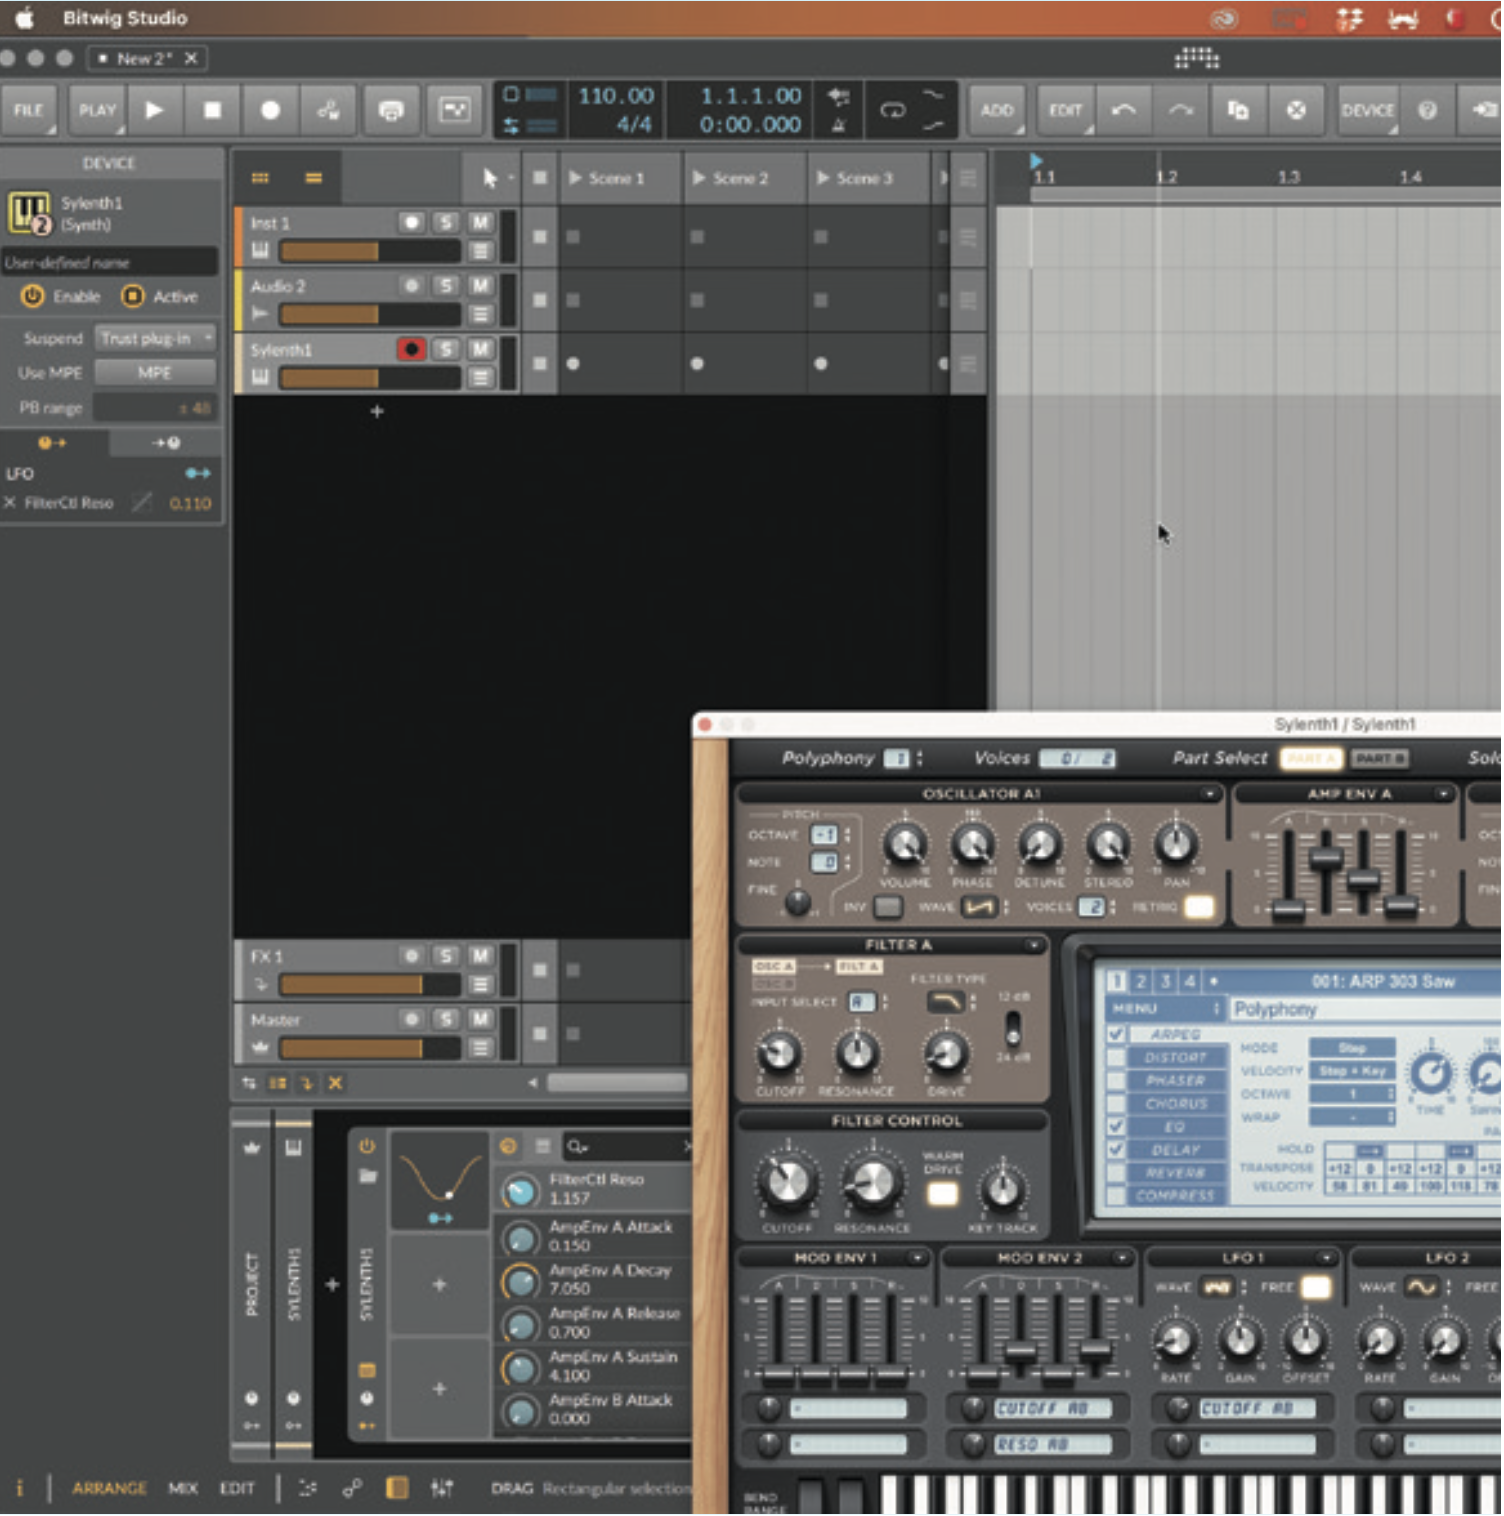
With a single LFO added, we see it cycling within the device window, and we can click its arrow to assign it to a recently clicked parameter. Here you can see the filter resonance moving in line with our LFO.
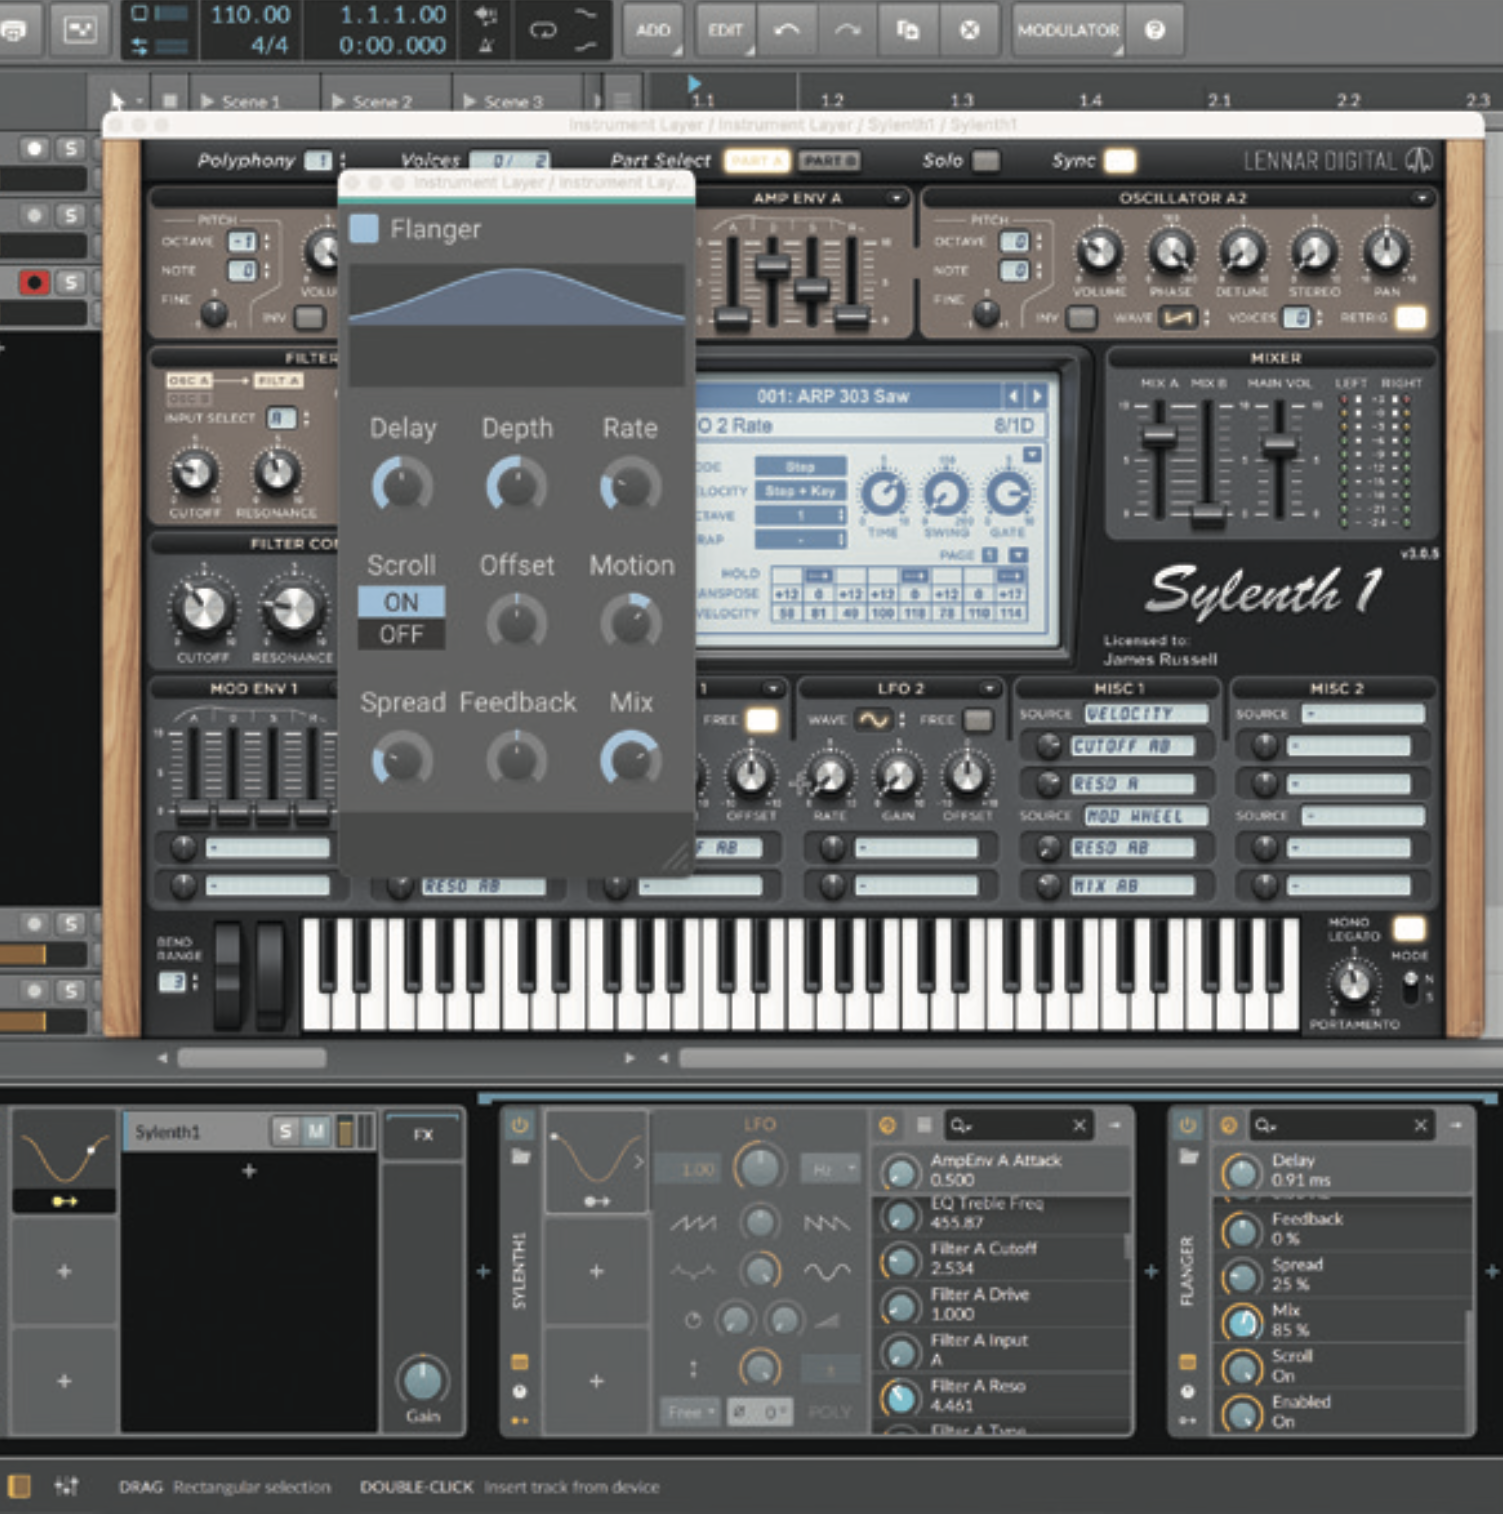
Another advantage of this system is that we can group the synth with an effects plugin that comes after it, and move the LFO to the parent group. This lets us point the LFO to multiple targets in the plugin and the processing chain.
3 of the best...
1. Xfer Records LFOtool
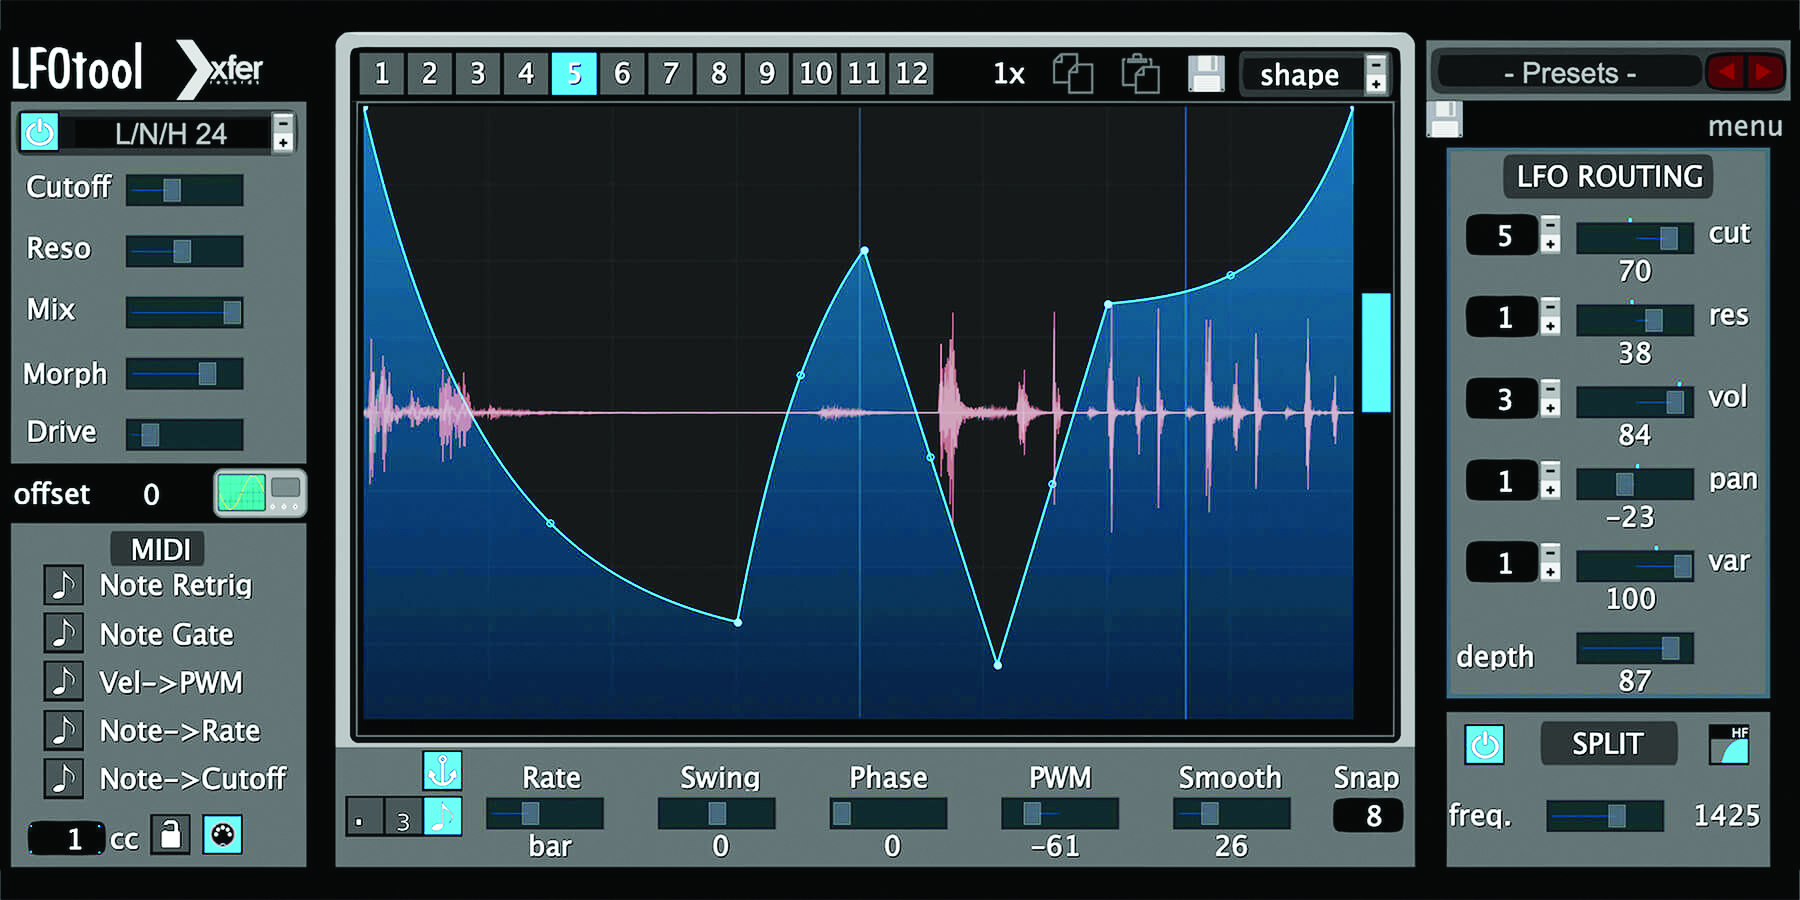
Sculpt custom LFO curves and shapes with this handy LFO effects processing plugin from Xfer Records. Packed with dozens of presets for you to get experimental with, you can count on LFOtool as a reliable sound design companion.
2. FabFilter Volcano 3
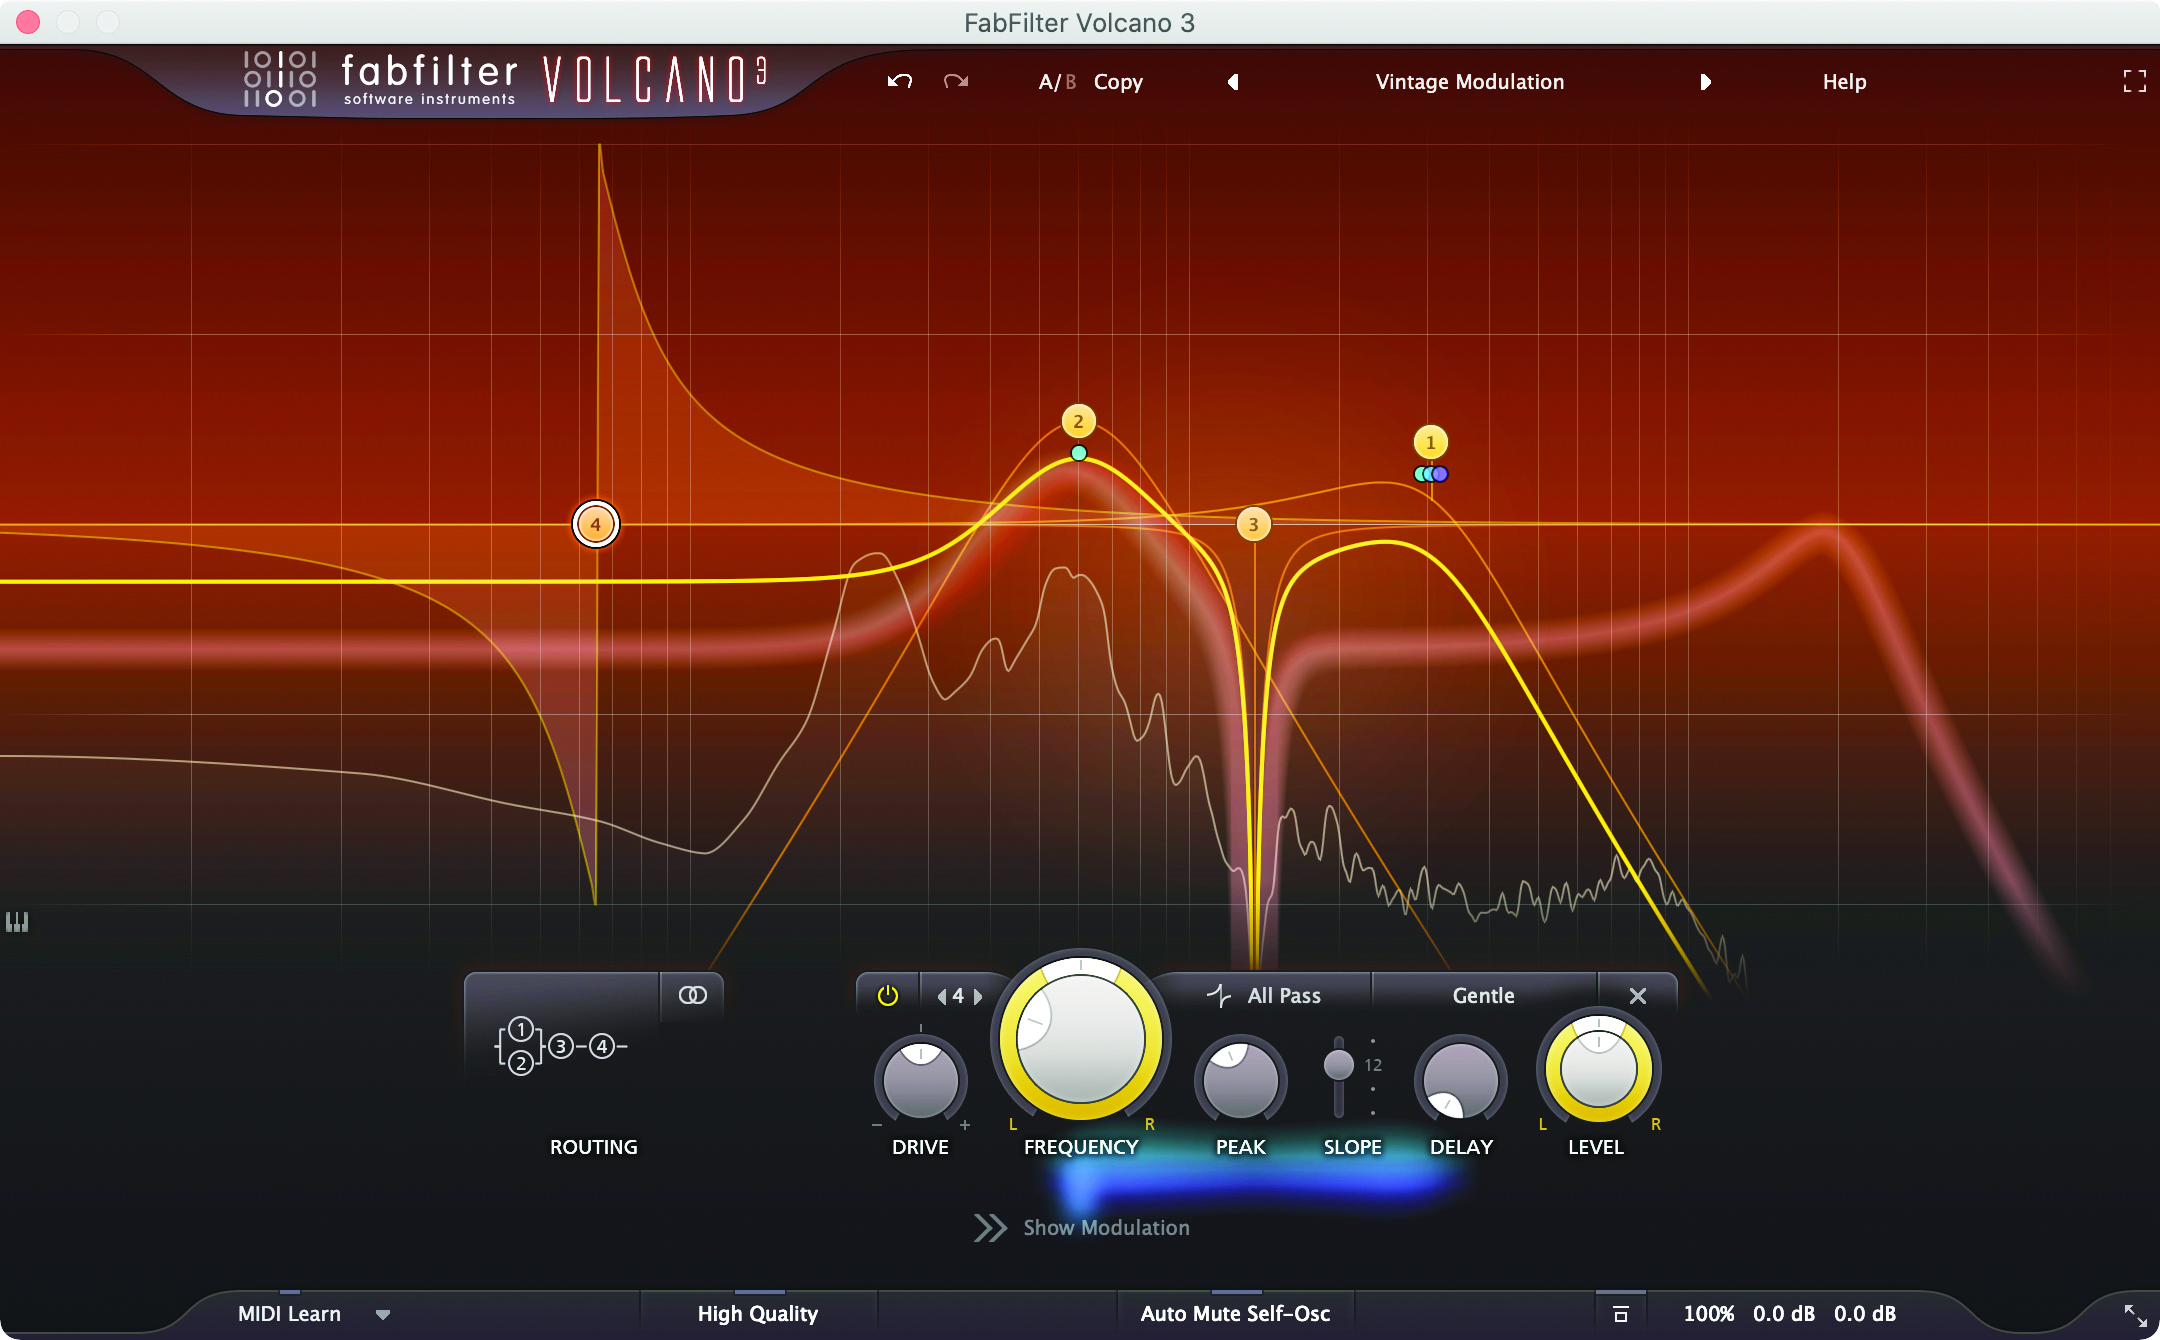
An eruptive sound modulation assistant, Volcano 3 is FabFilter’s award-winning effects entry to the LFO market. Coming with a revamped interface design in its third evolution, and an extensive list of categorised presets, this modulation plugin contains everything you need to add texture and depth to your tracks.
3. Devious Machines Duck
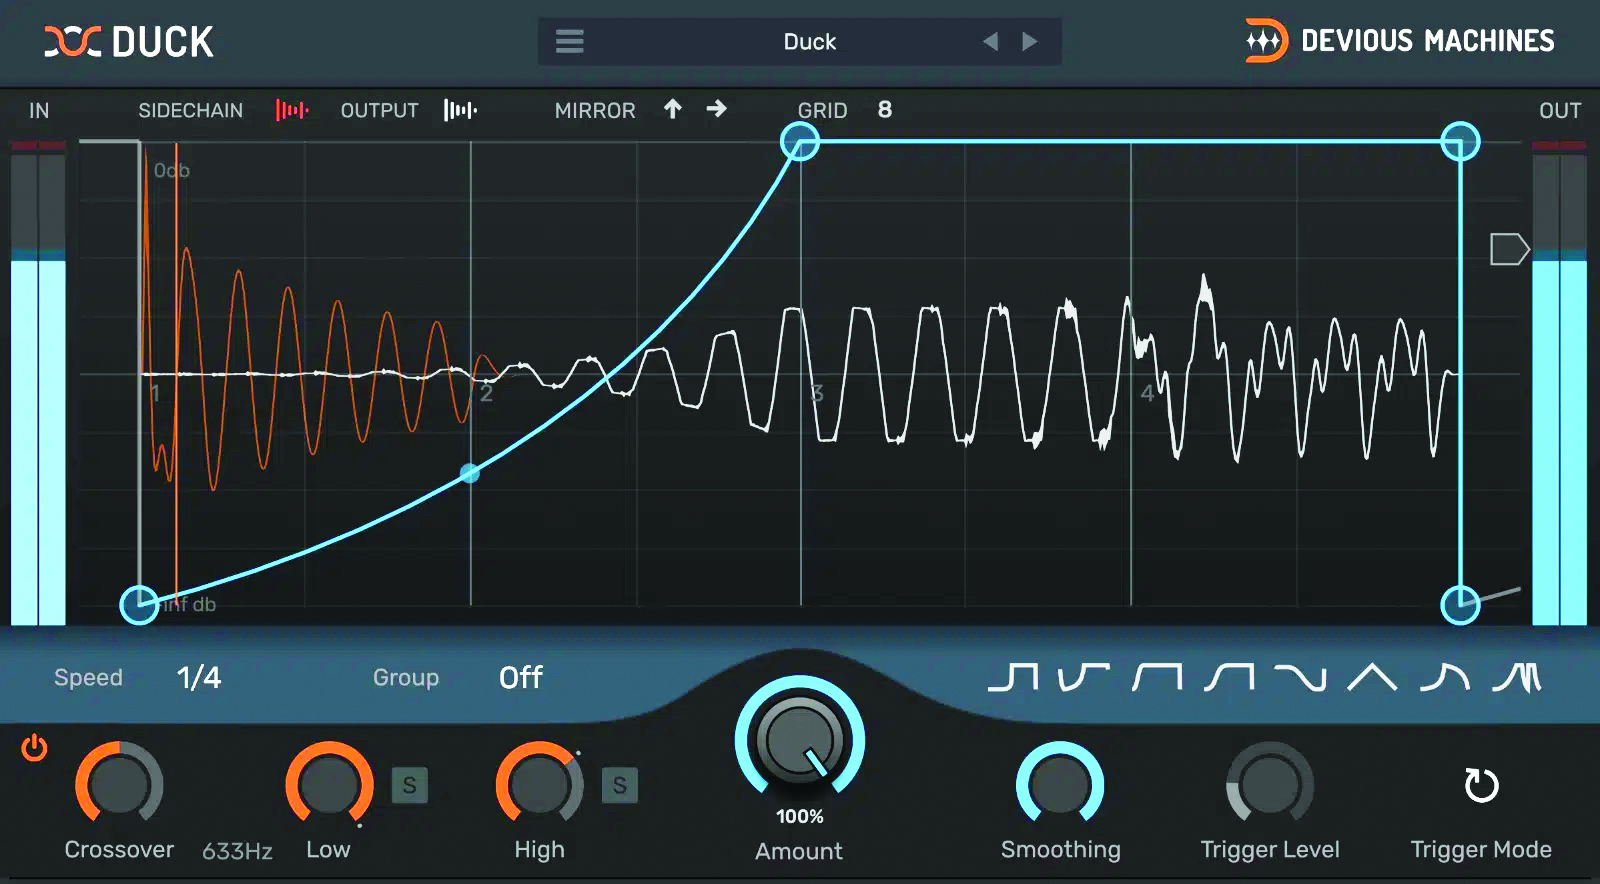
A volume shaper plugin that creates a pseudo ‘sidechain’ effect, Devious Machines Duck also had custom-drawn shapes that can loop, meaning it’s simple to be set up as an LFO, and even has a few presets to give that instant wobble.


A former Production Editor of Computer Music and FutureMusic magazines, James has gone on to be a freelance writer and reviewer of music software since 2018, and has also written for many of the biggest brands in music software. His specialties include mixing techniques, DAWs, acoustics and audio analysis, as well as an overall knowledge of the music software industry.

