Guitar setup: how to find and fix pickup phase problems
Guitar sounding thin? You might be experiencing phasing issues between your pickups
Guitar maintenance: We’ve teamed up with Jack Ellis from Manchester's Jack’s Instrument Services to solve common guitar issues and mod your instrument with simple tools and a DIY approach. This time we're looking at an essential for all players; how to squeeze better tuning stability from your guitar and stay in tune for longer!
More guitar setup tips
• How to fix guitar tuning problems
• How to fix your guitar's action
• How to fix your guitar's jack socket
• How to replace a humbucker with coil split
When it comes to guitar wiring, being in-phase or out-of-phase can be a welcome choice or a complete accident. Some guitars even have a custom phase switching feature - hit a mini-toggle or push/pull switch and you can fling your pickups out-of-phase with each other.

Jack Ellis and his team run an independent Manchester guitar setup and guitar repair service from their Cheetham Hill based workshop, serving the musicians of the Northwest England's electric guitars, bass guitars, acoustic guitars and much more, including custom pedals.
He also offers a custom guitar pickguard-making service called Tiny Tone.
Why would you want to do this though? First, we should explain a bit about what in/out-of-phase means. As a string vibrates over a magnetic pickup coil it very rapidly creates a positive then negative current (A/C).
Get the MusicRadar Newsletter
Want all the hottest music and gear news, reviews, deals, features and more, direct to your inbox? Sign up here.
For example if a string moves toward the pickup it would induce a positive current and moving away would induce a negative current.
A phasing issue occurs when two coils create opposing currents at the same time - the same as if you mistakenly wire a pair of hi-fi speakers with opposite polarities. However, when it comes to the guitar, this can be on purpose or by accident.
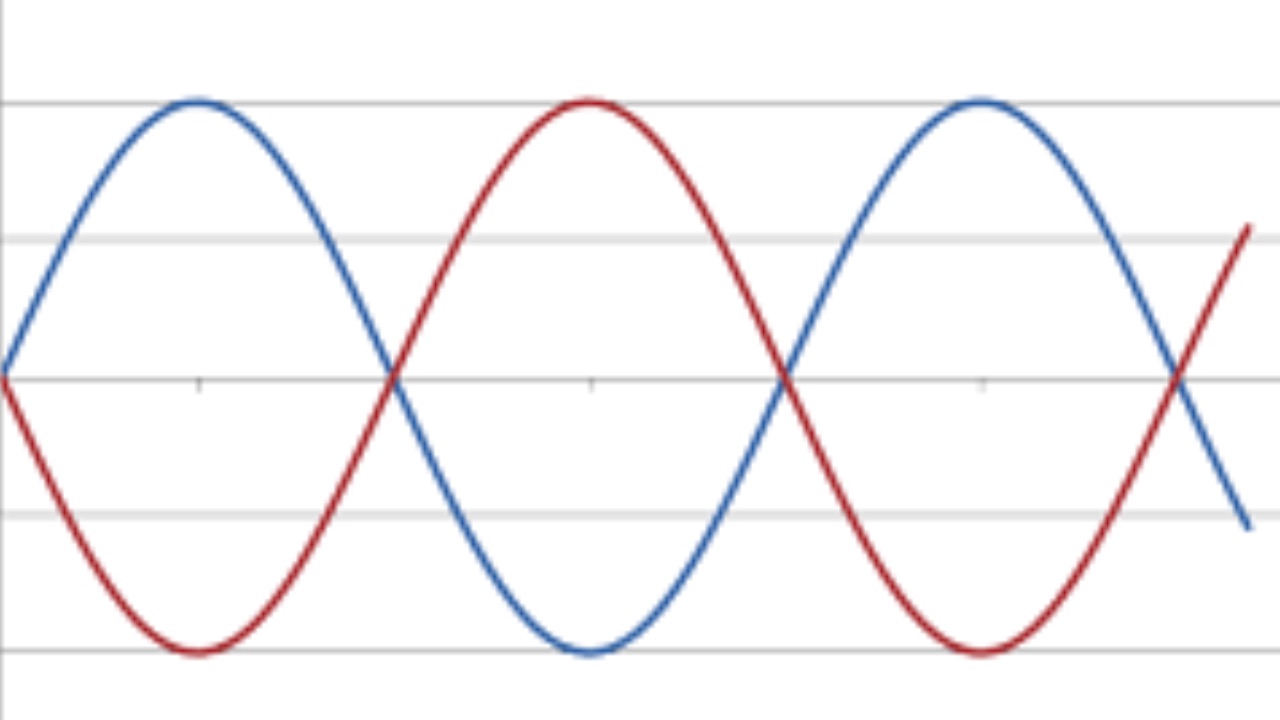
The diagram above shows two perfectly out-of-phase sine wave signals - for illustration the neck pickup would be the blue line and the bridge pickup would be the red line, notice how the peaks and troughs of each signal are direct opposites.
Unfortunately, there is no standard between different pickup manufacturers when it comes to magnet orientation (north or south polarity) or winding direction of the pickup coils. These factors determine the phase of the pickup so it’s very common to have phasing problems when it comes to mixing different brands of pickups, especially if your guitar has had previous DIY work done.
It’s important to note that phase is a relationship, in this case between two pickups. You won’t notice it until you select a position that blends the two pickups together.
Two pickups wired in-phase with each other will be working together to reproduce the full spectrum of sound they’re capable of capturing, while a pair of out-of-phase pickups will result in phase cancellation.
This culminates in overlapping frequencies being cancelled out, and you’ll find that when you select the two pickups simultaneously the result will be a thinner, hollow sound. As we mentioned, sometimes this is desirable, sometimes not - the key is being able to control it.
So, if you suspect your pickups might be wired out-of-phase, here’s how to revert them to normal. Today’s surgery involves a low-priced Telecaster copy that has it’s pickups accidentally wired out of phase to each other from the factory, no less!
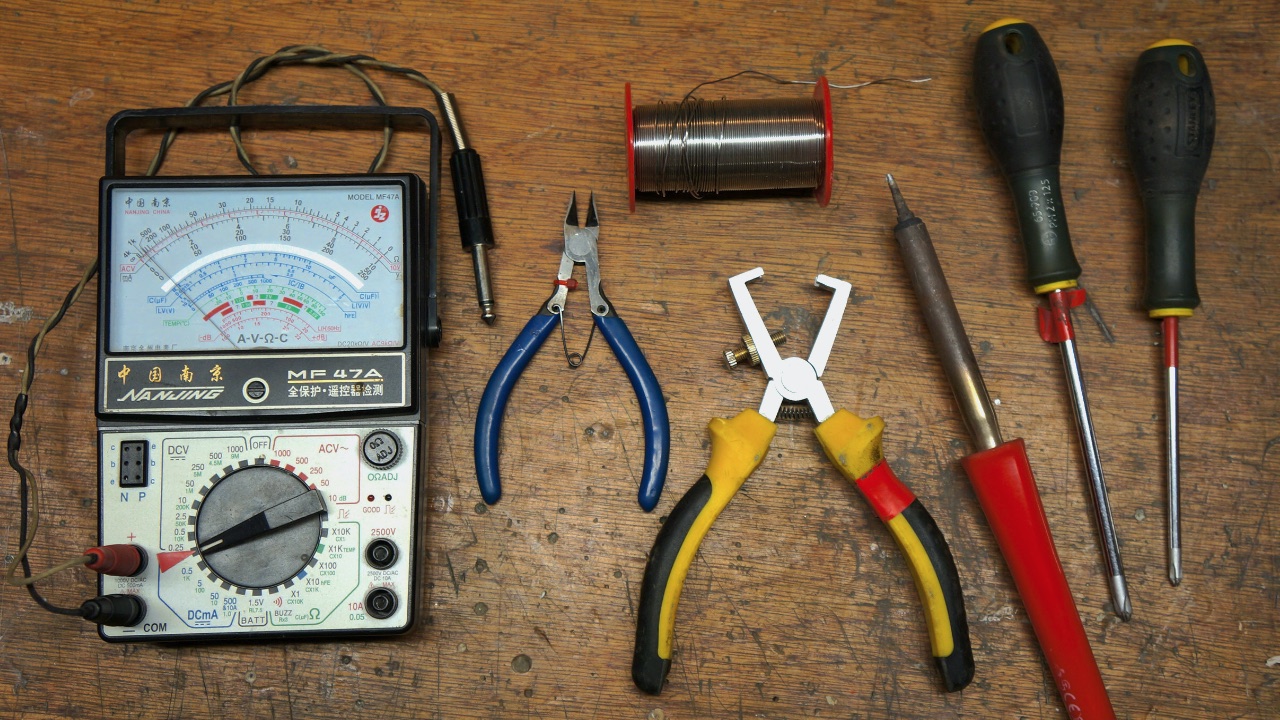
For this simple fix, you'll need the following:
- 40-watt Soldering Iron
- 60/40 Solder
- Small gauge equipment wire
- Analogue Multimeter
- PH2 and PH1 screwdrivers
- Wire cutters
- Wire strippers
Phase, off?

As well as the resulting sound, out-of-phase a pickups give some characteristic readings, we’ll show you how to spot these with a multimeter and by ear.
By multimeter:
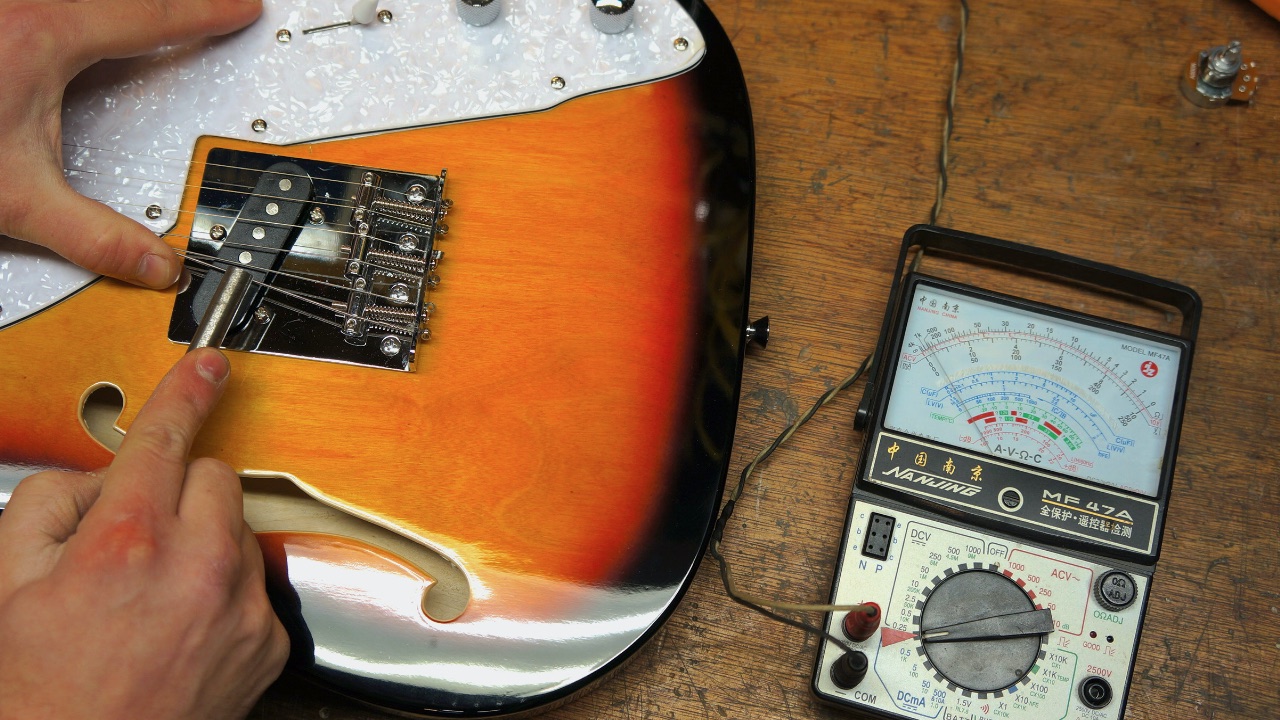
Plug in your analogue multimeter to the jack socket, you can put the two test leads on the sleeve and tip of a jack plug, but we’ve made a custom lead just for this application.
Set the multimeter to microvolts AC (~μV), turn up the guitar’s controls; we’re going to make the pickup create a current, grab something like a large screwdriver or something steel and lightly tap it on the pickup.
This makes a current in the coil. Watch the direction of the needle as you touch the tool on the top of the pickup and compare with its neighbour pickup - they should be the same and therefore in phase with each other.
By Ear:
How does it sound when my pickups are out of phase? In a word, thin! You can hear a very nasal sound with a characteristic honk. Plug into an amp and listen to your neck pickup, take note of the amount of bass frequency present, try out the bridge pickup also keeping an ear on the bass frequency. When you combine pickups you should get the same amount of bass response, but if it dramatically drops then you are likely to have a phasing problem.
How to wire a pickup back in-phase
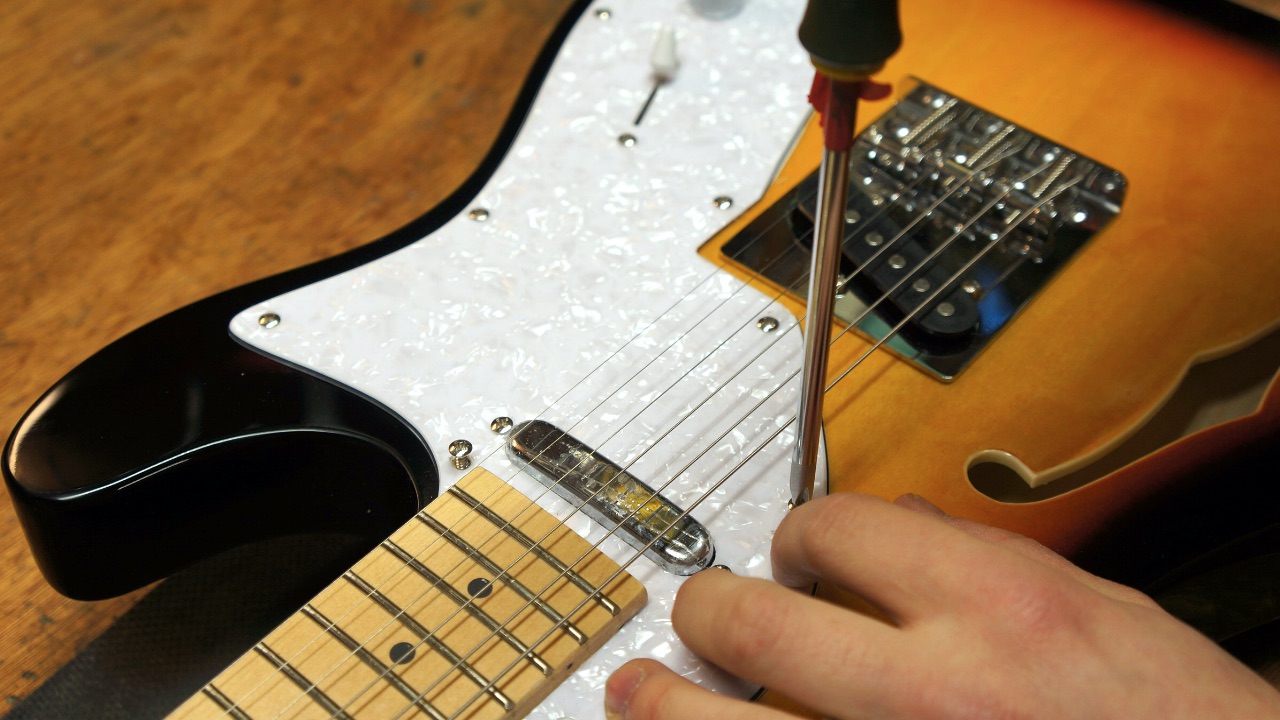
With our phase problem confirmed, we need to invert one pickup’s connection to make it match the other pickup. Let’s get to the wires by unscrewing the pickguard, which houses the guts of our wiring.
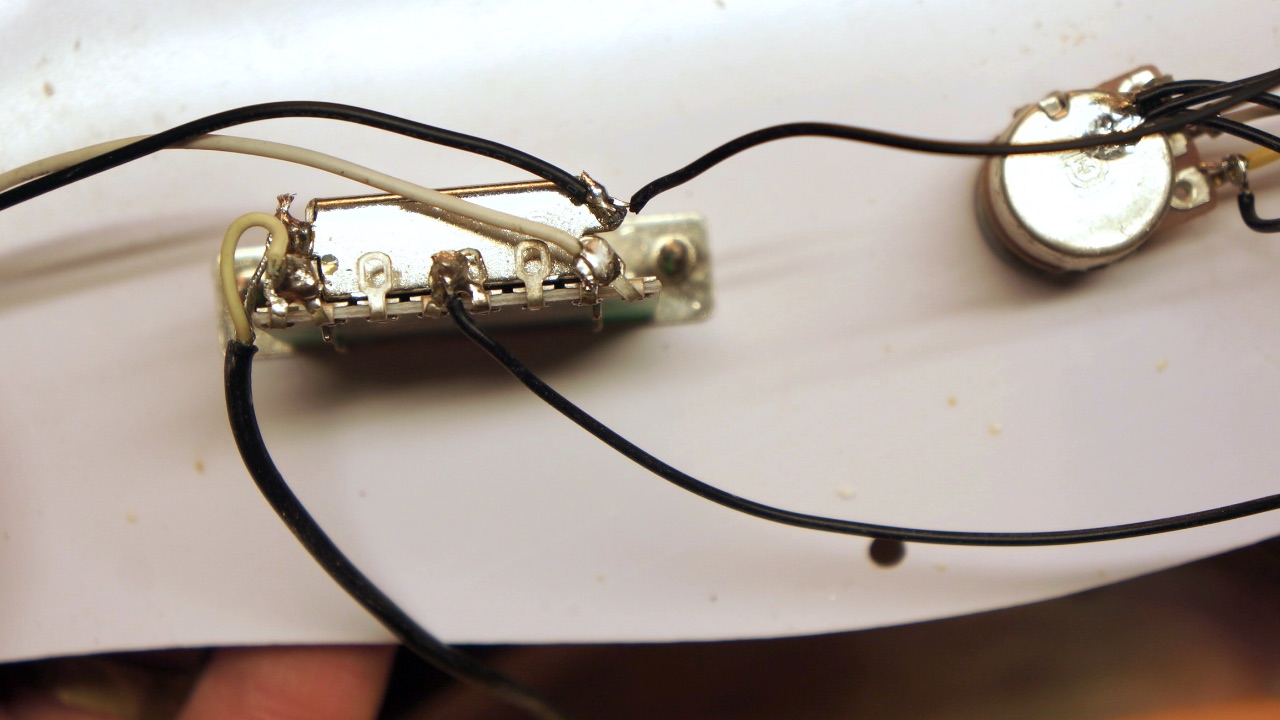
This is the ugly side of the pickguard for sure. Above you can see the pickup selector switch. On the left we have the two wires coming from the neck pickup. The two wires to the right go to the controls and the thicker wire is the bridge pickup wire - this one is a screened cable. In this instance, we’re going to change the neck pickup to match the bridge’s wiring polarity.
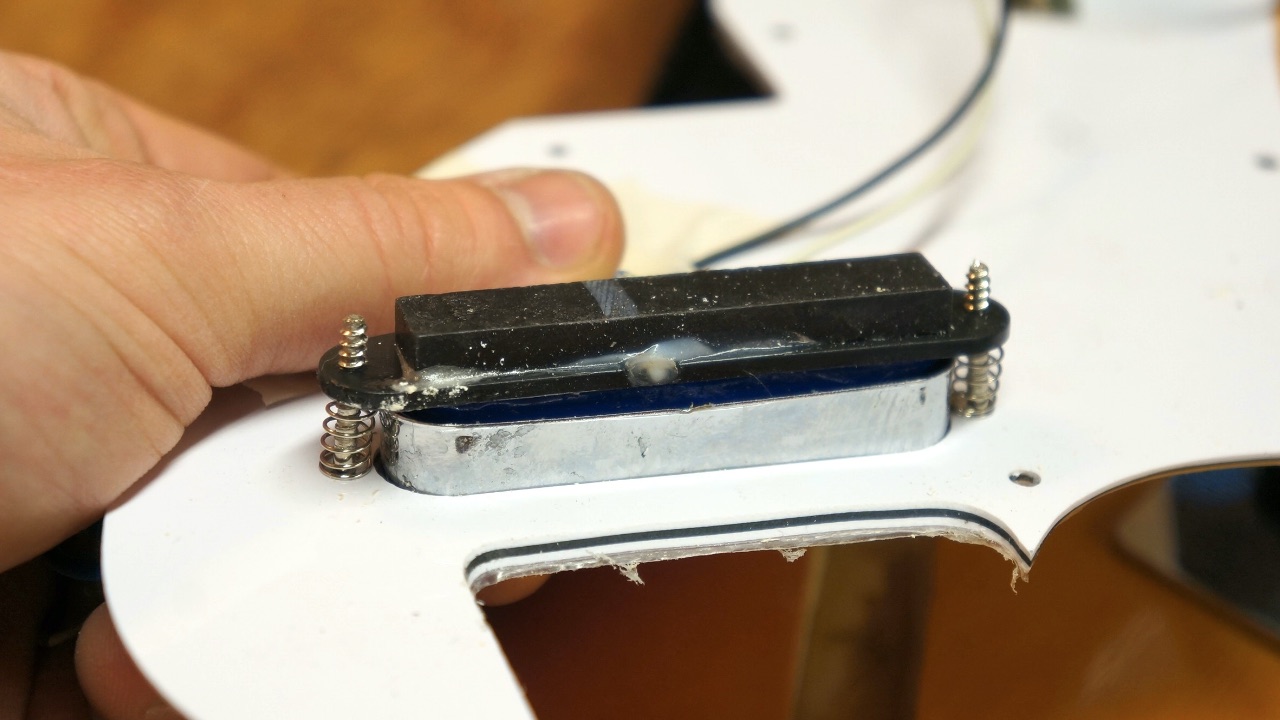
All we need to do is swap around the black and white pickup wires from the neck pickup but there’s one thing getting in the way. If we do that, the neck pickup’s chrome cover will become our “hot” or live. This will cause humming through the amp as the cover should be connected to ground.
A simple change is required to make this work out: we need to isolate the neck pickup’s cover and attach our own new wire to it.
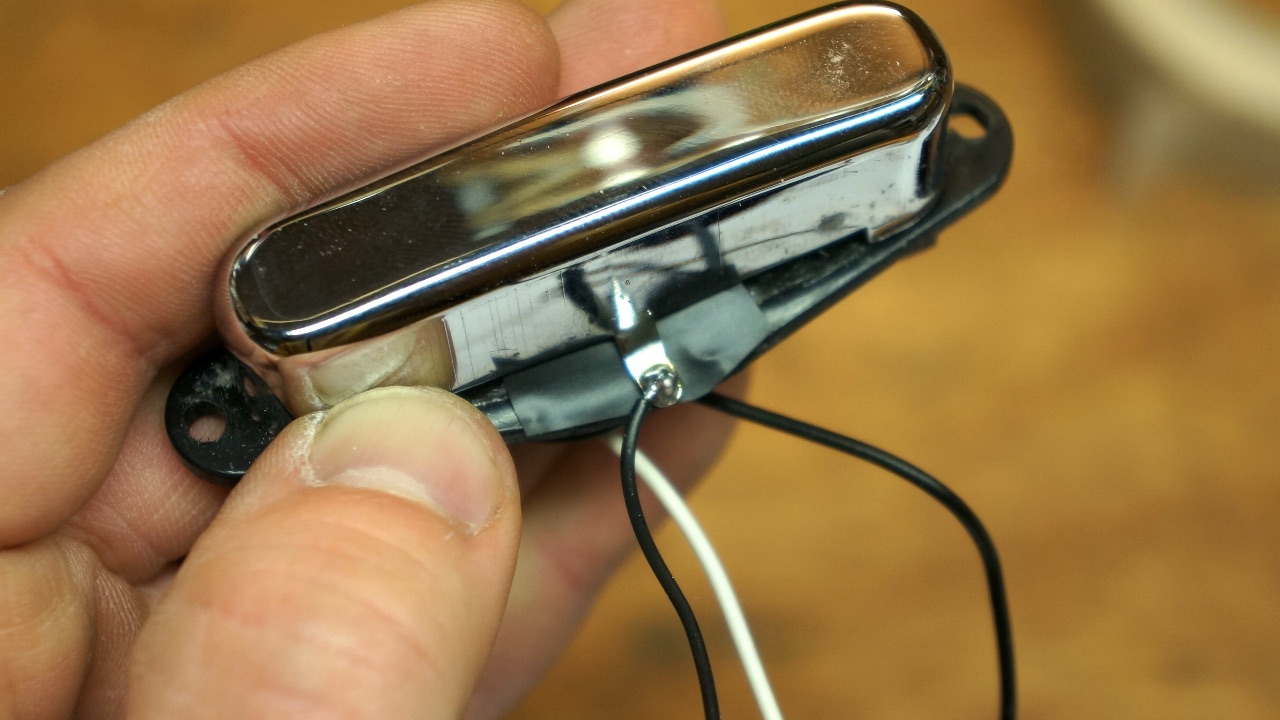
We’ll do this by cutting the pickup cover’s old connection off, insulating the end and adding our own replacement wire. Voilà, our new wire is added and the other 2 solder junctions are intact - they’re the start and end junctions of the pickup coil.
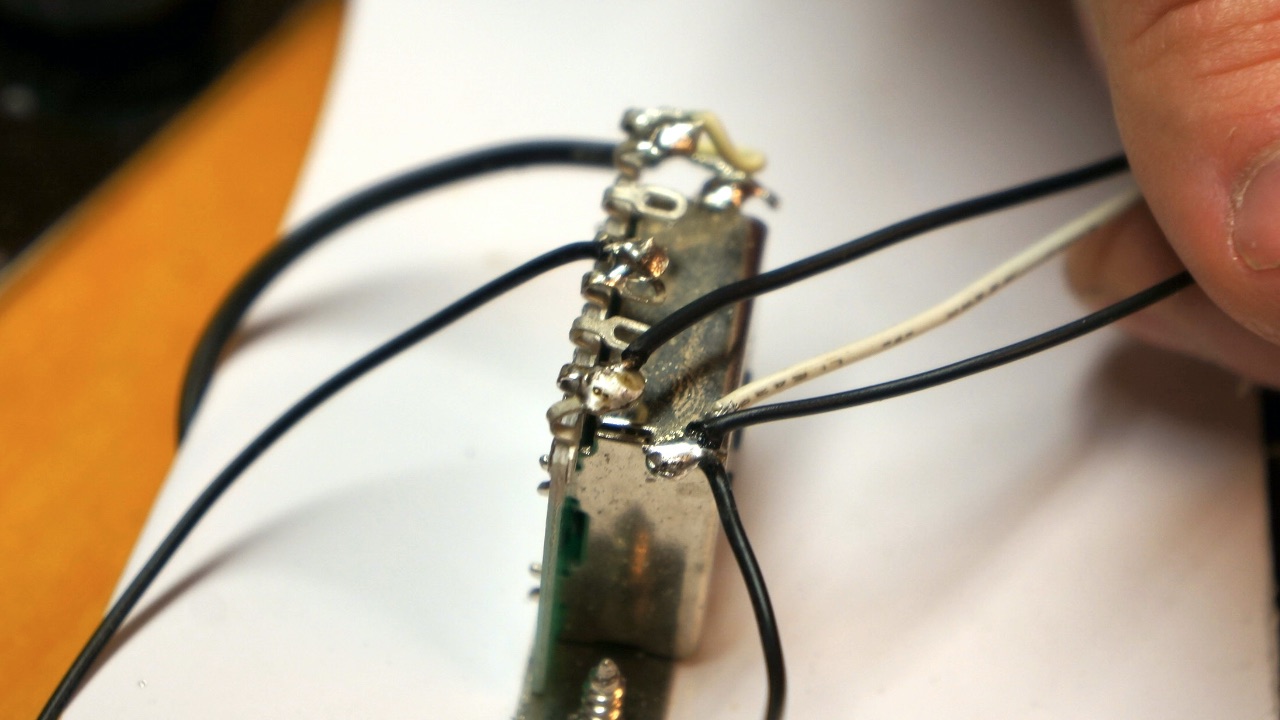
Swap around the original black and white wires from the neck pickup and then add your new wire from the pickup cover to ground too. In this case we’re using the pickup selector switch’s casing as a grounding point. To test, reassemble everything and take a listen to your new in phase and harmonious pickups working together!
Jack runs an independent guitar setup and guitar repair service in Manchester, England. He serves the musicians of the Northwest of England, working on electric guitars, bass guitars, acoustic guitars and more. Jack has been writing the Fix Your Guitar column in Total Guitar Magazine since 2017.


