The great outdoors: how to start making field recordings to use in your music
The great outdoors is calling – why not multitask with some found sound or field recording while you’re there?
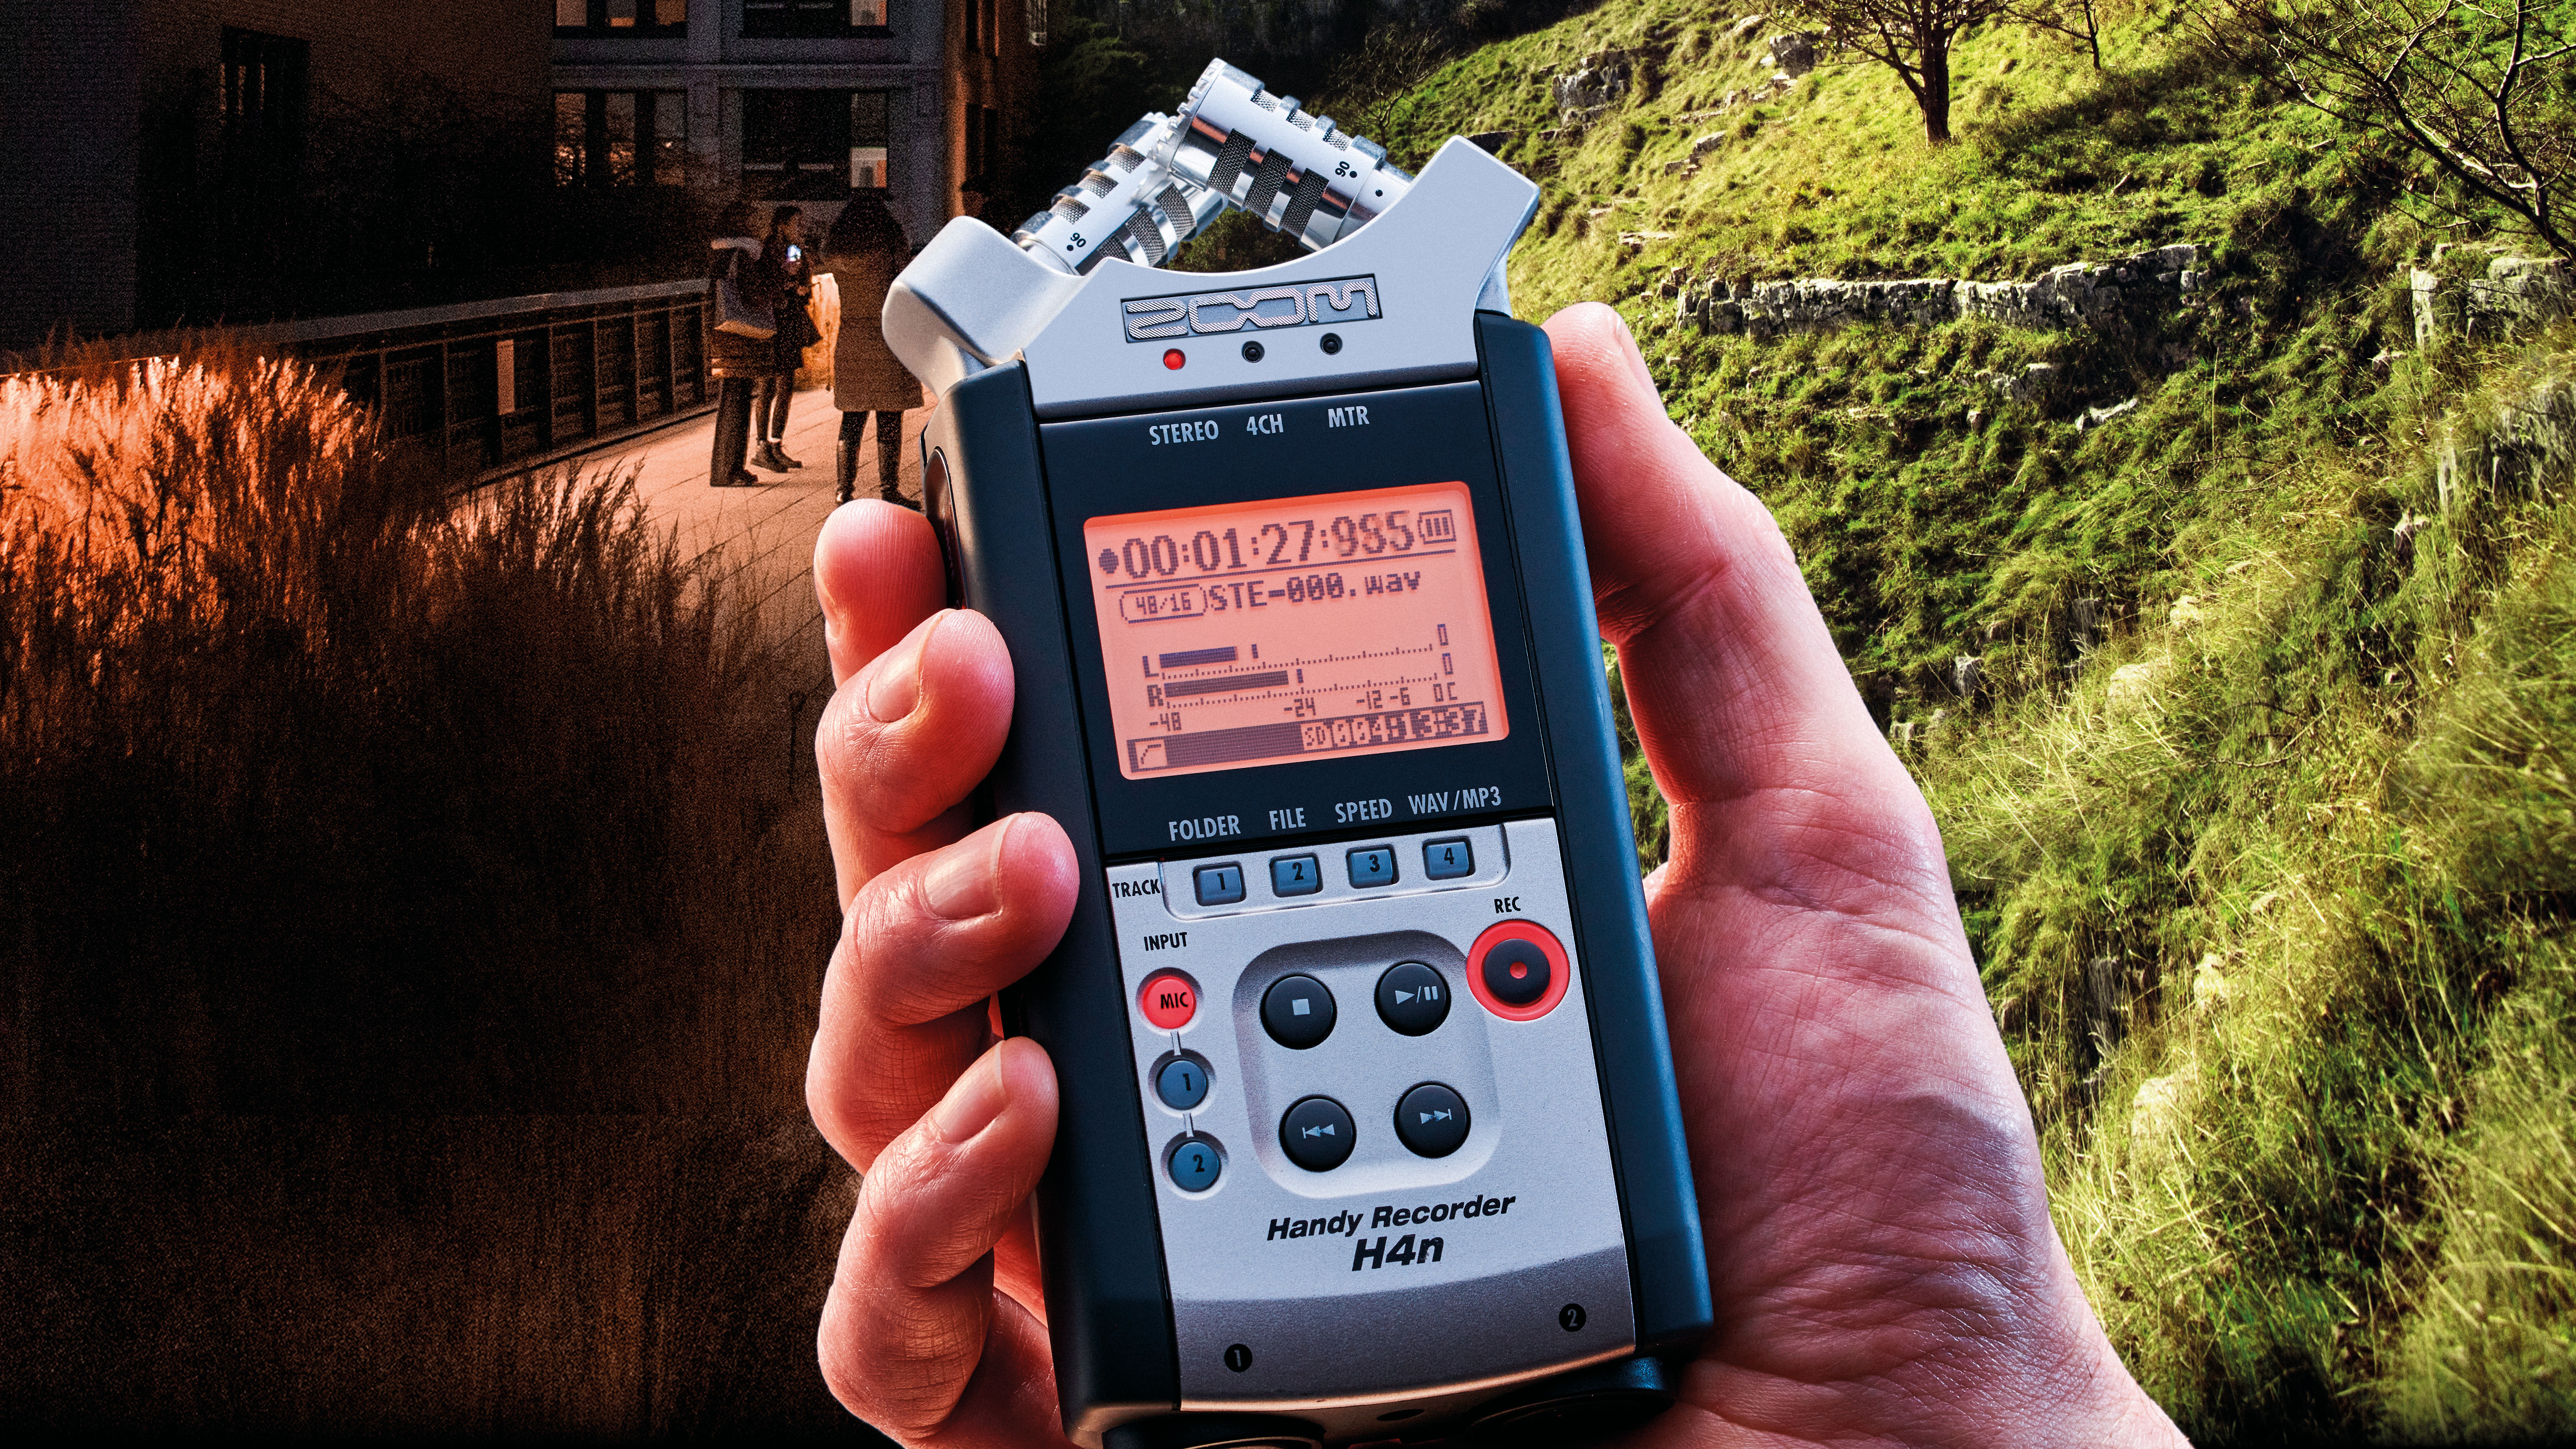
Though different endeavours, field recording and found sound recording are dealt with as one topic for much of what follows, but what is the difference?
Field recording refers to audio captured in its natural environment, be that a secluded forest or a church crypt; the recordist as an observer.
Found sound refers to a more intentional recording of non-musical objects (rather than environments) with the intent to use them in a musical context, as epitomised by musique concrète. Just think of the world as one giant, evolving modular synth with an infinite array of outputs (points in space/time) ready for sampling by anyone equipped with a mobile recording device.
As with modular synthesis, most of the sounds are uninteresting, but there is always audio gold just waiting to be discovered.
The results, from ambient soundscapes to percussive hits, can be original source materials for rhythm tracks, sampled-based synthesis, post-production work and so on.
The rich timbres and unique (in)harmonic structures that occur outside the musical world can provide (poly)rhythmic loops, tones for stretching/pitching, and noise for impulse reverbs. It’s a cliché, but your imagination is the only limitation.
Preparing to be surprised
With few exceptions, field and found sound capture relies on a mobile recording device. For professionals, there are a host of high-end recorders, shotgun mics, and wind shields at professional prices, but what about those dipping their toe into the outside recording world?
Get the MusicRadar Newsletter
Want all the hottest music and gear news, reviews, deals, features and more, direct to your inbox? Sign up here.
Fortunately there are many affordable options, from handheld stereo recorders by Zoom (H1N is a bang-for-buck beast), Tascam, Roland and Sony to the phone/tablet compatible mics by IK Multimedia, Rode, Sennheiser and Shure.
For those with a handheld video recorder or SLR camera, why not add an external mic (by the same manufacturers) to get your field recording game on? Note: always budget for a wind shield.
Finding the unexpected
The world is brimming with so many sonic variations it can be hard to know where to start. If you have a specific sound in mind, try planning a foray into the outside world, or within your own home, to find the sounds you are looking for, but be aware of two things.
First, the sounds may not translate as expected without the visual cues you’re used to, so expect to work a little to capture something evocative, as opposed to literally being the object or scene you imagined.
Second, be prepared to come across unexpected sounds and record them for future projects as they may well be one-offs.
Though many sounds present themselves easily and are recordable in a way that needs little processing, many won’t and will need teasing out of their environment.
Whilst listening through your microphone(s), experiment with proximity and angle, making use of the objects around you (nature’s baffles). Be aware of how sounds are reflecting off nearby surfaces and either direct your microphone towards them to maximise reverberations or use your body and other objects to block that sound path.
Whether you’re recording an object you’re manipulating as a found sound or capturing an ambient scene in the ‘field’, explore the spaces where the mic may be influenced tonally, such as a gap in a building site wall or in a bed of woodland moss. The discovery of new and unexpected soundscapes feeds the imagination and builds layers of experience that no amount of pre-planning can predict.
Transferable skills
Traditional studio recording skills are valuable and relevant in this context, especially the golden rule: use your ears. The key difference is that you’re recording objects that weren’t designed to be listened to, in environments that may be working against you. On top of that you’ll have less equipment at your disposal to mitigate these negative aspects.
There are few rules beyond being prepared to record immediately and travelling light, but the scope for learning about sound recording is enormous and deeply rewarding, often refining skills that can be applied in studio-type sessions.
Initial recording stripe editing
Streamlining raw recordings to remove the messy excess, maximise editing ease, aid archiving and minimise data storage
Field recordings and found sound sessions can produce lengthy files that eat precious data storage, lose their references and, when opened, look like a daunting edit prospect, the death knell for the creative spark.
As well as good file management practice, prepare those initial raw recordings for editing at the earliest opportunity. As shown below, removing unwanted noise can be a good place to start, leaving the material you want at its most accessible as well as reducing file size for archiving.
When working with wave editors, use the markers to identify sections and add explanatory info that could be forgotten; your future self will thank you! If working in a DAW you can also go crazy with the markers, but also use file minimising where possible to keep the storage space from ballooning.
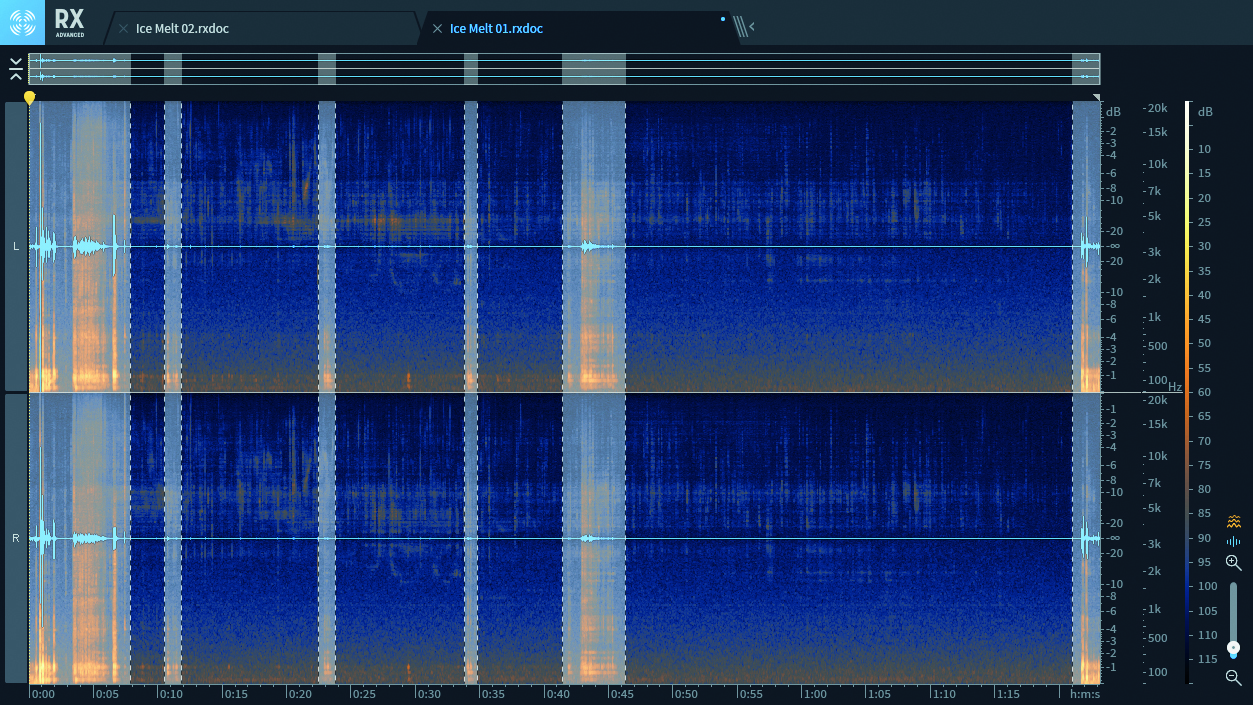
Step 1: To bring this 30-second recording of melting ice up to standard for editing and processing, the unwanted noises (mic movement, coughs, etc) that are above average level need to be highlighted and deleted to leave a more consistent sound level to work from.
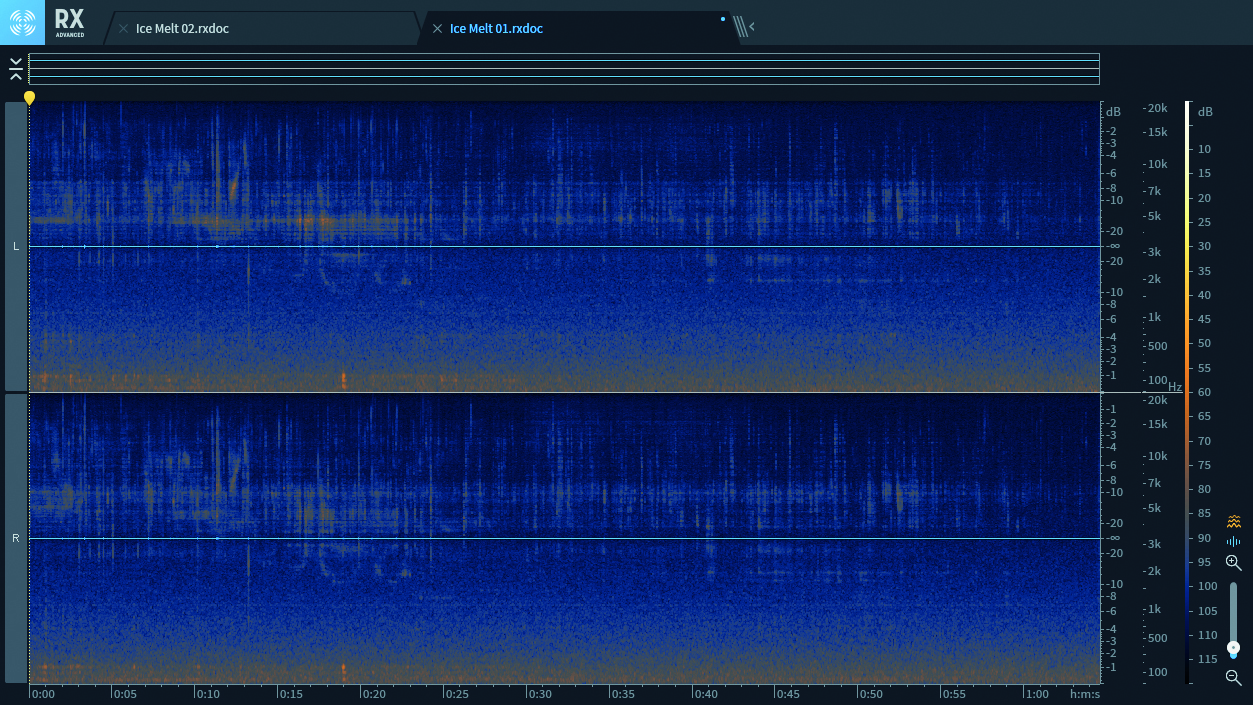
Step 2: This recording possesses little tonal/low frequency content so this crude deletion process has left no obvious artefacts but a second pass can get rid of these faster than carefully editing around unwanted material. What’s left is a more even audio stripe.
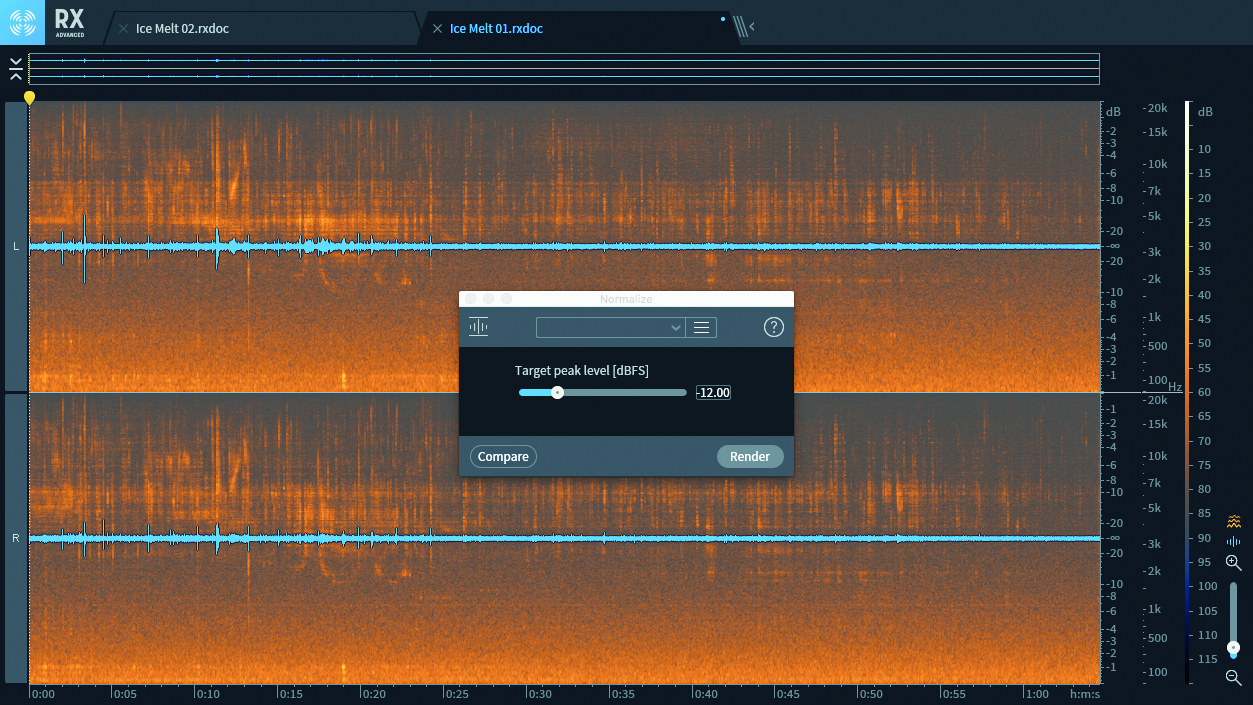
Step 3: Normalisation is the last stage before archiving/editing. Ambient material can sound like noise when turned up, so normalising to a peak of -12dBFS is good for monitoring and processing headroom. Raise more dynamic material to -9dBFS to -6dBFS.
Before you start…
Open ears, open mind
Many sounds interact in ways that aren’t immediately obvious. Practise listening analytically, tracking pitch changes in continuous sounds or separating frequency components in any larger soundscapes you have.
Found sound fashion and etiquette
Silence is golden. Minimise the amount of rustling your clothes produce, put your phone in flight mode, invest in decent microphone suspensions and wind shields, and try not to breathe too loudly.
Necessary excess
To isolate discrete sources from broader sound fields, capture as much pure background sound as you can, to feed de-noiser algorithms or analysing before filtering out.
Backup plan
Before plunging into the fun of editing, make a ‘raw’ or ‘unedited’ folder in case of an emergency.
What’s in a name?
Thoughtful file naming is key to good field recording and found sound archiving. Include data like place, recording device, sound source and date. Create a coding system with an accompanying text file as a key.


Future Music is the number one magazine for today's producers. Packed with technique and technology we'll help you make great new music. All-access artist interviews, in-depth gear reviews, essential production tutorials and much more. Every marvellous monthly edition features reliable reviews of the latest and greatest hardware and software technology and techniques, unparalleled advice, in-depth interviews, sensational free samples and so much more to improve the experience and outcome of your music-making.
“From a music production perspective, I really like a lot of what Equinox is capable of – it’s a shame it's priced for the post-production market”: iZotope Equinox review
"This is the amp that defined what electric guitar sounds like": Universal Audio releases its UAFX Woodrow '55 pedal as a plugin, putting an "American classic" in your DAW

