Vintage vs. modern: classic dynamics processors go up against their contemporary counterparts
Pit colourful character against state-of-the-art flexibility and discover the benefits of each in this dynamics mega-tutorial
Fundamentally, the processes and the tools behind music production don’t seem to have changed so much in the past half century. Today’s producers still use EQ, dynamics, reverb and so forth just like their forebears.
But start looking a little closer and the differences are huge. Modern plugins can do things that would have made a 1970s mixing engineer drop to their knees and weep. So why, then, do we inhabit a world where people use both the all-singing-all-dancing modern plugins and their “outdated” equivalents?
There was a lot that made classic studio gear tick. Without precise control over those 1s and 0s – or indeed, the absence of any 1s or 0s whatsoever – hardware manufacturers had to create devices that both worked and sounded good, bringing a process that was sympathetic to the music and a character that enhanced it. To get it right required a lot of listening, and this fact still shines through today, standing the test of time.
In this feature, we’re going to show you what’s best about both types of dynamics processor – the vintage and the modern – and demonstrate uses for each. We’ll put some of today’s most envelope-pushing compressors together alongside the best modern plugin tributes to timeless gear from yesteryear. Which one you reach for will be up to you.
Soundtoys Devil-Loc vs. Xfer OTT
Whether you’re a vintage hardware voyeur or a modern-day plugin maestro, everyone loves slamming the living daylights out of an audio signal. Let’s compare and contrast two heavy-handed compression plugins that work in different ways, but have similar uses: Soundtoys’ Devil-Loc and Xfer’s OTT.
Devil-Loc is the plugin ode to Shure’s Level-Loc, a consumer-grade brickwall limiting amplifier that was first used in PA systems in the '60s, and later in studios for distinctive, trashy and dense distortion. The Level-Loc worked like a washing machine full of grit on a spin cycle, and became a producer’s secret weapon for getting seriously dirty drums.
Soundtoys Devil-Loc is a minimalistic software spin on the hardware original, with only two knobs: “Crush” and “Crunch”. Turning up the Crush knob will increase the compression of the signal; cranking it introduces a saturation effect that changes the release time of the compression, to anything up to 22 seconds. The Crunch knob allows you to drive the output amplification, adding the destructive distortion that characterized the vintage hardware unit the plugin is inspired by.
Get the MusicRadar Newsletter
Want all the hottest music and gear news, reviews, deals, features and more, direct to your inbox? Sign up here.
On the other hand, Xfer’s OTT takes its name from the popular aggressive Multiband Dynamics preset in Ableton Live. OTT stands for ‘Over the Top’ and, like the name suggests, is capable of some pretty intense squashery.
The plugin works as a three-band upwards/downwards compressor, splitting the incoming audio signal into high, mid and low bands, which you can then treat separately. The green side applies either downwards compression or upwards expansion, while the red side applies the opposite – though you can only adjust both thresholds at once.
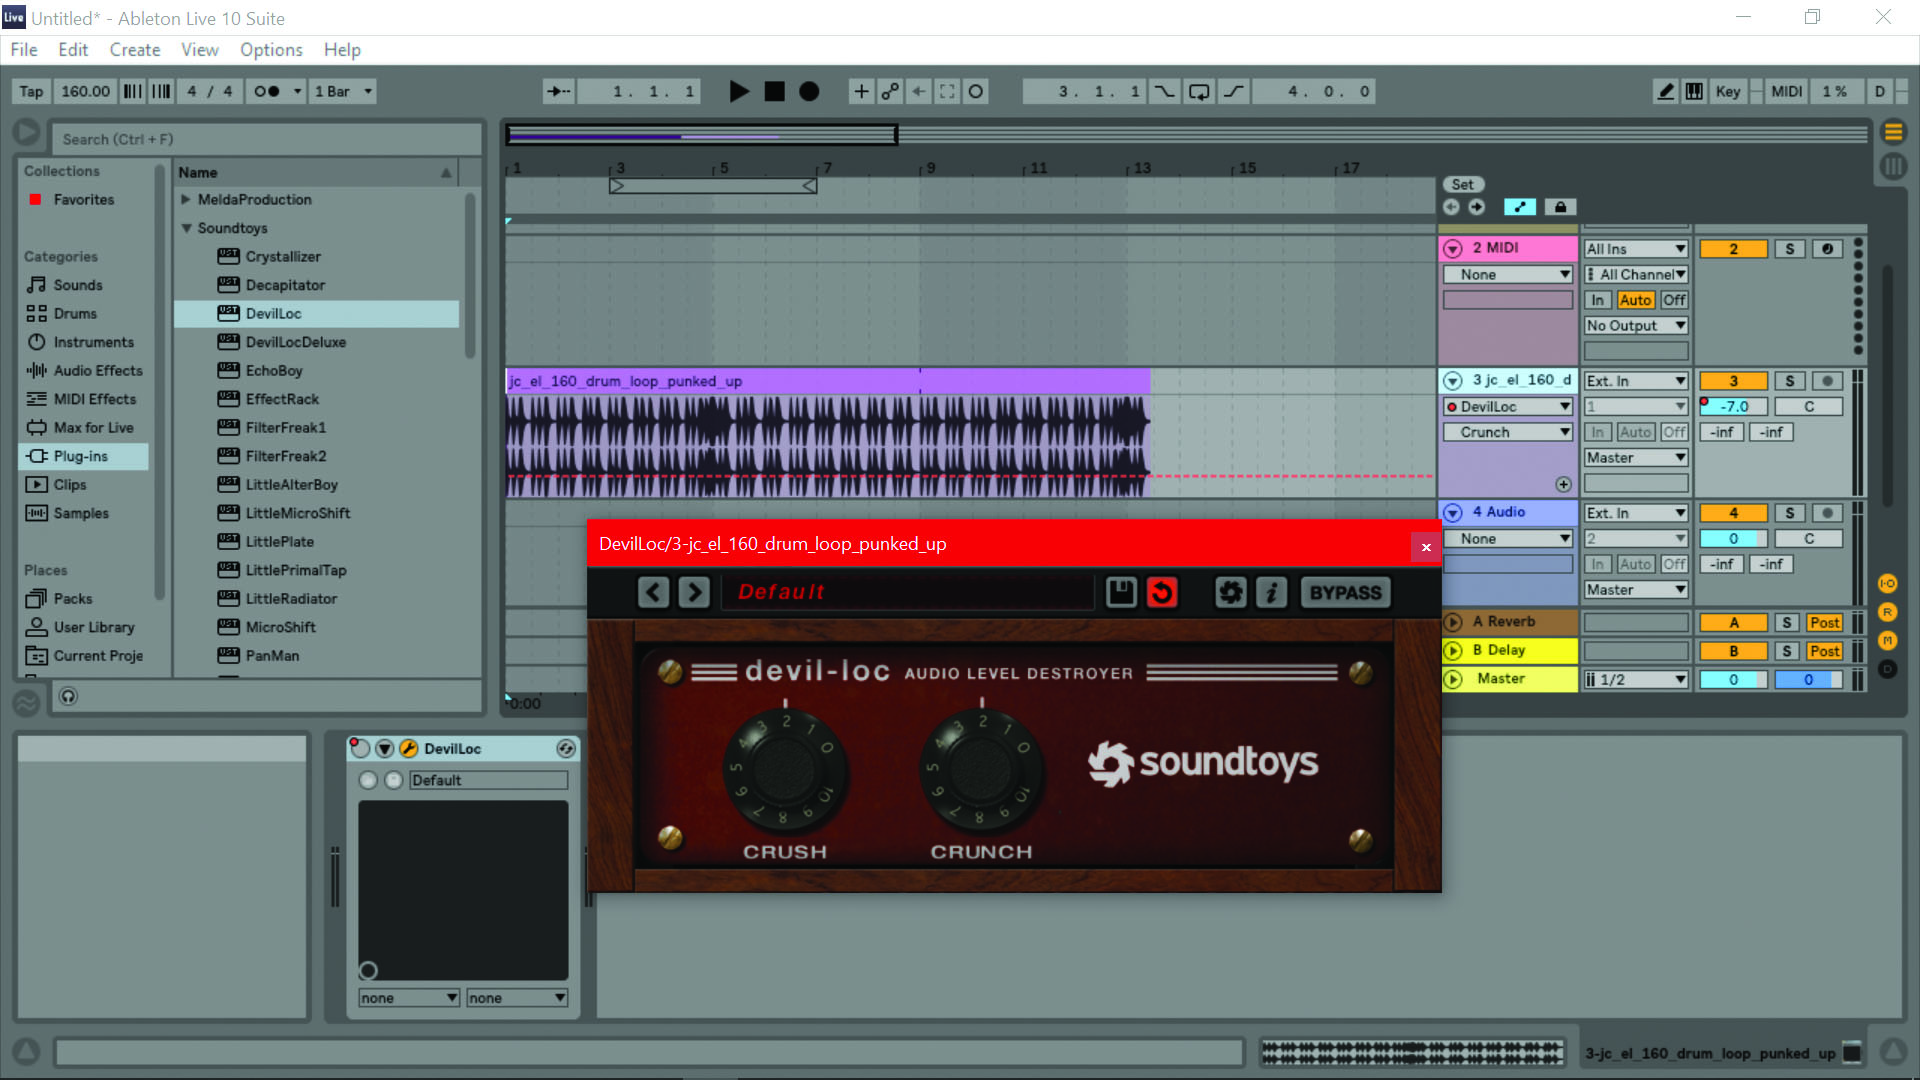
Step 1: Let’s demonstrate the compression capabilities of each plugin by applying them to a simple drum track, starting with Devil-Loc. First, we’ll get a dry drum loop and dirty it up, by setting both the Crush and Crunch knobs to two. Even at a low setting, notice how heavily saturated the sound appears to be.
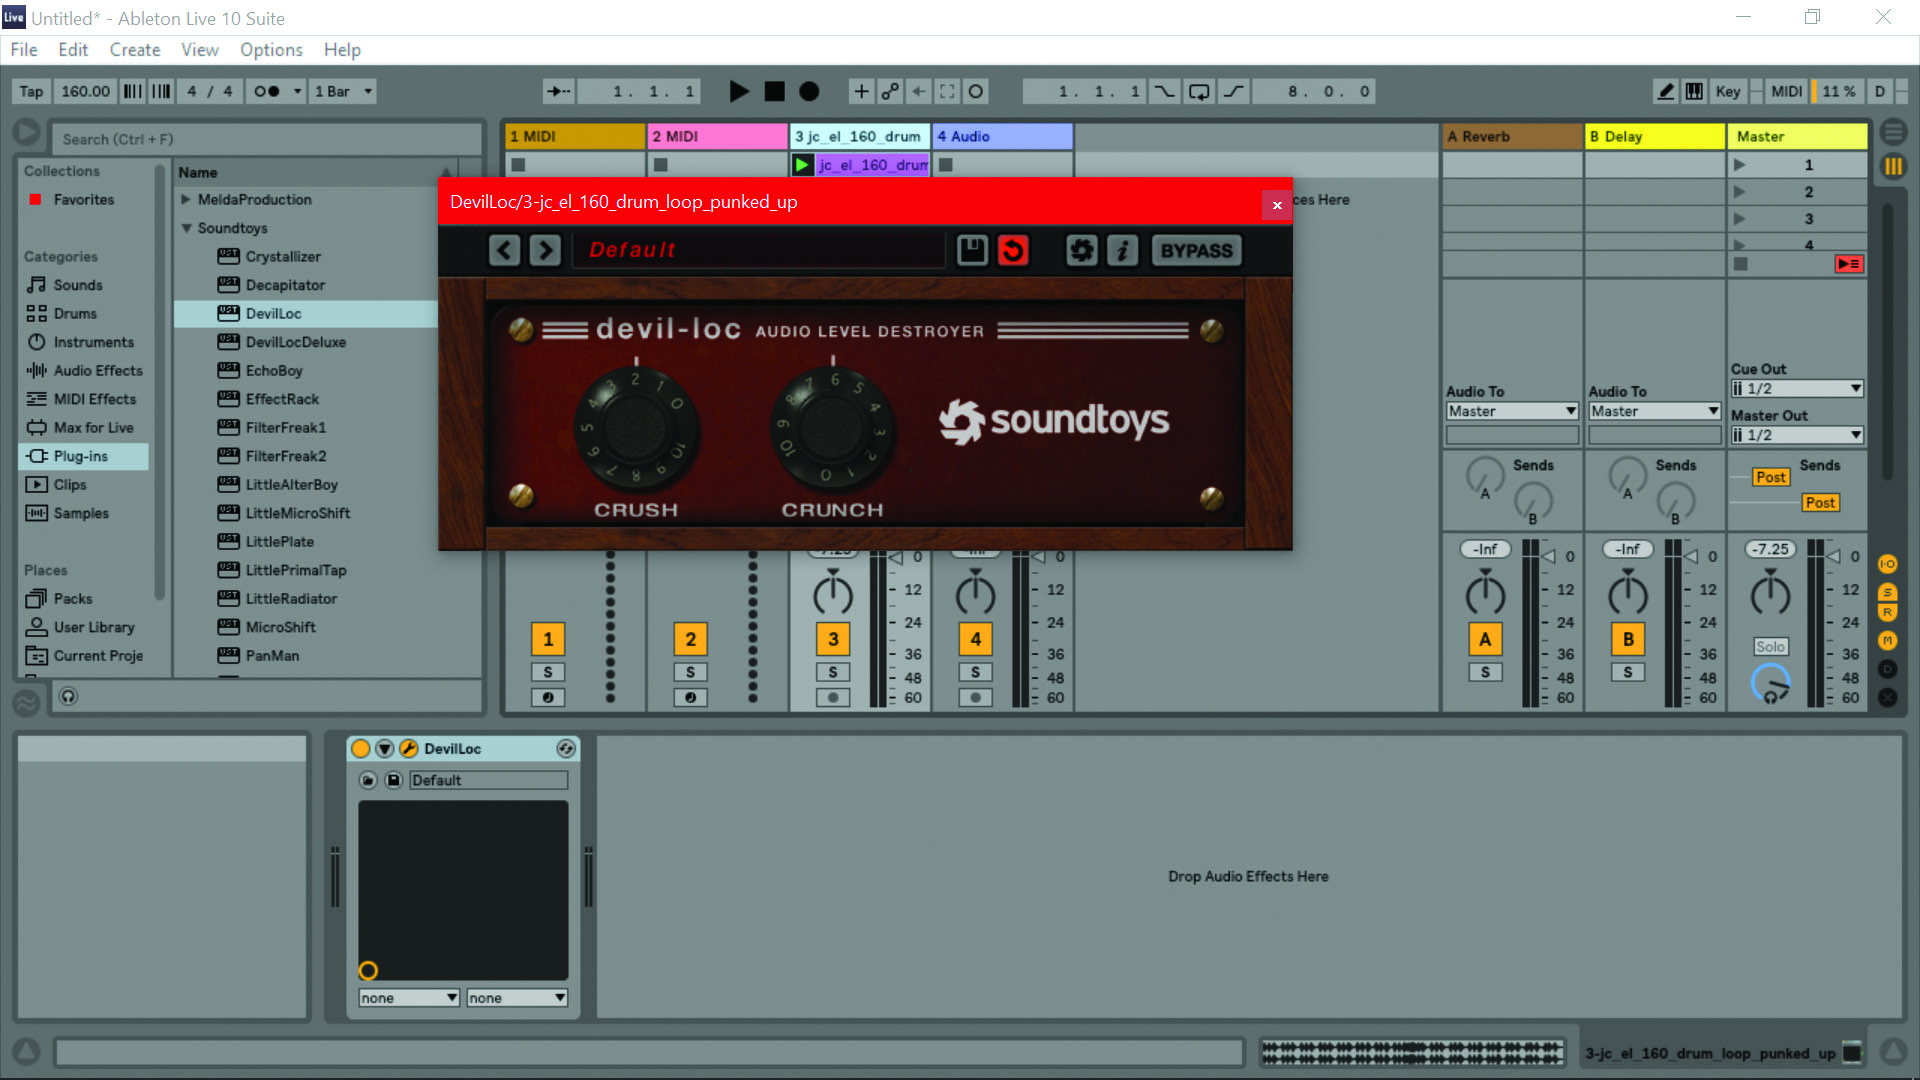
Step 2: Time to take it up a notch. The Crunch knob determines how much gain is applied after limiting, as well as determining how hard the output amplifier stage is driven. Let’s set it to six, to really distort the signal. Anything past this is utter destruction!
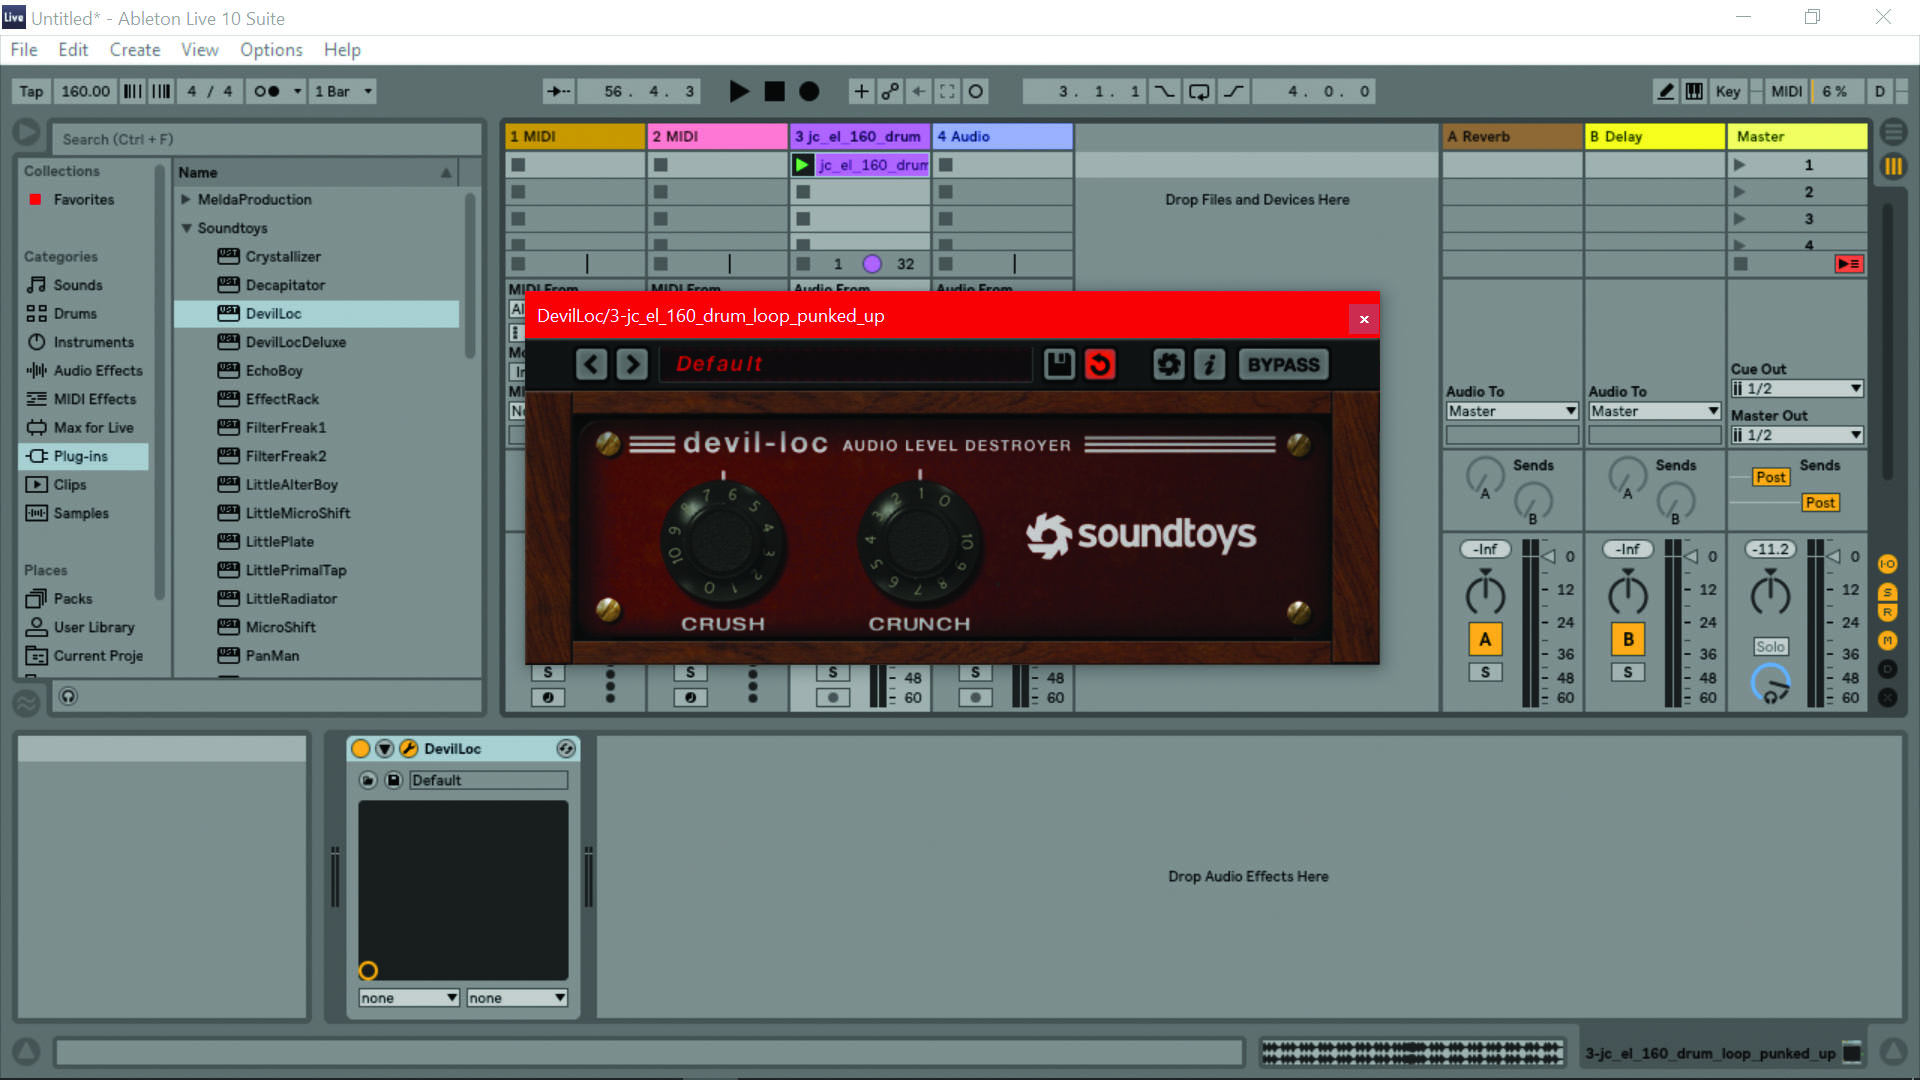
Step 3: With the Crush knob set halfway between six and seven, we get an intense but musical pumping effect from the compressor as the virtual gain reduction unit becomes saturated. By slowly turning the dial towards zero, you can hear the effect reduce as less of the signal is sent into the circuit.
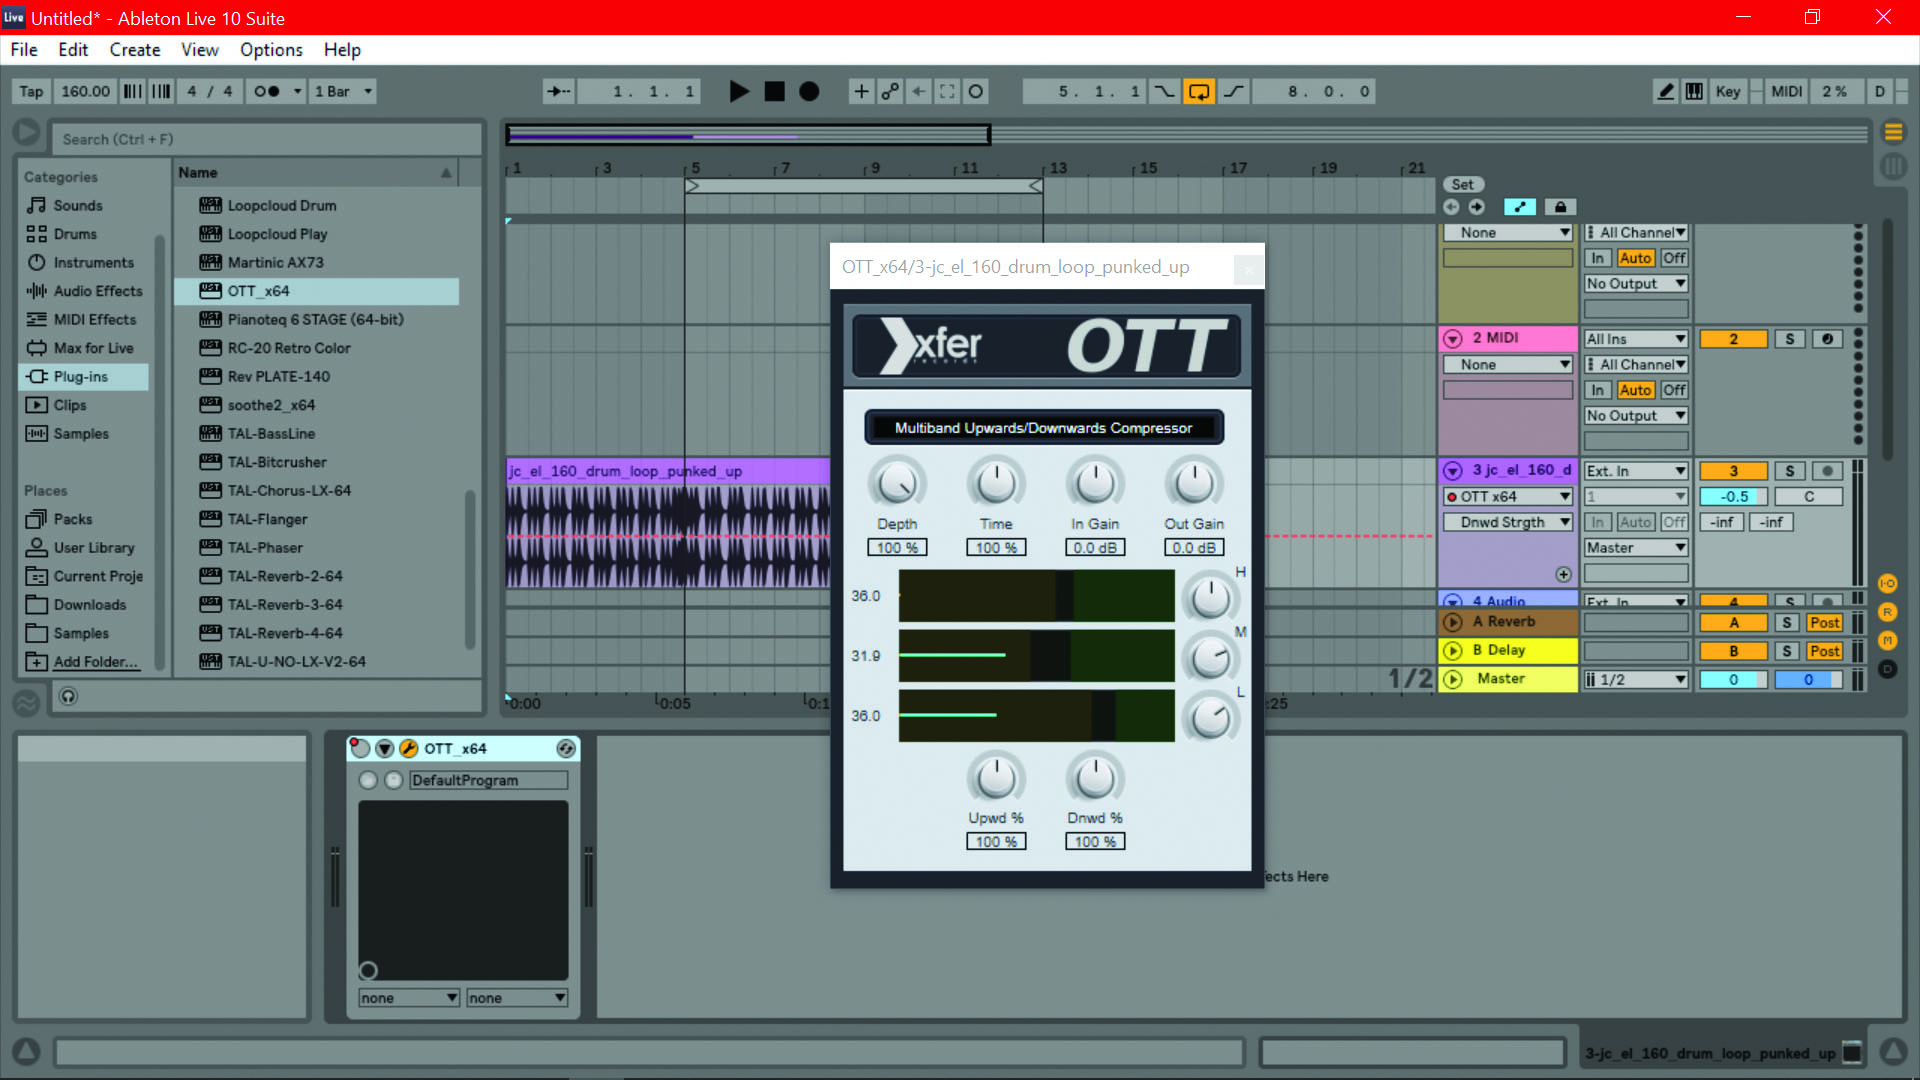
Step 4: Now let’s use OTT on the same drum loop, to hear how it sounds in comparison. The knobs beside each band are individual output gains; let’s turn up the mid and low bands to get things sounding meaty.
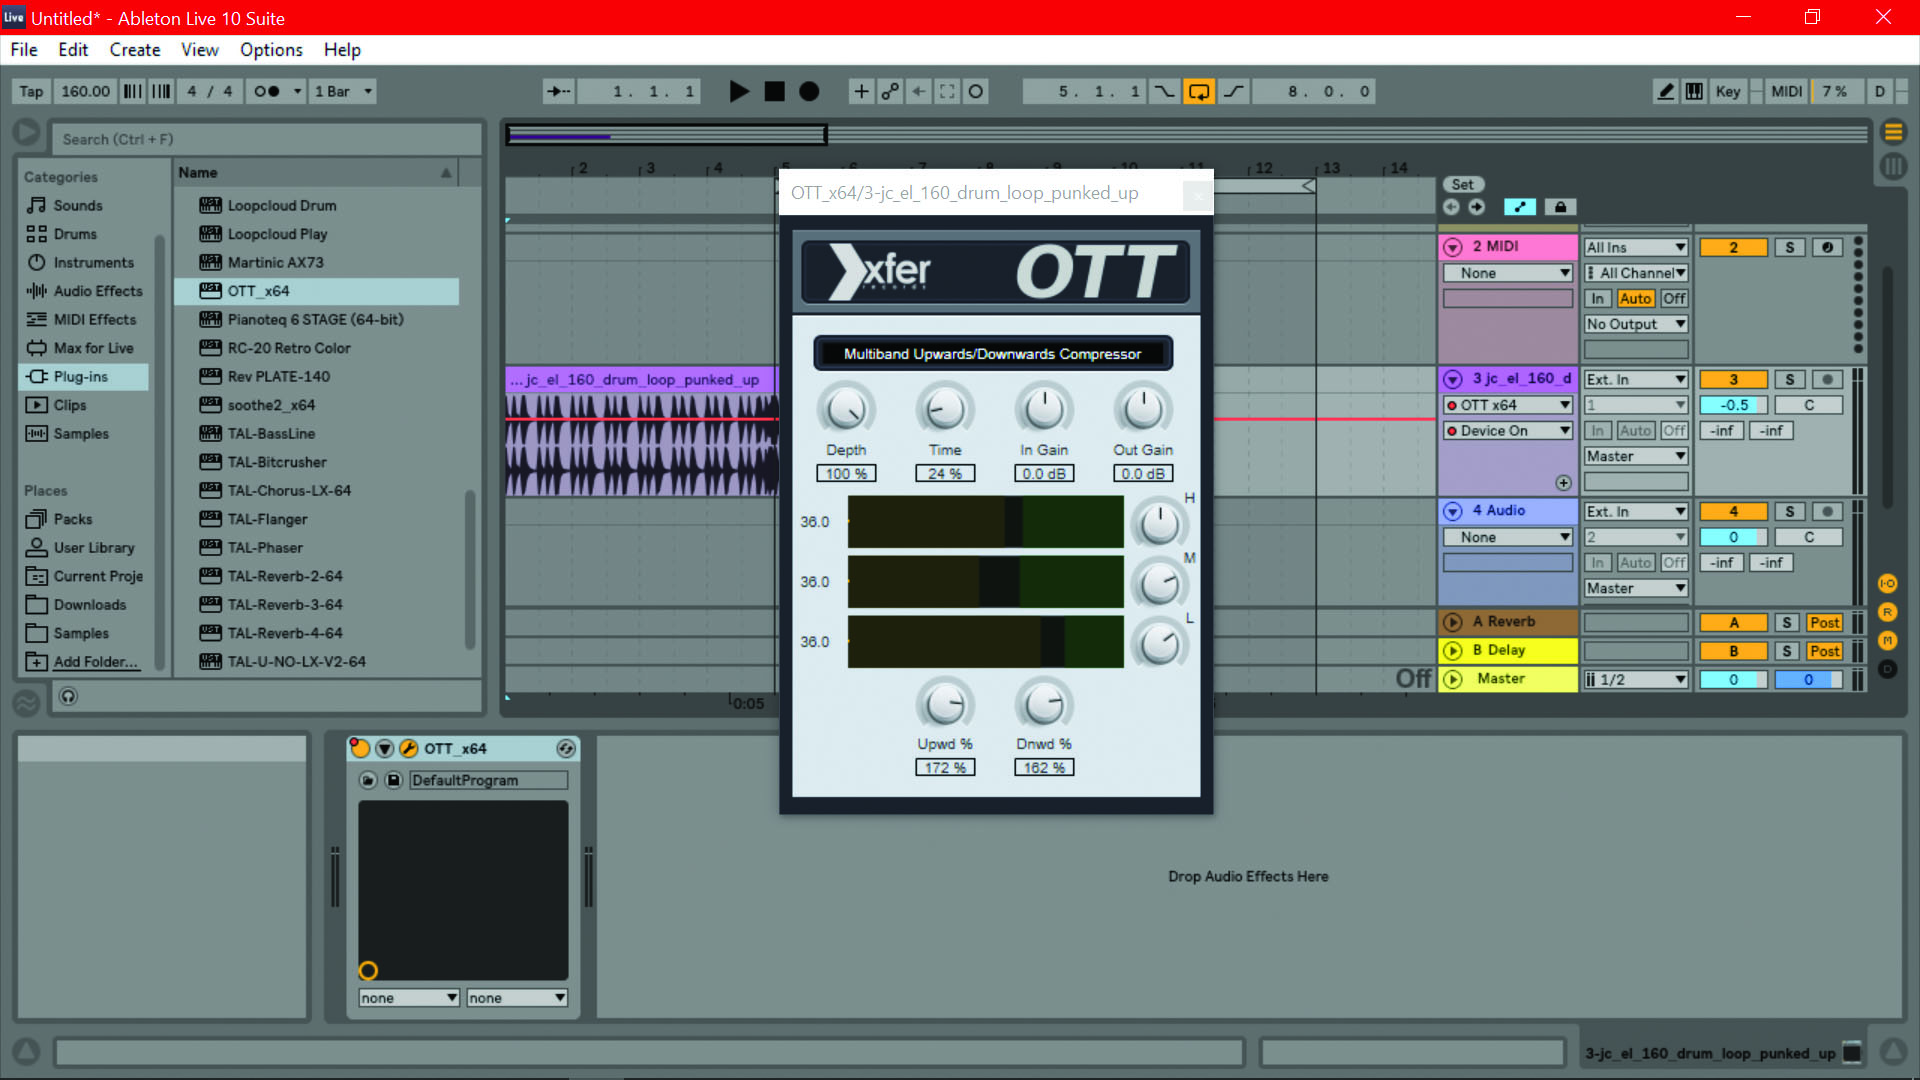
Step 5: Turning the Time knob down allows less transients to come through, which makes the compression sound more drastic, and gets that pumping effect. If we set both the upward and downward compression controls to over 150%, we get an intense distortion that’s more in line with the Devil-Loc.
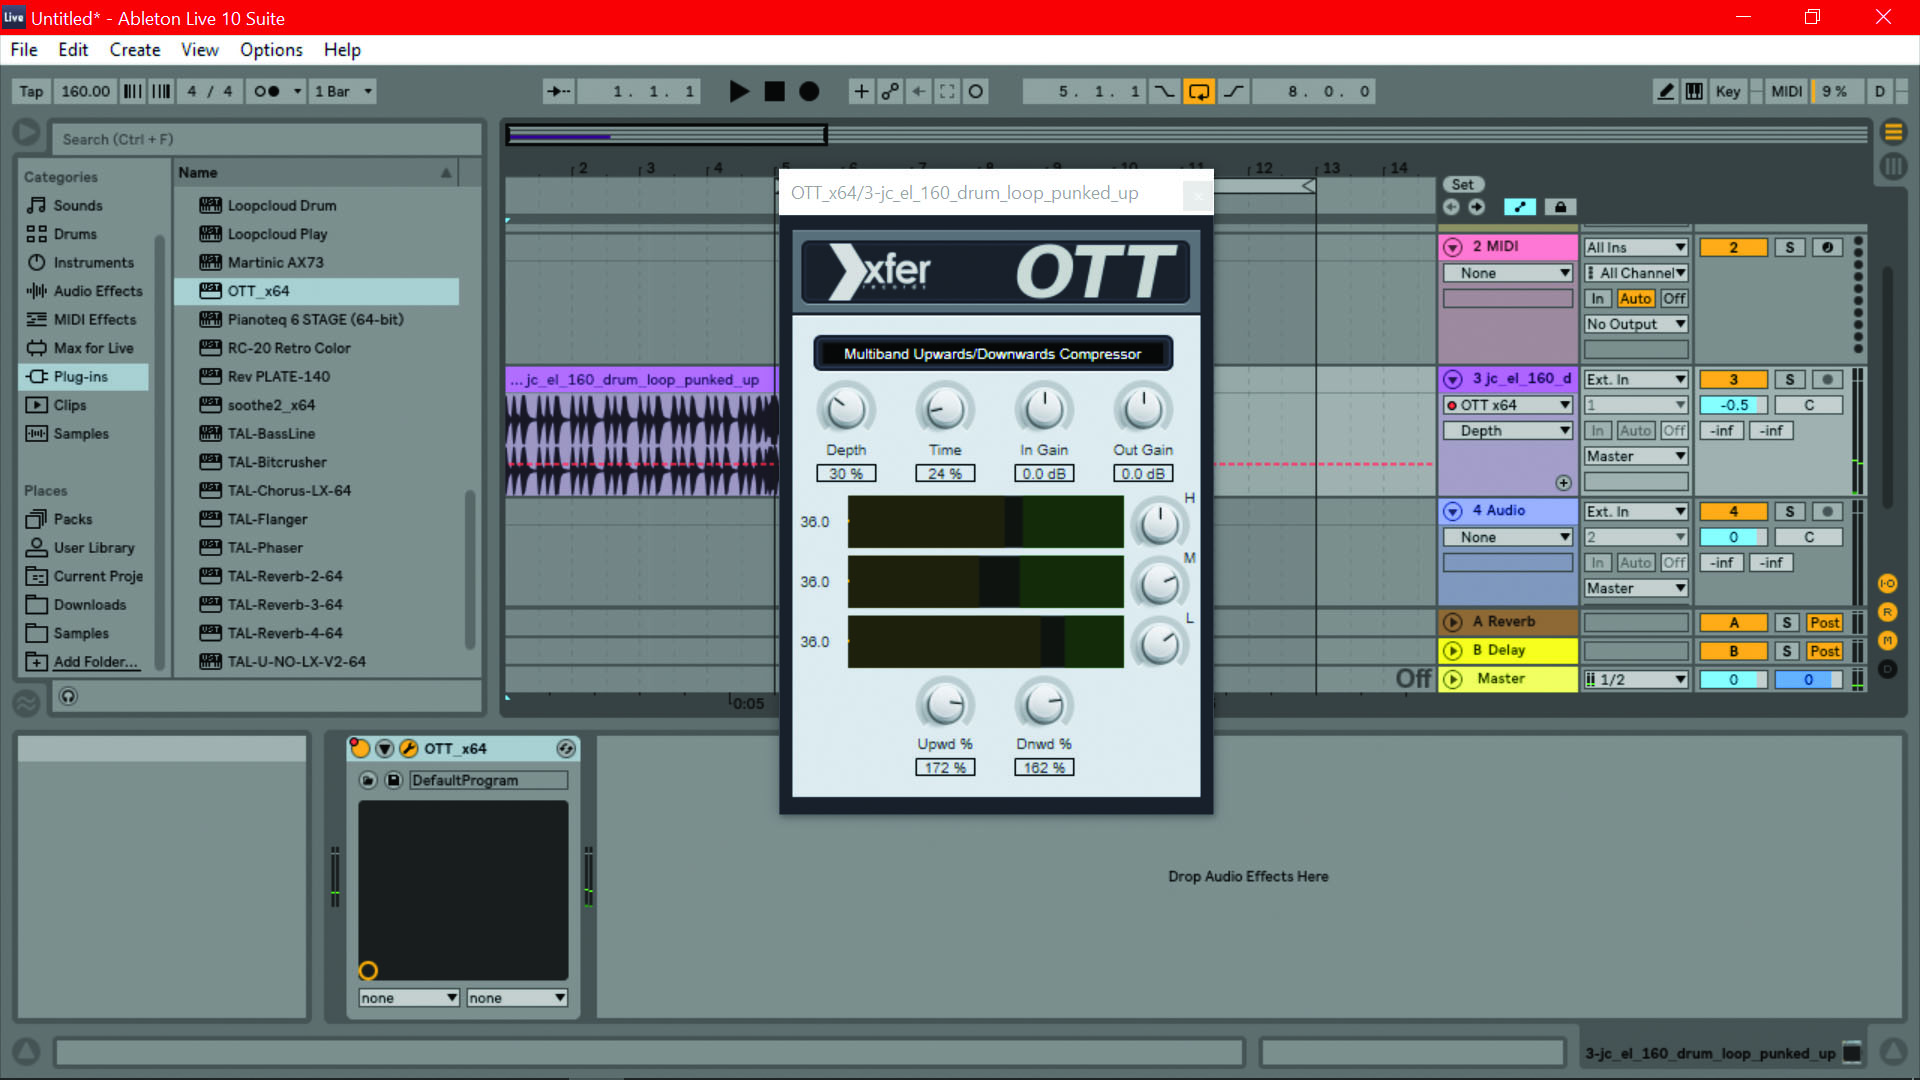
Step 6: The Depth knob on the plugin acts like a dry/wet control, so you can dial in the effect to your liking. If we adjust the depth to 30%, the gnarly distortion shreds the edges of the audio signal without oversaturating it.
FET's speedy attack vs. digital
The Urei 1176 compressor was a legend for many reasons – not least its “all buttons in” mode which led the unit to respond in extreme ways. One other particularly interesting factor was its fast attack, which allowed it to kick in within 20 microseconds (0.02 milliseconds) when set to its quickest. Until sample-accurate digital technology came around with its lookahead capabilities, this was a great way to clamp down on transients, should you have wanted to.
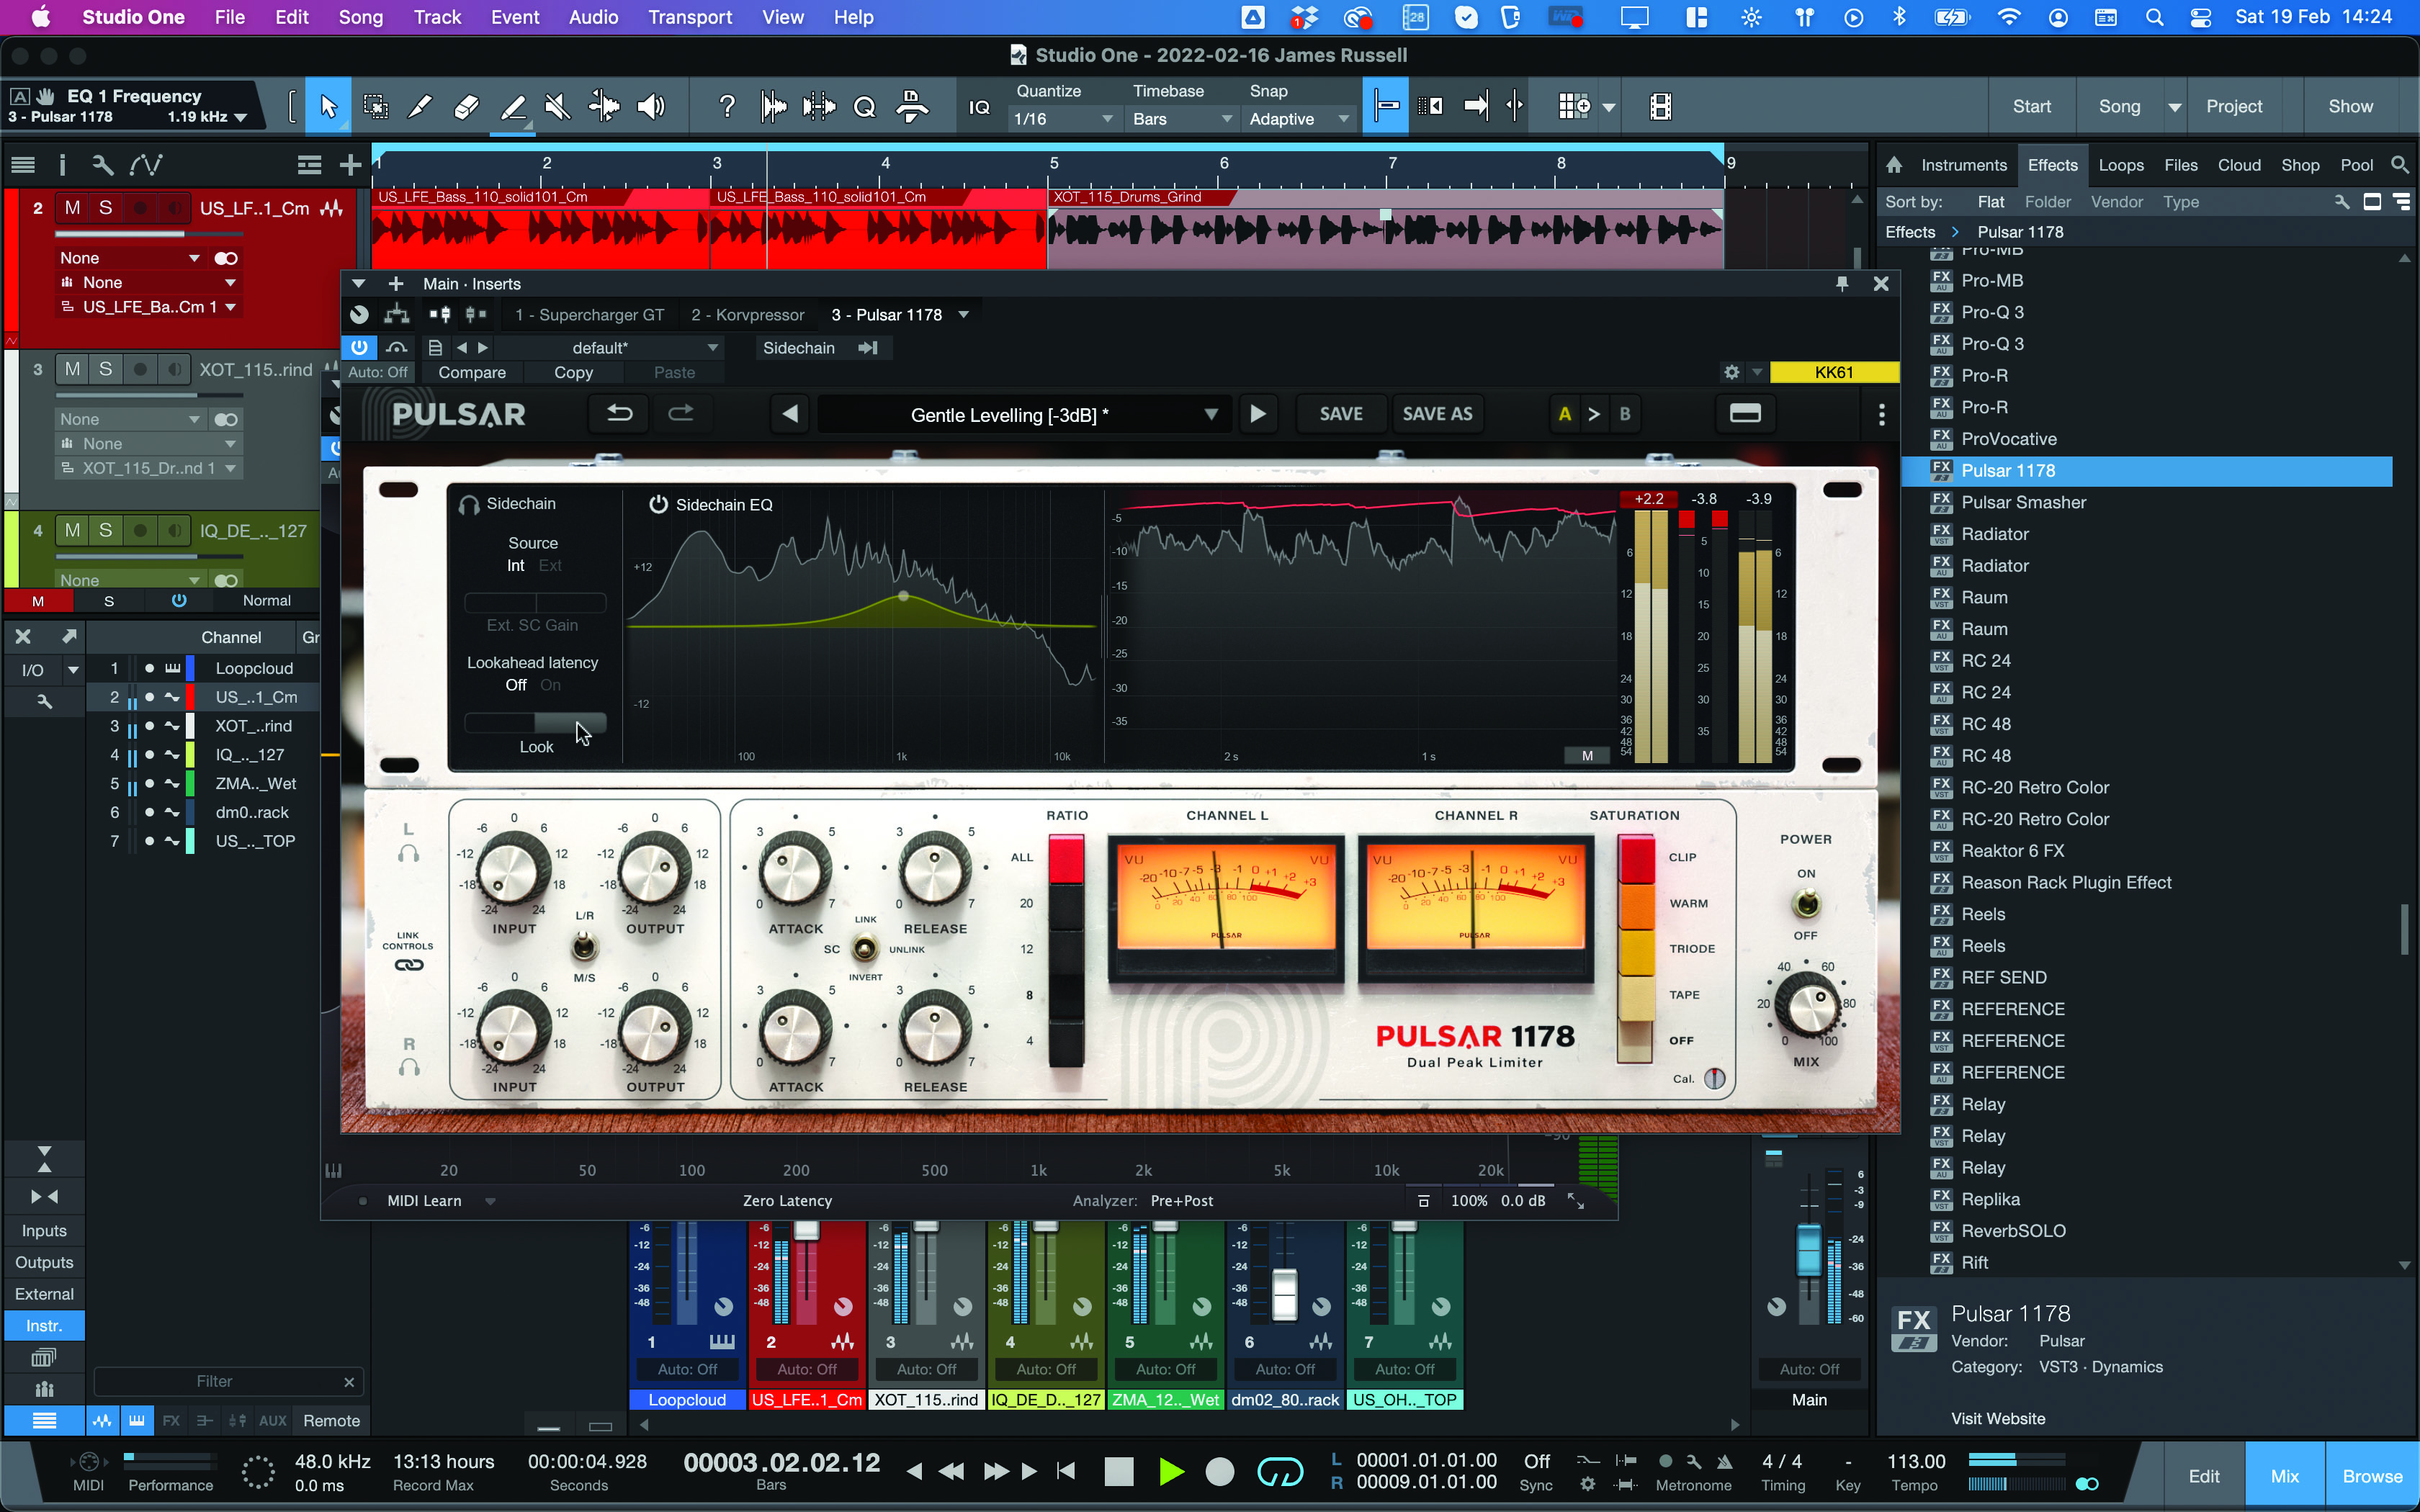
So how does 1176-style compression compare to today’s hyper-quick compressors? Below we’ll take Pulsar’s 1178 for a spin – an emulation of the stereo brother of the 1176 – and pit it against the attack speeds of a digital compressor.
But transient-squashing attack times aren’t a particular route to credible compression. Completely nullifying a nicely recorded transient has never really been the goal. Once you’ve got that attack set, bringing up the attack time to let parts of the transient through – and leading to the exact character chosen by you – is the aim of the entire affair.
Let’s check out how the 1178 – or Pulsar’s emulation of it – compares to something a little less analog and a little more digital…
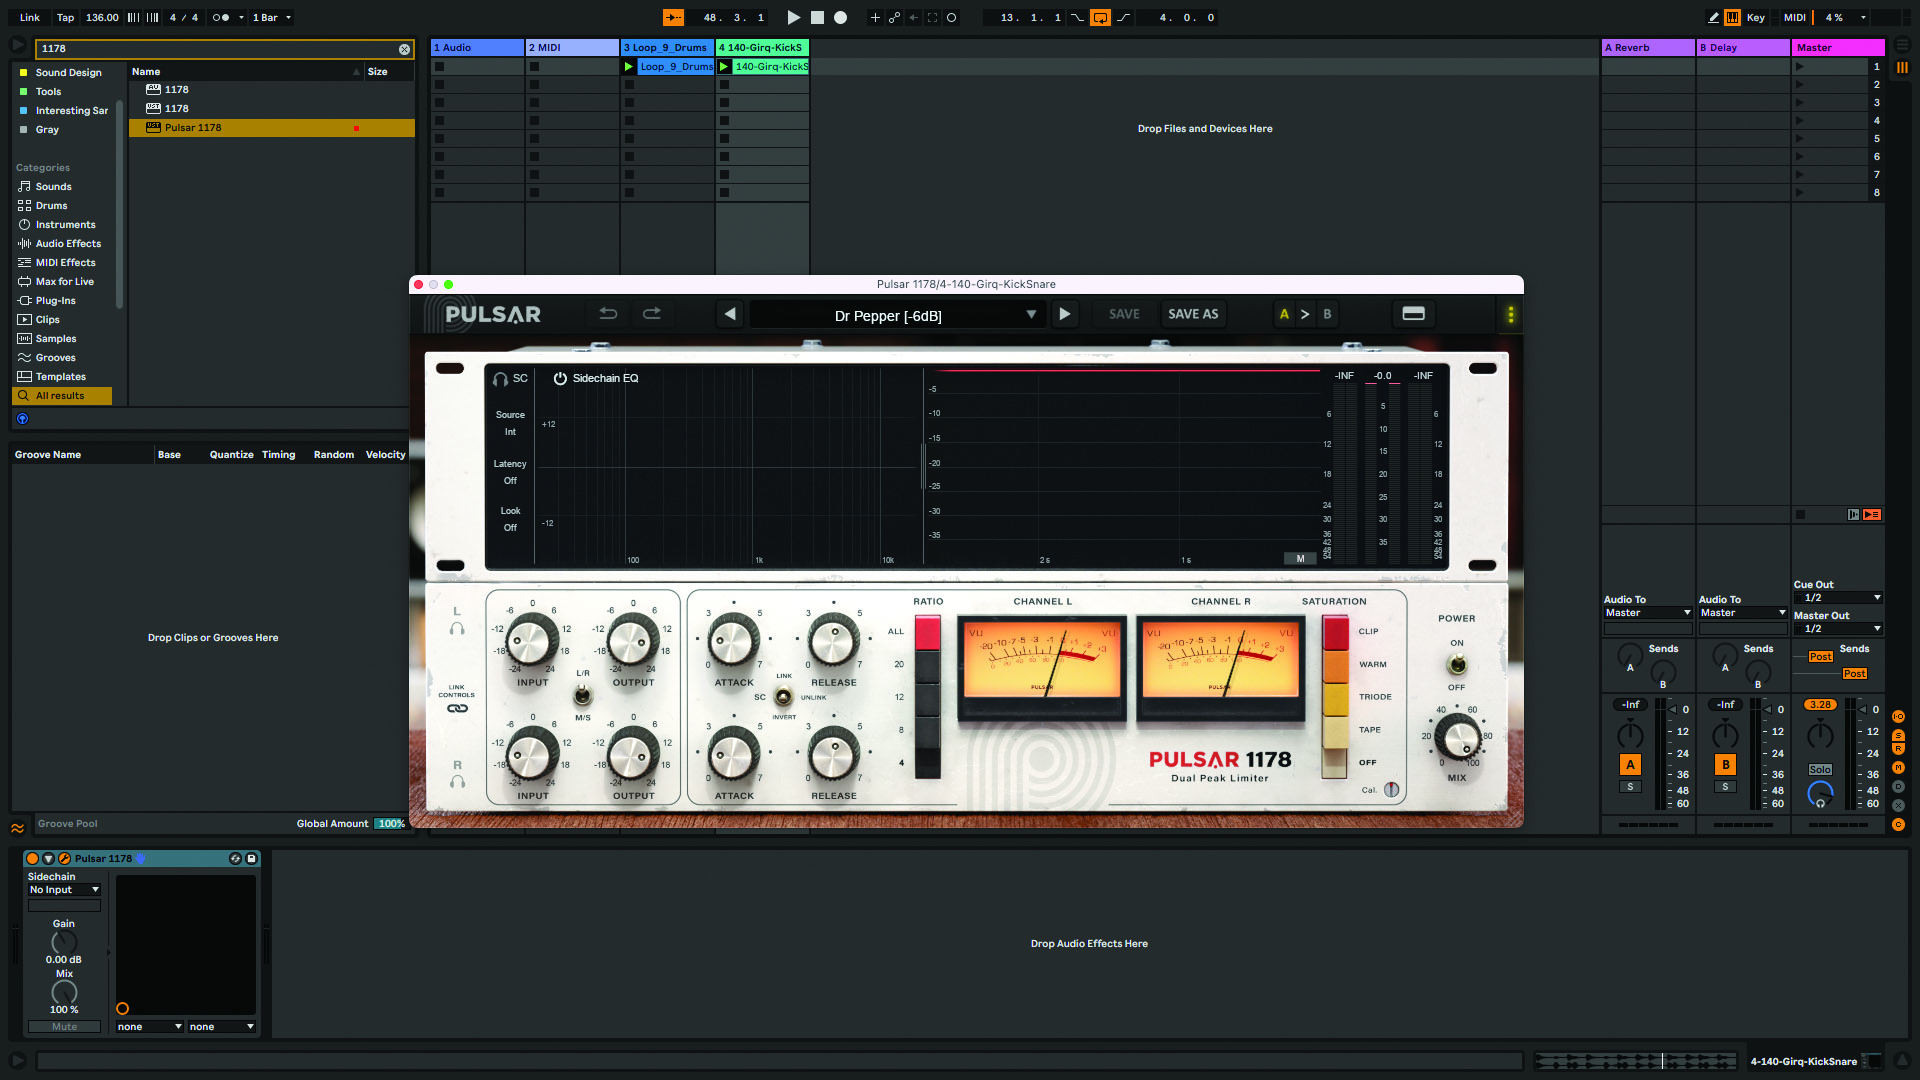
Step 1: First up we’ll take a look at Pulsar’s 1178. As previously mentioned it’s an emulation of the Urei 1178, the stereo version of the 1176. As with the original the attack is not measured in seconds, however the 1178 was renowned for a very fast attack and the same is true of the plugin.
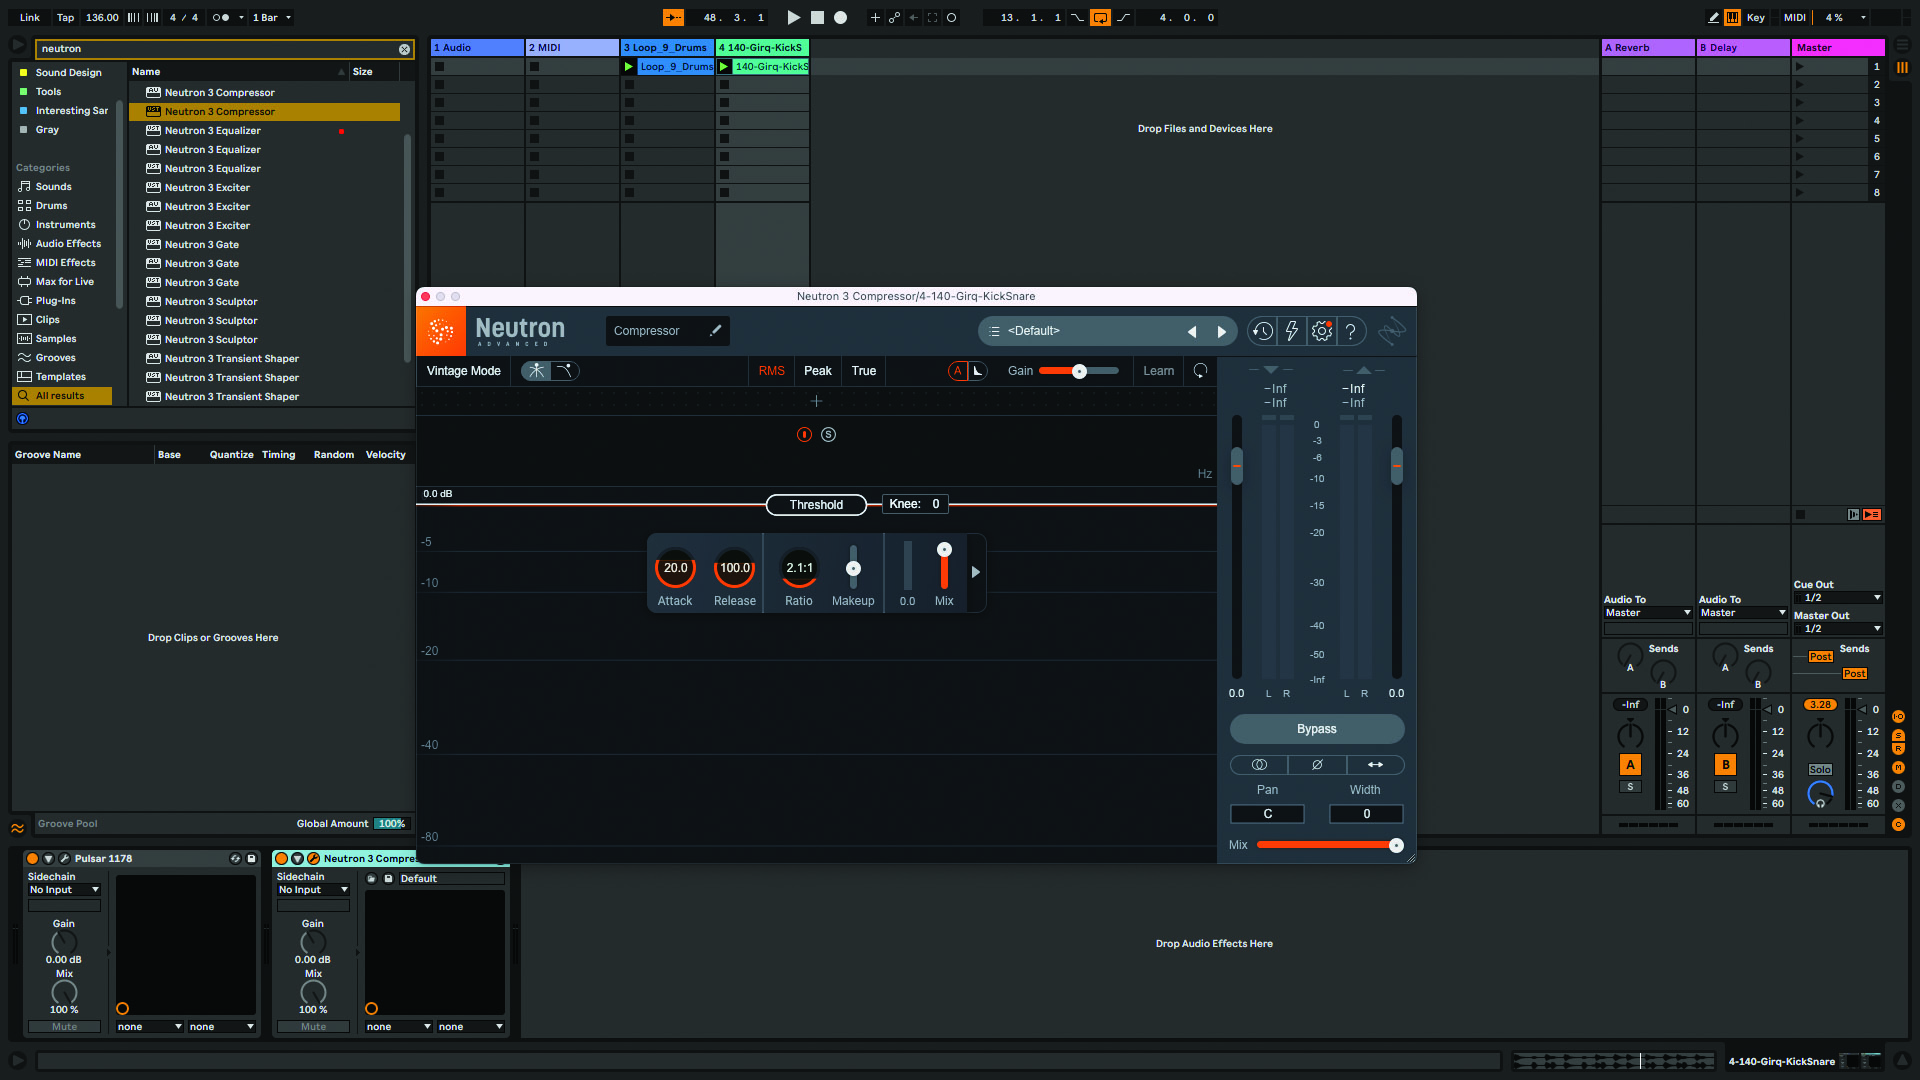
Step 2: We’ll be comparing the 1178 with the compressor that comes with Izotope’s Neutron 3 bundle. This is a totally modern compressor which isn’t trying to emulate old school gear. The attack time on this bad boy can go all the way down to 0.1ms (that’s pretty fast)...
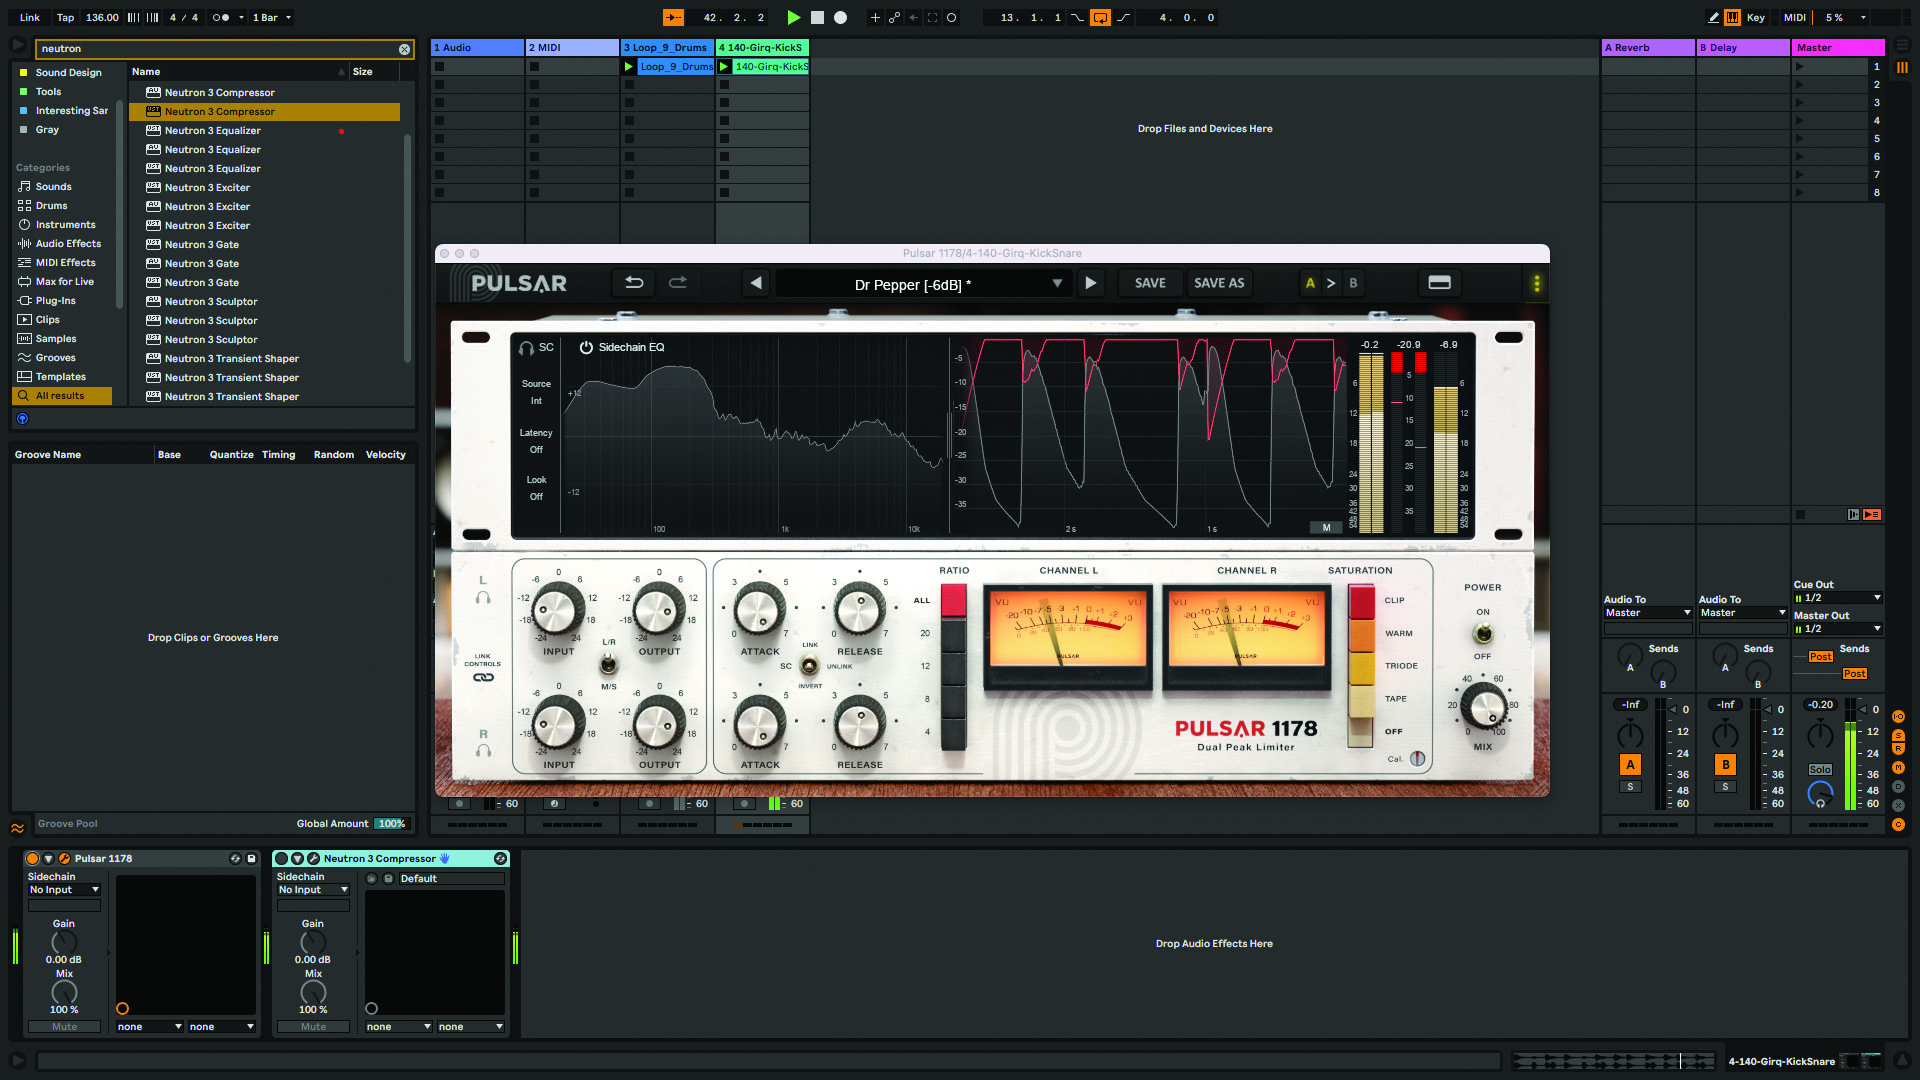
Step 3: Let’s compare them. We’ll whack up the ratio to max on each and dial in the fastest possible attack time. Counterintuitively, the fastest attack time on the Pulsar 1178 is the highest setting on the dial (7). In our audio demos you can hear how it sounds on a drum loop.
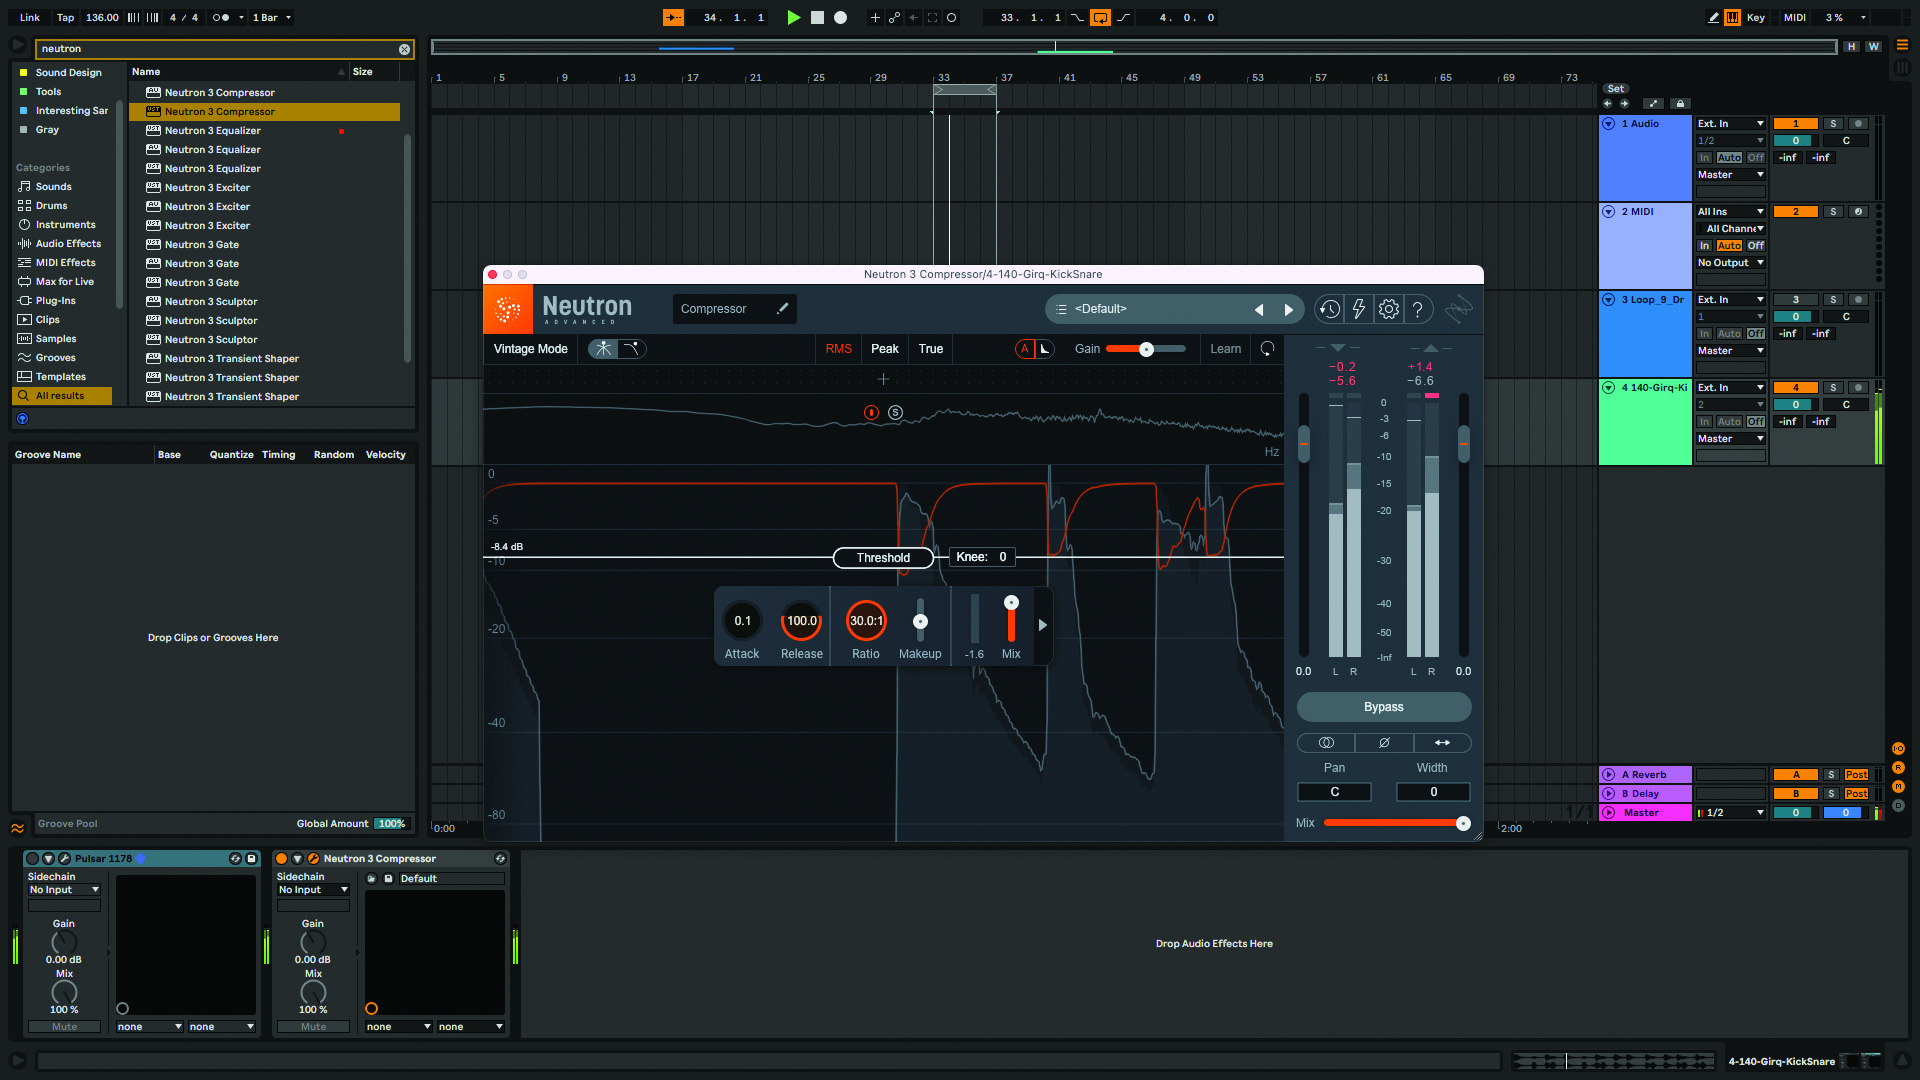
Step 4: Now it’s Neutron’s turn. We’ve adjusted the threshold so we get the same amount of compression. Comparing the two there is no massively noticeable audible difference between the two compressors. They both sound very fast, and very smooth.
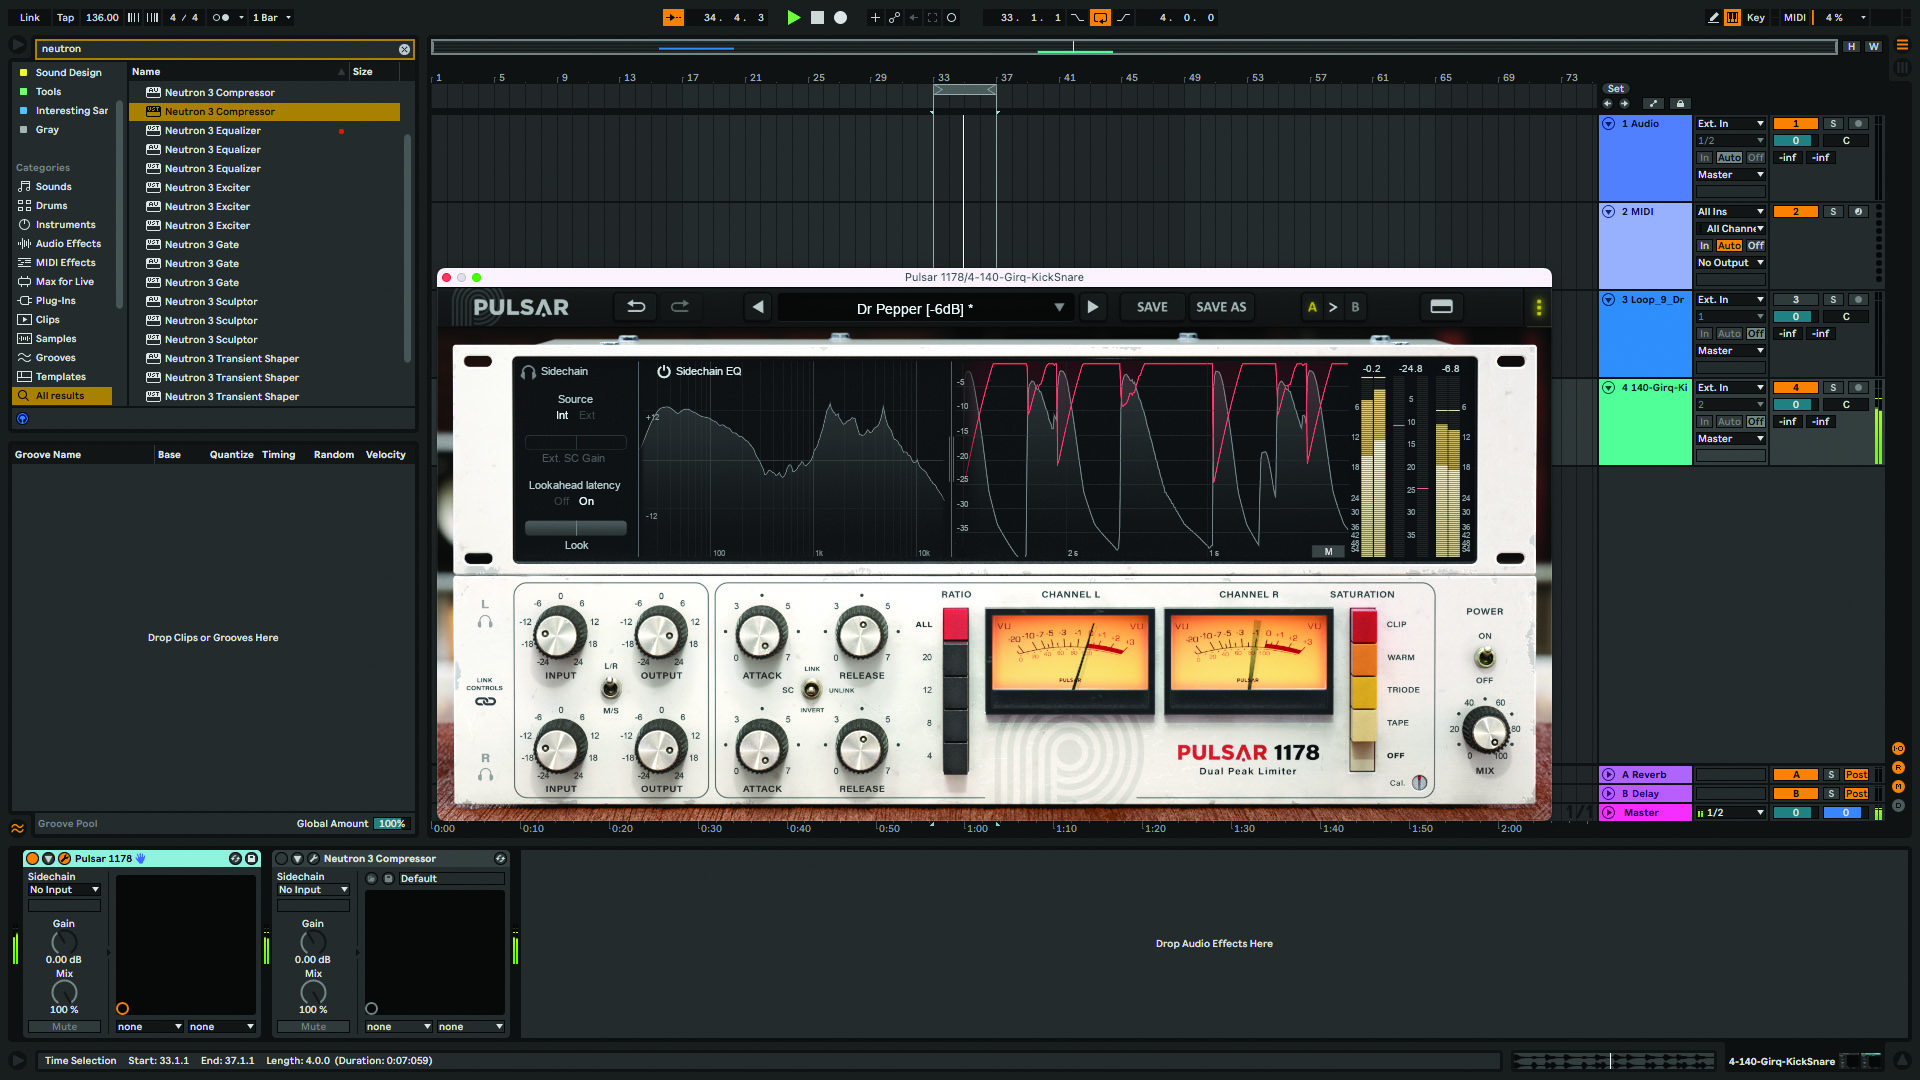
Step 5: The Pulsar 1178 has a little extra modern trick up its sleeve. In Pulsar’s software emulation you will find lookahead – this is most certainly not a feature you’ll find on vintage hardware compressors, but digital music production allows you to take advantage of this technology.
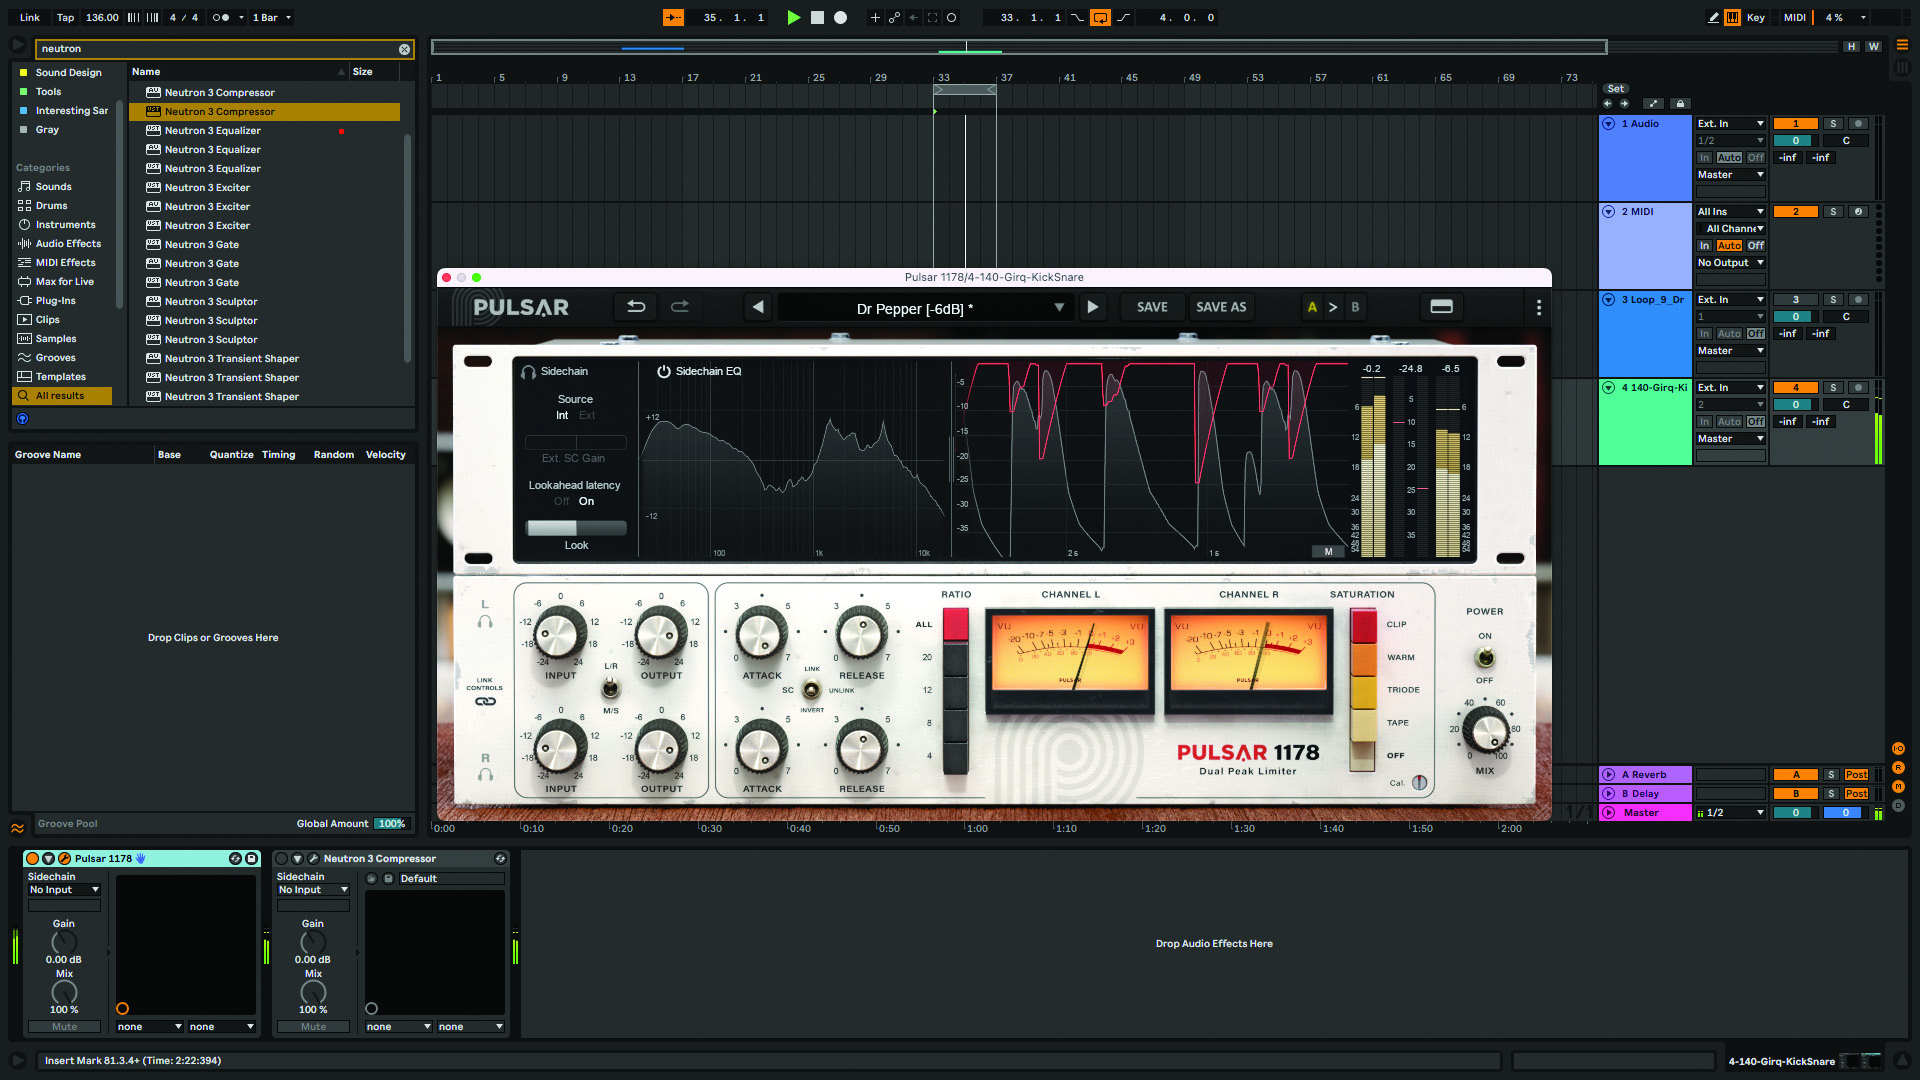
Step 6: Lookahead enables the 1178 to anticipate when a transient will occur and duck the signal a few milliseconds beforehand. In this example we’ve cranked the lookahead up to the maximum of -20ms. You’ll notice there are some artefacts from the process so in use you don’t want to push it this far.
Vintage gates?
Gates stop quiet audio from passing through unless a certain threshold is breached. As such, not many of these utilities can be considered ‘classics’ per se. Instead of comparing old and new flavors of gating, on this page we’ll just show you the modern takes: iZotope’s Neutron contains a gate processor (also available as its own plugin to owner of the package), which allows multiband operation.
This allows a big step up with, for example, drum sound, helping the different elements of a tom’s sound pop through at different moments in a hit. Moving on from gating to transient shaping: the SPL Transient Designer is rightly classed as a studio legend, but Neutron’s multiband take on transient handling moves us similarly further into the future.
Consider transient shaping on guitar sources to sculpt the perfect blend of bite and body – with a multiband formulation like Neutron’s, the possibilities can only increase.
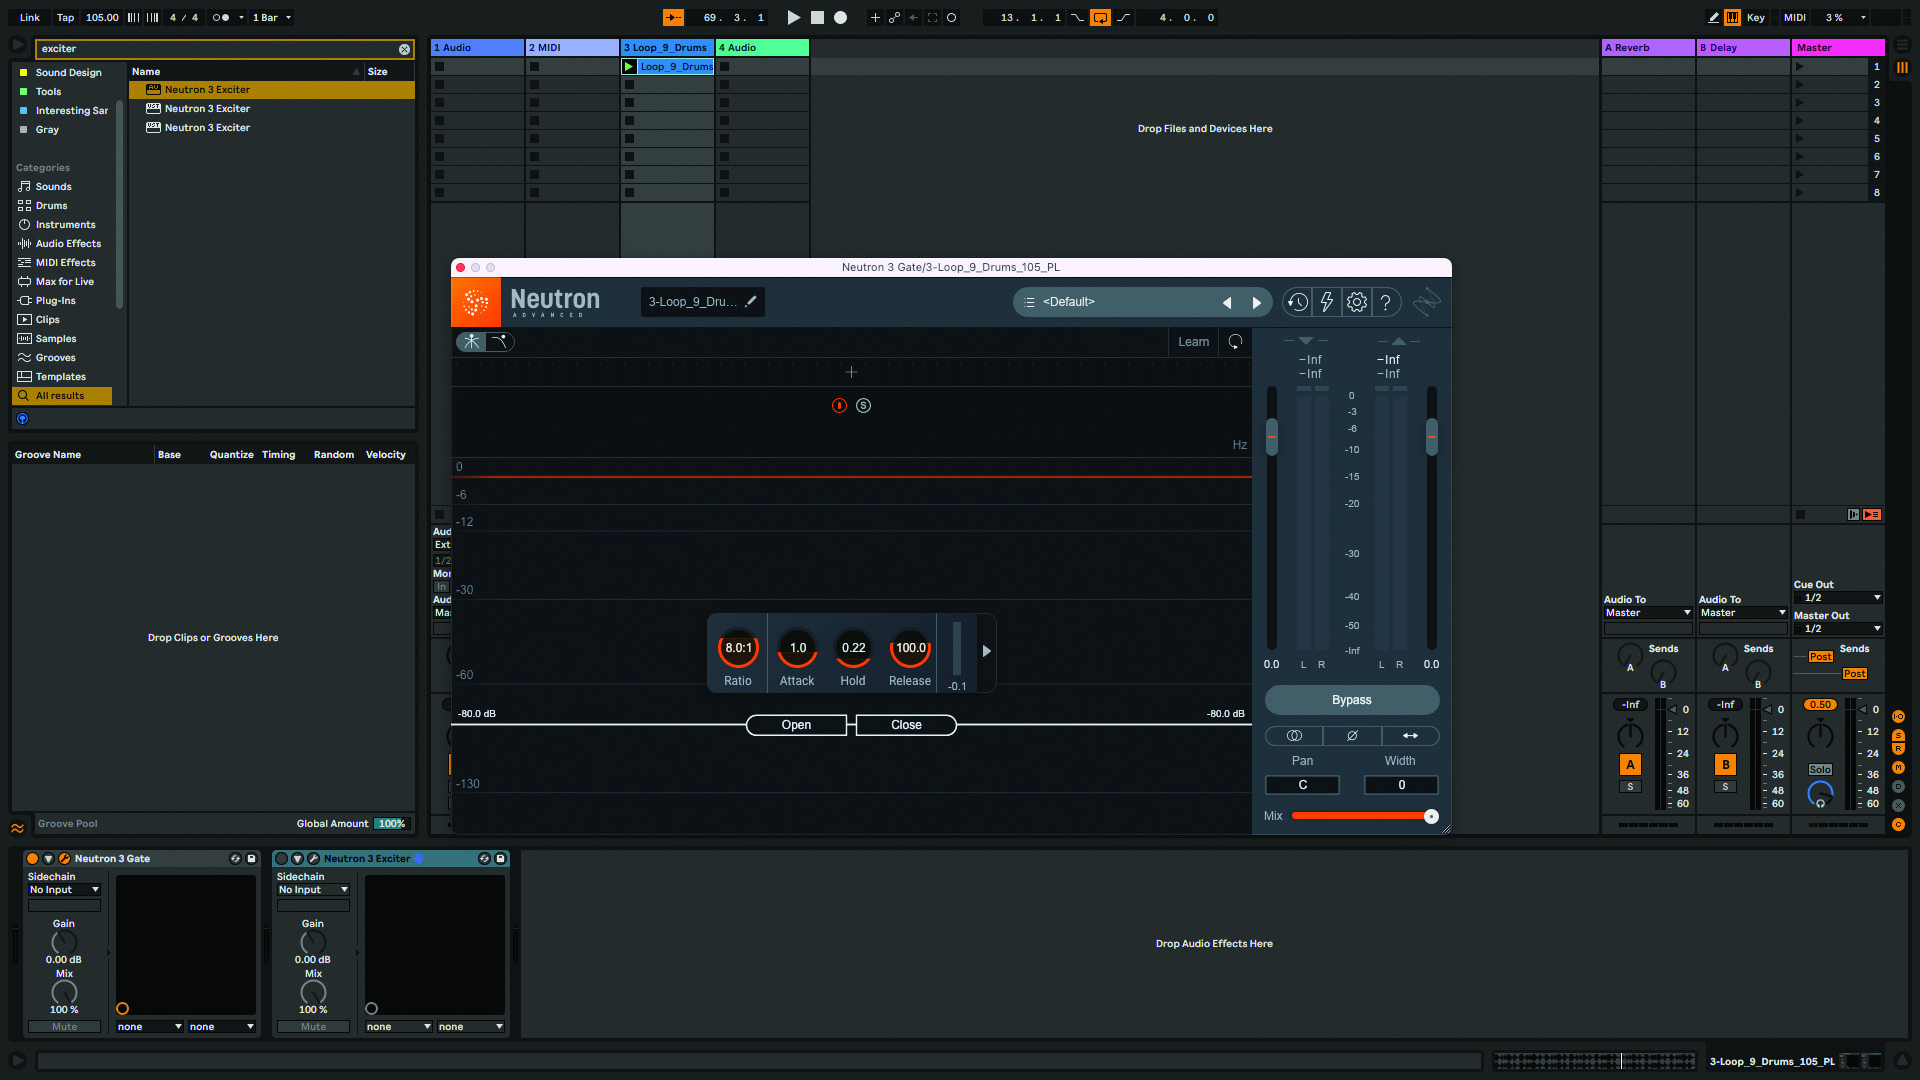
Step 1: Neutron 3 bundles together powerful mixing tools. In it you’ll find staples such as an EQ and compressor, plus find more specialized tools. In this walkthrough we’ll investigate the Gate – Neutron 3’s gate has useful multiband functionality which opens up many possibilities.
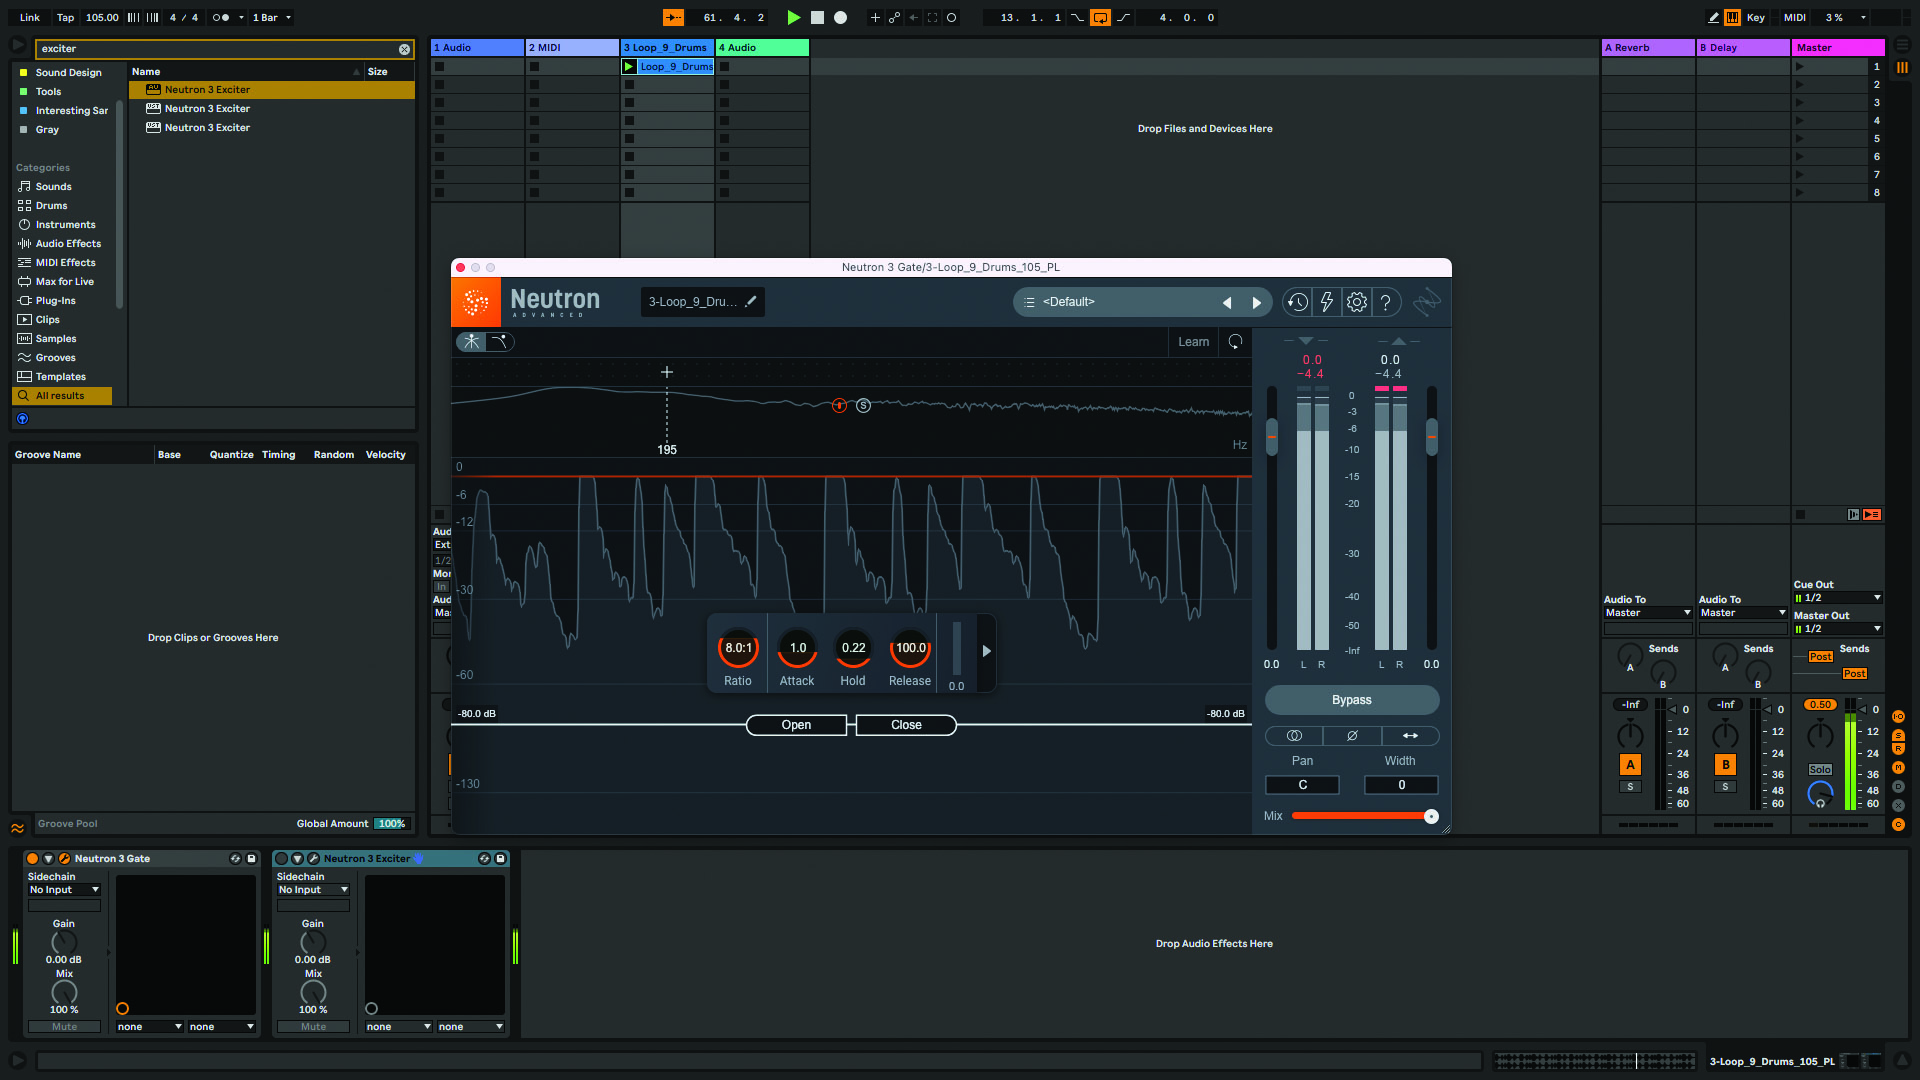
Step 2: We’ll loop a drum beat and run it through Neutron Gate. To add different bands we click the ‘+’ icon in the top of the main UI – Neutron will place the gate divider wherever you click in the frequency spectrum.
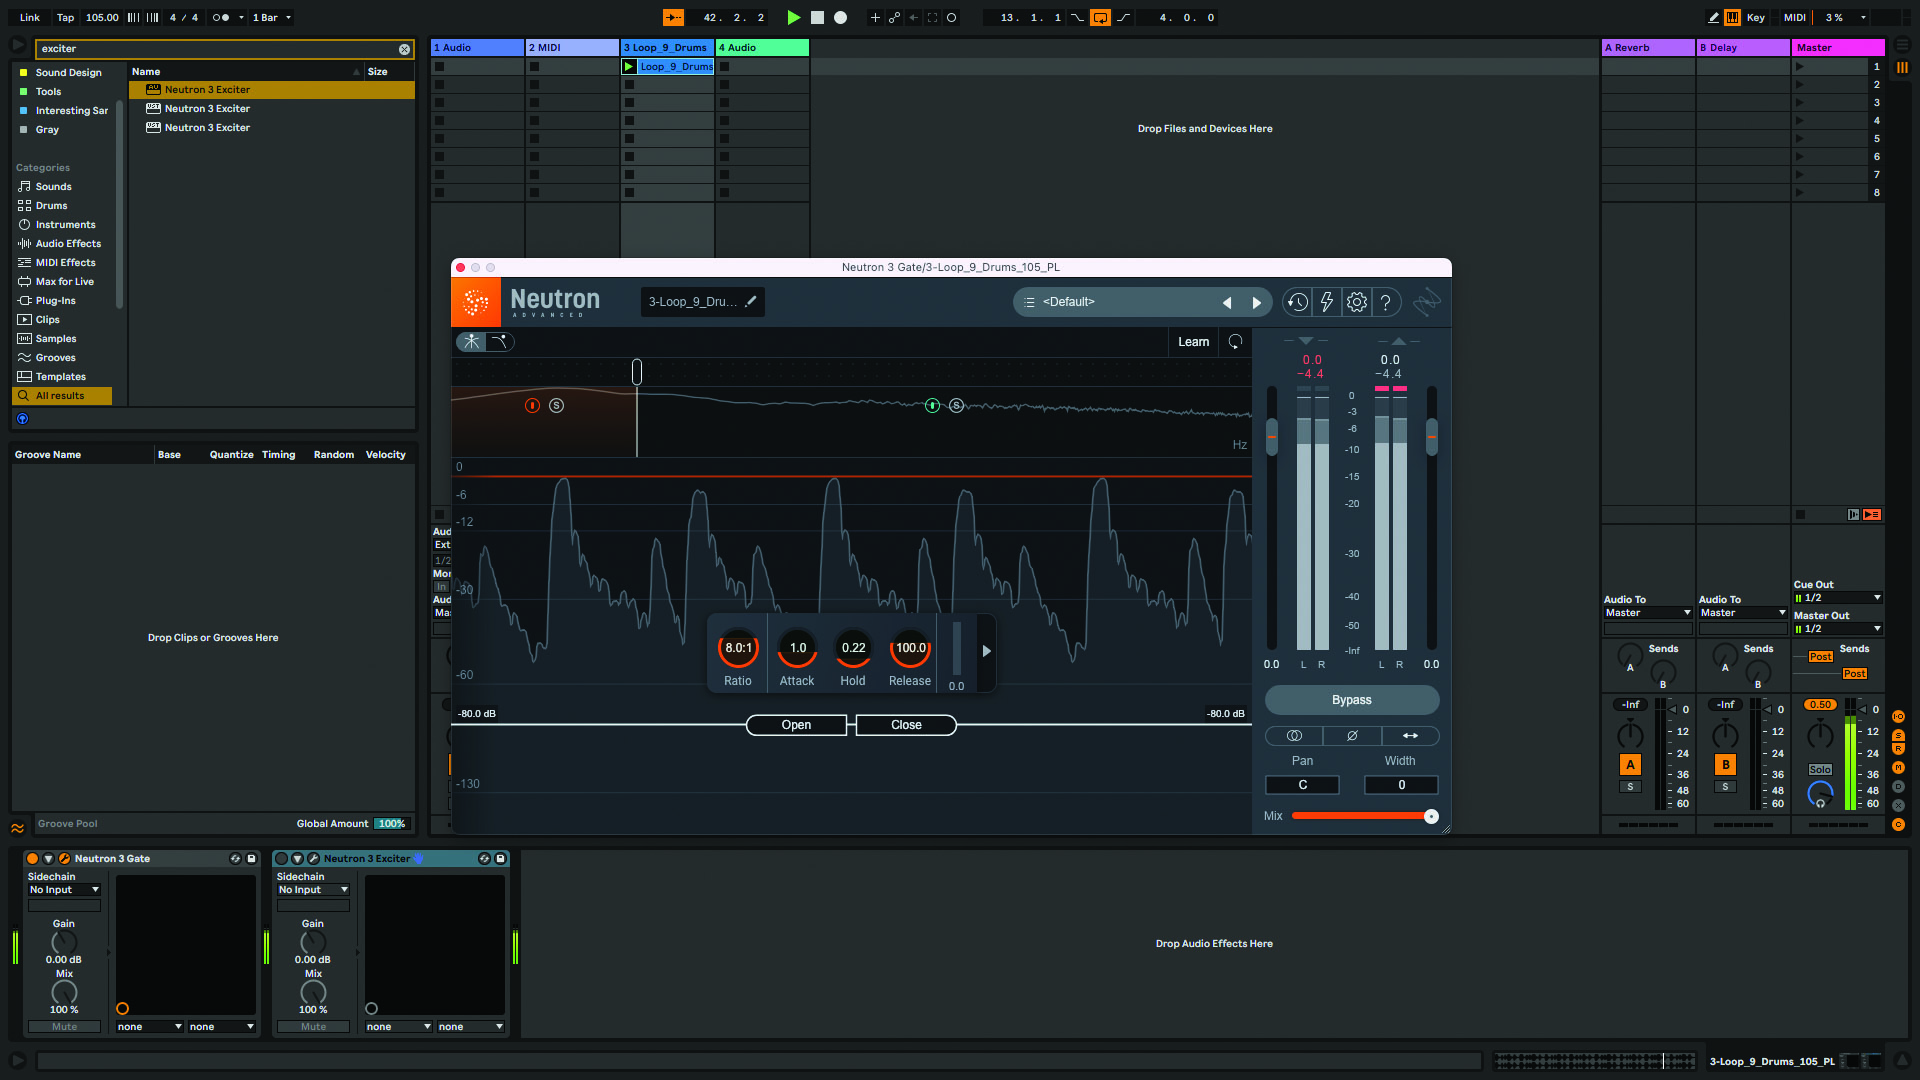
Step 3: One use for a multiband gate is to remove the kick from a beat, so let’s place a band in the sub frequency range. We’ll set the band at around 150Hz, this way all sub content will be removed whilst leaving the snare drum fully intact.
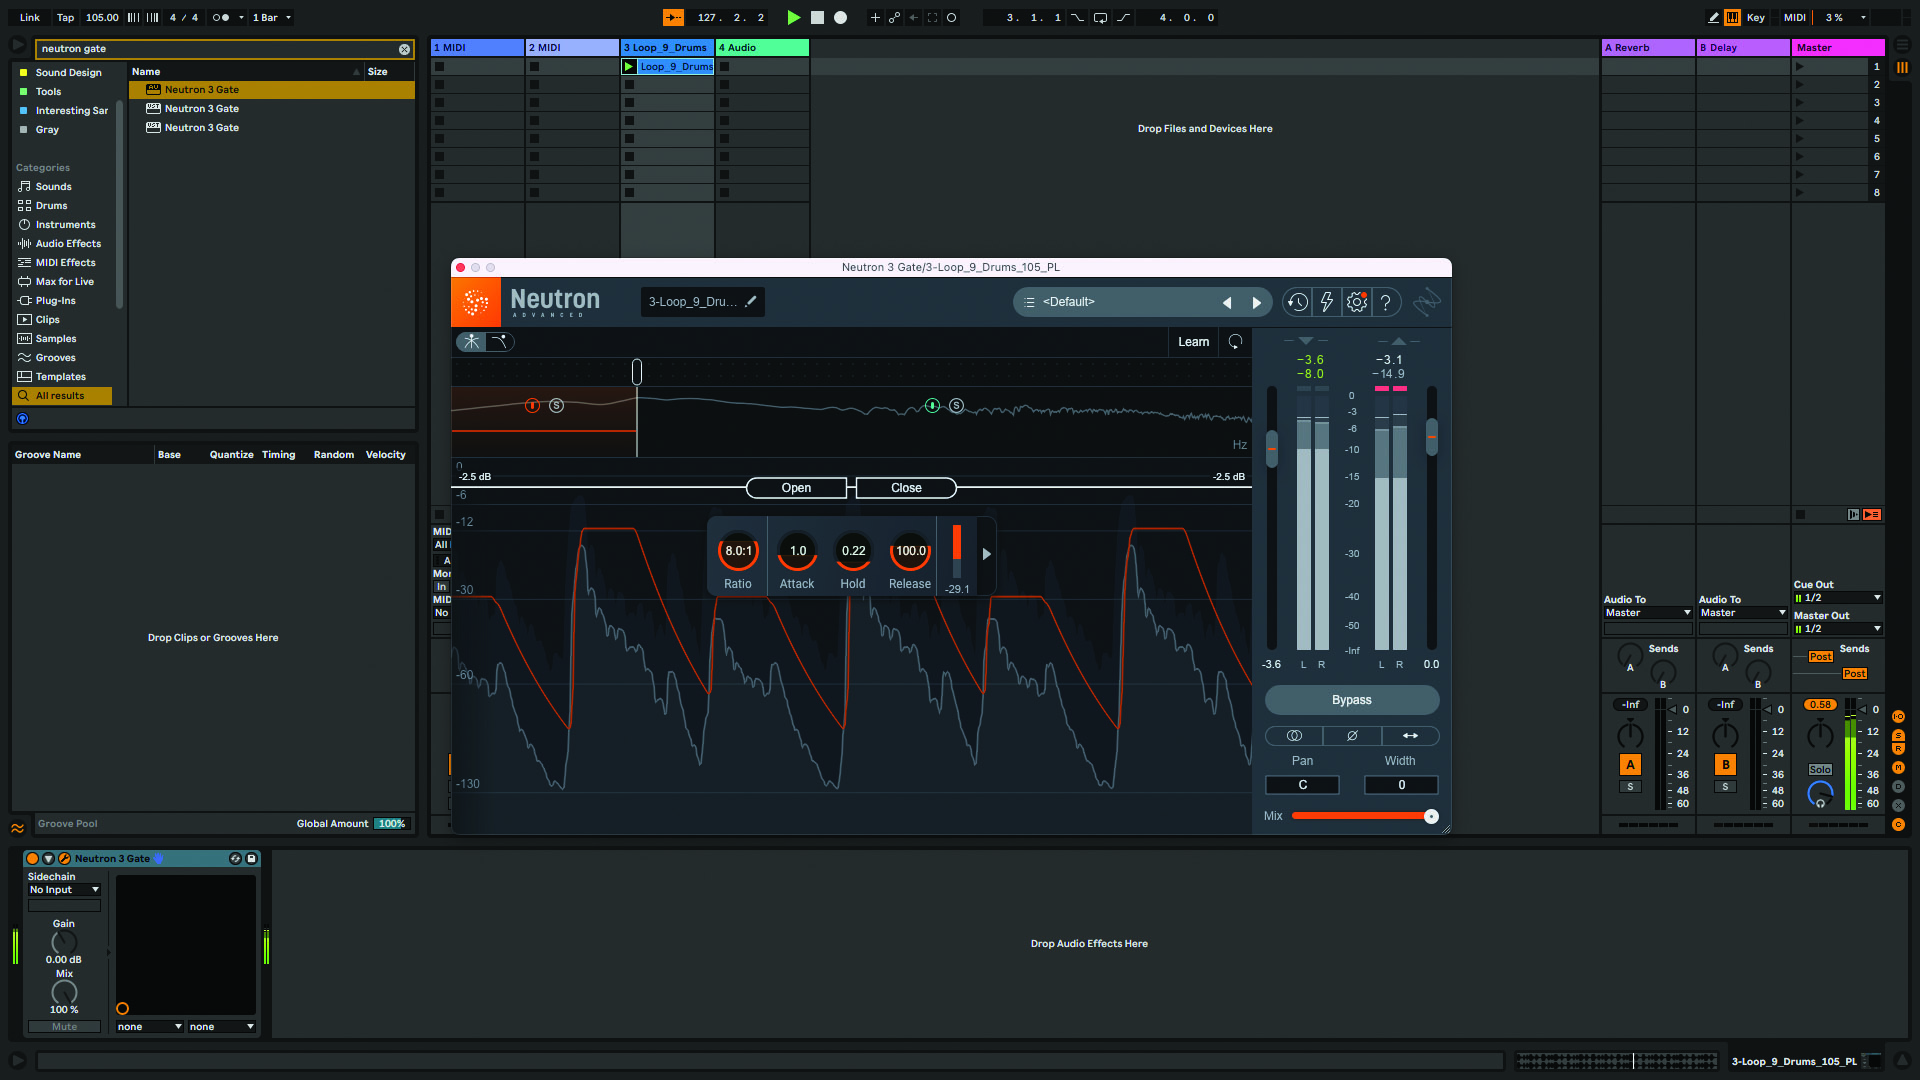
Step 4: Finally we’ll adjust the band settings so that the threshold for the gate opening is above the peak volume of the kick. If the kick hits 0dB you may need to bring down the input slider on the right hand side of the UI.
Add character with multiband saturation
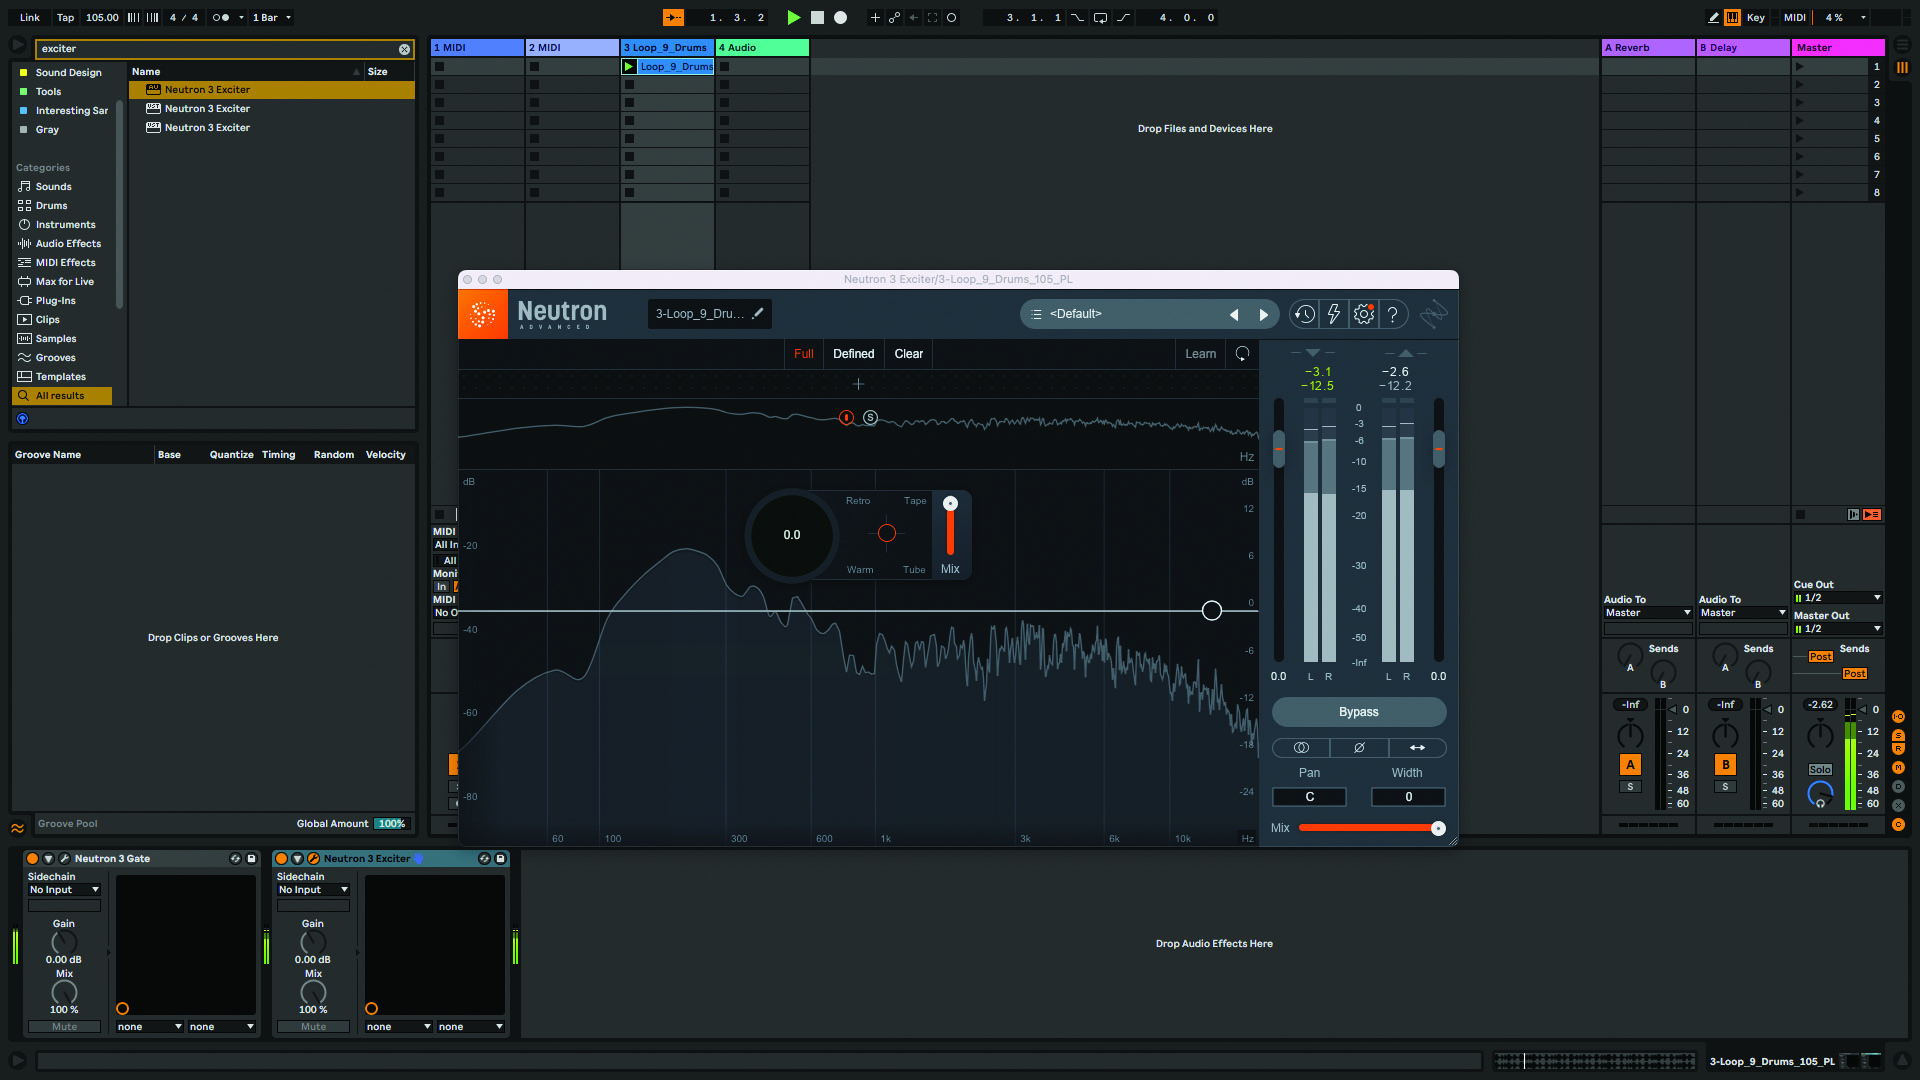
Step 1: Let’s take our loop with the kick drum removed and add some character to it with Neutron 3’s multiband exciter. We want to liven up our hats and snare, but in slightly different ways – this is the perfect job for a multiband exciter.
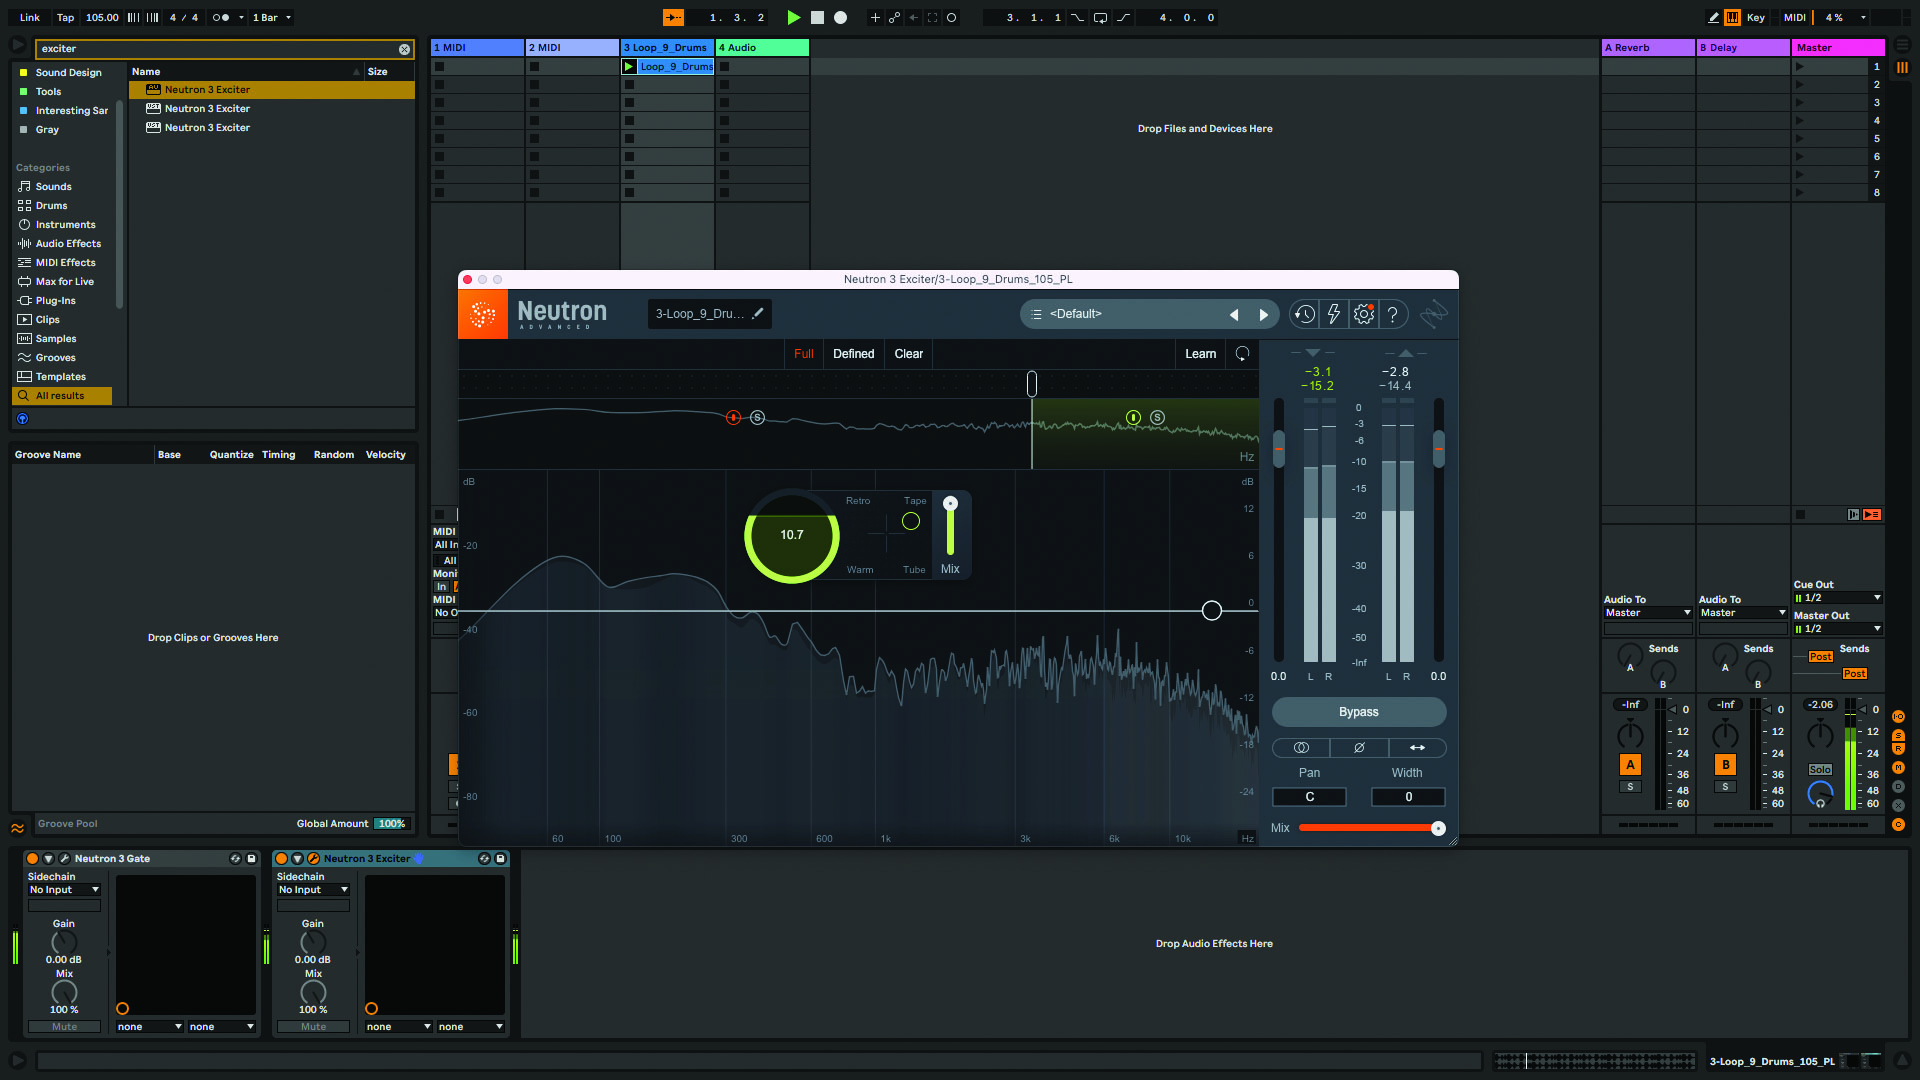
Step 2: We’ll start by creating bands for the snare (about 250Hz to 3.5kHz) and hi hats (3.5kHz +). Now let’s add some saturation to each. Exciter has four saturation modes (Retro, Tape, Warm and Tube) which you can blend between. We’ll go for Tape here.
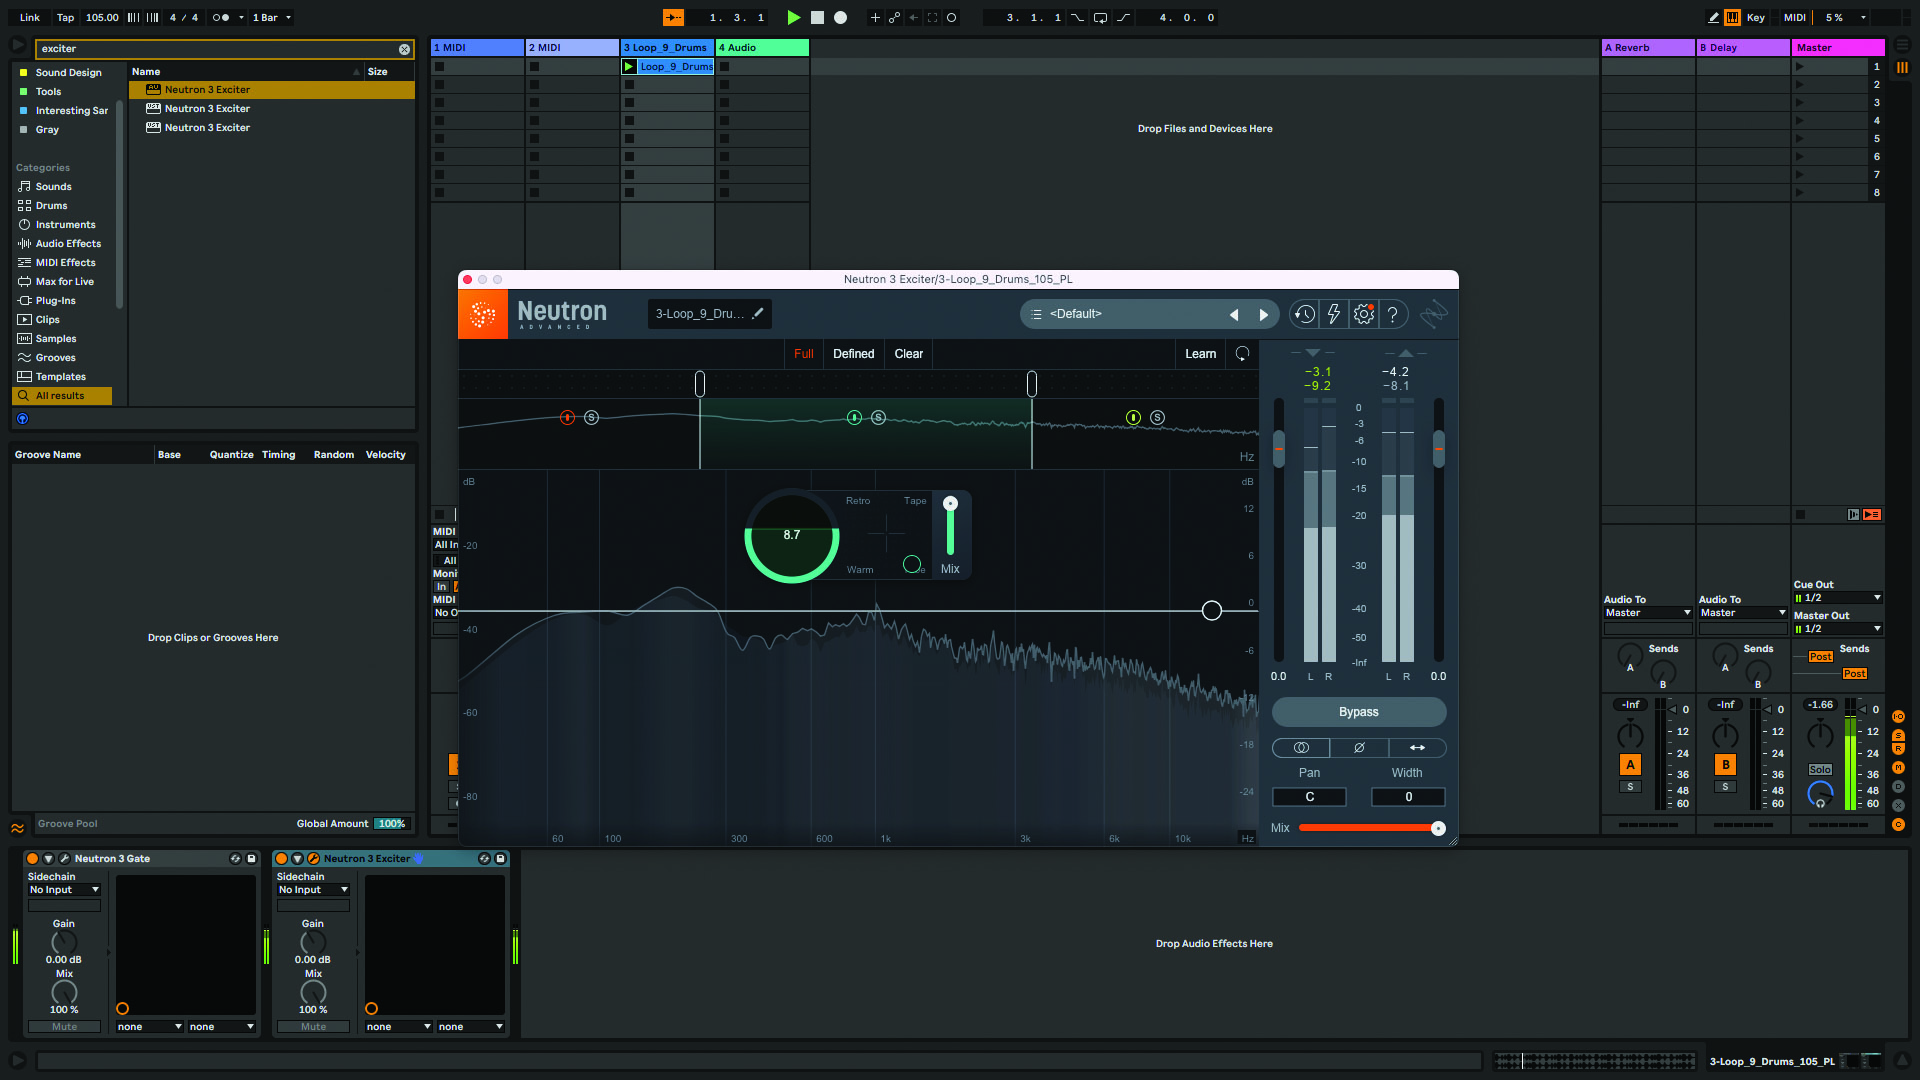
Step 3: We want a beefier distortion model for the snare so we’ll pick Tube, however this is an area in which you can mess around and find the perfect blend of distortion modes for your drums.
Exploring dynamic EQ with Pro-Q 3
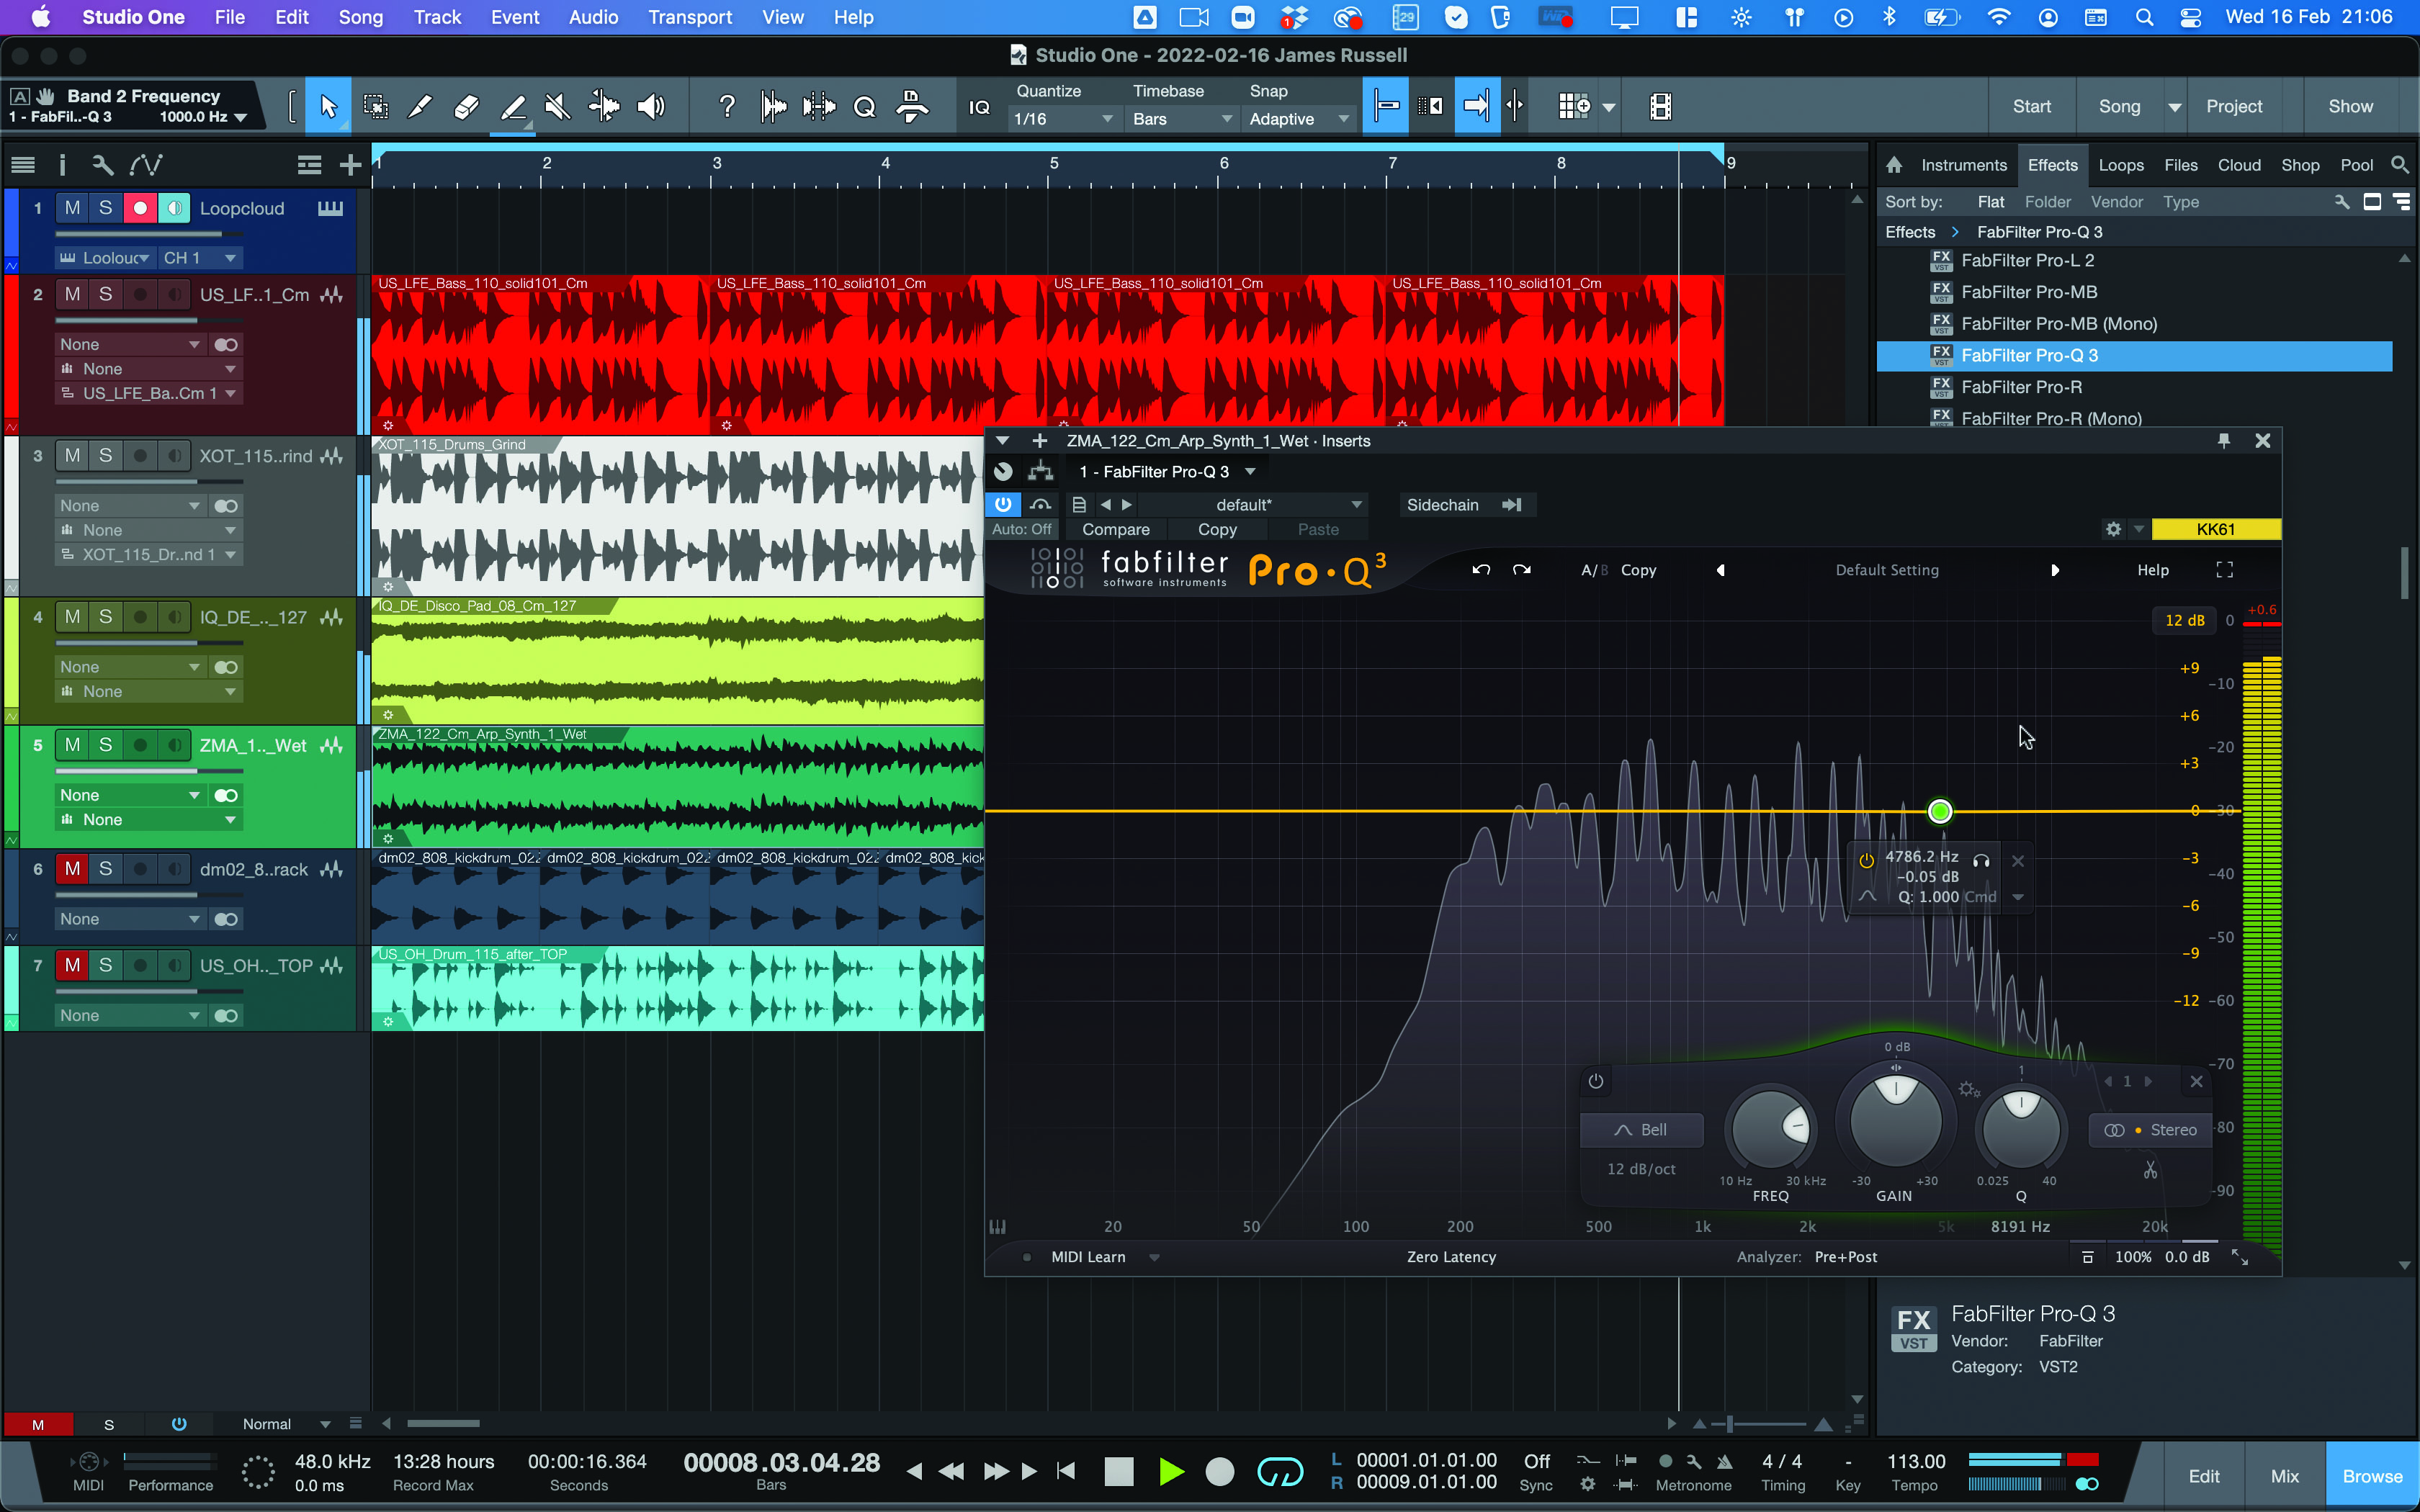
Step 1: Dynamic EQ gives you the responsive level control of a compressor, but tucked inside a single band of EQ. Here’s FabFilter’s Pro-Q 3 with a standard EQ band placed over a synth arp track. We want to downplay the arp a little, taking its edge off but not simply turning it down.
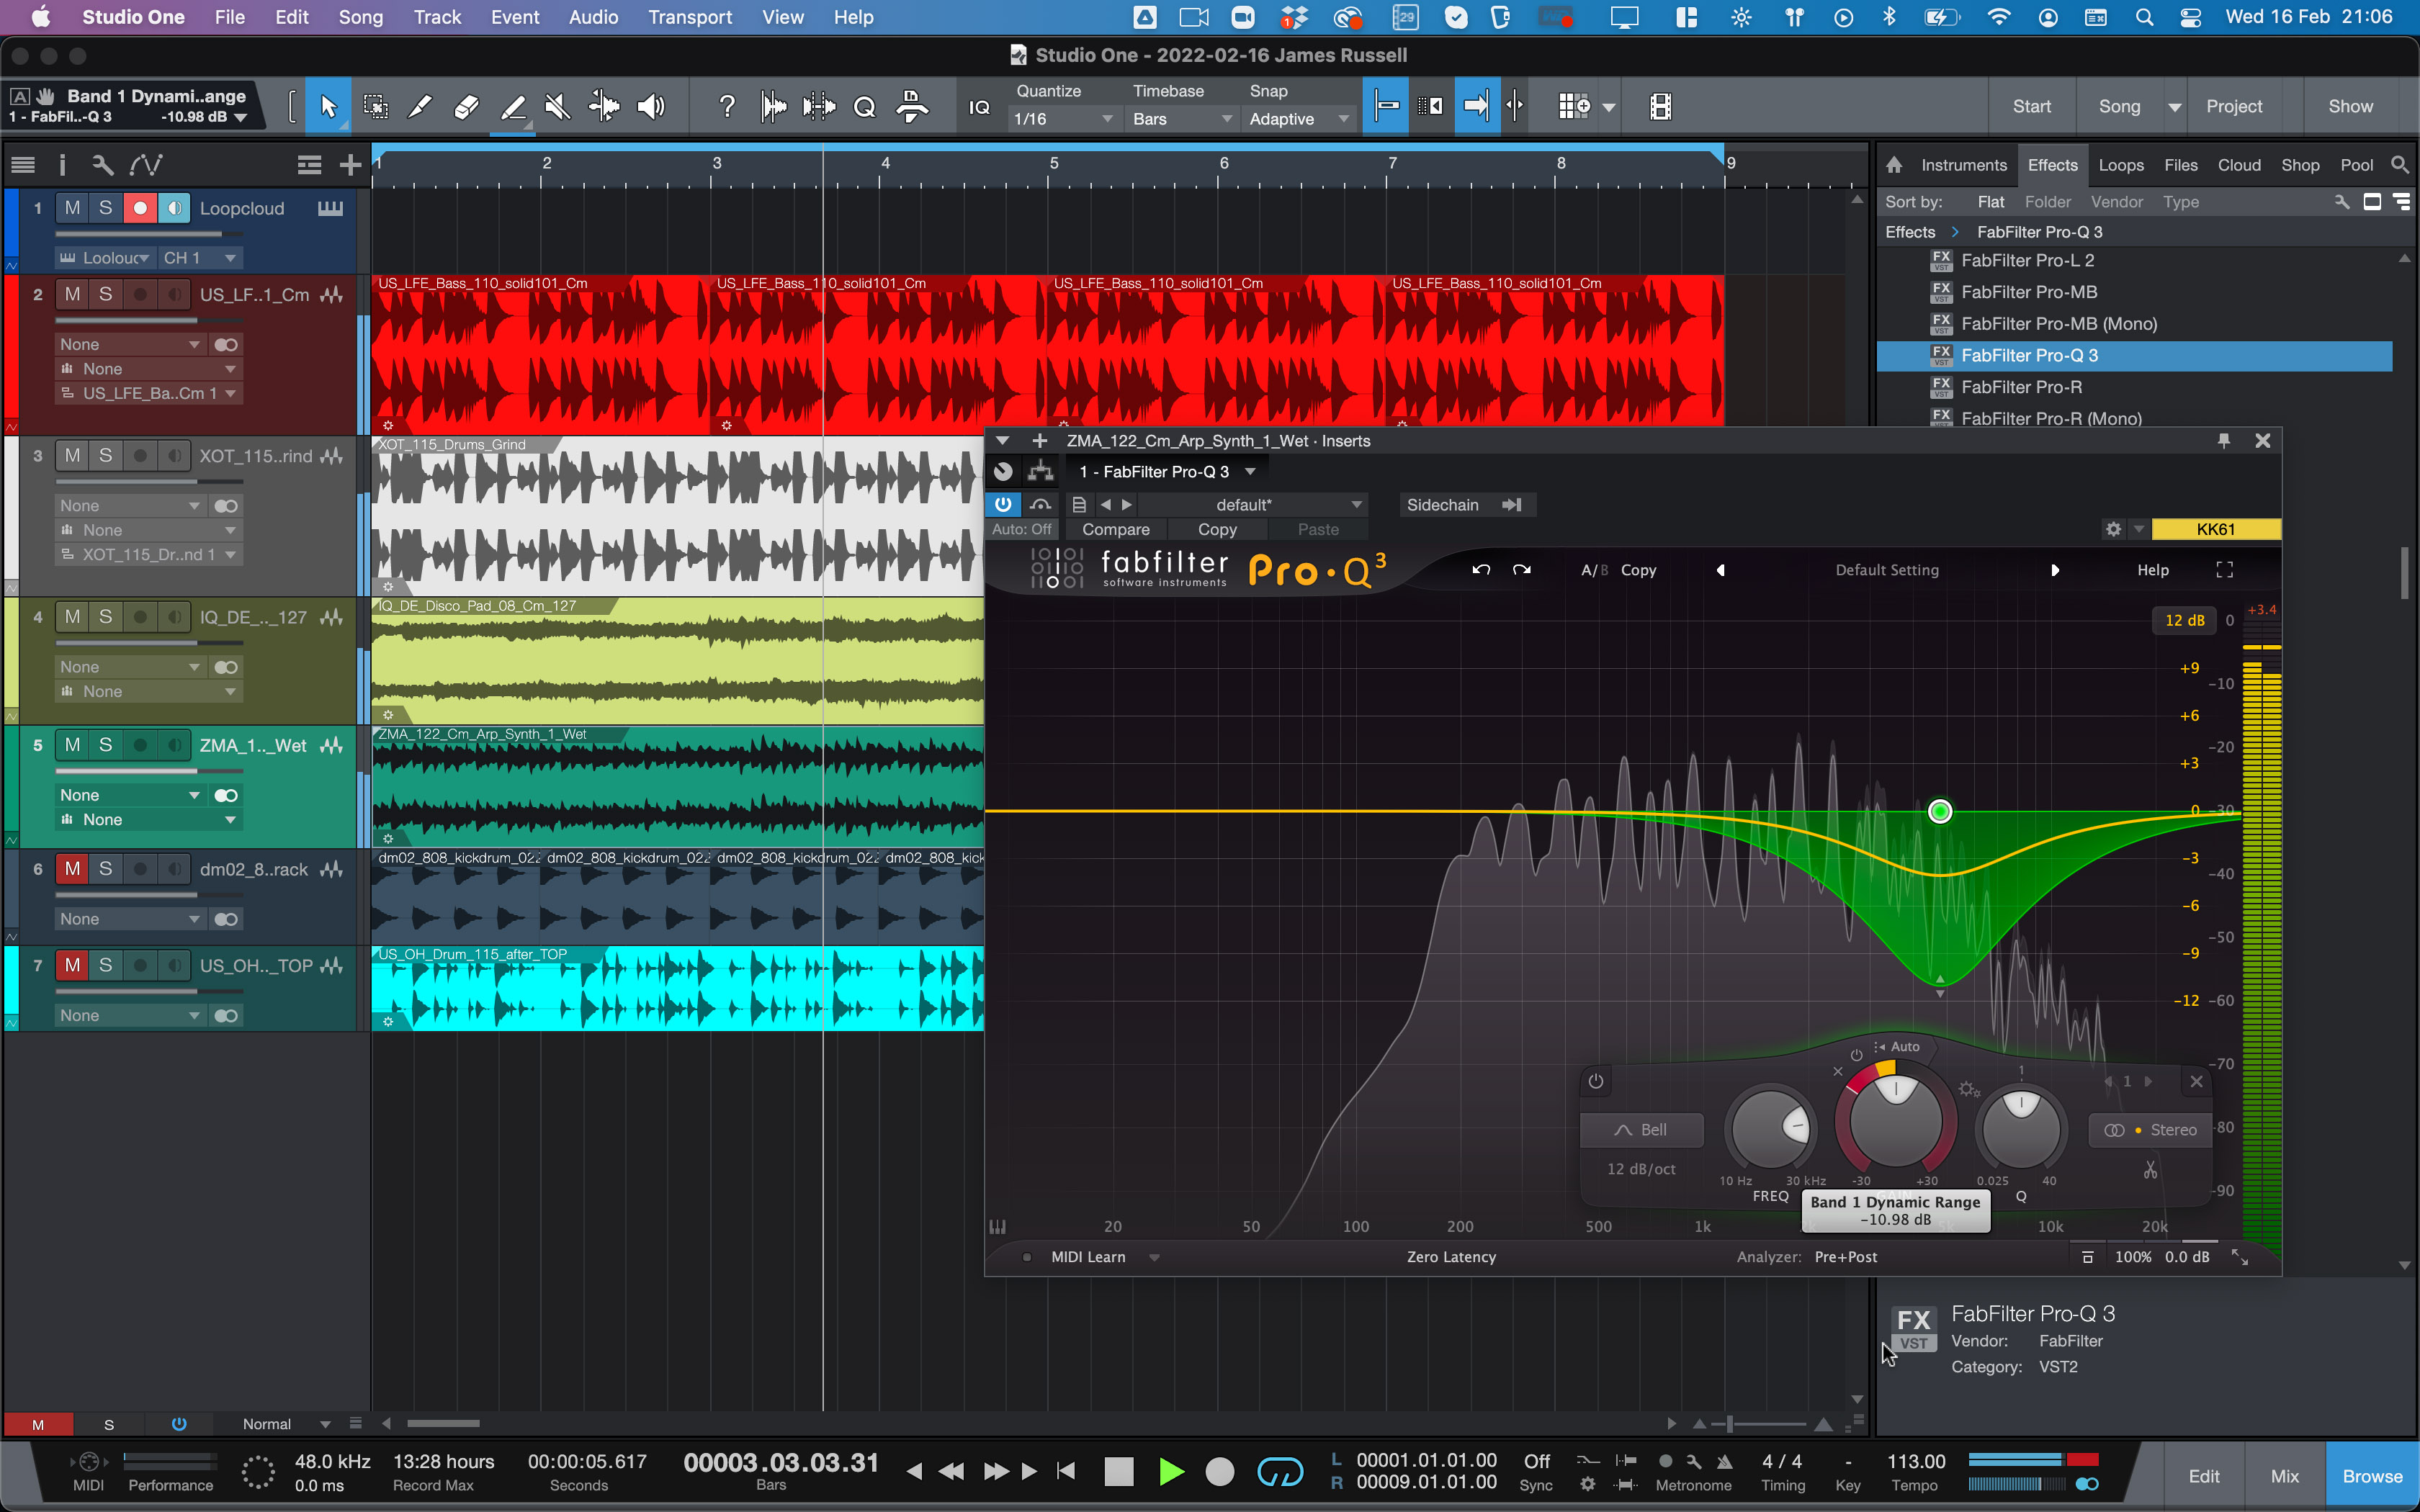
Step 2: In the audio, we want to control some of the synth arp’s higher frequencies. Not only do we want to tame them in general, they overload in the fifth and sixth bar. With the band active, we drag the collar around its Gain knob to activate compression just within this band.
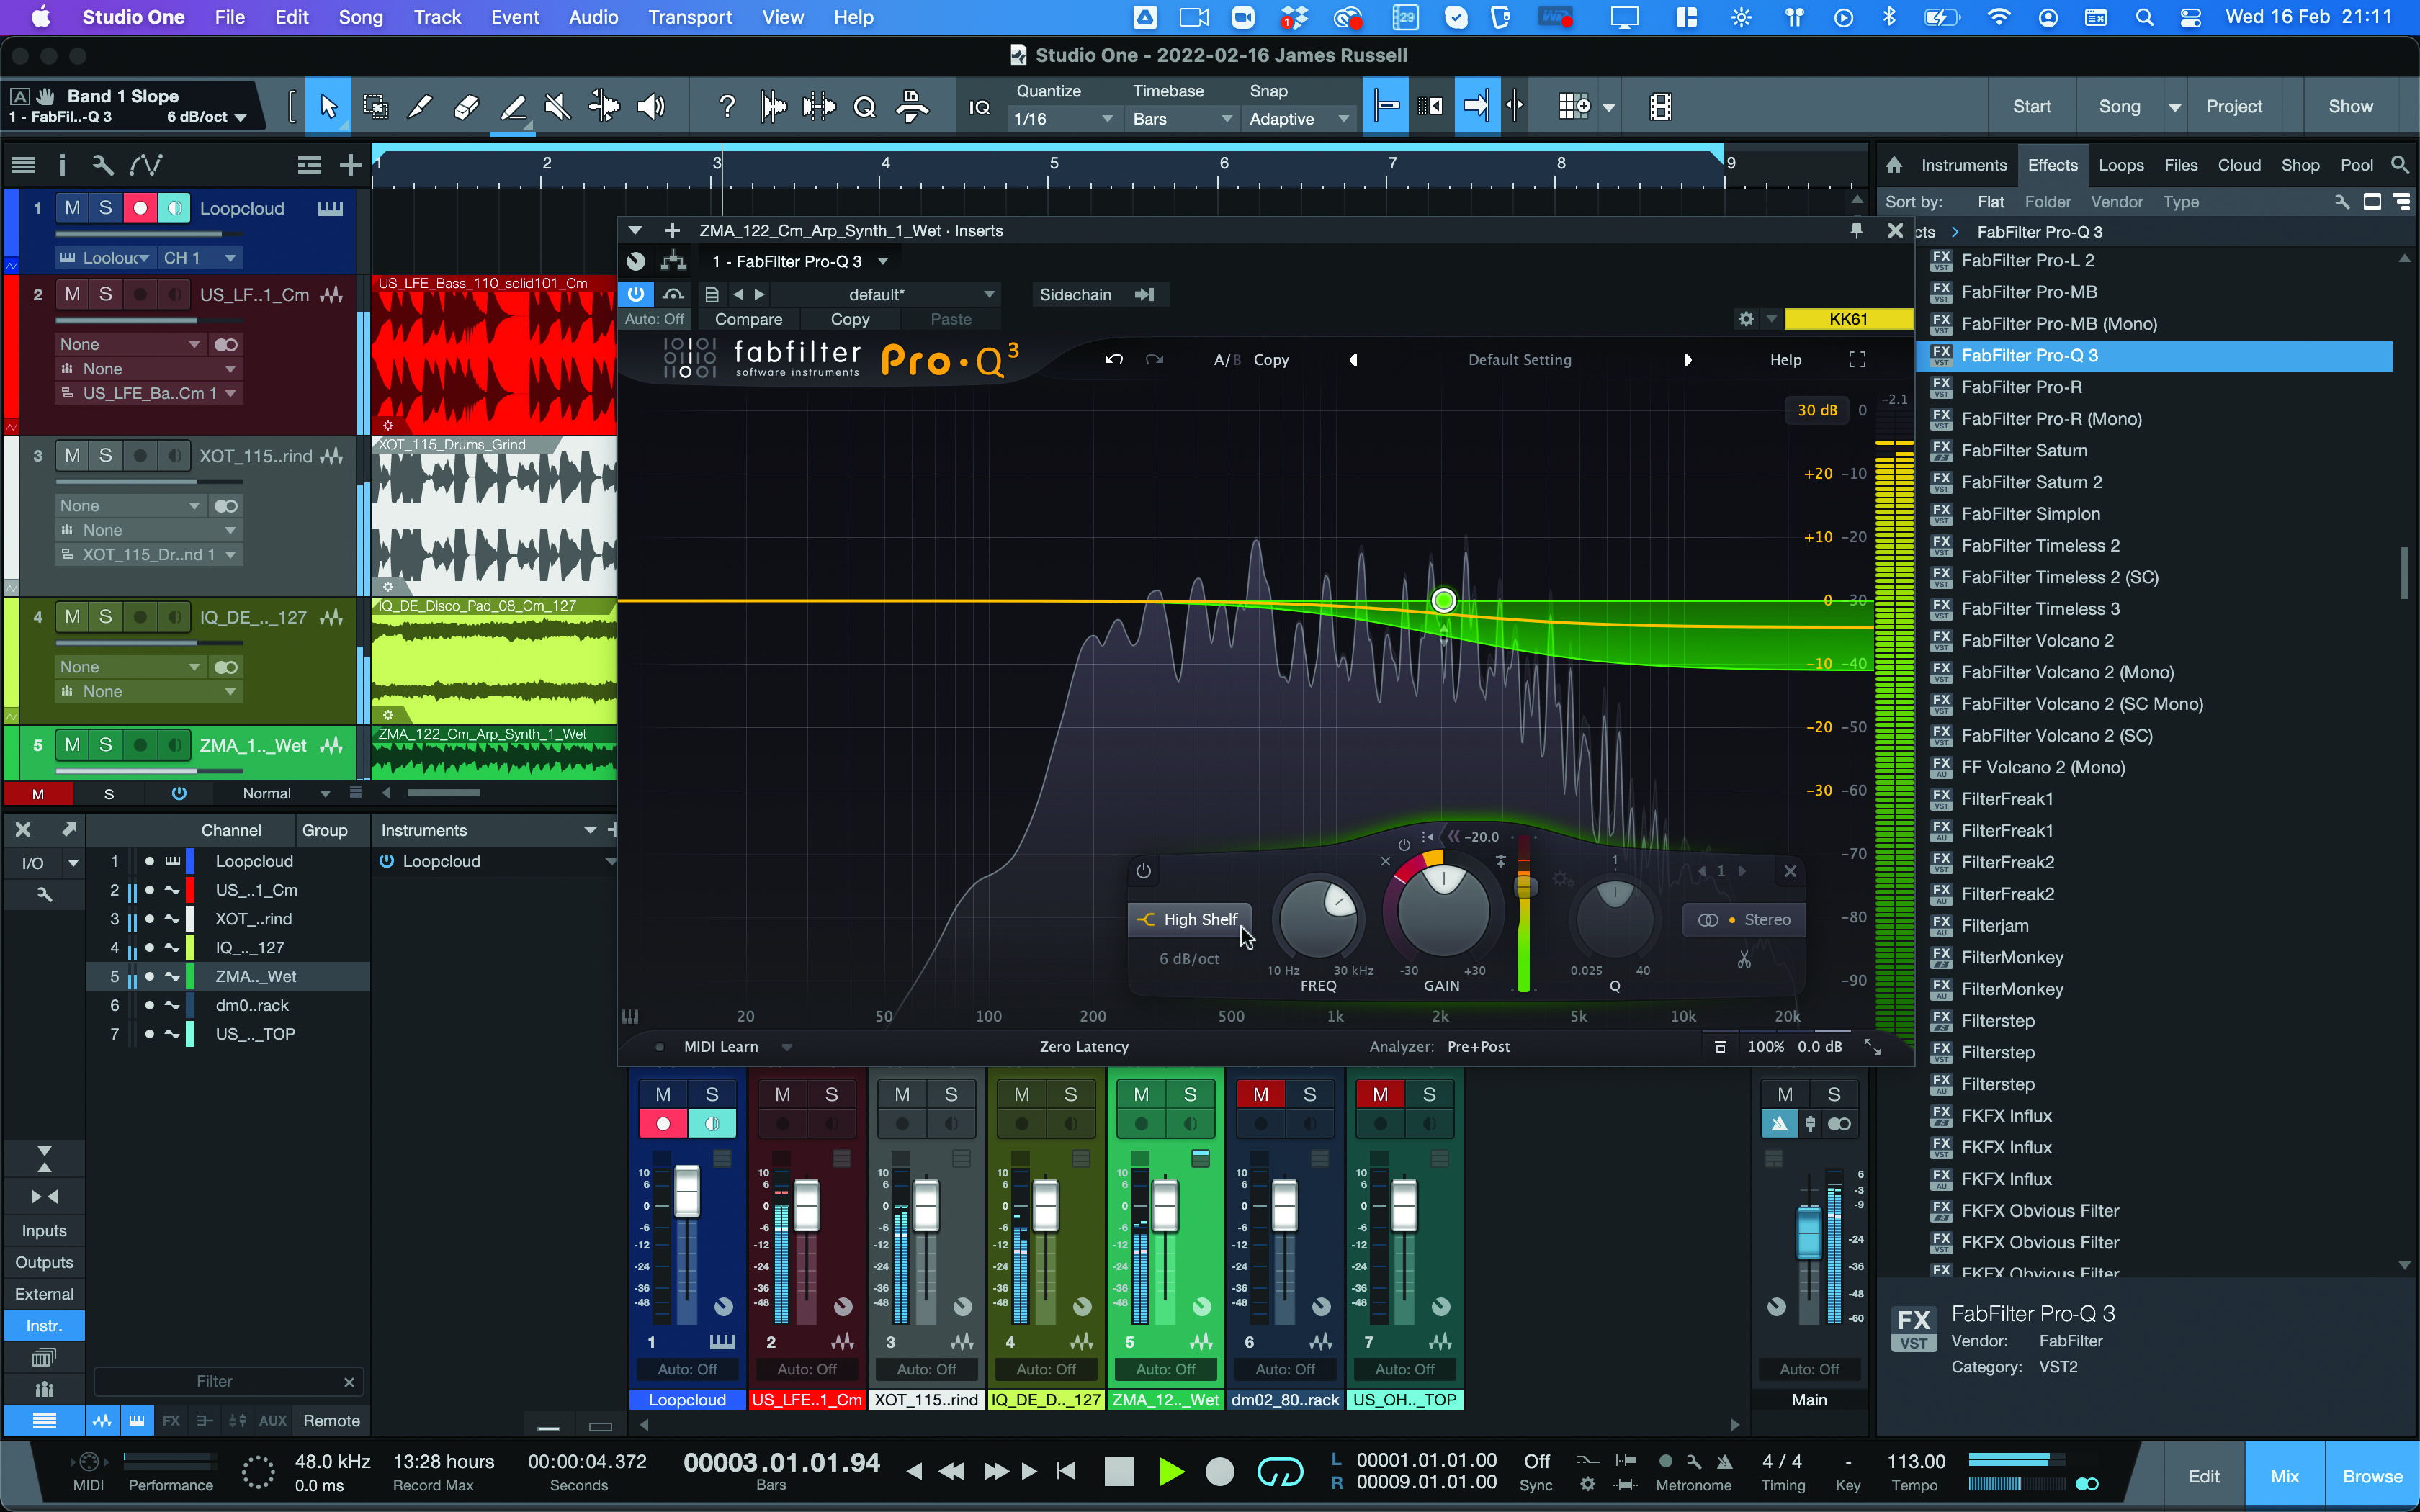
Step 3: The default compression is fine for now, and starts to solve that overload halfway through. We can spend some time focusing on the frequencies at work here. We’ll opt to change the bell filter for a High Shelf type, which rolls off the transients, pushing the arp into the background.
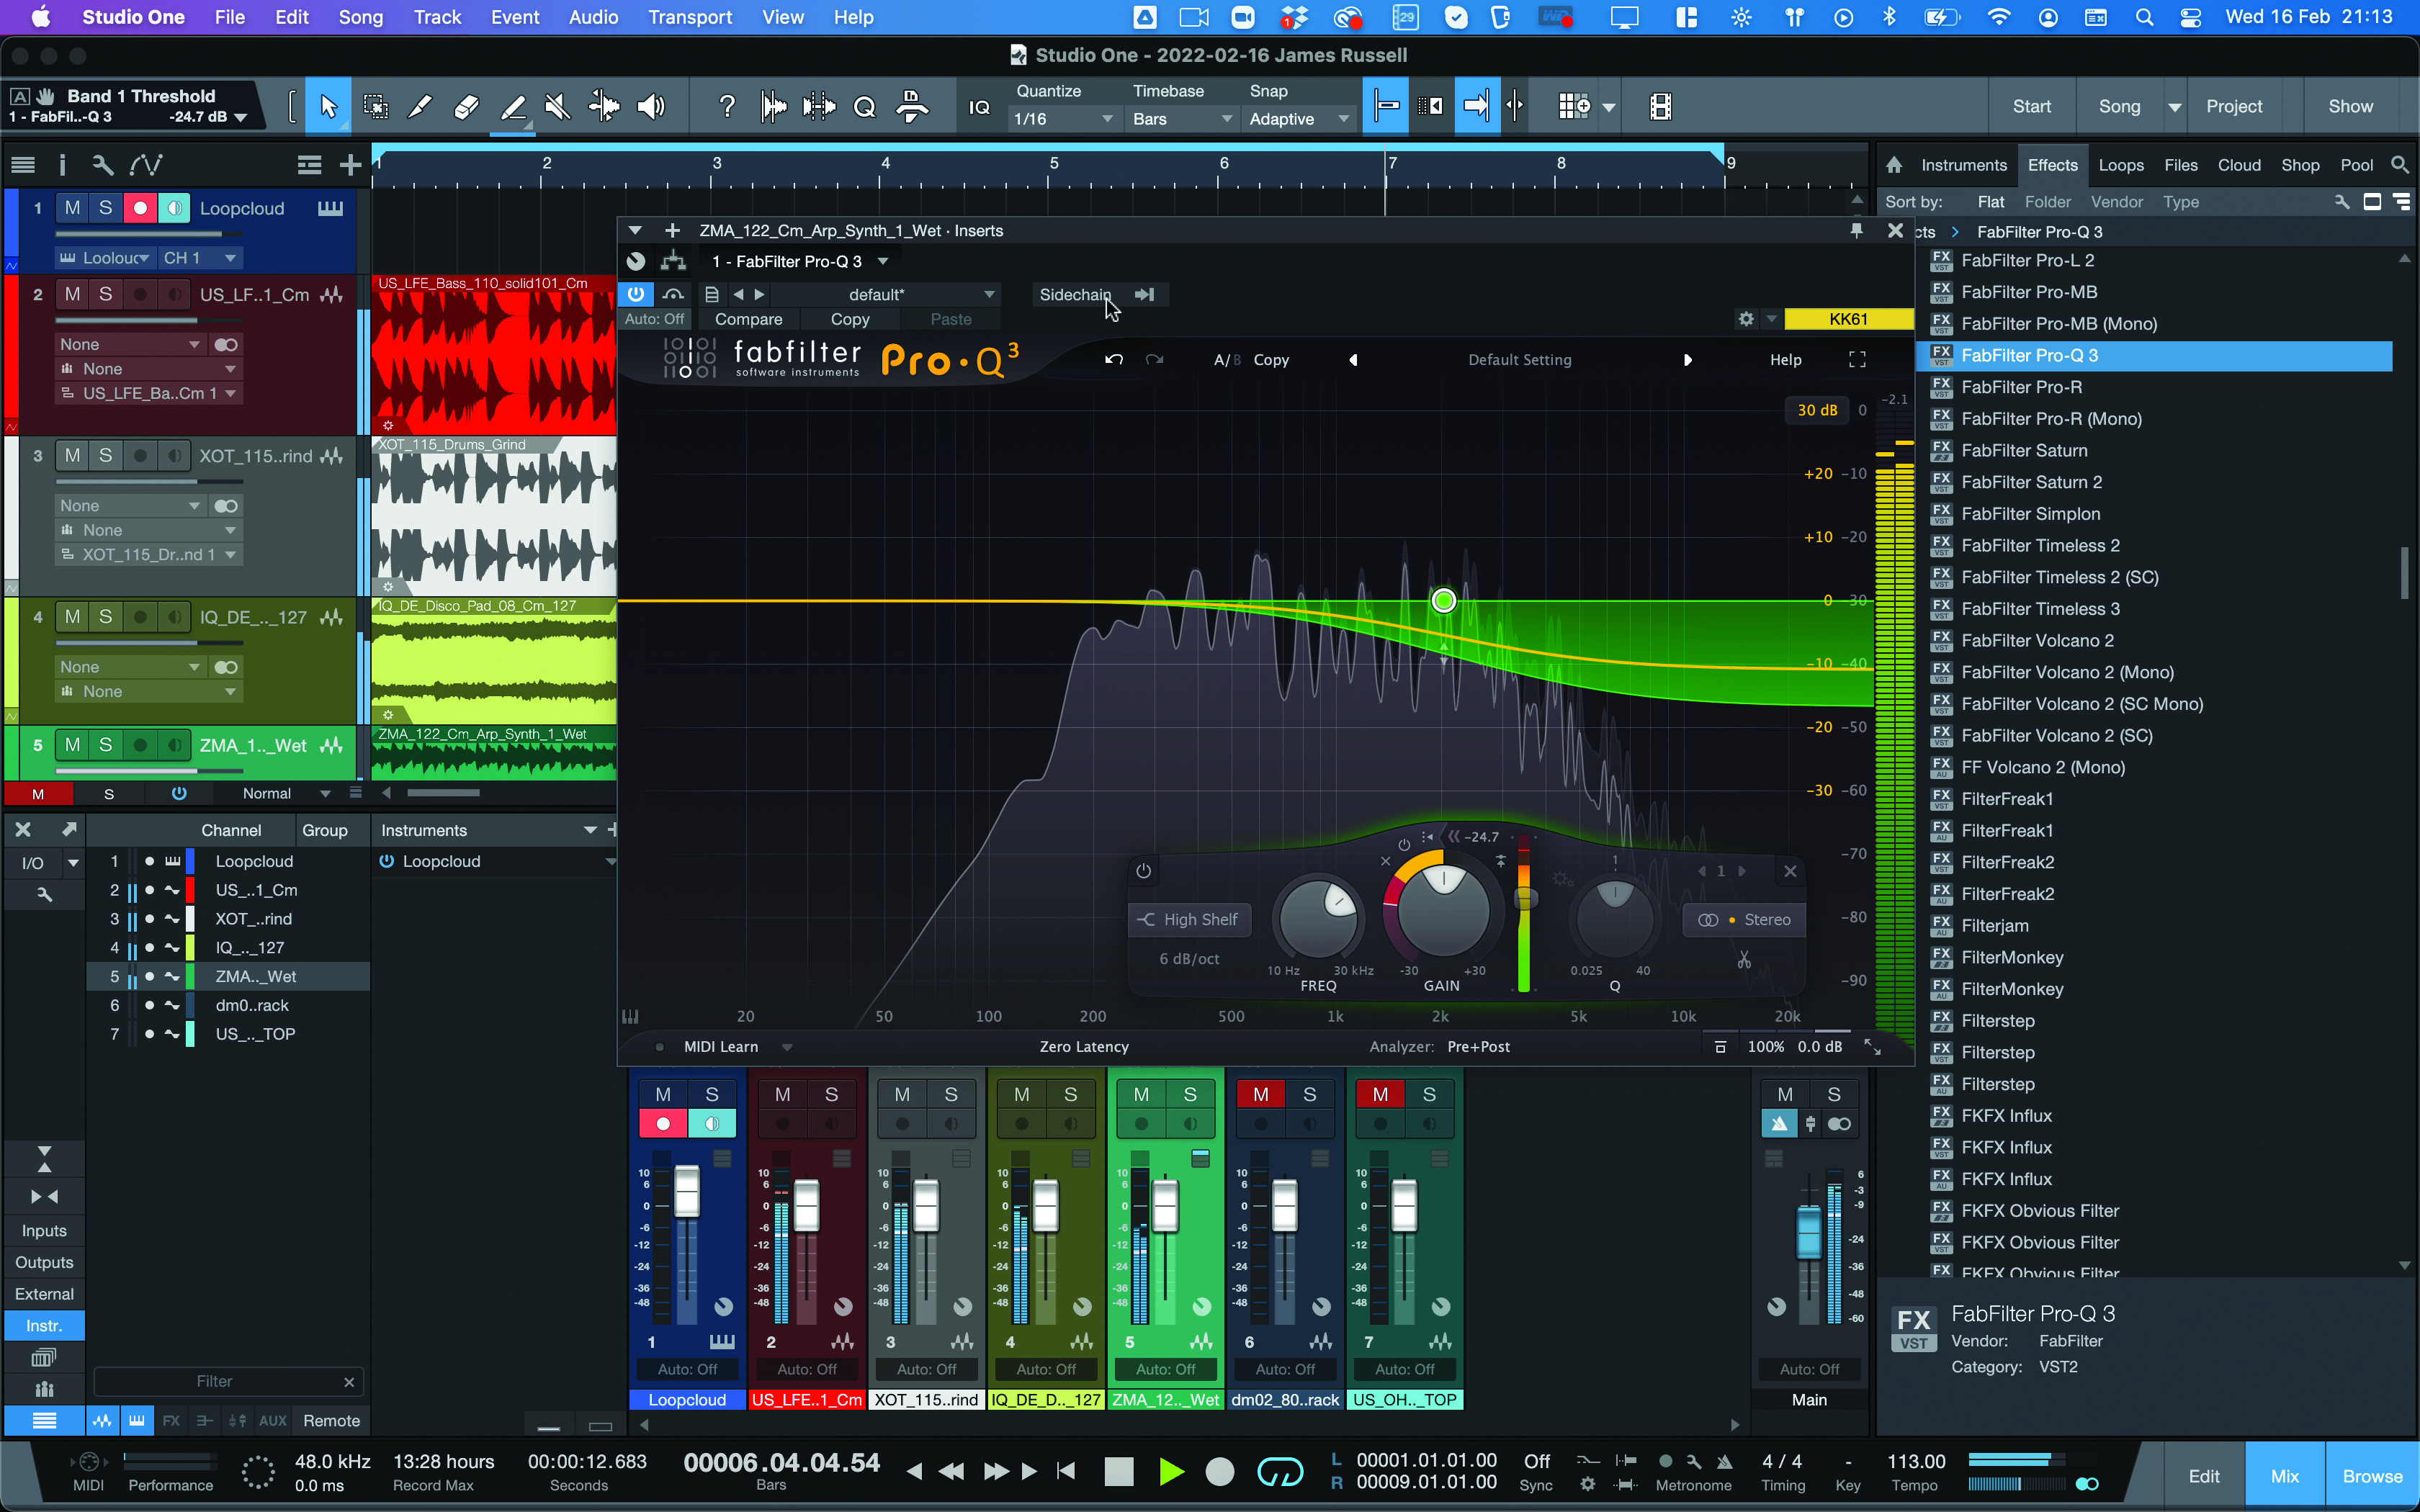
Step 4: Time to tweak the compression a little now. Pro-Q 3 gives us scant controls: a Dynamic Range setting (the collar we turned before) and a Threshold, no timing control for the compression, this is done automatically. Using the two controls in concert, we can fine-tune the compression response to get the feeling we want.
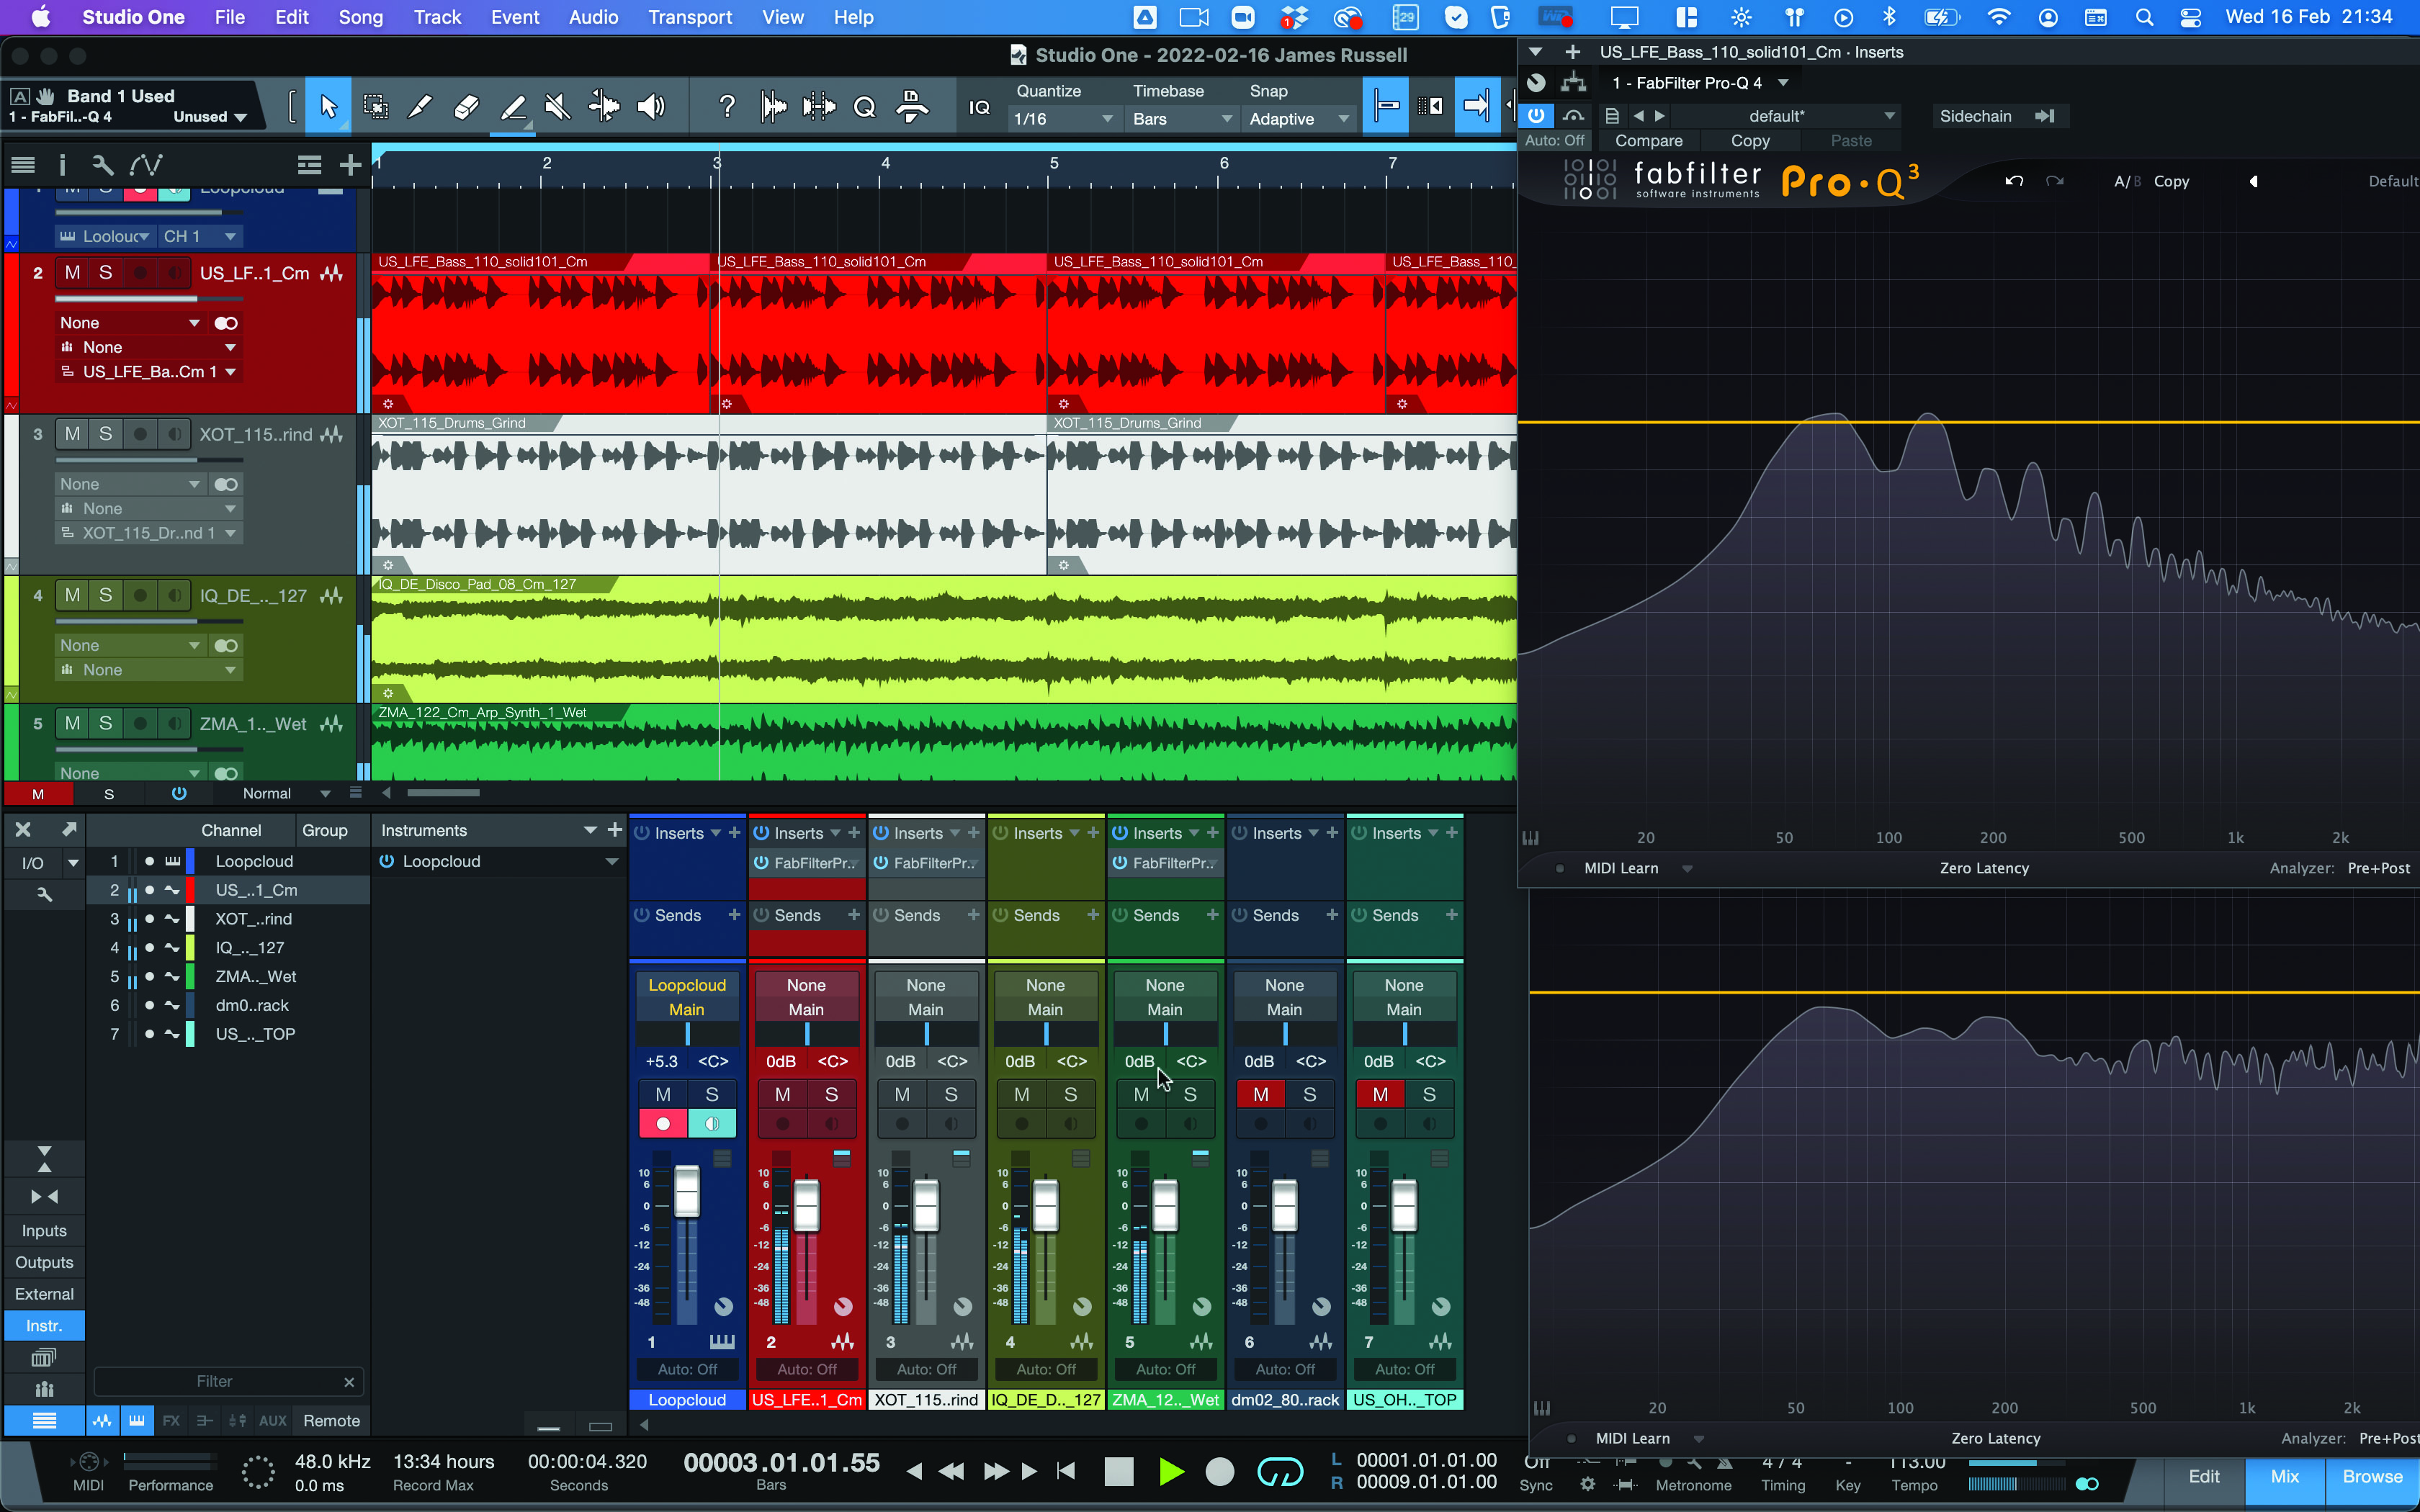
Step 5: Let’s move onto another use for dynamic EQ, with our bass and drum tracks. Here we can see (and hopefully hear) a clear conflict between our low-down solid bass sound and the kick drum. With dynamic EQ, we don’t necessarily need to sacrifice one for the other. Here’s Pro-Q 3 once again to show both bass regions.
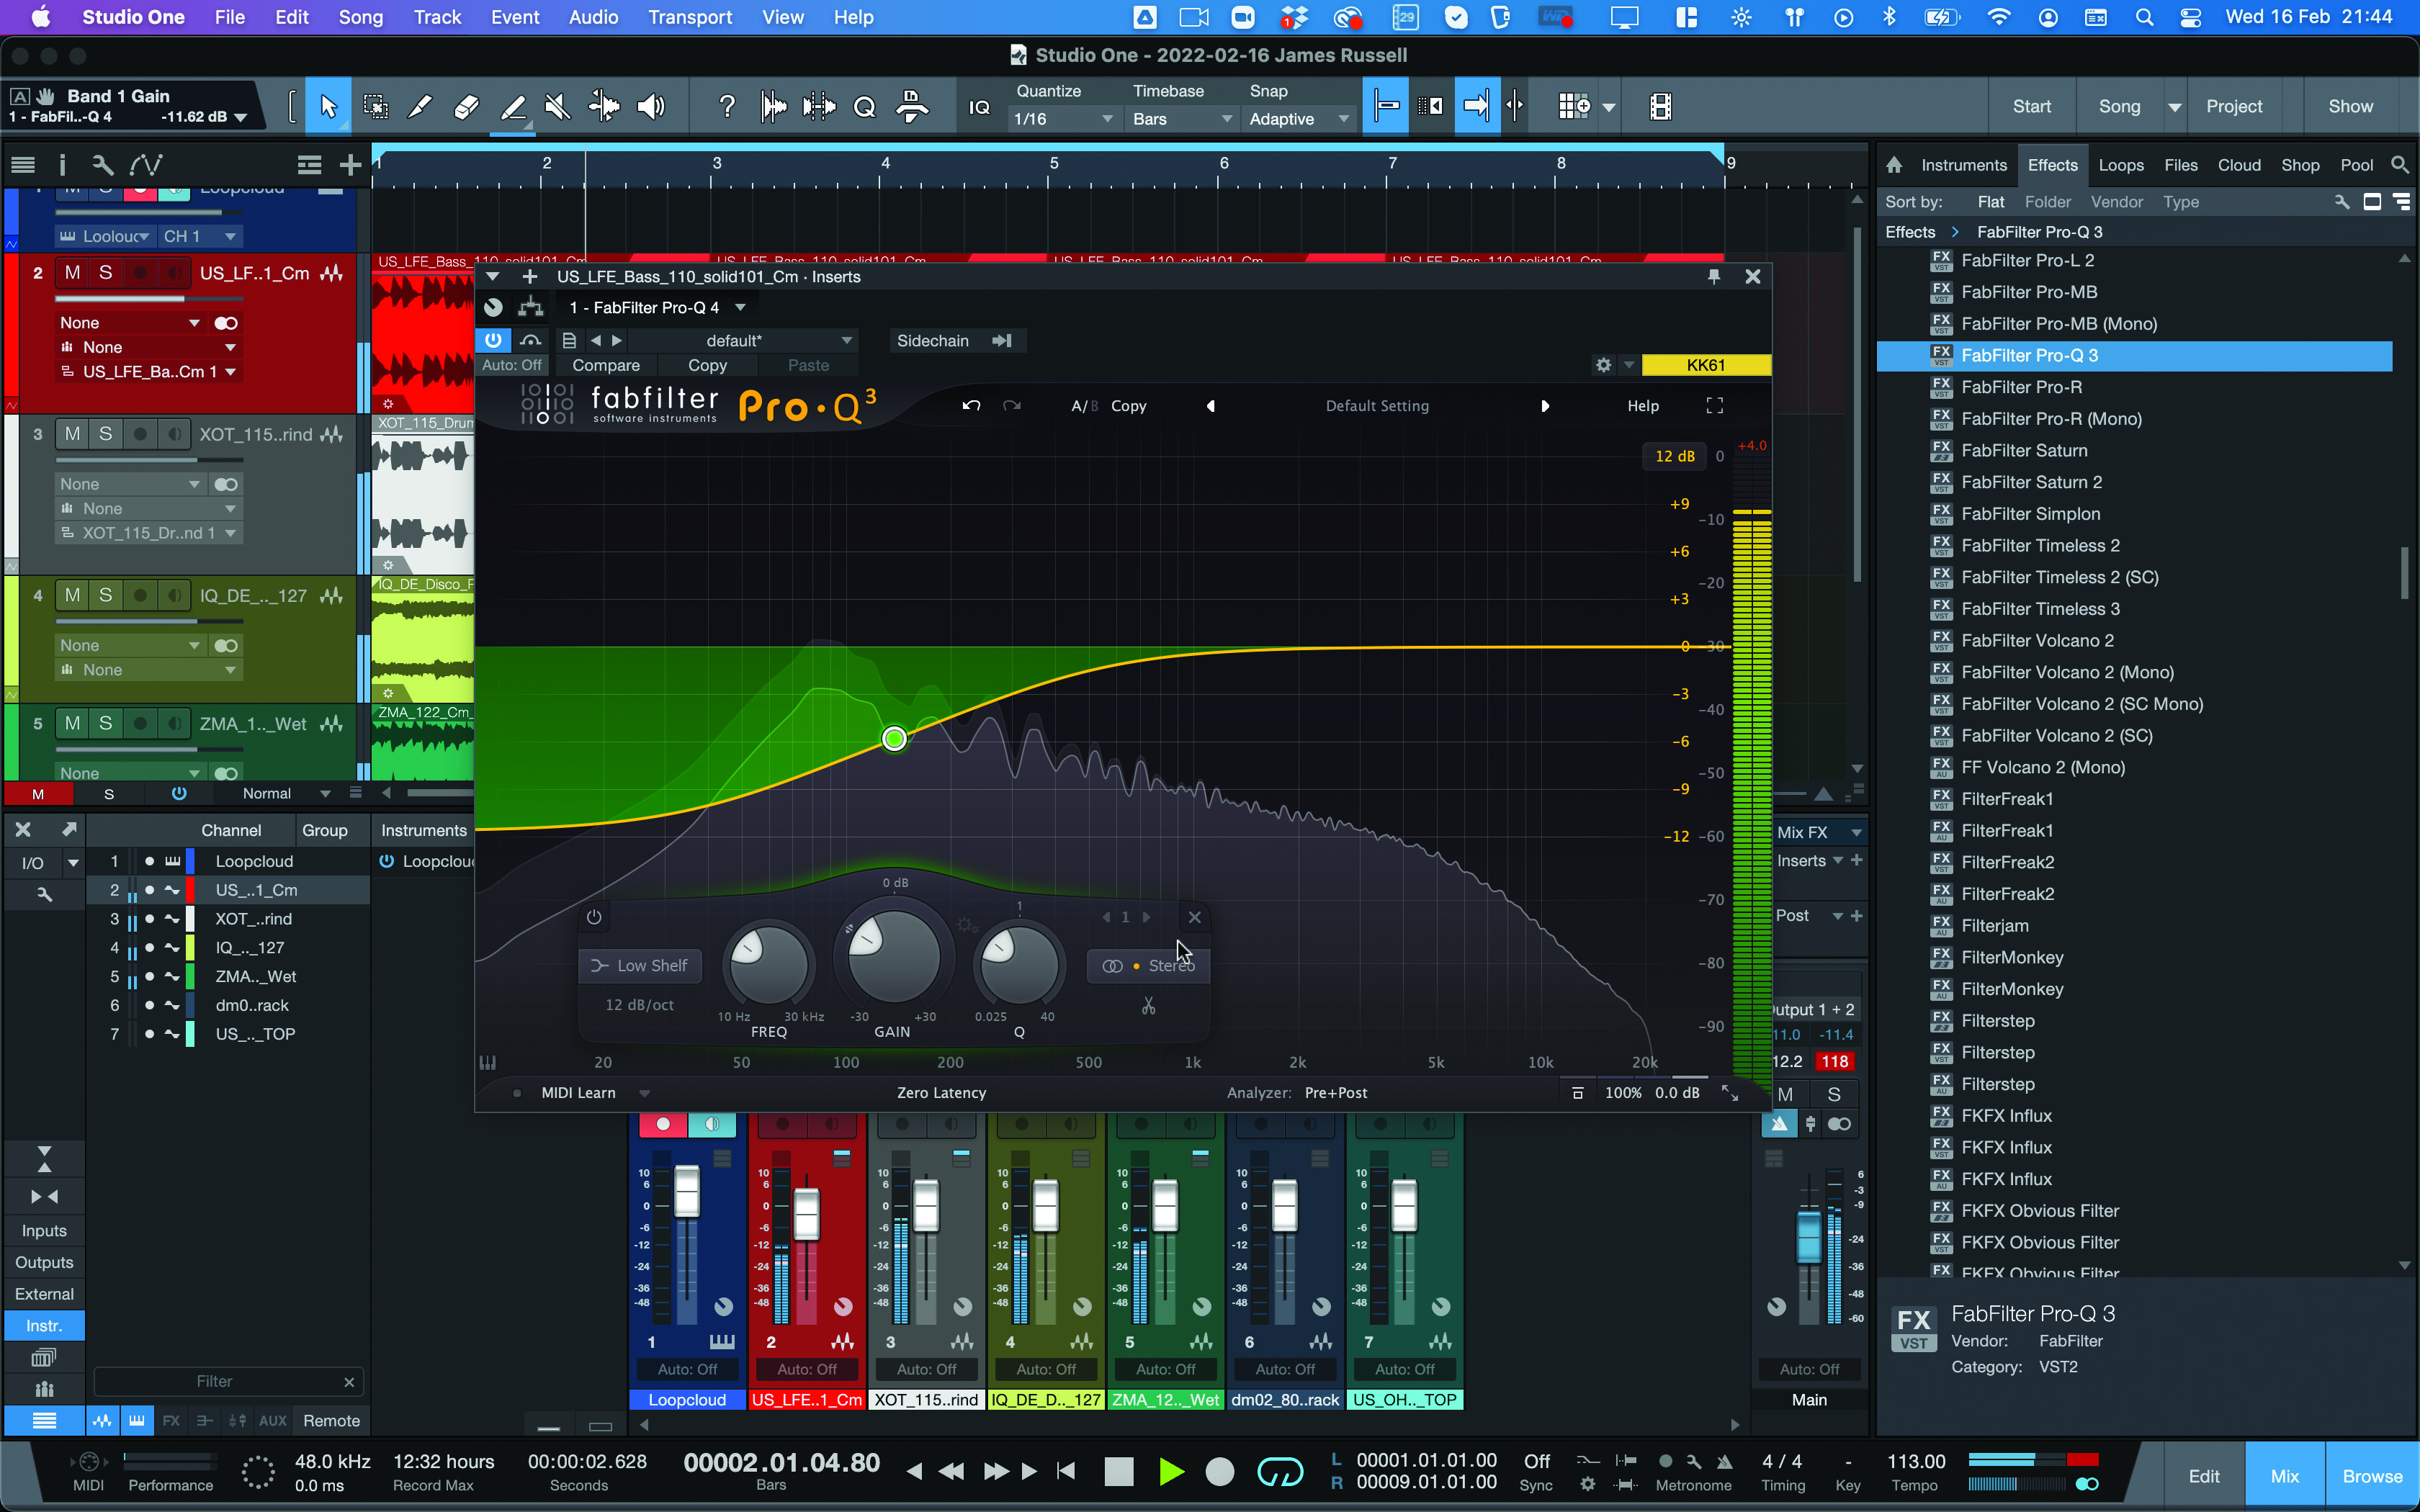
Step 6: This time we’ll call up a low shelf band. It can be quite broad, placed higher up the frequency spectrum. Normally, we’d use this kind of band to cut a chunk out of the bass’s low end, but this time we’ll set up something cleverer.
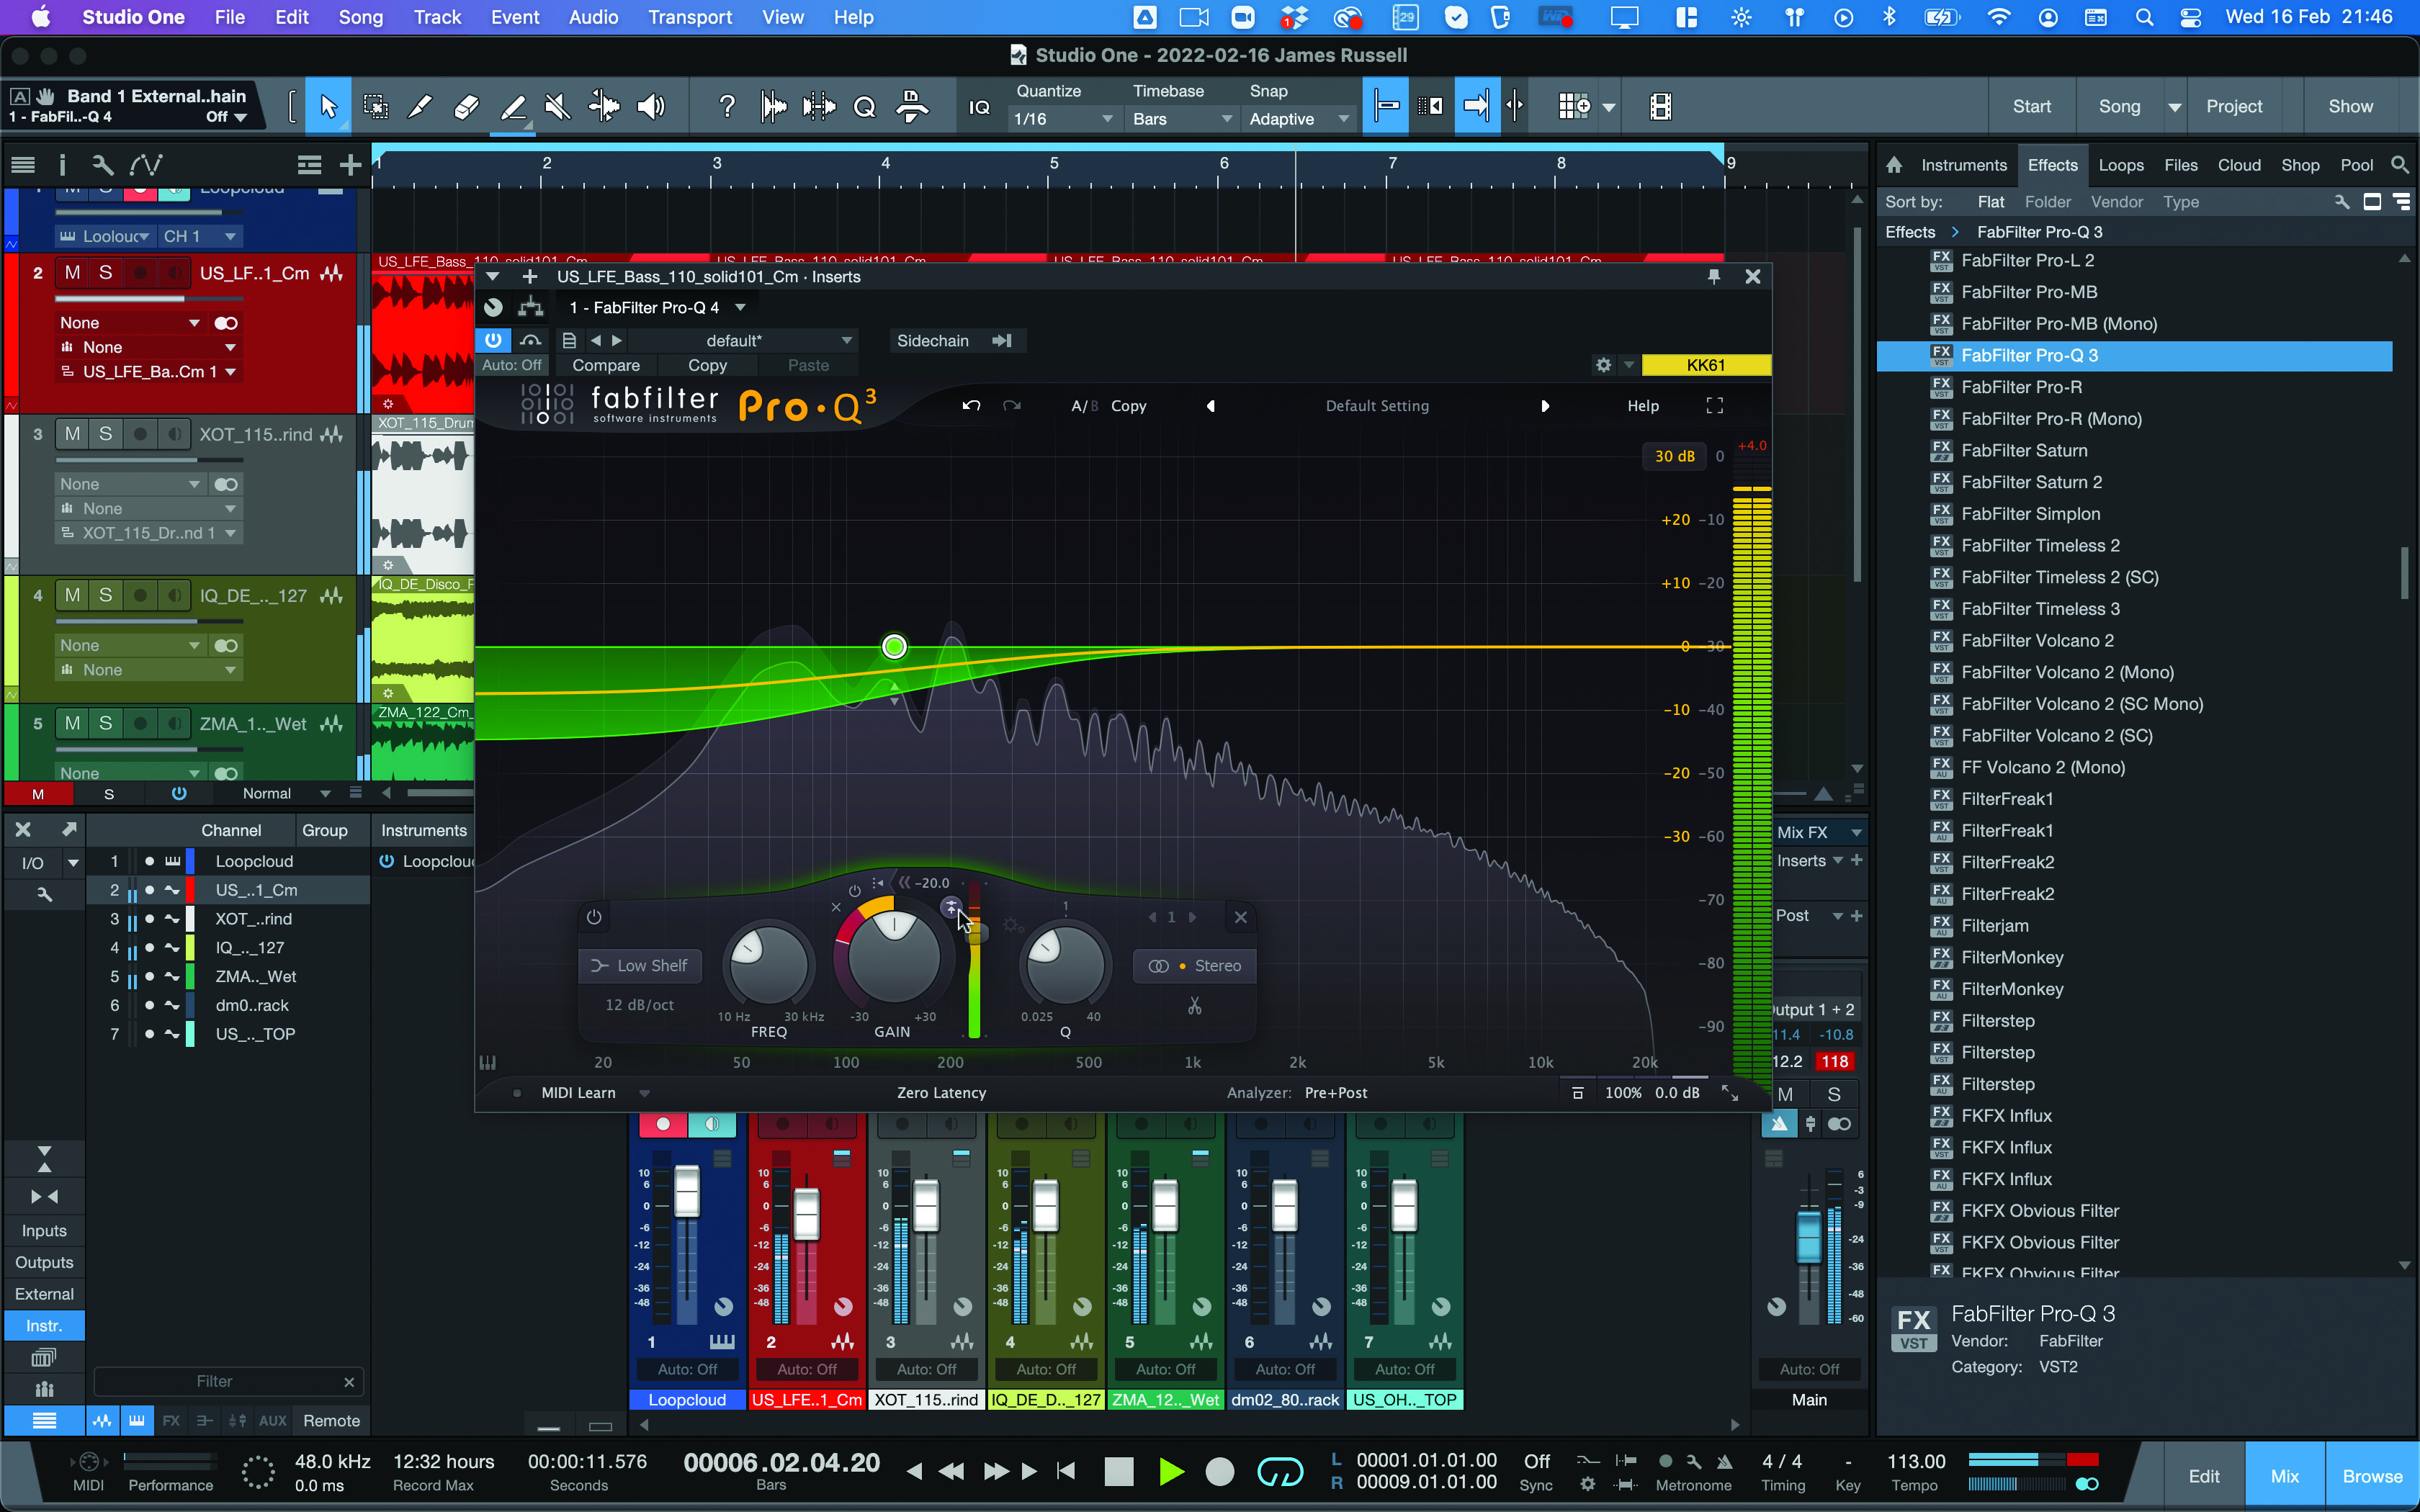
Step 7: We reset the Gain to 0 so there’s no reduction and activate the Dynamic Range collar to get some dynamics going. But instead of triggering the compression from the bass itself, we’ll sidechain the kick’s signal to it. Pro-Q does this using the small button between the collar and the threshold.
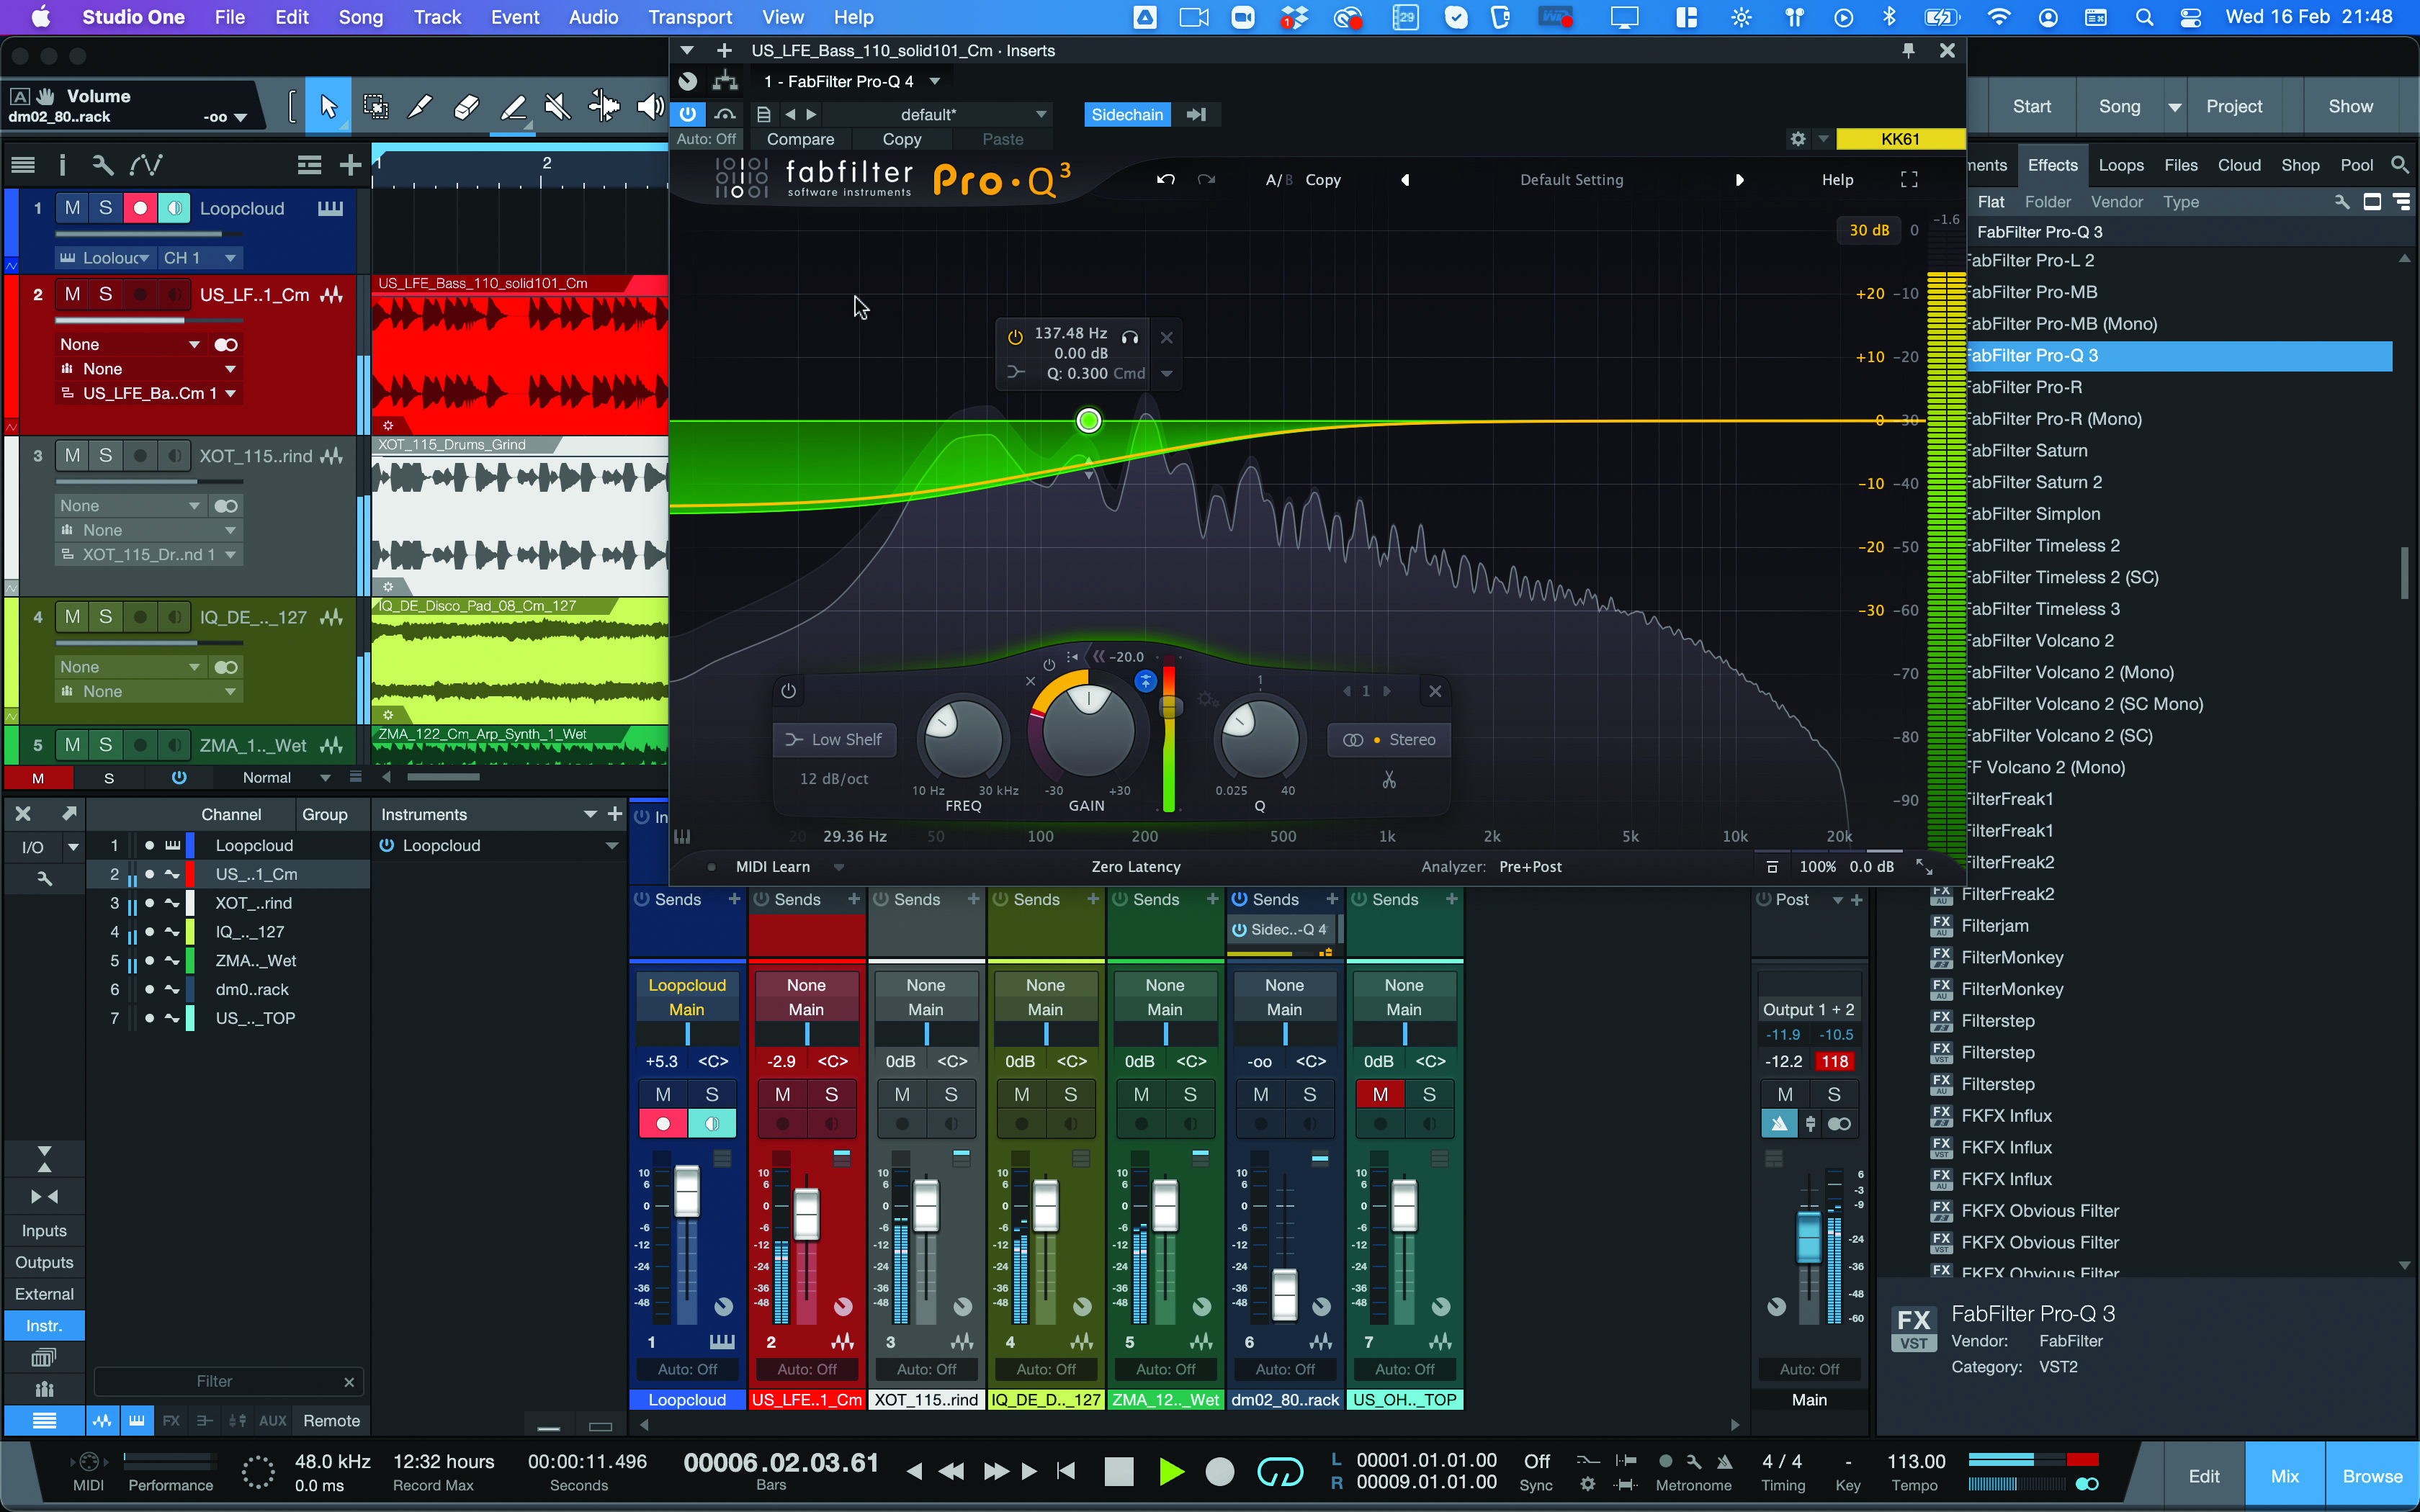
Step 8: We activate the button and, using our DAW’s functionality, choose the kick as our sidechain input. Actually, in this case, we use a ghost kick, sending it to the EQ band pre-fade and turning its mix output down so it can’t be heard in the mix, but it’s triggering gain reduction either way.
There are other ways to combine frequency sculpting and dynamics for different types of control. As well as dynamic EQ, try multiband compression, which gives you multiple bands of compression and input/output gain controls. Here, your compression controls are a little more comprehensive, but there’s less flexibility in each band’s filter shape.
Consider frequency-conscious compression, which sees a sidechain signal boosted at a certain frequency, making a full-band compressor kick in only when a certain frequency is too much. This circuit is reminiscent of a de-esser or de-harsher, but with dynamic EQ or multiband compression, you can get a far more precise effect.
Modern compressors
Today’s compressors don’t all push boundaries – analog-style compression has such a solid reputation that many software releases are actually tributes to old-school units. But there are a few developers truly willing to explore new compression territory…
DDMF’s Comprezzore is a recent plugin release that explores the ultimate in sculpting attack and release timing, response curves and more. FabFilter’s Pro-C 2 offers very easily accessible compression with a choice of types, but is still very powerful. sonible's smart:comp – and the rest of its smart: plugins range – use AI to analyze and suggest how to best process your material.
Tokyo Dawn's TDR Kotelnikov is a free mastering-grade compressor that can kick in peak and RMS compression separately. The compressors in iZotope's Neutron and Ozone packages are similarly fully featured, modern dynamics units.
Five vintage-meets-analogue compressors
1. Native Instruments Supercharger GT
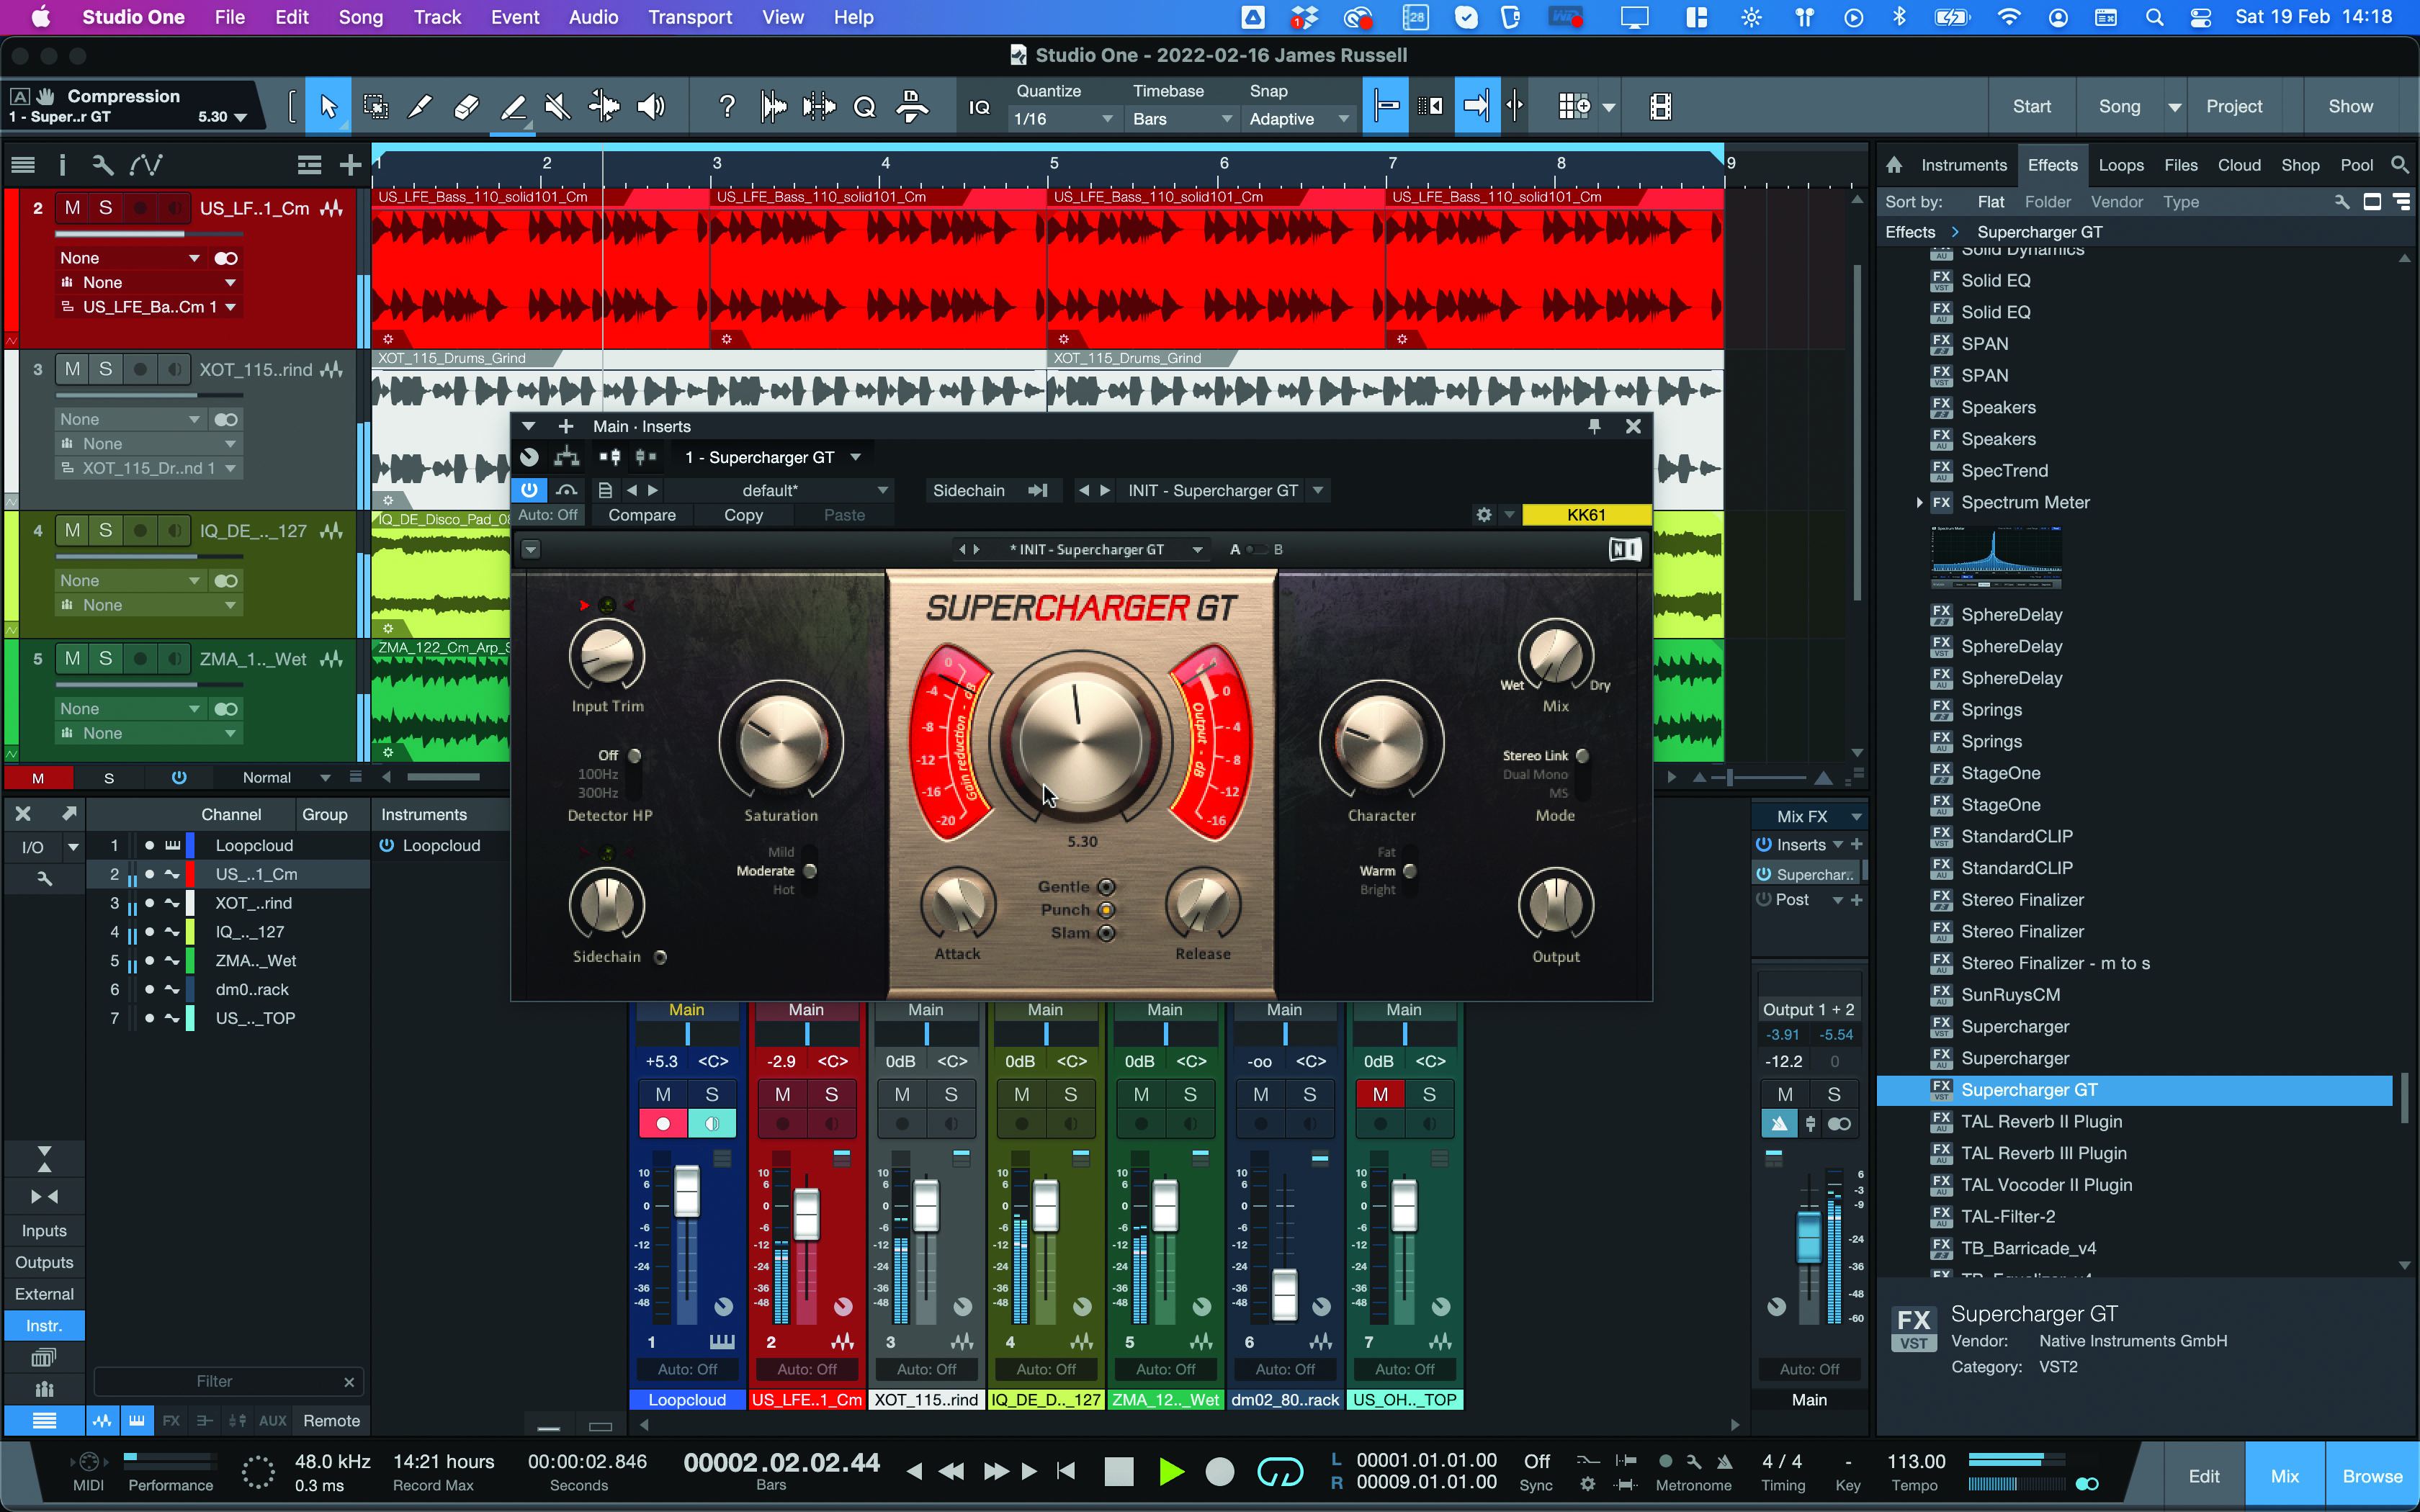
Native Instruments’ Supercharger GT is a character compressor of the old-school. While there’s a lot of modern operation here, including sidechain high-passing, stereo linking options, the whole thing is meant to be used with a little more of an analog philosophy.
2. Klevgrand Korvpressor
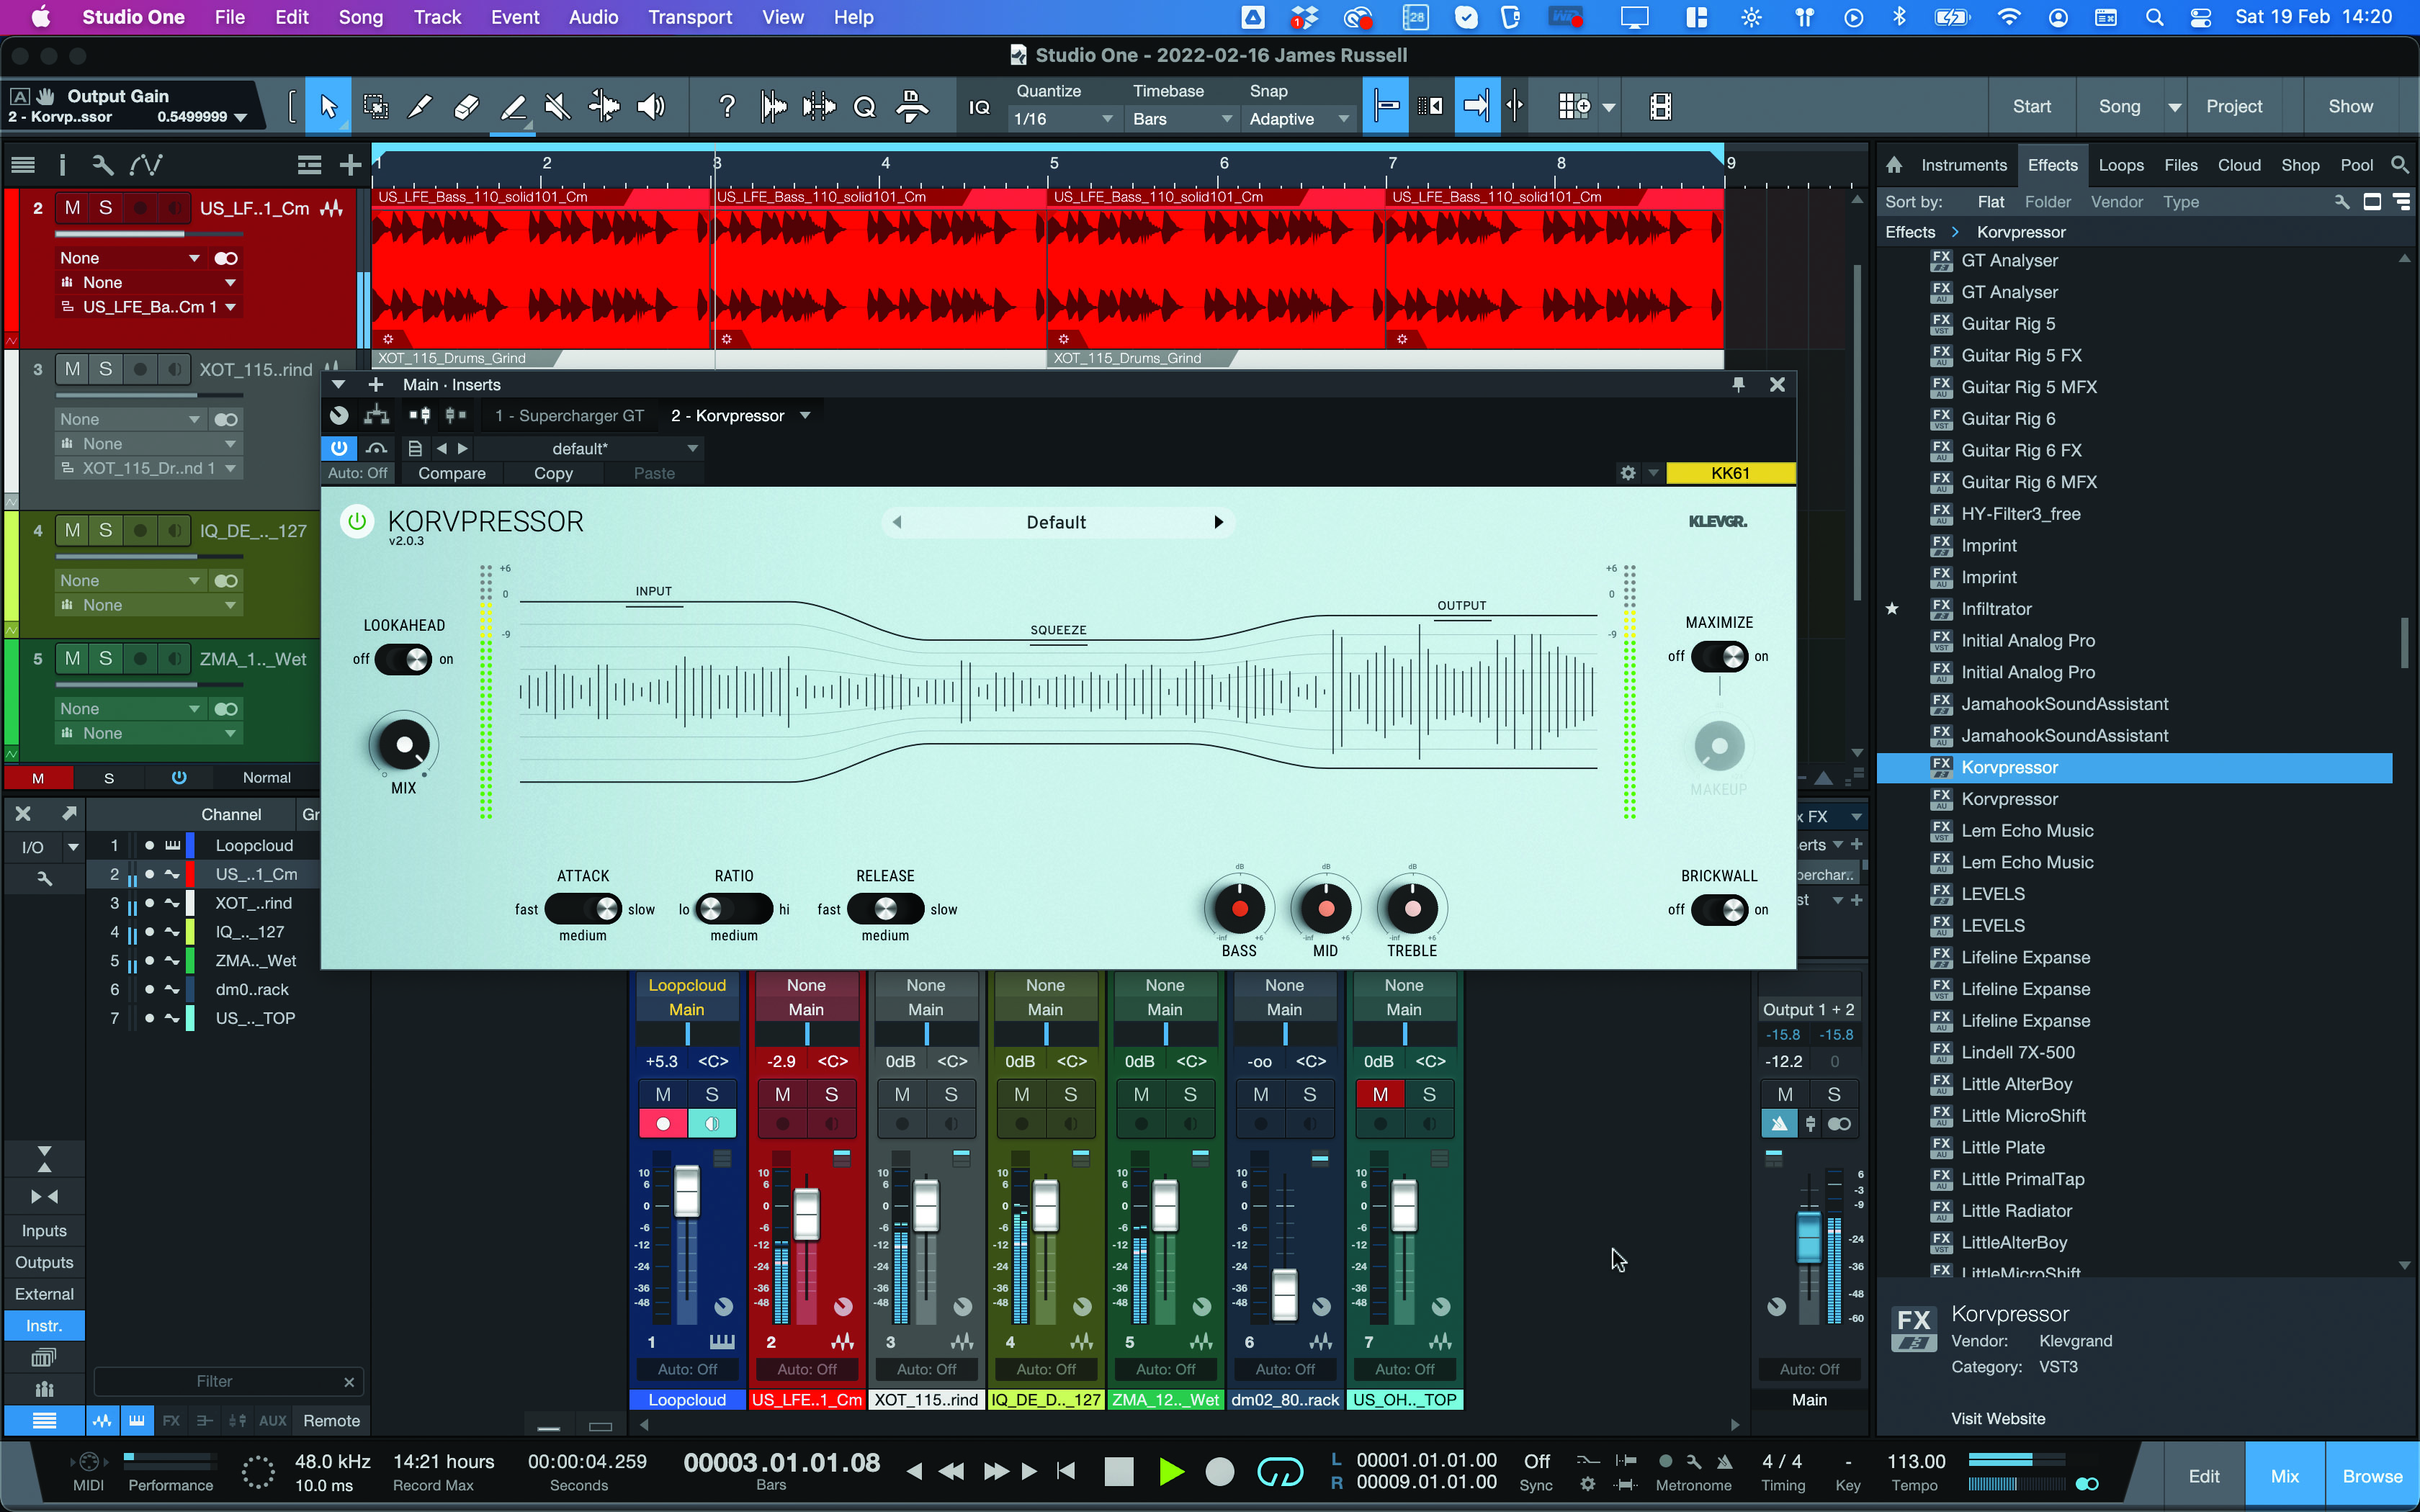
Klevgrand’s Korvpressor seems modern, with its under-the-hood compression and signal-squeezing algorithms mostly hidden from the user. But the way it's used makes it feel a lot more traditional – Input, Squeeze and Output knobs make compression simple, and a few other options are in tow.
3. Pulsar 1178

We’ve already looked at Pulsar’s 1178 elsewhere in this feature, but of particularly interesting note on this vintage stereo compressor are its modern additions: full sidechain EQ (instead of simple high-pass), plus look-ahead and even what Pulsar calls look-behind to help transients really pop!
4. MaterialComp
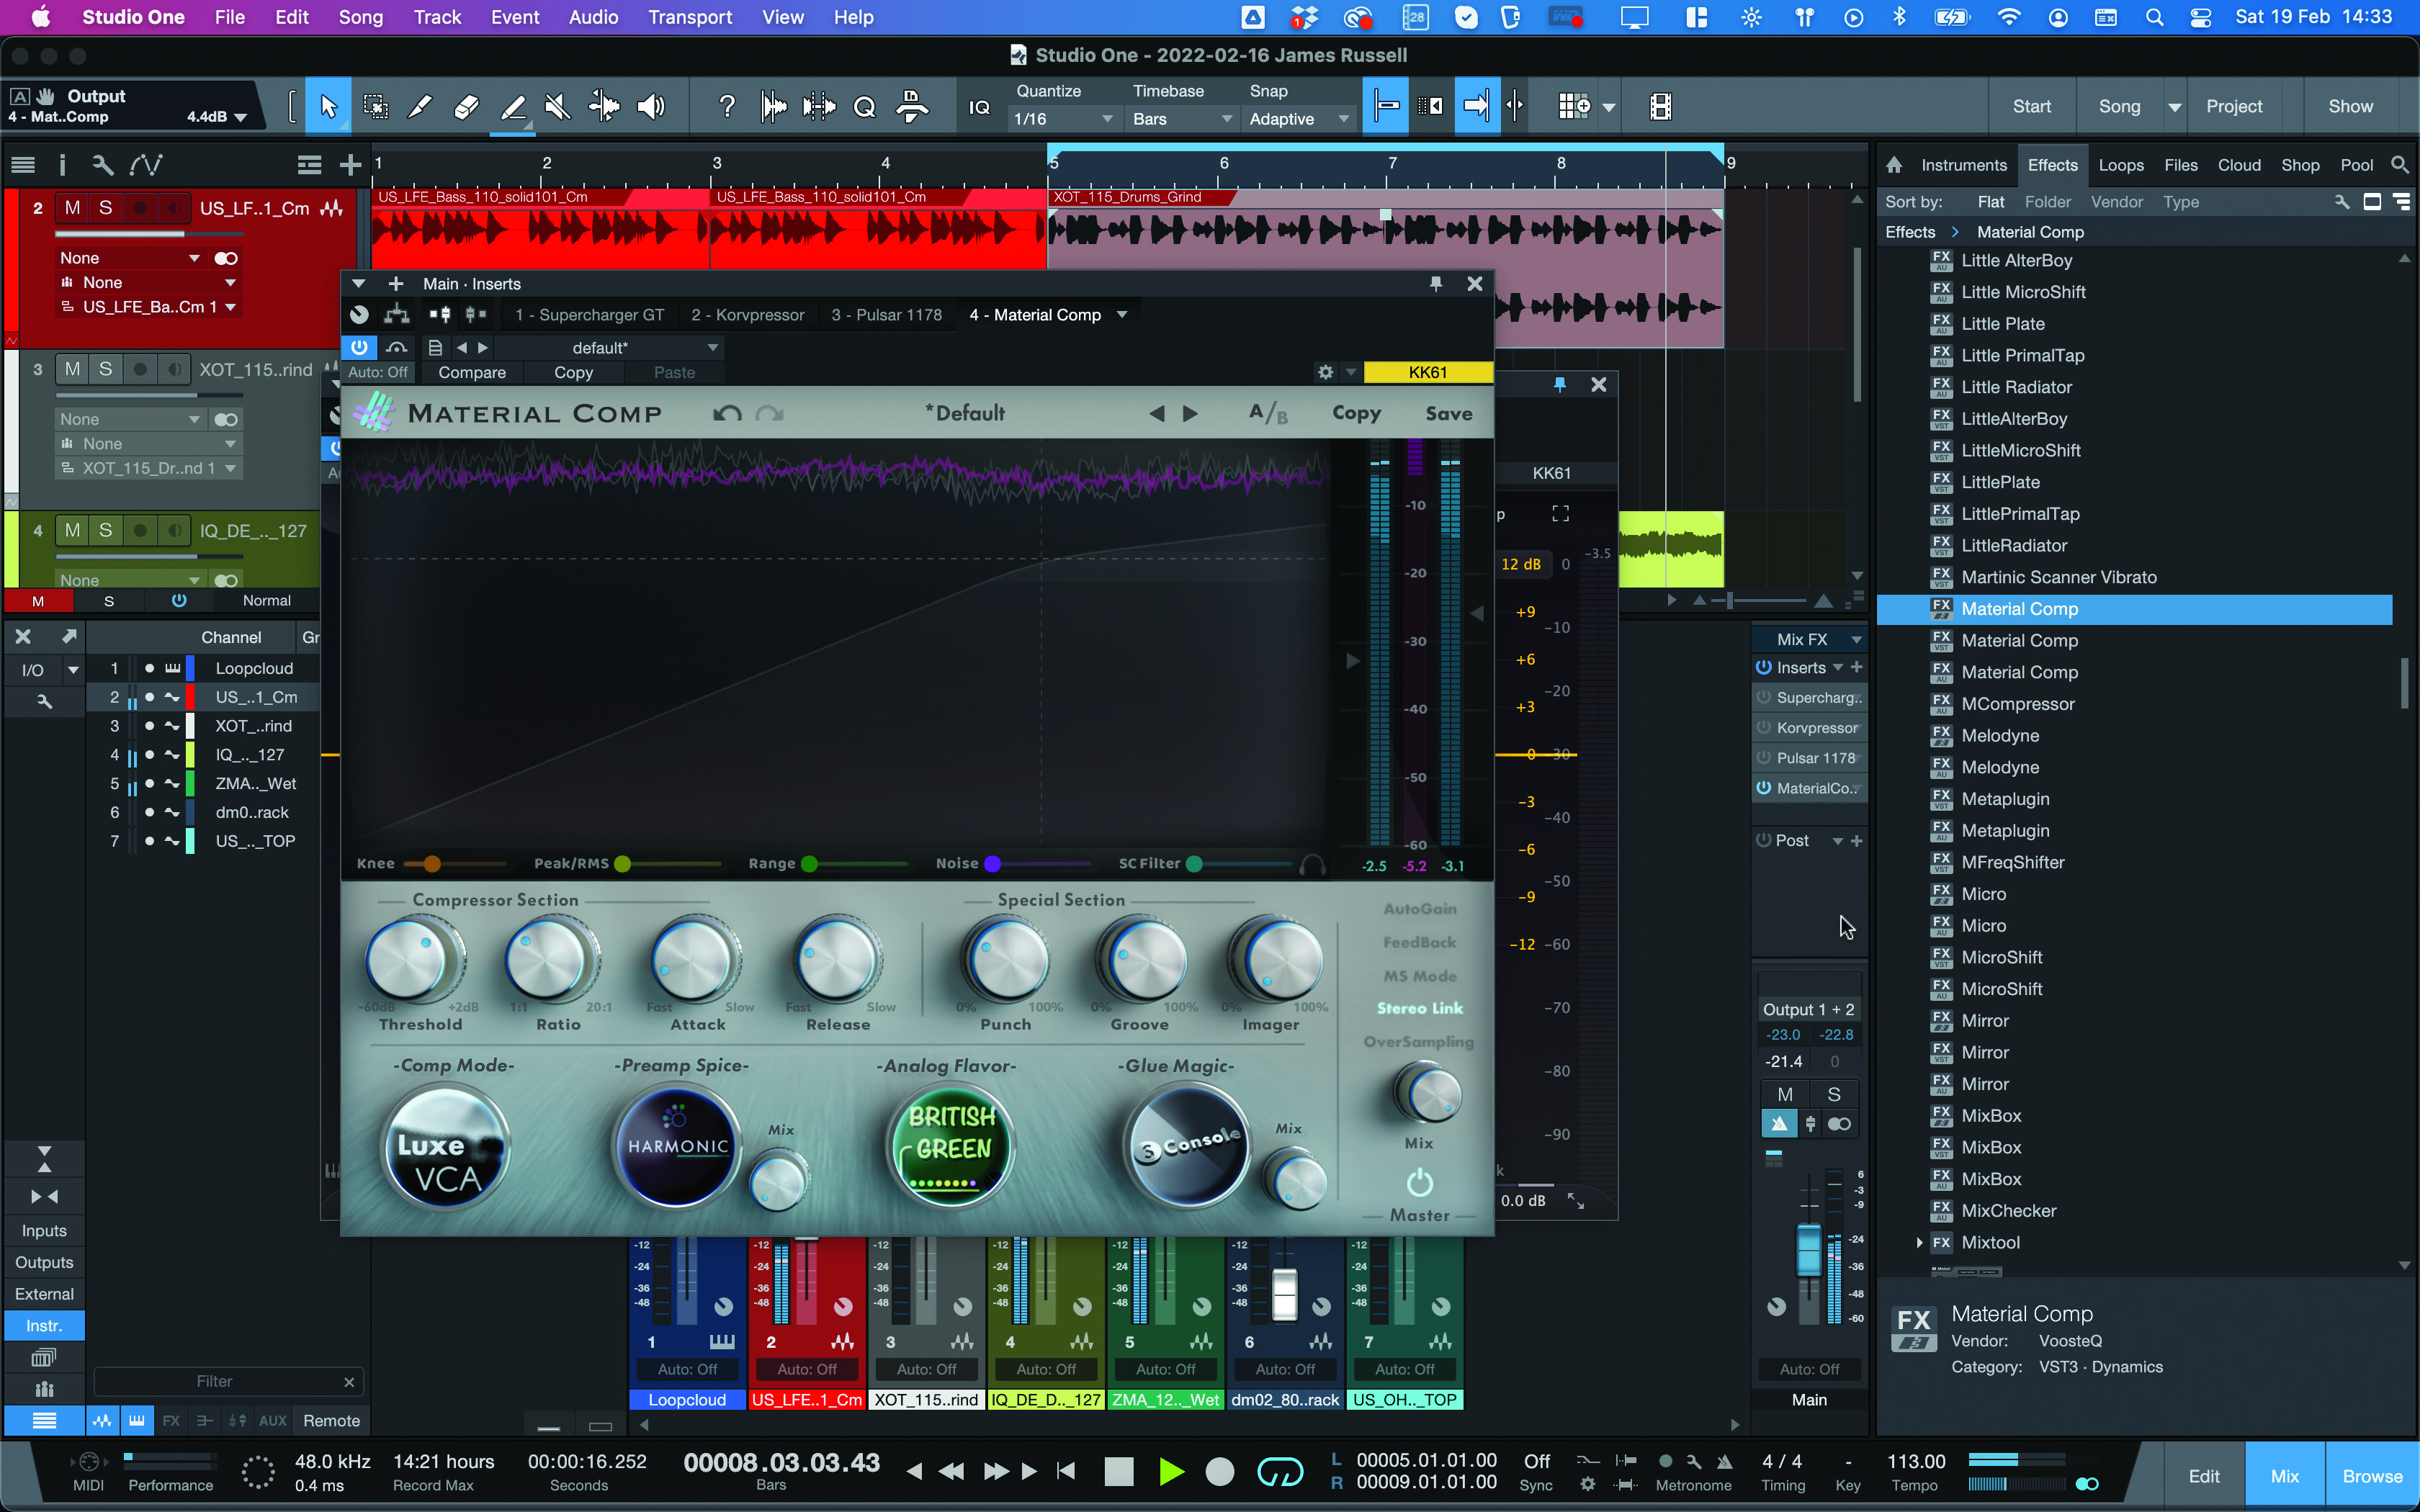
You could also try out MaterialComp – a digital compressor that gives you several options to choose from when it comes to its processing type. There’s Comp Mode, Preamp Spice, Analog Flavor and Glue Magic – a menu of selections for dialing in iconic compression characters and saturation types.
5. Slate Digital Virtual Mix Rack
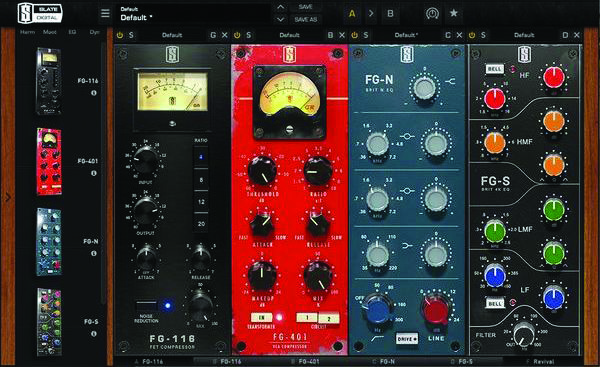
Virtual Mix Rack 2.0 contains several compressors, as well as EQs, preamps and more, and a subscription to Slate’s All Access Pass bundle nets you all their other plugins as well. Dynamics highlights from VMR include FG-116, FG-401, and the hella-destructive FG-Bomber “Impact Enhancer”.


Electronic Musician magazine is the ultimate resource for musicians who want to make better music, in the studio or onstage. In each and every issue it surveys all aspects of music production - performance, recording, and technology, from studio to stage and offers product news and reviews on the latest equipment and services. Plus, get in-depth tips & techniques, gear reviews, and insights from today’s top artists!
“A synthesizer that is both easy to use and fun to play whilst maintaining a decent degree of programming depth and flexibility”: PWM Mantis review
“Do you dare to ditch those ‘normal’ beats in favour of hands-on tweaking and extreme sounds? Of course, you do”: Sonicware CyDrums review
